AI Summary
Managing events used to mean manually copying form submissions into Google Calendar — a repetitive task that often led to mistakes or missed details.
It was a hassle, and honestly, I started to worry if there was an easier way to keep everything organized. That’s when I found out you can automatically add events to Google Calendar directly from WPForms.
Whether you’re managing client appointments, booking events, or scheduling classes, this feature can save you tons of time. Let me show you how to set it up so you’ll never have to enter events again manually.
Add Events to Google Calendar from WPForms! 🙂
How to Add Events to Google Calendar From WPForms
- Step 1: Install the WPForms Pro Plugin
- Step 2: Connect WPForms to Your Google Account
- Step 3: Create a Form With Event Fields
- Step 4: Add a Google Calendar Connection to the Form
- Step 5: Configure Event Details
- Step 6: Set Permissions and Conditional Logic (Optional)
- FAQs — How to Add Events to Google Calendar From WPForms
Step 1: Install the WPForms Pro Plugin
First, make sure you’re running WPForms Pro (or higher) and that you’ve updated to version 1.9.7 or later — this is required for the Google Calendar Addon.
Then, from your WordPress dashboard, go to WPForms » Addons, find the Google Calendar Addon, and click Install Addon. Once installed, it will automatically activate.
Step 2: Connect WPForms to Your Google Account
Next, you’ll connect WPForms directly to your Google Calendar.
Go to WPForms » Settings » Integrations.
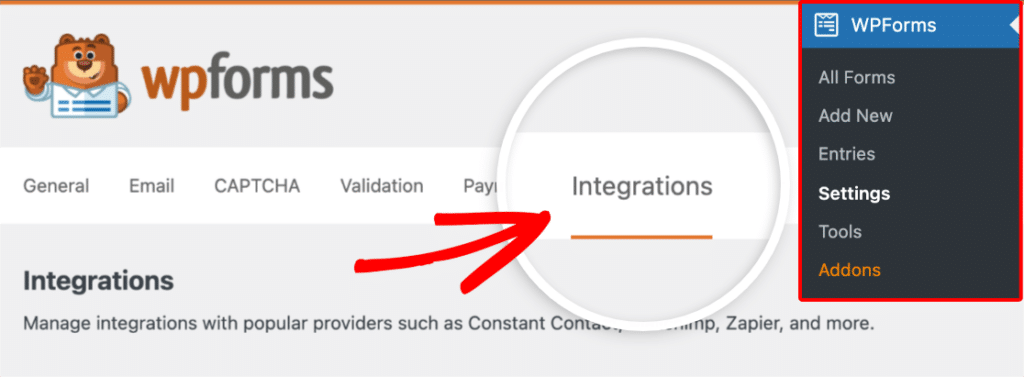
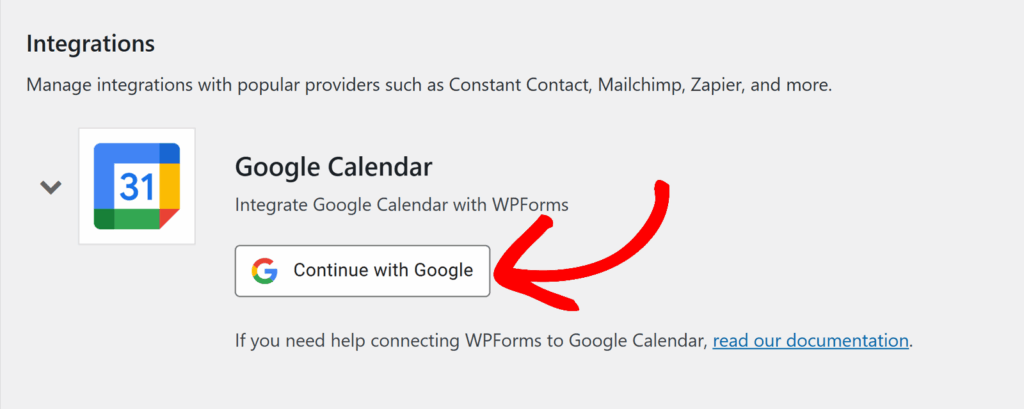
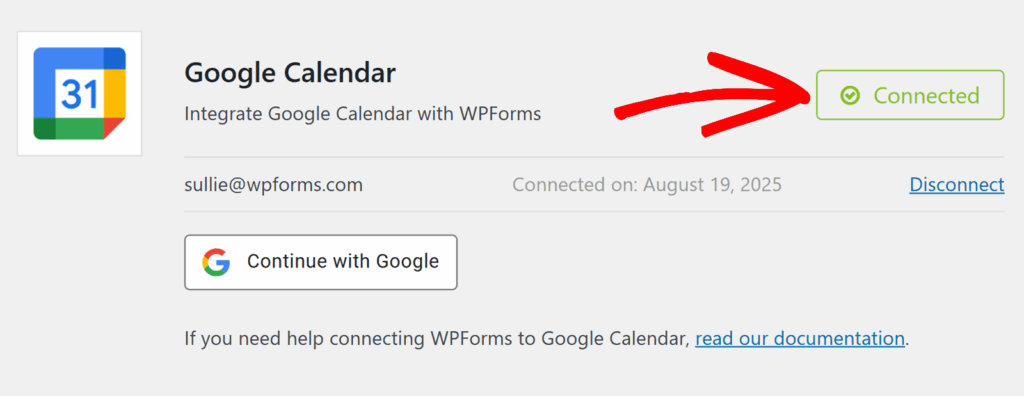
then click on Google Calendar. Select Continue with Google to begin the connection.
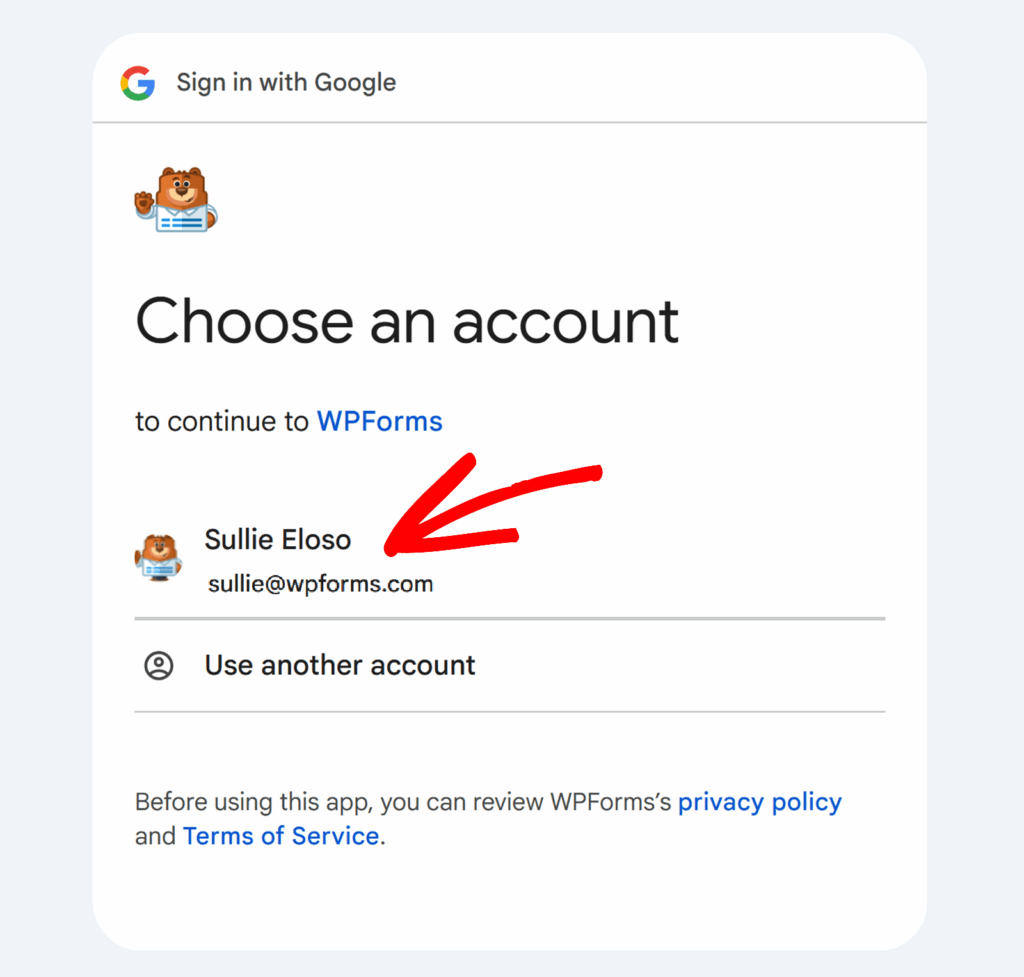
When prompted, choose the Google account you want to use and allow WPForms the necessary permissions to create and manage calendar events.
Once connected, you’ll see a green “Connected” status back in WPForms.
Step 3: Create a Form With Event Fields
Now create the form you want to use to collect event details. Go to WPForms » Add New and choose a template.
For example, I like using the Event Planner Form template because it already includes fields like Name, Email, Event Date, Start Time, and End Time.
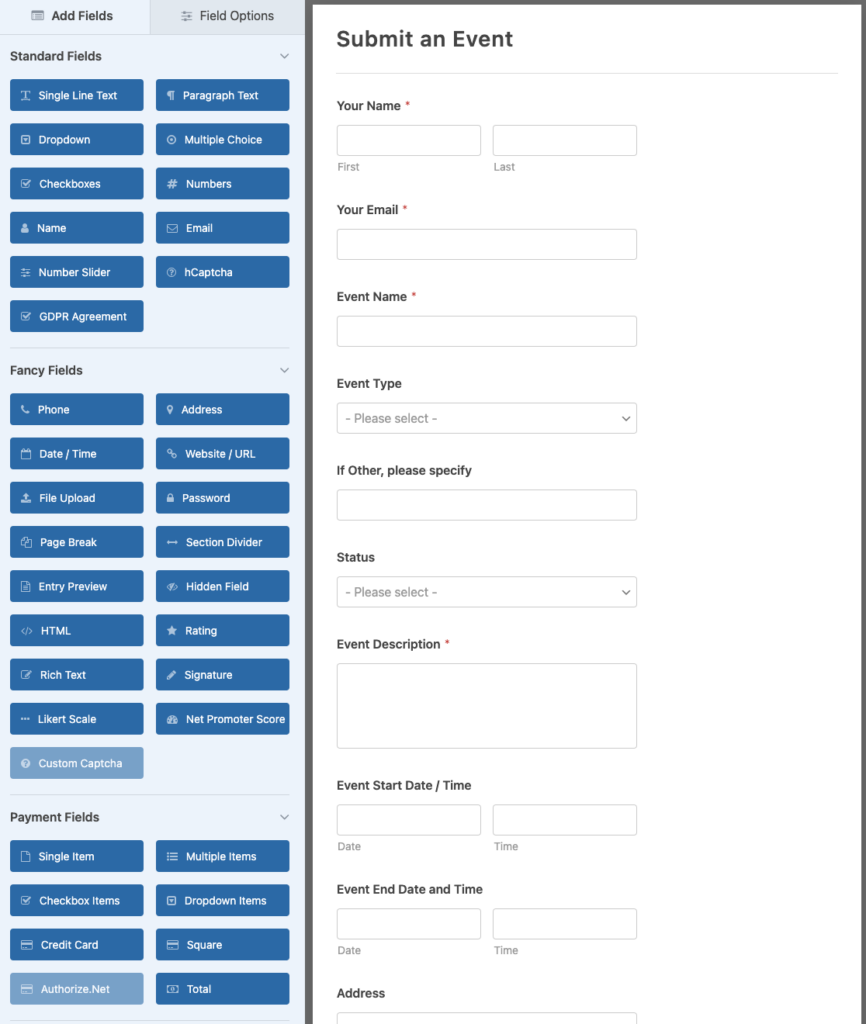
You can customize the form by adding fields like:
- Date/Time (for start and end times)
- Paragraph Text (for event description)
- Address (for event location)
- Email (to invite guests automatically)
Be sure to save your form when you’re happy with it!
Step 4: Add a Google Calendar Connection to the Form
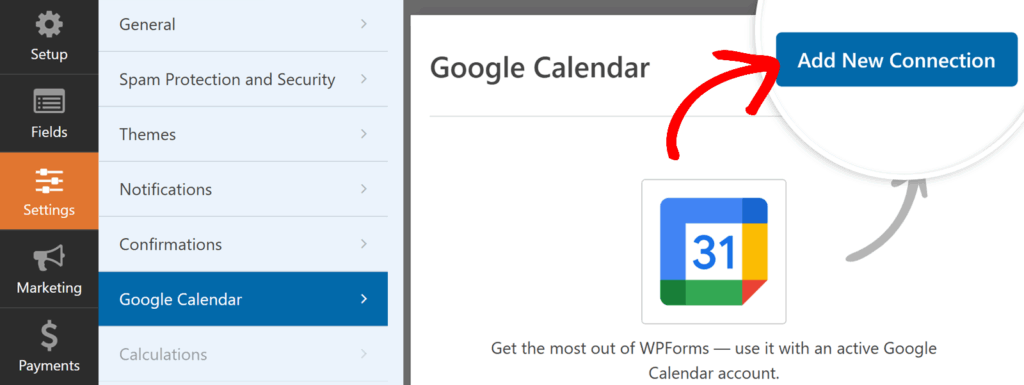
With your form ready, open its settings and go to Settings » Google Calendar. Click Add New Connection.
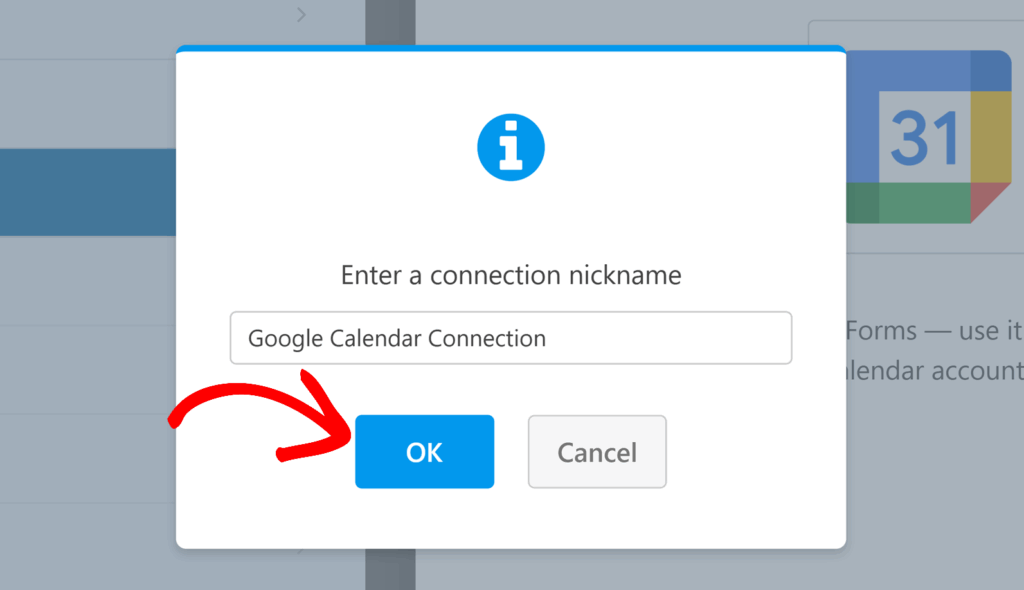
A popup will ask for a connection nickname. This is just for your own reference (e.g., “Client Appointments”). Enter a name and click OK.
Step 5: Configure Event Details
Now it’s time to map your form fields to Google Calendar event fields.
- Title: Use a static name (like “New Appointment”) or insert a smart tag from your form, such as
{Name}. - Description: Map this to a Paragraph Text field to capture details.
- Location: Use an Address field or add text like “Online.”
- Guests: Choose the Email field from your form to automatically invite attendees.
- Start/End Date & Time: Map these to your Date/Time fields.
- Duration: Pick a set duration (like 30 minutes) or let users define an end time.
- Repeat: Choose if the event should repeat daily, weekly, or monthly.
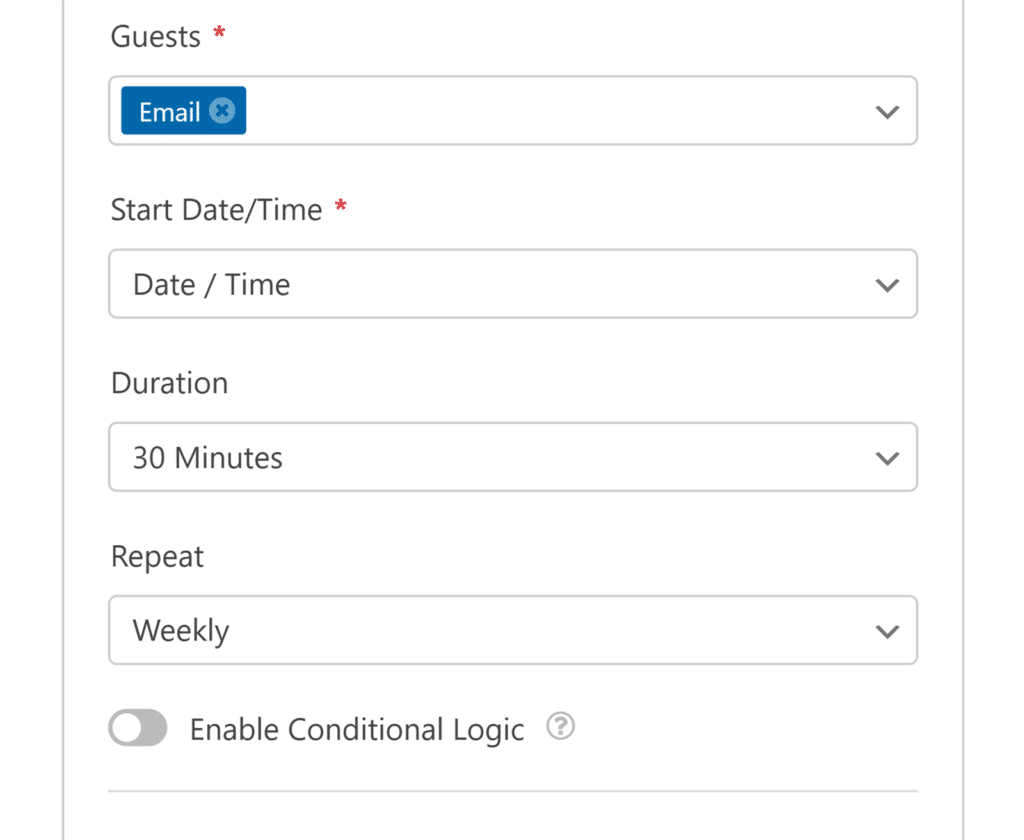
This flexibility means your Google Calendar event will match exactly what users submit in your form.
Step 6: Set Permissions and Conditional Logic (Optional)
In the Permissions section, you can decide what guests are allowed to do:
- View the guest list
- Invite others
- Modify the event
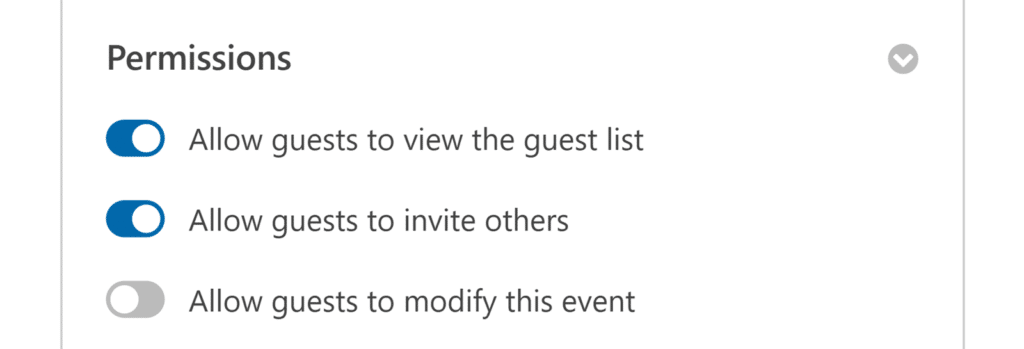
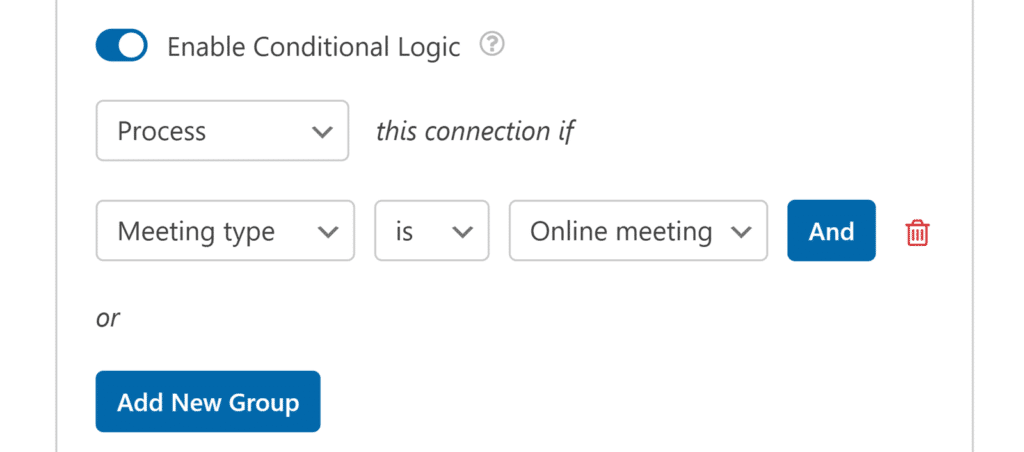
You can also enable Conditional Logic so events are only created under certain conditions.
For example, you might only want to add events if someone selects “Confirmed” from a dropdown.
That’s it!
Your WPForms entries will now automatically become Google Calendar events. Happy Planning!
Create Your WordPress Form Now
FAQs — How to Add Events to Google Calendar From WPForms
Can I invite people automatically to events?
Yes. Just map the Email field in your form to the Guests field in the addon, and they’ll receive a Google Calendar invite.
Can I create recurring events?
Yes. The addon includes options for daily, weekly, or monthly repeats.
Can I limit who sees or edits the events?
Yes. The Permissions settings let you choose whether guests can see the guest list, invite others, or edit the event
Can I limit who sees or edits the events?
Yes. The Permissions settings let you choose whether guests can see the guest list, invite others, or edit the event
Can I control which events are added?
Yes. You can enable conditional logic so only certain submissions create events (for example, only if a checkbox is selected)
Next, Connect Your Forms to Google Drive
This blog post showed you how to easily connect your forms to Google Calendar to automatically plan events. Did you know that you can also connect directly to Google Drive?
And you can even upload files! Take a look at our next Google-related tutorial to learn how to upload files to Google Drive form a WordPress form.
Ready to build your form? Get started today with the easiest WordPress form builder plugin. WPForms Pro includes lots of free templates and offers a 14-day money-back guarantee.
If this article helped you out, please follow us on Facebook and Twitter for more free WordPress tutorials and guides.


Is there a way we can block out the dates in the Calendar feilds that already have an event in our google calendar so then appointments can’t be double booked? Thank you
Hi Jordan,
We don’t have a way to do this right now, but I’ve made a note on our feature request list so we can keep it on our radar! Thanks for the suggestion 🙂
Is this feature fixed? I see that last year someone asked about this date blocking feature.
Hi Dominykas.
Currently, we don’t have a built-in option to manage the availability in the calendar.
I apologize for any inconvenience!
Have a good one 🙂
Yeah Please if this would be possible WPforms is again outstanding. An idea could be to go over the google calander API this would be best to have a picked and one can define their dates in gcal.
hello i’m using contact form 7, fill the dental appointment from and add details in google calendar is it possible to contact form 7 please help me.
Hi Prachi,
Unfortunately we can’t provide any support for Contact Form 7 so I apologize for the inconvenience! You may want to reach out to their support team if you have any questions or need assistance.
If you’re curious though about the differences between Contact Form 7 and WPForms definitely check out our article where we go into further detail about this so you can decide which option might be best for you.
Thanks! 🙂
Is it possible now to sync WP Forms with Google Calendar to show only available hours?
Hi Oscar!
Currently, we do not have a built-in option to sync WPForms with Google Calendar in a way you have described it. I do agree it would be super helpful, though. I’ve made a note of the feature request and we’ll keep it on our radar as we plan out our roadmap for the future.
Thanks for the suggestion.
Have a good one 🙂
dose this also work with intranet sides?
Hi Sebastian! I’m sorry, I’m not sure I understand your question. Could you please submit a support ticket with more details if you have an active subscription? If you do not, don’t hesitate to reach out in our support forums.
Thanks!
Seriously need a feature to be able to block out dates like a accomodation booking website, pretty useless otherwise.
Hi Mitchell- Currently, we do not have an inbuilt feature to manage inventory and block/restrict dates as you’ve mentioned. I have added your vote to the feature request list for future enhancements.
Thanks 🙂
Hello. I’ve seen many questions related to this topic. Please let us know if this is now an option. We’d like to sync WP Forms with Google Calendar to show only available days?
hey Jay – I apologize, we currently don’t have this feature, though our developers are working to have Booking time slot scheduler option for calendar. We hope to have this feature soon in one of our upcoming updates.
Any update?
Hey Soeren – Thank you for checking. I apologize, this feature is not available yet. However, it’s on our developers’ radar, and I’ve added a vote on this request on your behalf. Thank you 🙂