AI Summary
Are you looking to get users to subscribe to your WordPress blog via email?
Getting users to subscribe to your blog via email is a great way to keep them engaged with your brand. WordPress doesn’t offer an inbuilt way to do this, but it’s possible to set it up with the help of a few handy plugins.
In this guide, we’ll show you all the steps to take to allow users to subscribe to your blog by email. Let’s dive in!
Why Should You Get Email Subscribers for Your Blog?
Lots of readers may stumble across your blog content from a search engine, but most first-time readers will never return, even if they liked your content. Staying in touch with readers by sending them blog publication notifications by email is an excellent way to build a following for your blog and draw recurring traffic consistently.
To do this, you’ll need a way for users to opt in to receive these notifications, and then, you’ll need a way to send them these emails. Here’s the full guide below.
How to Let Visitors Subscribe to Your Blog Via Email
In This Article
Step 1. Install Icegram Express
To get started, we’re going to need an email newsletter plugin for WordPress. One of the best plugins with blog subscription features is Icegram Express.

The plugin includes a suite of powerful tools that offer ways for users to opt in to your email lists, along with a way to send those users emails each time your blog is updated with a new post. The best part is that these tools are all very easy to use!
So go ahead and get started by downloading and installing Icegram Express. You can download the Starter plugin for free from the WordPress plugin directory.
If you need a bit of guidance with this, here’s a helpful guide to installing WordPress plugins for beginners. Once installed, there’s a quick setup process to go through. You’ll just need to enter the following details:
- From name – the name that will appear as the sender of your emails.
- From address – the email domain that will appear as the sending address.
- Test email address – enter a couple of email addresses you own that can be used for testing.
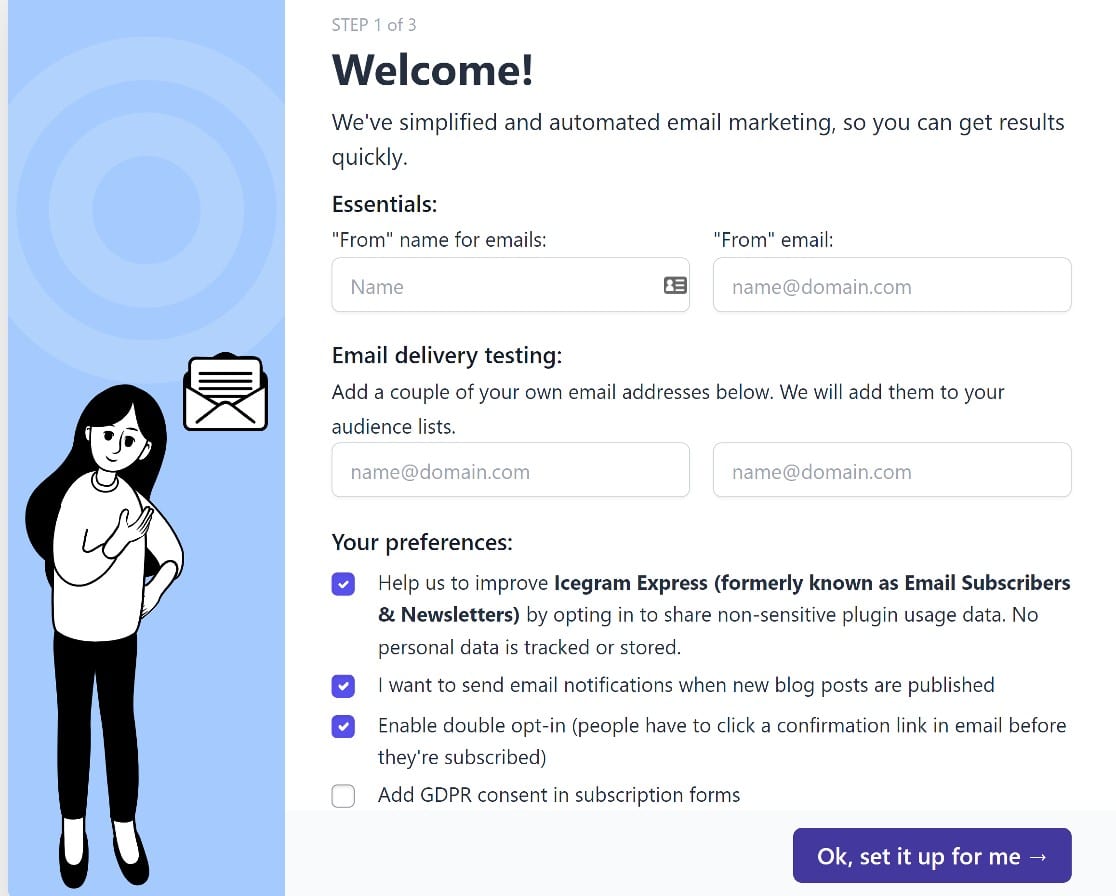
Then, select your preferences and click Ok, set it up for me when you’re done. There won’t be much more to do here, as the rest of the installation will run automatically. Just click All good, let’s finish things up when the installation runs through.
Once we’ve gotten the basic installation out of the way, we’ll create a few email lists next.
Step 2. Create Email Lists
An email list is a collection of users who’ve opted in for your email campaigns. You can have just one email list if you’d like to send all your blog posts to all subscribers, or you can segment your users by topic and allow them to optin to receive specific types of blog content.
We’d strongly recommend segmenting your audience, as users are more likely to convert and less likely to unsubscribe if you’re sending them highly targeted content.
Fortunately, it’s really straightforward to create multiple email lists using Icegram Express. From your WordPress dashboard, click on Icegram » Audience » Manage Lists.

From this page, you can easily add new email lists simply by clicking Add New, then giving your list a name and description. Save it, and that will be all.

Now, when you go to configure your optin forms, you’ll have multiple lists that users can select from.
Step 3. Create an Optin Form
From the WordPress dashboard, click on Icegram » Forms. You’ll see that the plugin has already created one optin form for you.

This is a basic optin form with a name and email field and a subscribe button.
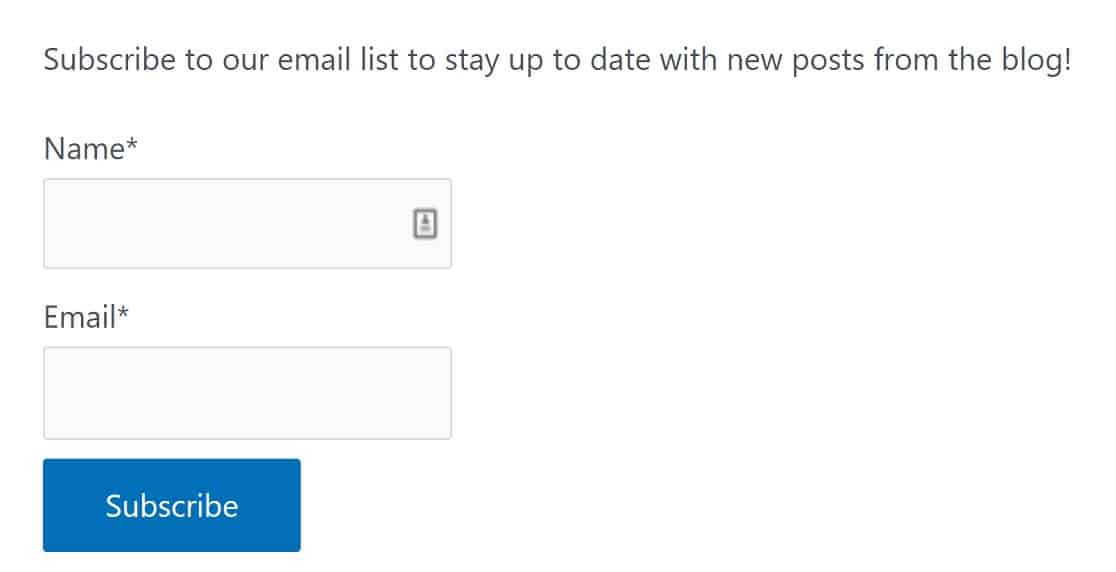
To add this form to a page, simply copy the shortcode and paste it where you want it to appear. But first, let’s edit this form a little to make it more effective.
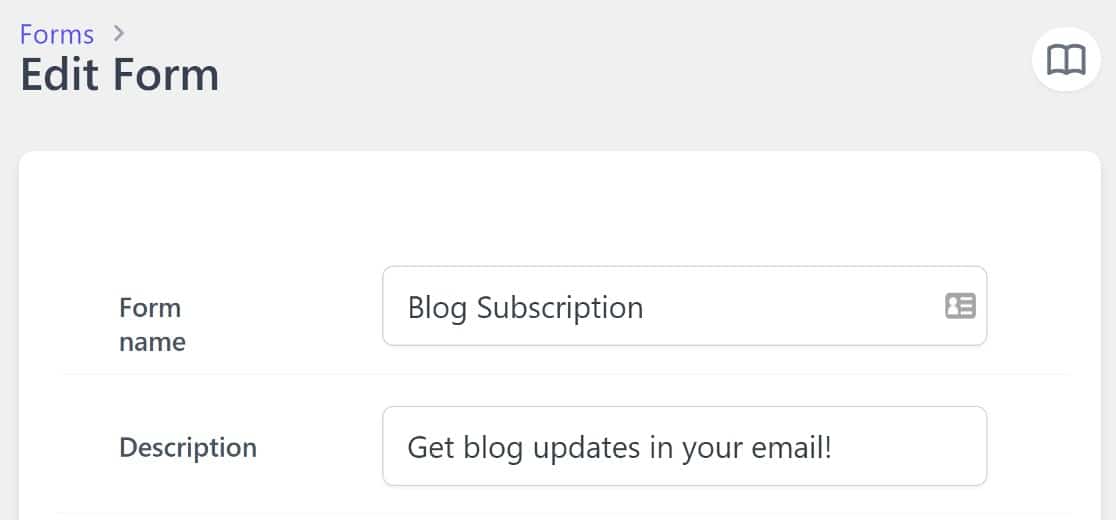
Hover over the form and click Edit to get started. You can change the form name if you’d like, then we’ll add a description, which is where we tell the users what they’re subscribing to.
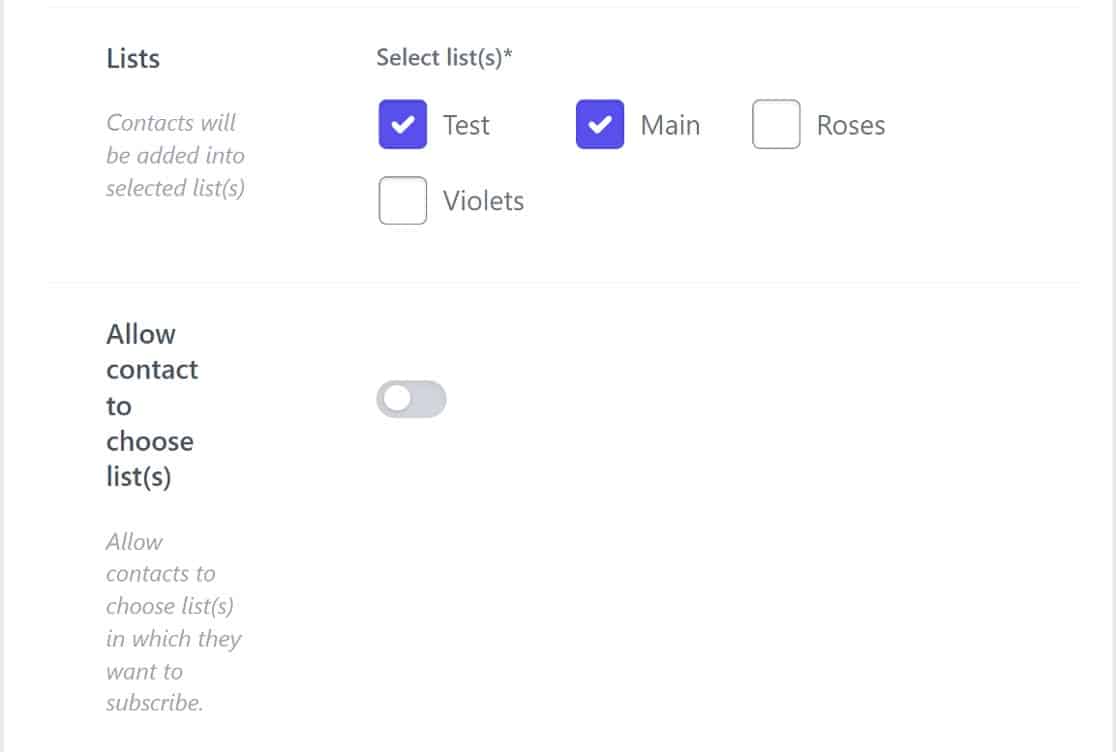
Next, we’ll scroll down to the Lists section and tick all the lists we want readers to be able to choose from. You’ll also see an option labeled Allow contact to choose list(s). Toggle this button.
There are a few more optional steps to take here. You may want your optin form to display as a popup. If so, simply toggle the Show in popup button.
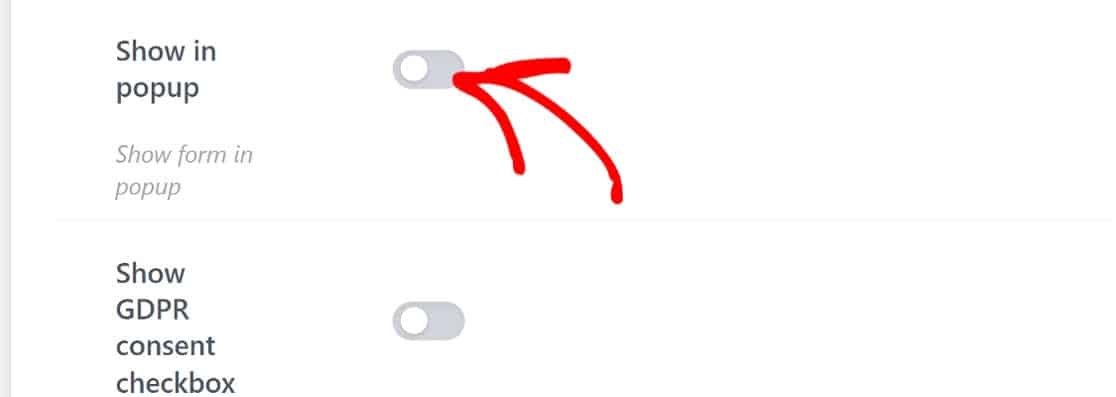
This will open up a dropdown with a headline field. The headline field replaces the opt-in description, so use it to tell users what they’re opting in to.

There are a few more optional settings to consider. For instance, you may also want to enable CAPTCHA to protect your form from spam, as well as the GDPR consent checkbox so that users consent to your privacy policy.
Once you’re done with these settings, simply save them. Next, we’re going to configure Icegram Express to send automated emails when posts are published.
Step 4. Create a New Campaign
At this point, we’ll have an active opt-in form and a few email lists for users to subscribe to. We still need to set up an automated email sequence for when new blog posts are published.
To do this, we’ll create a new campaign. Back in the WordPress dashboard, we’re going to click through Icegram » Campaigns » Create Post notification.

You can create a new post notification template from scratch, but a few ready-made templates are also available for premium users.
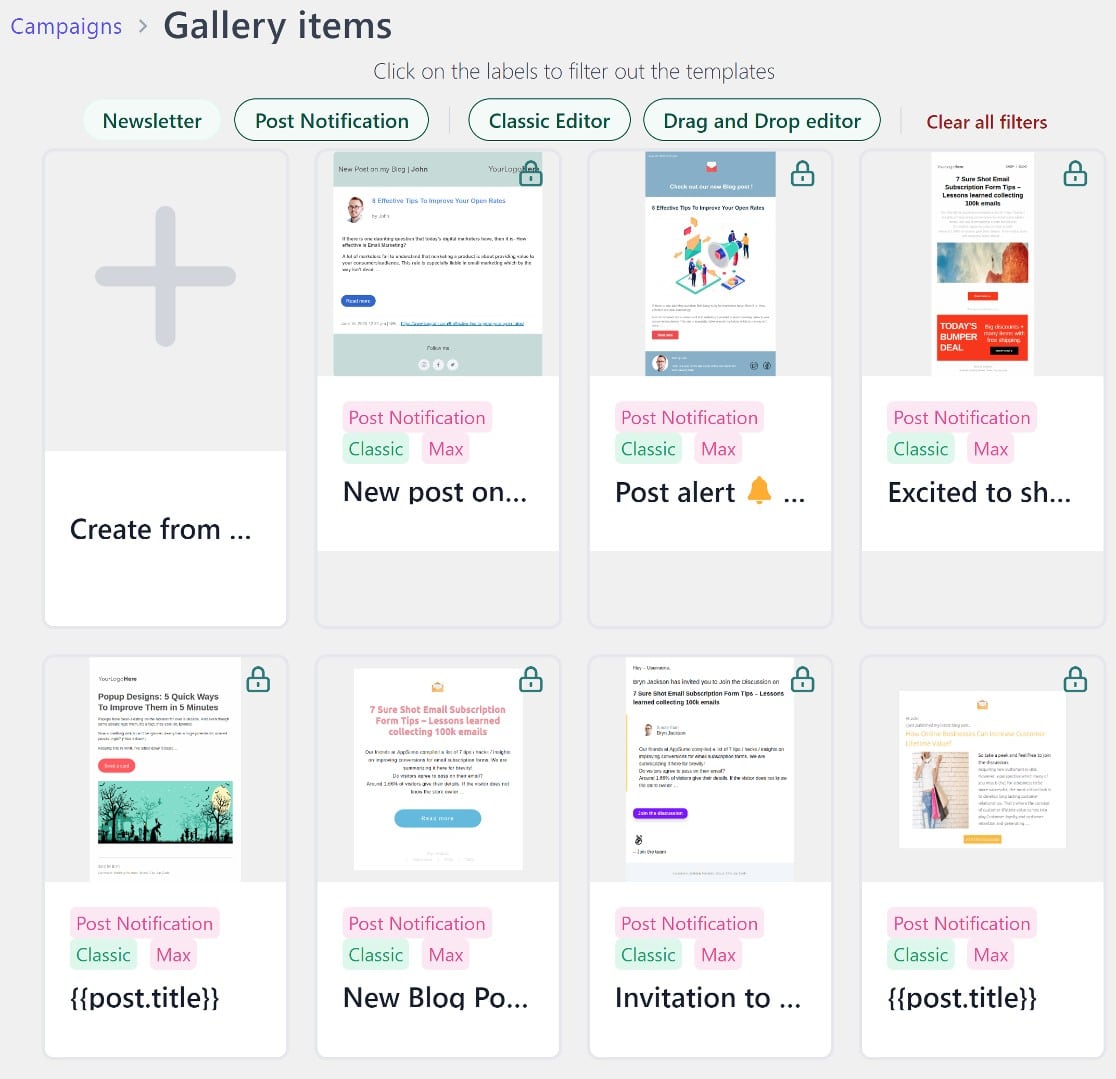
If you’d like to build your template from scratch, you’ll have two options: the drag-and-drop editor or the classic editor.
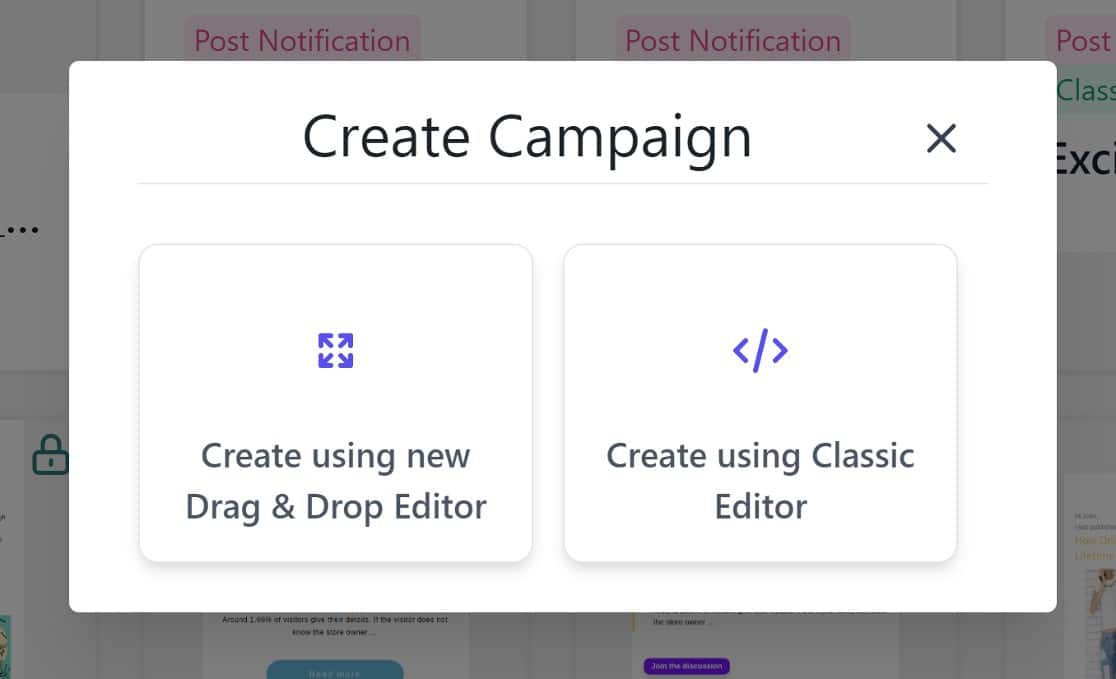
Whichever you choose, if you’re familiar with adding content to WordPress pages, you’ll find it easy to create your template.
You won’t really be creating a template from scratch. There’ll be some basic content, mainly consisting of text along with a placeholder for your logo and some smart tags. You can then add or remove the content as you wish.
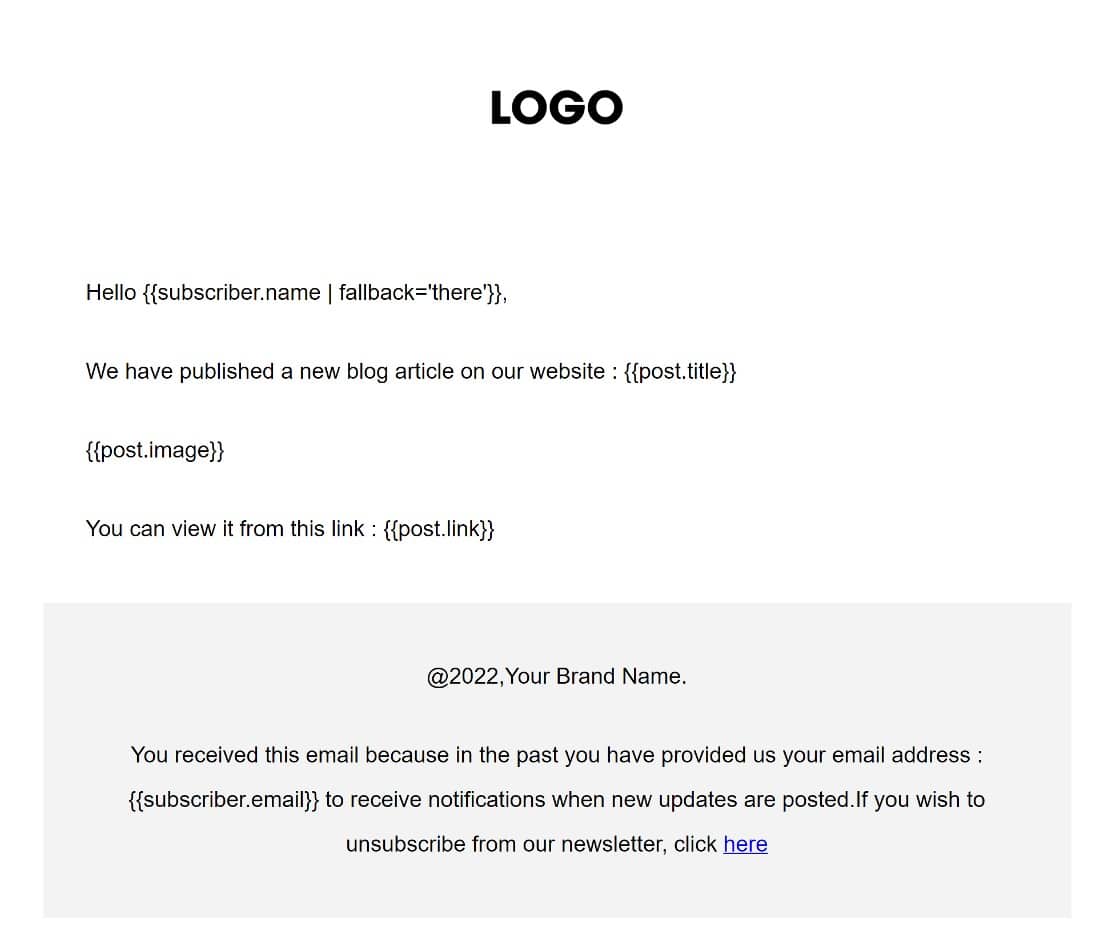
When you scroll down the page, you’ll see even more optional tags that you can add to your template.
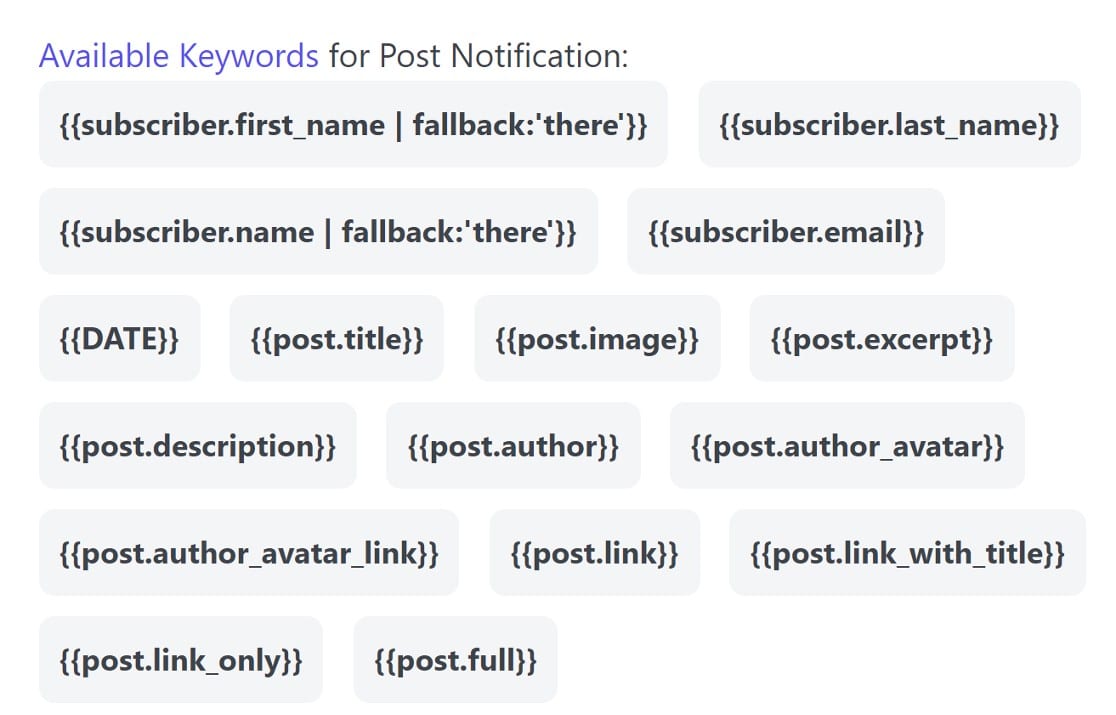
For example, while the default template includes a link to your blog post, you may include additional elements in your notification email, such as a post excerpt using the {{post.excerpt}} tag.
When you’re done here, scroll up and click Summary to create and manage the rules for the new campaign.

Importantly, you should set the list you want to send this campaign to. We’ll choose Test for this guide, but you can choose whichever you want.
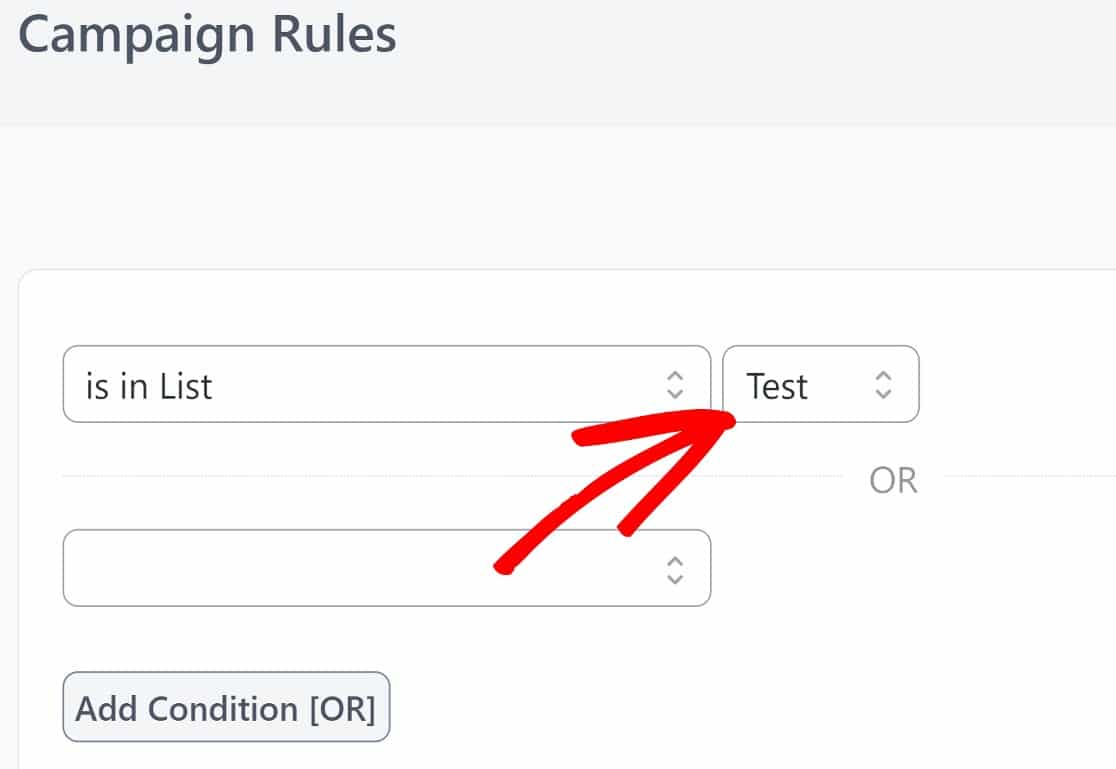
Once you’re done here, it’ll be time to take this campaign live. Scroll up to the top right corner of the page and click Next.

Then click Activate.

At this point, you’ll have a live campaign, and when users opt in to your email list, they’ll receive a notification when you publish a new blog post.

There’s just one more step to take. We’ll need to make sure that your emails get delivered successfully by using an SMTP plugin.
We’ll explain why this is so important and how to get started in the next step.
Step 5. Enable SMTP to Ensure Successful Email Delivery
Ordinarily, WordPress uses the PHP mailer to send emails, but this is not a very effective method. Emails sent this way typically get sent to spam folders or blocked outright.
To ensure your emails are delivered to subscribers, you’ll need to use an SMTP plugin. These plugins work with 3rd party mailers, like SendLayer, to provide authentication for your email domains.
There are a few SMTP plugins out there, but we’d strongly recommend using WP Mail SMTP, which is the best one on the market.
First off, you’ll need to install WP Mail SMTP and initiate the setup wizard. To get started, head into the WordPress admin area and click through WP Mail SMTP » Settings » General.
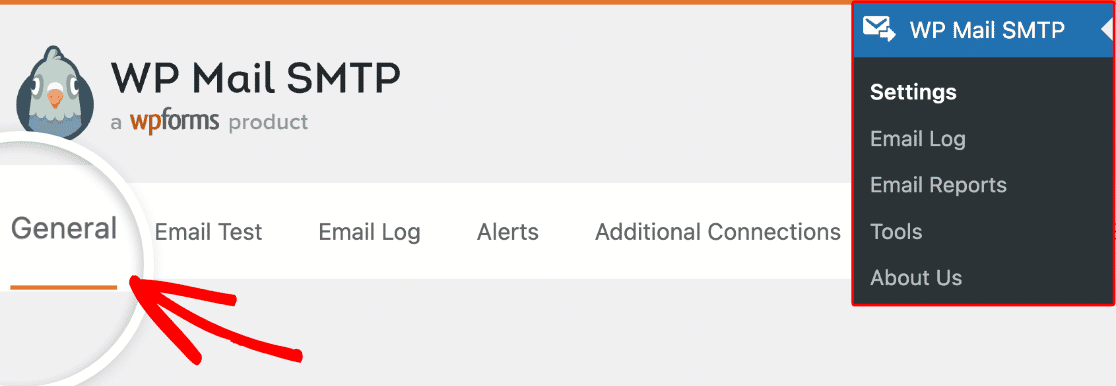
Once in, scroll down to the Mail section and click Launch Setup Wizard.

As mentioned, SMTP plugins work with 3rd party mailers, so a really important part of the setup process is choosing a mailer. We’d recommend SendLayer for its seamless integration with WP Mail SMTP, but if you’d like to try other options, there are quite a few to consider.
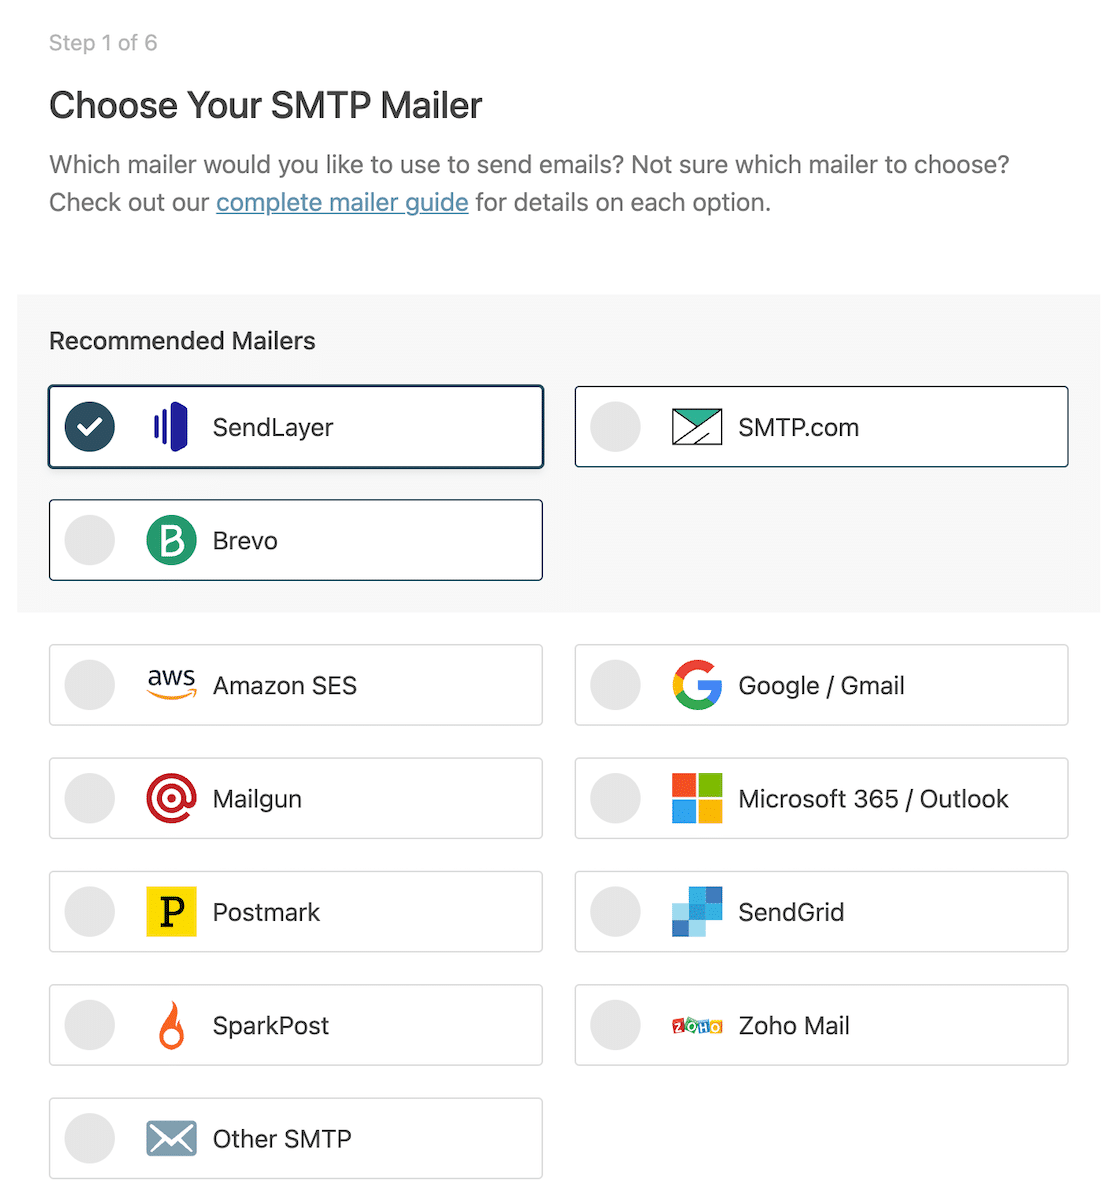
Whichever you choose, take a look at these helpful guides to set it up correctly.
| Mailers available in all versions | Mailers in WP Mail SMTP Pro |
|---|---|
| SendLayer | Amazon SES |
| SMTP.com | Microsoft 365 / Outlook.com |
| Brevo (formerly Sendinblue) | Zoho Mail |
| Google Workspace / Gmail | |
| Mailgun | |
| Postmark | |
| SendGrid | |
| SparkPost | |
| Other SMTP |
With WP Mail SMTP all set up, we’re now at the finish line!
Now, your subscribers will receive notifications by email every time you publish a blog post on your site!
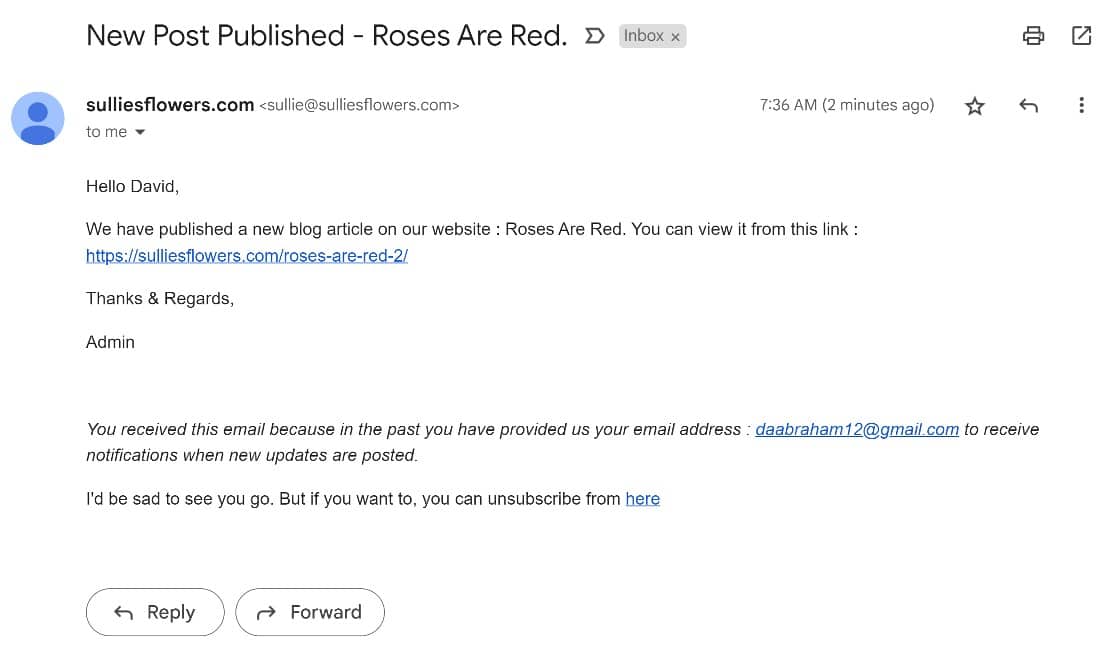
And that’s all there is to it! You now know how to get users to subscribe to your WordPress blog using email.
Next, Track Email Opens in a Google Sheet
As you send out emails, wouldn’t it be great to have an easy way to track who’s opening your emails? Both Icegram Express and WP Mail SMTP offer some powerful email tracking tools, but with WP Mail SMTP, you’ll be able to track email opens in a Google Sheet spreadsheet. Sound interesting? Try it out!
Create Your WordPress Form Now
Ready to build your form? Get started today with the easiest WordPress form builder plugin. WPForms Pro includes lots of free templates and offers a 14-day money-back guarantee.
If this article helped you out, please follow us on Facebook and Twitter for more free WordPress tutorials and guides.

