AI Summary
Do you want to learn how to customize a password-protected page in WordPress?
Customizing locked pages allows you to encourage more visitors to become subscribers of your site. Plus, it’s a great way of utilizing the space to promote other services or pages on your site.
In this post, we’ll walk you through the steps to customize your WordPress password-protected pages.
When Should You Customize a Password Protected Page in WordPress?
There are various scenarios where using a custom password-protected page is a good idea.
For example, if your site is still under construction, locking your pages with passwords allows only authorized people to access these for testing purposes. Another common situation where password-protected pages come in really handy is when you want to restrict some of your pages to paid subscribers only.
The default WordPress password-locked page has a very basic design that has a password field and has a design based on your WordPress theme. This is what a standard WordPress password locked page looks like:

Unfortunately, it’s not easy to add additional elements like custom buttons, widgets, forms, and other elements using the default WordPress editor.
But to make this considerably easy, we’re going to use a special plugin for WordPress called SeedProd. As the best page builder plugin for WordPress, SeedProd allows you to create password-locked pages that look super awesome without requiring any code!
How to Customize a Password Protected WordPress Page with SeedProd
To customize your password-protected page in WordPress, simply follow these steps:
- Step 1: Install SeedProd
- Step 2: Make a Coming Soon Page
- Step 3: Customize the Password Protected Page
- Step 4: WordPress Password Protected Page Settings
- Step 5: Publish Your Password Protected WordPress Page
Let’s begin.
Step 1: Install SeedProd
SeedProd is a drag and drop landing page builder for WordPress. It comes with built-in templates that make it extremely easy to customize your pages.
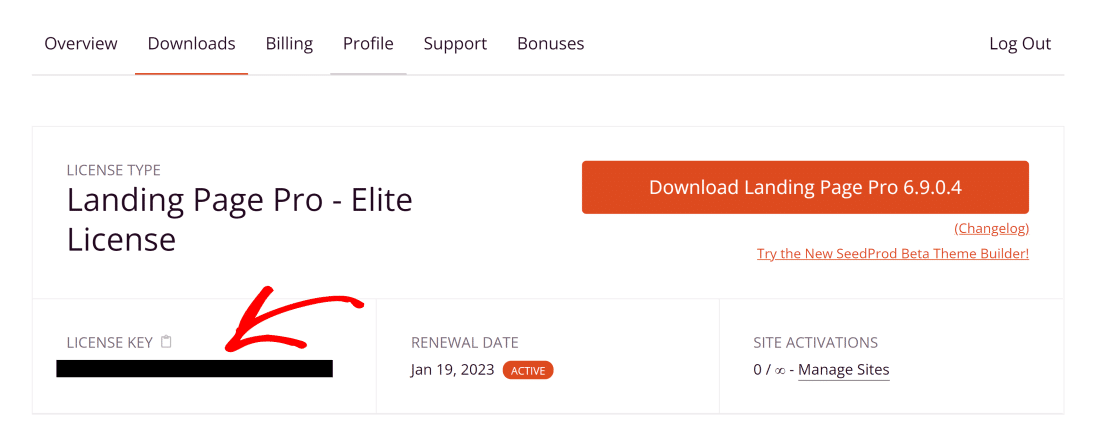
So, we’re going to begin by installing the plugin. Once it’s installed, make sure to copy your license key. You can find your SeedProd account license key by going to your SeedProd dashboard and clicking on the Downloads tab. Then, scroll down to find the License Key field and copy it.
Now, open your WordPress admin dashboard and head over to SeedProd » Settings. Here, enter your License Key and click on the Verify button.
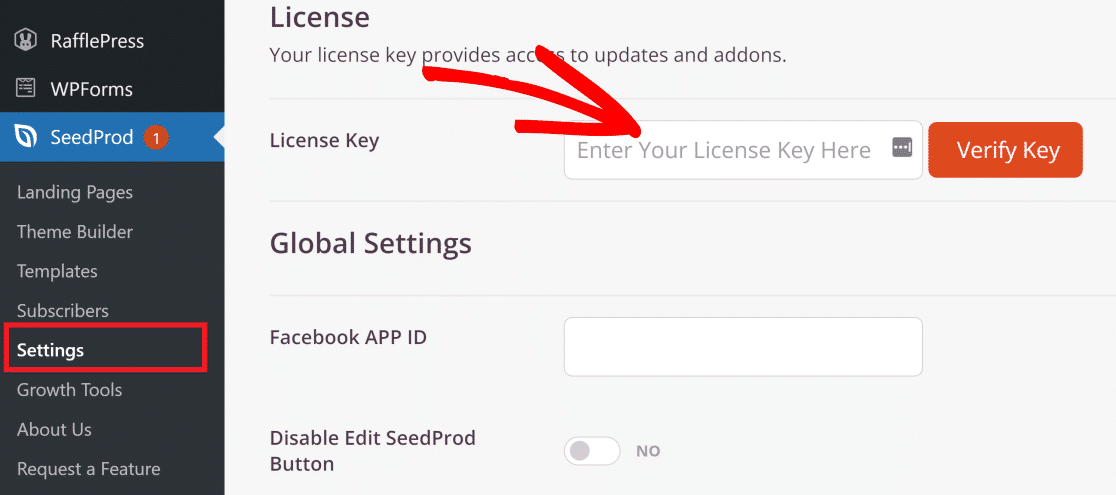
Great! Now that SeedProd Pro is active on your site, you can do all kinds of exciting customizations.
Step 2: Make a Coming Soon Page
SeedProd has a coming soon mode which comes with settings for access restrictions. With these access restrictions, you can easily set a password for your page.
To build a coming soon page with SeedProd, click on the SeedProd menu item within your WordPress sidebar.

Now, click on the Set up a Coming Soon Page button.
Here, you’ll find a huge variety of templates to choose from. You can pick any that you like, but we’re going to use the Conference Webinar Page template for this example.

After selecting the theme, you should now see the SeedProd drag and drop builder which lets you customize the page in all kinds of ways.
Step 3: Customize the Password Protected Page
When you’ve selected your template, you can customize your password-protected page using dozens of different kinds of blocks visible on the left-hand pane.
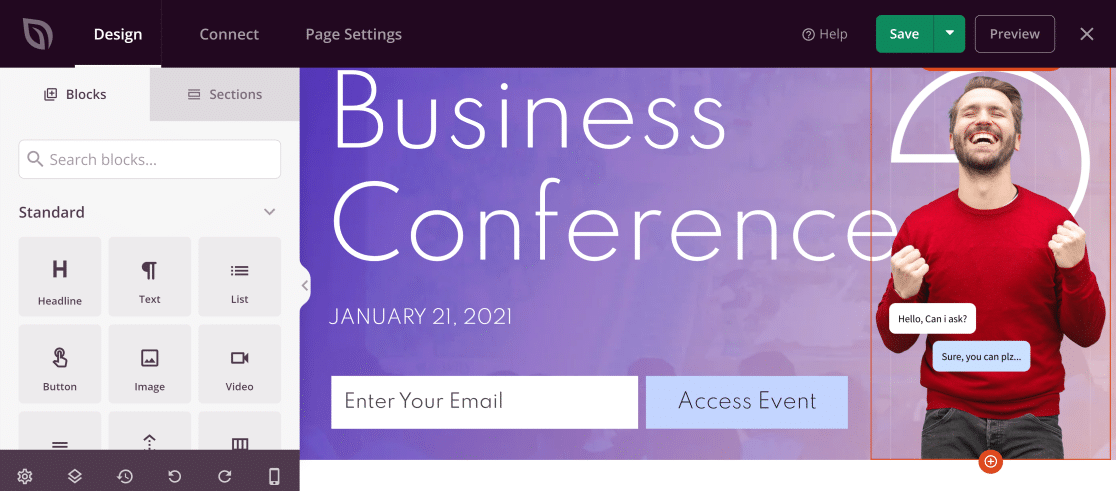
You can simply drag and drop these blocks on the right to add a new element such as a form, social media icons, giveaway contests, and more.
Since we want to add a password field that allows users to access the the locked content, we’re going to drag and drop the Custom HTML onto the page.
To do this, simply search Custom HTML in the search field and place this block as per your desired spot on your password-protected page.
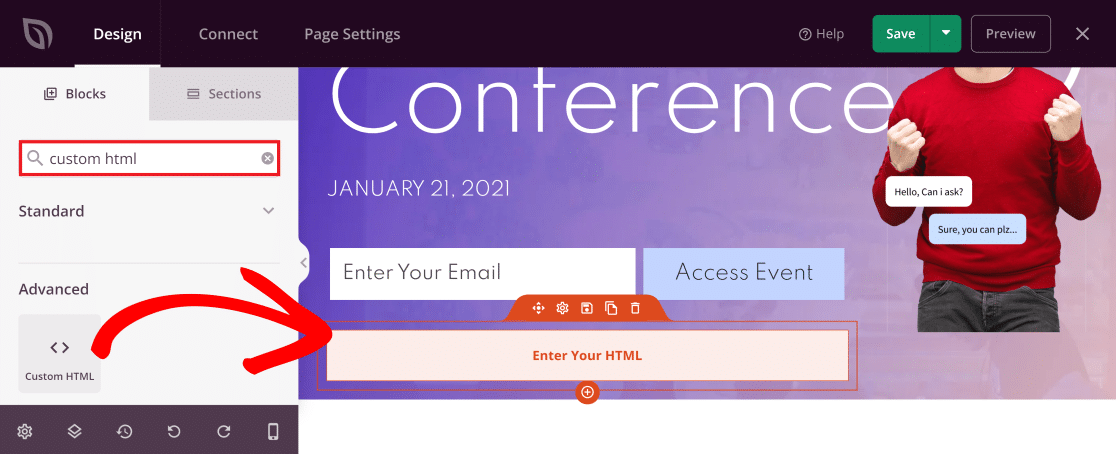
Now, click on the block on the live editor to access its settings. Here, paste this code in the Custom HTML field:
seed_bypass_form msg="Enter passcode" button-txt="Login" return="https://yourwebsite.com/welcome"
Note: Make sure to enclose the above code in square brackets when pasting in the Custom HTML field.
The code above creates a standard password field, but you’ll need to slightly edit it in order for it to work perfectly on your site. Here’s what each of the three parts of this code means:
- msg: This tag specifies the text that appears within the password field. By default, this is set to “Enter passcode”. You can edit this text if you’d like to, but it’s not necessary.
- button-txt: This tag controls the text that appears on the button that leads to your password-protected page. Again, you can edit this text but it’s not required.
- return: Within this tag, you need to provide the URL of the page you want users to access with a password. Make sure to enter the correct link.
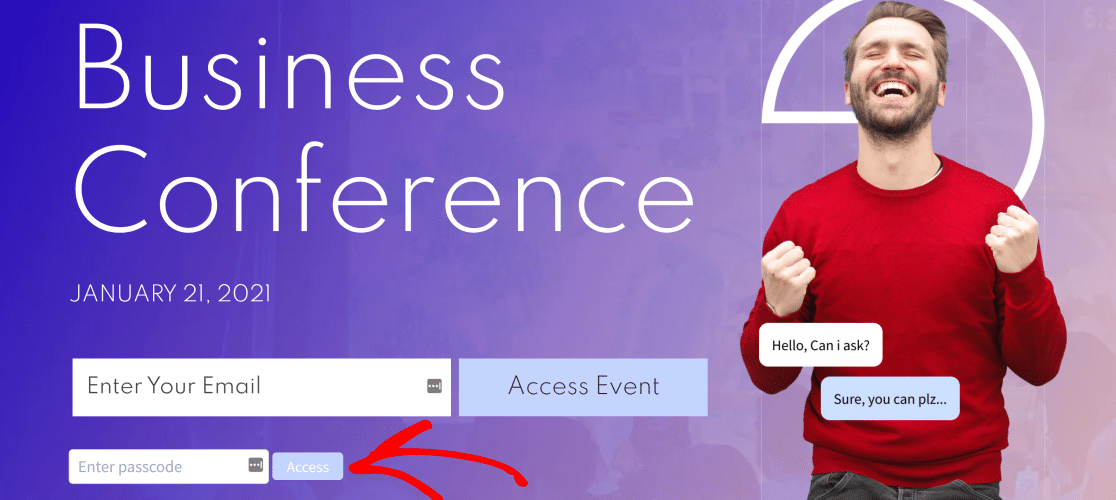
In our example, we customized the values in the code like this:
seed_bypass_form msg="Enter passcode" button-txt="Access" return="https://wpforms.example.com/"
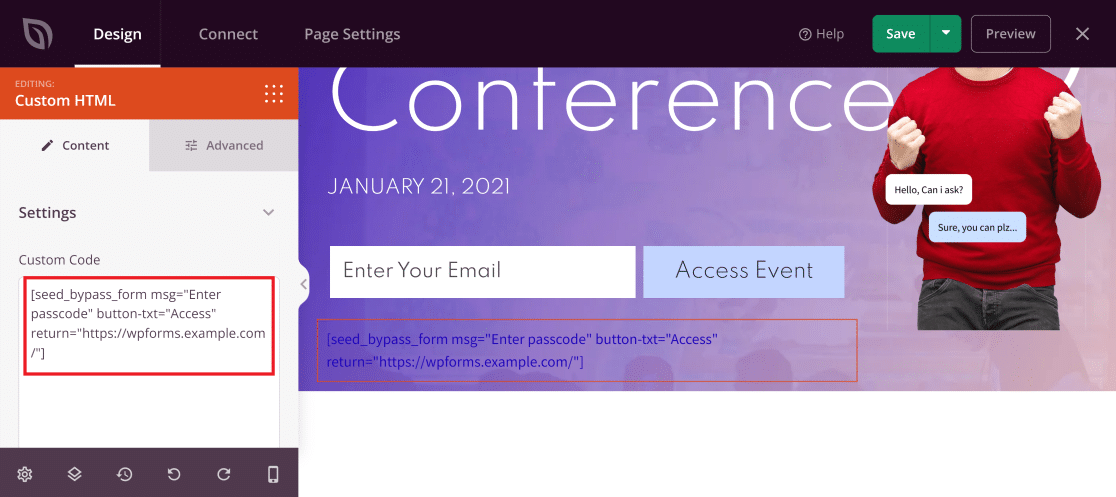
Note that you won’t see the password input field until you preview it. But before we do that, we need to configure a few more settings to set up password protection.
Make sure to click on the Save button on the top-right to save your changes up until this point.
Step 4: WordPress Password Protected Page Settings
In this step, we’re going to set the password that users will need to actually access your protected content.
On your SeedProd page builder, click on the Page Settings tab (3rd option from the top-left). Now, select Access Control from the menu on the left. Then, within the Bypass URL field, you can enter any password that you want to set up.
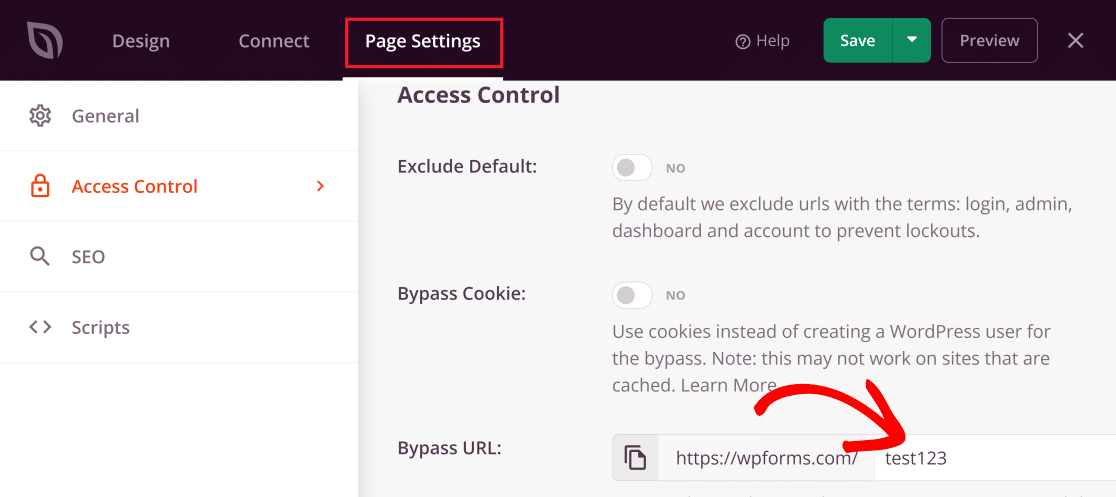
It’s important to note that the password you choose will also be your bypass URL. This means that if you want a user to directly access this page, you can simply give them the bypass URL to it.
You’re almost there! Scroll down to the Include/Exclude URLs section and click on the Include URLs options. Then, paste here the link to the actual page that you want to be hidden behind a password.
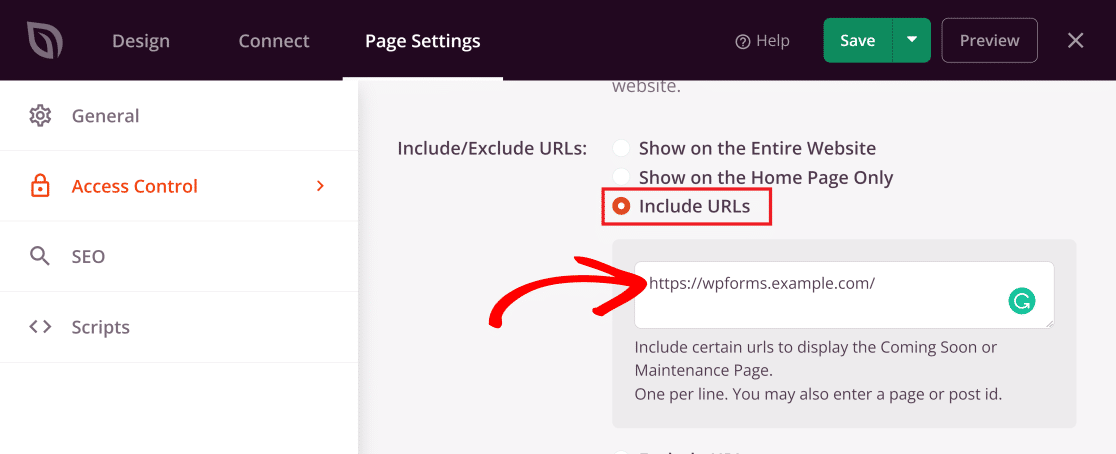
And now it’s time to publish and activate our new custom password-protected page!
Step 5: Publish Your Password Protected WordPress Page
Now that we’ve customized the page and configured the settings to our liking, we can move ahead to publishing it.
Click on the downward-pointing arrow next to the Save button to expand the menu and then press Publish.

You will then see the following message popup.

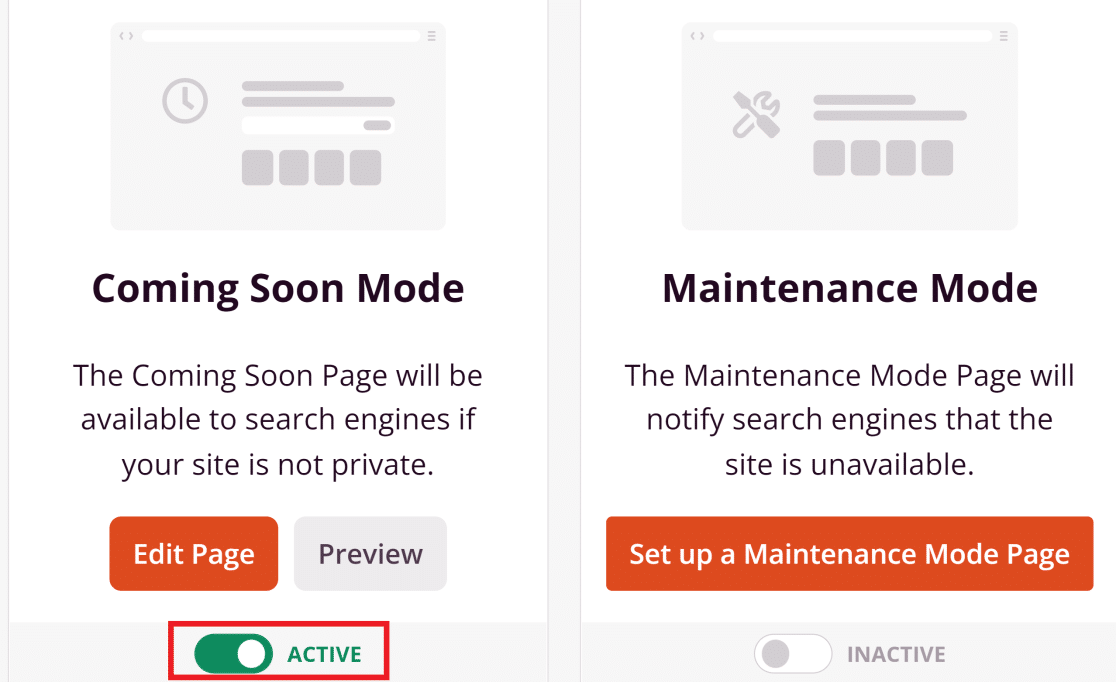
Now, return to your SeedProd dashboard and press the toggle switch so that the status reads Active under the Coming Soon Mode.
Your custom password-protected page is now published!
Excellent!
If you’d like to customize a password-protected form page, then see the steps below where we use WPForms to accomplish this.
How to Customize Password-Protected Form Pages
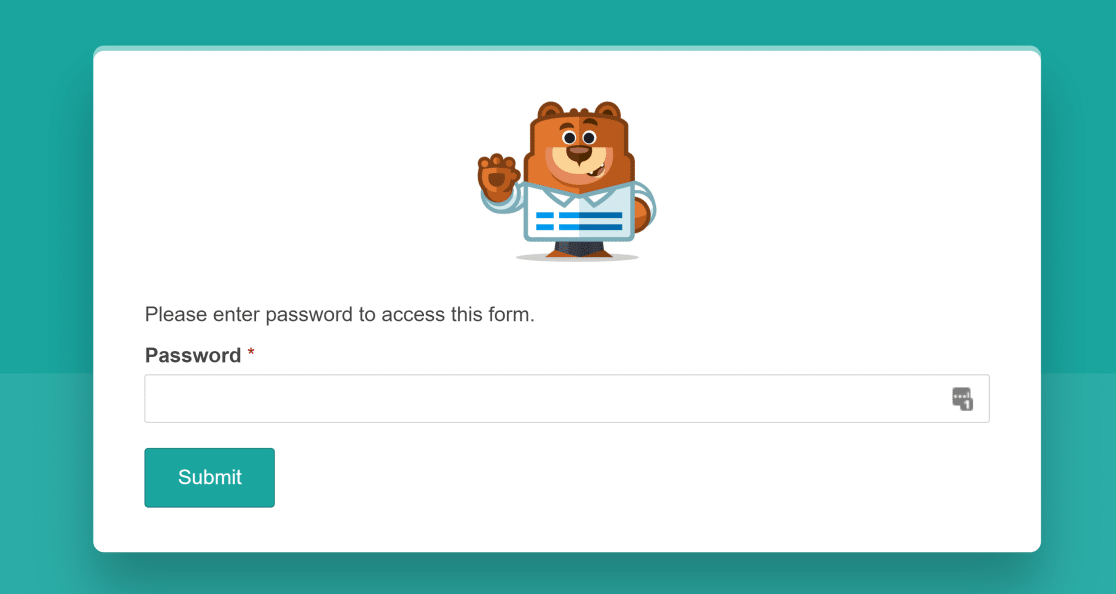
You can also create and customize a password-locked form page on your WordPress site. This is very useful if you want to restrict form access to only logged-in users or those that have a password.
For details, please see this guide on how to build a password-protected form.
And there you have it! You now know how to customize a password-protected page in WordPress.
Next, Create Your Own WordPress Theme
Do you want to create a WordPress theme that looks exactly like the way you want? Thankfully, you no longer need to be a developer to build your own WordPress theme. Check out our detailed guide on creating WordPress themes without code for more information.
Also, if you’re looking for an easy way to grow visitors to your site, you can look into sending push notifications from WordPress.
Create Your WordPress Form Now
Ready to build your form? Get started today with the easiest WordPress form builder plugin. WPForms Pro includes lots of free templates and offers a 14-day money-back guarantee.
If this article helped you out, please follow us on Facebook and Twitter for more free WordPress tutorials and guides.

