AI Summary
Setting up a contact form that truly fits your brand can feel like a difficult task, especially when you want it to seamlessly integrate with tools like Kit. The good news is that it’s entirely possible to build a customized Kit contact form that captures leads while maintaining your site’s style.
Create Your WordPress Kit Form Now! 🙂
In this article, I’ll show you how to create a customized Kit form and add it to your WordPress site without any coding! Let’s get started.
How to Create a Customized Kit Contact Form in WordPress
I’ll show you how to create a basic Kit form. You can follow the same steps to connect any form to Kit easily.
Step 1: Install the WPForms Plugin and Activate the Kit Addon
The first thing you need to do is to install and activate the WPForms plugin. Here’s a step-by-step guide on how to install a WordPress plugin if you need some help.
Once you have WPForms installed on your website, you must next install and activate the Kit addon, which is quite simple. From your WordPress dashboard, navigate to WPForms » Addons.
Scroll down until you locate the Kit addon. If it’s not already installed, click on the Install Addon button. After the addon is installed, flip the toggle switch to activate it if it isn’t automatically activated upon installation.
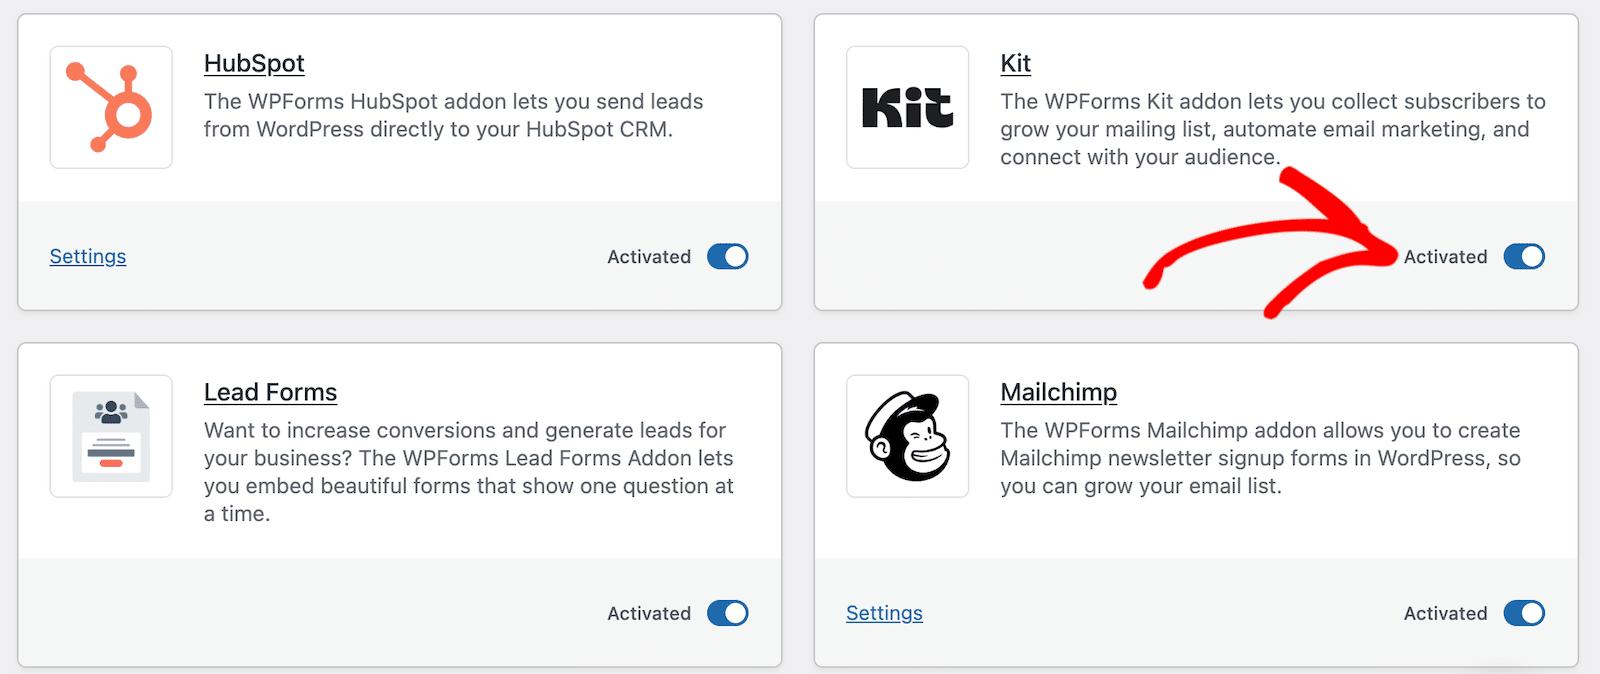
After you install and activate the Kit addon, you’re ready to move on. In the next step, we’re going to connect our Kit accounts to WPForms. It’s important to note that you can do this later if you want to skip straight to creating the form in step 3, but I find that it’s easier to do it now before you start working on your form.
Step 2: Connect Your WPForms and Kit Accounts
To connect WPForms to Kit, you’ll first need to open a new tab and log in on the Kit website to access your account information. It’s important to do this in a new tab or window because you’ll be copying and pasting things from Kit into WPForms.
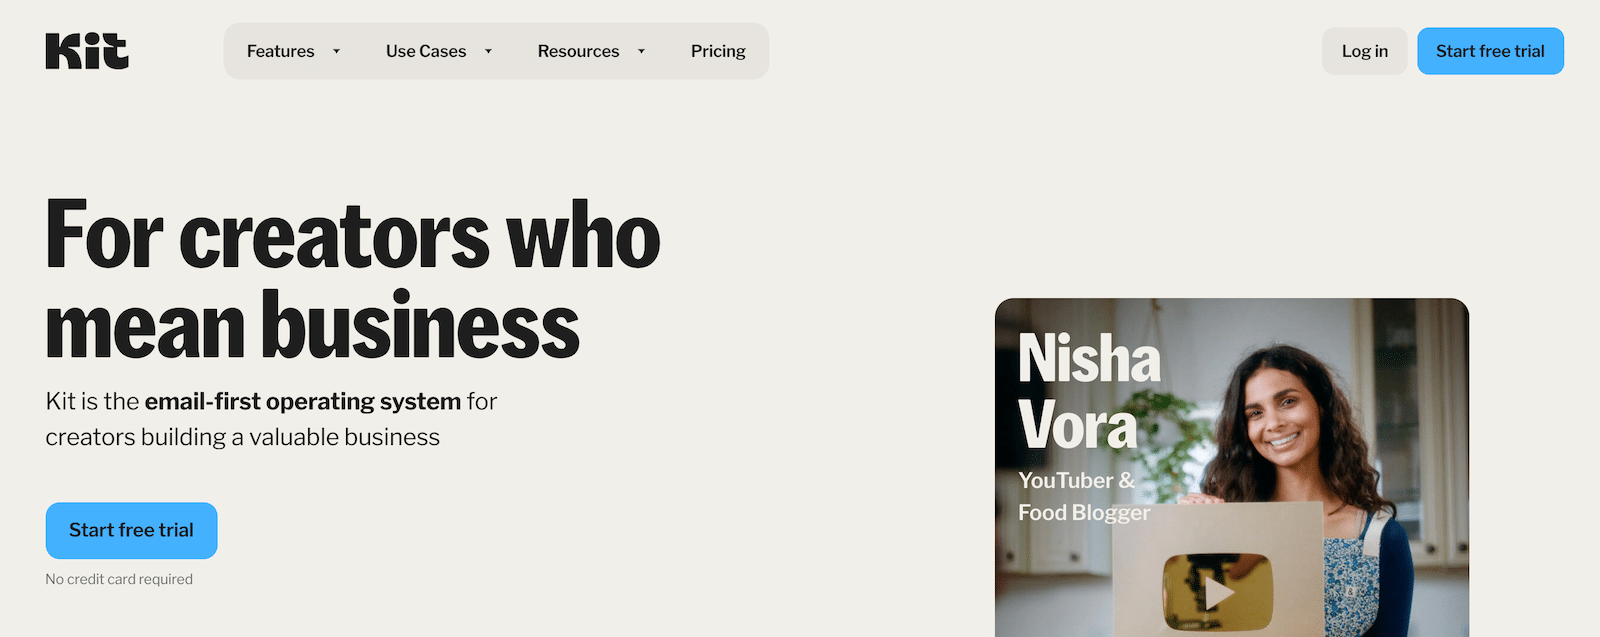
Once you’ve logged in, click on the dropdown next to your name in the top right of the page and select Settings.

On the Settings page, scroll down through the options in the left sidebar until you find Developer and click on that.
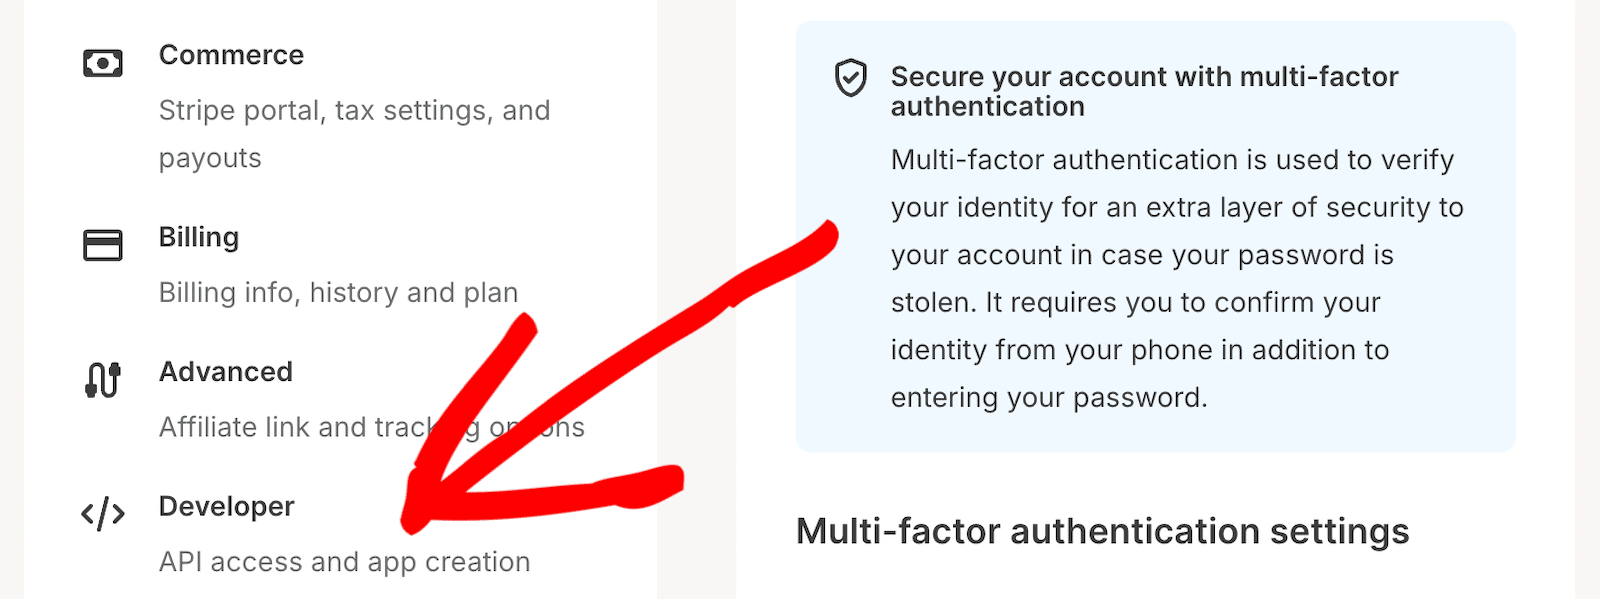
On the Developer settings page, you should see your API and Secret Keys.

Leave that window just for the moment and click back over to the one with your WPForms account.
The last thing we did here was install and activate the Kit addon. Now we’re going to establish the connection between accounts. To do this, under WPForms in the left sidebar menu, click on Settings. On that page, click on the tab that says Integrations.
Scroll down until you find the option for Kit.
Click on the Add New Account button. This is where you’ll need to return to the tab with your Kit account info and copy over your API Key and API Secret Key.
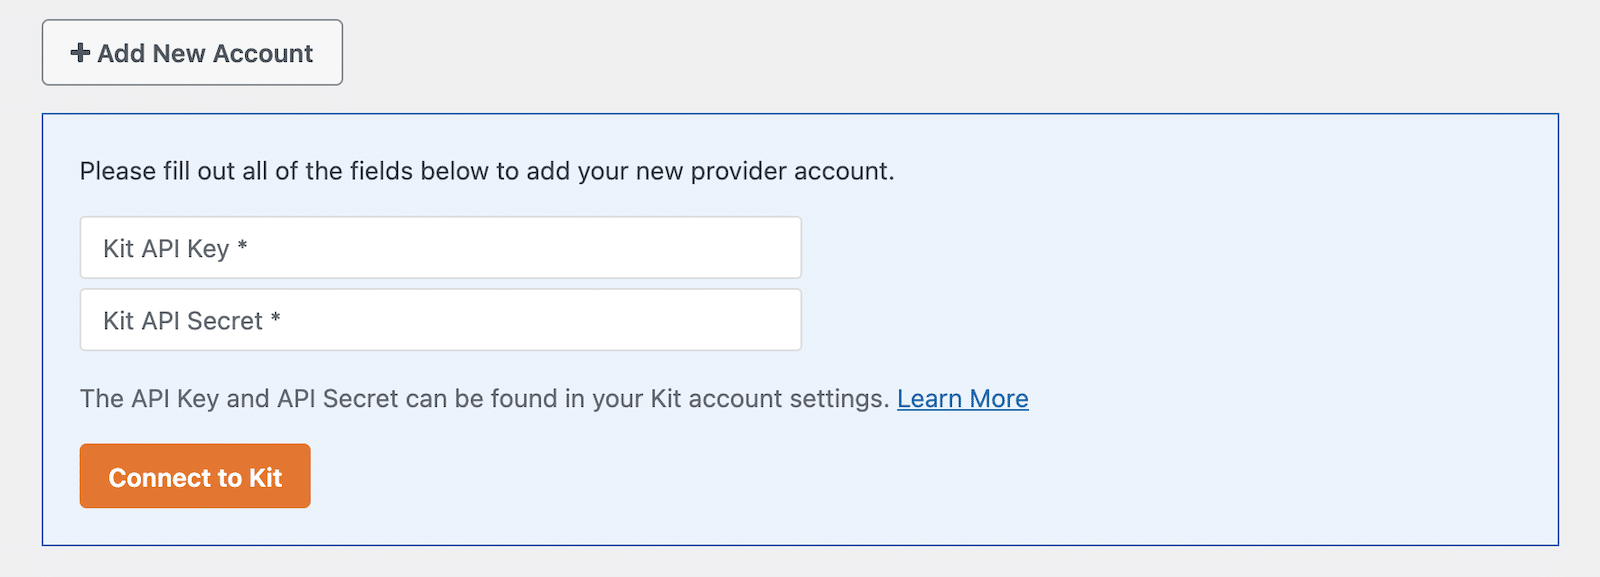
Once the account connection has been established, you’ll see a confirmation.

Now your Kit account is connected to WPForms. Like I said, you can still do this later after you build your form. I’ll even point out in the tutorial where you can do it. I just find it easier to have everything set up ahead of time so the next steps are smoother.
Right, then. Let’s carry on.
Step 3: Create Your Kit WordPress Form
WPForms comes with an awesome built-in form template library consisting of 2,000+ WordPress form templates. You can use them as-is or customize them to suit your needs.
Using these templates, you can kick-start your form-building process with just a few clicks and without needing to build forms from a blank canvas if you don’t want to.
To create a new form in WPForms, click WPForms » Add New in your WordPress dashboard.

This will prompt you to the form setup screen. Here, you need to add a name to your form and select the form template you want to use
For this example, we’ll use the Simple Contact Form and name it “Kit Form.” If you want, you can choose the Newsletter Signup Form Template here instead. You can preview templates by selecting them and clicking on the View Demo button.
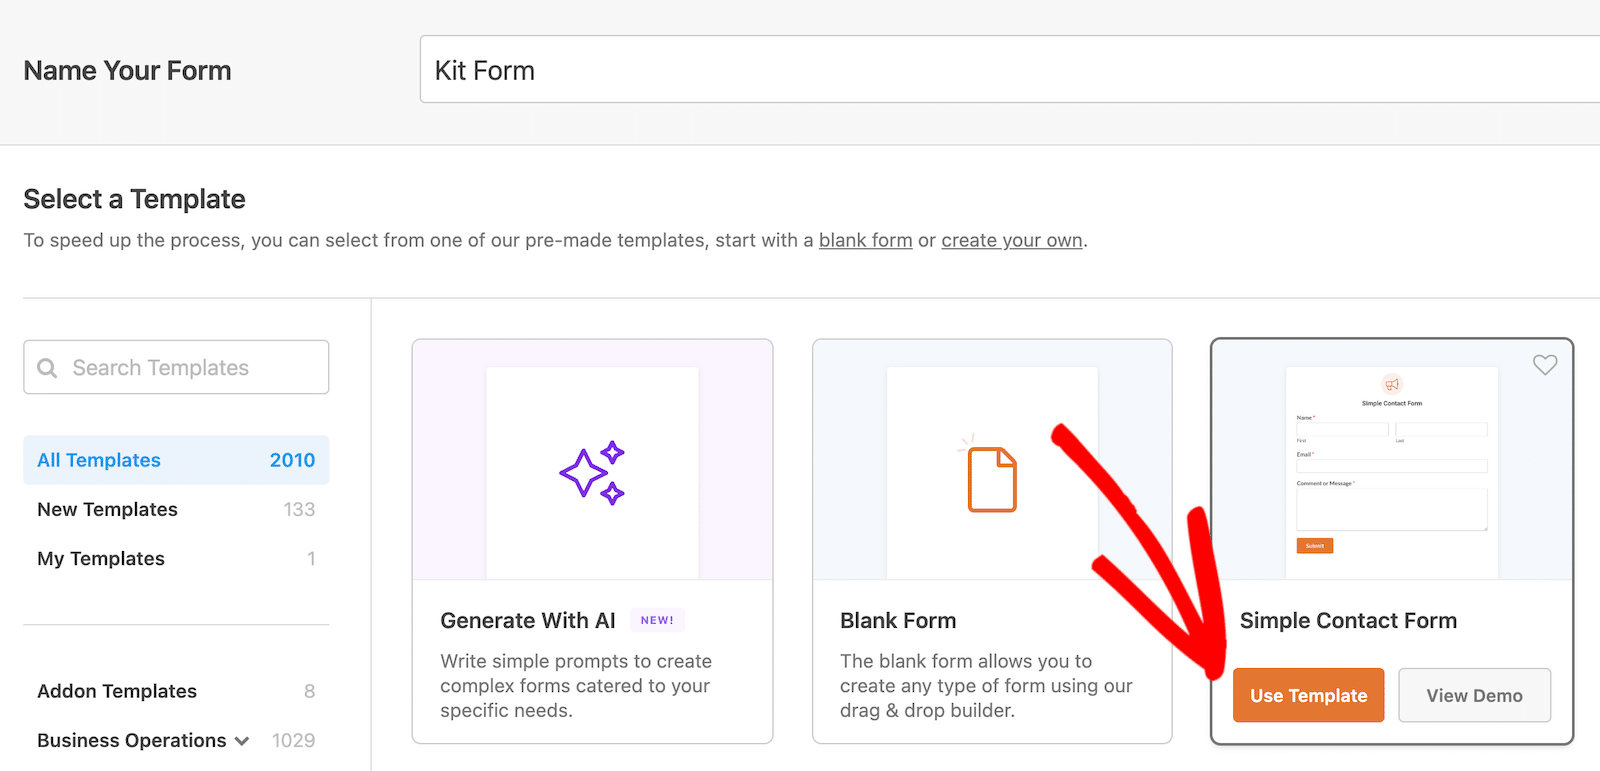
After you select the template you want to use, click on the Use Template button to load it in the form builder.
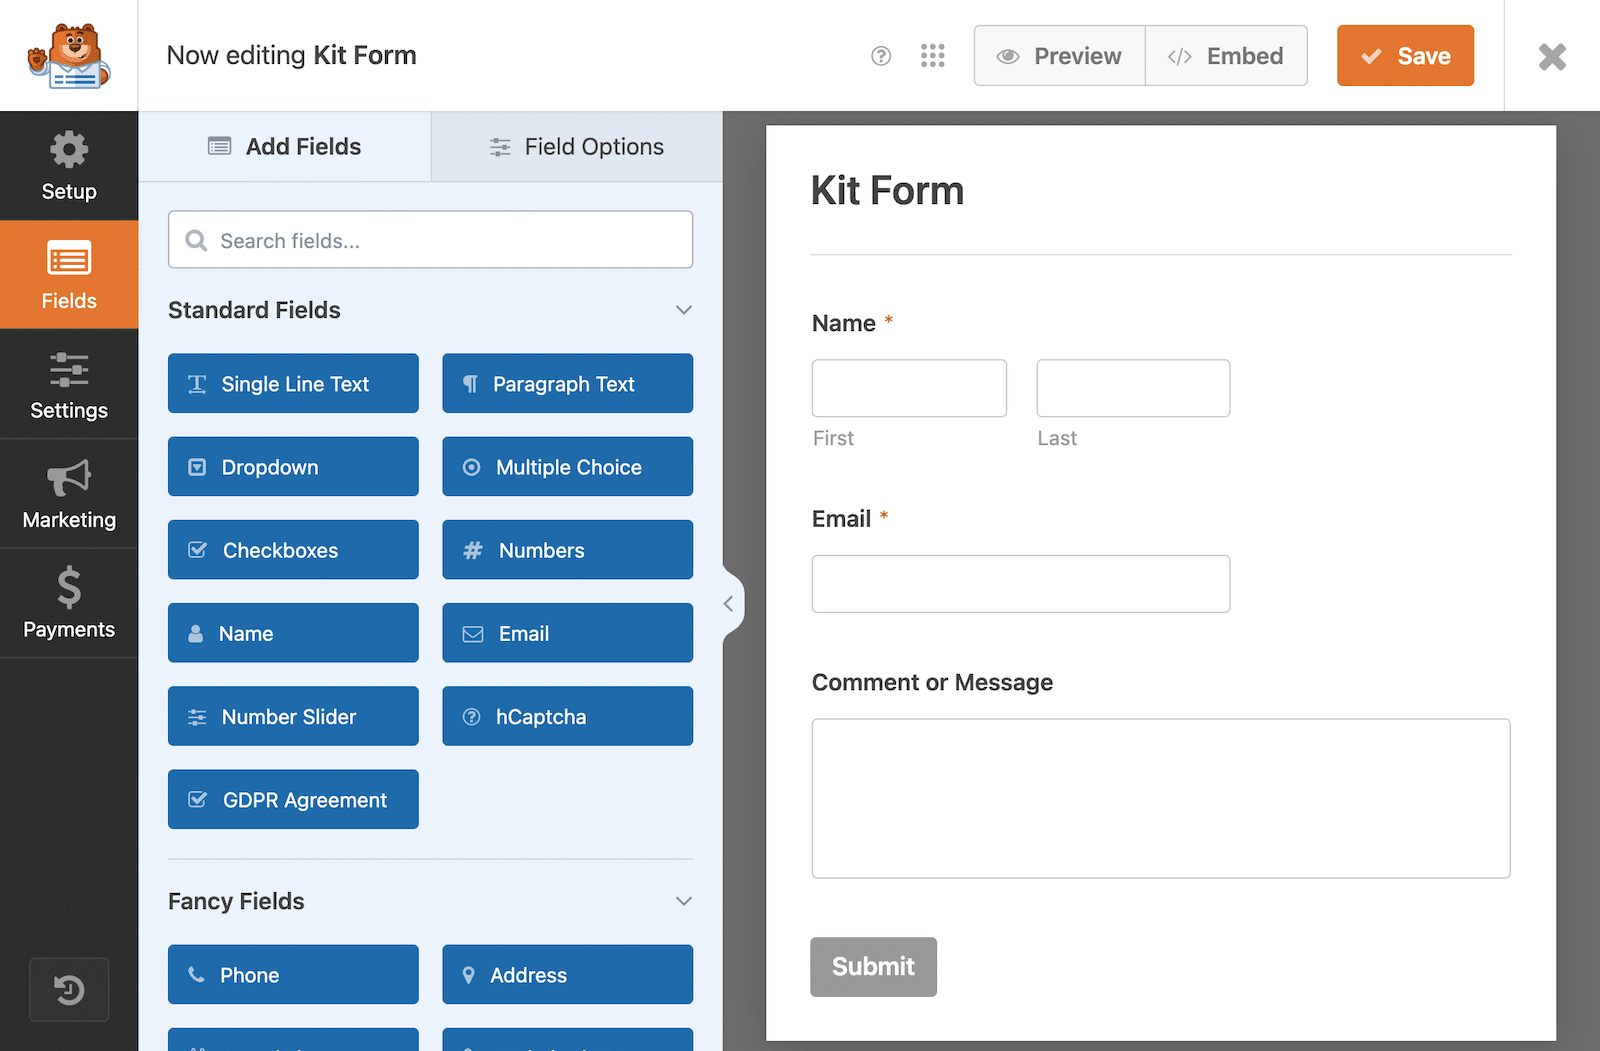
This is how your form will look in the form builder dashboard. Feel free to add, edit, or rearrange fields according to your liking.
One thing you might want or need to add is a GDPR agreement field. Since it’s completely optional, I’m not going to cover it in depth here, but if you want to read more about how to enable the GDPR field and add it to your form, check out our doc on creating GDPR-compliant forms.
Step 4: Connect Your Form to Kit
So far, we’ve installed and activated WPForms and the Kit addon, connected our Kit accounts to WPForms, and built our form. Now we need to make sure the information from our forms goes to our Kit accounts.
When you established the connection between WPForms and Kit earlier in this tutorial, you set up your account to be used with WPForms. When you want to send form submission data from a specific form to your Kit account, you need to enable it on that specific form. That’s what we’re going to do here.
If you haven’t connected your Kit account yet, continue here. If you connected your account in step 2, you can skip the next few paragraphs and pick back up at “If You’ve Already Connected Your Account…” below.
If You Haven’t Connected Your Account Yet…
With your Kit form open in the form editor, click on Marketing in the left sidebar. If you didn’t already connect your Kit account to WPForms, this is where you’re going to do it by selecting Kit and then clicking on the Add New Connection button.
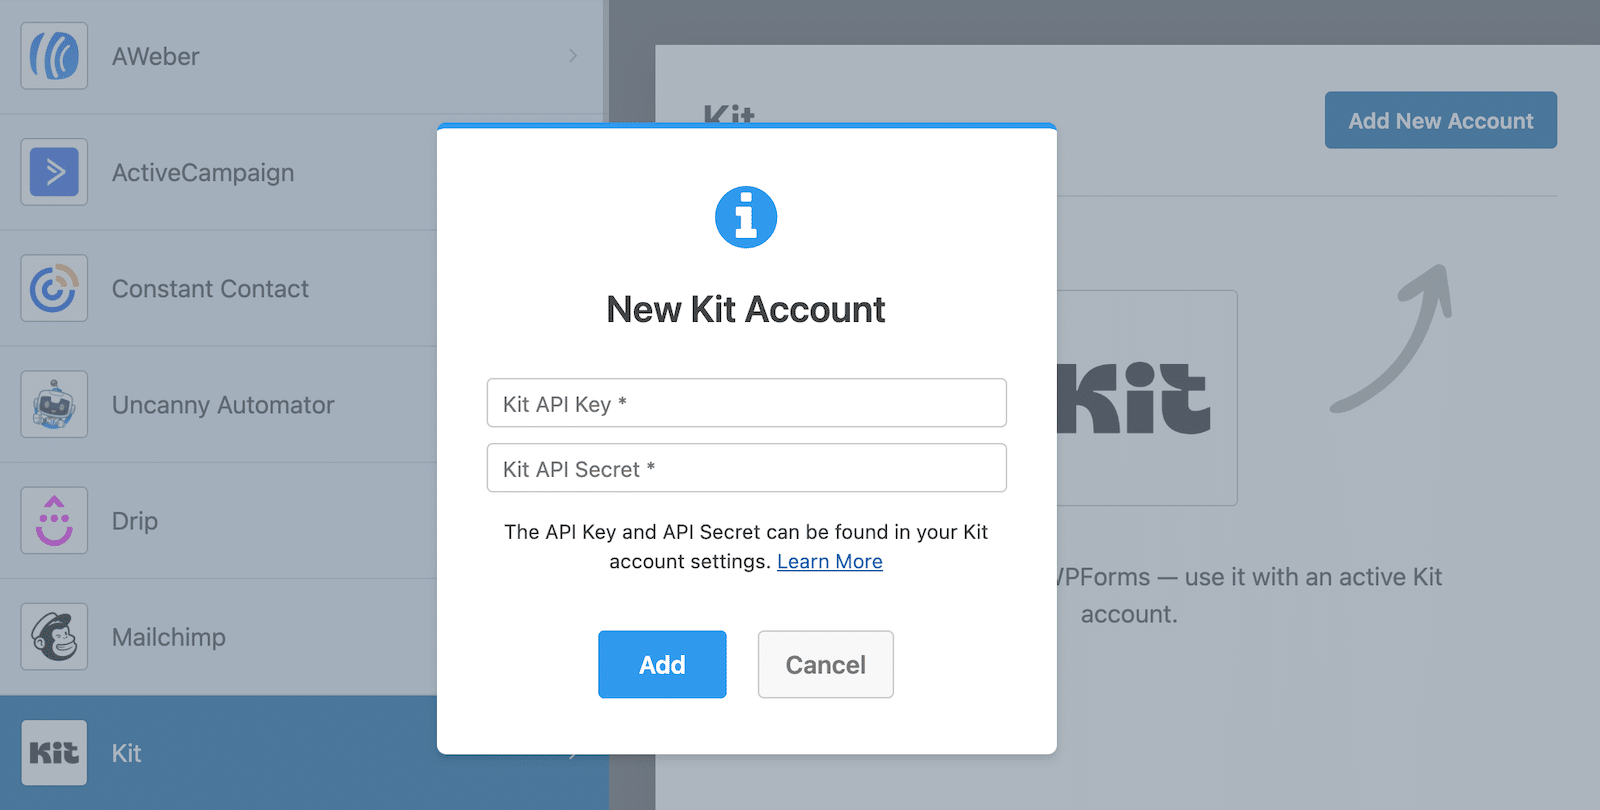
Then you’ll have to follow the directions from Step 2 above to connect your account before continuing.
If You’ve Already Connected Your Account…
With your form open in the form builder, click on Marketing in the left sidebar. Scroll down through your options until you find Kit and click on it.
Since your account is already connected, you shouldn’t see an option to connect an account. Instead, click on the Add New Connection button.
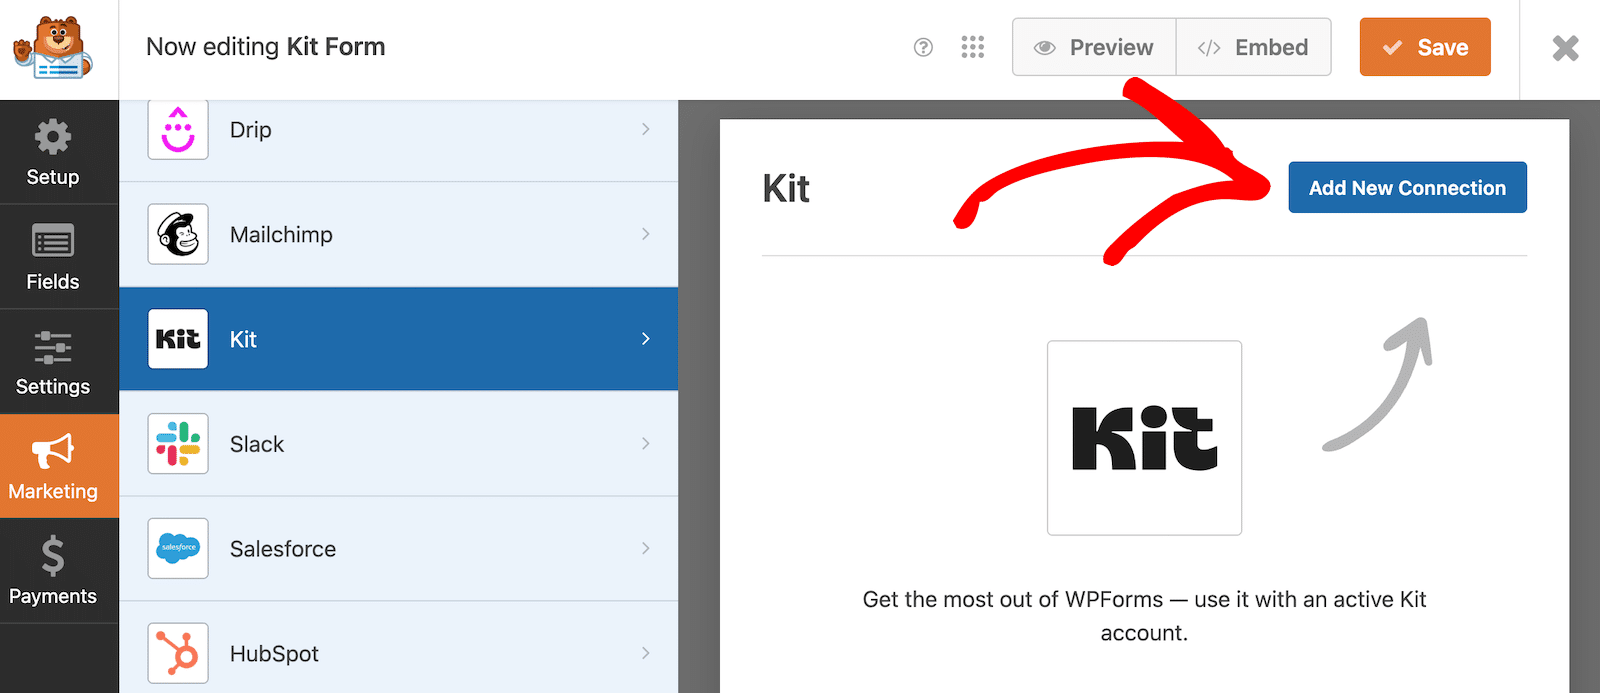
After that, simply give the connection a name and click the OK button to complete the integration process. The connection name is internal only and is just intended to help you differentiate among your connections if you have multiple.
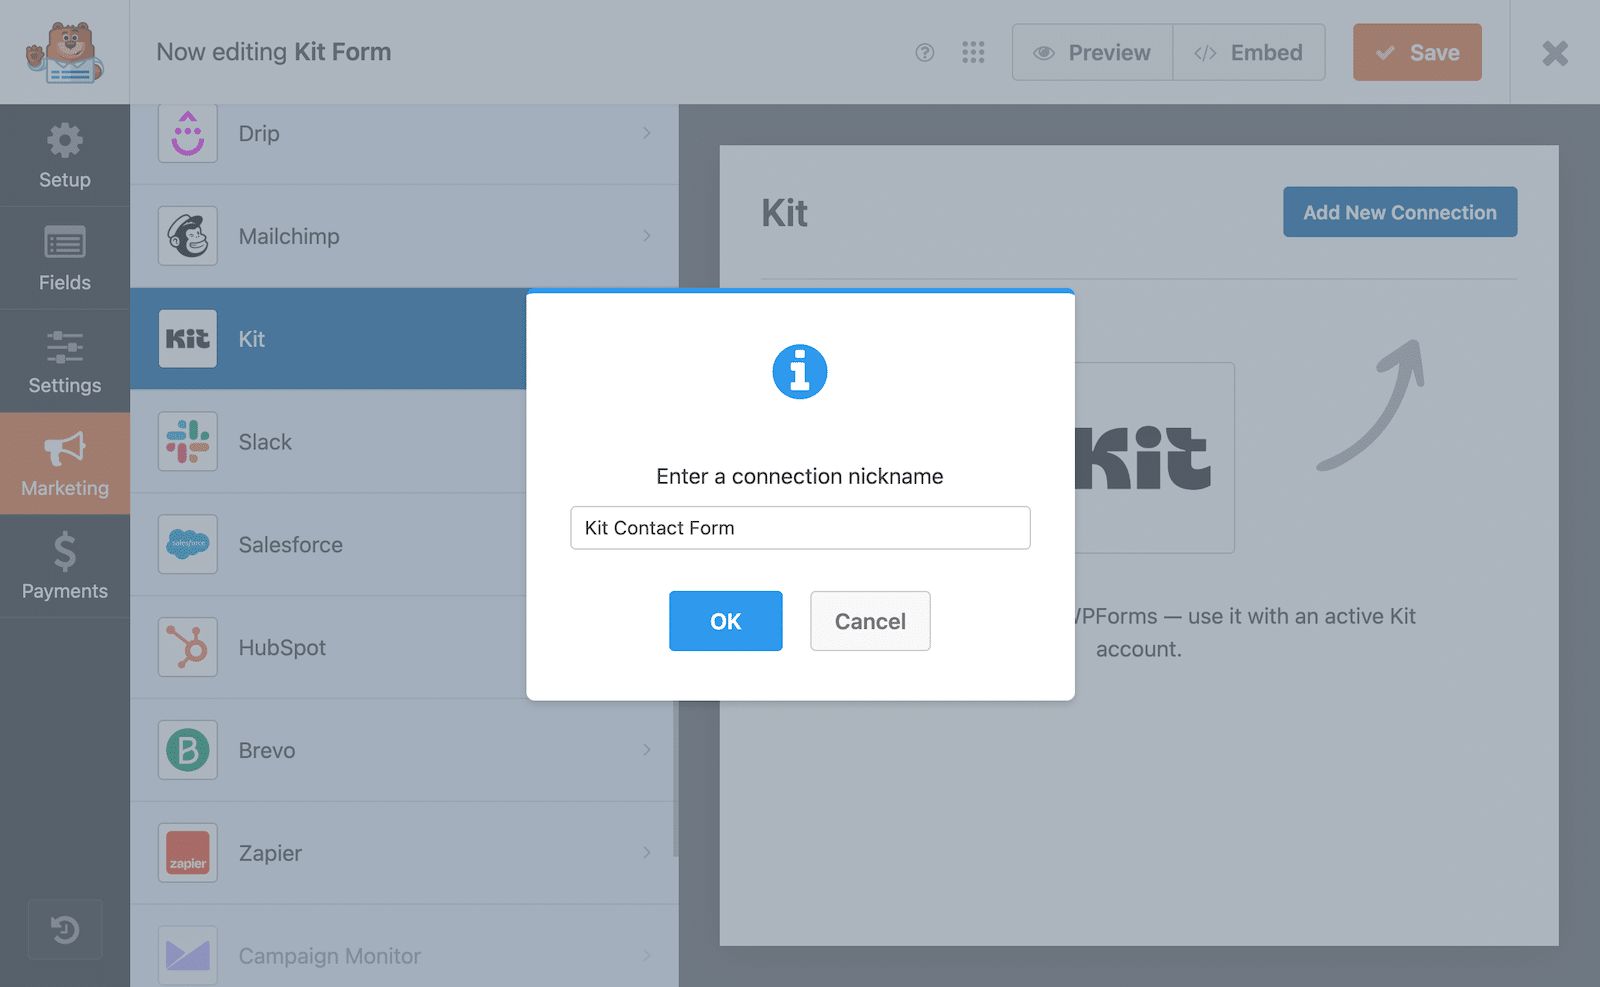
After you name your connection, you’ll need to select the account you want to use, as well as the action you want to perform, from the dropdown menus in setup.
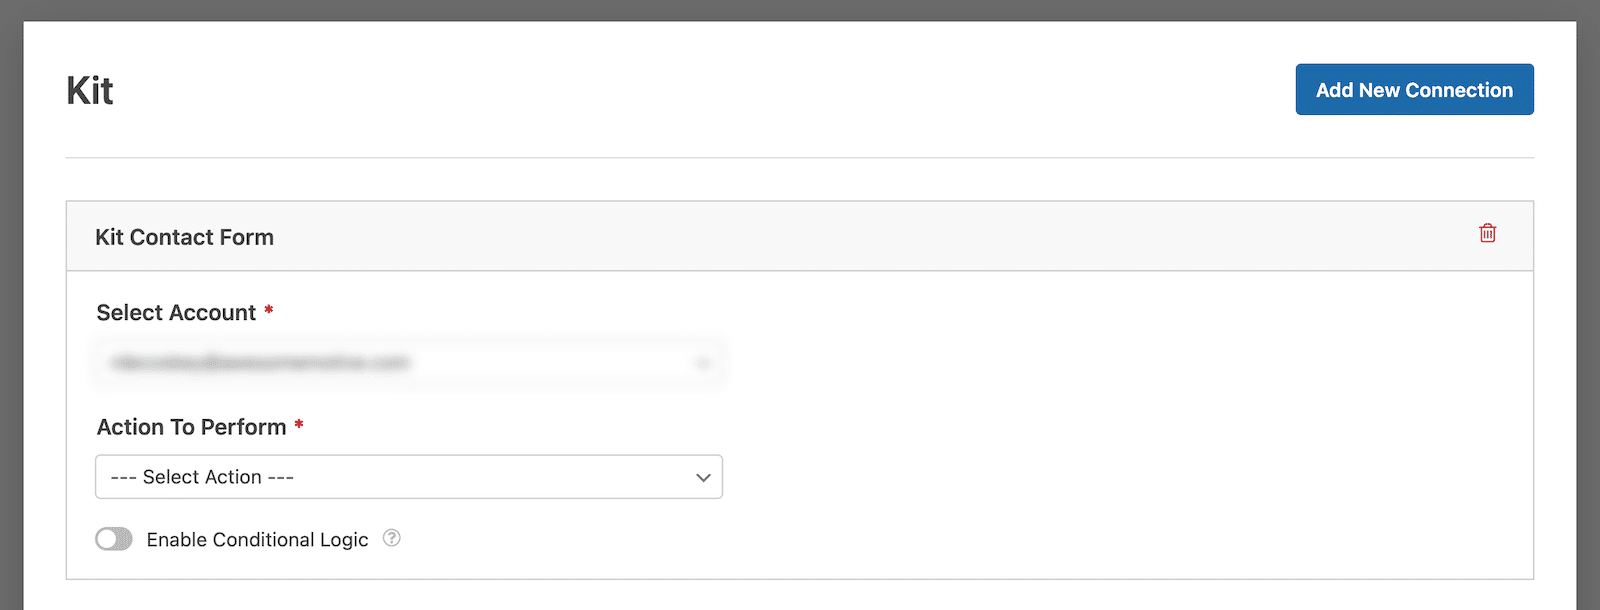
The action options you have are:
- Subscribe
- Unsubscribe
- Remove Subscriber’s Tags
We’re going to choose Subscribe for our tutorial, but you should choose what makes the most sense for your form. When you select Subscribe, you’ll see that more options appear.
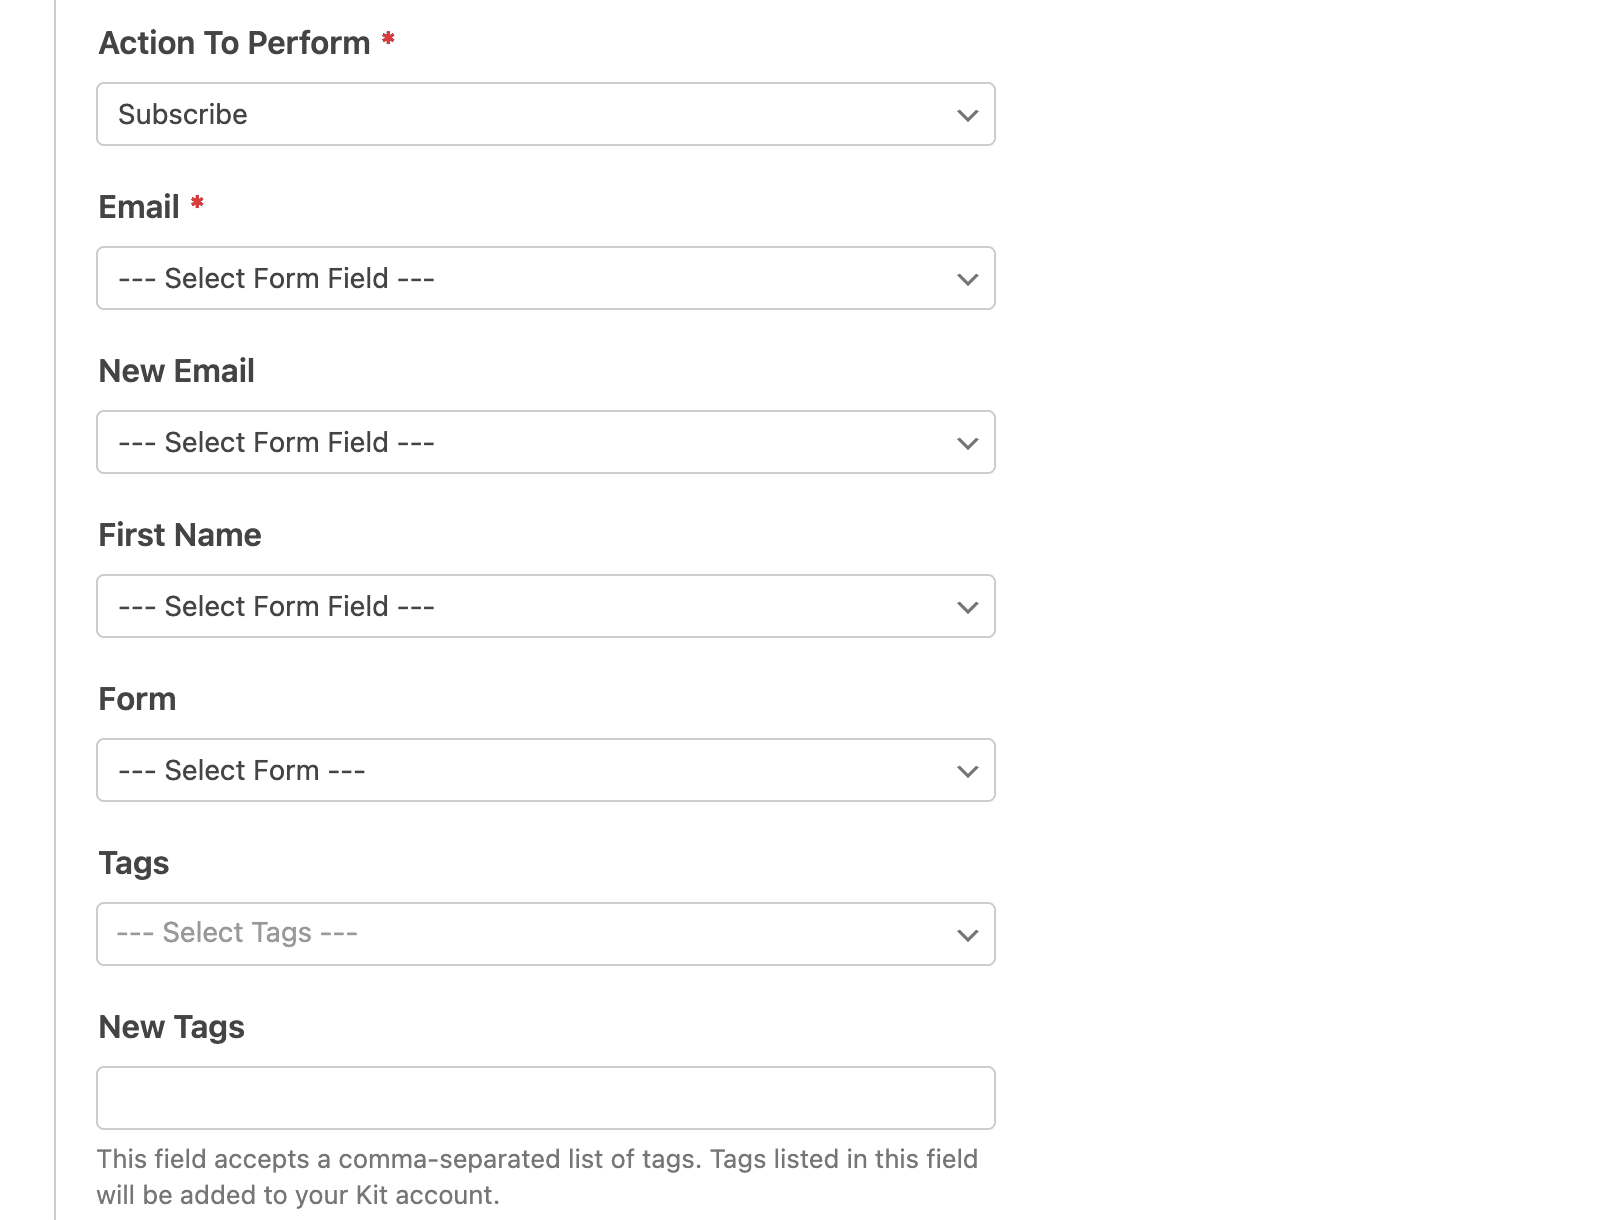
Now you’re going to map the form fields. The options that you have will depend on the fields in the form you’ve created. The Form and Tags fields are based on what exists already in your Kit account. You might opt to connect your WPForms form to a form on Kit, but you’ll most likely be using tags.
If you have tags created already, those will be options for you to choose. You can also create new tags from WPForms and they will also be created in your Kit account.
You can also use conditional logic if you only want to process certain submissions in this manner.
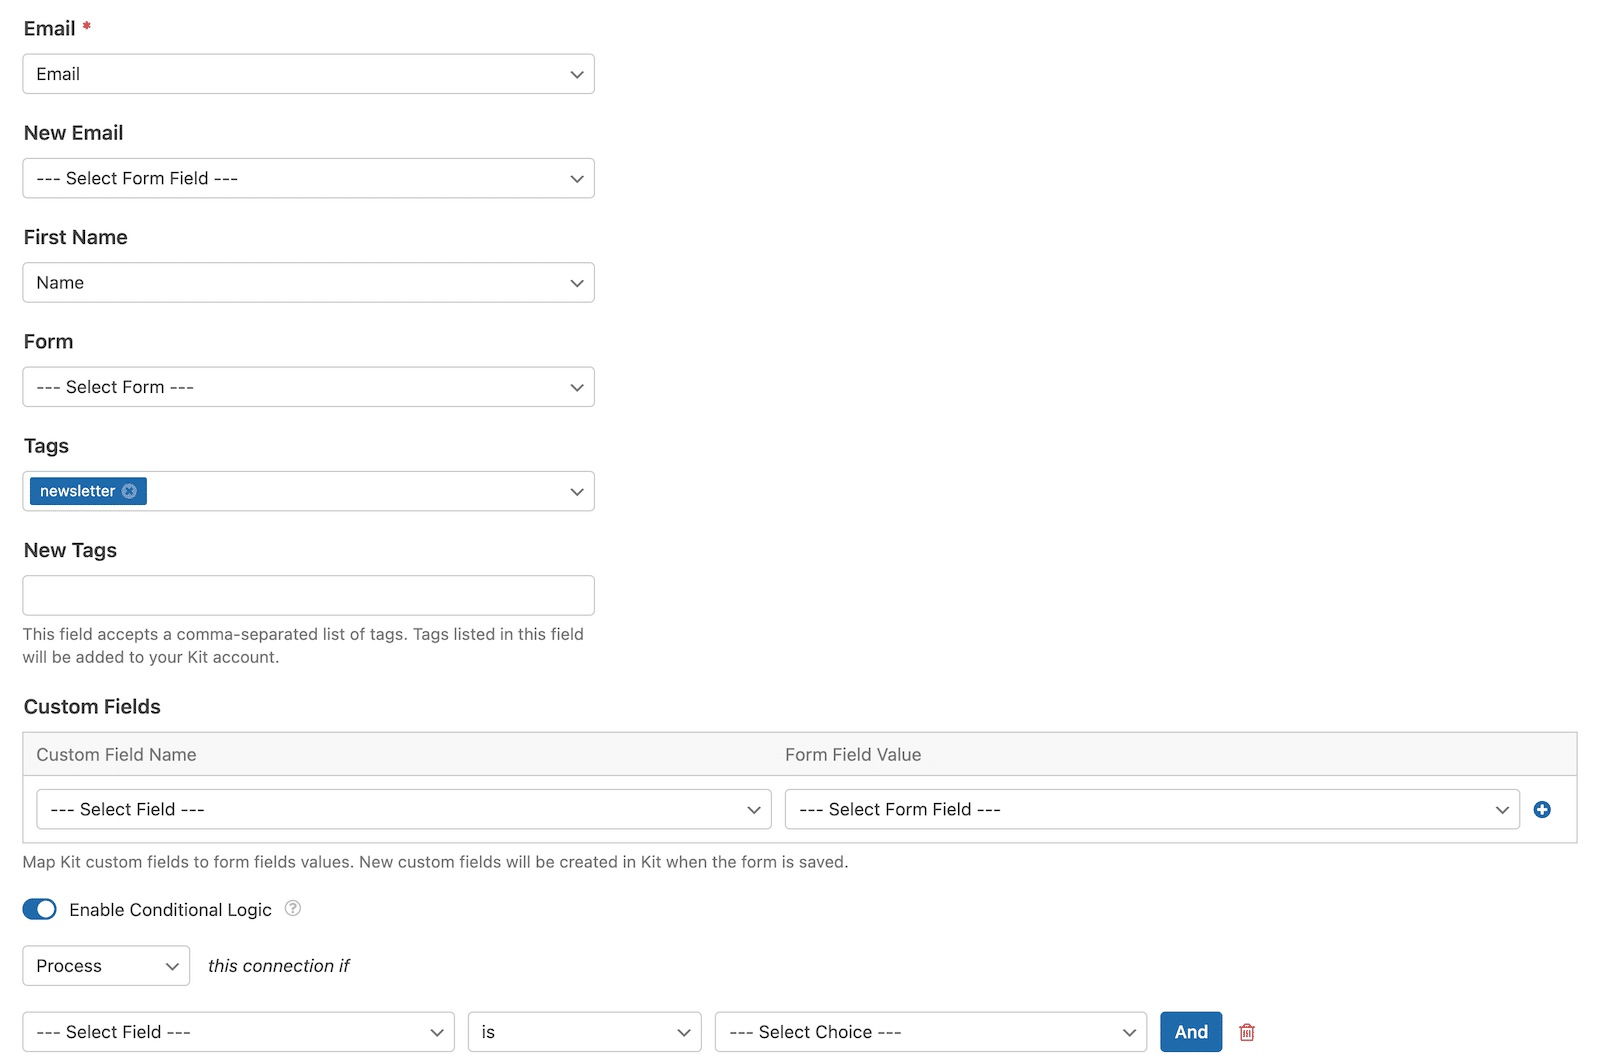
Map Form Fields with Kit
For assistance on mapping your contact form’s fields with Kit, you can check out this Kit Addon documentation that lists down all the steps, including what to keep in mind if you’re using conditional logic for your form.
Nice work! You’ve successfully integrated Kit with WPForms and are now ready to embed the form on your website.
Step 5: Embed Your Kit Contact Form
Now you’re at the final step: embedding your form on your website so it can start collecting new subscribers. The easiest way to embed a form is to use the Embed button at the top of the form builder. After clicking that, it will ask you if you’d like to embed the form on a new or existing page.
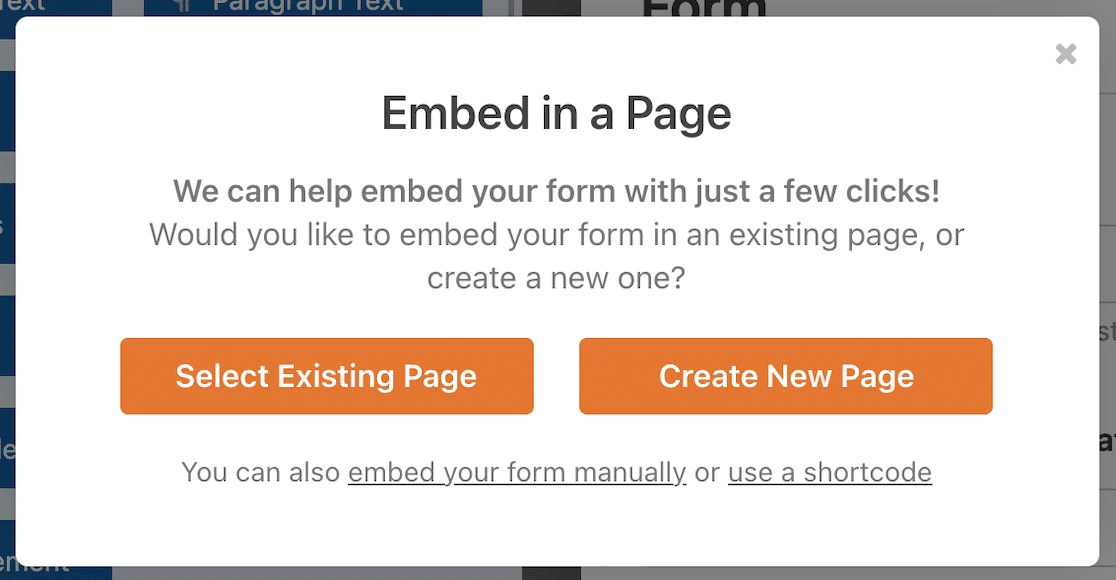
If you choose an existing page, you’ll see a list of pages on your site to choose. If you create a new page, you’ll be able to create it right from the form builder. Check out this guide on 3 ways to embed forms for more.
This is how your Kit form will look on the live page. Make sure to test the embedded form to ensure it works as intended.
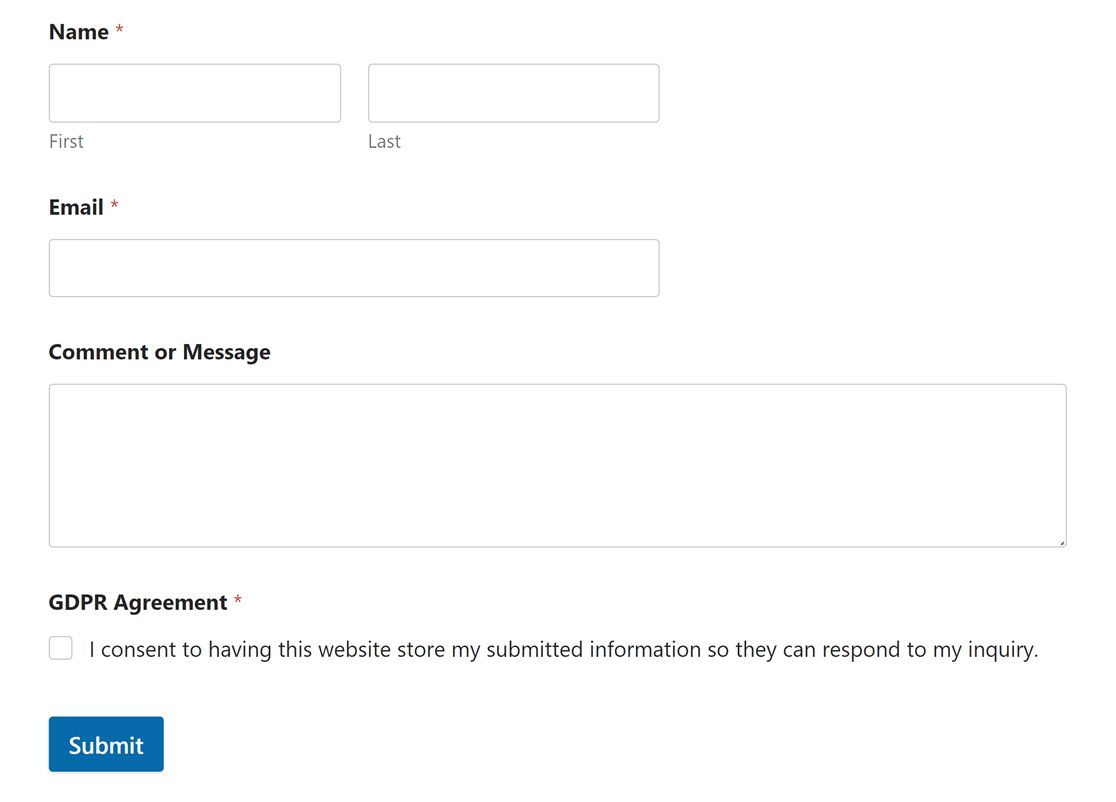
That’s it! Now, you can automatically add subscribers to your Kit account whenever visitors submit the form on your site.
FAQ — More Questions About Kit Contact Forms
The WPForms and Kit integration is a popular topic of interest among our readers. Here are answers to some of the most common questions we receive about it.
Does Kit have contact forms?
Yes, Kit offers contact forms that can be easily created and embedded in your website. These forms are designed to capture subscriber information and integrate seamlessly with Kit’s email marketing tools.
How do I create a Form Kit?
Creating a form in Kit is straightforward. After logging into Kit, navigate to the Forms section, click on Create New, and choose Form. You can then select a template and customize it according to your needs, including custom fields and design elements.
How do I integrate WPForms with Kit?
To integrate WPForms with Kit, first, ensure you have the WP » Forms plugin and Kit Addon installed on your WordPress site. Create a form in WPForms, go to Marketing Kit, add a new connection, authenticate your Kit account, and link your form to a Kit form or tag.
How do I create a contact form in WPForms?
Creating a contact form in WPForms is easy. Install and activate WPForms on your WordPress site. Click on WPForms » Add New, select a contact form template or start from scratch, customize your form fields, configure settings, and embed the form on your site.
Next, Get More Subscribers for Your Email List
Are you struggling to get subscribers for your blog or website? Worry not; we’ve got you covered with our powerful tips on how to grow your email list fast.
If you enjoyed this article, you might also want to read about these clever hacks to unlock hidden customer data with a WPForms hidden field.
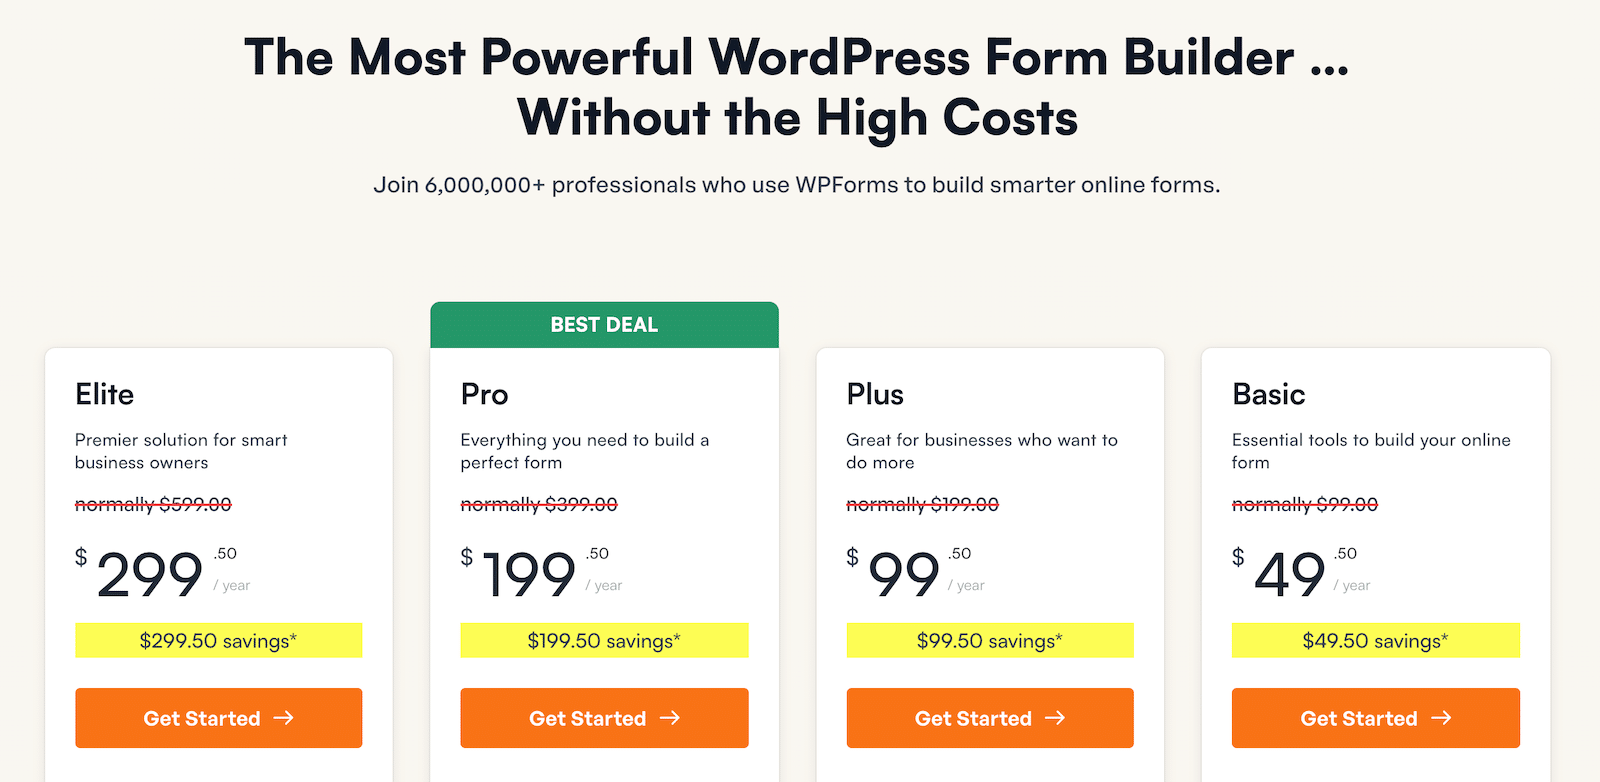
Ready to build your form? Get started today with the easiest WordPress form builder plugin. WPForms Pro includes lots of free templates and offers a 14-day money-back guarantee.
If this article helped you out, please follow us on Facebook and Twitter for more free WordPress tutorials and guides.

