AI Summary
Are you looking to add a confirm email address field to your WordPress forms?
Users sometimes enter the wrong email addresses when they submit forms. This can make it hard to respond to their messages, or add them to a lead pipeline.
The easiest way to fix this is by adding an email address confirmation field to your forms.
In this article, we’ll show you how to enable user email address confirmation in your form in just a few simple steps.
Ready? Jump right in!
What Is the Point of the Confirm Address Field?
The point of including email address confirmation is to ensure that users enter the correct email addresses when they submit your forms.
Contact forms are a great way for people to get in touch with you. You might also have a user registration form on your site so visitors can create accounts. But if you’re receiving form entries with incorrect email addresses, you’ll end up with false leads and lose potential customers.
Requiring users to provide an email address twice is a good way to make users check again and ensure there aren’t any typos in the provided address.
How to Show a Confirm Email Address Field on WordPress Forms
Adding a confirm email address field to your WordPress forms is really easy. In fact, all it takes are 4 simple steps, as we’ll show below:
In This Article
Step 1: Install WPForms
Creating forms of all types in WordPress is really simple if you have WPForms. WPForms is a super flexible form builder for WordPress that makes field customizations very easy.
For instance, we’ll show you how to confirm an email address simply by clicking a single toggle switch.
We recommend that you get started with WPForms Pro, which is packed with some of our most popular features.
If you need a bit of help to get started, here’s a handy guide to installing WordPress plugins.
Step 2: Create a Form
Once you’ve installed and activated WPForms, you can go ahead to create a form and add it to a page on your website.
With WPForms, this is really easy to do, as you can use the drag-and-drop form builder, or simply choose from over 2,000+ form templates.
To do this, click on the WPForms tab on the left sidebar in the WordPress admin area. Then click through Add New.

This will take you to the WPForms interface where you can name your form and choose a template. Start by entering a title for your form, which can be anything you like.
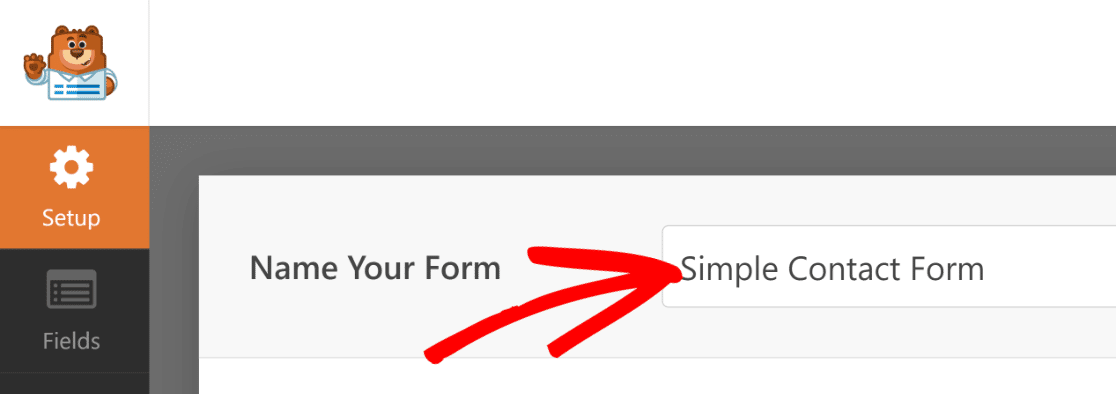
Then choose a template that works for you. For this guide, we’ll choose the Simple Contact Form Template. Hover your cursor over the template you want and click Use Template.

The form will now open up in the form builder, where you’ll see the form template on the right and a panel with form fields on the left.
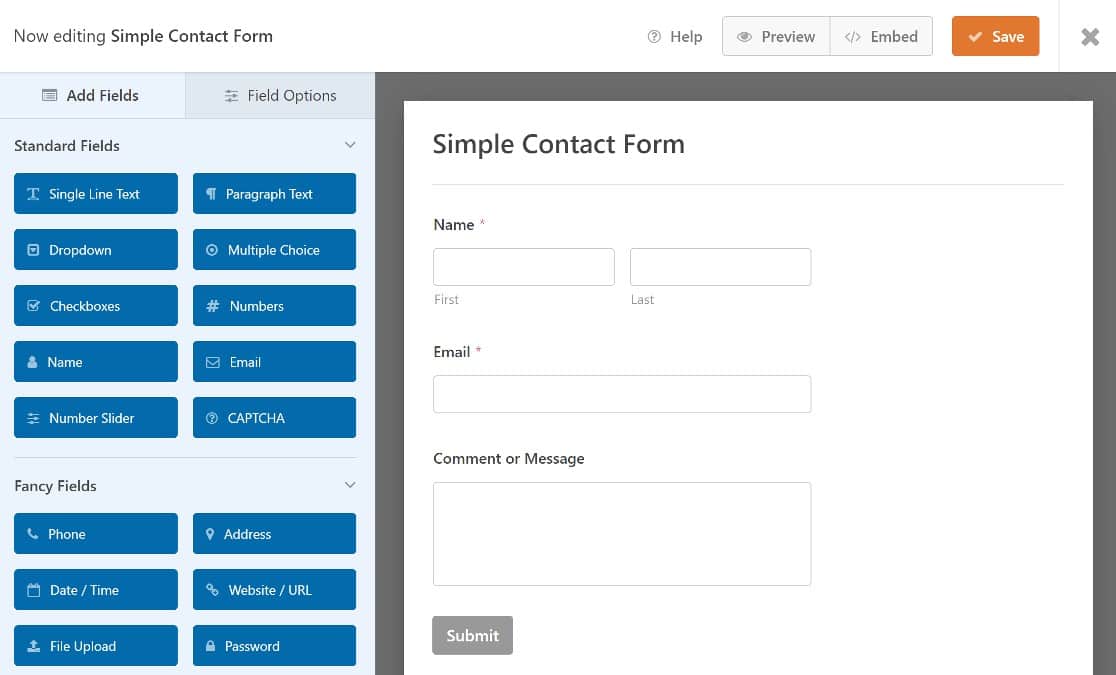
We won’t need to add any form fields since the one we want — the email field is already added to the Simple Form template. However, you can go ahead and add any other fields you need for your form.
For step-by-step instructions on working with WordPress forms, here’s our guide to making a simple contact form.
Step 3. Edit the Email Field
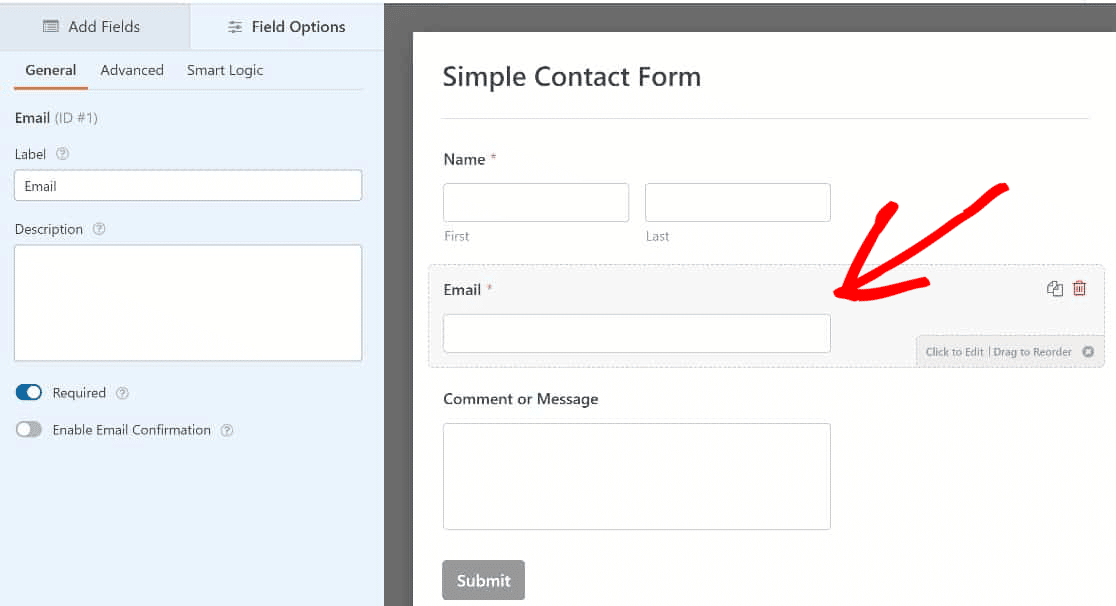
To add an email confirmation field, we’ll need to edit the email field. Simply click on it to open the Field Options on the left-hand panel.
Click on the Enable Email Confirmation toggle button to enable this option.
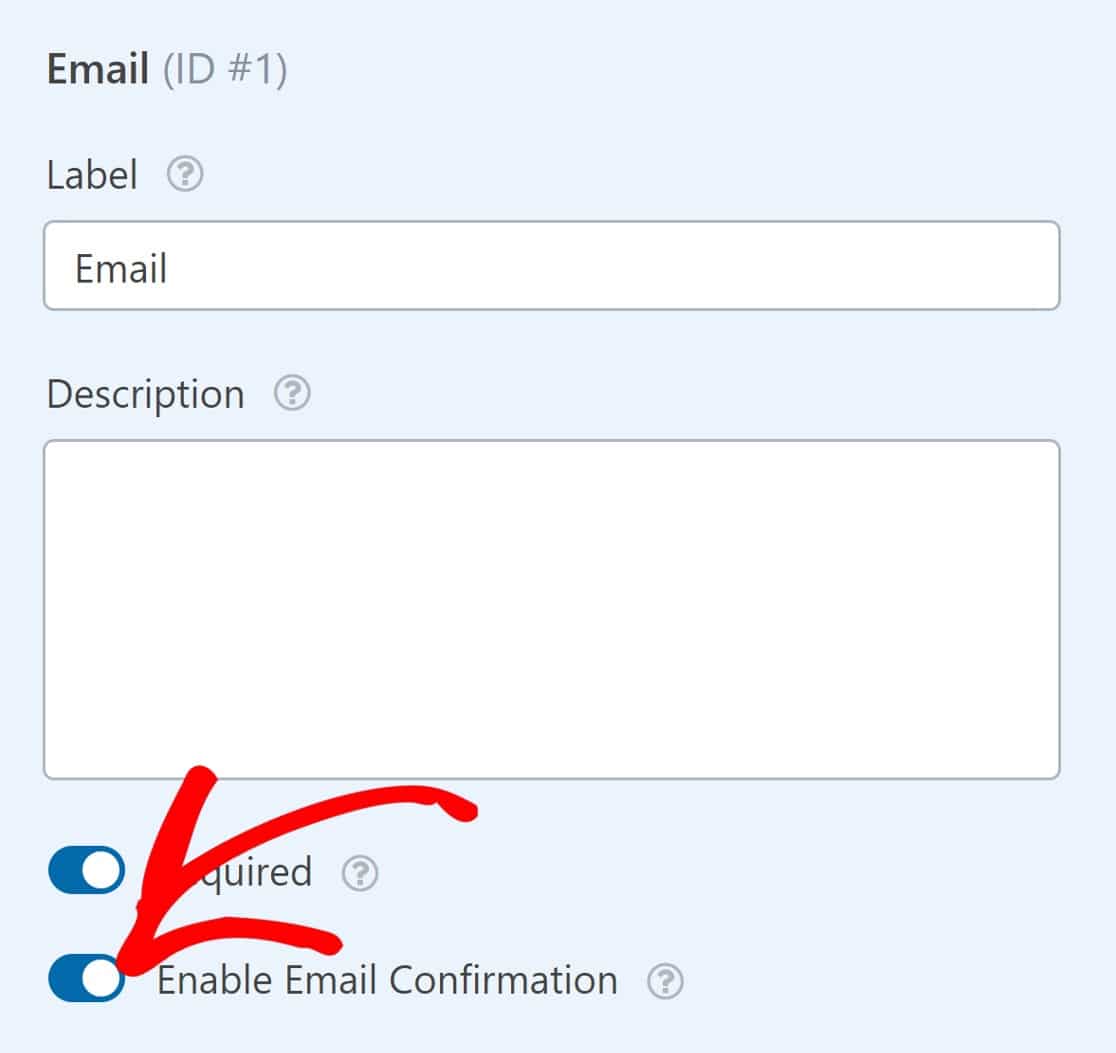
And that’s all you’ll have to do here. Your form will now require users to confirm their email addresses before they submit it.
Step 4. Publish the form
The final step would be to publish your form on your WordPress site. First, click the Save button at the top right corner of the page.

Next, click Embed, to publish your form to a page on your website.

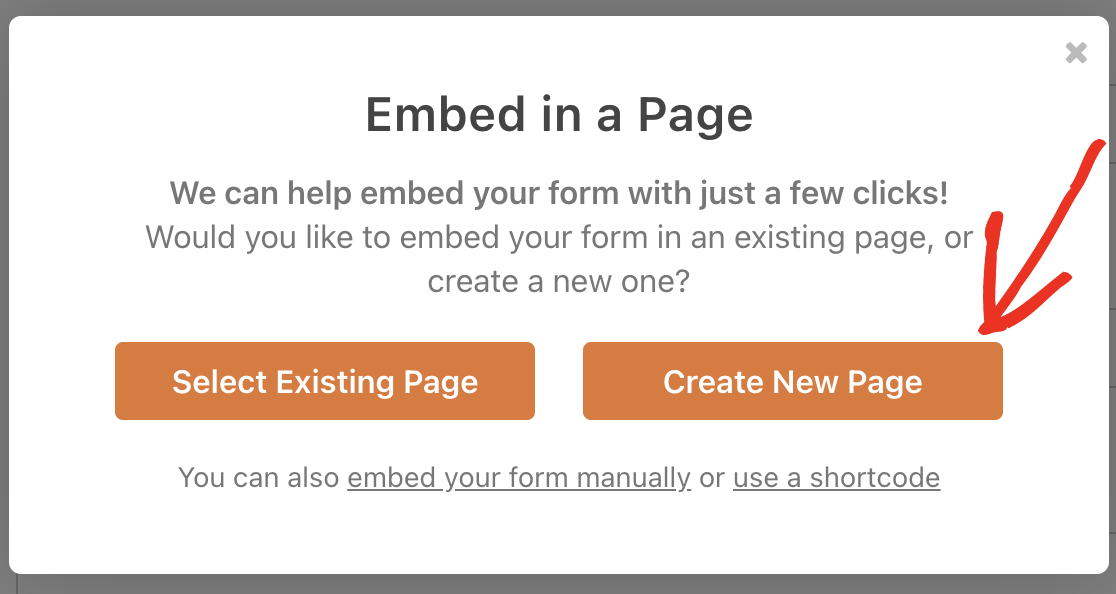
You’ll see a modal offering you the options of embedding the form either in a new page or in an existing one.
We’ll embed the form in a new page for this tutorial by clicking on Create New Page.
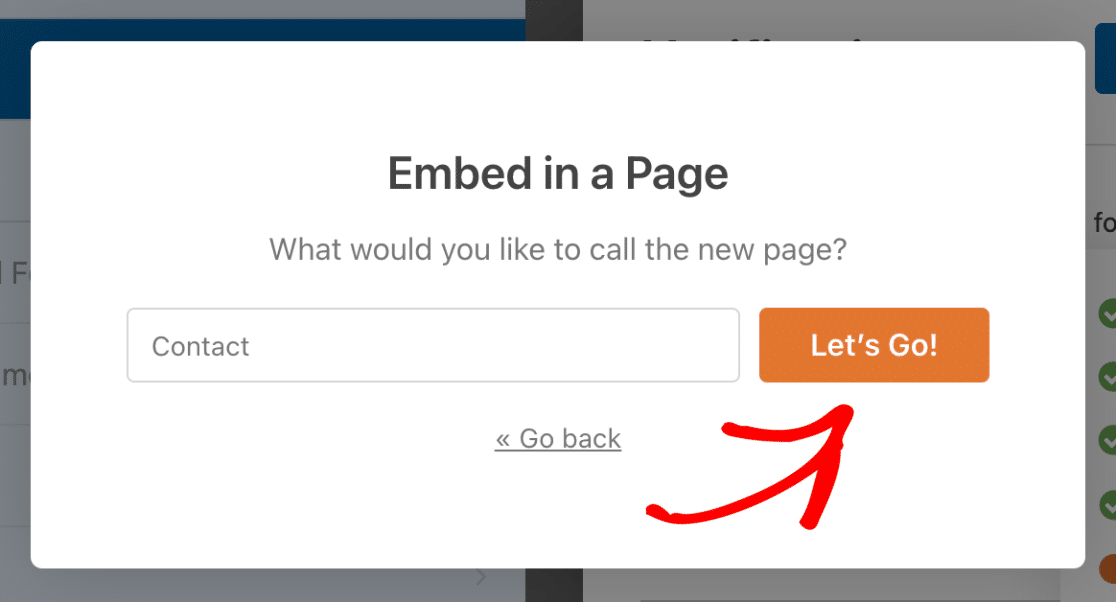
Enter a name for your new page and click on Let’s Go.
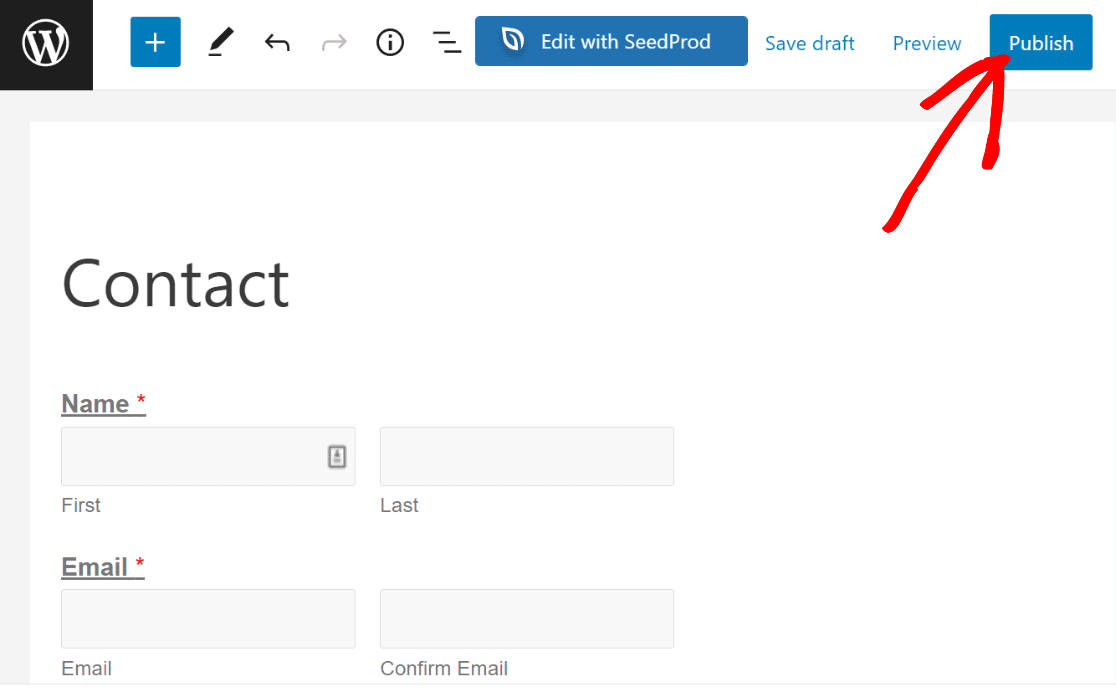
You should now see your WordPress page editor open with your form placed inside it. Press the Publish button on the top right to take your form live.
When you view your form on the frontend now, you’ll see the confirm address field and users will be required to enter their email twice to confirm it.
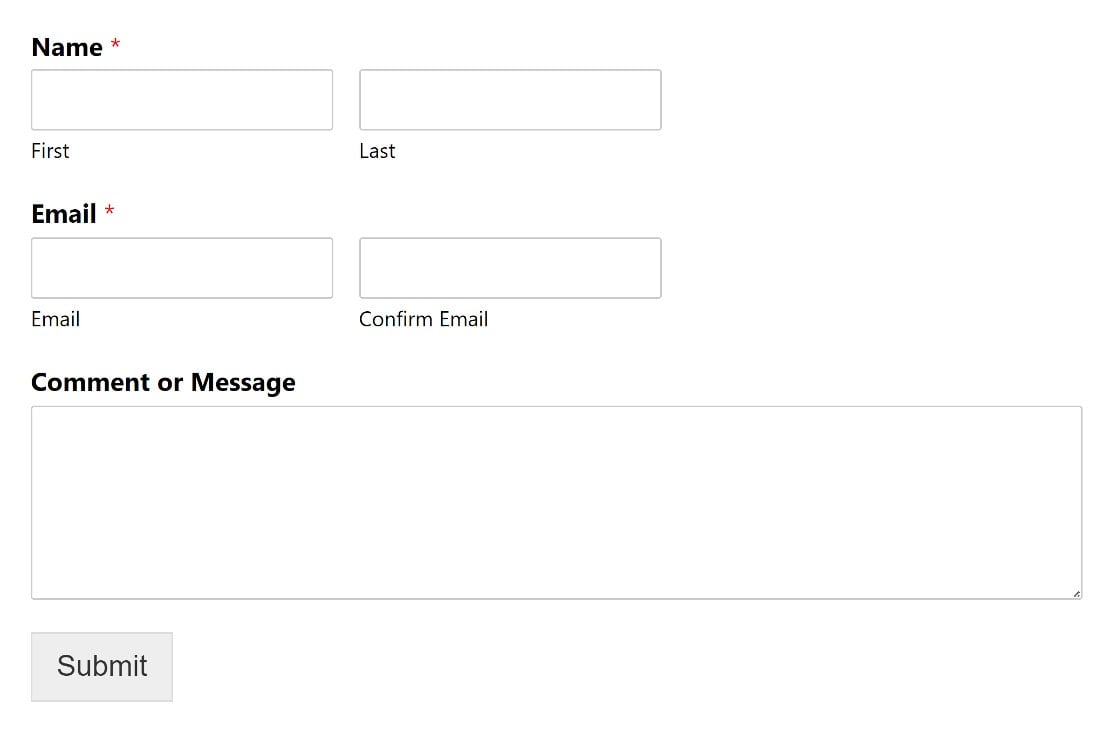
If they enter 2 email addresses that don’t match, your form will show a validation message instructing the user to re-enter their email address.

They will have to correct their mistake before sending in their form submission.
And that’s it! You now know how to add a confirm email address field to your WordPress forms in just 4 steps.
Email Verification UX Best Practices: 2 Extra Tips
While the email address confirmation field is very effective at reducing the number of entries with incorrect email addresses, it can sometimes be slightly frustrating for users to enter their email addresses twice in the same form.
If you think that adding an extra confirm email field will spoil the user experience for your visitors, here are two tips to try:
Make the Email Field More Prominent
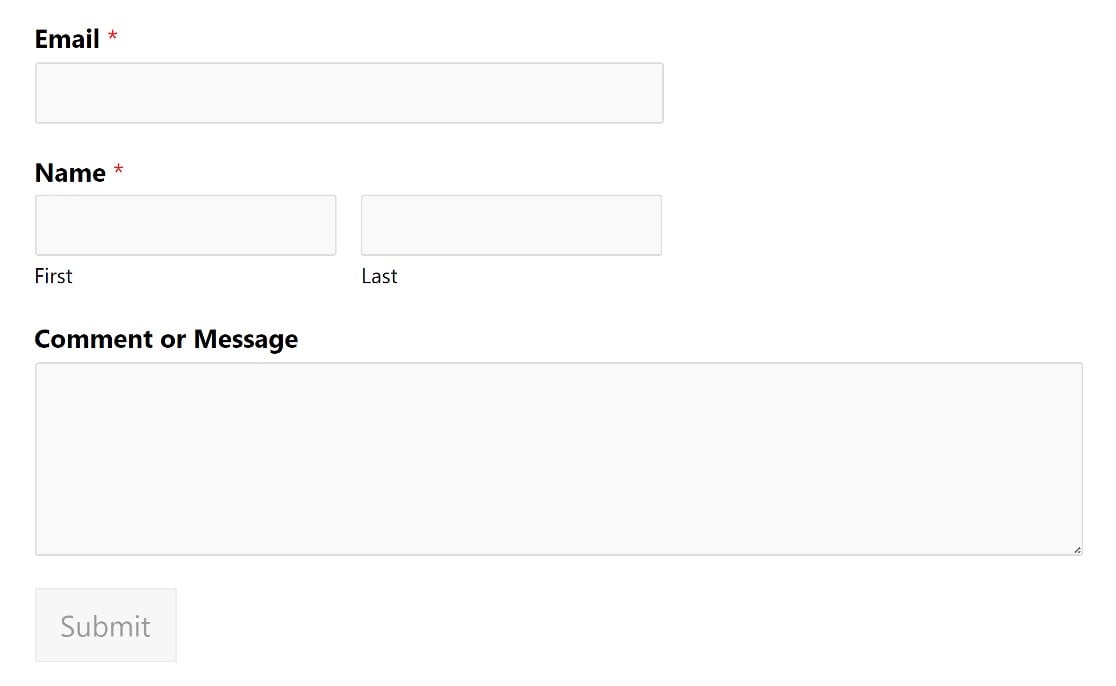
The usual practice would be to start your forms with a name field. But putting the email address field first is one way to make it stand out so that users pay more attention to it and fill the field more carefully.
Add a Reminder in the Email Field Label
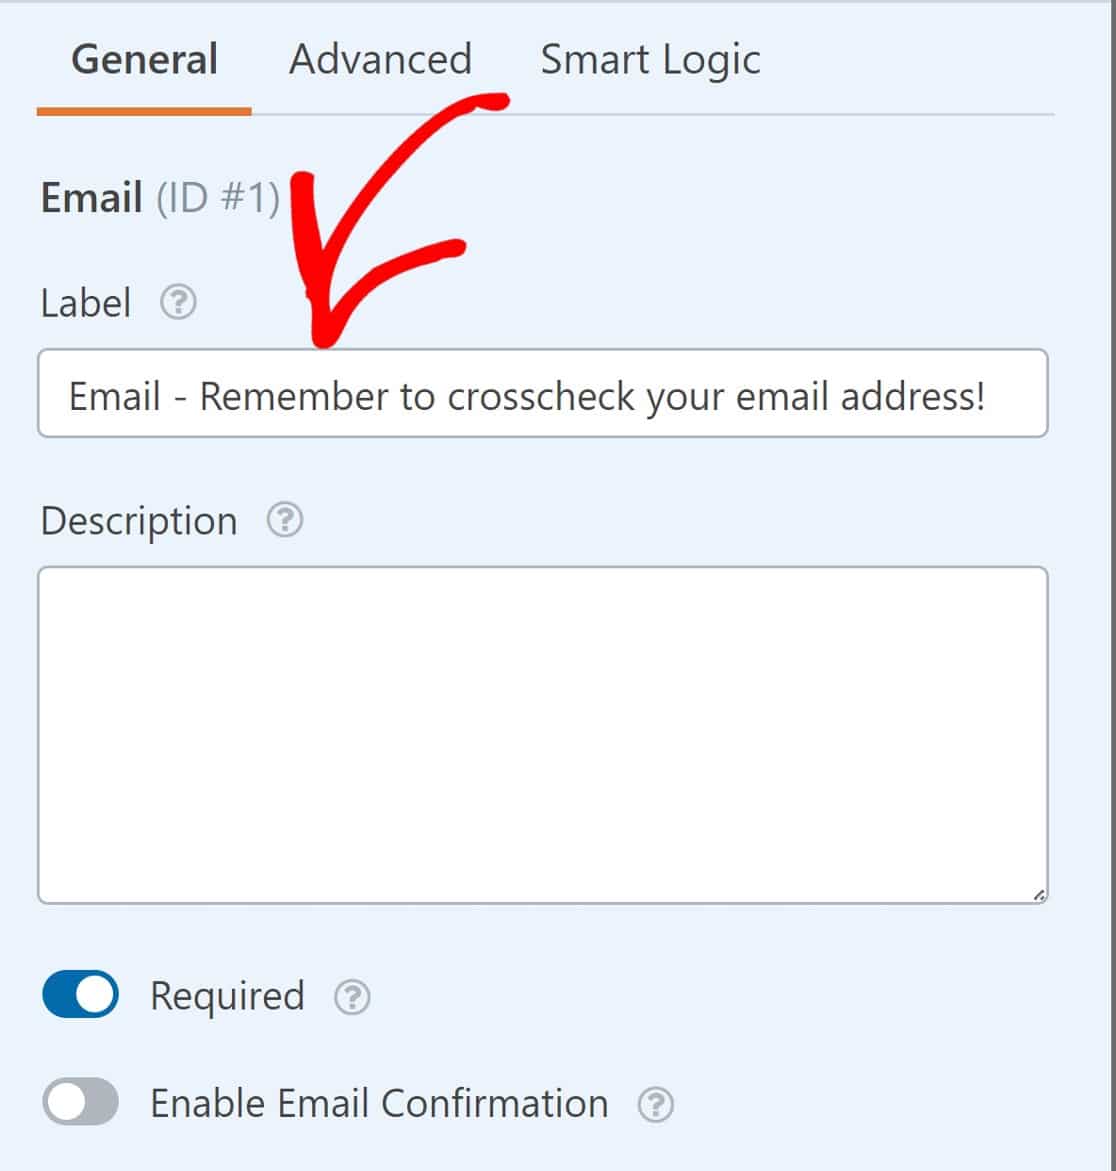
Another thing to try is adding a reminder to the email field, asking users to check that their email address has been entered correctly.
This can be done from the field options panel of the email field. Simply look for the Label field and add some text where it says Email.
And if you like, you can use a combination of these tips for the best results.
And that’s all there is to it!
We’ve shown you how to confirm an email address in your forms, and we’ve shared 2 additional UX tips.
Go ahead and try them out! And you can take a look at our guide to the top form design best practices for more form design and layout tips!
Next, Add Custom Confirmations and Notifications to Your WordPress Forms
WPForms includes so many great form-building features, including built-in confirmation messages and email notifications with a custom from name, email subject and email message. You can easily set these up right in the form builder so that your users know their forms were submitted properly.
You can also have submission notifications sent to your admin email and view all your form entries for repeater fields in your WordPress dashboard.
Ready to build powerful, flexible WordPress forms? Get started today with the easiest WordPress form builder plugin. WPForms Pro includes lots of free templates and integrations with popular email marketing services and CRMs. It also offers a 14-day money-back guarantee.
Create Your WordPress Form Now
If this article helped you out, please follow us on Facebook and Twitter for more free WordPress tutorials and guides.

