Have you ever thought about how to receive Microsoft Teams alerts when people submit a form on your WordPress website?
Alerts from your WordPress forms in Microsoft Teams can provide real-time updates on online submissions, ensuring you never miss out on timely actions.
Connect WPForms with Microsoft Teams! 🙂
In this tutorial, I’ll show you how to enable Microsoft Teams alerts for forms by using WPForms and connecting it to Microsoft Teams via Zapier.
How to Get Microsoft Teams Alerts from Your WordPress Forms
Zapier allows you to send Microsoft Teams channel messages for new WPForms entries on your form. Follow the steps below to get started:
In This Article
1. Install and Activate WPForms Pro
First, download the WPForms plugin and activate it on your site. WPForms is the best plugin for creating contact forms in WordPress.
It offers 2,000+ WordPress form templates and Addons to customize your forms. Its versatility also allows it to send Microsoft Teams alerts.
I recommend getting WPForms Pro since it includes the Zapier addon, which is necessary for integrating WPForms with Microsoft Teams.
If you are new to WordPress plugins and don’t know how to install one, check out this guide for easy steps on how to install a WordPress plugin.
2. Create Your Custom Form for WordPress
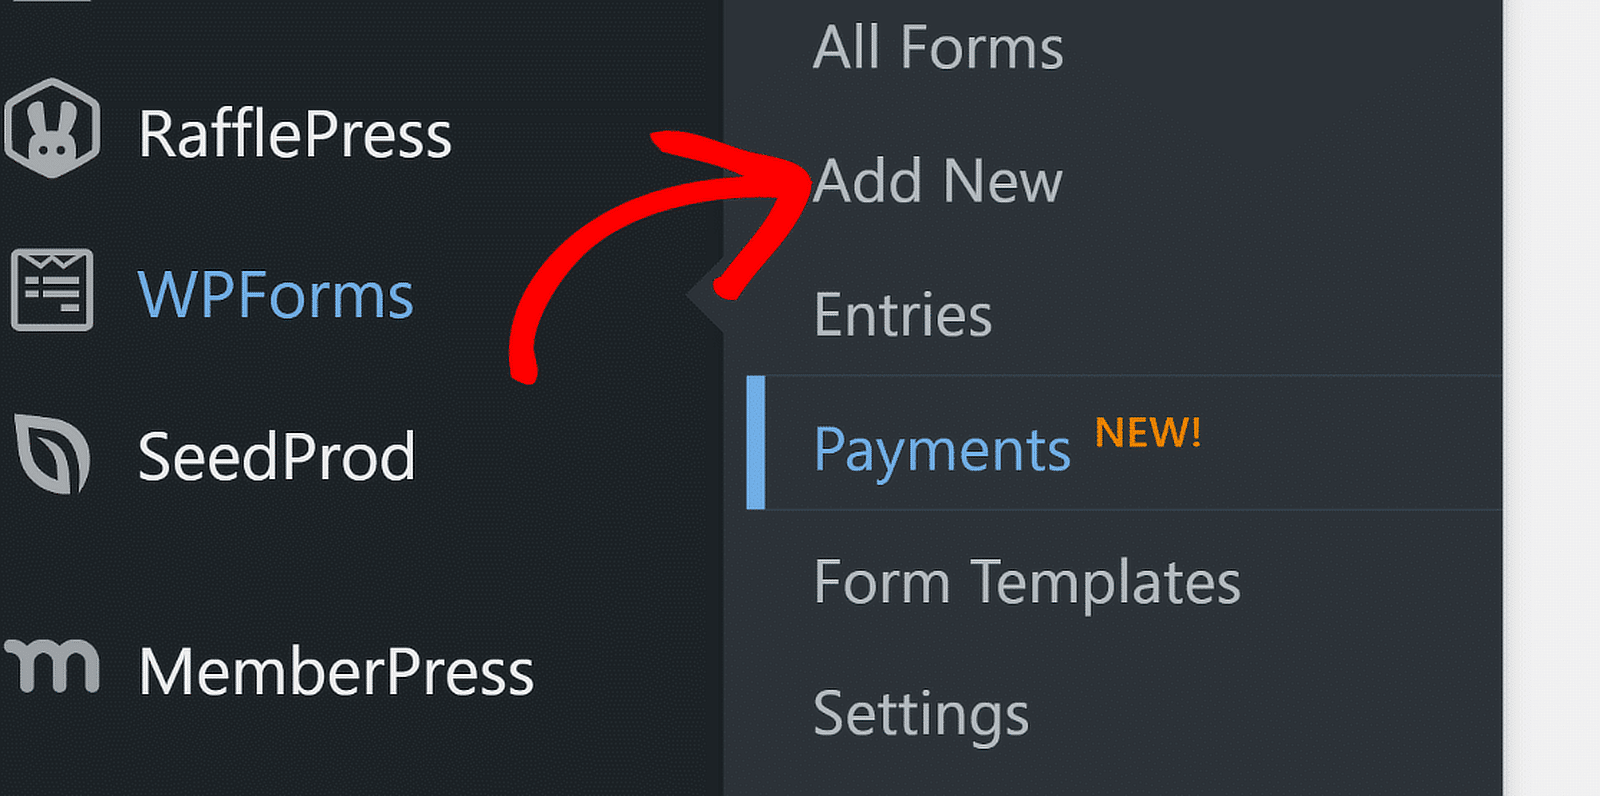
After you’ve installed and activated the plugin, go to WPForms » Add New from your WordPress dashboard to create a new form.
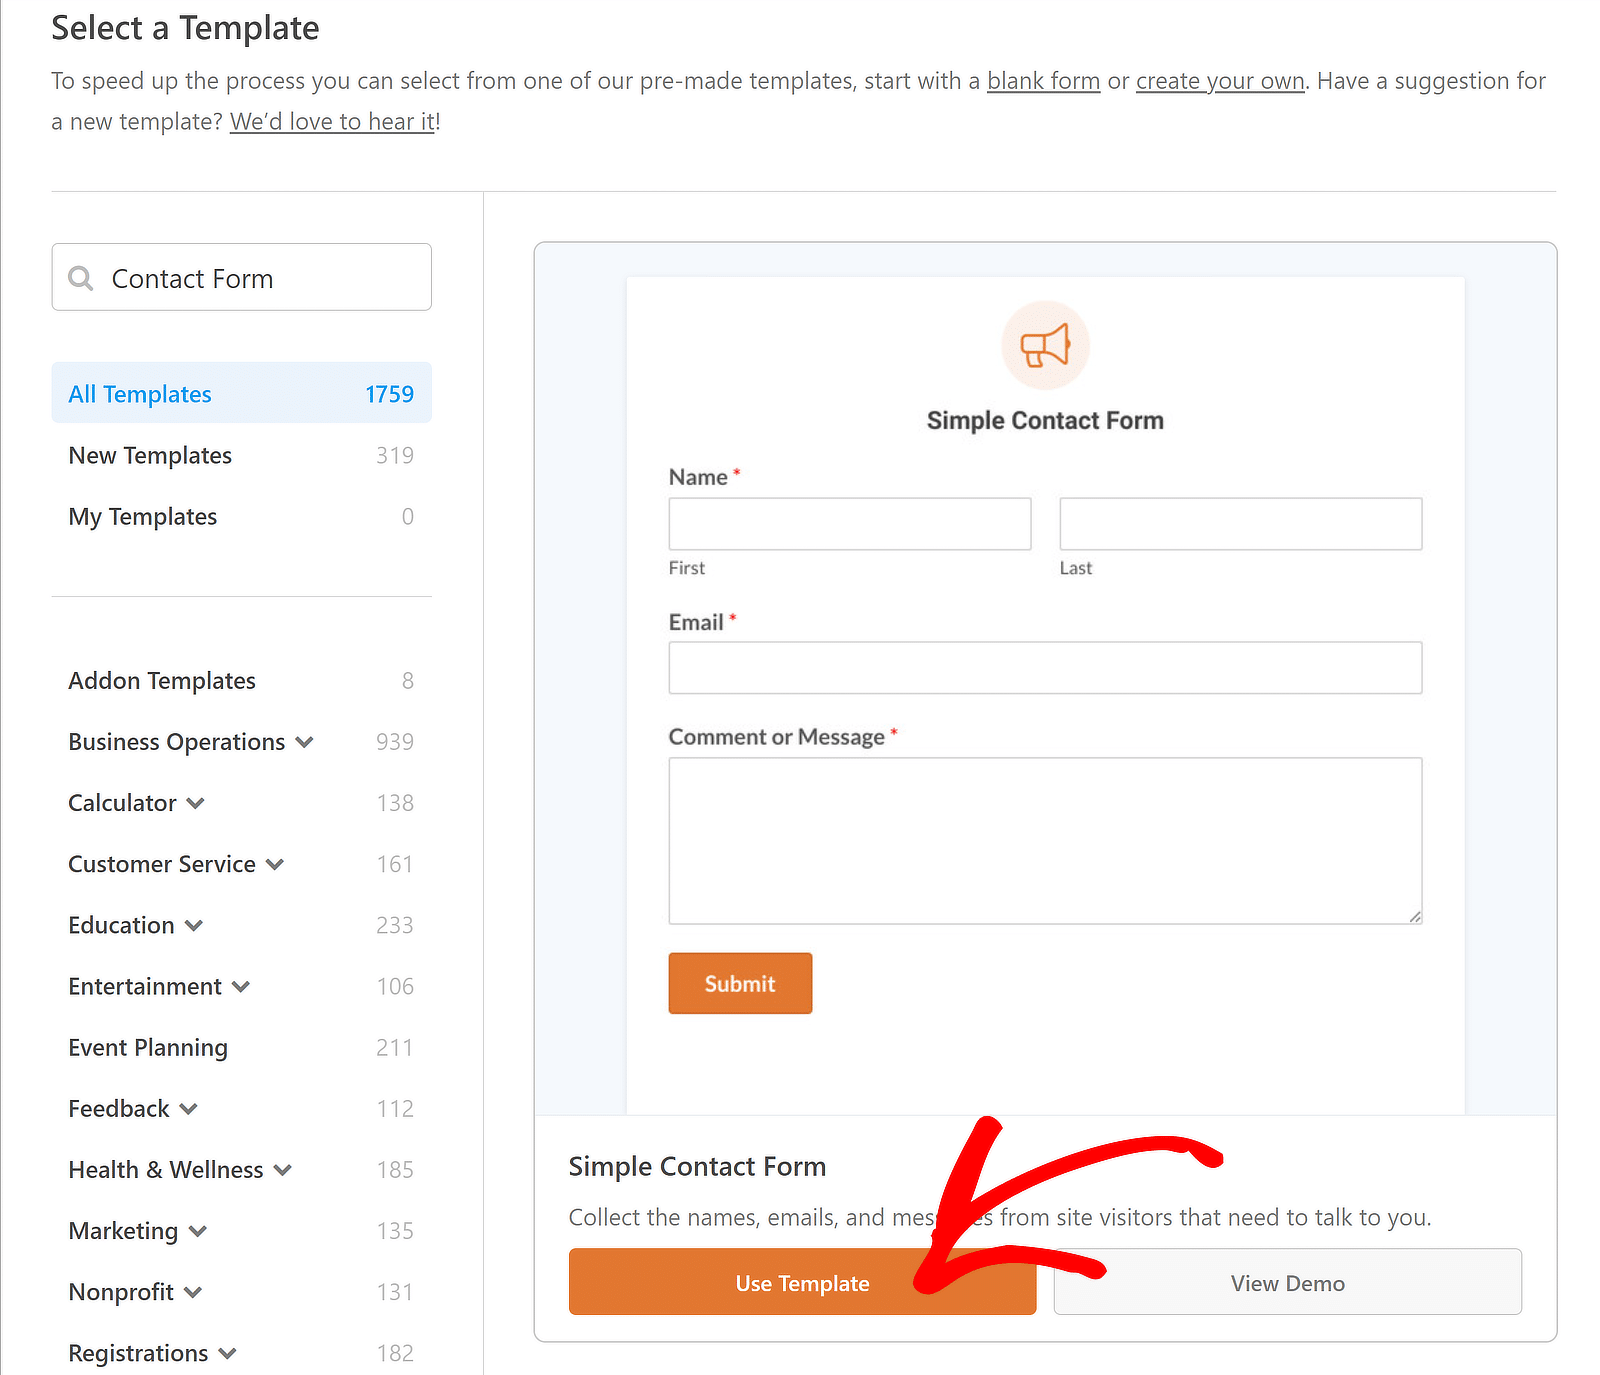
Next, name your form and use the search box to find a suitable template. I’ll select the Simple Contact Form for this tutorial and hit the Use Template button.
You can now see a preview of your form in the form builder interface. Feel free to add form fields and set up email notifications and confirmation messages.
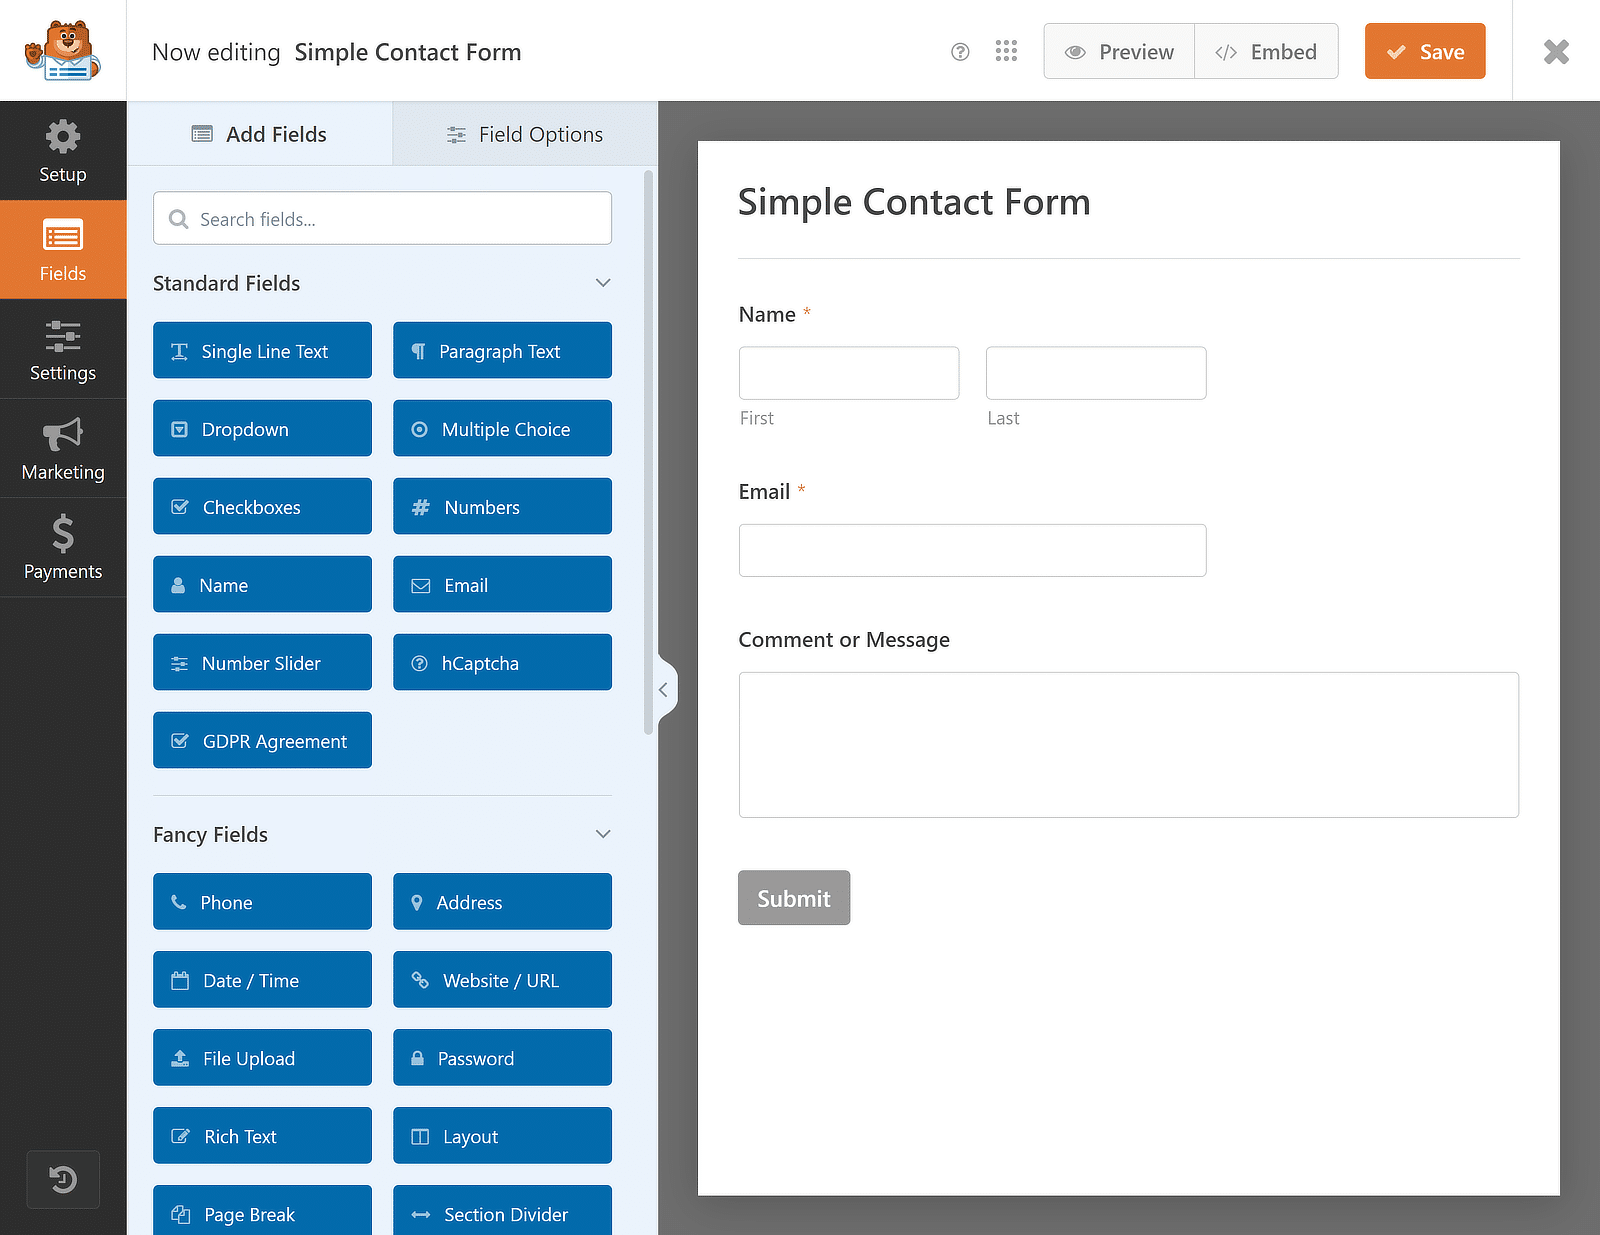
Once you’ve tailored the form to your needs using the drag-and-drop builder, hit the Save button and you can proceed to install the Zapier Addon.
Also Read: How to Allow Visitors to Duplicate Form Fields
3. Install the Zapier Addon in WPForms
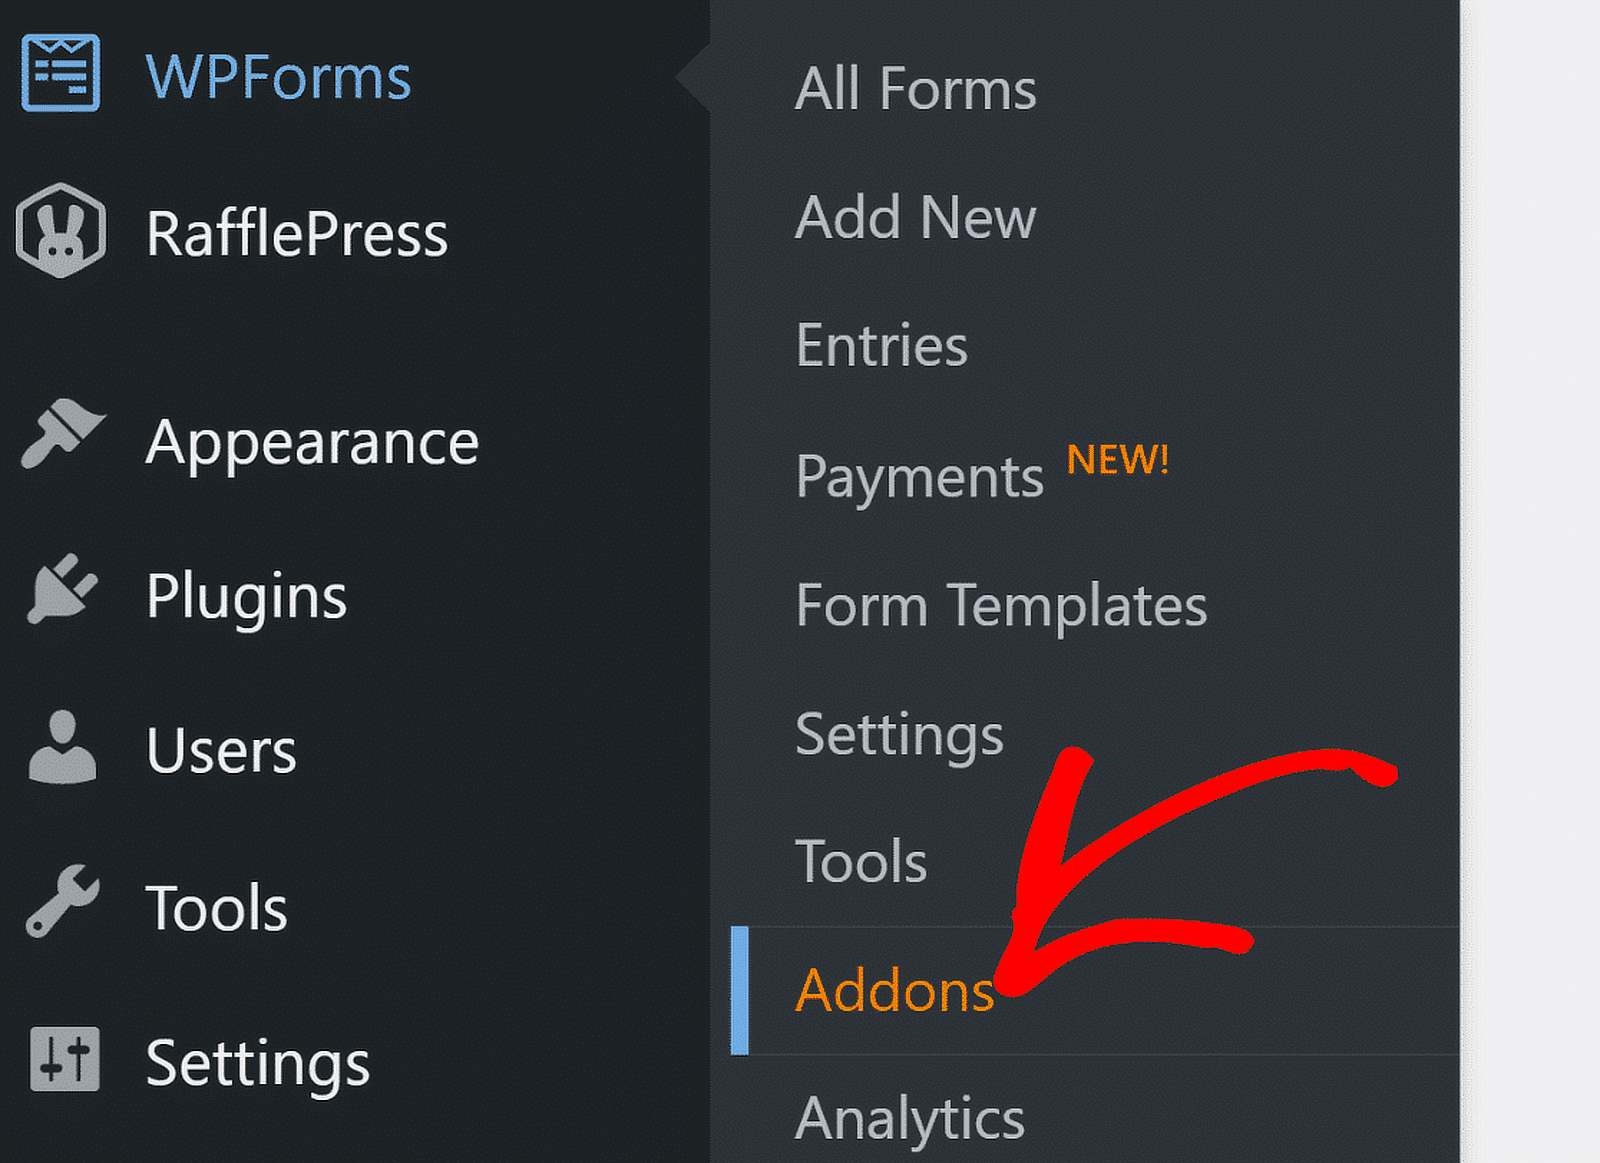
Now, let’s install the Zapier Addon. To do this, navigate to WPForms from your WordPress dashboard and click on Addons.
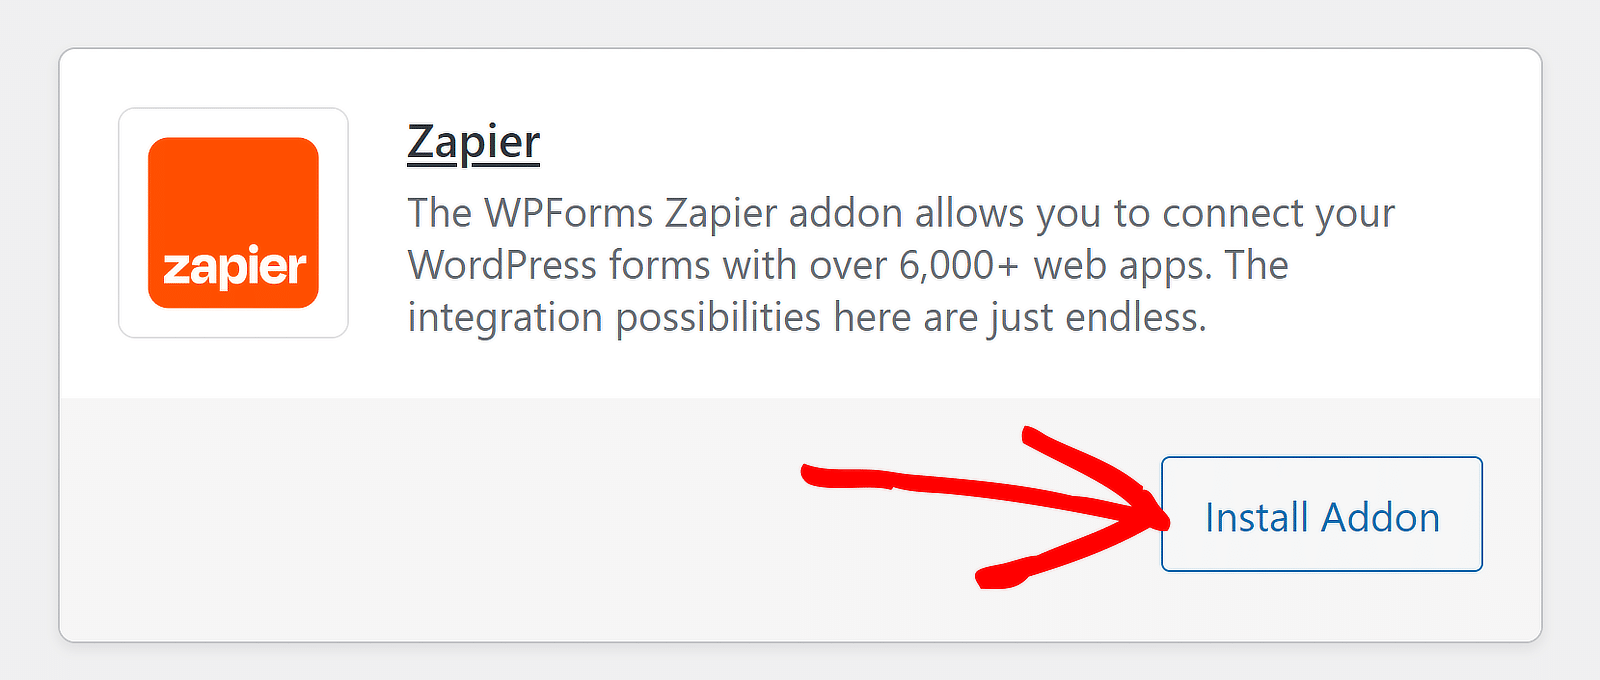
In the Addons screen, type “Zapier” in the Search Addons field. Once you find it, click on Install Addon.
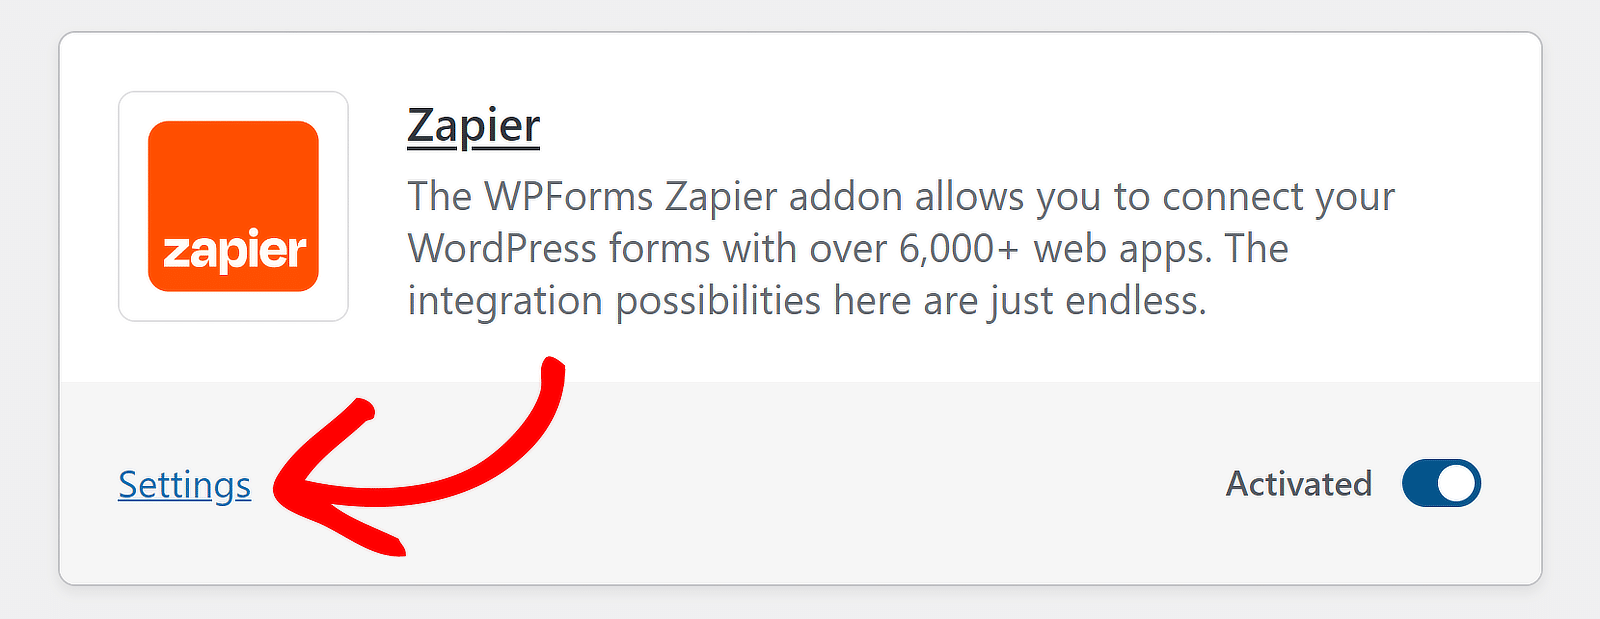
If you see an inactive status, press the same button again to Activate it, and then click on the Settings option to manage your integration.
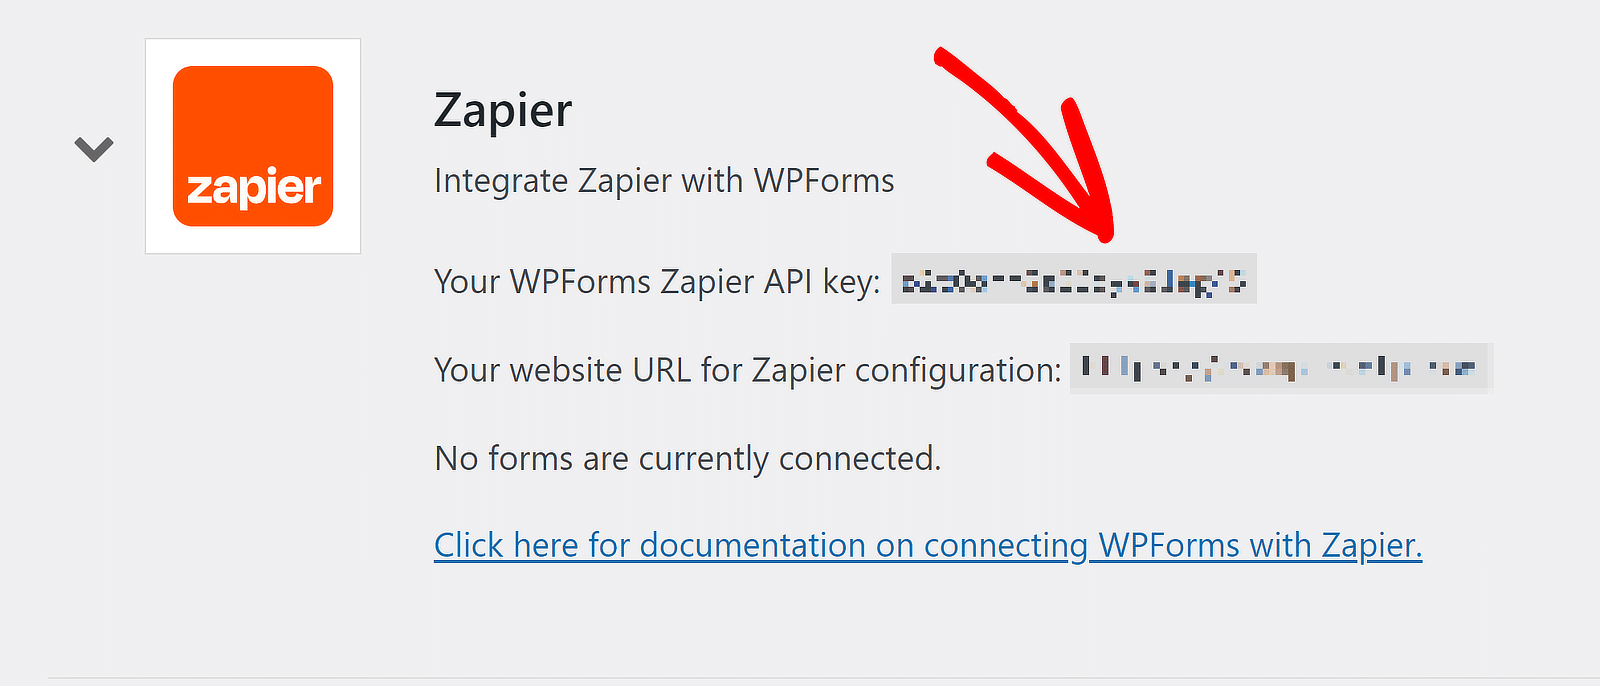
On the next screen, click on Zapier from the list of integrations and keep this tab open to later copy the API key for the connection process.
Good job so far! Now, to prepare for the automation functionality, we just need to install Zapier in your Microsoft Teams account.
4. Get the Zapier App in Microsoft Teams
Click on the three small dots on the left-hand side navigation bar in your Microsoft Teams workspace. Then, type ‘Zapier’ into the search bar and select the Zapier app.
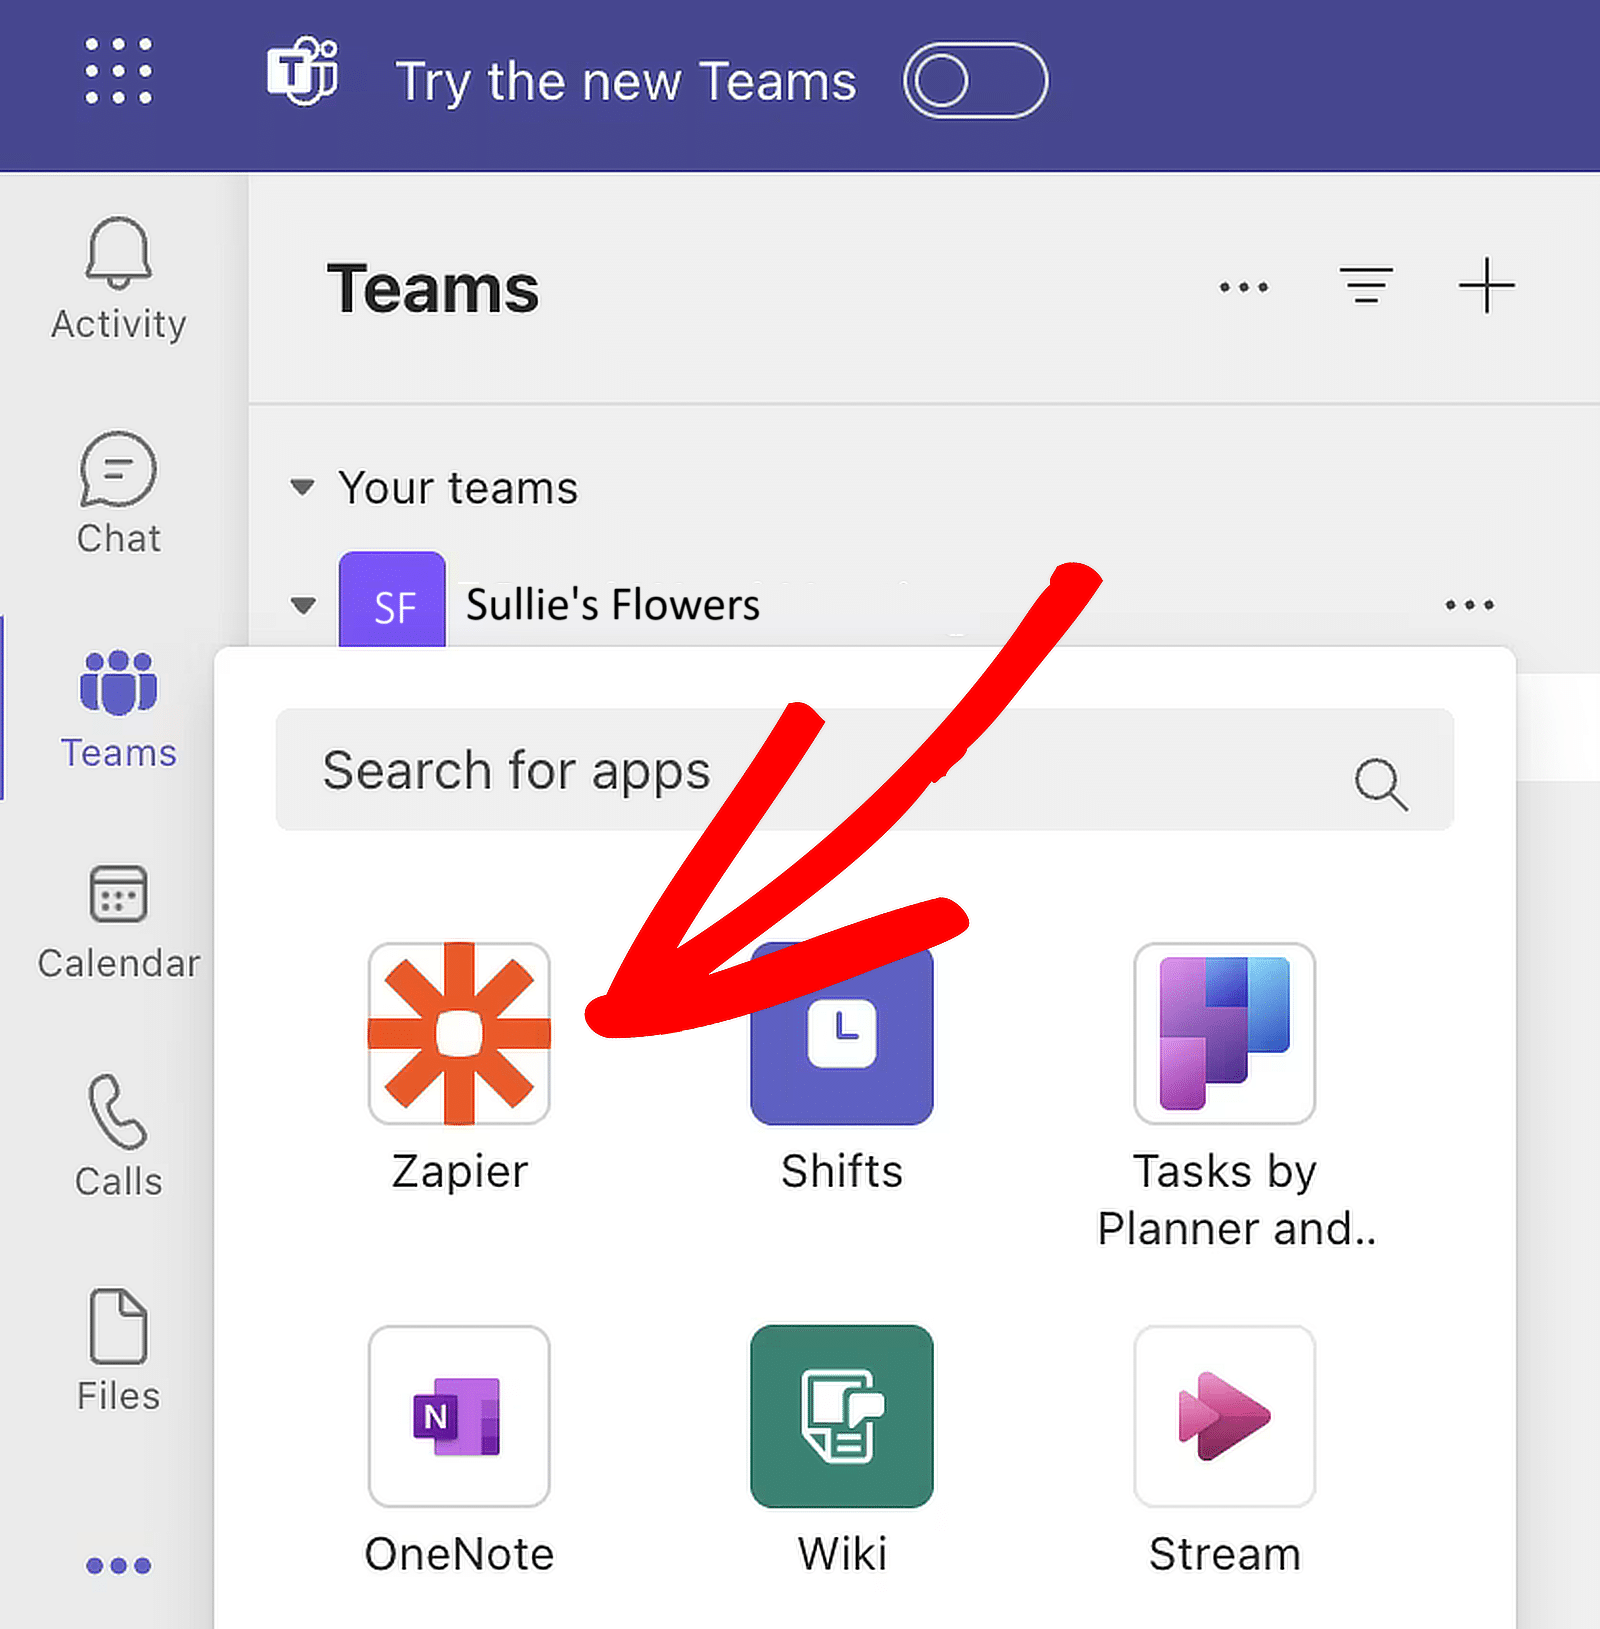
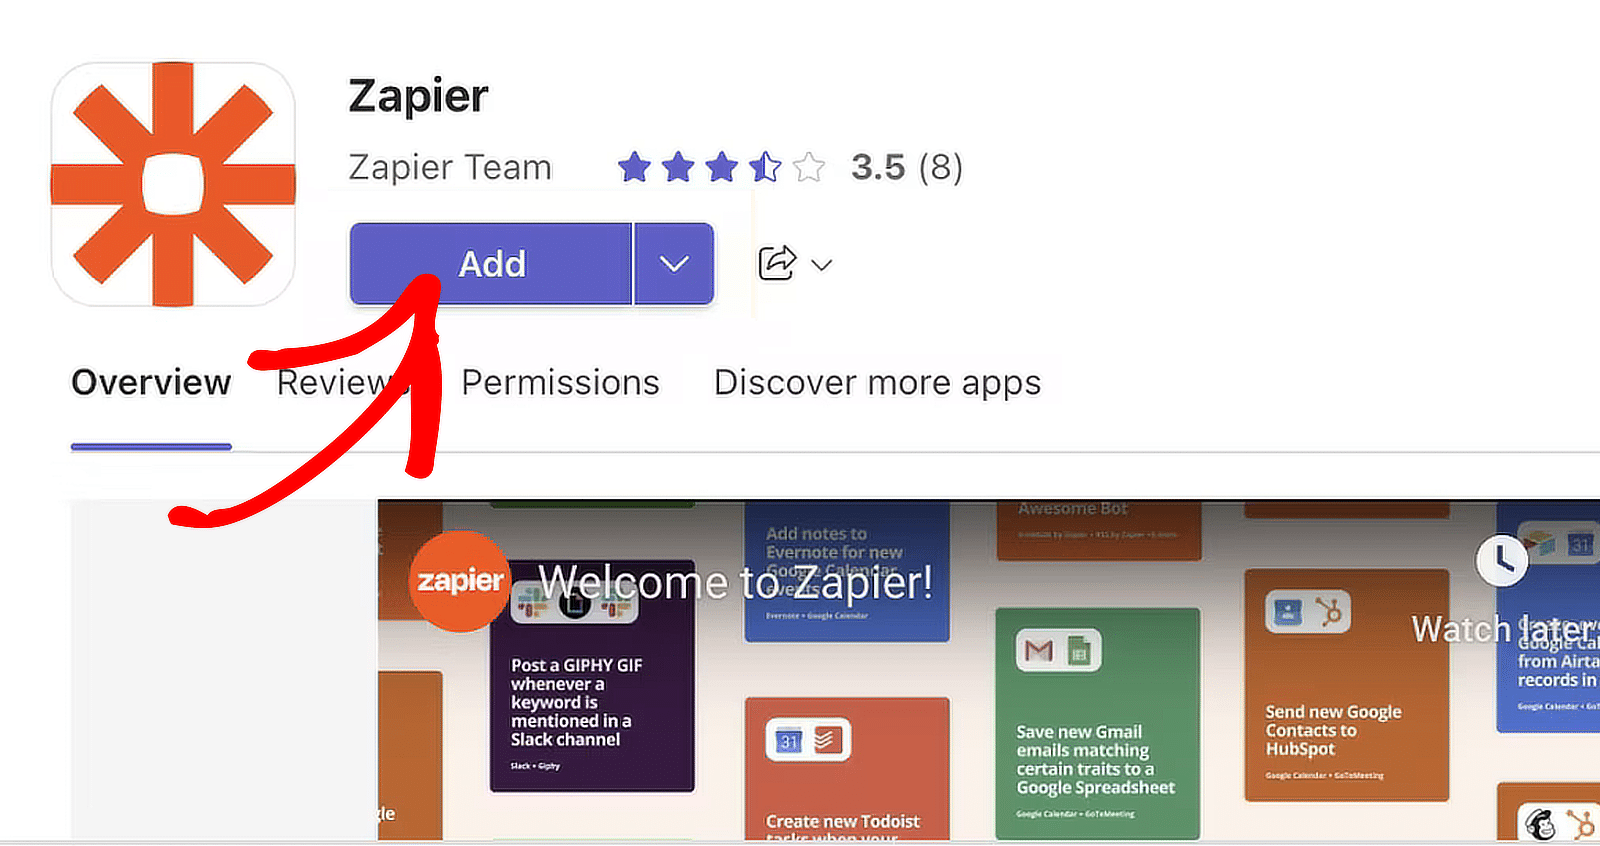
After selecting the Zapier app, a pop-up window will appear. Click the Add button to install it for yourself.
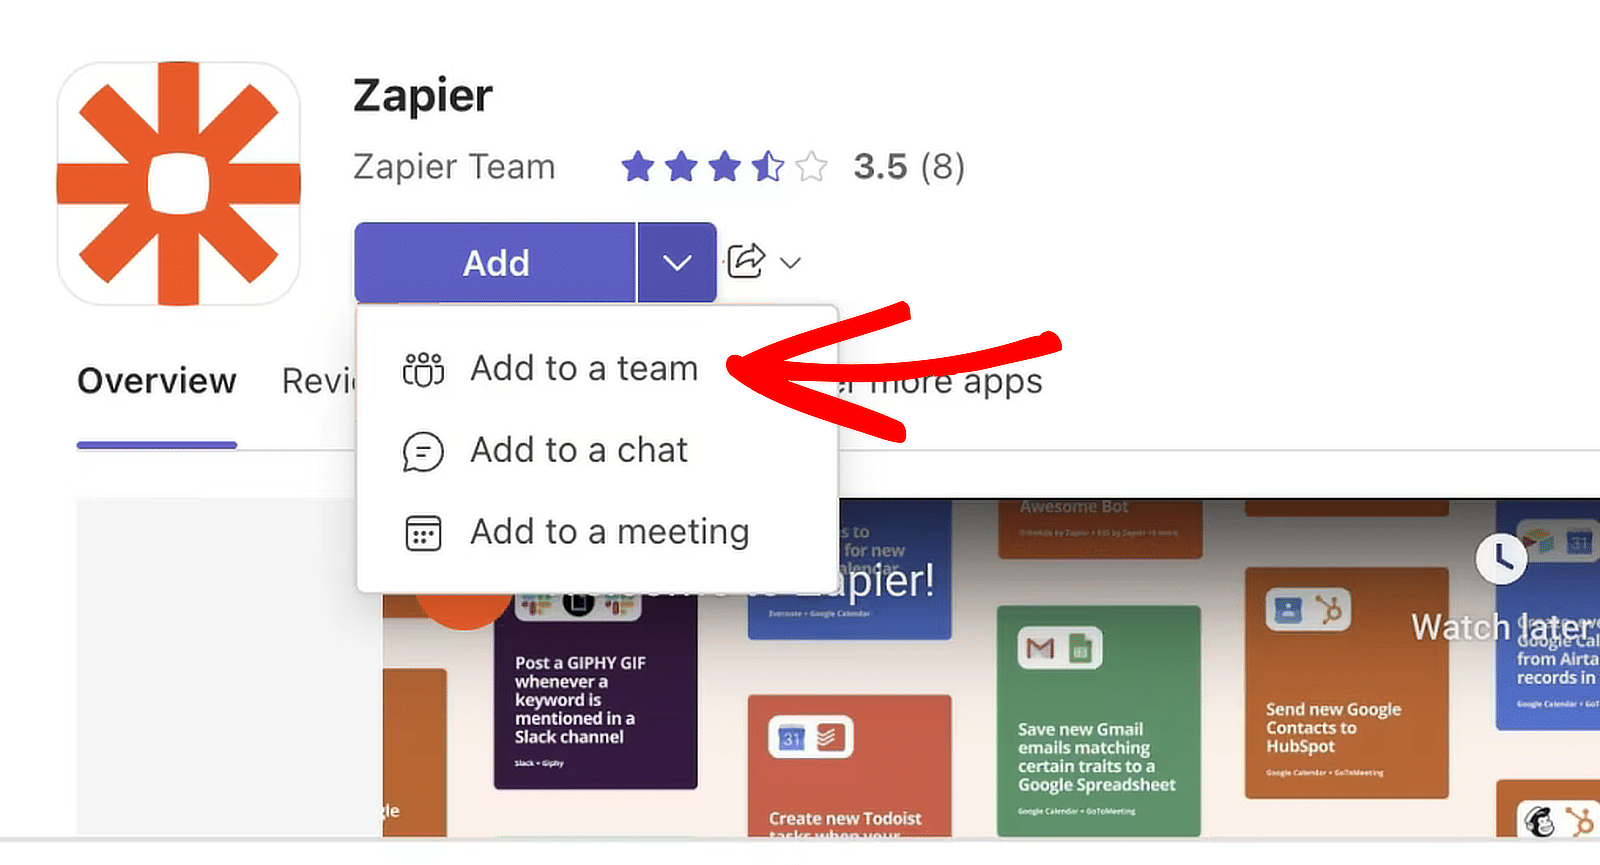
If you’re an admin for your workspace, you can install the app for your entire team. Click the down arrow next to the Add button and select Add to a team.
Once you’ve added the Zapier app, you will be taken to the app page, where you can start creating a Zap from scratch.
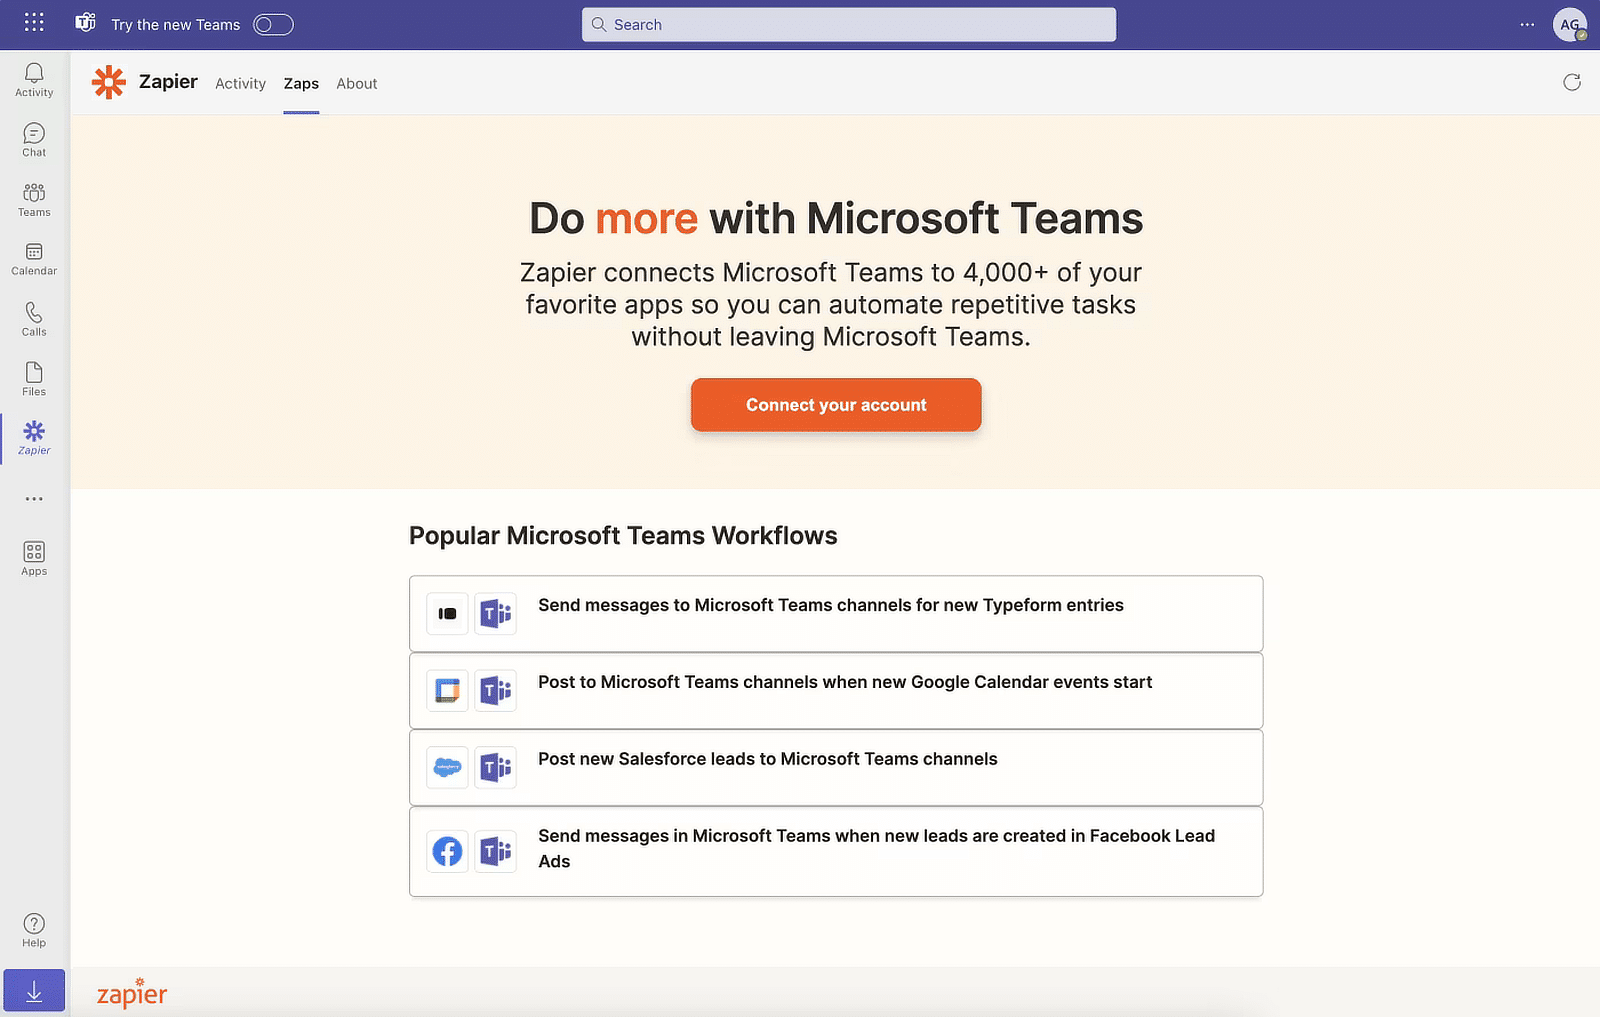
You can choose to connect your account here, but we’ll move to the Zapier dashboard to set up the automation and authentication.
5. Create an Automation in Zapier
The automations you create with Zapier are called “zaps.” So, the next step is to create a zap that sends data from your forms to an external service.
Log into your Zapier account to create a Zap. If you don’t have an account yet, you can sign up for free (which supports up to 100 tasks/month).
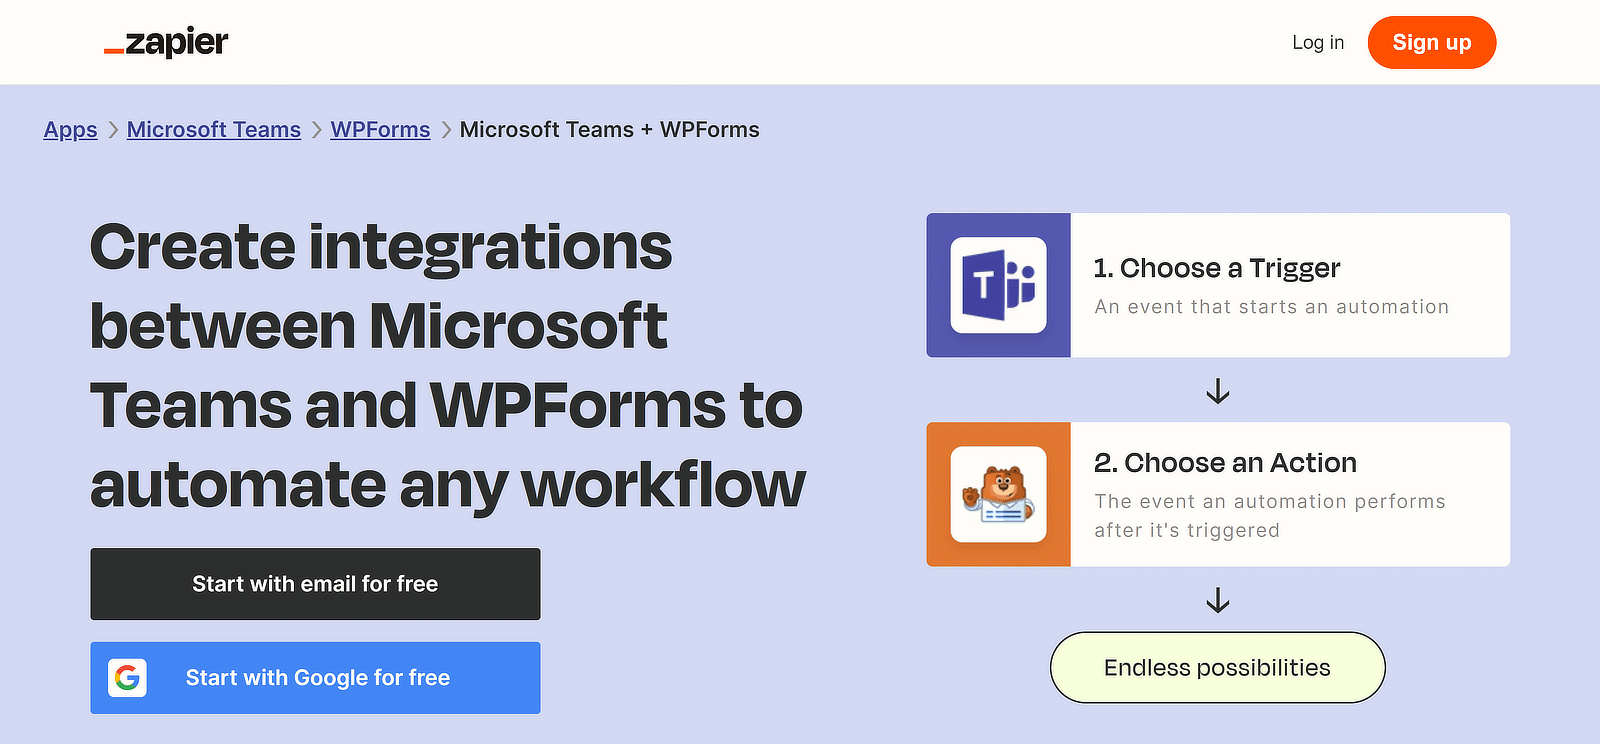
Create a Zap (Automated Workflow)
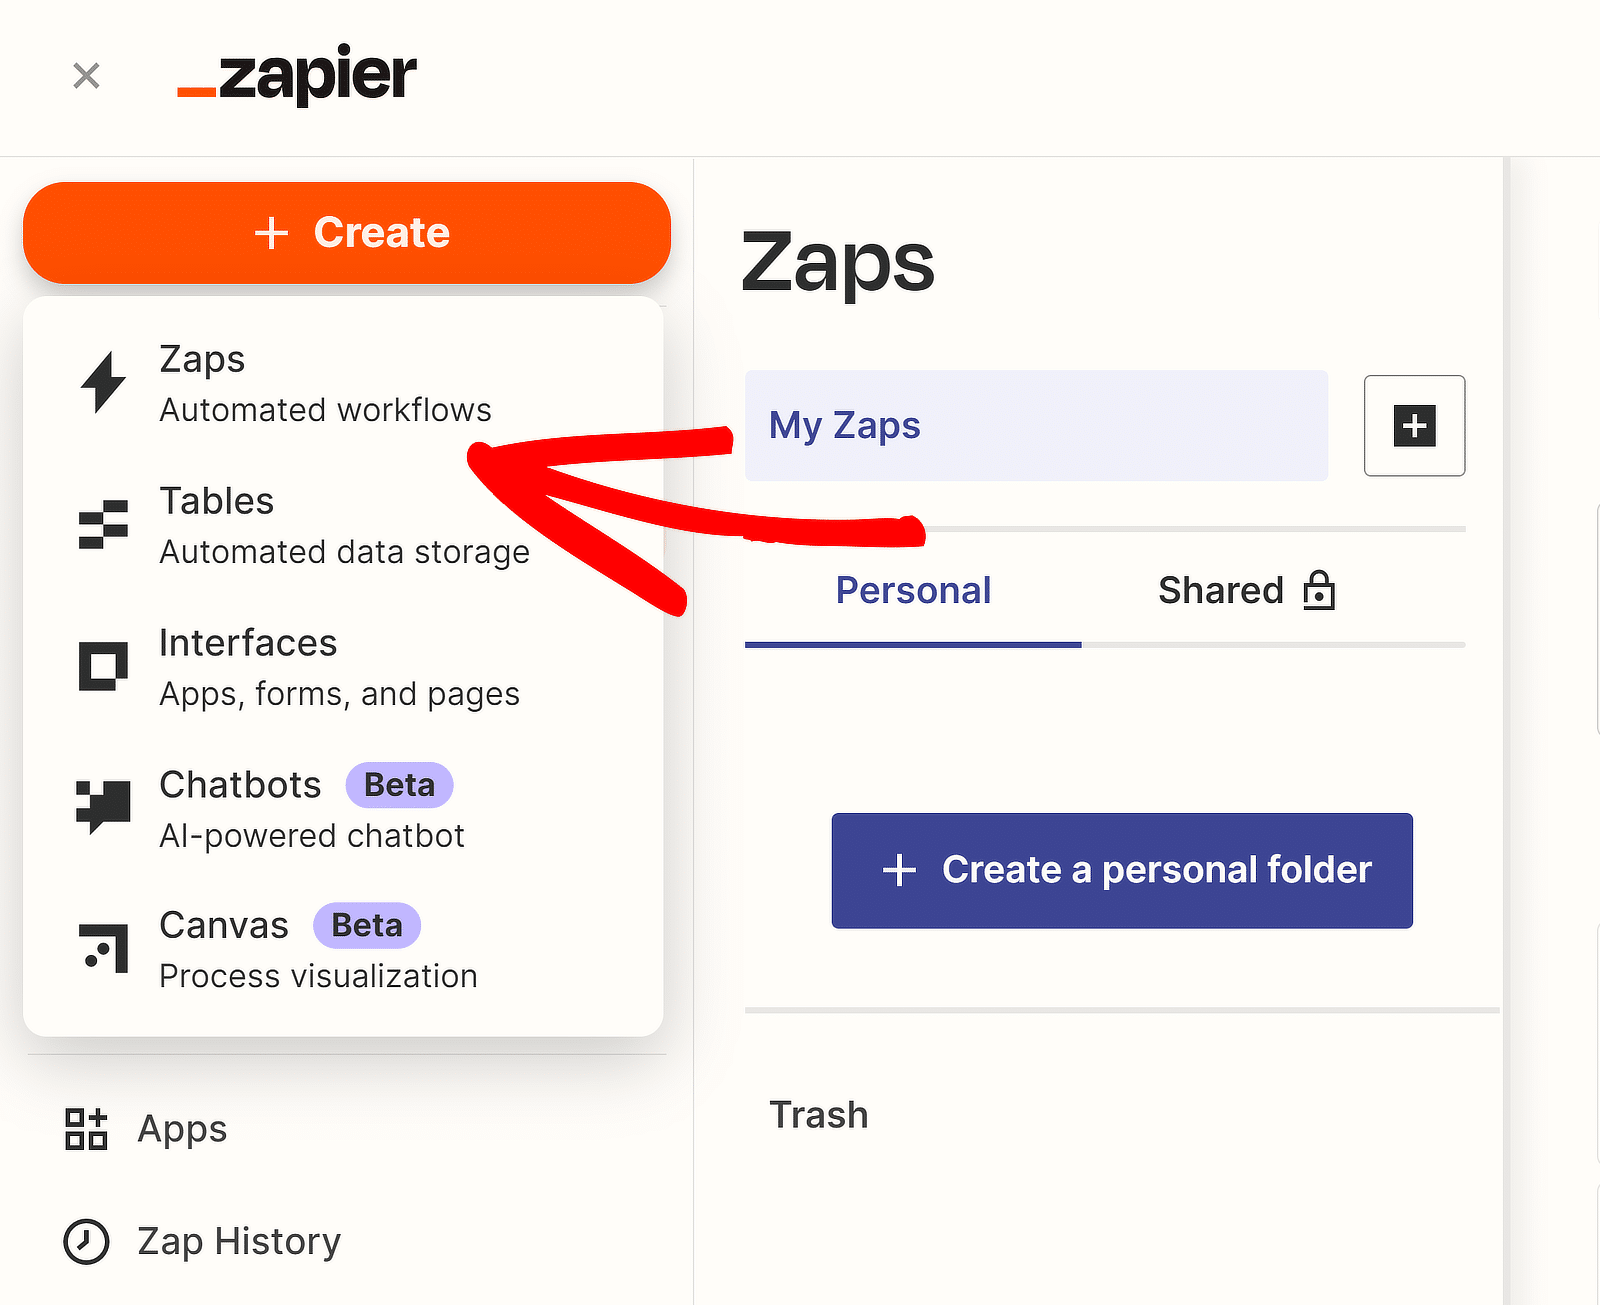
Once logged in, click the orange Create Zap button in the upper left corner and then select Zaps from the list of options.
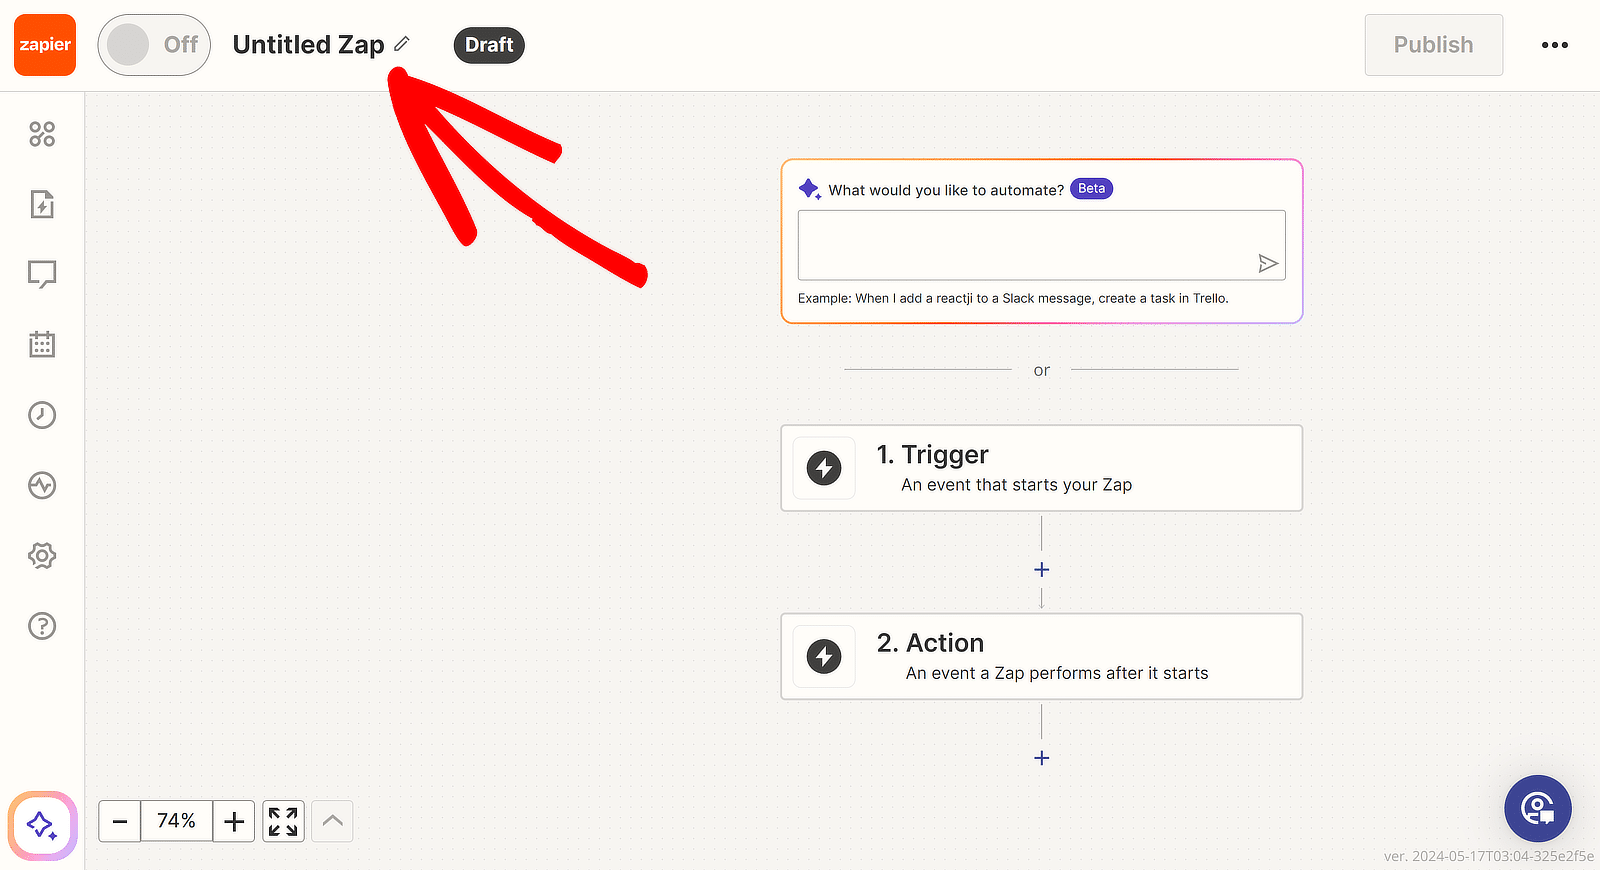
This will open the Zap setup page. You can rename your Zap by clicking on Untitled Zap in the top-left corner.
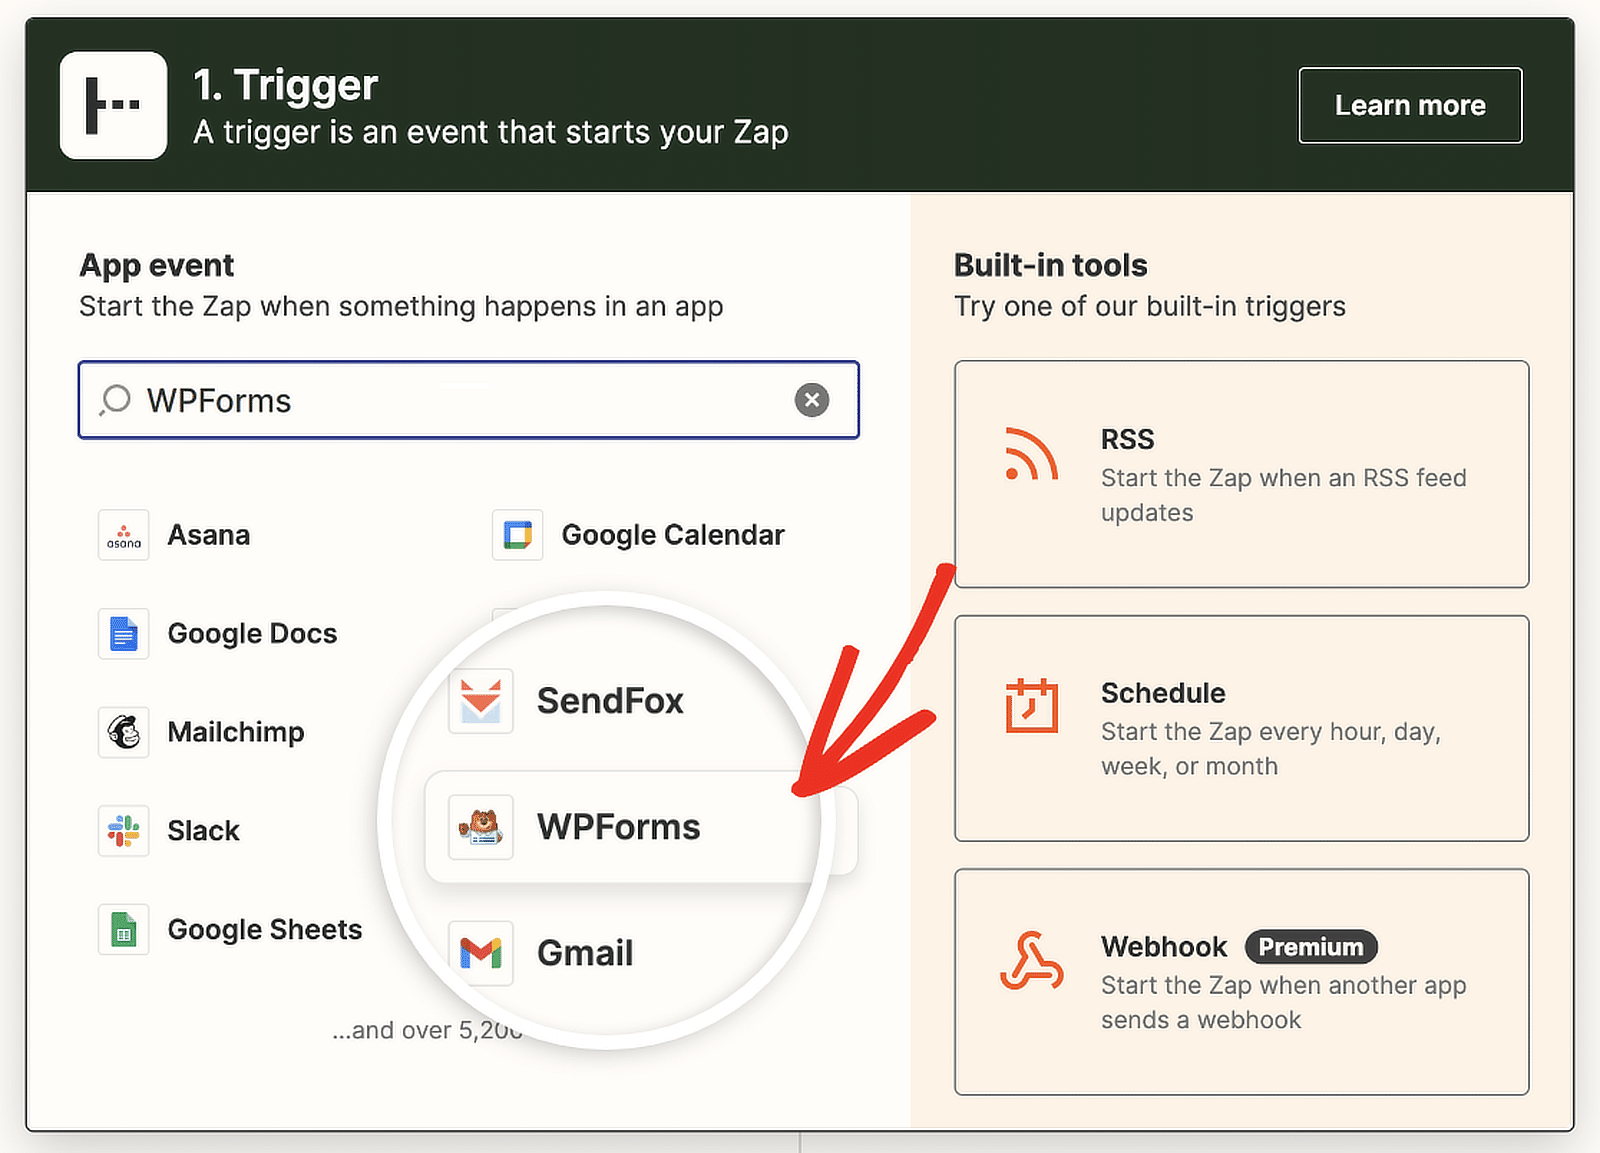
Next, click on 1. Trigger WPForms as your trigger app. In the search box for App event, type “WPForms.” Select WPForms from the results.
Zapier will now present options in the Trigger section. Click within the search box and select New Form Entry from the dropdown menu.
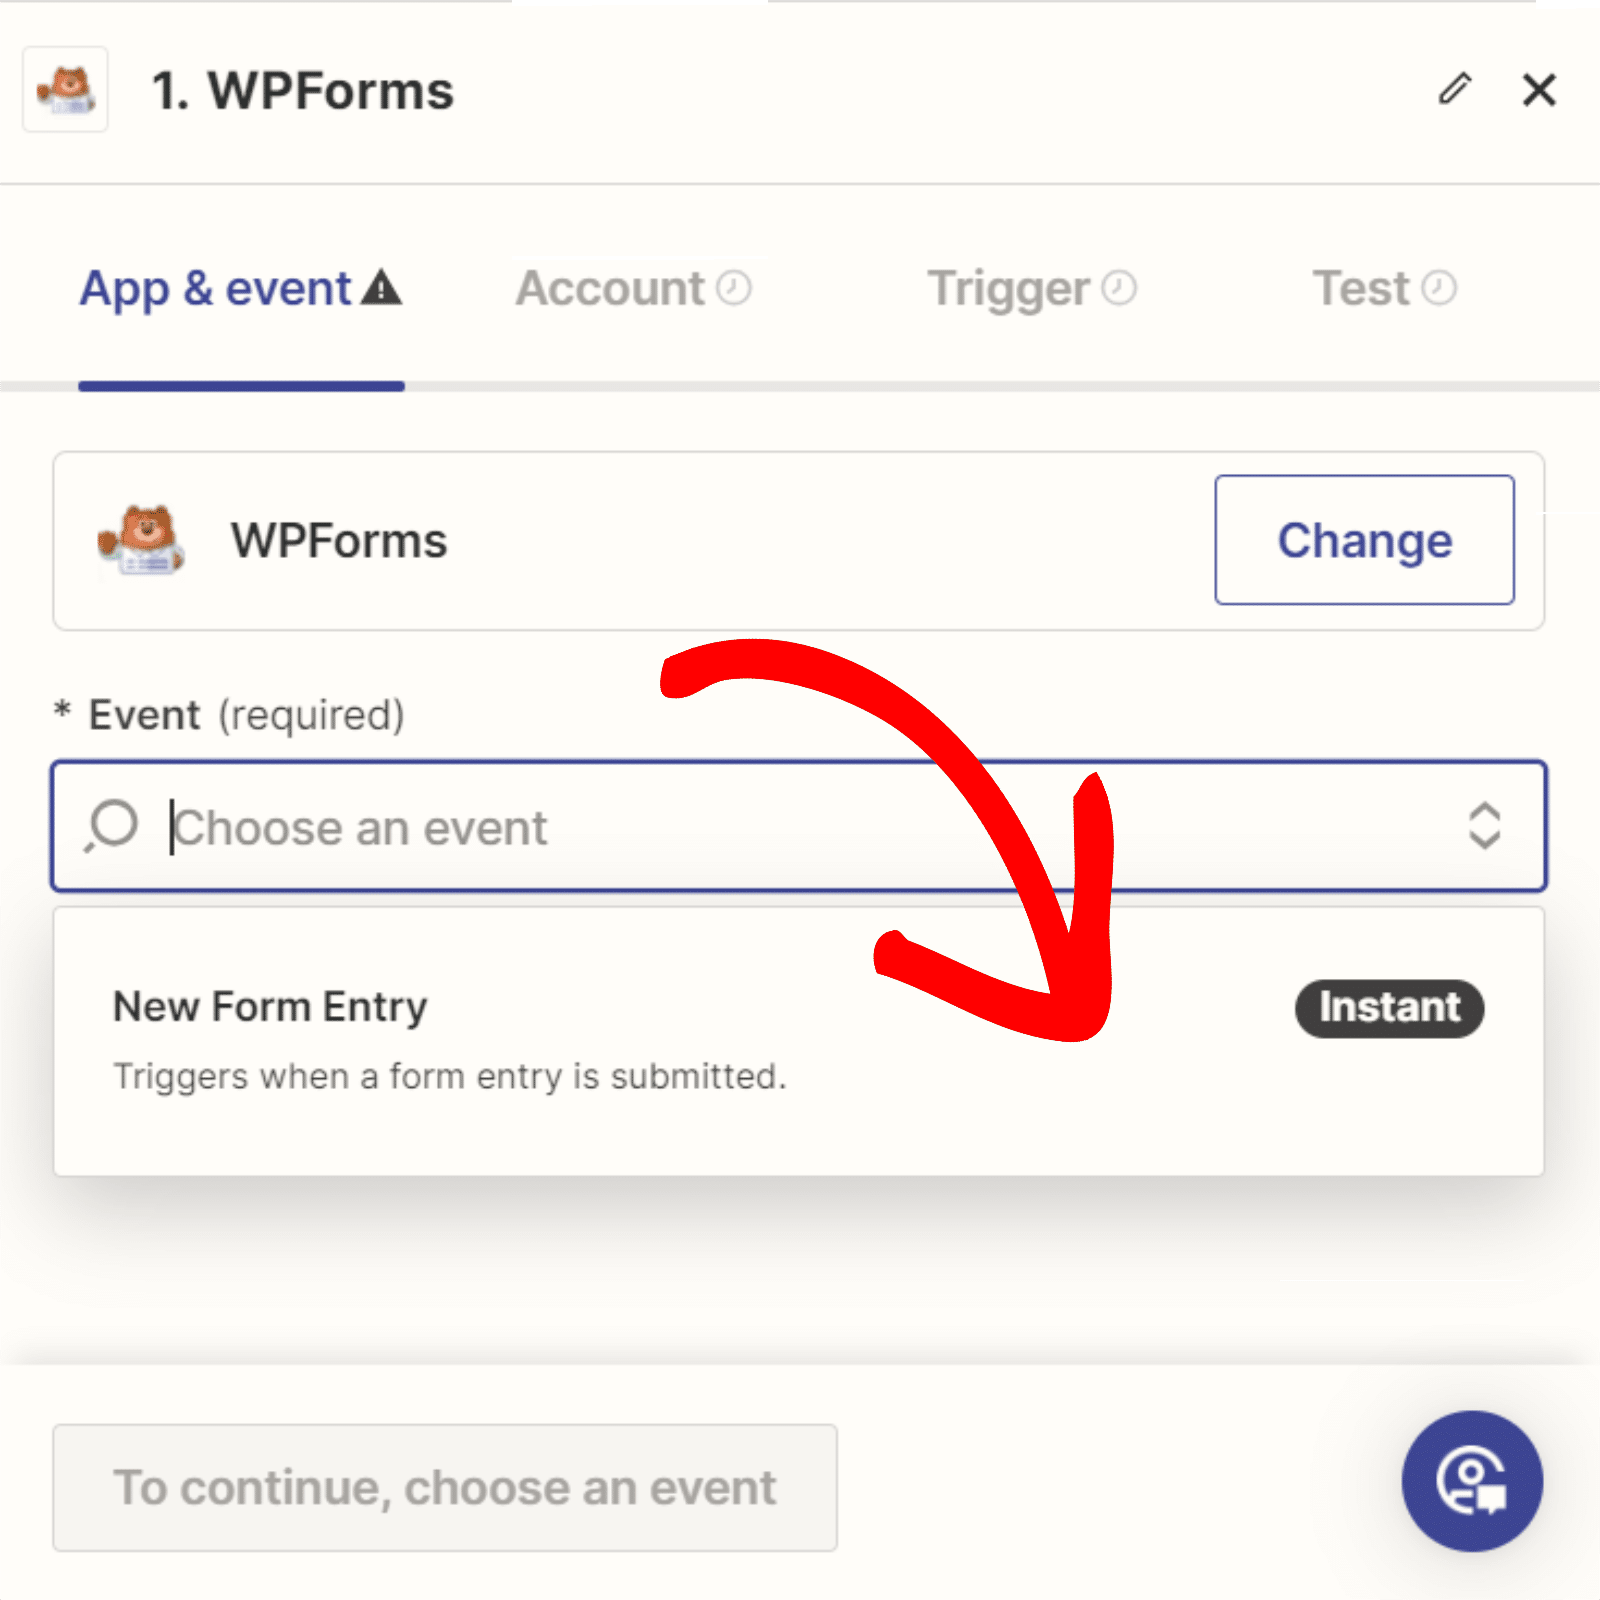
Click on Continue. Now, you need to connect your WPForms account to your Zapier account. Click the Sign in button.
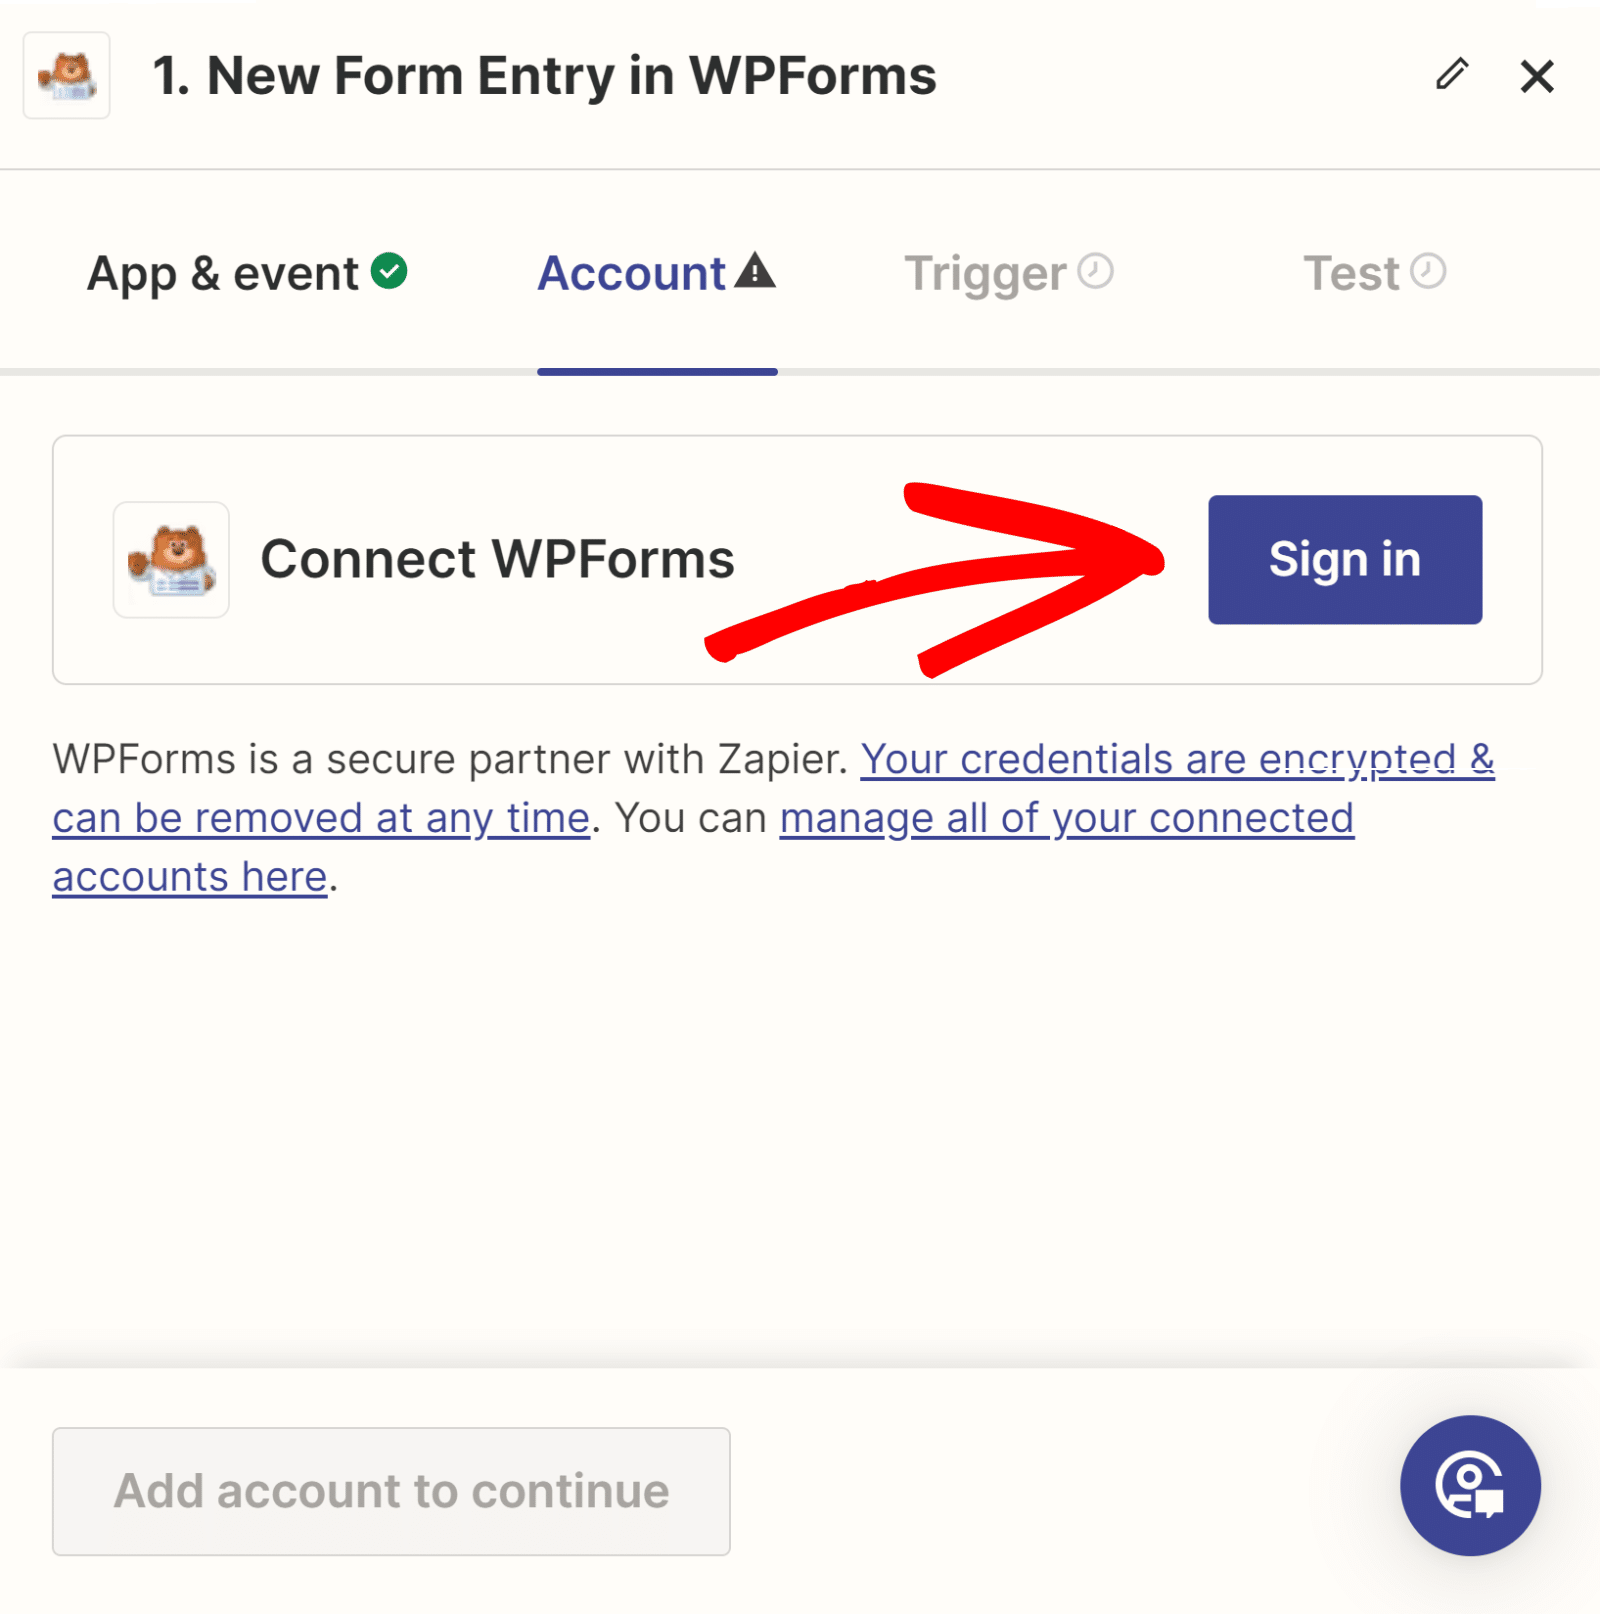
Connect WPForms to the Zap (API)
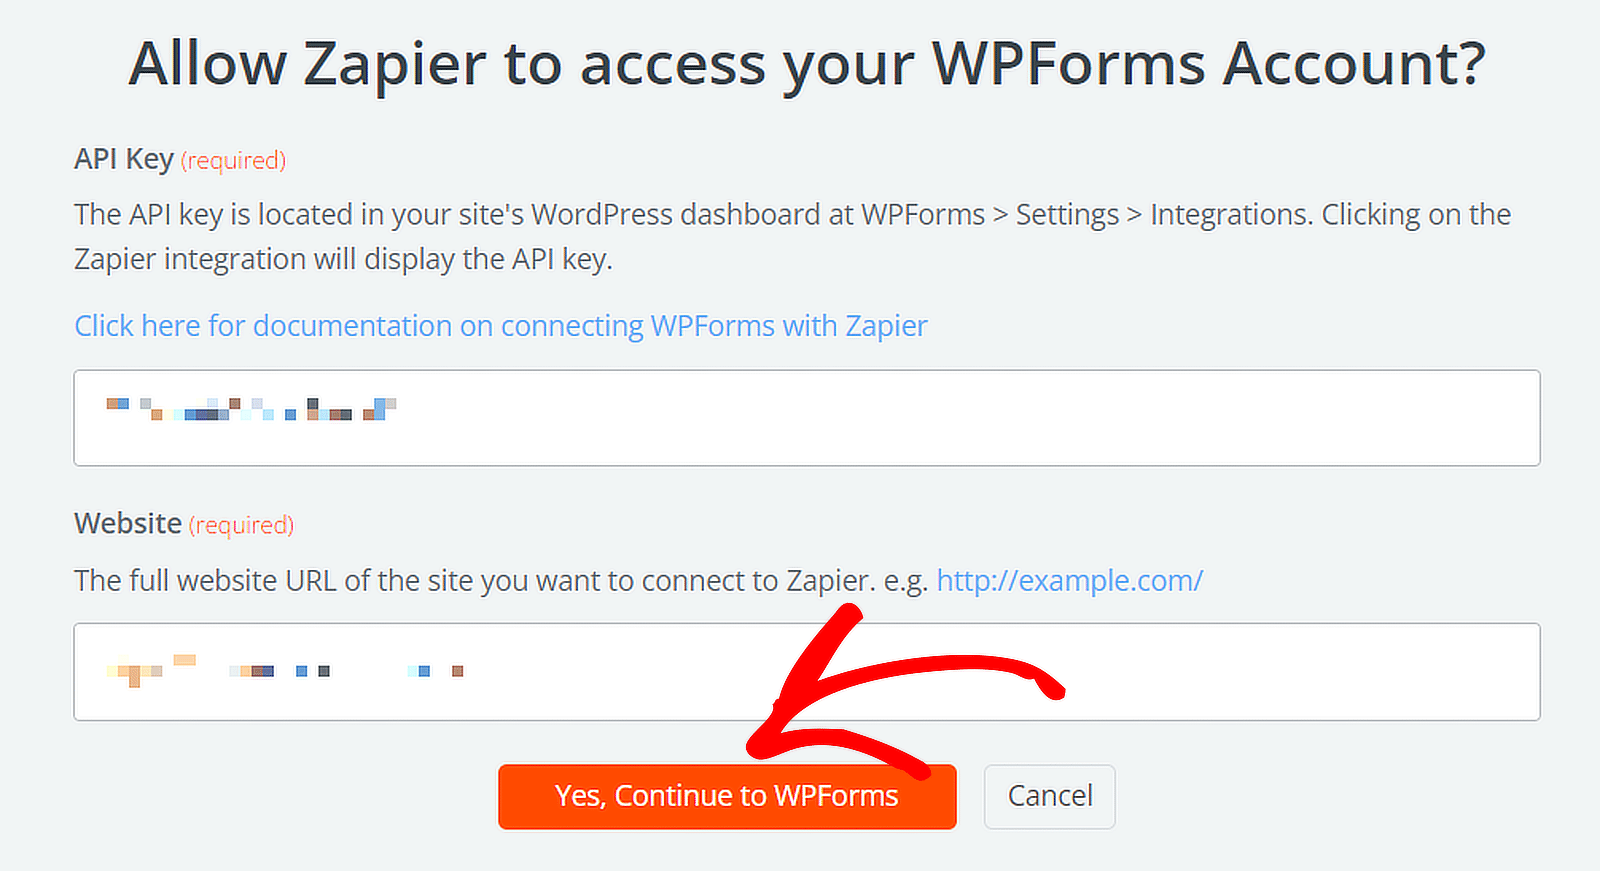
A new window will open where you need to enter your API Key. Return to the tab where you set up your WPForms connections to find your API key.

Copy and paste your API key into the popup window from Zapier. Then, input your domain name and click the Yes, Continue to WPForms button.
Set Up the Trigger for the Zap (Form)
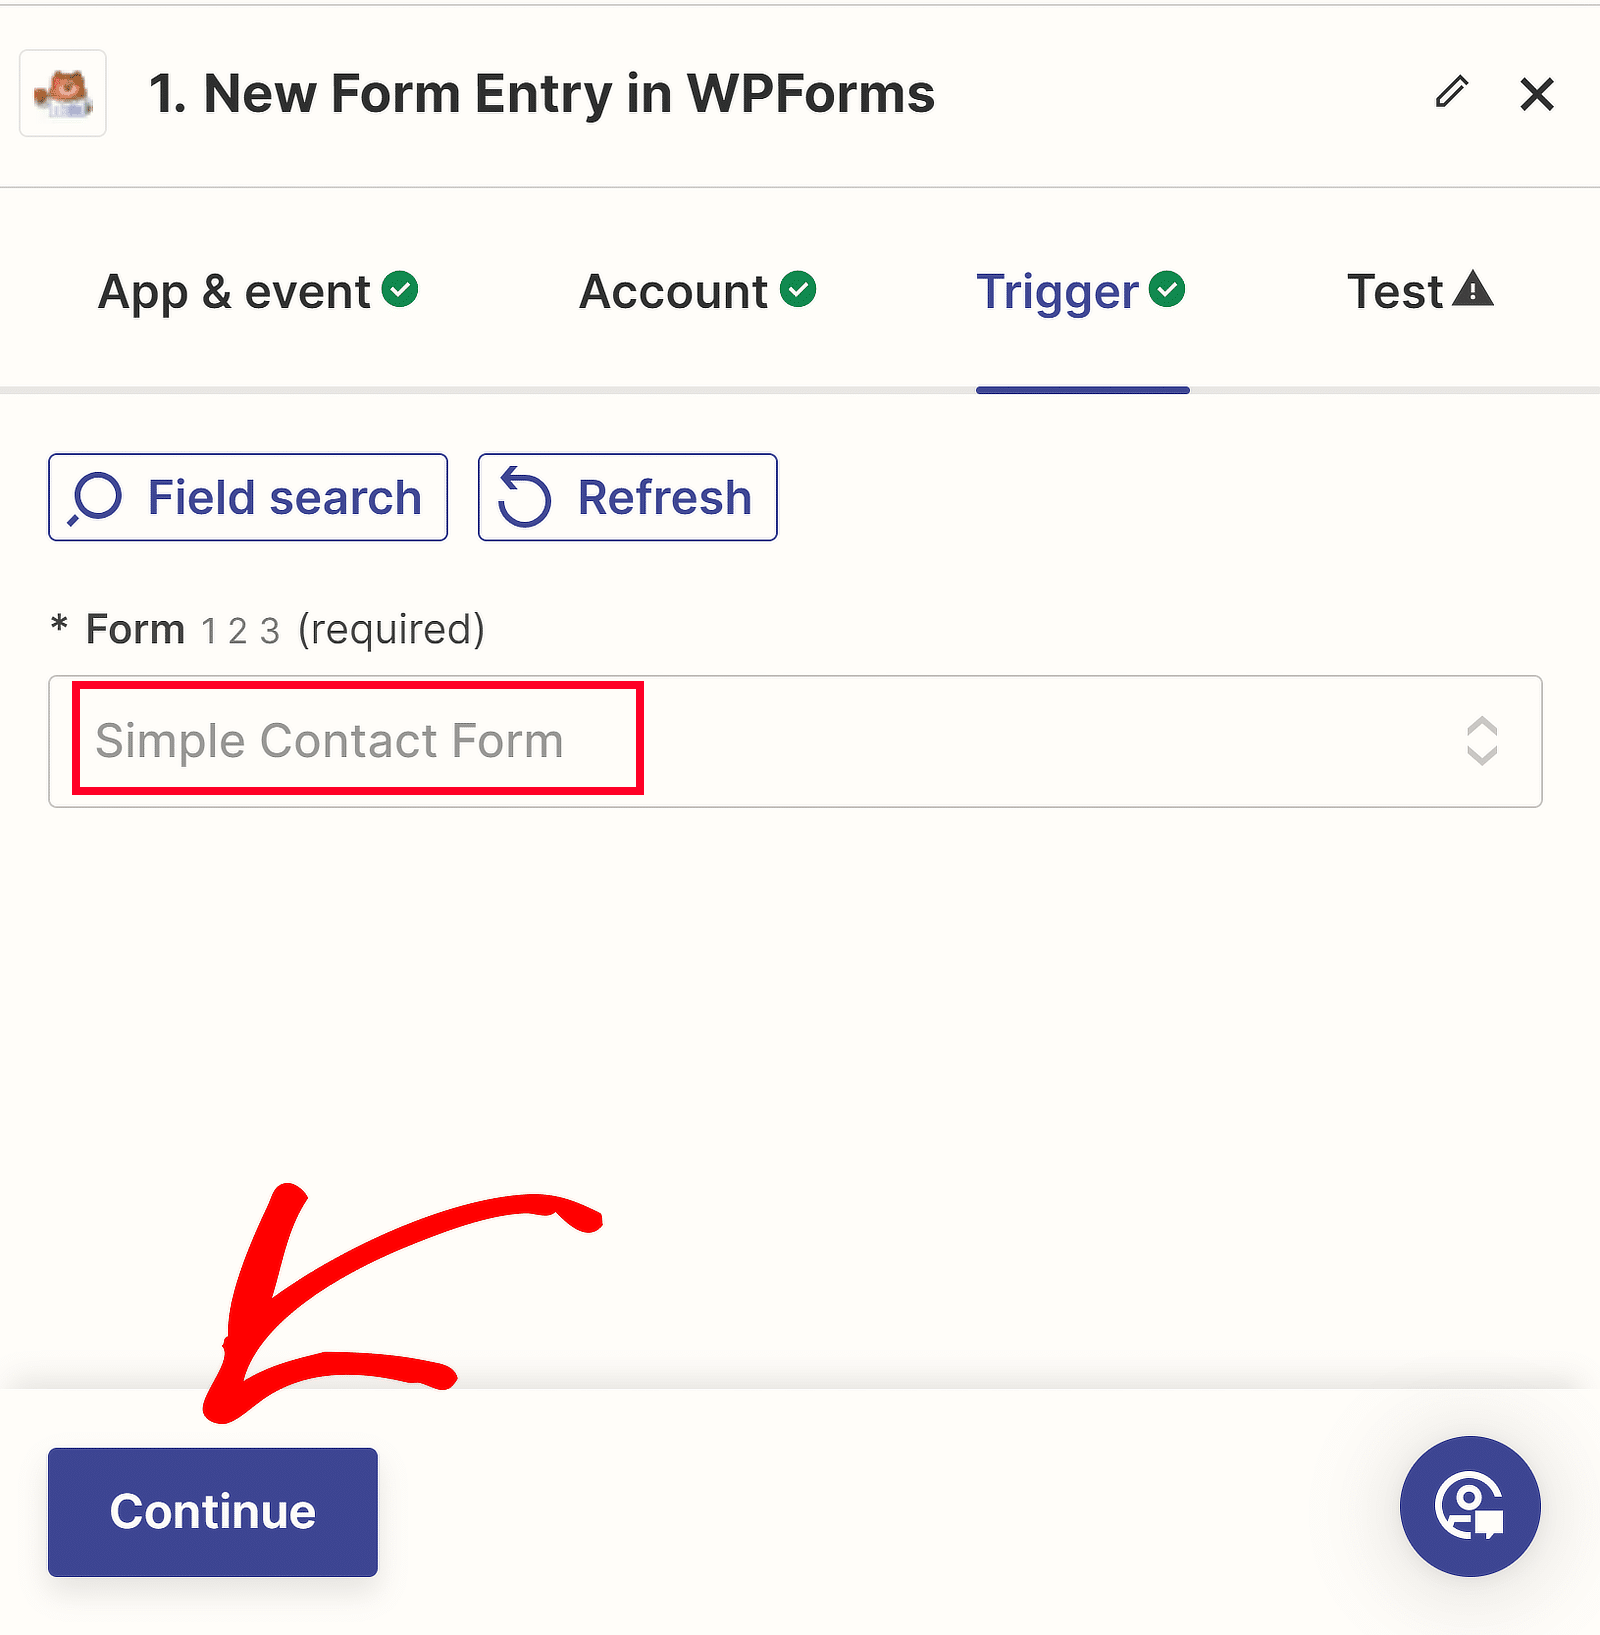
From the dropdown menu, choose the form you want to receive Microsoft Teams notifications and click the Continue button.
You can now test the connection between your form and Zapier. Before clicking the Test trigger button, submit at least one test entry for your form.
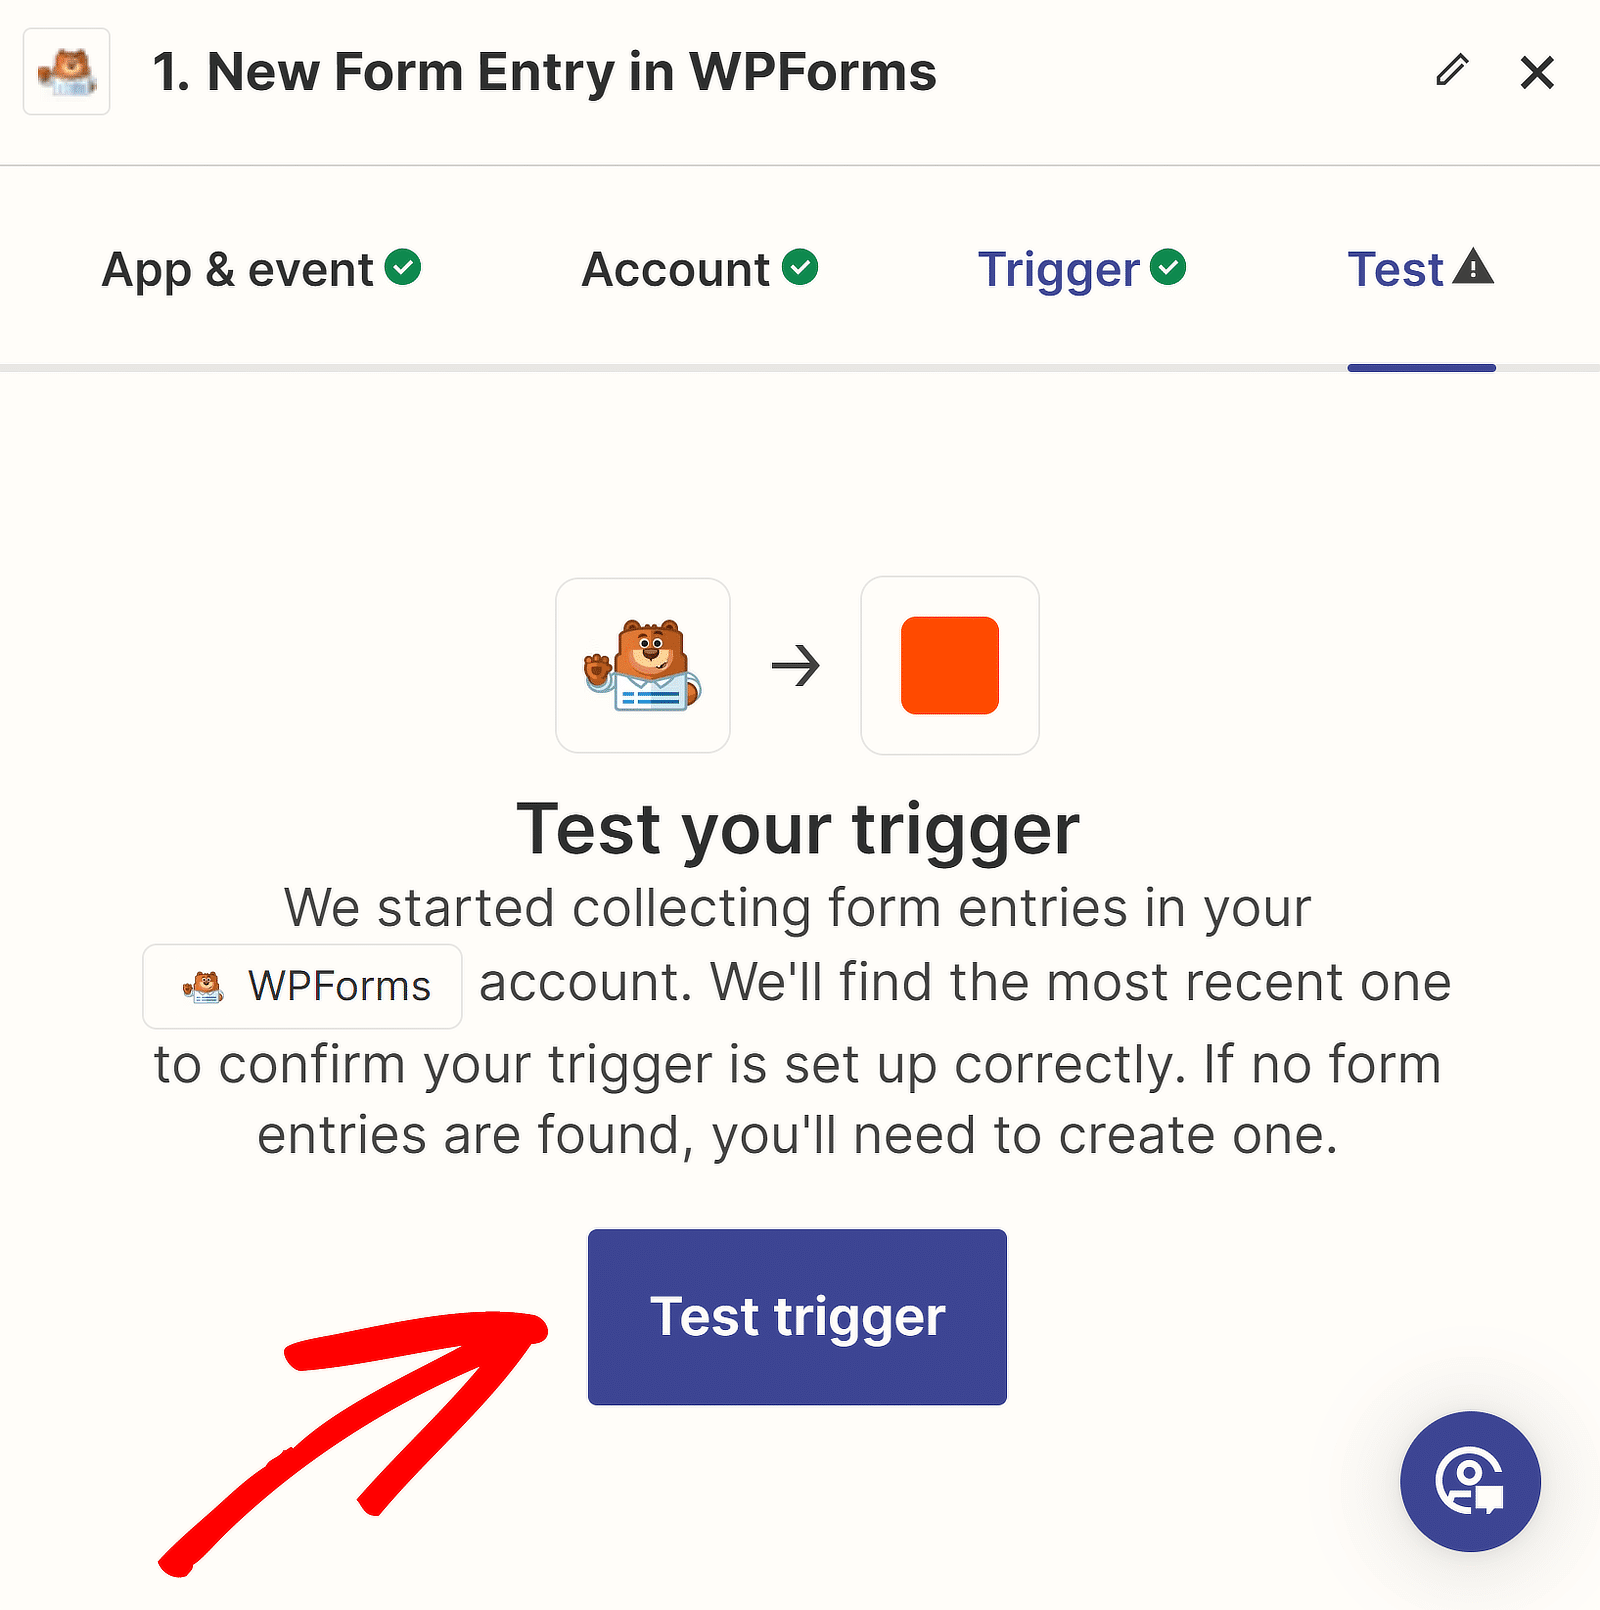
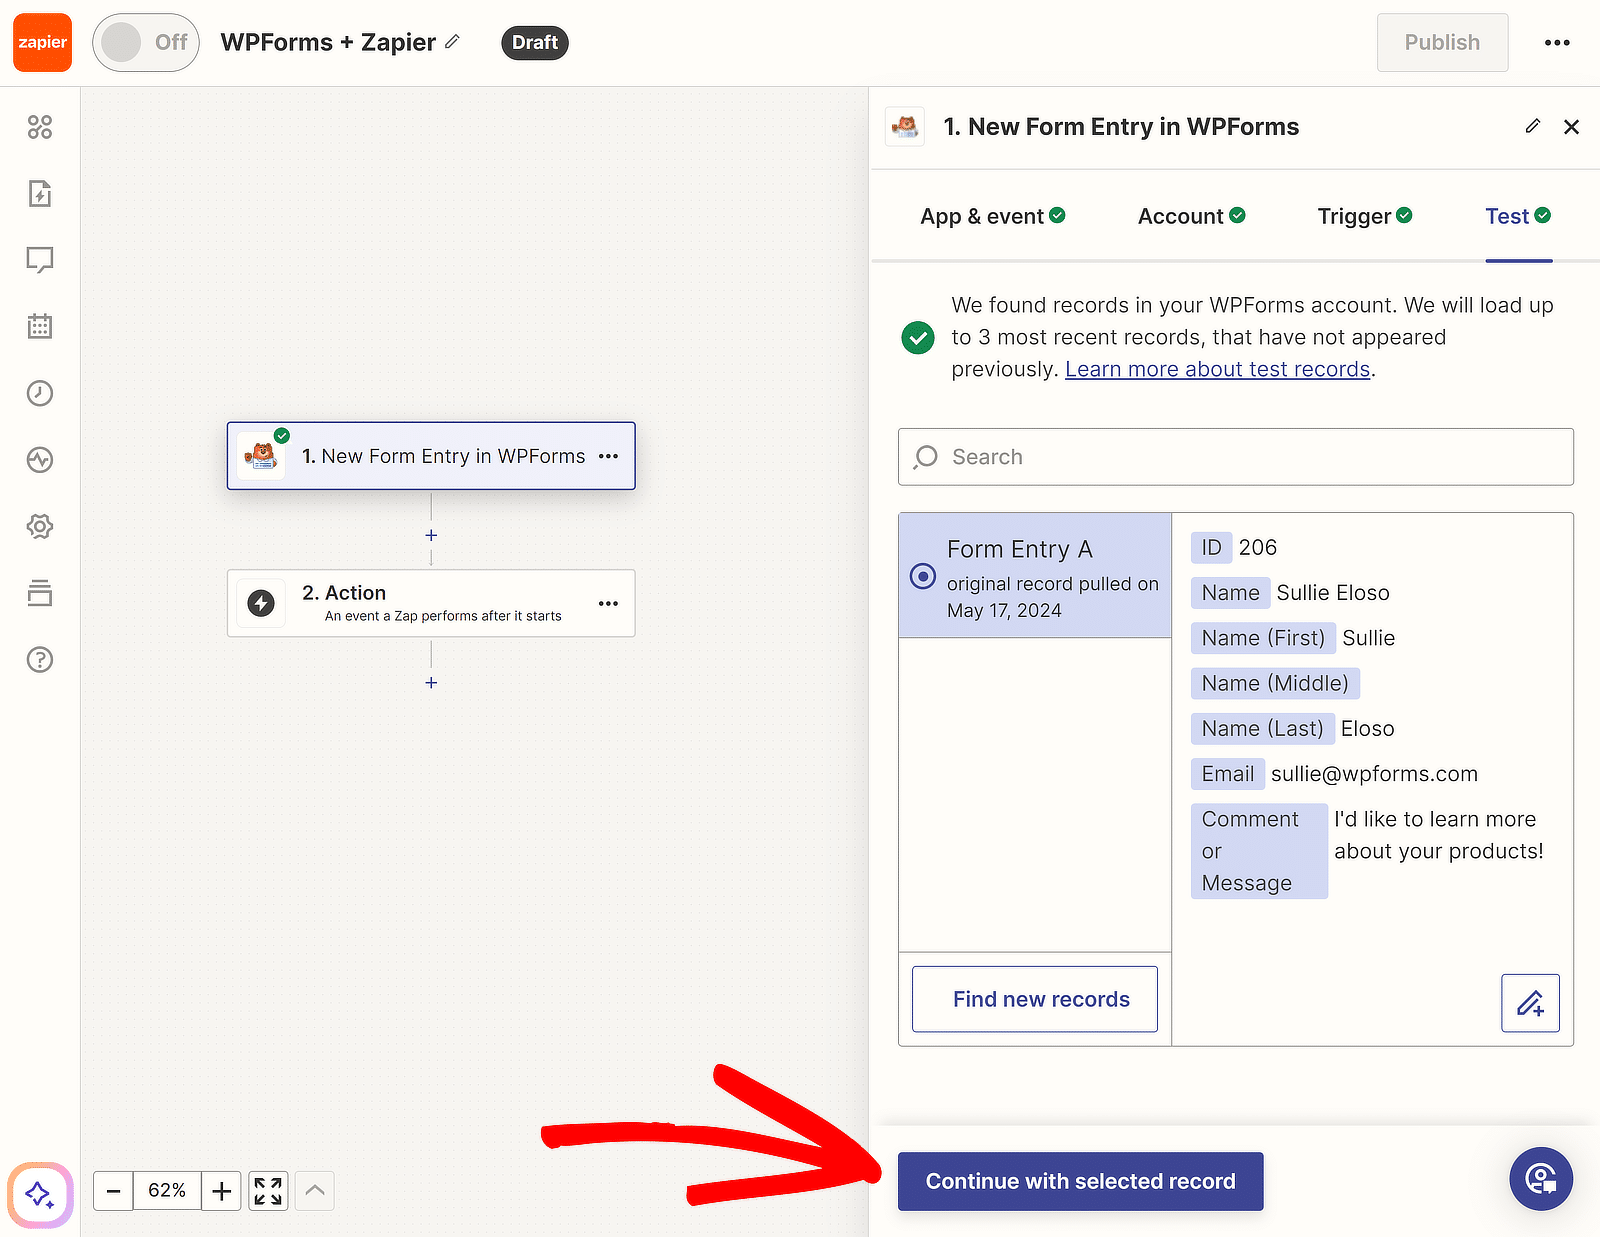
After a while, you’ll see a message confirming the action’s success. You can also review the data you entered into the form.
Click on Continue with the selected record to set up your action, which involves creating an alert integration in WordPress using Microsoft Teams.
6. Configure Your Action Event for the Zap
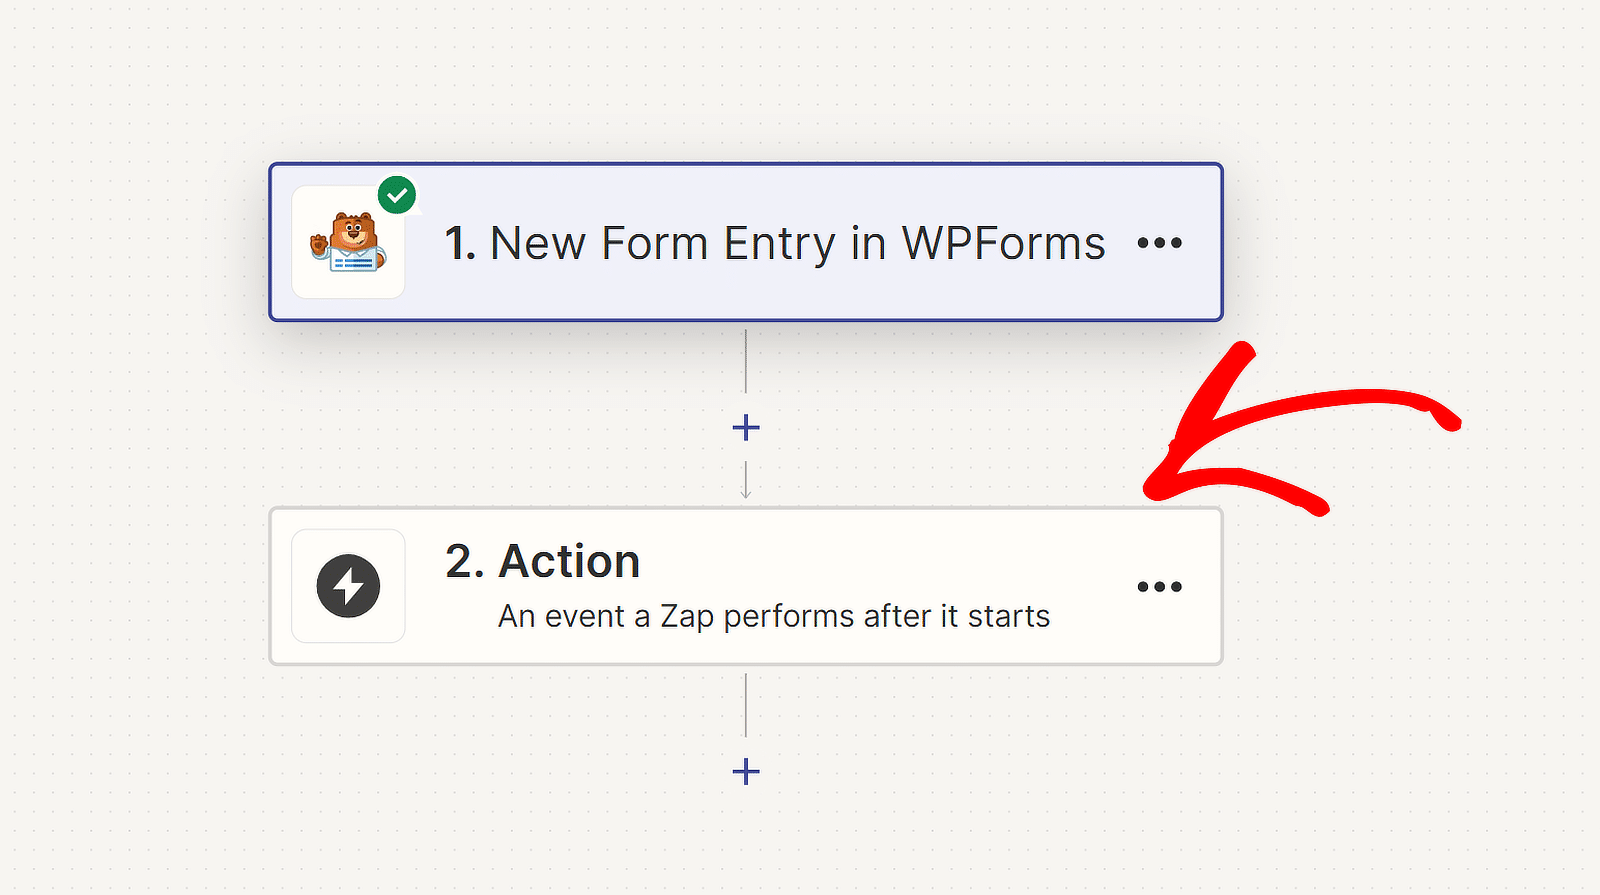
Now, we’ll create our action, which is what our Zap will perform when it is triggered. Click on 2. Action within the Zap builder.
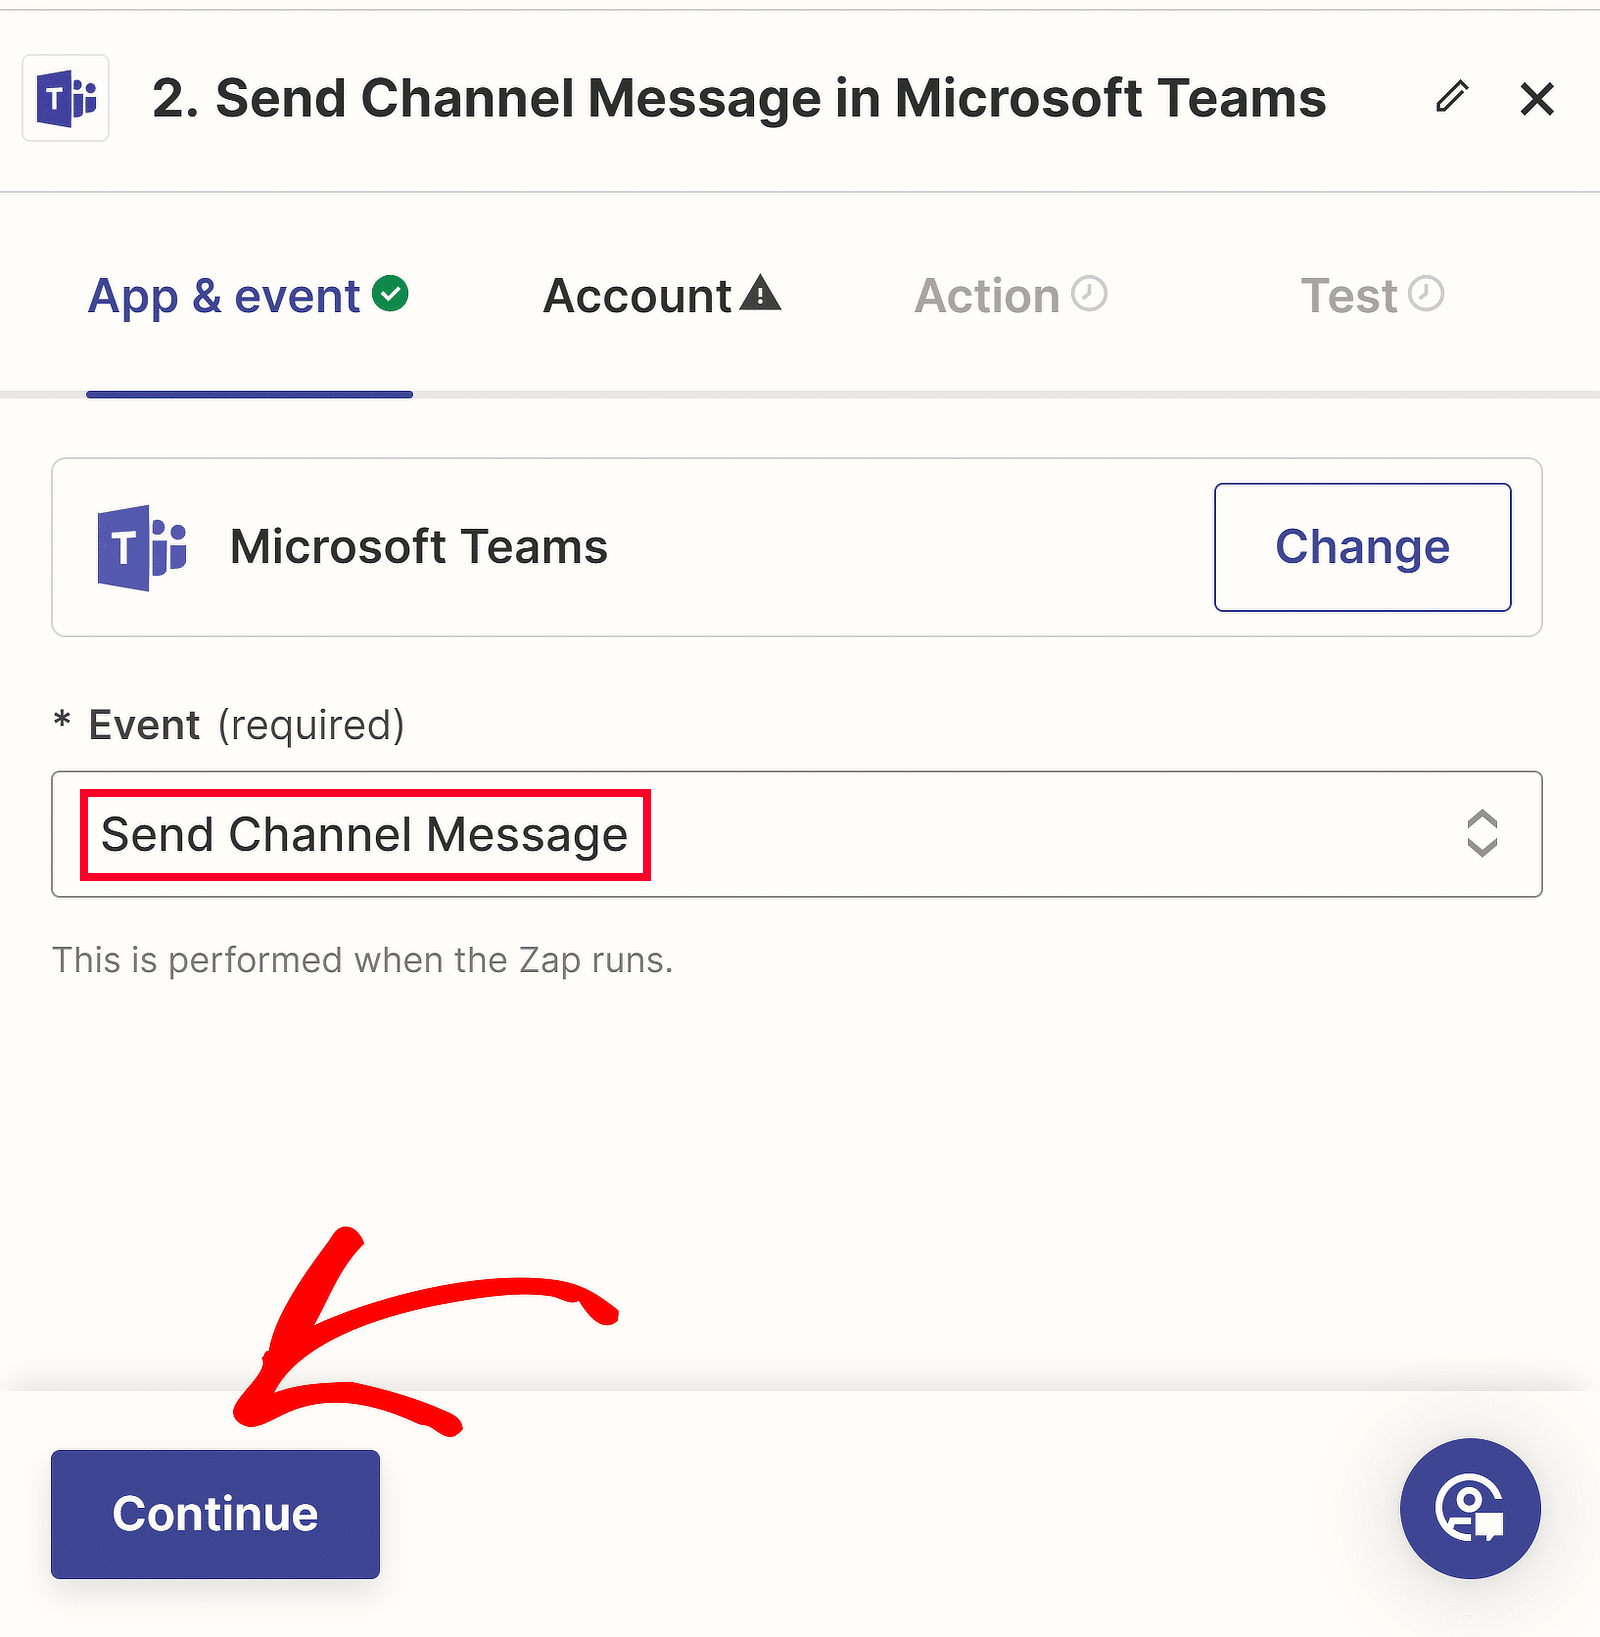
After that, pick Microsoft Teams as your app and Send Channel Message as the event if you’re making a Zap from scratch. Then, press Continue.
If you have already linked your Microsoft Teams account to Zapier, you can select your workspace from the dropdown menu.
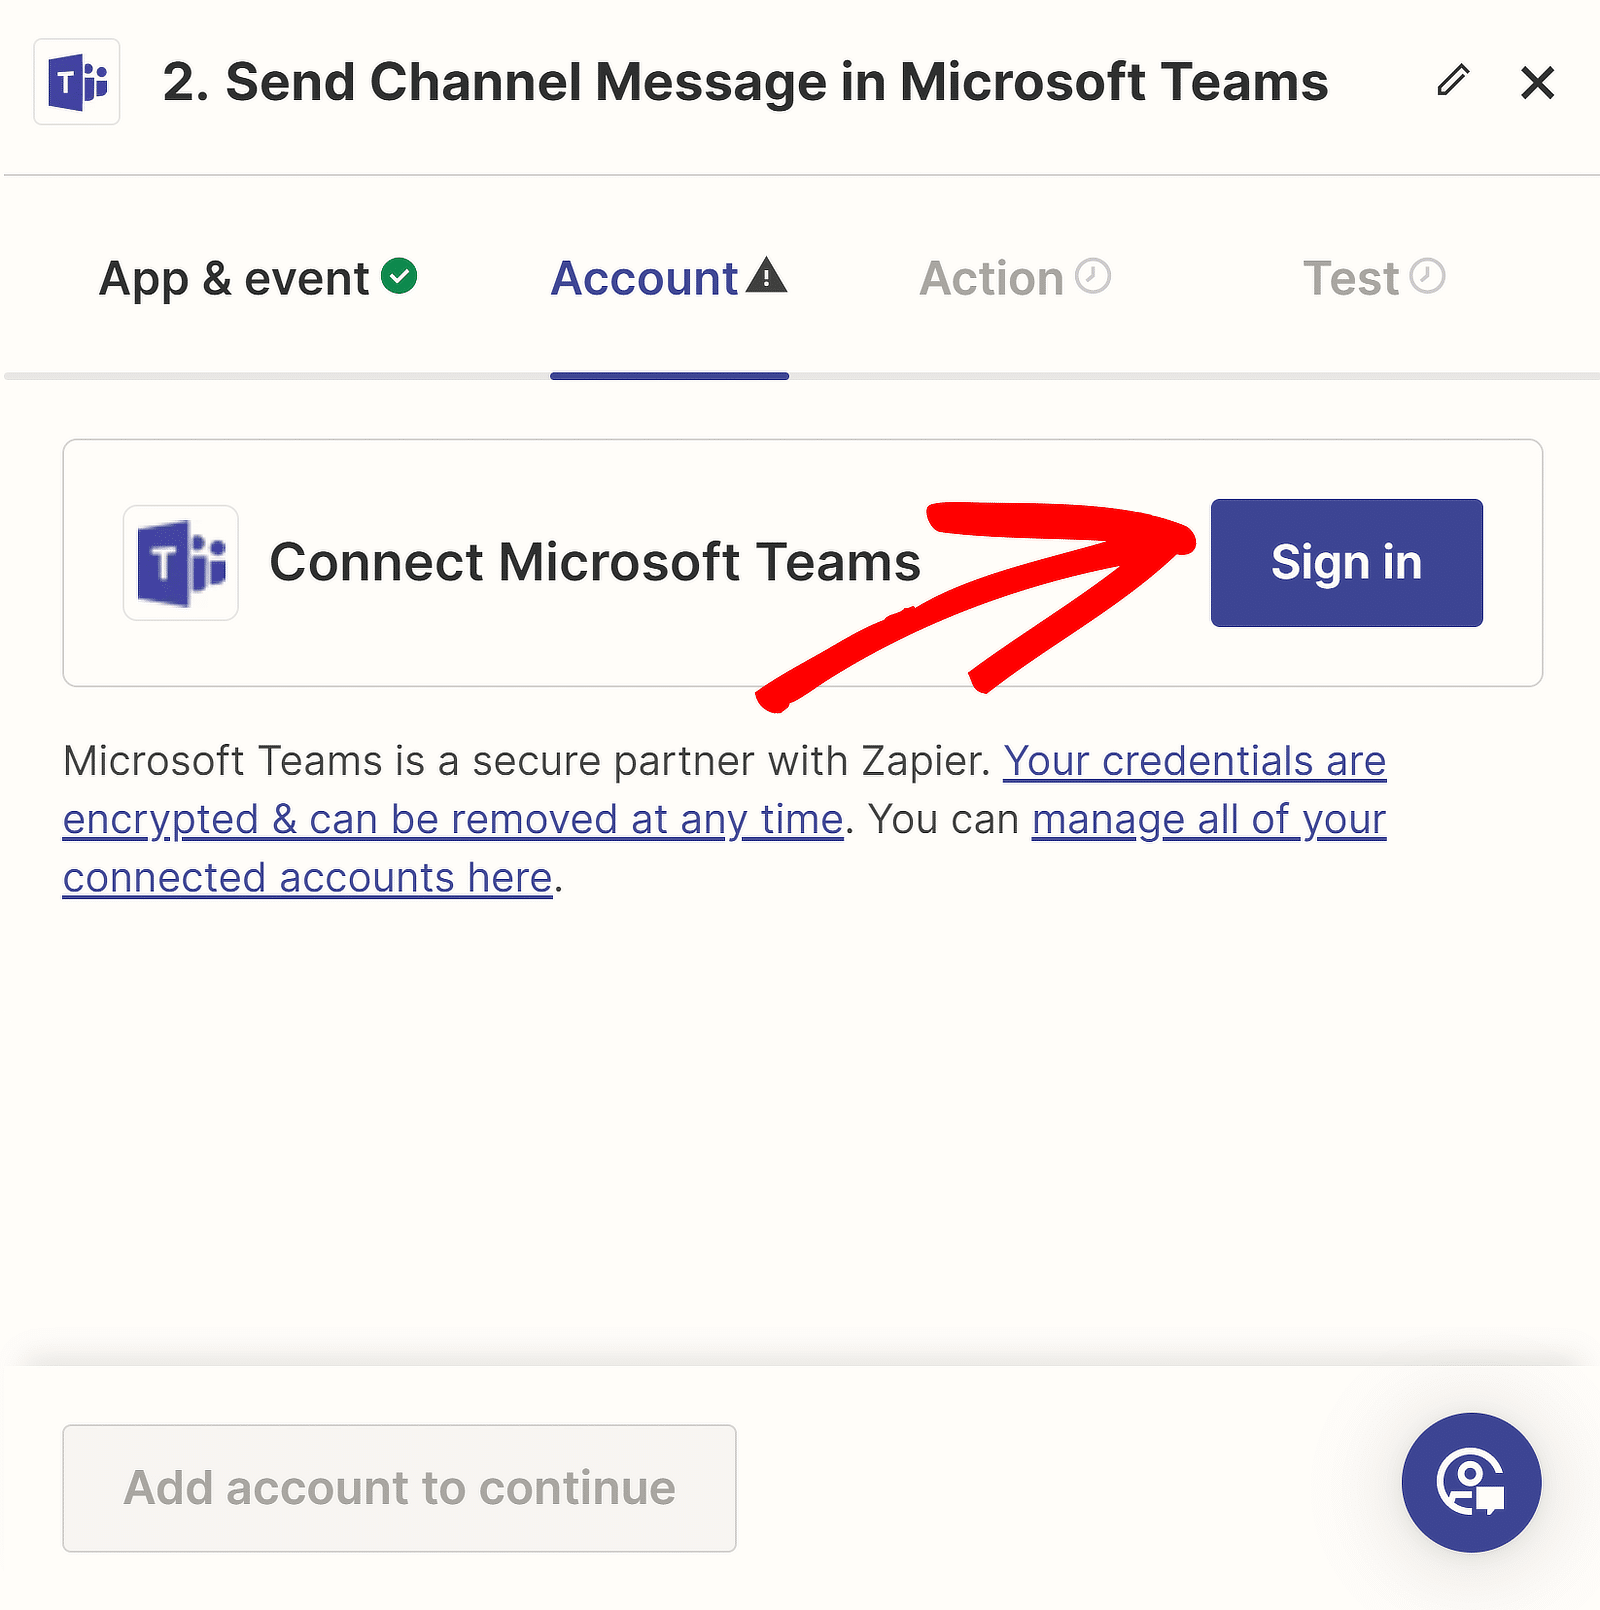
On the other hand, if this is our first time connecting Teams to Zapier, we’ll need to click on the Sign in button.
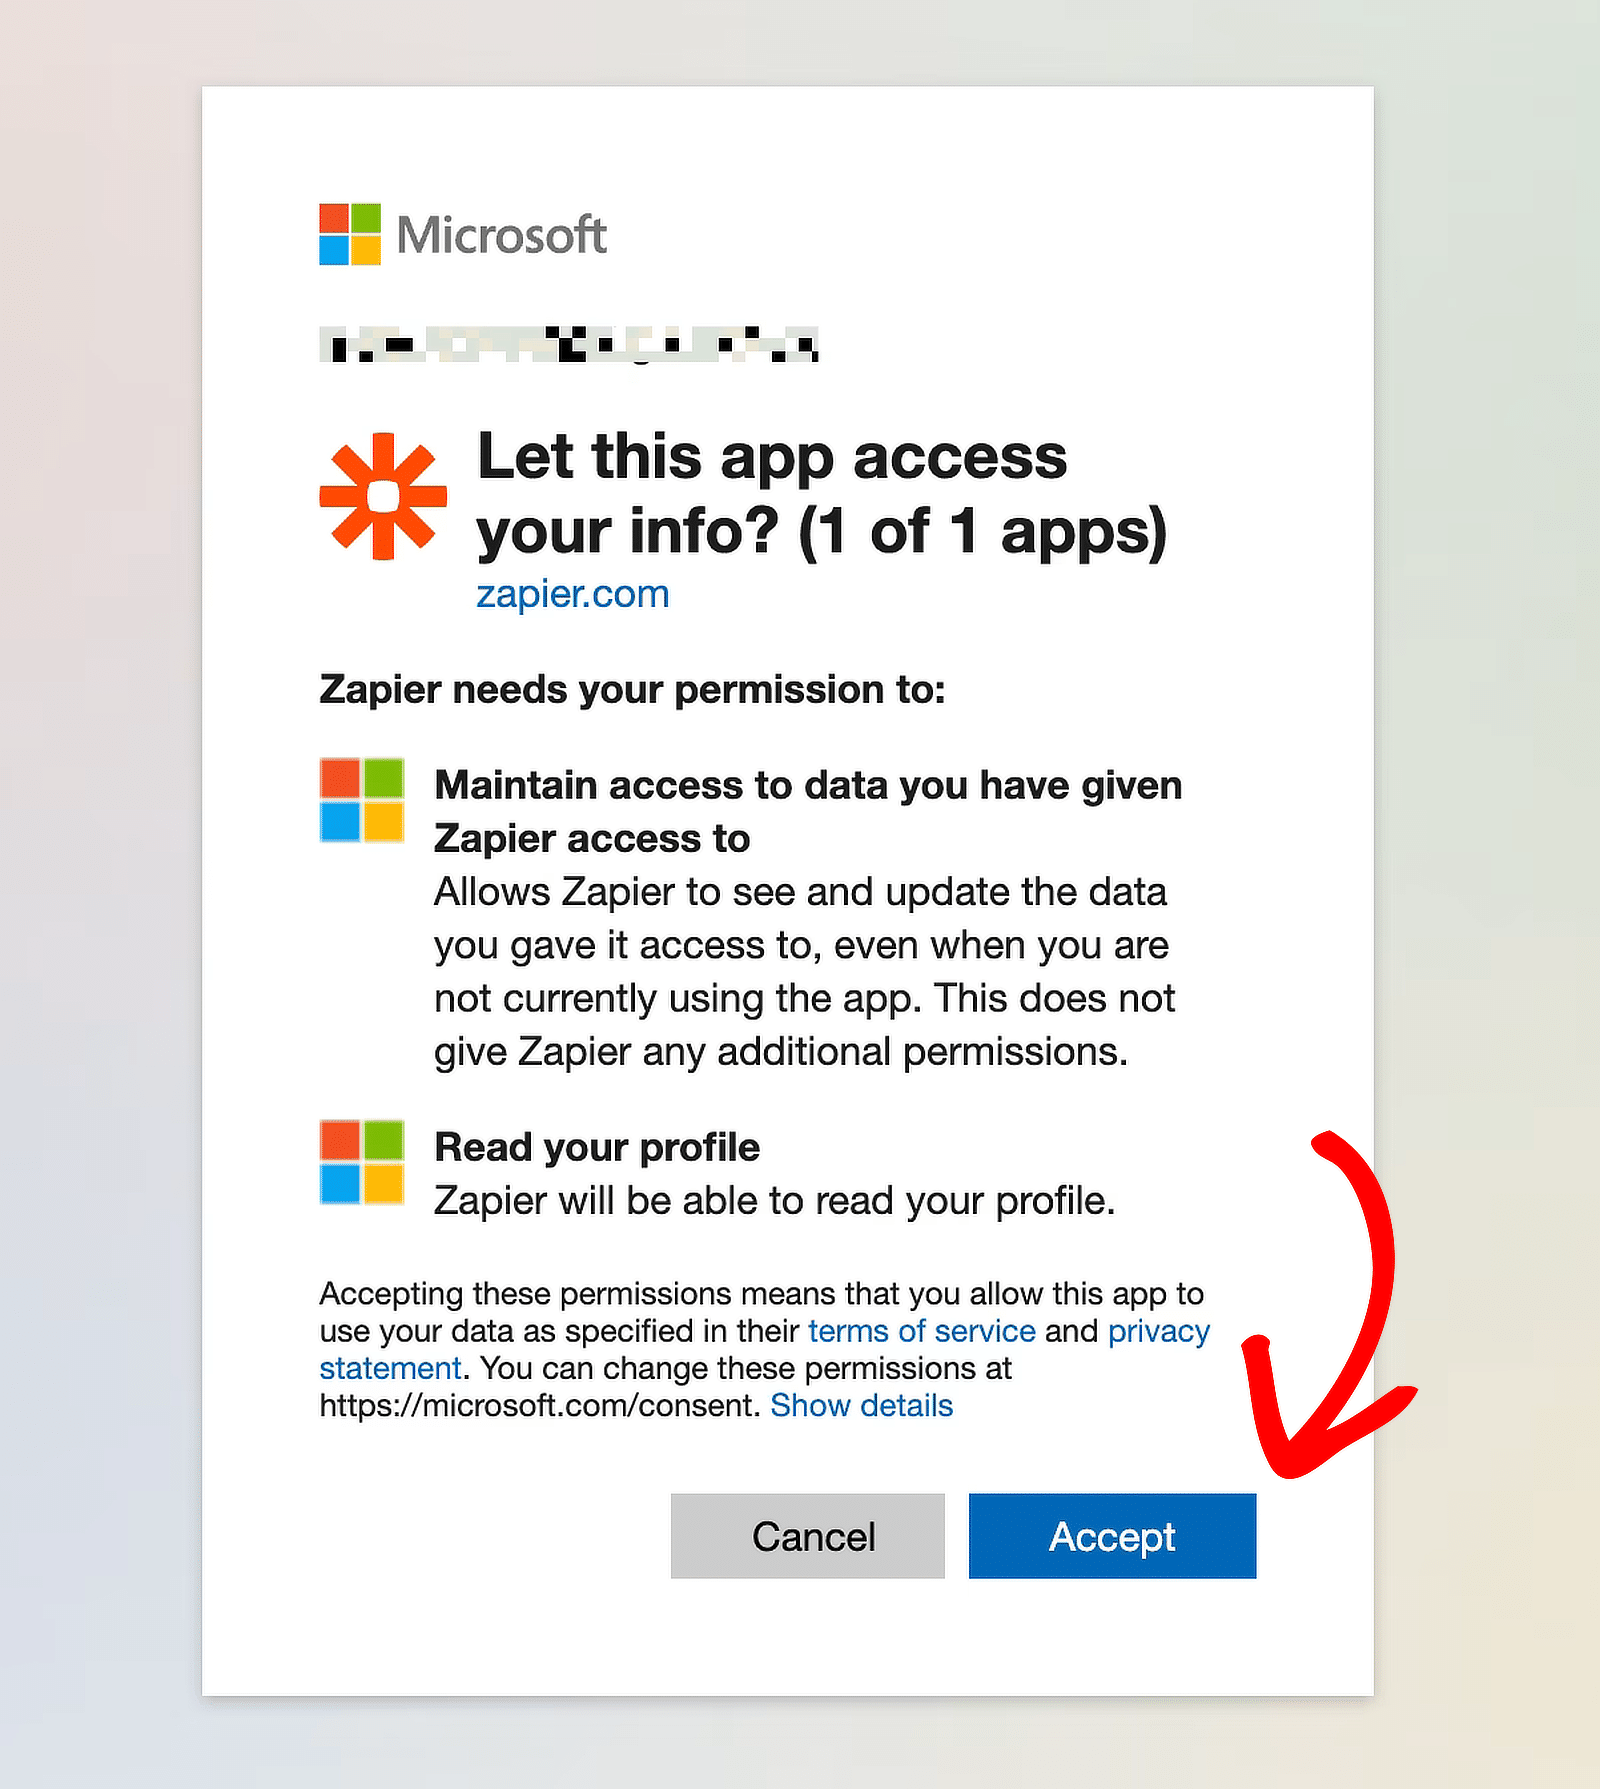
Zapier will request permission to access Microsoft Teams. Click on the Accept button to proceed with creating your action event.
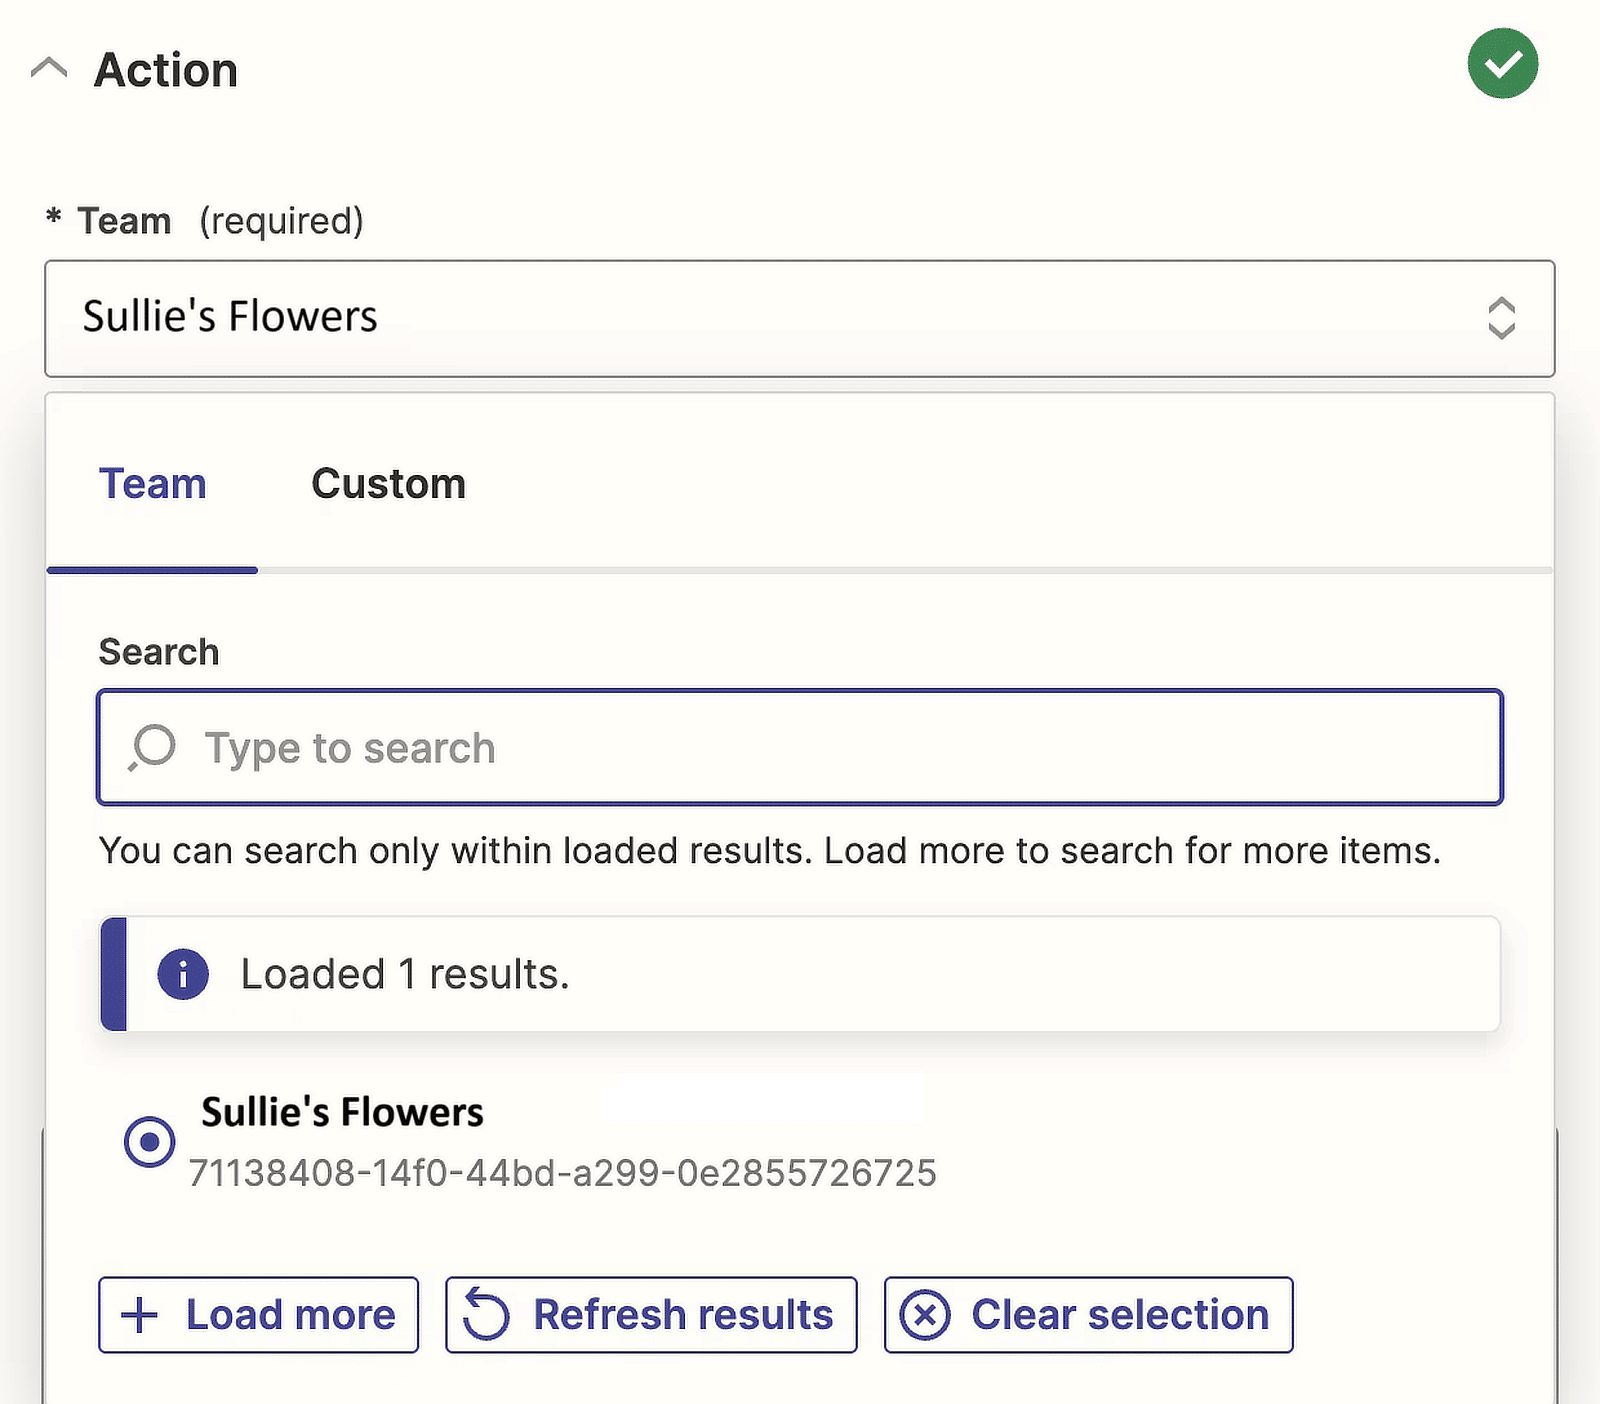
Your Teams account will now be selected in the dropdown menu. Click Continue and then choose your channel in the dropdown under Team.
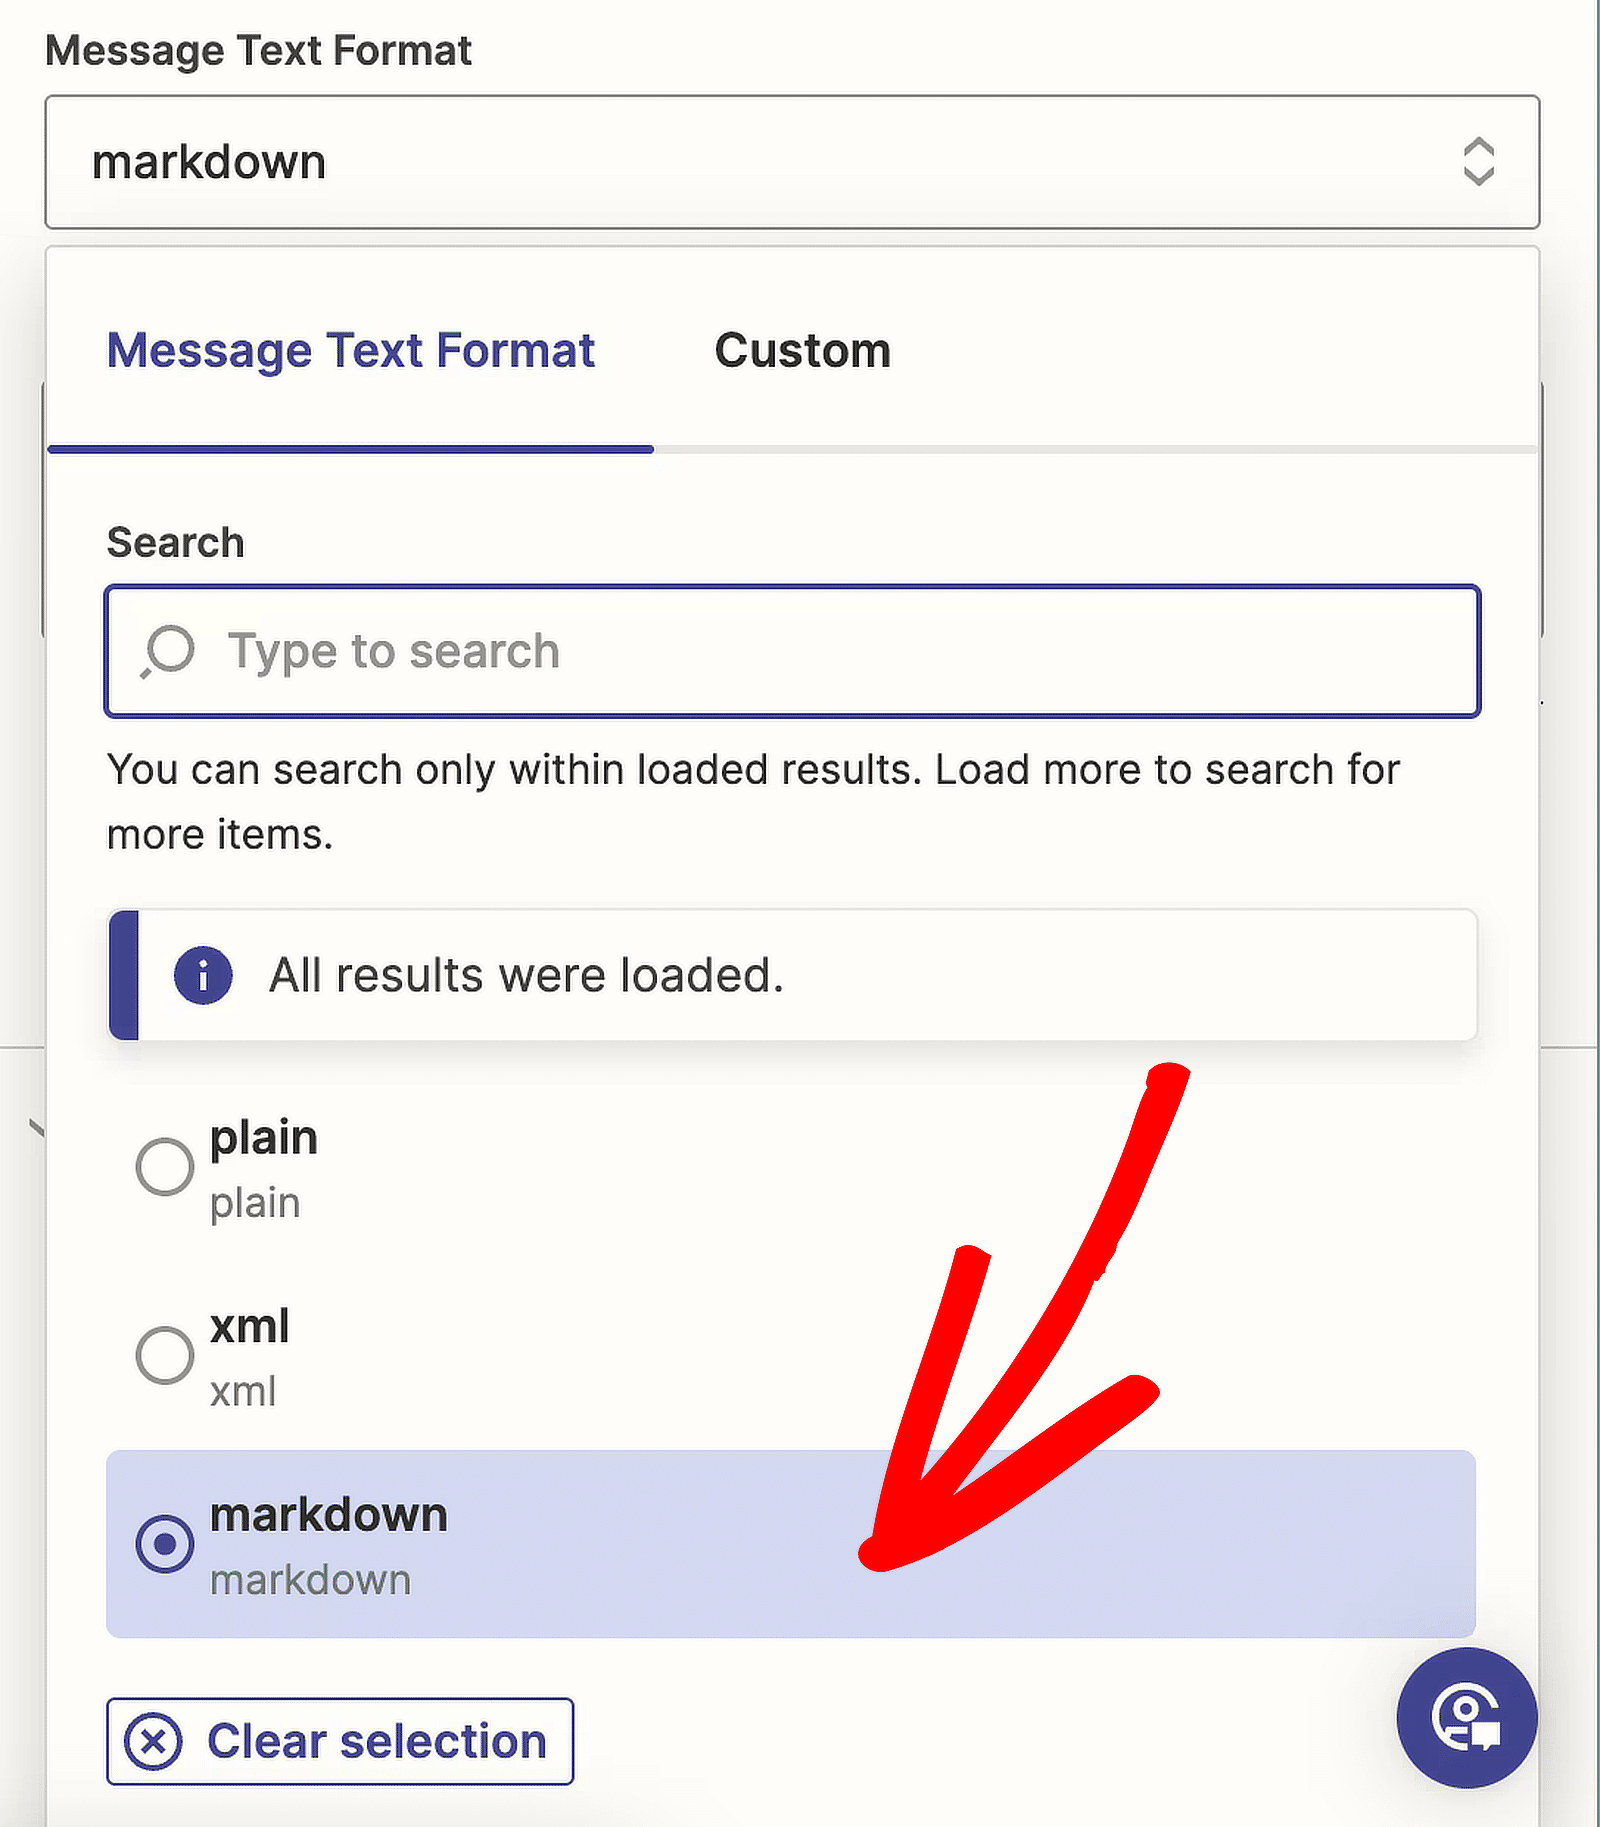
Zapier will now give you the choice between Plain, XML, and Markdown for the Message Text Format.
Since I want to bold and hyperlink the text, I will choose the Markdown option, but pick the one that works best for you.
It’s now time to change the text of our message. To start setting up your message, click in the Message Text field.
We also want some information from the form submission to appear in our message so we can send the most recent submissions to our channel.
If you scroll down, you can see all the data options that Zapier found when it tested the WPForms trigger. You can also choose answers to specific questions.
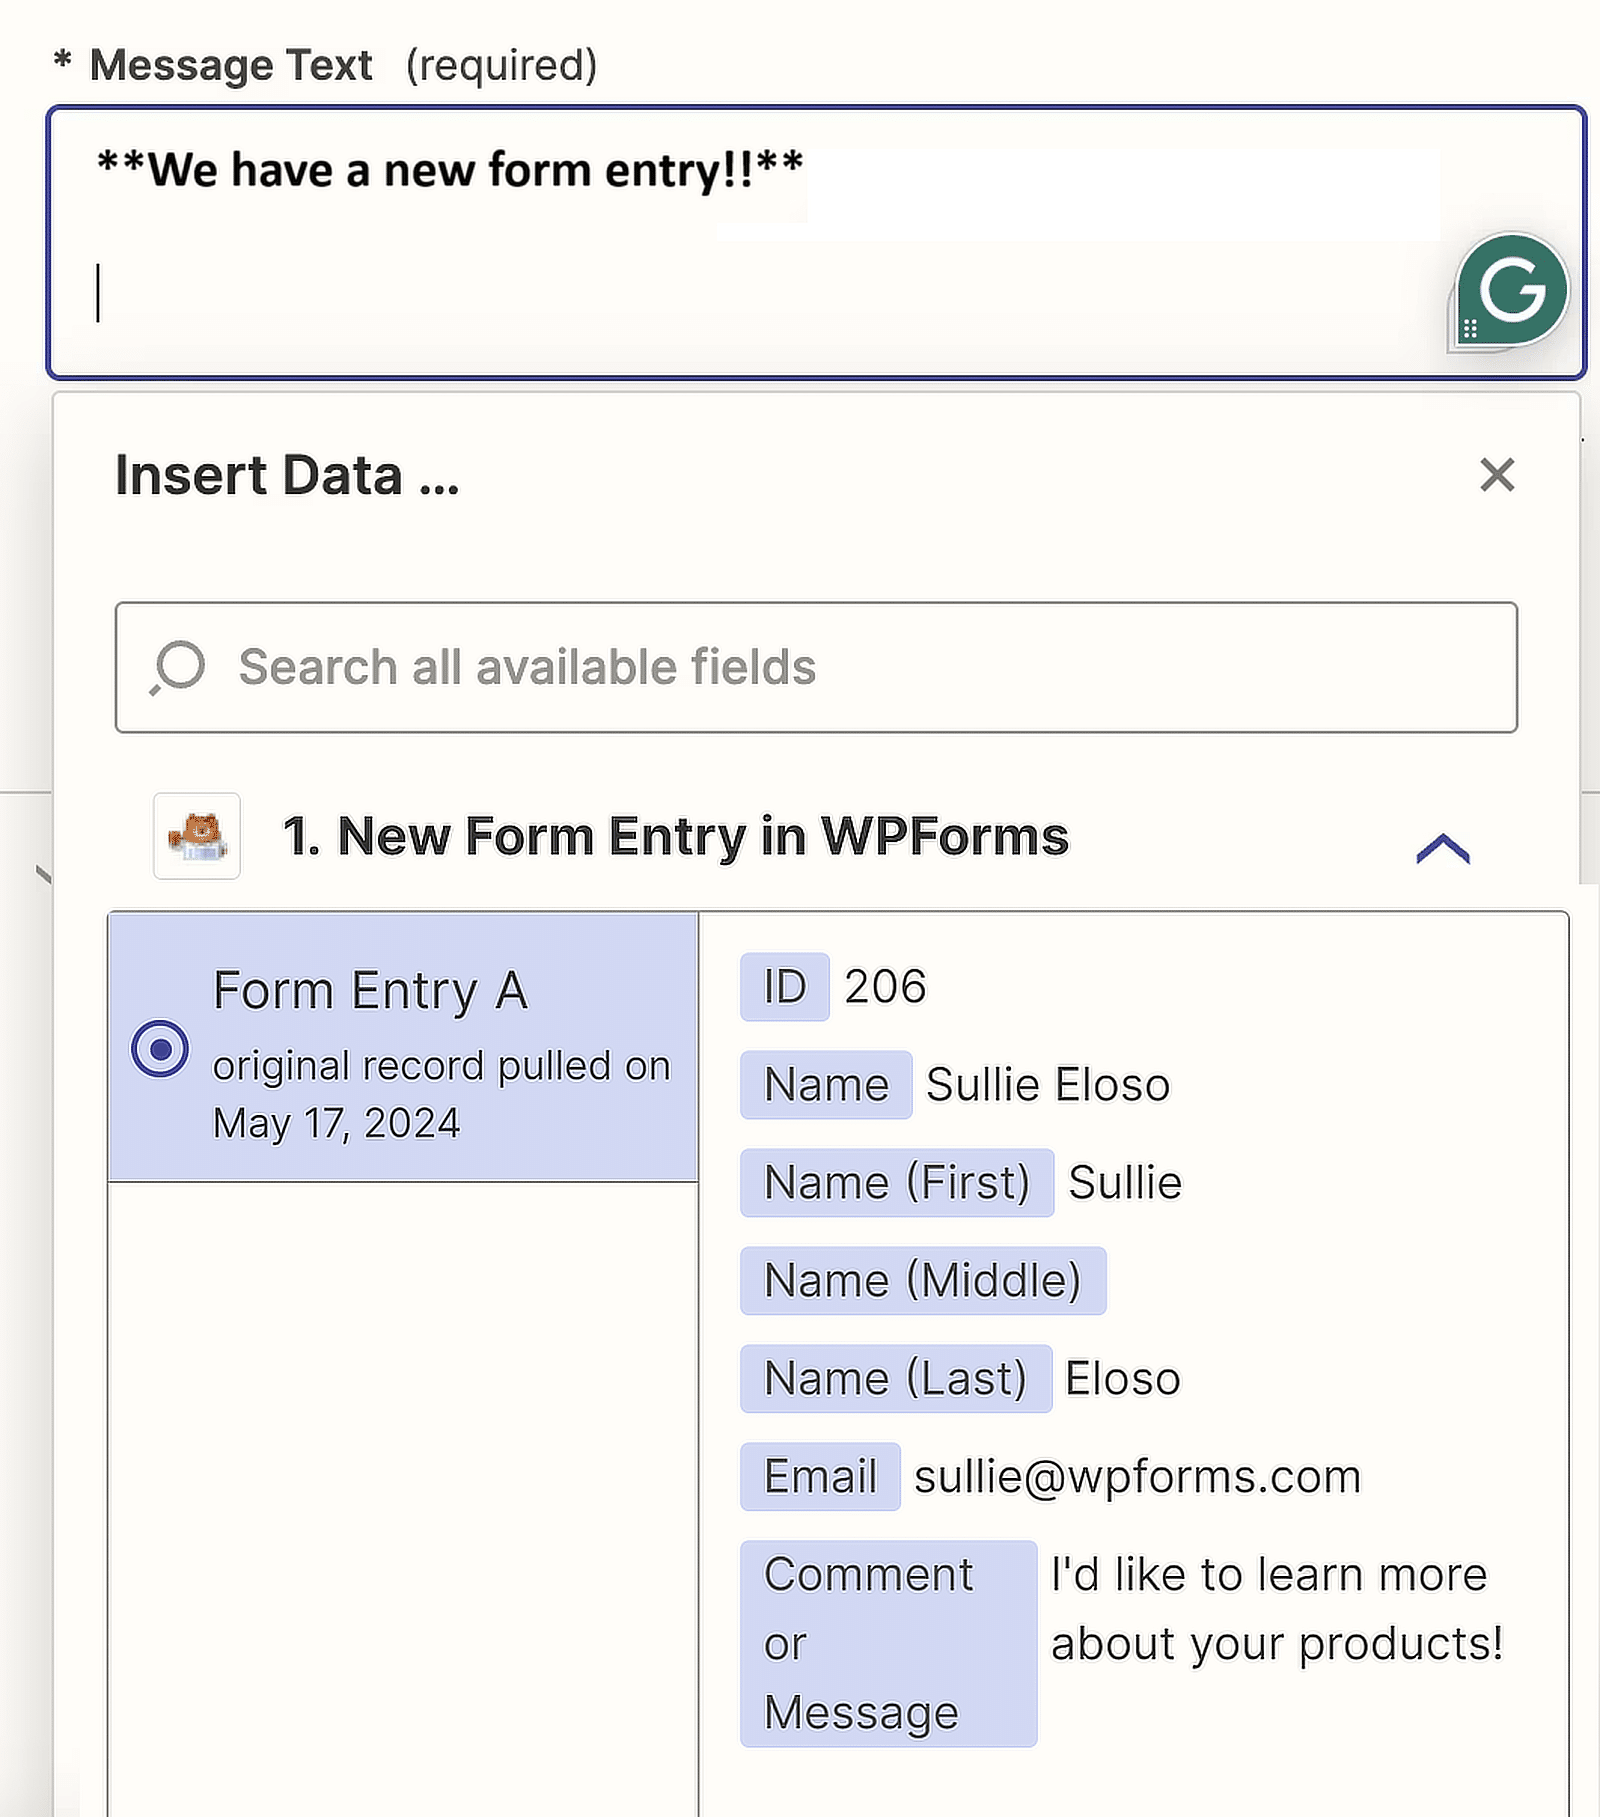
When you’re done with this step, click Continue. To ensure everything is working properly, click on the Test step button.
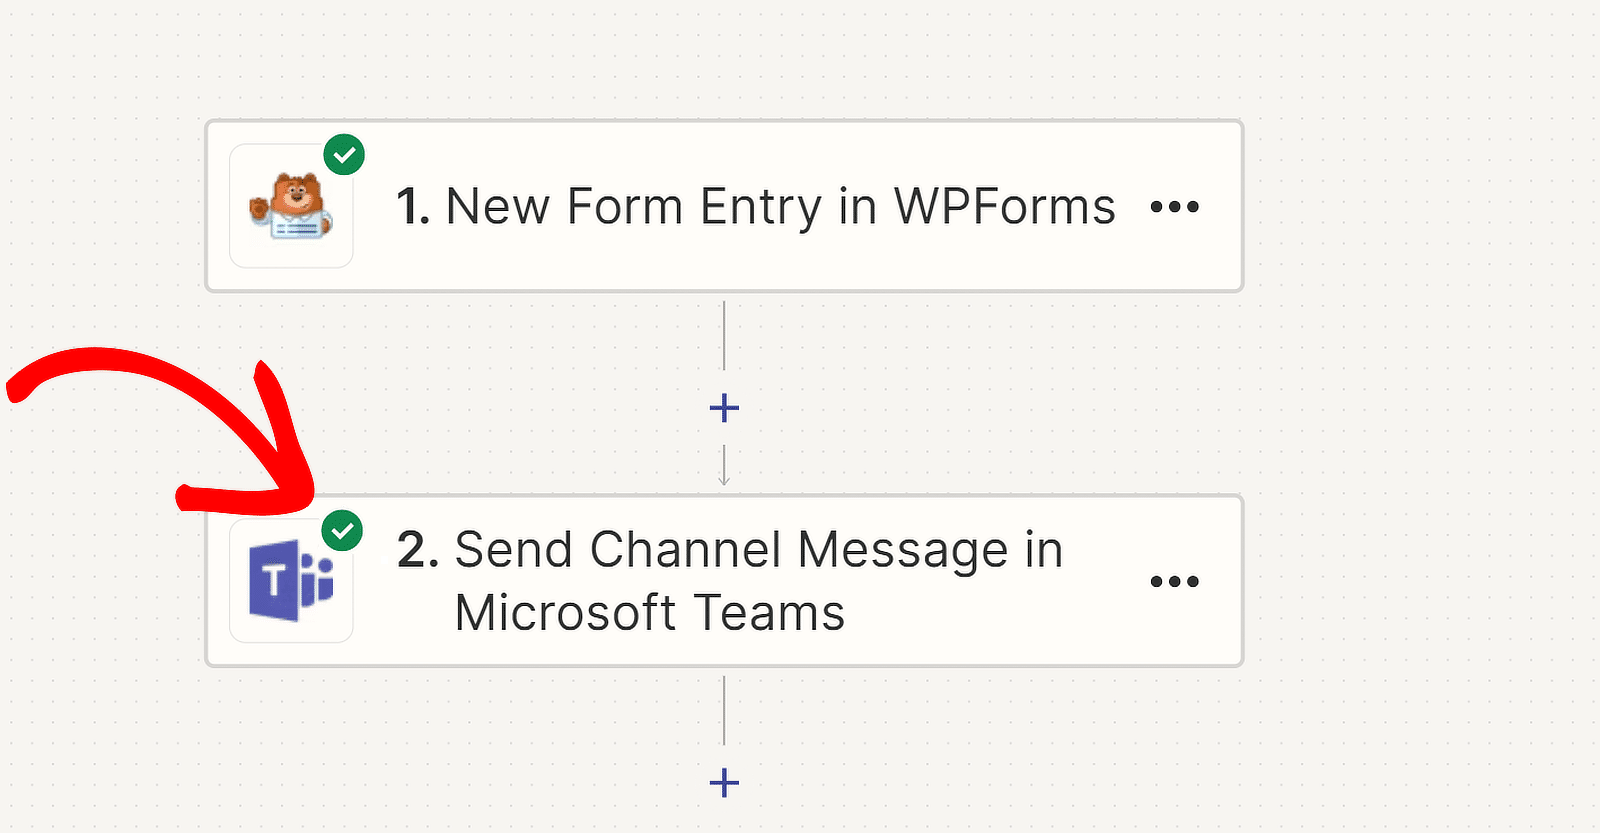
If everything goes smoothly, a green check should appear in the Zap editor dashboard before Send Channel Message in Microsoft Teams.
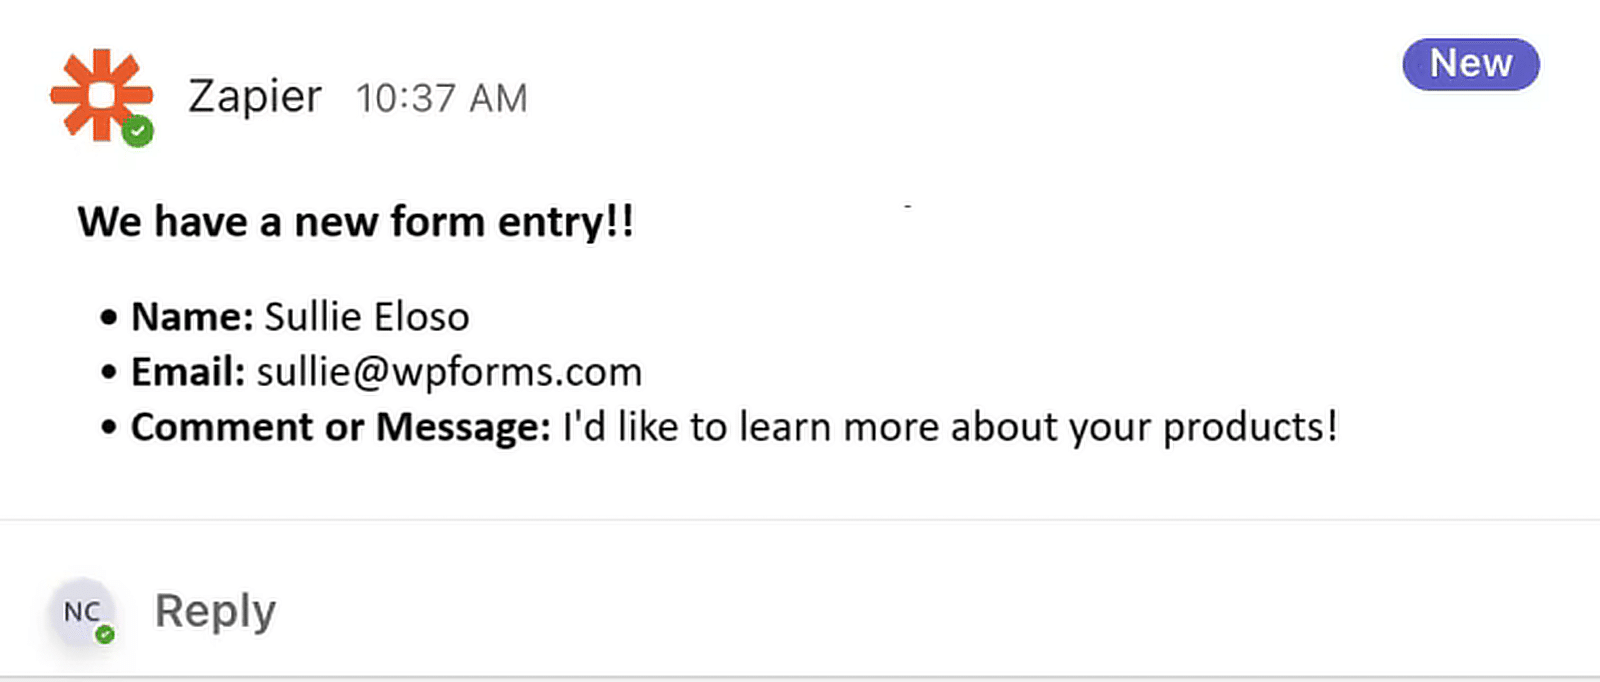
You’ll also receive the test entry in Microsoft Teams in the same channel you selected to get the alert. This is how our message looks:
And there you have it! You have successfully connected WPForms with Microsoft Teams using Zapier. Enjoy!
FAQs about How to Get Microsoft Teams Alerts from Your WordPress Forms
Receiving Microsoft Teams messages when people submit a form is a popular topic among readers. Here are answers to some common queries about it.
How do I get notifications for a form setup in my team’s channel?
To get notifications for form submissions in your Microsoft Teams channel, use WPForms Pro with the Zapier Addon. First, create your form with WPForms.
Then, set up a Zap in Zapier to connect WPForms to Microsoft Teams, creating a trigger action that sends a notification to your Teams channel whenever the form is submitted.
Can I get Microsoft Teams alerts for partial entries & leads?
Yes, you can receive Microsoft Teams alerts for partial entries and leads. WPForms Pro, combined with the Zapier Addon, allows you to set up a trigger in Zapier.
This trigger can send notifications to Microsoft Teams for partial form submissions, helping you track leads in real time.
Is there a way to send form responses to Microsoft Teams?
You can send form responses directly to Microsoft Teams. By using WPForms Pro and the Zapier Addon, you can create a Zap that connects WPForms with Microsoft Teams.
This setup will automatically send the form responses to your Teams channel as soon as they are submitted.
How do I get notified on Microsoft Teams?
To receive notifications on Microsoft Teams, start by installing WPForms Pro and the Zapier Addon.
Create a Zap that links WPForms to Microsoft Teams, setting up a trigger action that sends notifications to your Teams channel when a form is submitted.
Next, Learn About More Zapier + WPForms Integrations
Check out this guide for step-by-step instructions on how to set up SMS notifications for WordPress forms, or follow these steps if you want to create a Notion form in WordPress.
Create Your WordPress Form Now
Ready to build your form? Get started today with the easiest WordPress form builder plugin. WPForms Pro includes lots of free templates and offers a 14-day money-back guarantee.
If this article helped you out, please follow us on Facebook and Twitter for more free WordPress tutorials and guides.

