
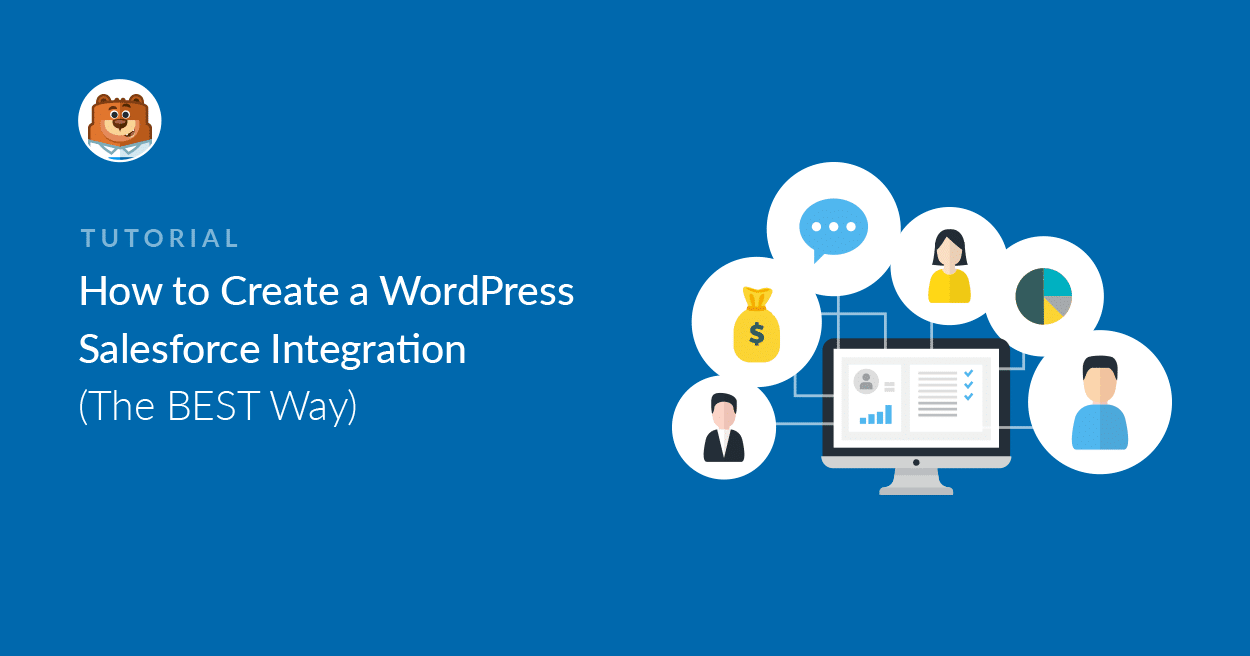
Do you want to create a WordPress Salesforce integration? Connecting WordPress to Salesforce lets you create leads, contacts, and accounts automatically from your forms.
In this article, we’ll show you the best way to connect your WordPress form to Salesforce. Our method is the easiest way to sync up your site with Salesforce.
Create Your WordPress Salesforce Form Now
Does Salesforce Integrate with WordPress?
Absolutely. You can integrate Salesforce with WordPress to automatically create objects when your forms are submitted.
In this step-by-step guide, we’re going to show you how to integrate Salesforce and WordPress with the WPForms Salesforce addon.

WPForms works perfectly as a WordPress Salesforce form plugin because it lets you connect your forms to your Salesforce database. You don’t need to pay for a developer to use it because we’re going to show you how to quickly set up the connection yourself.
Let’s get started!
How to Create a WordPress Salesforce Integration
Here’s a table of contents so you can jump to the section you’re looking for in this tutorial:
In This Article
This article is aimed at Salesforce users only. If you’re looking for a way to integrate Pardot with WordPress, we have a separate guide on how to create a custom Pardot form in WordPress that you can switch to.
OK, we’re ready to get started with Salesforce!
Step 1: Check Your Salesforce Version
Before we start, let’s check that your Salesforce account has API access. Quickly checking this now will avoid any issues later on.
API access is only available on these Salesforce plans:
- Enterprise Edition
- Developer Edition
- Unlimited Edition
- Performance Edition
To check your Salesforce edition, log in to Salesforce now. Your edition will be displayed in the title area of your browser tab like this:

If you can’t see the edition, there’s another way to check.
First, if you’re in the Lightning Experience, click your profile icon and then click Switch to Salesforce Classic.

Next, go ahead and click Setup at the top.

Now expand Company Profile, then click Company Information.

Your Salesforce edition is listed towards the bottom of this page on the right.

If you’re not using one of the editions that we mentioned at the start, now is the perfect time to reach out to Salesforce to change it.
If you’re already on an edition with API access, we can move on to the next step. You can keep the Salesforce site open in a tab, so it’s easy to switch back to.
Step 2: Install the WPForms Plugin
Now we’re ready to install and activate the WPForms plugin so we can set up our connection to Salesforce.
Here’s a helpful step-by-step guide on how to install a WordPress plugin if you need a little help getting WPForms installed on your website.
Next, you’ll want to install and activate the Salesforce addon for WPForms. In the WordPress dashboard, click WPForms » Addons in the sidebar.

And then install the Salesforce addon by clicking this button:

Great! We’re all set.
Let’s connect WPForms to Salesforce now. Keep the WordPress tab open to make it easy to switch back to WPForms as we move through the next step.
Step 3. Set Up Your Salesforce WordPress Integration
In this step, we’ll set up a Salesforce app. We need an app so that WPForms can make a connection to our site.
To start, log in to your Salesforce account if you haven’t done that already. You’ll want to switch to the Salesforce Classic layout if you haven’t done that yet, too.
When the Classic screen loads, click Setup in the top navigation bar.
Next, you’ll need to scroll down and look for the Build menu item on the left hand side. Click Create to expand the list, and then click the Apps link underneath it.

Now we’re going to scroll down to the Connected Apps section of the page. Go ahead and click the New button.

We’re ready to make our app in the New Connected App screen. There are 2 fields to fill in first:
- In Connected App Name, type in a name for your app. You can type anything that makes sense to you. When you’re done, Salesforce will automatically copy your name to the API Name field.
- In Contact Email, type in your email address.

OK, that’s all we need to do, but stay on this screen for the next step.
Step 4. Set Up Your Salesforce App Permissions
Now we need to set up the authentication for the new app we created.
Go ahead and scroll down to the API section and tick the Enable OAuth Settings checkbox.

Now we’re going to need to grab the WPForms callback URL so we can paste it into Salesforce.
Switch back to your WordPress site in a separate tab and click WPForms » Settings.

Now look to the tabs at the top and click Integrations.

You’ll need to scroll down the Integrations page until you find the Salesforce icon.
On this line, click the small arrow to the left of the logo to expand the box. You can go ahead and click the Add New Account button.

And here it is – the Callback URL. Click the copy icon here to copy it to your clipboard.

Switch back to your Salesforce tab now. Let’s paste that Callback URL into the OAuth settings box like this:

Great. Next, let’s scroll down a little to Selected OAuth Scopes and look for these 2 items:
- Manage user data via APIs (api)
- Perform requests at any time (refresh_token, offline_access)
Use the arrows on the right to add those 2 permissions to the Selected OAuth Scopes box on the right-hand side.
Here’s a quick video to show how this works:

After you’ve added those permissions, scroll down and uncheck the option that says Require Proof Key for Code Exchange (PKCE) Extension for Supported Authorization Flows.
This checkbox is enabled by default, but you won’t be able to authorize your connection if you don’t uncheck it first.

All set? Great. Now you can click Save at the bottom of this screen.
Salesforce will show you a message now to confirm that it’s setting your app up in the background.
We recommend that you wait at least 10 minutes before moving on to Step 4. If you try to race ahead, you’ll see an error that looks like this:
error=invalid_client_id&error_description=client%20identifier%20invalid
Don’t worry! This error just means that your connection hasn’t been set up in Salesforce. It’s best to wait a few more minutes before trying again.
Step 5. Connect WordPress to Salesforce
Great! Now we’ve waited for 10 minutes, we can go ahead and copy the API keys into WordPress.
Just like before, you’ll want to have Salesforce and WPForms open in different tabs.
Follow these 2 steps to copy the keys:
- In your Salesforce browser tab, press the Copy button next to Consumer Key. Switch to the WPForms tab and paste the key in.
- Switch back to your Salesforce tab and look to the right. Next to Secret Key, press Click to reveal. Copy the key, then switch back to WPForms and paste that in too.
That’s everything done. You can click Connect to Salesforce.

You may need to log in to Salesforce again here. Once you’ve one that, click the blue Allow button.

And that’s it! Your Salesforce account is connected to WordPress.
You can see that we have a success message in WPForms at the top of the screen now:

And we have a connected account on the Integrations page too!

You now have the WPForms Salesforce integration ready! Now let’s make the form.
Step 6. Create Your Salesforce WordPress Form
Now we have our Salesforce WordPress integration set up, we’re ready to send data from a form to Salesforce.
If you don’t already have a contact form on your site, jump over to this guide on how to create a simple contact form. Come back to this page when you have your form set up the way you want it.
WPForms lets you connect any form to Salesforce. And each form can create a different object. You can create:
- Accounts
- Campaigns
- Cases
- Contacts
- Leads
- Opportunities
- Products
In this example, we’re going to create a lead from the contact form we made.
Start in the form builder and click Marketing on the left.

From here, click Salesforce. Then click Add New Connection.

WPForms will ask you to give your connection a name. This will appear in the form builder so you can easily identify it later.

Now select the Salesforce account you set up earlier from the first dropdown. In the second one, let’s select Lead.

Underneath, we’re going to map the fields on the contact form to the fields in the leads area of our Salesforce account.

You can stop here and save the form if you’d like to. But here’s another neat trick. We can use smart conditional logic to automatically filter the leads that get sent to Salesforce.
For example, on our form, we asked our visitors if they wanted to hear more about our product. If we enable conditional logic, we can choose to only send the lead to Salesforce if the visitor answered Yes.

That’s it. Just click Save at the top to save your progress.
We’re almost done!
Step 7: Publish Your Salesforce Form
The final step is the easiest of them all. You can publish your form without using any code.
This part takes just a few minutes.
At the top of the form builder, click Embed.

Now let’s click Create New Page.

Now type in a name for your new page here.

When you click the Let’s Go button, WPForms will automatically create a WordPress page with your form embedded in it. All we need to do now is press the blue Publish button to go live.

And we’re done! You can test the form now and check that everything’s working. When you submit the form entry, you’ll see the corresponding entry appear in Salesforce:

And that’s it! Your WordPress Salesforce integration is live.
Create Your WordPress Salesforce Form Now
Next, Save Your Form Entries
Do you want to view your form entries in WordPress as well? Saving your entries in the WordPress dashboard makes it easy to see how your lead capture forms are performing.
Check out this guide on how to save contact form entries in the WordPress database to quickly learn how this works.
Also, if you’re a HubSpot user, check out our post on integrating WPForms with HubSpot.
Ready to build your form? Get started today with the easiest WordPress form builder plugin. WPForms Pro includes free form templates and offers a 14-day money-back guarantee.
If this article helped you out, please follow us on Facebook and Twitter for more free WordPress tutorials and guides.


We have integrated our wp form to salesforce using the salesforce add on .We have a question with multiple values to be selected and the field type for this question in “multiselect picklist” in salesforce (Object we are mapping to is ‘Account’). If a person is selecting more than 1 value for the question, those entries are not creating records in salesforce. We would like to know if the salesforce add on supports “multiselect picklist” values and if not, is there a way to handle this issue?
Hey Susan – I apologize! We currently don’t have the multi-select picklist feature in Salesforce. I’ve added a vote to our feature request list and we’ll keep it on our radar as we plan out our roadmap for the future.
If you need any further help on this please feel welcome to reach out to our support team.
Have a good one. 🙂
Hello! Any updates on multi-select picklists for SF? It seems that it still doesn’t work with more than one value selected
Hi Katia,
In order to make sure we answer your question as thoroughly as possible, could you please contact our team with some additional details about what you’re looking to do?
Thanks! 🙂
Please, I really need to be able to build custom form that connect to my custom objects Salesforce objects. Not just the standard sets…
Accounts
Cases
Leads
Contacts
Products
Campaigns
Etc..
When will this be made available to Elite licence.
Hey Matthew – I totally understand how useful it would be to connect to custom objects in Salesforce, however, I’m afraid we can’t provide any ETA on this at the moment. I have gone ahead and added your vote to keep it on our radar as we plan out our roadmap for the future.
Thanks for your patience.
After the salesforce integration, we would like to have a lead Id in the response from salesforce. Is there any provision do you have so that after submission of the form and lead/package created in the salesforce, we can get the lead/package Id of the created lead.
Hey Vaibhav- Great question!
Currently, our Salesforce addon does not have the feature to receive the information, it can only send the data to the Salesforce application. I do agree it would be super helpful, and we’ll keep it on our radar as we plan out our roadmap in the future.
I hope this helps! If you have any questions, please feel free to get in touch with our team.
Will the WPForms add on handle bi-directional integration (ie. pulling data from Salesforce to pre-populate the WordPress form)?
Hi TR- Currently we do not have an inbuilt feature to populate data from the secondary applications to the form. I do agree it would be an useful feature so I have added your vote to the feature request list for future enhancements 🙂
We appreciate and thank you for the suggestion here!
I have a WPForm that creates a lead in SalesForce. Does the WPForm plugin not sync checkbox values to checkbox fields in SalesForce? I’m able to pass through all of my text field values and picklist field values but none of the checklist values pass through to the lead record.
Hi Matt! It seems that you’ve already reached out to us directly at our contact page, so please continue with us there 🙂
Thanks!
I have my form sync’d to Salesforce lead, however, I have more than one lead record type. How can I send the form fields to a specific lead type ?
Hi Rachelle!
At this time our Salesforce addon can only map your forms to different Salesforce objects (ie. Campaign object, Leads object, etc.). I do agree it would be super helpful, though. I’ve made a note of the feature request and we’ll keep it on our radar as we plan out our roadmap for the future.
I apologize that we can’t provide what you’re looking for right now, but I appreciate the suggestion and any other details you may be able to provide! It’s always helpful to get insights from our users.
If you have any further questions about this, please contact us.
Hi, we have connected the SF app to WP forms but when we try to connect the Form to SF in the Marketing > SF section, we select the account and then the SF Object (Lead) but we get this error message “Something went wrong while performing an AJAX request.” Any ideas?
Hey — We are sorry for any trouble. The WPForms Salesforce addon requires access to the Salesforce REST API, and this error message typically indicates that you’re using the Professional Edition of Salesforce that does not have API access.
I’d recommend checking the version of Salesforce you’re using because currenly, Salesforce only provides API support for the Enterprise, Unlimited, Performance, or Developer editions.
That said, in order to make sure we answer your question as thoroughly as possible and to avoid any confusion, could you please contact our team with some additional details about the issue you are facing?
If you have a WPForms license, you have access to our email support, so please submit a support ticket.
Thanks.
I’ve just spent a day trying to make this work, do you think it might be worth mentioning in your documentation?
Hey Ian, we are sorry for any inconvenience that might have been caused as a result of this. I’ve shared the feedback with our team on the same to include this info in our documentation. Thanks.
Just encountered the same issue. Not only does WPForms require an Enterprise, Unlimited, Performance, or Developer edition Salesforce account, it also requires Web Services API Add-on for *each* seat. That just ballooned the cost for us…
Hi Aaron,
Sorry to hear that! Please know that API support in the Professional Edition from Salesforce at an additional cost. The WPForms Salesforce addon requires access to the Salesforce REST API, and the error message typically indicates that you’re using the Professional Edition of Salesforce that does not have API access.
Hello,
We are currently using the WPForms and Salesforce Integration. One of the fields on our form allows the submitter to select the State they are located in. In the Salesforce mappings in WPForms, I see the ability to map to the address field in Salesforce, however I do not see the specific field for the State field. Is there a way to map to the State “subfield”?
Hi John,
In order to make sure we answer your question as thoroughly as possible, could you please contact our team with some additional details about what you’re looking to do?
Thanks! 🙂
Hi my friend,
You find the solution for case? The state?
Hey Fcarneiro – Could you please contact our support team with some additional details about what you’re looking to do?
Thanks!
We have a WP form that does not ask for Last Name. This is a required field in order to create a Lead in SF. We noticed that “Unknown” is getting stamped into the Last Name field when a lead gets created (that didn’t provide a last name). Is the WP integration sending over Last Name = “Unknown”?
Hey Kim — We are sorry for any trouble. In order to make sure we answer your question as thoroughly as possible, could you please contact our team with some additional details?
If you have a WPForms license, you have access to our email support, so please submit a support ticket. Otherwise, we provide limited complimentary support in the WPForms Lite WordPress.org support forum.
Thanks.
I want to ask about the update, is it possible to add the record to the custom object? or just in the standard objects provided by the salesforce.
Hi Shikhar,
Unfortunately, we still do not have this feature added to integrate Custom made objects with WPForms and Salesforce. I have gone ahead and added your vote to the enhancement list.
Thank you for sharing your interest here 🙂
It feels like this add-on is not designed by people who have had to use Salesforce… the add-on unfortunately creates duplicates if contact/lead/account etc already exists (on a high-traffic site or a site using the forms for employ submission to Salesforce), this becomes bad for data-integrity and can balloon your costs.
Hey Jacquice, we are sorry for any trouble. In order to make sure we answer your question as thoroughly as possible and avoid any confusion.
Would you mind reaching out to us with additional details so that we can help you further on this case?
Thanks.
We are a statewide umbrella non-profit. We have upgraded WPForms to one that integrates with SF. The intent is that the contact data (name, address, phone etc) would automatically populate/update existing SF Account records. WP does not recognize the Account Name. One of two things happens: If we use SF object “account” SF rejects the form due to MALFORMED_ID… fields being mapped are not of the same type. If we use object “contact” the data is accepted but SF creates a new record with the individual as the “account” The Account Name field is a “standard” not “custom” field and WPForms Salesforce integration lists only custom fields. I’ve reached out to both WP and SF and so far can get no good answer.
Hi Jane,
Sorry to hear about the confusion you are facing here!
To help you with a through answer, would you mind writing to our support team with additional details of the complete workflow that your are looking for and we will be happy to assist.
Thanks,
It didnt work for me. I am getting the quote form sent to my email but nothing is mapping to my Saleforce. I have professional eddition.
i followed the saleforce instructions. installed the correct connection in wordpress forms for salesforce too.
Hey Lauren – We’d be happy to help! When you get a chance, please drop us a line in support so we can assist.
If you have a WPForms license, you have access to our email support, so please submit a support ticket so we can investigate the issue for you.
Thanks 🙂
Hello,
We have WP forms integrated with our Salesforce instance, and this creates a lead in SF once the form is submitted.
Unfortunately, it appears that there is an inconsistency in creating leads in SF.
It appears that, when UTM parameters are included in the URL (where the form resides), it creates leads only for some users, and not the others.
We observed that when UTM parameters are included in the URL , the form submission creates leads for users from US, Canada.
Whereas , the leads are not created for users of other region ,when the UTM parameter are included in the URL.
Thanks
Hey Rama – We’d be happy to help! When you get a chance, please drop us a line in support so we can assist.
If you have a WPForms license, you have access to our email support, so please submit a support ticket.
Otherwise, we provide limited complimentary support in the WPForms Lite WordPress.org support forum.
Thanks 🙂
Hei,
Is it possible to map customized object created in SF? Will you add this to your roadmap if the function is unavailable?
Hey Zhao – currently, we do not have a way to send field values to Salesforce Custom objects. We have this as a feature request and I will add your vote on that.
As a workaround, for custom objects, you can export the existing entries and import them to Salesforce. In case it helps, here’s a guide on importing CSV to Salesforce account.
Hope this helps. Thanks!
Does this integration work with Salesforce Gov’t & Public Sector CRM? We need to maintain appropriate compliance in our workplace doing business with the government.
Hi Paul,
Great question — currently WPForms has not been verified to be Salesforce government and Public sector compliant. WPForms stores all the form entries inside the WordPress database after submission and uses the Salesforce API to transfer this data. I would recommend getting in touch with Saleforce Public sector team directly and a security consultant to further advise about how to secure that data while it is in transit to Salesforce.
Thanks!