AI Summary
Guest post forms usually only collect titles and content, leaving you to manually format author information for every submission.
This creates inconsistent author sections and wastes hours reformatting guest blogger details like websites, social profiles, and bios.
Custom fields solve this by automatically collecting structured author data that displays professionally on every guest post.
This tutorial shows you how to add custom fields to guest post forms using WPForms and Advanced Custom Fields (ACF).
You’ll create forms that collect author details automatically and display them consistently on published posts, minus the hassle.
Start Accepting Guest Posts Today! 🙂
What Are Custom Fields?
Custom fields are extra fields that you use to collect and display information in WordPress. They’re sometimes called ‘post meta’ fields.
Your site likely has some custom fields already. For example, the All in One SEO plugin uses custom fields for the page meta description and meta title.
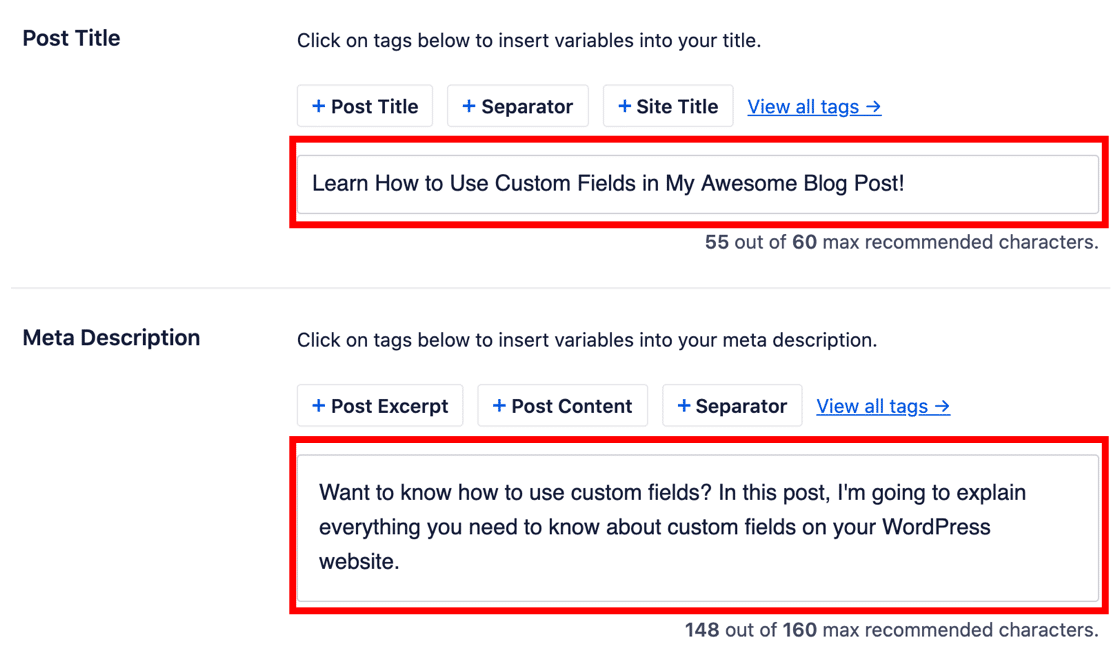
You can create your own custom fields to store extra information for any post, page, or custom post type. For example, if you’re writing a review, you could have another field for the rating out of ten.
You can then modify your post template to display your rating in the same place each time you publish a review. Custom fields are handy if you want to:
- Make custom layouts
- Add content to your RSS feed, like ads or brand logos
- Control the way WordPress works with automations.
Now we understand what custom fields are for, let’s create a guest post form with custom fields.
How to Use Custom Fields in WordPress Guest Posts
We’re going to edit important WordPress files later on in the tutorial. Before you start, I recommend that you use a backup plugin to back up your WordPress site. Once done, follow the steps below:
Step 1: Install the Required Plugins
For this tutorial, we’ll need to install 3 plugins:
- WPForms Pro: Creates the frontend guest post submission form
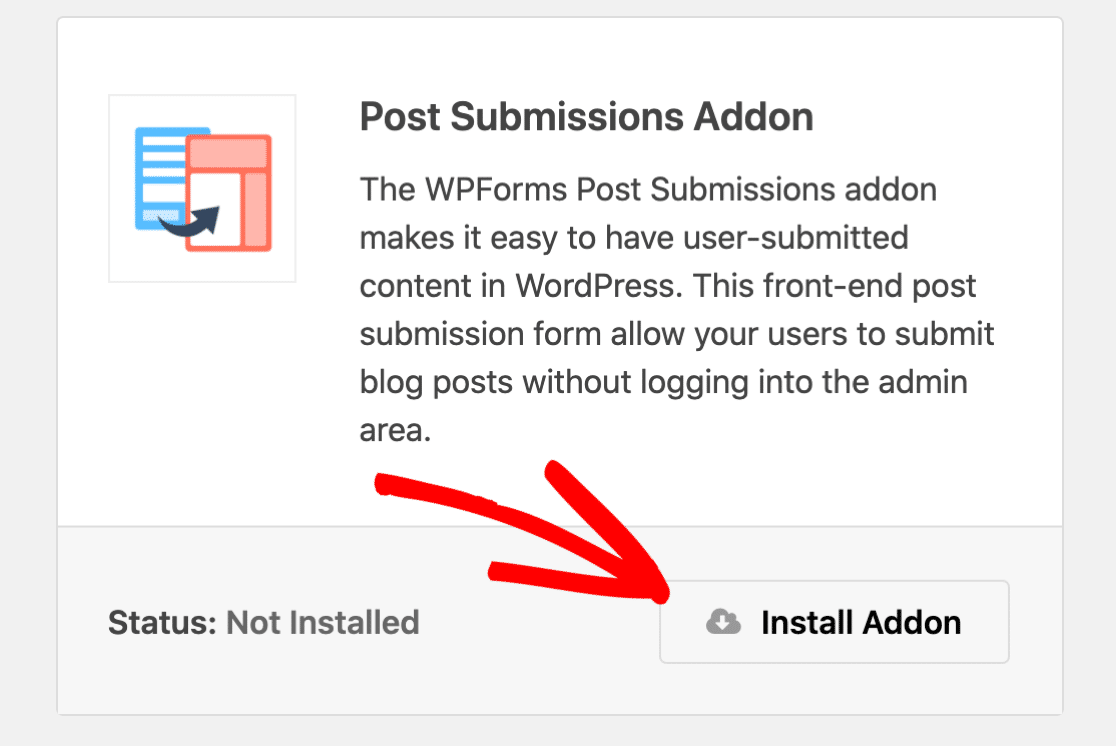
- Post Submissions Addon: Converts form submissions into published WordPress posts
- Advanced Custom Fields (ACF): Stores and displays custom author information
Start by installing and activating WPForms Pro. Once activated, navigate to WPForms » Addons in your WordPress dashboard.
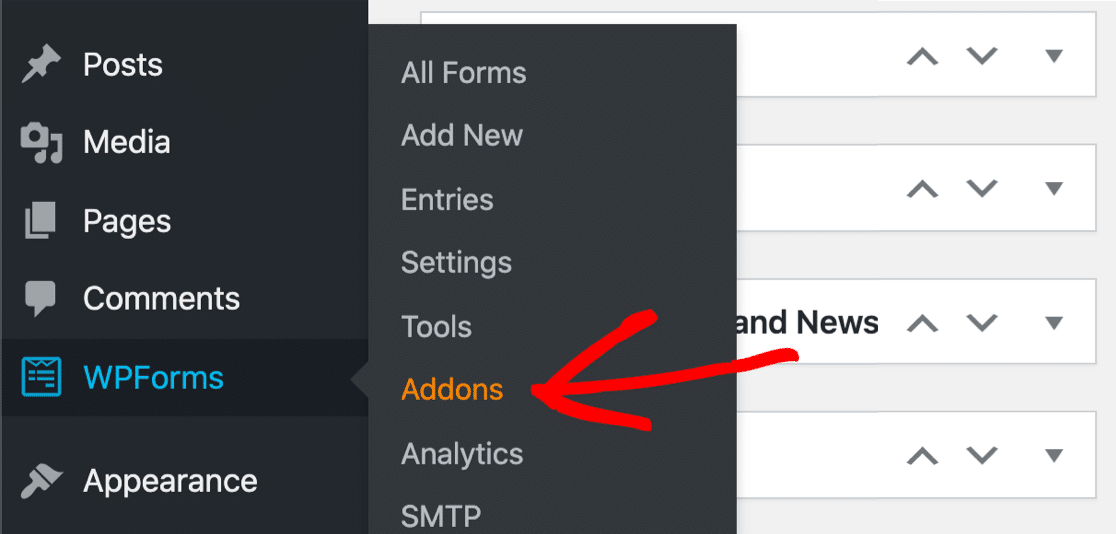
Find the Post Submissions addon and click Install Addon. This addon is what converts your form submissions into actual WordPress posts on your website.
Next, install the Advanced Custom Fields plugin. Go to Plugins » Add New in your WordPress dashboard.

Search for Advanced Custom Fields and click Install Now on the free version (the free version has all features needed for this tutorial).
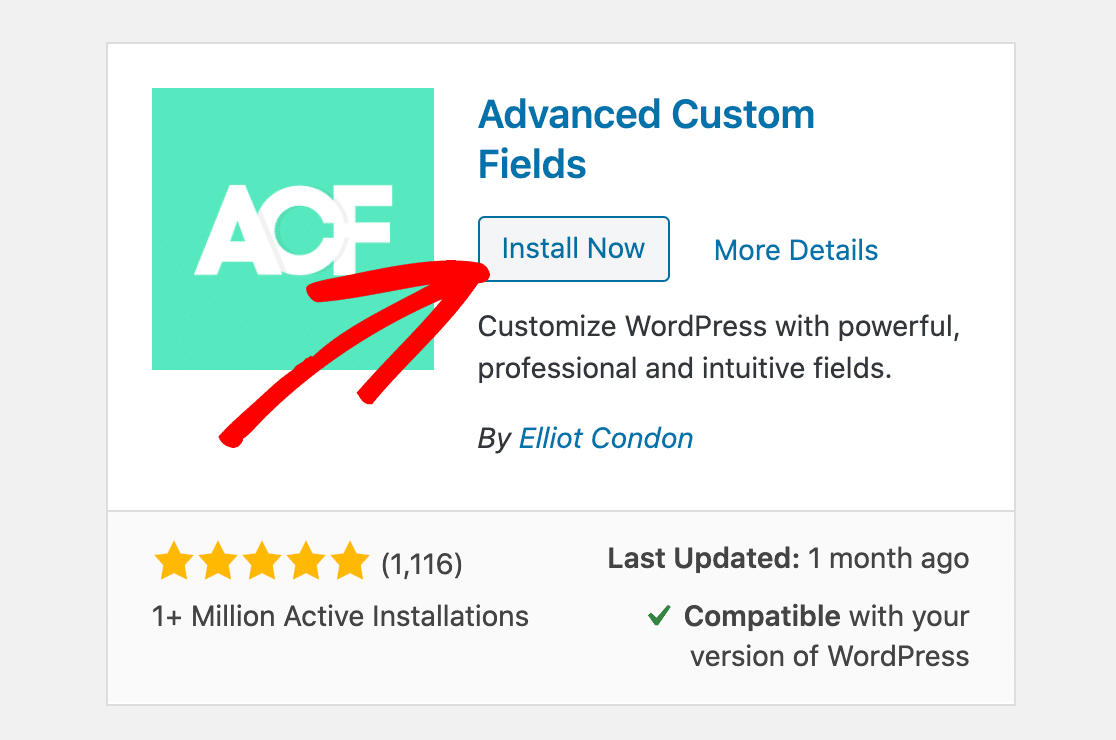
When the plugin’s installed, don’t forget to click Activate. Great! Now we have everything set up. Let’s move on and create our custom field.
Step 2: Create a Custom Field in ACF
Now you’ll create the custom fields that store additional guest author information.
These fields define what extra data you collect beyond the standard title and content, such as author websites, social profiles, or expertise areas.
In your WordPress sidebar, click Custom Fields » Add New to create a new field group.

Give your field group a descriptive name like “Guest Author Information” or “Guest Post Details.” This name is for internal organization only and won’t appear on your website frontend.

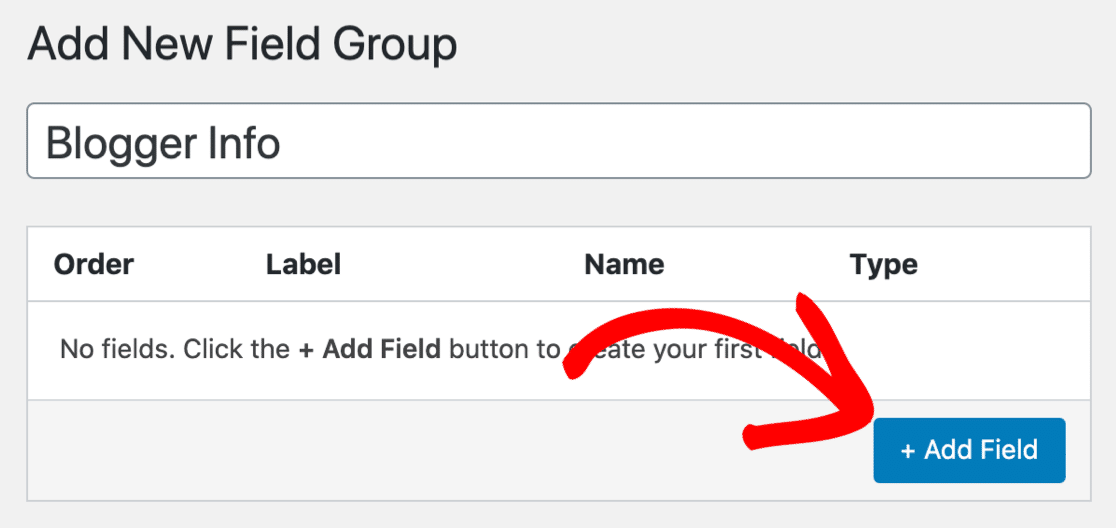
Now, click Add Field to start making your custom field.
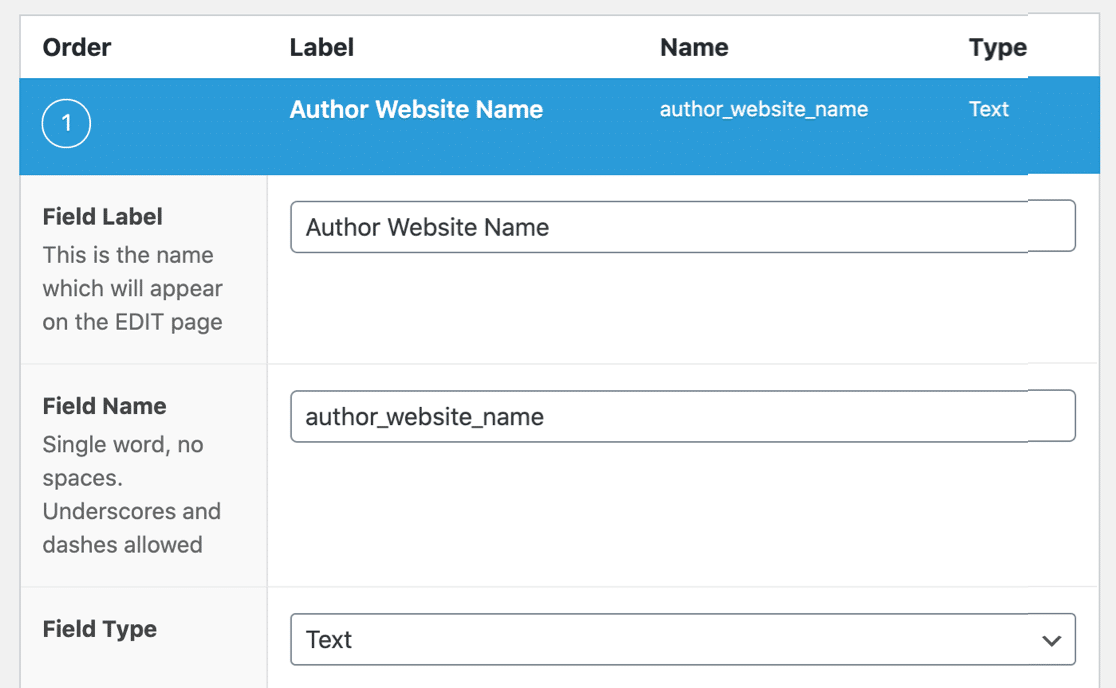
You’ll notice that some options drop down underneath. You don’t need to fill all of these out. Here are the 2 we’re going to use:
- Field Label – Give your new field a name that makes sense to you.
- Field Type – We’re going to use a simple text field, so we left this set to Text.
You’ll notice that the Field Name field will automatically be filled in for you.
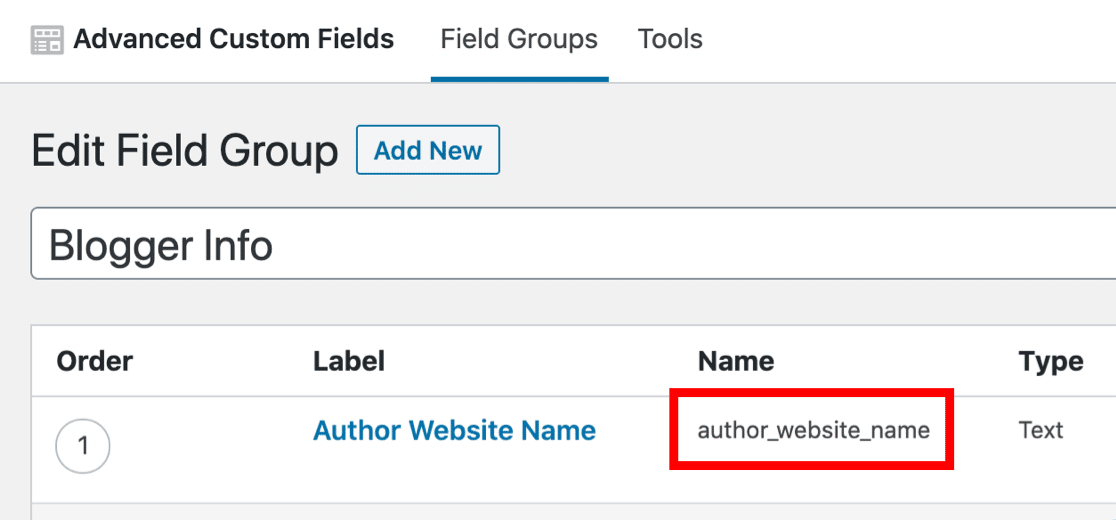
Go ahead and click Publish to save your new custom field. You can see here that the new field’s been saved. Note the Field Name – you’ll need that for the next step.
Now you’ll create the frontend form that guest bloggers use to submit their content. This form will collect both the standard post content and the custom field information you just created.
Step 3: Create Your Guest Post Form
In this step, we’re going to create a guest post submission form and add the new field to it so the guest blogger can fill it out.
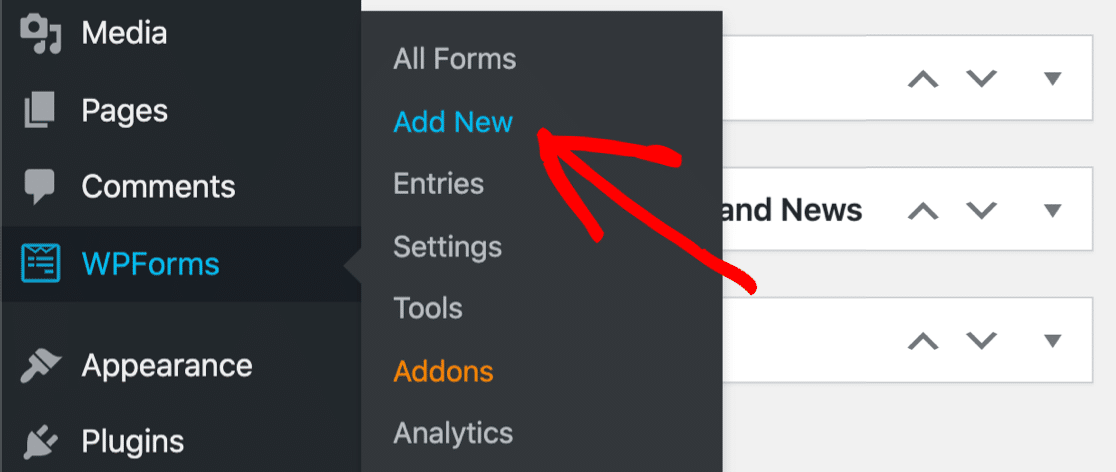
If you don’t already have a form for user submitted posts, start by clicking WPForms » Add New in the WordPress navigation bar.
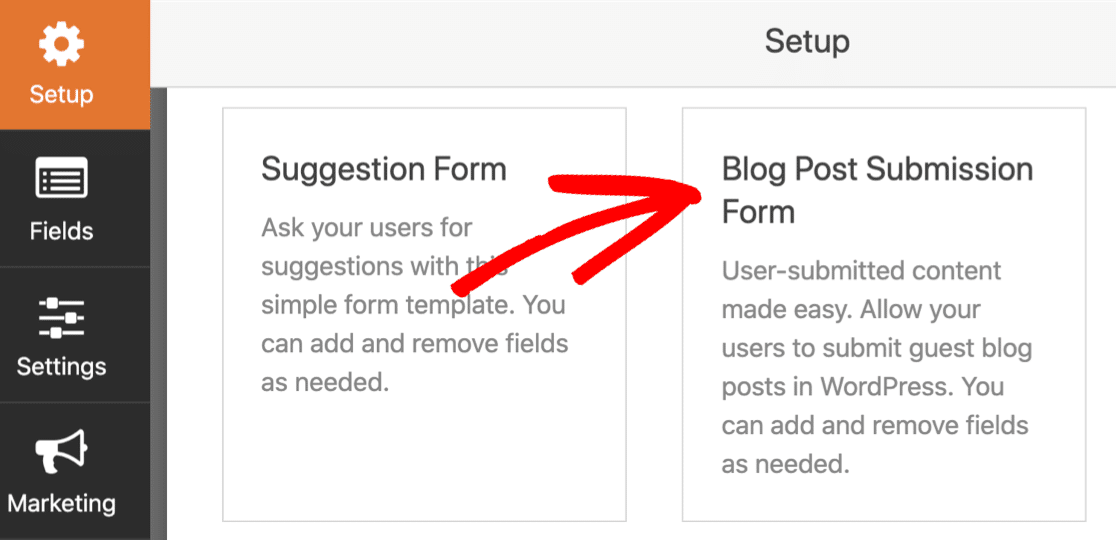
Look for the Blog Post Submission Form template and click Use Template. This pre-built template includes essential fields for guest post collection:
- Post title field
- Post content area (visual editor)
- Author name and email
- Featured image upload
- Post category selection
If you need to tweak the defaults, jump over to this guide on creating a frontend form for user submitted posts. When you have all the basics ready, come back to this tutorial.
Step 4: Add Custom Field to Guest Post Form
Now you have a user submitted post form, you’ll want to add the custom field we created in step 2.
Let’s drag a Single Line Text field from the left hand panel onto the form preview on the right. We’ll name this Website Name.
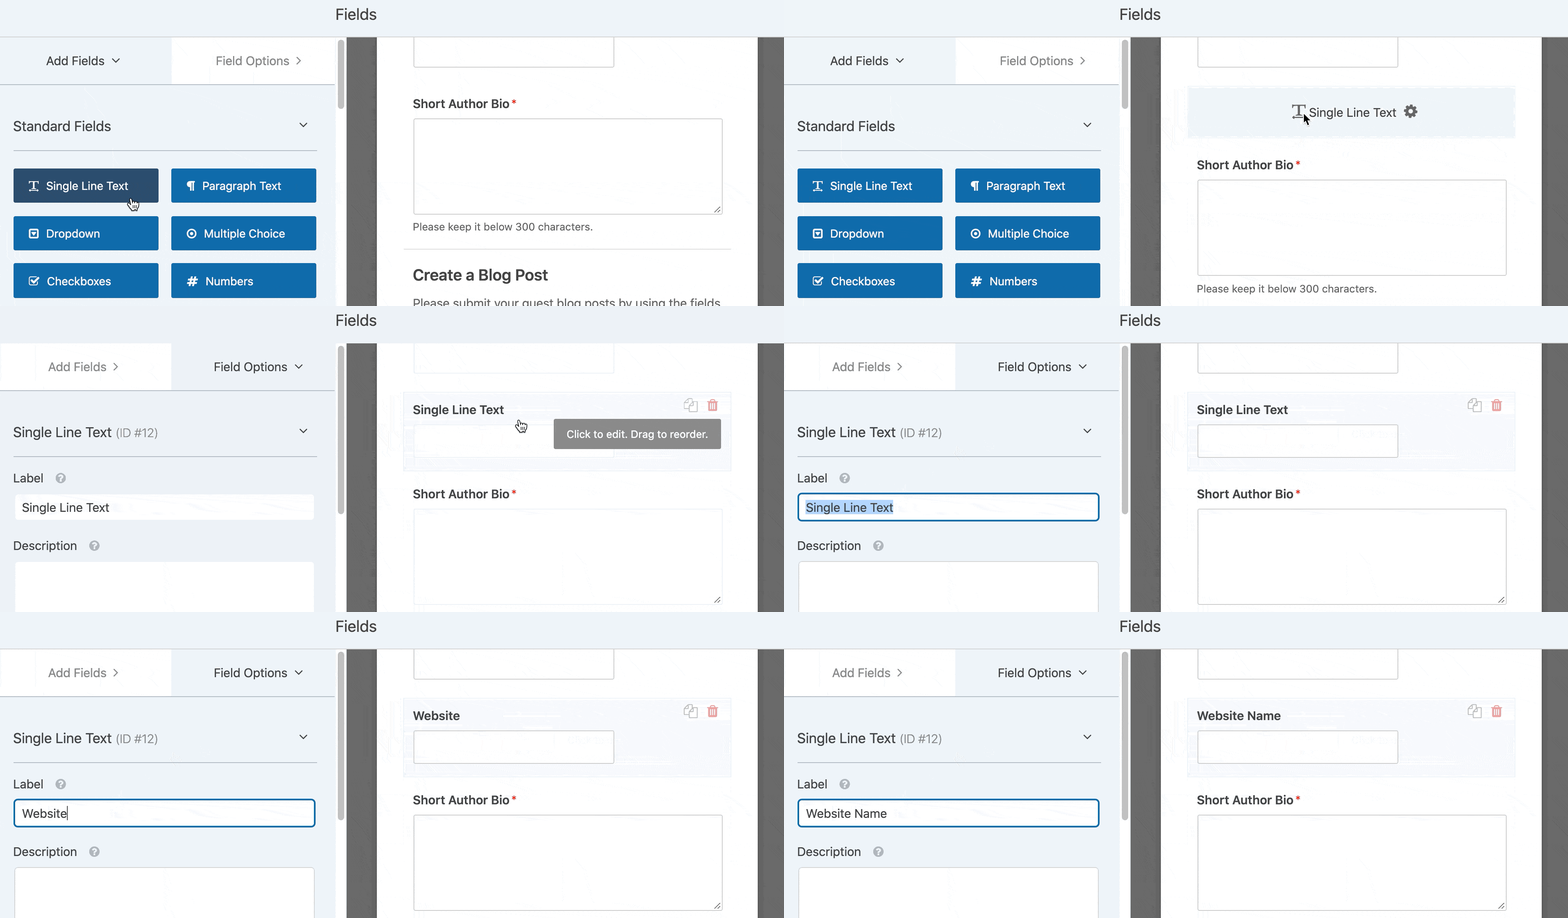
Now we’re ready to map the field to the field we created in the Advanced Custom Fields plugin. To start, click Settings on the left-hand side, and then Post Submissions.
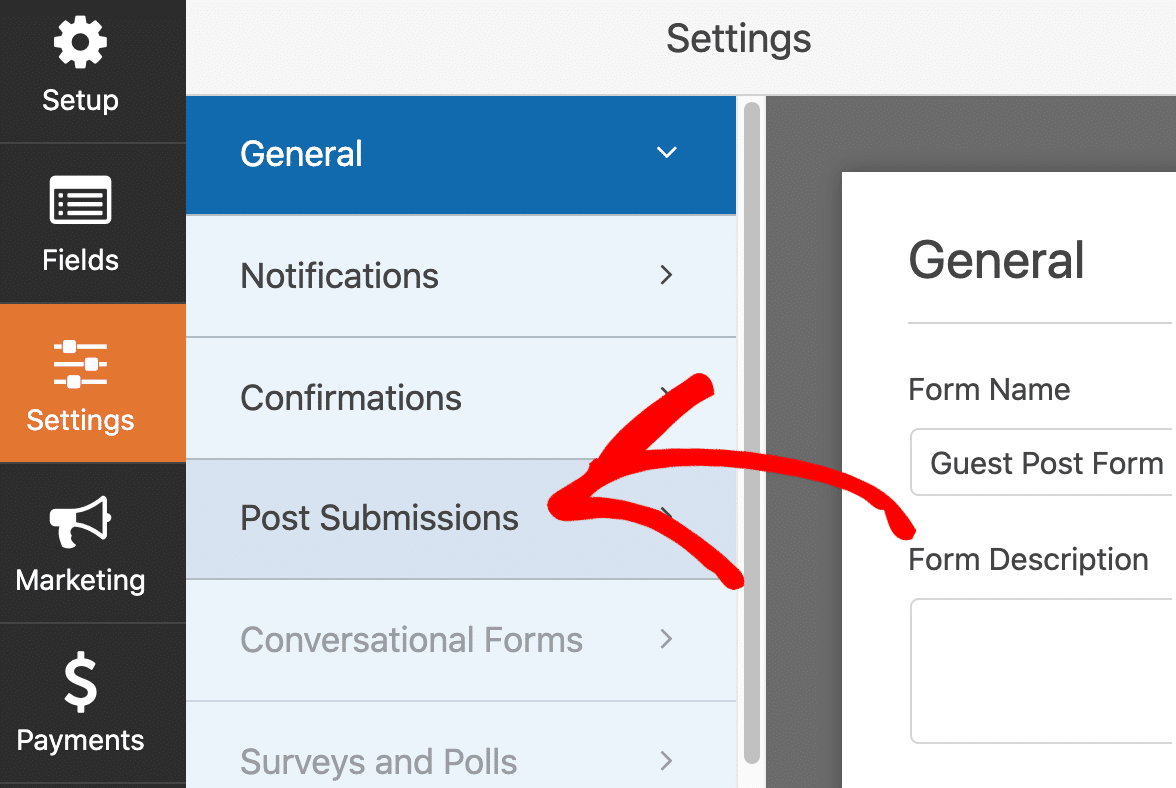
This screen shows all of the functionality and features for the Post Submissions addon. You can set the post status and other settings here.
To add the custom field, you’ll want to scroll all the way down to the Custom Post Meta section. On the left, paste in the Field Name that we created in ACF.
On the right, choose the Website Name form field that we just created in WPForms (or whatever you named it) that you just added to your form.
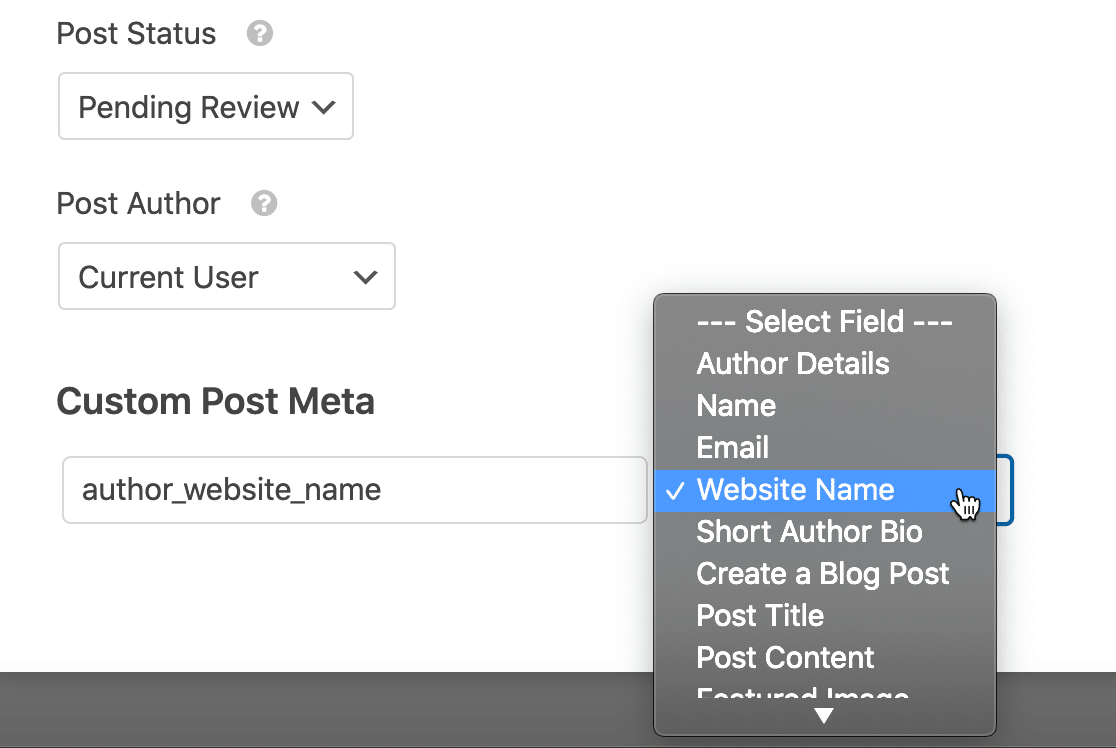
That’s all you need to do! From now on, anything typed into the Website Name field will be saved in the custom field so you can display it in your post template. Click Save to save your form.
Ready to get some guest posts? You’ll want to click the Embed button to publish your form if you haven’t done that already. You can automatically add it to a page, or use a shortcode.

Now, when you view your guest post submission form on the frontend, you’ll see the extra field we added earlier.
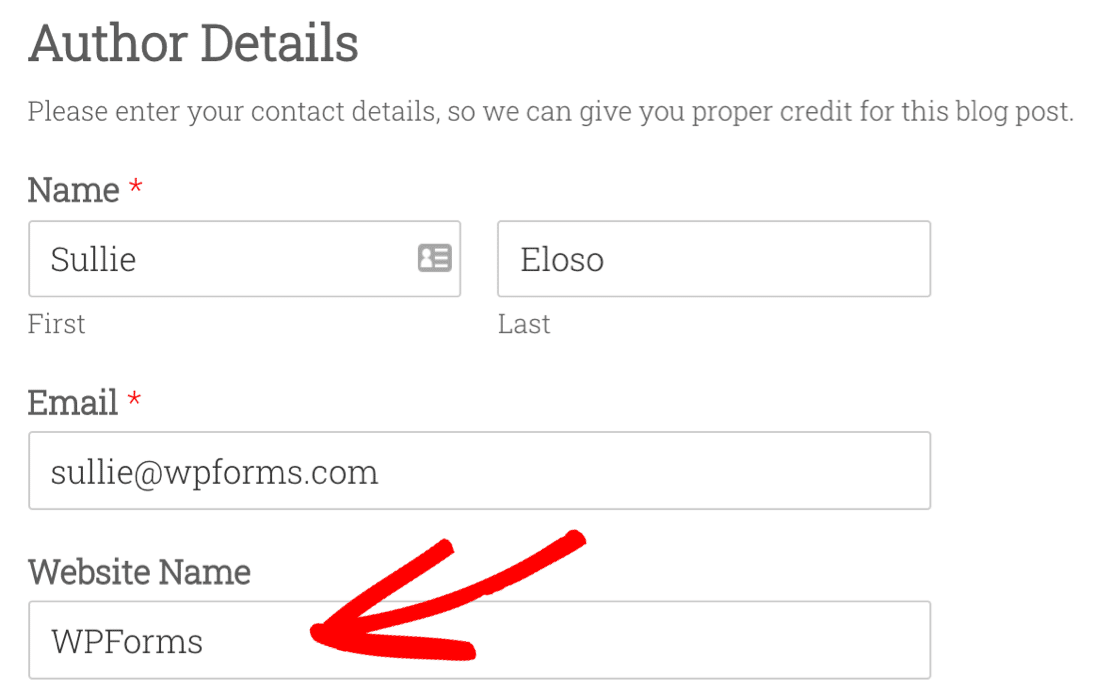
Go ahead and fill out the form with a test entry. Once it’s submitted, we can display the field on the frontend of your site.
Step 5: Add Your Custom Fields to Your Website
There are many different ways to show custom field data in WordPress. We’re going to show you some easy examples.
This first method requires some knowledge of WordPress theme files. Before going ahead, make a child theme for your website. (It’s also a good idea to back up your site again at this point.)
In all of these examples, we’ll use the_field() function in Advanced Custom Fields. First, let’s edit our single post template to display the field. Go to Appearances » Theme Editor.

We’ve opened up the theme file called single.php. In your theme, the name of this template file might be different. Find a spot to display your field, then paste in this code. This is a super easy example to get started:
<?php if( get_field('author_website_name') ): ?>
    <h2>Author's Blog: <?php the_field('author_website_name'); ?></h2>
<?php endif; ?>
This code means that WordPress will display the author’s website name in an H2 if that information exists. Just change the field name author_website_name to the name of the field you created.
When you save the template file, your field will show up in your blog posts where you placed the code.

If this looks a little tricky, we’ll quickly show you an easier way to use custom fields with Elementor.
Step 6: Display Custom Fields With Elementor
Before we finish the tutorial on using custom fields in user submitted posts, we wanted to quickly show you how to display a custom field in Elementor.
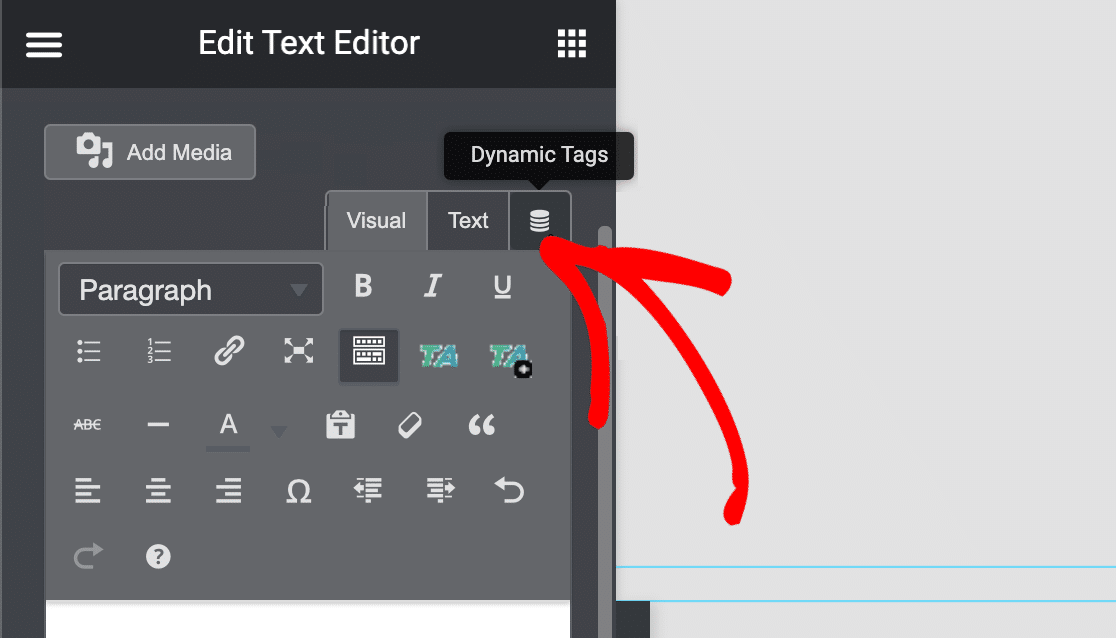
This method lets you easily build advanced templates for user submitted content. In this example, we have a blank text block in Elementor. Click the icon at the top that’s labeled Dynamic Tags in this screenshot:
Now select ACF Field and choose the custom field you made in step 2.
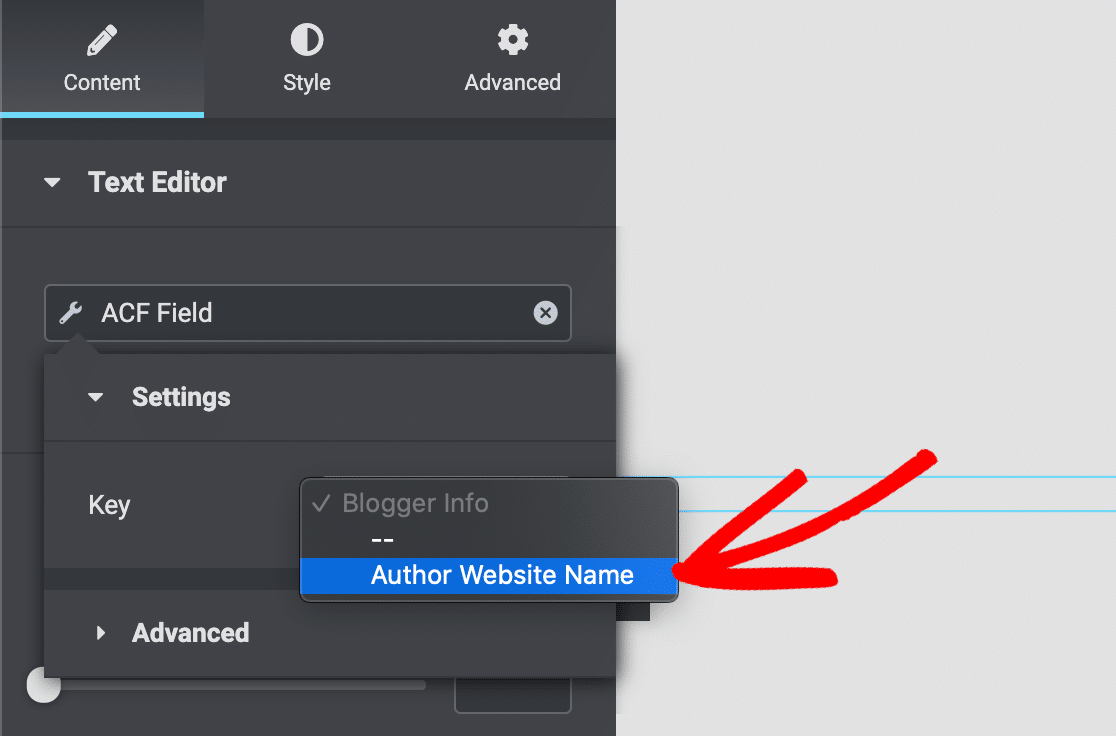
Now the contents of your custom field will show up on your posts whenever you use this Elementor template. This makes it super easy to display custom field data that you collect in WPForms.
FAQs on How to Display Custom Fields in Guest Posts
Learning how to add and display custom fields in guest post forms are a popular topic of interest among our readers. Here are answers to some common queries about it:
How do I integrate WPForms with ACF?
Install both WPForms Pro and Advanced Custom Fields, then create your custom fields in ACF first. In your WPForms guest post form, go to Settings » Post Submissions and scroll to the Custom Post Meta section.
Map your ACF field names (left side) to your WPForms fields (right side). The integration is automatic once both plugins are active. No additional setup required.
How do I use custom fields in WordPress?
Custom fields store additional information beyond standard post content. In WordPress, go to Custom Fields » Add New to create field groups, then add individual fields like text, textarea, or dropdown options.
You can display custom field data in your theme using the_field() function or through page builders like Elementor using dynamic tags.
What are custom fields in WordPress?
Custom fields are extra data storage areas for WordPress posts and pages. They’re also called “post meta” fields. For example, you might create custom fields for product prices, author bios, or review ratings.
Unlike regular content, custom fields store structured data that can be displayed consistently across your website and used for sorting, filtering, or special layouts.
How do I show custom fields in WordPress posts?
You can display custom fields using PHP code in your theme files or through page builders like Elementor. For code method, use <?php the_field(‘field_name’); ?> where you want the data to appear.
For Elementor, add a text widget and use Dynamic Tags » ACF Field to pull in your custom field data. Both methods automatically display the information collected from your guest post forms.
How do I enable custom fields in WordPress?
Custom fields are always available in WordPress but may be hidden in the post editor. To show them, edit any post and click Screen Options (top right), then check “Custom Fields.”
However, for guest post submissions, you don’t need to enable this. WPForms and ACF handle custom field creation and management automatically through their interfaces.
How do I add custom fields to WordPress pages and posts?
With ACF installed, custom fields appear automatically when editing posts. For guest submissions through WPForms, the custom fields populate automatically when forms are submitted.
You don’t manually add them to individual posts – the form submission process handles this. For displaying the data, you’ll modify your theme template or use Elementor dynamic content features.
Can I use WPForms Post Submissions for user-generated content?
Yes, the Post Submissions addon is perfect for any user-generated content including guest posts, job listings, testimonials, or community submissions.
It automatically creates WordPress posts from form submissions, assigns authors, sets categories, and handles custom field data.
You can moderate submissions before publishing and maintain full editorial control over user-submitted content.
Next Step: Get More Guest Post Submissions
Now you have a guest post form set up with custom fields, you’ll want to get more user submitted content for your site. To do that, check out these tips on how to get more guest posts on your blog.
Ready to build your form? Get started today with the easiest WordPress form builder plugin. WPForms Pro includes lots of free templates and offers a 14-day money-back guarantee.
If this article helped you out, please follow us on Facebook and Twitter for more free WordPress tutorials and guides.


I am not able to show more that the three fields that already existed on Post Submission, in my final blog view! I tried custom fields but didnt succeed
Hi Maryam,
To help you with through insights on this, would you mind reaching out to us via support with additional details and our team will be happy to help!
Thanks 🙂
I need to use a true/false custom field for my post submissions. Currently this results in the field always being true because it always sends a non boolean value to the field. Is there an easy way to get the post to send a true/false boolean value to the custom field?
Hi Sondre,
Thanks for reaching out! To help you with a thorough response, kindly reach out to us via Support and we will be happy to assist 🙂