AI Summary
Apple Pay is becoming increasingly popular as the payment method of choice for mobile customers. But many eCommerce stores or nonprofit organizations still don’t support Apple Pay as a payment option.
This represents a missed opportunity because you might be turning away otherwise interested customers and donors simply due to not having their preferred payment methods in place.
The good news is that setting up WordPress Apple Pay forms is really easy to do. And because it’s so easy, I’m always giving this free advice to my new business clients: don’t forget to enable Apple Pay on your forms!
Naturally, I’m often asked back “… but how?”. So I figured now would be a good time to prepare a detailed guide so you can use Apple Pay for WordPress without any hassle.
Create Your Apple Pay Form Now 💳
How Can You Use Apple Pay for WordPress?
The easiest way to add Apple Pay to your WordPress site is by using WPForms with the Stripe. WPForms lets you make stylish forms without ever needing to know how to code. When you add Stripe as your payment gateway, as you’ll see in this post, you can offer Apple Pay as a payment option.
How To Take Apple Pay Payments in WordPress
Now let’s walk through setting up Stripe in your WPForms account step-by-step so you can accept payments on WordPress through Apple Pay. Here’s a video tutorial that shows the whole process:
Or, if you prefer written instructions, check out the steps below:
1. Download and Install WPForms
The first thing you need to do on your way to setting up Apple Pay on your WordPress site is to download and install WPForms. Note that the Stripe payment integration is available in ALL versions of WPForms, including Lite.
However, a Pro license offers added advantages like the removal of the 3% per transaction fee and the Stripe Pro addon for setting up conditional logic for payment fields.

For this reason, we’ll be using the Pro version for this tutorial. Need some help? Check out this guide on how to install a WordPress plugin.
2. Activate the Stripe Pro Addon (Optional)
While this step is optional, we recommend installing the Stripe Pro addon (available in Pro and above licenses) to access conditional logic for the Stripe payment fields.
Once you’ve set up WPForms Pro on your site, you can install addons by navigating to WPForms » Addons from your WordPress dashboard.
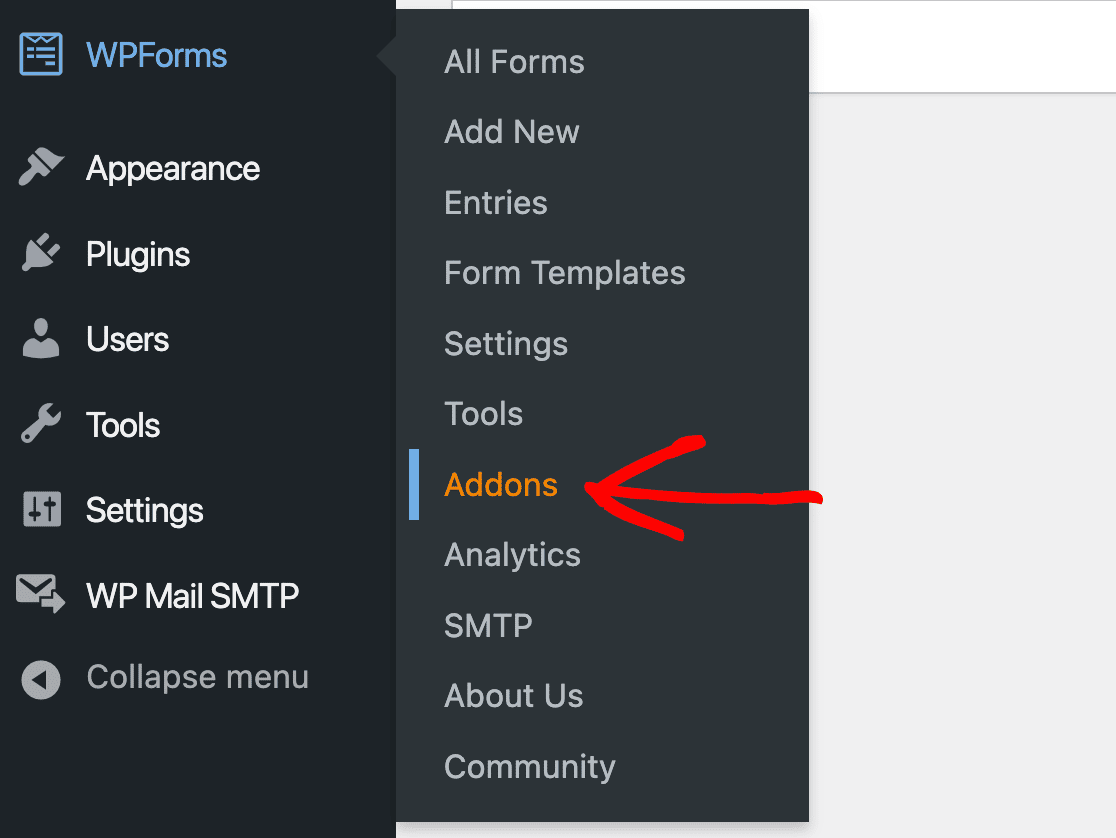
Next, you’ll see a screen containing all of the addons available. Scroll down until you locate the plugin, then install it.
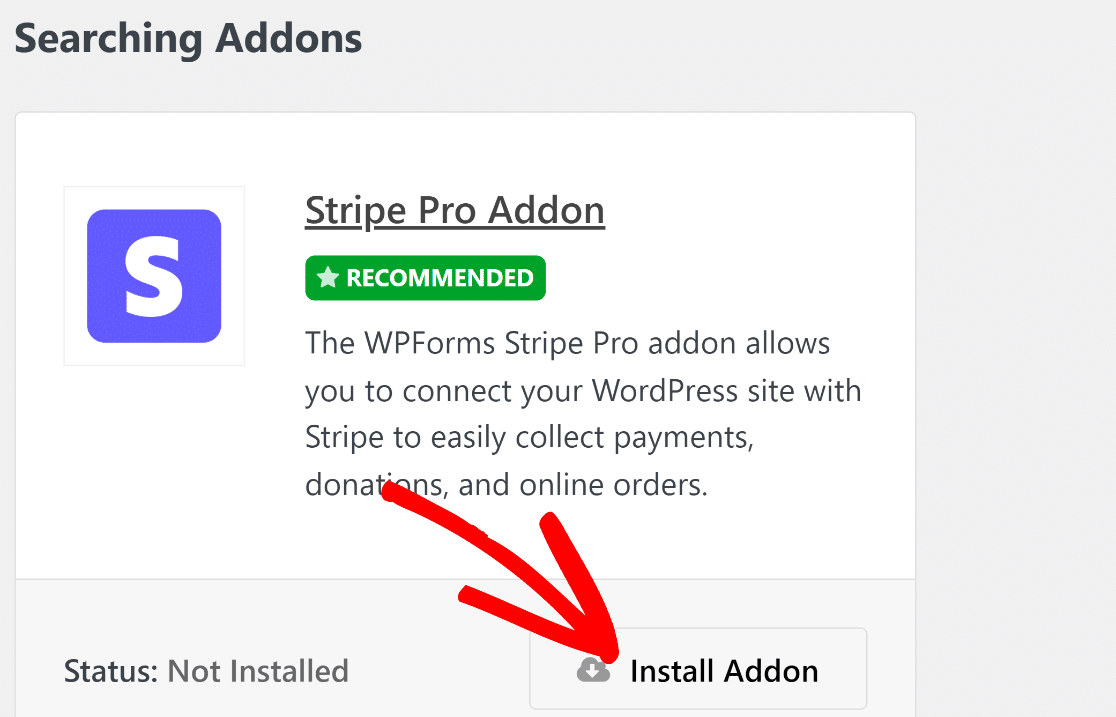
When you install the addon, it should automatically activate. If you’ve previously installed and deactivated the addon, however, you will need to press Activate to continue.
3. Connect Stripe in the Payments Settings
After you’ve installed the Stripe addon in WPForms, you need to connect it to your account. To do this, you can click on WPForms » Settings from your WordPress dashboard.
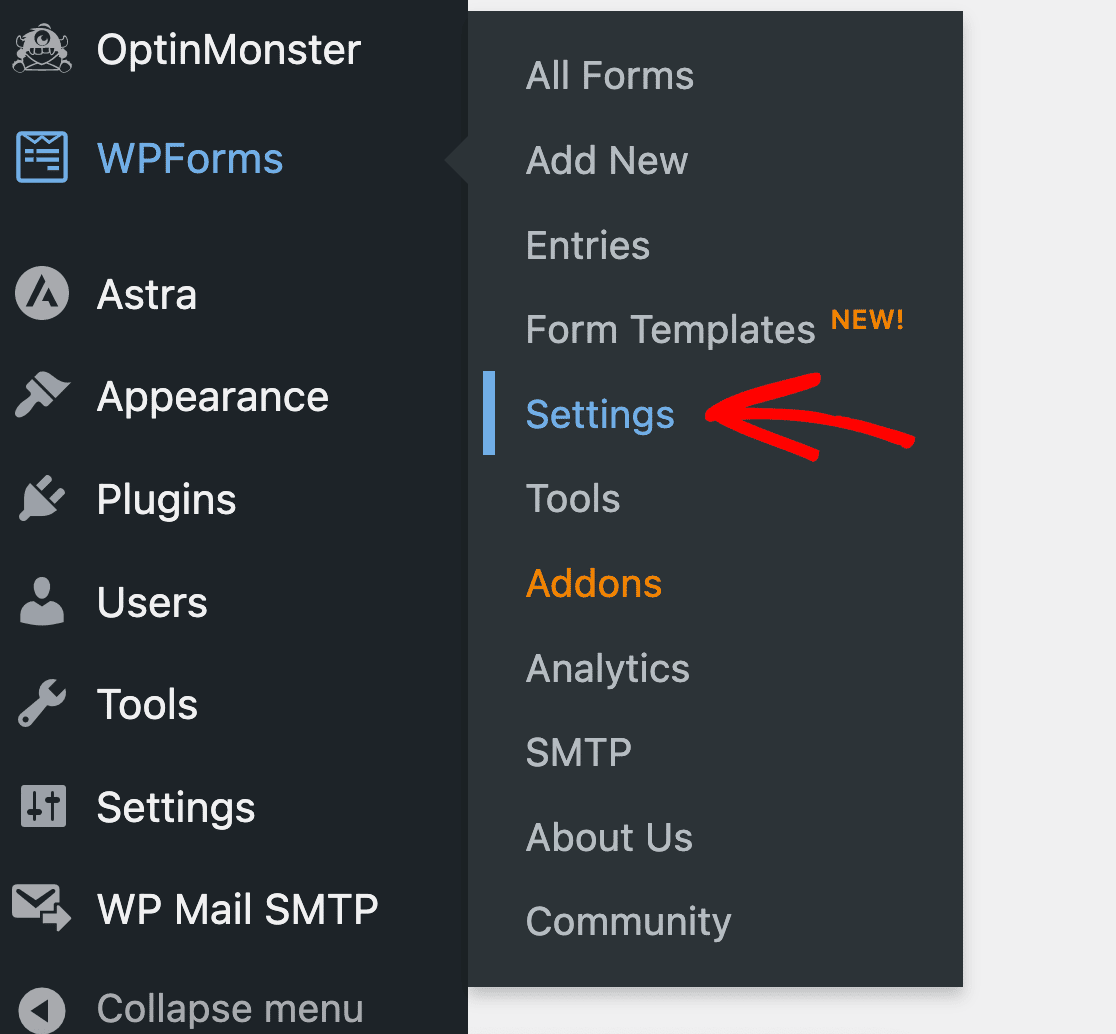
That will take you to your WPForms account settings. You’ll see several tabs across the top. Select the Payments tab.

First, check that the Currency is set correctly to match the currency of your Stripe account. This simple check prevents transaction errors later on.

Next, because you’ve installed the Stripe addon, you should see where to connect it in your payment settings.

When you click Connect With Stripe, you’ll be prompted to enter your login information and other details needed to connect your Stripe account to WPForms.
This is what will allow you to receive payments to your bank account. When your account is connected, the blue button will become a confirmation.

4. Create Your Apple Pay Form
Now that you’ve set Stripe up with your WPForms account, you can begin creating your form.
To get started, you can either click on WPForms » Add New, or simply click the Add New button at the top of your WPForms dashboard.

After that, you can name your form and decide whether you’re choosing one of our 2,000+ form templates, or if you’re going to start from scratch with a blank form.
Once you’ve done that, you’re ready to drag and drop elements into place in the form builder.
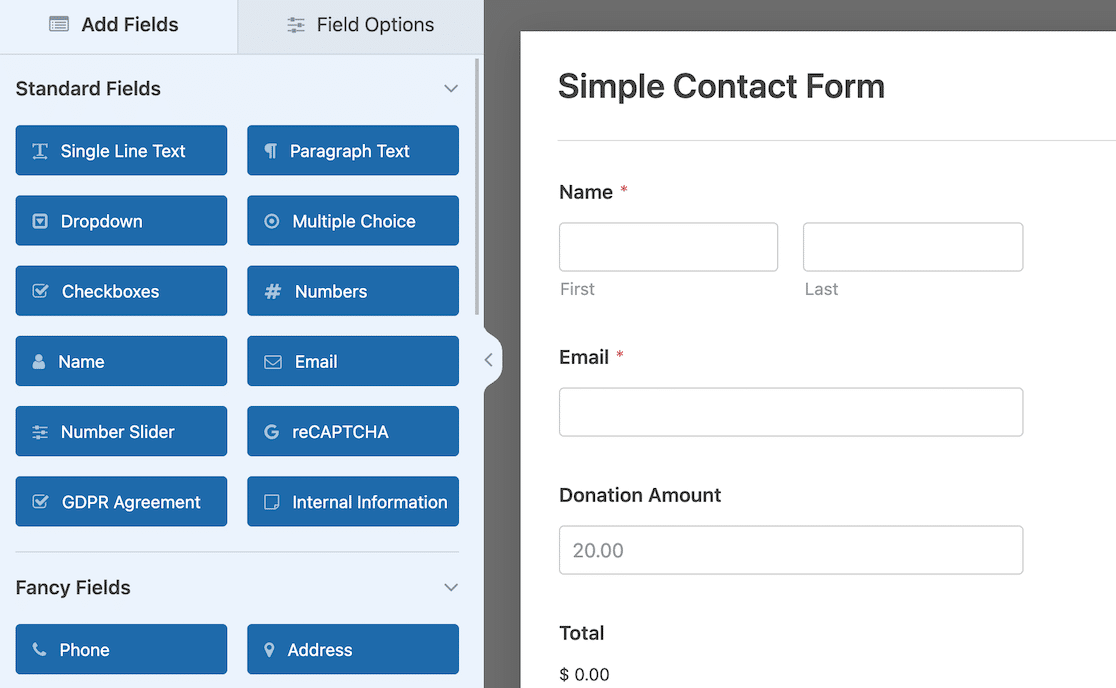
Don’t forget your payment fields! Whether you add specific items with a fixed price or let donors define the amount, you must have at least one payment field, such as Single Item, Multiple Items, Total, and so on, for the credit card field to work in the next step.
5. Add the Stripe Credit Card Field
With your form’s structure in place, the final step is to add the field that handles the actual payment.
In the form field options, scroll the whole way down until you see the payment fields. From there, select drag and drop the Stripe Credit Card onto your form.
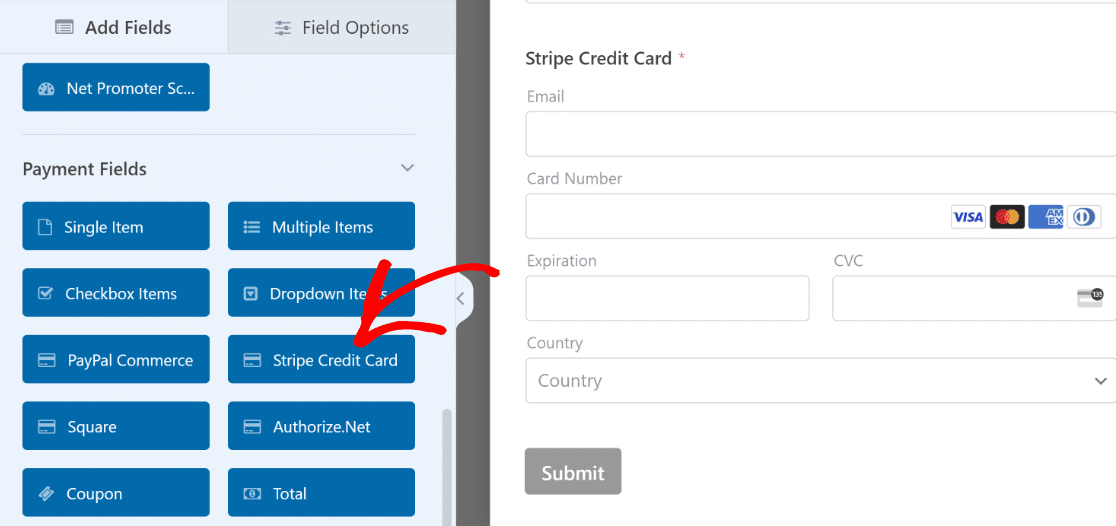
This one field does all the work. It will securely display standard credit card input fields to most users, but it will automatically show the Apple Pay button to visitors using a compatible Apple device and Safari browser.
You don’t need to add a separate “Apple Pay” button or configure any extra settings for it to appear. That was easy, wasn’t it? We have just a few more steps to go.
After you’ve added a Stripe field to your form, you have to enable payments. This is a very simple but important step. With your form open, click on the Payments button at the bottom of the left sidebar.
Note that this is different from the payment options you set earlier. This setting is specific to this form only. Click on Stripe and then use the toggle switch to enable Stripe payments.
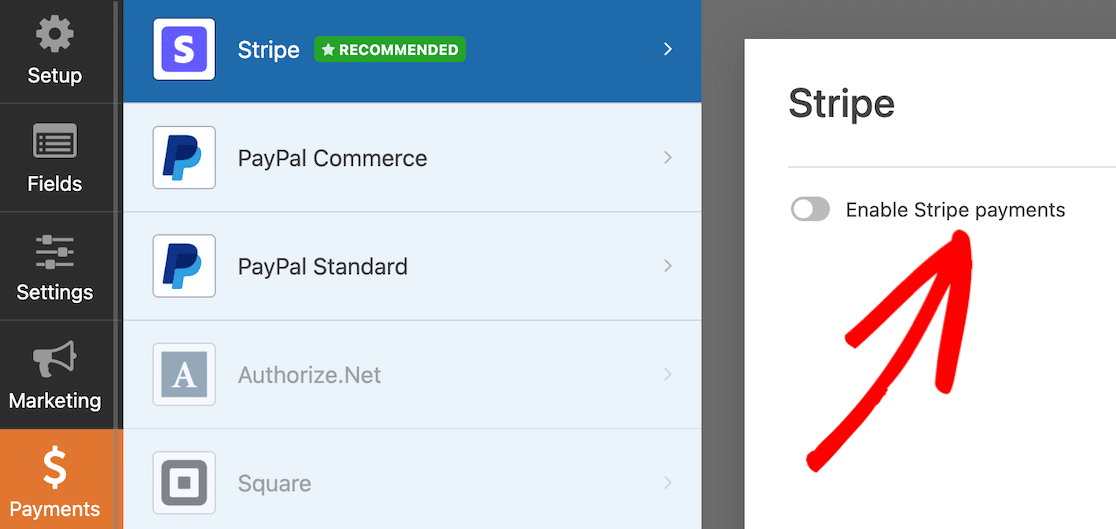
When you do that, you’ll see some more options appear. These options are for payment receipt and customer email, and you can map form fields for those.
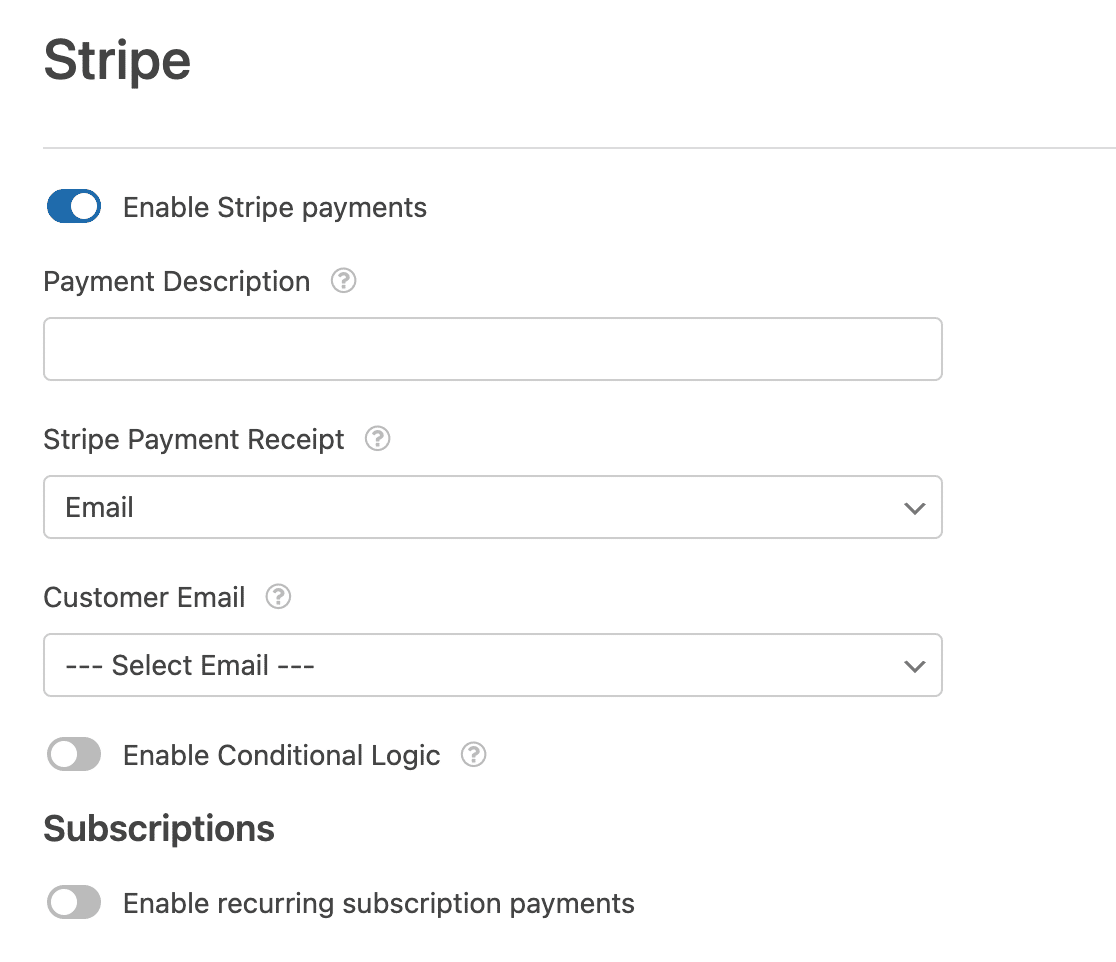
It’s a good idea to set up these field mappings if you want Stripe to send a payment receipt to the customer’s provided email address as soon as they submit your Apple Pay form.
6. Embed the Form on Your Site
When your form is finished and you’re ready to start collecting payments, it’s time to embed it on your site. The easiest way to do this is by using the Embed button in the top right corner of the form builder.

There are a few other ways you can embed forms, as well. This guide on embedding a form on your WordPress site will show you how.
After you’ve embedded your form on the page or post where you want it to appear and you’ve ensured all the page content is complete, it’s time to publish. Voila! Your form is complete.
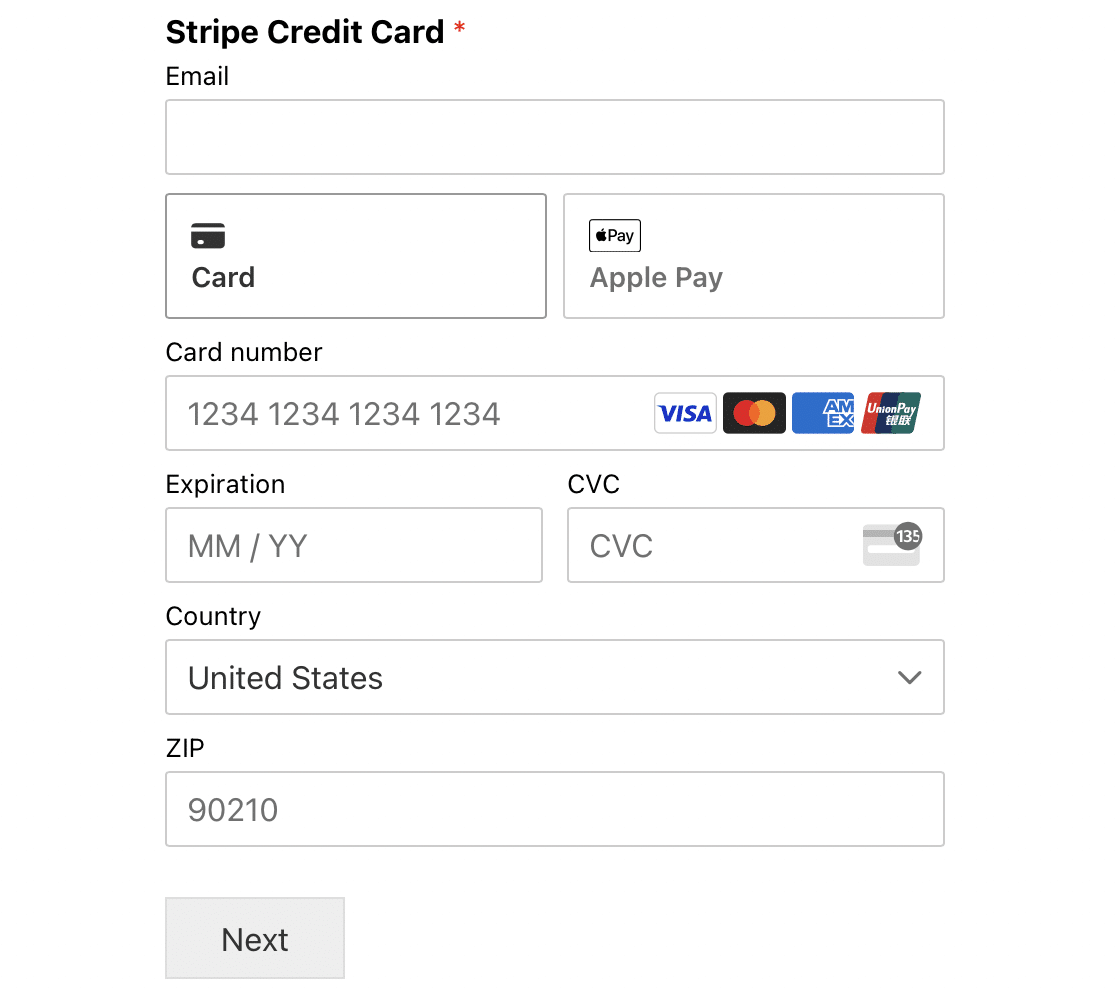
Something to keep in mind once your form is live is that you might not see the Apple Pay option. If that happens, don’t panic!
Apple Pay will only appear if you view the form on a device with Apple Pay enabled. This means you might not see Apple Pay on a Windows computer.
But if you use Apple Wallet on your iPhone or other iOS device and have a card saved to use with Apple Pay, you should see it there.
So your customers need to have Apple Pay enabled and be viewing your form from a compatible device and browser in order to see the Apple Pay option appear.
More Questions on Apple Pay for WordPress
How do I test Apple Pay transactions before going live?
WPForms allows you to switch between test mode and production mode from your Stripe integration settings.
You can simulate Apple Pay transactions while in test mode to verify that everything is working as expected.
WPForms also lets you track any payments made in test mode, which means you don’t have to leave anything to guesswork and verify payments thoroughly before going live.
Can I see a report of all Apple Pay transactions processed through my form?
Yes, WPForms tracks all processed payments on your site, including those made through Apple Pay. You can go to WPForms » Payments to view all information related to processed payments with intuitive charts and tables for details.
Is it possible to offer both Apple Pay and other payment methods in the same form?
Yes, WPForms supports multiple payment processors. When using Stripe, your visitors can pay you through Apple Pay, credit cards, as well as Google Pay.
In addition, you can use the WPForms PayPal integration in the same form for visitors who prefer PayPal payments.
Offering multiple payment options helps minimize abandonment from customers who may quit checkout if you’re missing their preferred payment method.
What fees are associated with accepting Apple Pay payments through WPForms?
While WPForms itself doesn’t charge a fee for using the Stripe addon, Stripe charges 3% plus additional fees per transaction.
You can remove the 3% charge if you’re using WPForms Pro. Apple Pay transactions are included in your Stripe account’s standard processing fees.
Why don’t I see the Apple Pay button on my form?
The Apple Pay button only appears under specific conditions. You (or your customer) must be using the Safari browser on an Apple device (like an iPhone, iPad, or Mac) where Apple Pay has been set up.
If you view the form on a Windows PC or using a browser like Chrome, you will only see the standard credit card fields.
Can I accept donations with Apple Pay using this method?
Yes, absolutely. This is one of the most popular uses for this feature. Simply create a donation form in WPForms, add your payment fields, and connect to Stripe.
Donors using an Apple device will see the Apple Pay option, which makes giving a quick, frictionless experience and can significantly increase conversion rates.
Are there extra fees for Apple Pay transactions?
No, Apple does not charge any additional fees to you or your customers for using Apple Pay. The transaction is processed through your Stripe account at their standard processing rate, just like any other credit card transaction.
Next, Put Your Forms to Work With a Side Hustle
Now that you have Stripe connected to your WPForms account and you can accept Apple Pay payments, you can also start earning some extra income. Find out how you can start a side hustle with WPForms.
Create Your Apple Pay Form Now 💳
Ready to build your form? Get started today with the easiest WordPress form builder plugin. WPForms Pro includes lots of free templates and offers a 14-day money-back guarantee.
If this article helped you out, please follow us on Facebook and Twitter for more free WordPress tutorials and guides.

