Do you want to learn how to block a country in WordPress? You might receive excess spam from a certain country, for example, and are looking for ways to prevent it.
While it’s possible to modify the .htaccess file in WordPress for country blocking, I promise you that better alternatives are generally more user-friendly and easier to maintain.
And I’ll show you what these alternatives are! So, read along. In this article, I’ll cover 5 different ways to block a country in WordPress.
How to Block a Country in WordPress (5+ Ways)
In This Article
But First, Get WPForms
When it comes to preventing spam by blocking a country, the solutions offered by WPForms are probably the easiest.
For instance, I’m going to talk about using Cloudflare later on in this article. Spoiler alert! But WPForms already implements Couldflare protection anyway… So with WPForms, you’re kind of getting the best of both worlds.
All that to say, be sure to get WPForms for your WordPress website and it’ll save you some time and headache.
Block a Country in WordPress Now
1. Country Filter
The WPForms country filter is the most effective way to prevent forms from coming through from certain countries. This way, you can keep out spam that consistently comes from repeat offender countries.
And since spam prevention is one of the driving factors behind blocking a country from your site, you’ll find the country filter in the form builder’s spam and security settings.
So, to enable this feature, open the form builder for your form of choice, head to Settings » Security and Spam Protection and toggle on the Enable country filter option.
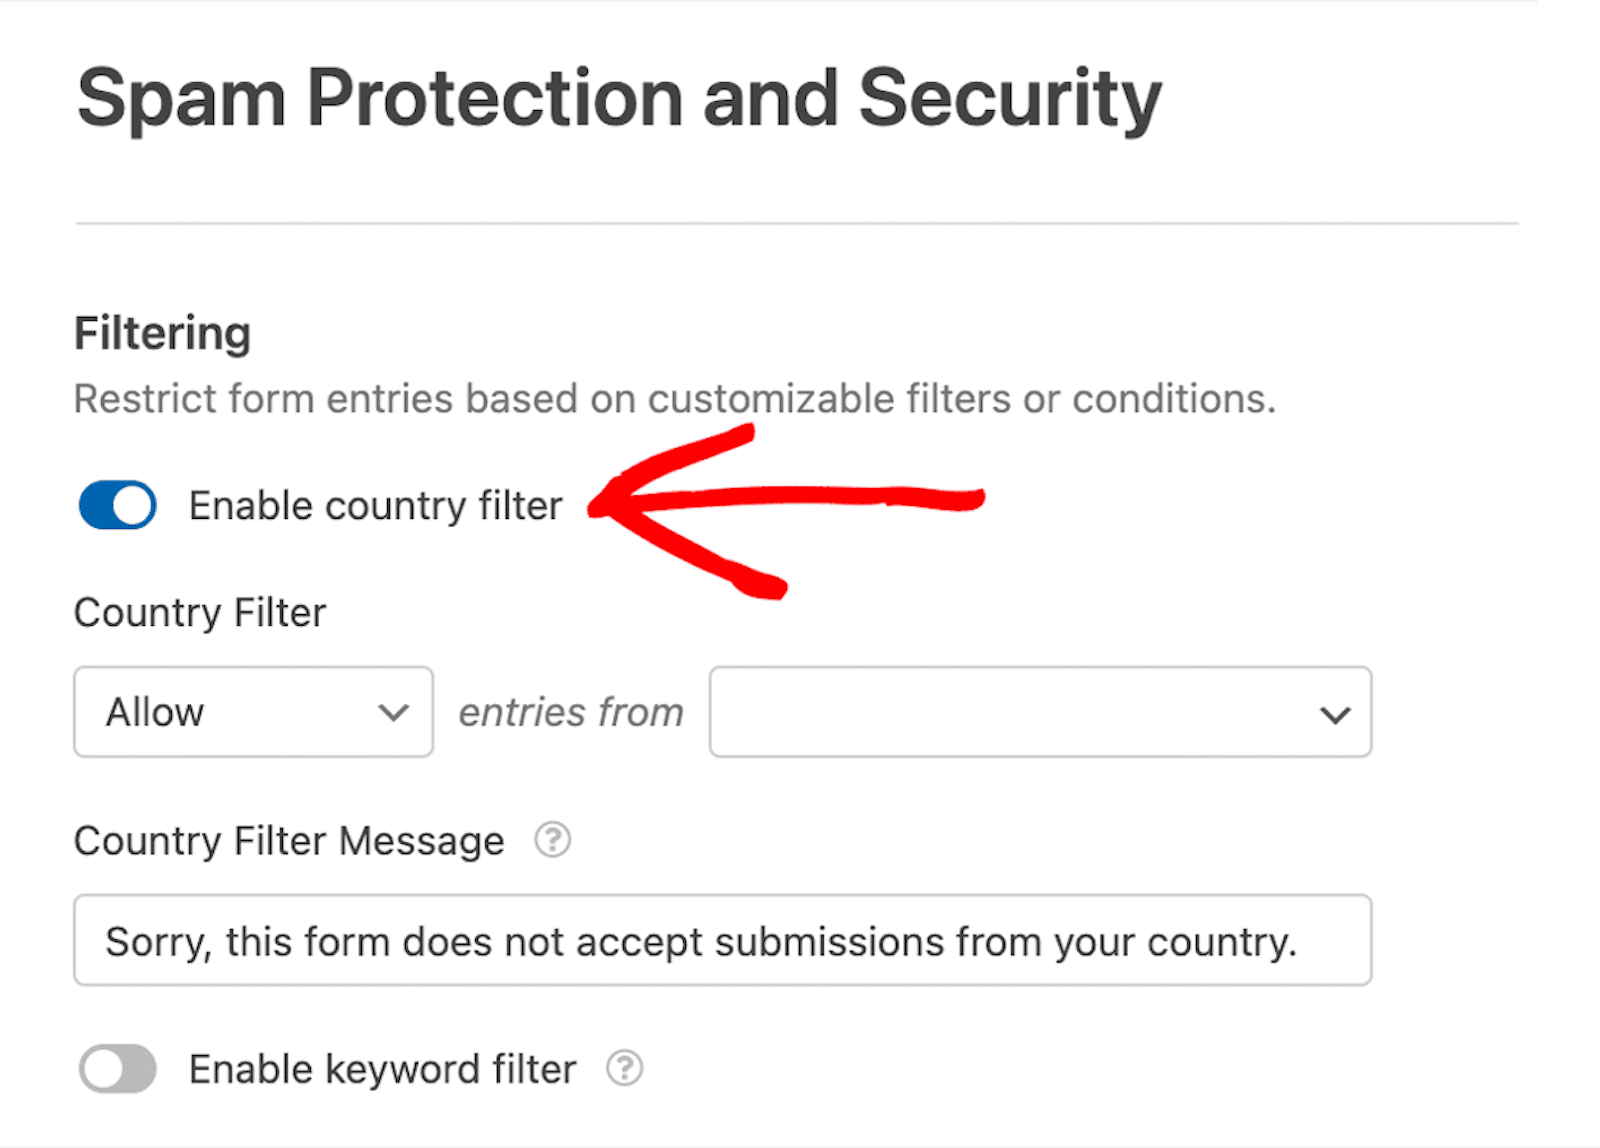
Now, click the dropdown menu under Country Filter and select Allow to permit users from specific countries to submit this form on your site. Alternatively, to block users from certain countries from submitting the form, select Deny.
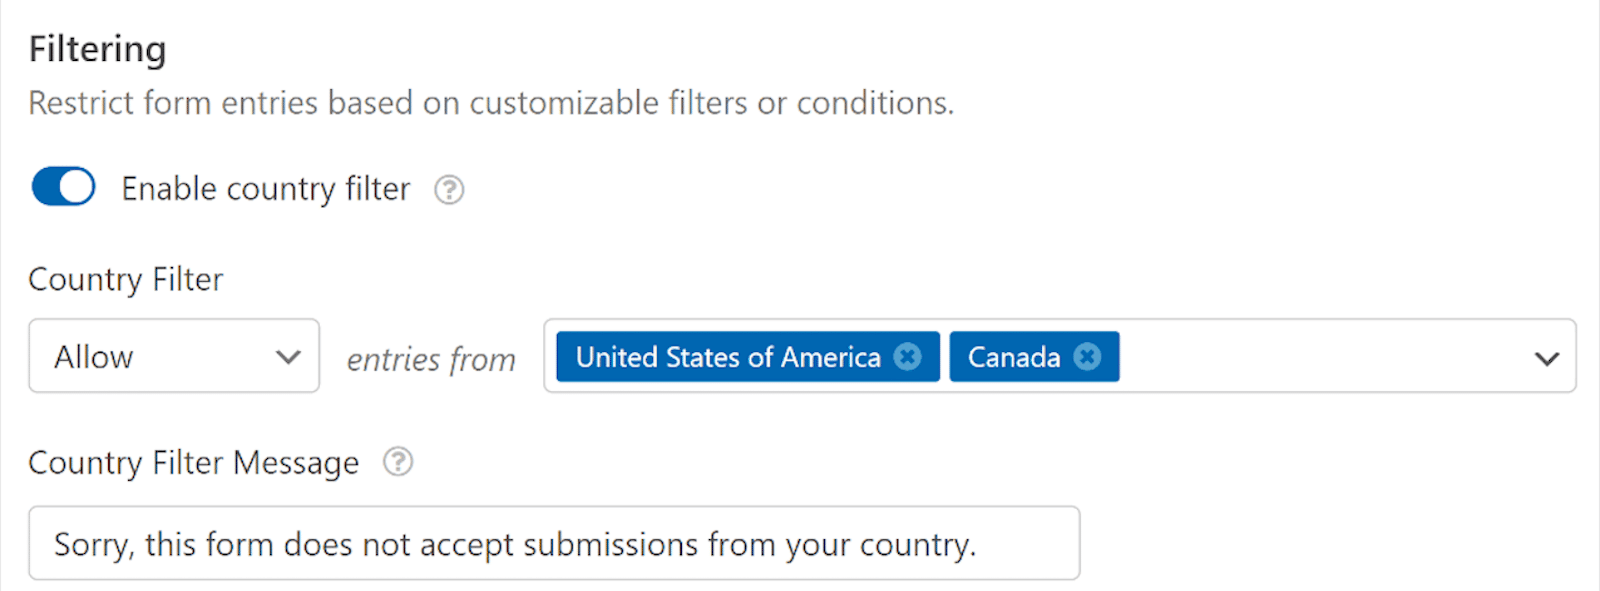
Then, click on the second dropdown menu and select the countries you’d like to either allow or deny entries from.
This way, if a user tries to submit this form from outside of your selected counties, the form will fail to submit. Instead, they’ll receive a default message that reads, “Sorry, this form does not accept submissions from your country.” You can edit this message to your liking, too.
Heads Up: Keep in mind that if you’ve enabled the option to store spam entries, your user’s form will still be submitted. That is to be expected, though! Entries like this will be labeled as spam.
2. Email Address Allowlist or Denylist
Another way to control access from certain countries is to add those countries to your email address allowlist or denylist.
These lists are built into WPForms, and they allow you to create rules around which email addresses are allowed in your forms.
To add countries to your allowlist and denylist, you’ll need to add the Email field to your form if it isn’t already on there and click on the field to open up its options. Then, click on the Advanced tab within the field to open up more configuration options.
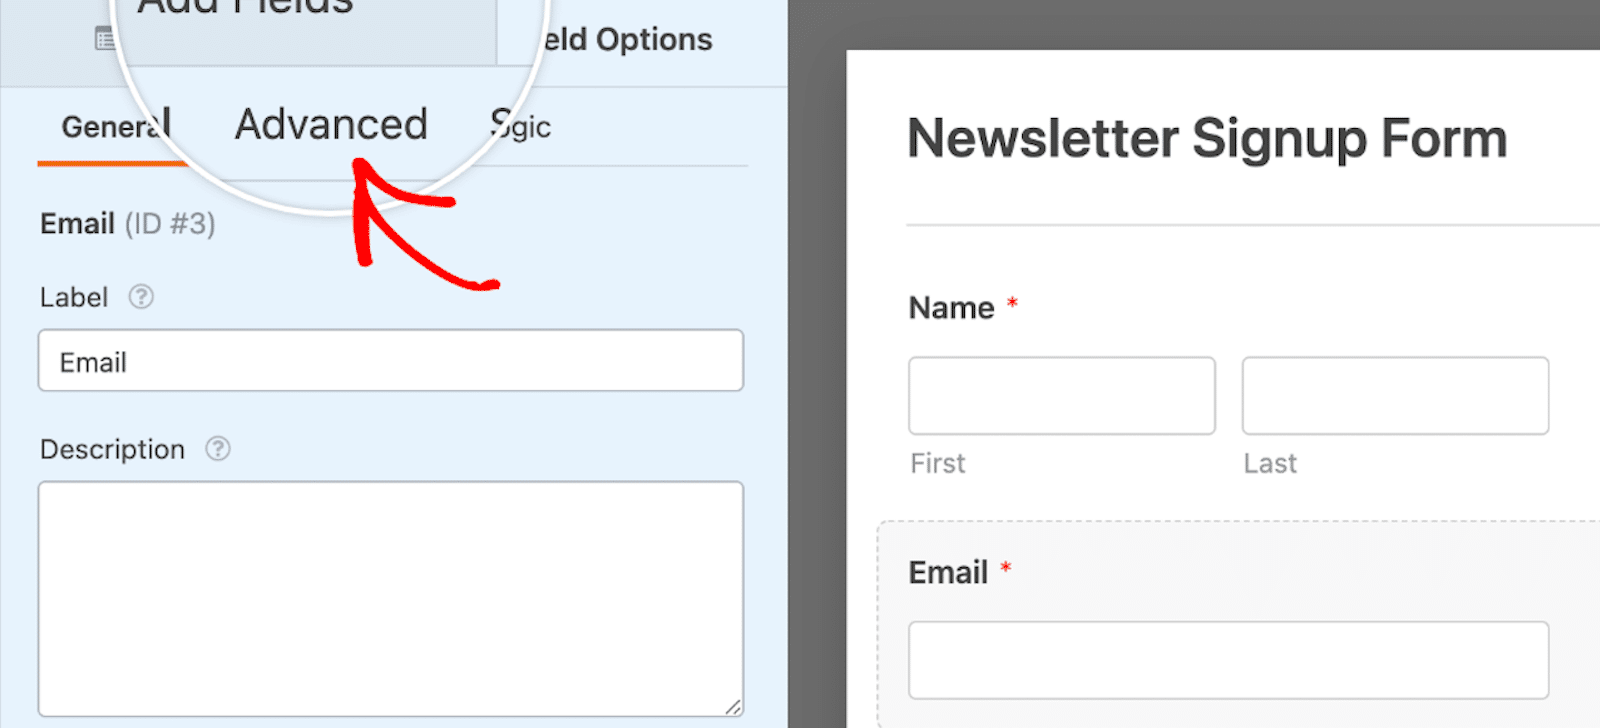
In this tab, you’ll find the dropdown labeled Allowlist / Denylist, where you set the type of restrictions you want to apply.

When you select either list, a box appears to enter your rules. These “rules” are just the list of email addresses you want to accept or deny.
You can accept or deny individual emails, groups of emails, or whole countries of emails.
To apply your rules to a certain country, simply put an asterisk (*), or “wild card symbol”, in front of the country-specific domains.
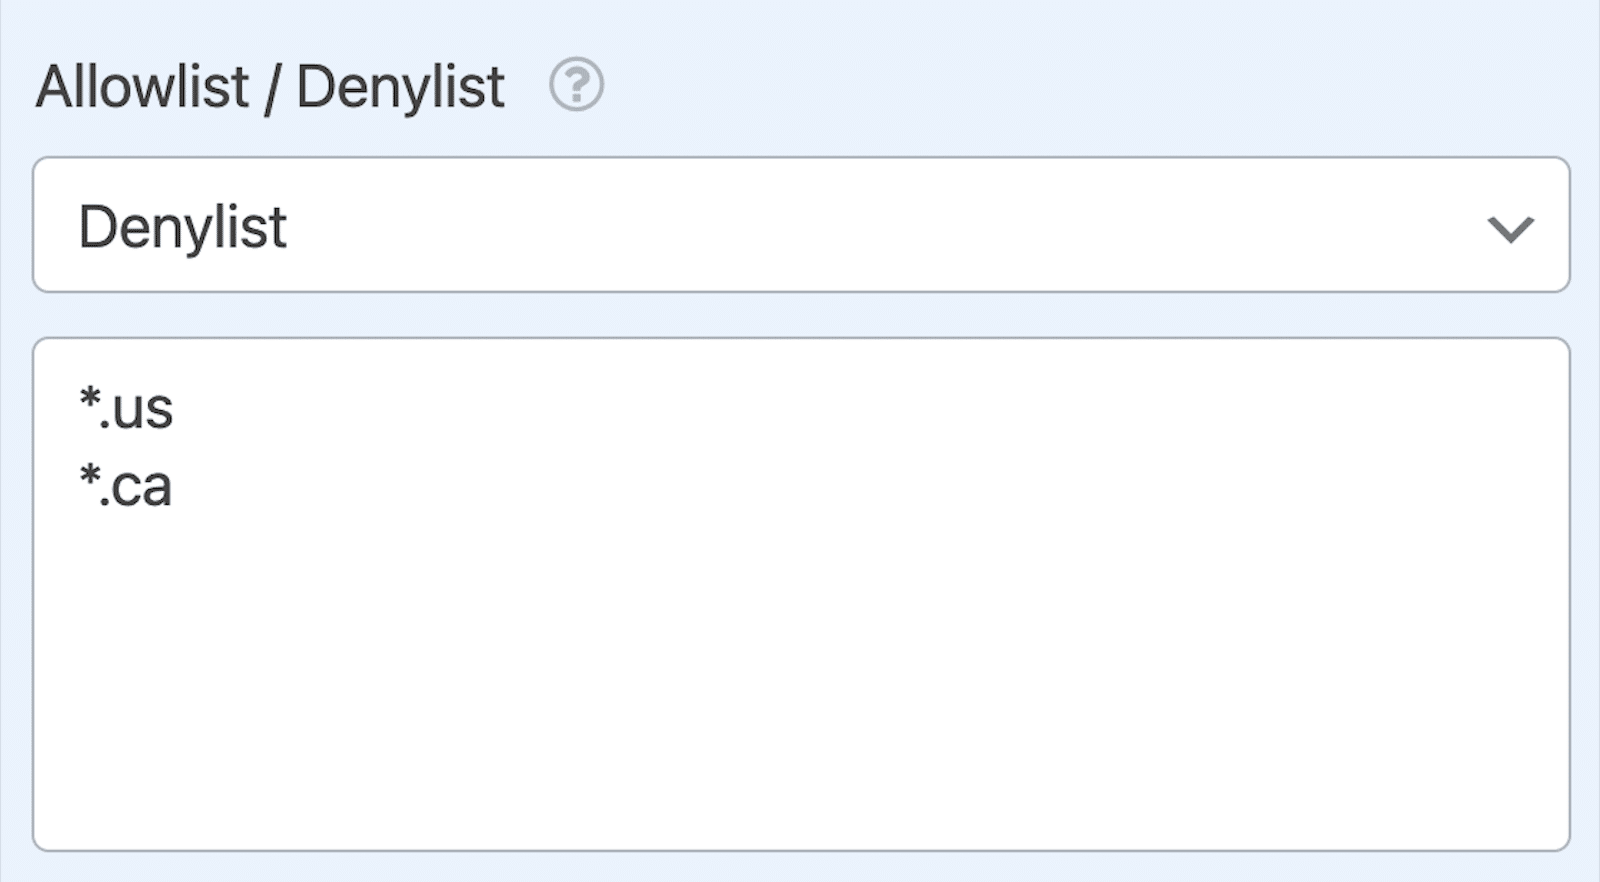
You can then add as many country-specific domain rules as you’d like! Be sure to have a peek at our full documentation on creating an email address allowlist or denylist for even more details and options.
And if you’re feeling adventurous, you can also Restrict Countries Inside Smart Phone Form Fields. But, FYI! This tutorial is for developers only.
3. Your Web Host
To block a country using your web hosting provider, you’ll need to access your hosting control panel and use the appropriate tools or settings.

Some hosting providers may have different methods or tools for IP blocking, so it’s always a good idea to take a look at their documentation or contact their support team for assistance.
But generally, the steps go something like this:
- Log in to your web hosting control panel (cPanel, Plesk, or any other panel provided by your host).
- Locate the security section or the section related to IP blocking. This might be called “IP Blocker,” “IP Deny Manager,” “Security” or something similar, depending on your hosting provider.
- Gather a list of IP address ranges associated with the country you want to block. You can find this information online or through a plugin like IP2Location. (More on those plugins later 👀)
- Add the IP address ranges to the IP blocking tool in your hosting control panel. This may involve adding them individually or uploading a list, depending on the tool’s interface.
- Save your changes and test the country blocking by using a VPN or proxy server to simulate a connection from the blocked country.
Remember, though, that IP blocking can be bypassed by users with VPNs or proxies. So, you might want to implement other measures, like CAPTCHA protections I mentioned earlier, as well.
4. Cloudflare WAF
You might also consider using Cloudflare to block certain countries from accessing your WordPress website. Cloudflare is a web security service that optimizes website performance and enhances online protection, and we offer its protection on our forms.
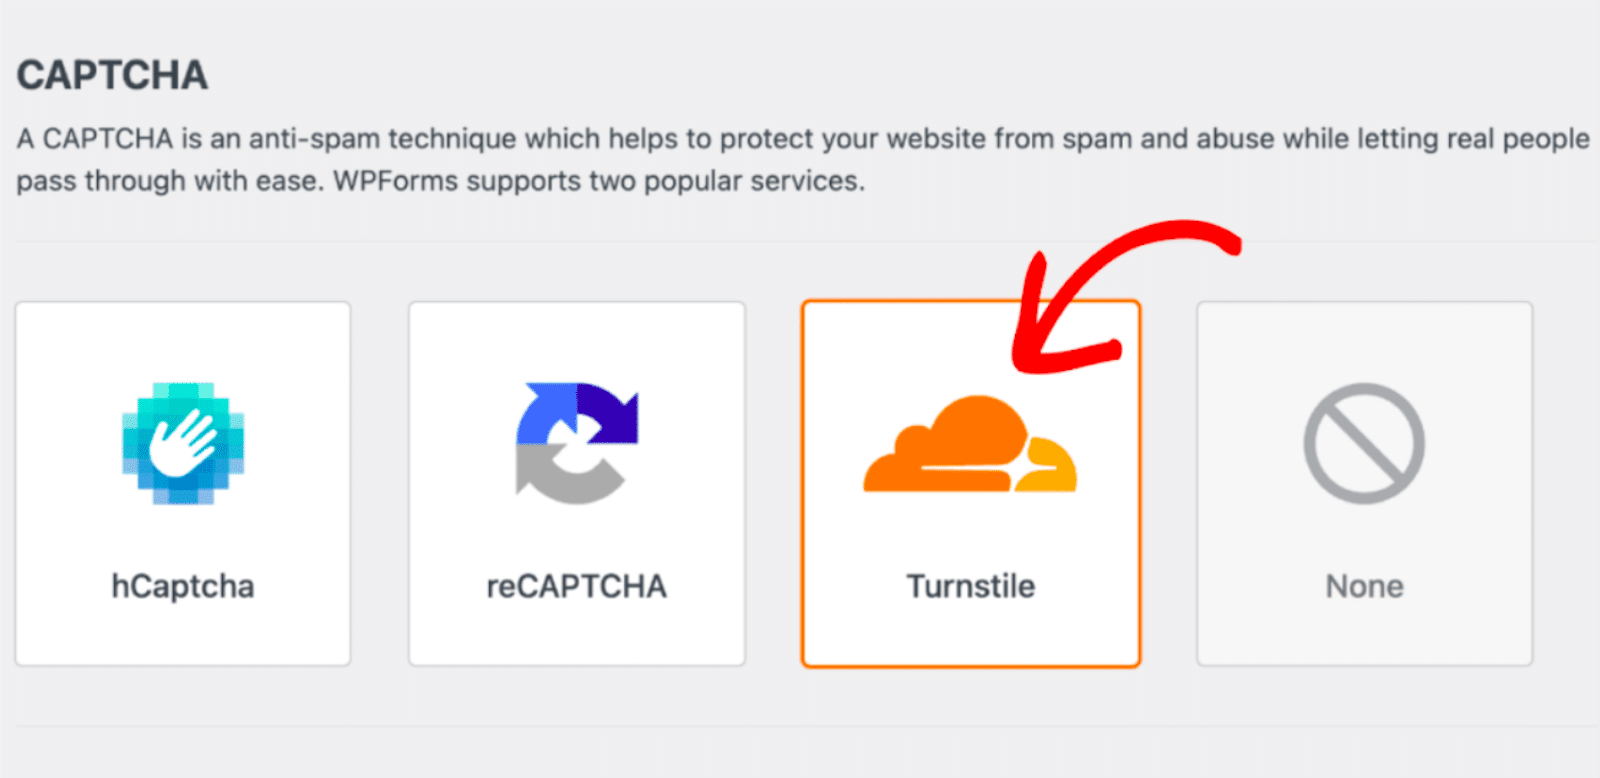
But within its own system, Cloudflare’s Web Application Firewall (WAF) can be used to block countries from accessing your website by creating custom rules based on the IP addresses associated with those countries. These custom rules are basically the same type of rules for email allowlists and denylists I covered earlier.
Once the rule is created, Cloudflare’s WAF will start blocking traffic from the specified IP ranges, effectively restricting access to your website from the chosen country.
5. Designated Plugins
Another option for blocking a country is with a designated tool that is made just for that purpose.
CloudGuard, for example, is a lightweight plugin that harnesses the power of Cloudflare’s free Geolocation service to restrict certain countries from accessing your login page. Then, users from these countries can’t get into your site at all.

By restricting login access to your chosen countries, unauthorized login attempts from other regions are automatically blocked. You can then monitor and track these attempts through a world map on your dashboard.
While other plugins offer geographic restrictions, they rely on your server for IP detection and storage, consuming resources and requiring frequent updates. But since ClouldGuard utilizes Cloudflare’s Geolocation service, your server focuses only on data retrieval and maintains optimal site performance.
Just keep in mind that the plugin requires that you have an account (either free or premium) on Cloudflare with Geolocation enabled.
But if you find yourself still in the market for a plugin, you might check out options like these:
- Wordfence: A comprehensive security plugin with a country-blocking feature, enabling you to restrict access to your entire website or specific pages.
- IP2Location Country Blocker: Allows you to block countries by IP addresses, IP address ranges, or specific cities.
- iQ Block Country: Lets you block countries by denying access to your website or specific pages based on the visitor’s IP address.
And there you have it! You now know more than 5 ways to block a country so users can’t access your WordPress site.
Why Would I Need to Block a Whole Country From My Website?
There are all kinds of reasons to block a country from your WordPress website!
Perhaps you have security concerns and are looking to prevent malicious traffic or cyberattacks from specific regions. Or, compliance with local laws and regulations may require restricting access to certain countries.
Plus, businesses targeting a particular geographic audience might want to limit access to countries outside their target demographic. However, exercise caution when implementing country-wide blocks to avoid affecting genuine users and potential customers.
FAQ
These are some additional questions that are frequently asked about blocking a country in WordPress:
Can I block a country from my WordPress site without using a plugin?
Yes, you can block a country by editing your .htaccess file or using the NGINX+GEO IP module. However, these methods require technical knowledge and can be risky if not implemented correctly.
Will blocking a country affect my website’s SEO?
Blocking countries may have a minor impact on your website’s SEO, as search engines might not be able to crawl and index your site from the blocked regions. But it shouldn’t significantly impact your overall SEO performance.
Can users bypass country blocking using VPNs or proxies?
Yes, users can bypass country blocking by using VPNs or proxies, which mask their IP addresses and location. So, you might consider implementing additional security measures like CAPTCHA or two-factor authentication.
Block a Country in WordPress Now
Next, Block ALL the Spam From Your Forms
Are you interested in learning more ways to prevent all kinds of spam from coming through your forms? Then be sure to check out this year’s updated edition of How to Stop Contact Form Spam in WordPress.
Ready to build your form? Get started today with the easiest WordPress form builder plugin. WPForms Pro includes lots of free templates and offers a 14-day money-back guarantee.
If this article helped you out, please follow us on Facebook and Twitter for more free WordPress tutorials and guides.

