AI Summary
Do you want to add instructional text to a form on your WordPress website?
When you know how to add instructional text to your form, you can share a descriptive prompt or directions with users.
In this article, we’ll walk you through 4 different ways to add instructional text to a form.
Add Instructional Text to Your Form Now
What Are Some Examples of Instructional Text?
Instructional text directs readers to complete a task, such as instructing website visitors to complete a form.
While instructional text can vary in content and length, such as a recipe or user manual, this text would likely be a short snippet when included on an online form.
For example, you may simply prompt your website visitors to message you on your contact page. So, your instructional text might be something like, “Please fill out the contact form below.”
In a nutshell, instructional text simply directs website visitors toward what you want them to do.
How to Add Instructional Text to a Form (4 Ways)
For this tutorial, we’re going to be using WPForms. With its easy-to-use, drag-and-drop user interface, it takes almost no time to learn how to use it.
With WPForms, you’ll find several ways to add instructional text to your form, whether you’re using a form template or building from scratch. The many options for customization allow you to include instructional text in various styles to fit your needs.
In This Article
1. Content Field
One way to add instructional text with the WPForms form builder is by using the Content field. To access the Content field, you’ll need the WPForms Pro license.
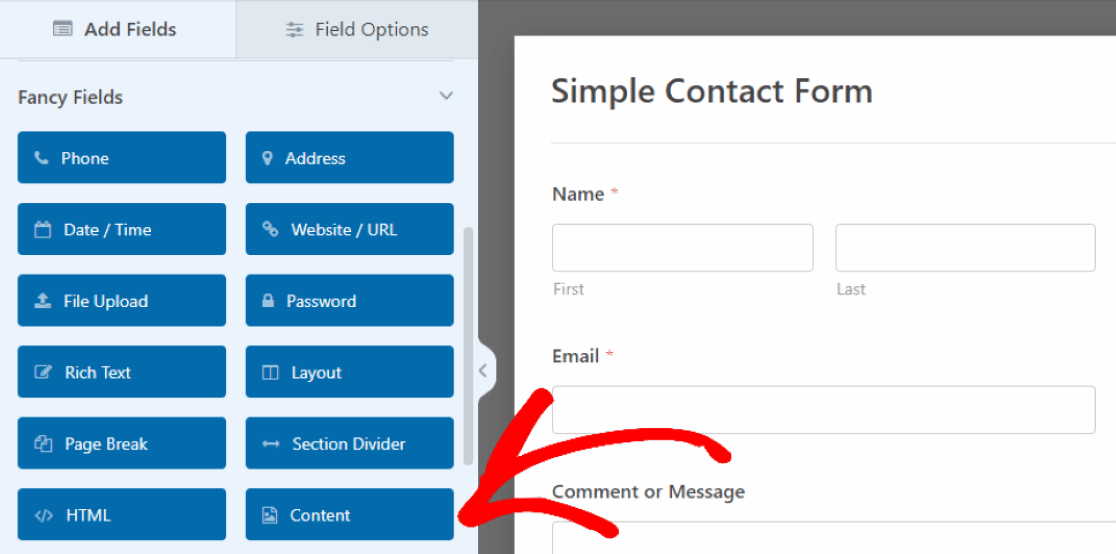
In our example, we’ve dragged and dropped our Content field at the top of the form, where we’ll insert directions for users to fill out the form.
To do so, just click on the field to open its Field Options and then enter your text in this text box that appears on the left.
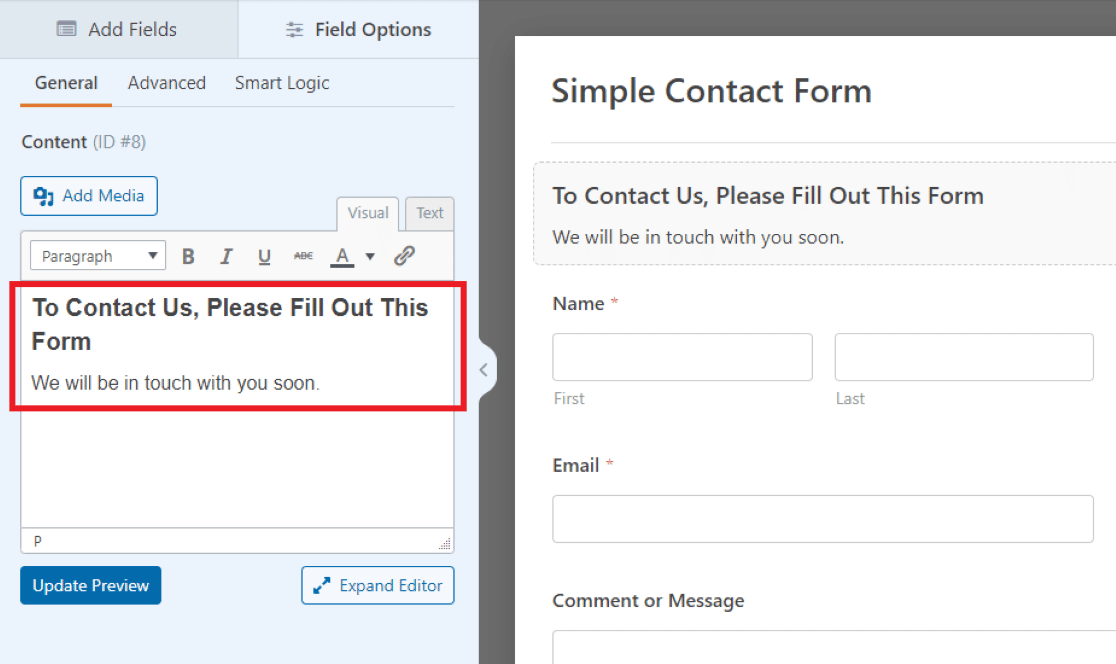
Here in the text editor in our example, we’ve written a welcoming message and prompt for visitors to fill out our form.
You can adjust the font, size, color, and other styling elements of the text you’re including in the Content field using the formatting tools built into the text editor.
You may find that you want to use this form field in other places on your form, too, since it’s an easy way to add customizable text anywhere you want it.
In fact, the Content field lets you insert images alongside instructional text too. This is a unique capability that makes WPForms stand out from competitors. See Gravity Forms vs Fluent Forms vs WPForms for more details.
2. Field Descriptions
Another way to add instructional text to your form is by using the field descriptions. Most fields in WPForms allow you to write out a small text description, which is displayed with the given field.
To add a description to any form field, first, insert the text field into your form and then click on it to open its Field Options. Now, in the General tab of the Field Options, you can enter your instructions in the Description text box.
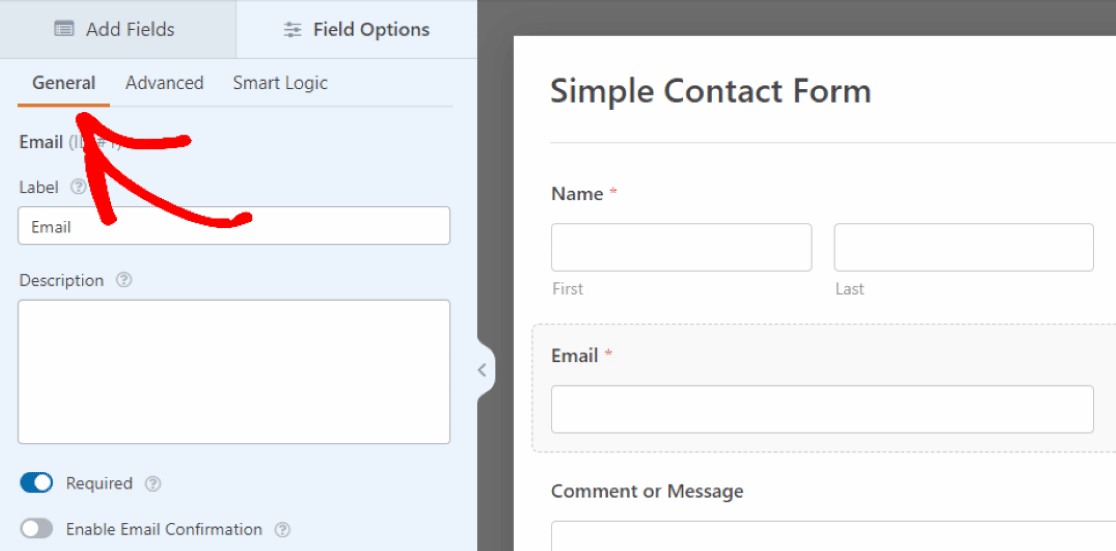
So, we’re adding instructional text to the Email field by clicking on the General tab and writing instructions in the Description box.
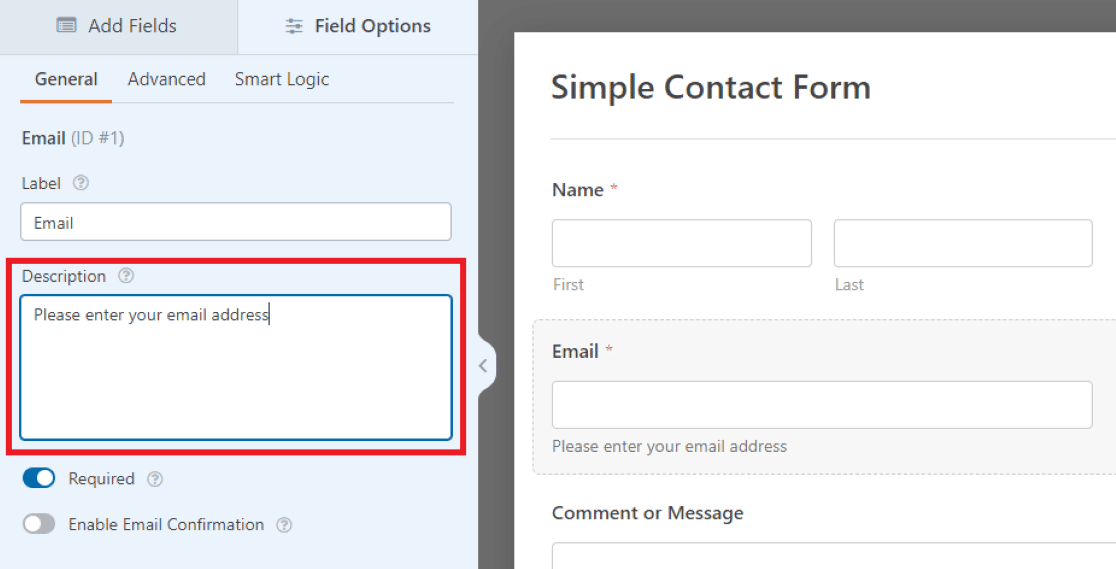
Then, what you’ve written in the Description will appear as small text directly below the field on the form. Think of them like little notifications to indicate to users what kind of information you need.
In our example here, we’re instructing website visitors to enter their email addresses, but you may decide to use the settings of other fields on your form to customize your instructional text as you see fit.
3. Placeholder Text In Fields
You can also use other field settings to include instructional text in a different way.
In the Advanced settings of the field, you have the option of writing out a bit of Placeholder Text.
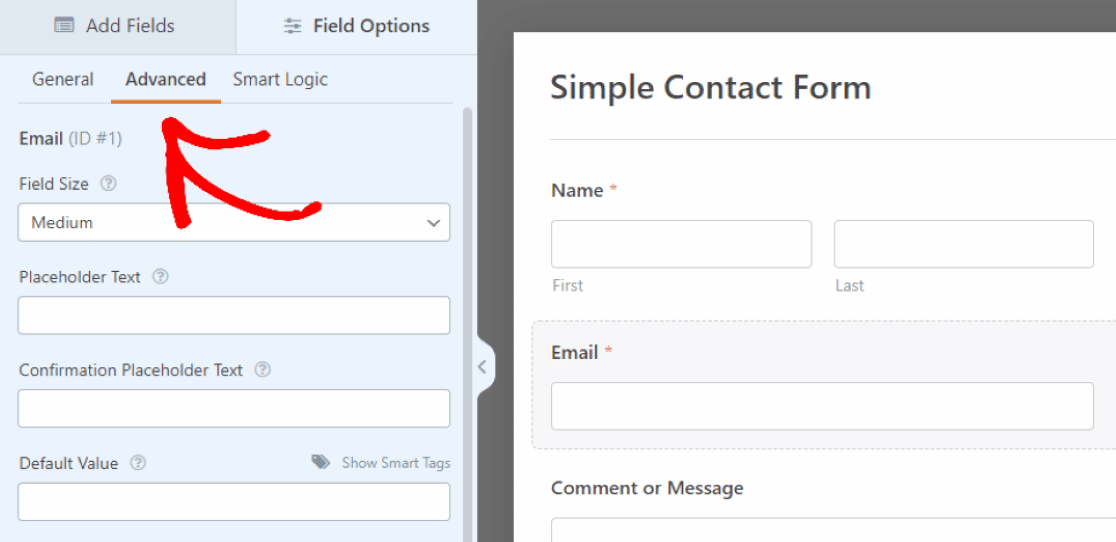
This means that the text you enter here will act as a placeholder in the field.
From the Advanced tab under the Field Options, you’ll scroll down to the box labeled Placeholder Text. Then, the instructional text you write here will appear inside the entry box of the Email field on your form.
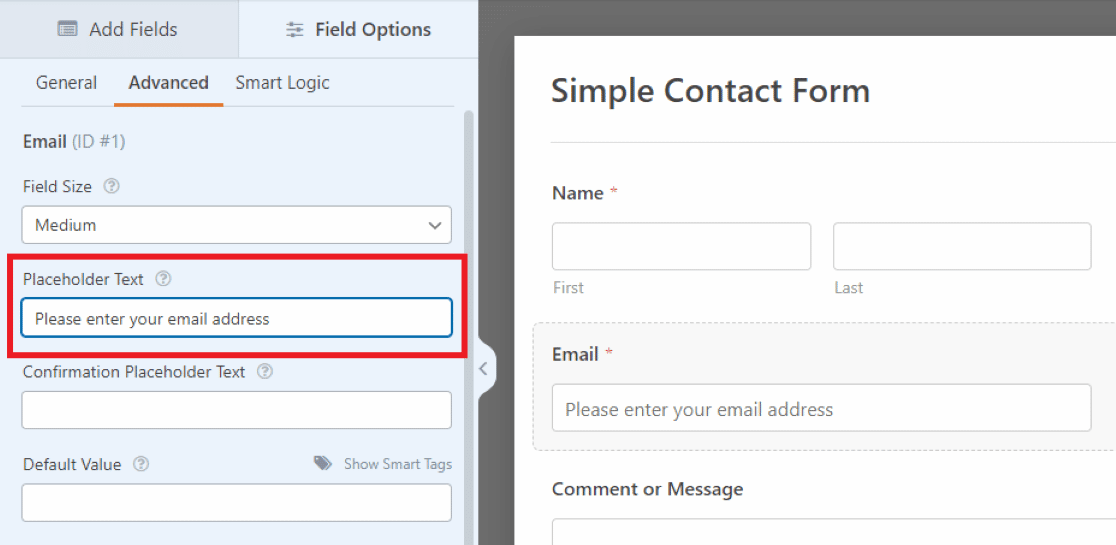
Since this text is placed in the email entry box of the field, you’re limited on space. So, you need the instructional text here to be somewhat short.
For longer directions or prompts, it’s tidier to use Descriptions under the field, as shown in the previous method.
4. Editing Text In the Section Divider
The next way you can add instructional text to your form is by editing the text in the Section Divider field. You’ll find it back in the Fancy Fields we accessed in the first example.
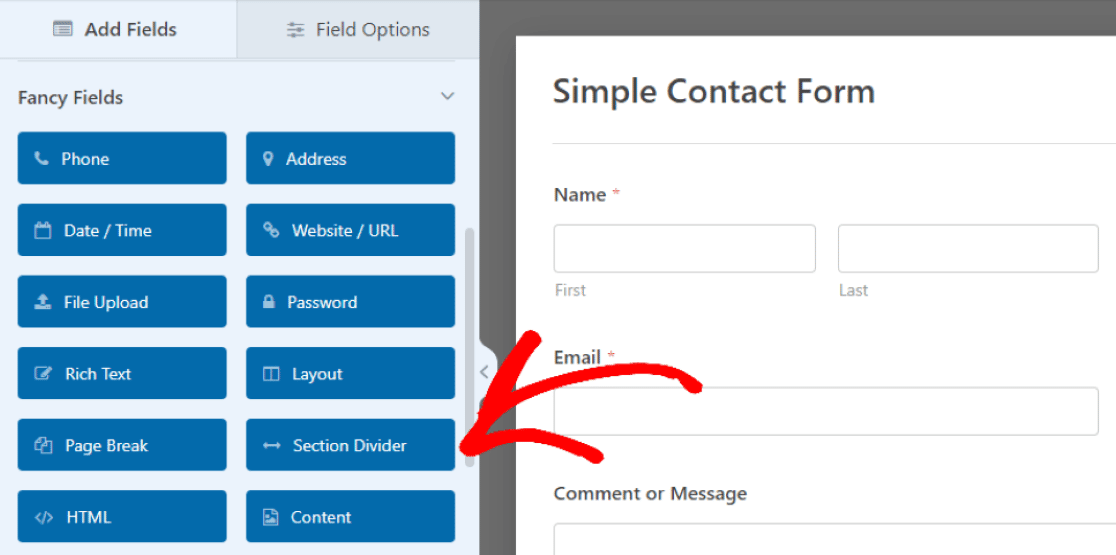
Once again, you can drag this field to place it where you’d like on your form.
In our example here, we’re placing the field at the bottom section of the form, between the comment box and submit button. This will be a concluding message to visitors to wrap up the form’s contents.
Then, you’ll use the Label and the Description together to create your instructional text. But you can use either of these options to style your form however you like.
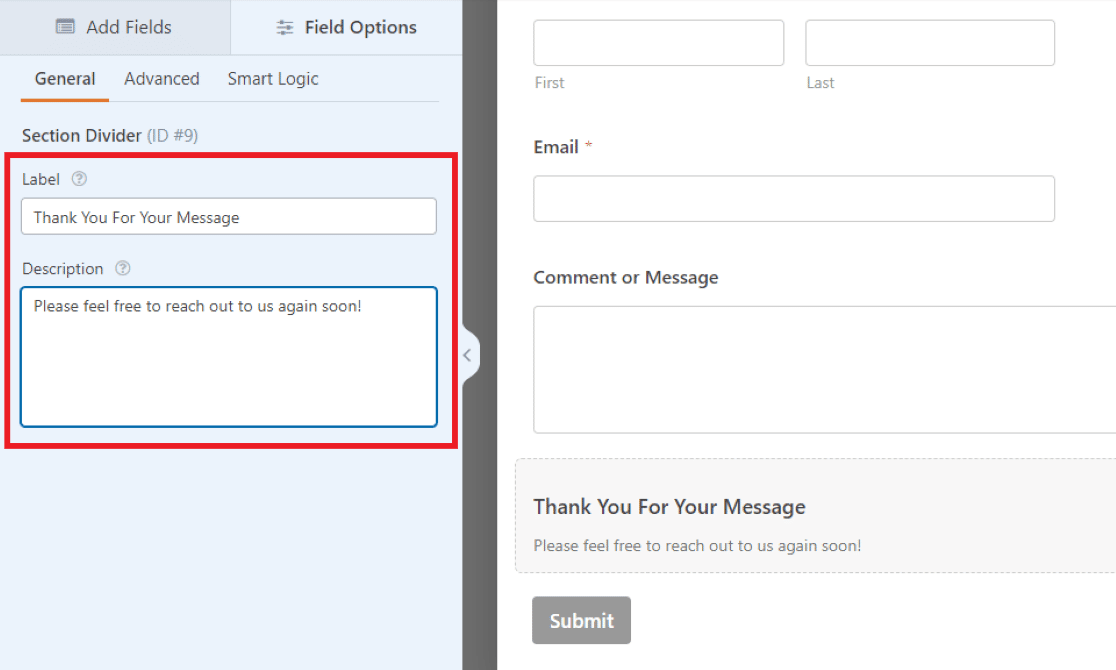
Since the field’s label is displayed in a bold font, we’re inserting the important text here in our example. We’ll use the smaller text of the Description to include a short message.
As we’ve mentioned, you can utilize the different font sizes to style your instructional text however you’d like, or you may decide to simply not use one of the options at all.
Notice how the method we’ve used here creates a similar text style to what we created with the first example, using the Content field. However, there are many additional options for font customization thanks to the text editor of the Content field.
That said, you’ll find what you prefer as you edit and customize your own form to fit your needs.
Add Instructional Text to Your Form Now
Next, Use the Content Field to Add a Header Image
Remember how we skipped the Add Media button in the Content field from example one? Now’s the time to revisit it and add a header image to your form. Including a header image is a creative way to personalize your form or promote your business. Check out this tutorial on how to use the Content field to add a header image.
Don’t forget that you can also use conditional logic to improve form functionality.
And finally, to learn how to use good form design to boost conversions.
Ready to build your form? Get started today with the easiest WordPress form builder plugin. WPForms Pro includes lots of free templates and offers a 14-day money-back guarantee.
If this article helped you out, please follow us on Facebook and Twitter for more free WordPress tutorials and guides.

