



AI Summary
Want to add an image in your form header? Maybe it’s your logo, a banner that matches your site, or a photo that shows visitors what the form is all about.
Whatever you’re picturing, a plain block of gray fields isn’t doing your brand any favors. I’ve seen so many beautiful websites with forms that look like they were borrowed from someone else’s site.
The fix is the Content field in WPForms. It lets you drop images, logos, and text directly into your forms, no code required.
In this post, I’ll walk you through the whole process of adding a form header image in WordPress, step by step.
Add a Header Image to Your Form Now
Why Should I Add a Header Image to a Form?
A custom form header image is one of the fastest ways to make your form look like it actually belongs on your website. Instead of a generic set of fields, visitors see your branding first, which builds trust before they type a single letter.
It also sets expectations. A header image or logo gives people a clear idea of who they’re contacting and why, and it ties your form into your site’s overall color scheme and design theme.
Your header might reflect the subject of the form, or it might simply be your business logo. And if you want the same branded look on every form you build, you can create branded form templates so each new form starts with your header already in place.
Logos come in all sizes, too. If you’re wondering how big yours should be, see our guide on the best logo size for sites.
How to Add a Form Header Image or Logo in WordPress
In this step-by-step guide, I’ll show you how to add a header image or logo to your WordPress forms without touching any code. This tutorial is perfect for beginners, and you won’t need custom CSS, a page builder, or the WordPress Customizer.
Step 1: Install the WPForms Basic Plugin
WPForms is the easiest way to build branded forms in WordPress. You get a drag-and-drop builder plus 2,100+ templates to start from, so you’re never staring at a blank form wondering where to begin.
What I like most about WPForms for this particular job is that the Content field works just like the WordPress editor you already know. Adding your logo to a form feels exactly like adding an image to a blog post, right down to the Add Media button.
You’ll need a license to use the Content field, since it isn’t included in Lite. The good news is that it unlocks at Basic, the first paid tier, so you don’t have to spring for a pricier plan just to brand your forms.


To get started, buy the Basic license. Then, install WPForms on your website. If you need help, follow these instructions on how to add a plugin to WordPress.
Step 2: Select the Simple Contact Form Template
Once you have the plugin set up on your site, go to WPForms » Add New in your WordPress dashboard.
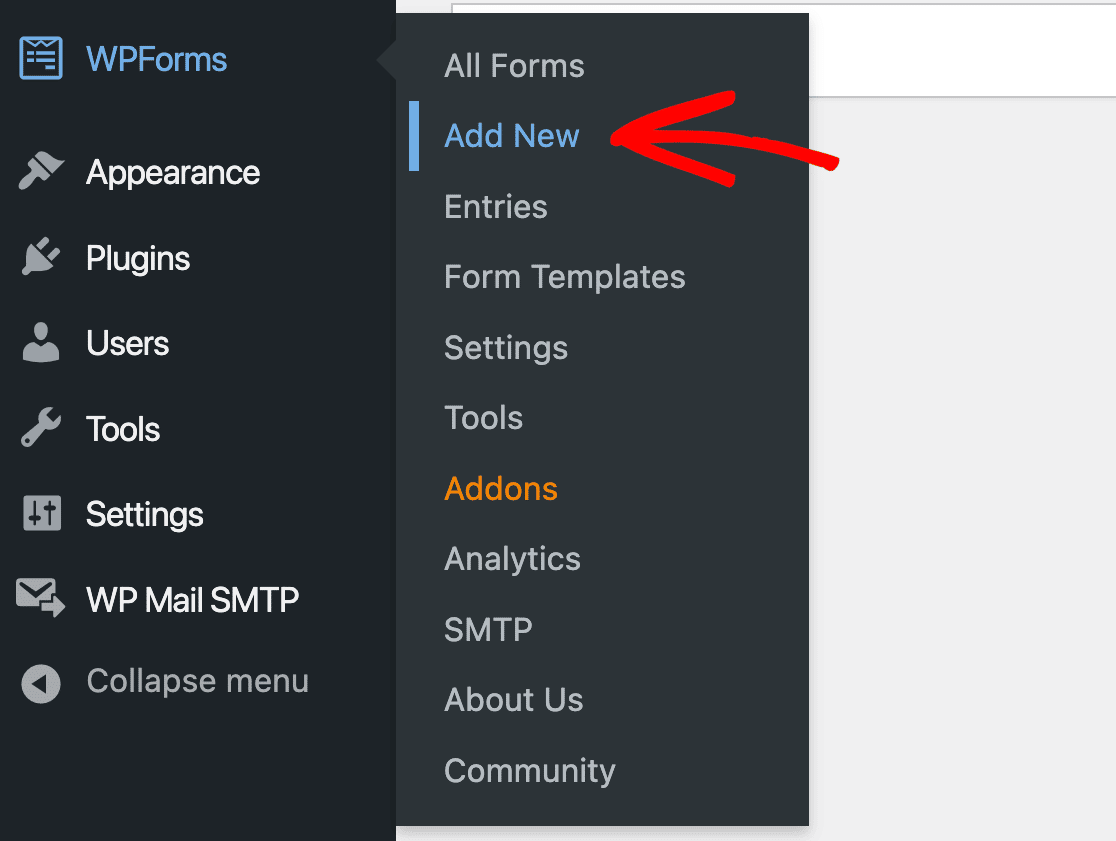
From here, you’ll find a huge library of form templates to choose from.
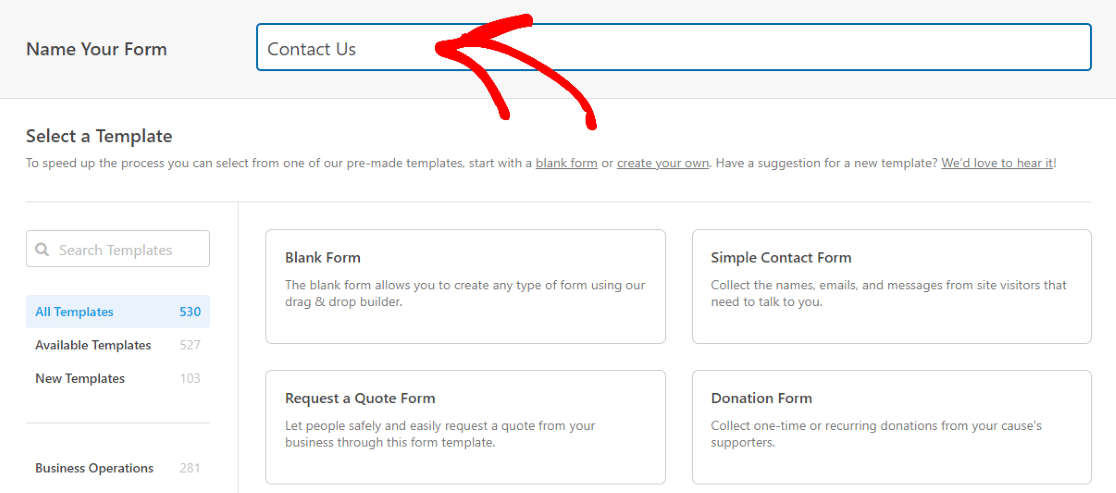
But first, let’s name the form. For this tutorial, we’ll name our form “Contact Us,” which will be displayed at the top of the form.
Now, we’ll select the Simple Contact Form template.
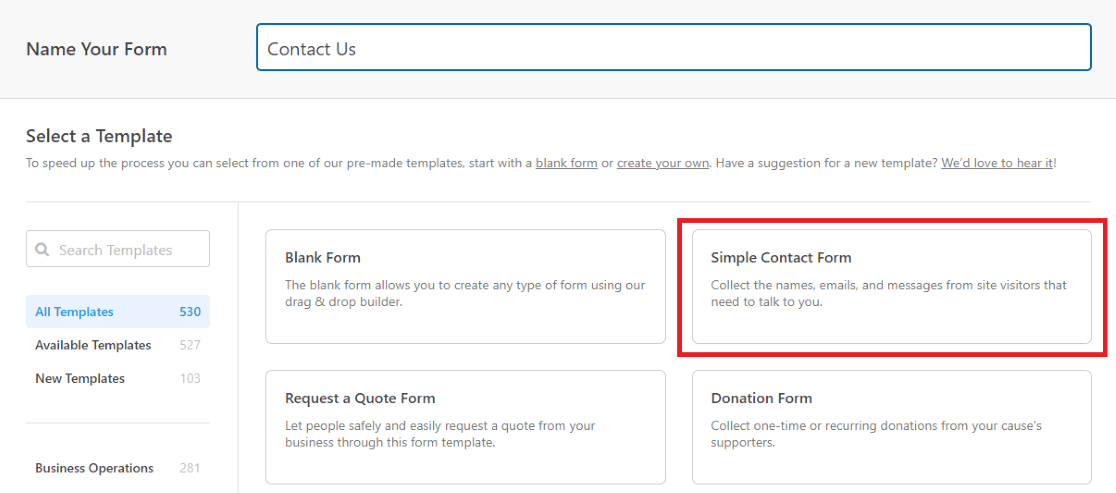
This takes us straight into the drag-and-drop form builder, where we’ll customize the template.
Step 3: Add the Content Field
Now that we’re in the form builder, find the Content field in the Fields tab.
Simply click on Content, then drag and drop the field wherever you want it on your form.
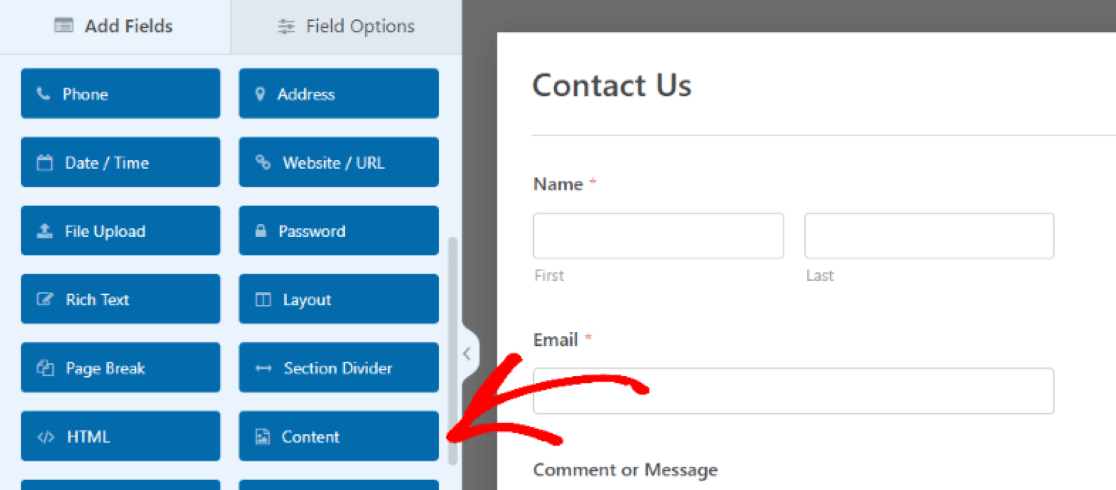
We’re dragging the Content field to the top of the form so the uploaded media will act as a header section.
When the field is in place in the preview area, click on it to open its Field Options. This is where you’ll add your media and edit the text using the editor in the left-hand pane.
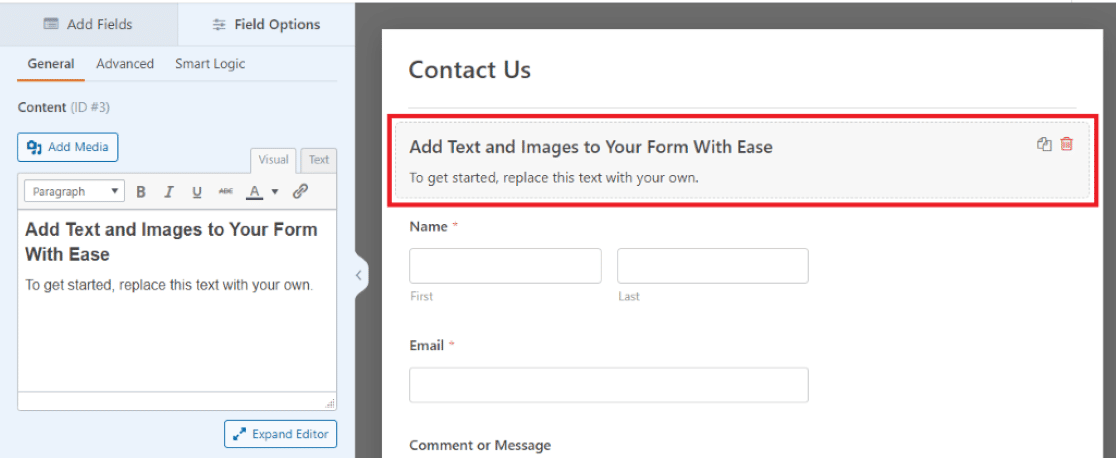
You can edit your content visually or switch to the Text editor to work in HTML. For a full rundown of everything this field can do, check out our complete guide to using the Content field.
Great! Now we’re ready to upload our image and add some text to the form.
Step 4: Upload Your Company Logo or Image
Next, click Add Media to upload your image to the Content field.
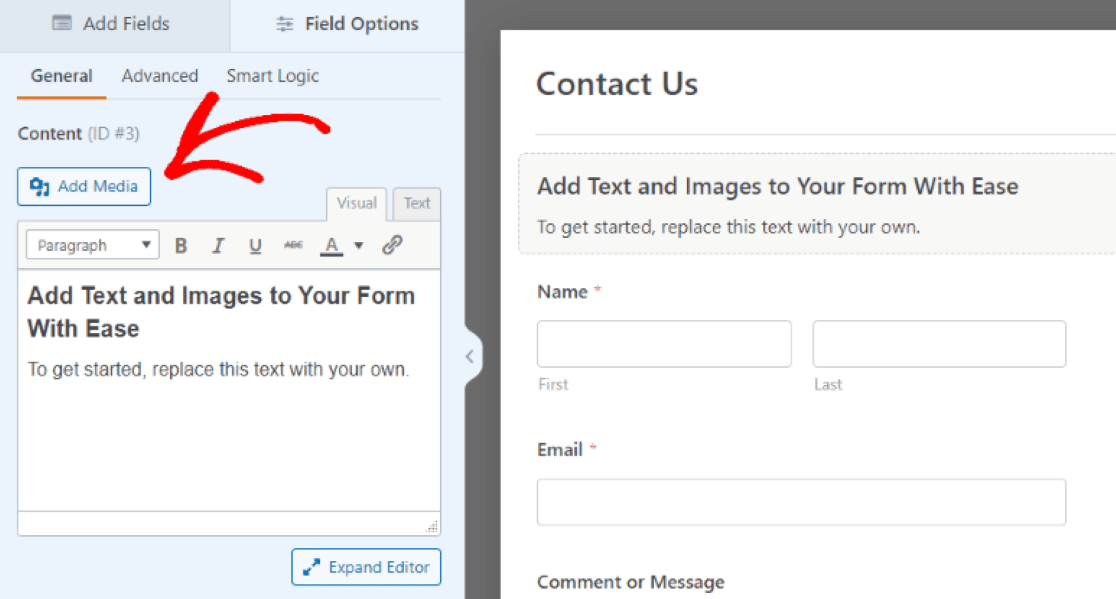
You’ll be able to upload a new image or select one from your Media Library. JPG and PNG files are accepted.
A couple of quick tips before you upload. For logos, use a PNG with a transparent background so your logo doesn’t sit inside a white box, and a width of around 200 pixels is a good starting point. For banner-style header images, pick something at least as wide as your form, roughly 700 to 800 pixels for most WordPress content areas, so it stays sharp at full size.
Don’t have a logo yet? These AI logo generators can get you a solid one in a few minutes.
With our custom logo in place, we can then edit customization options such as the image size, orientation, and other details.
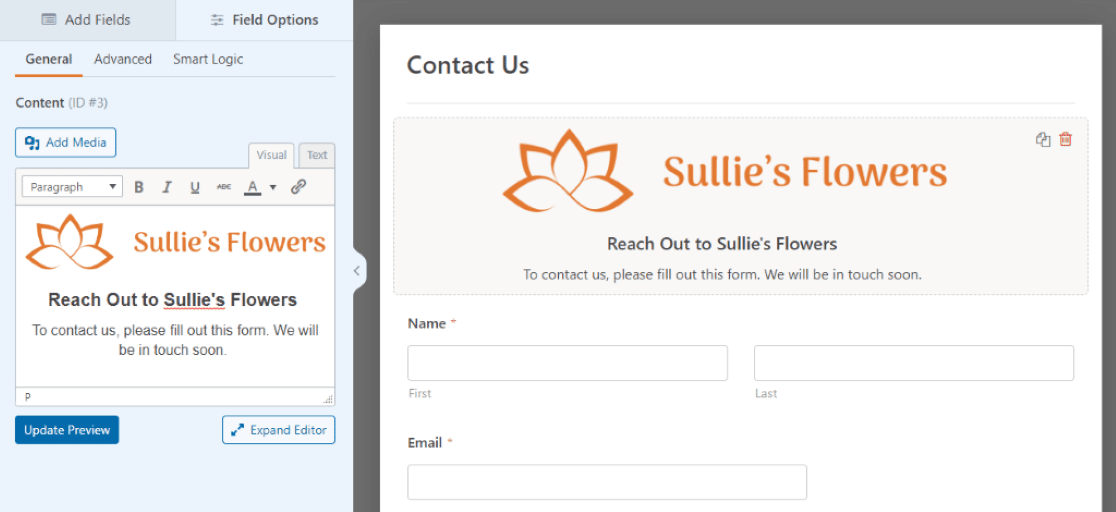
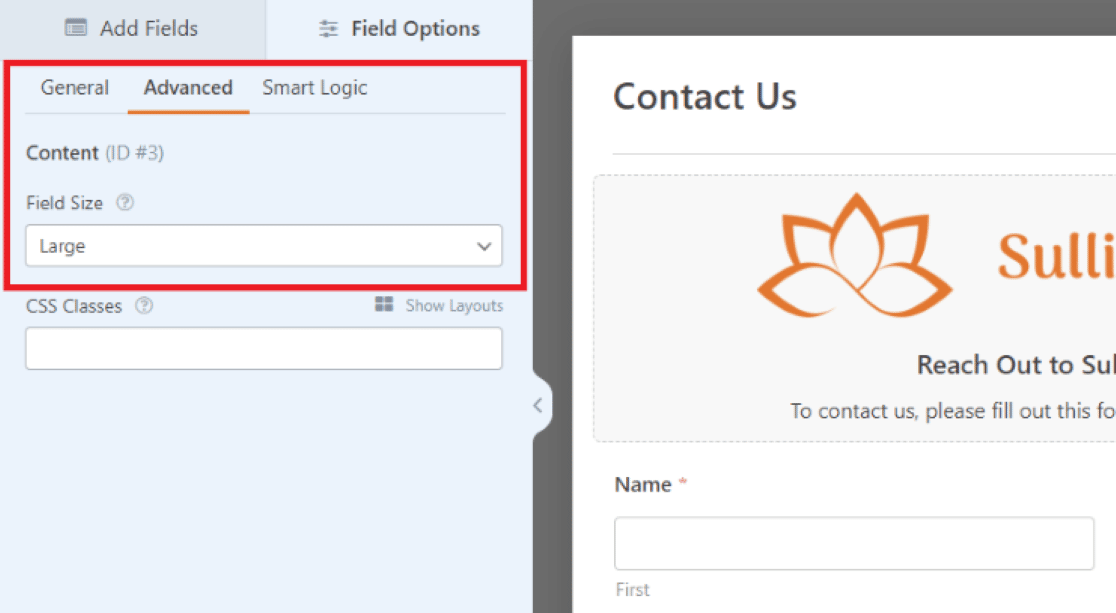
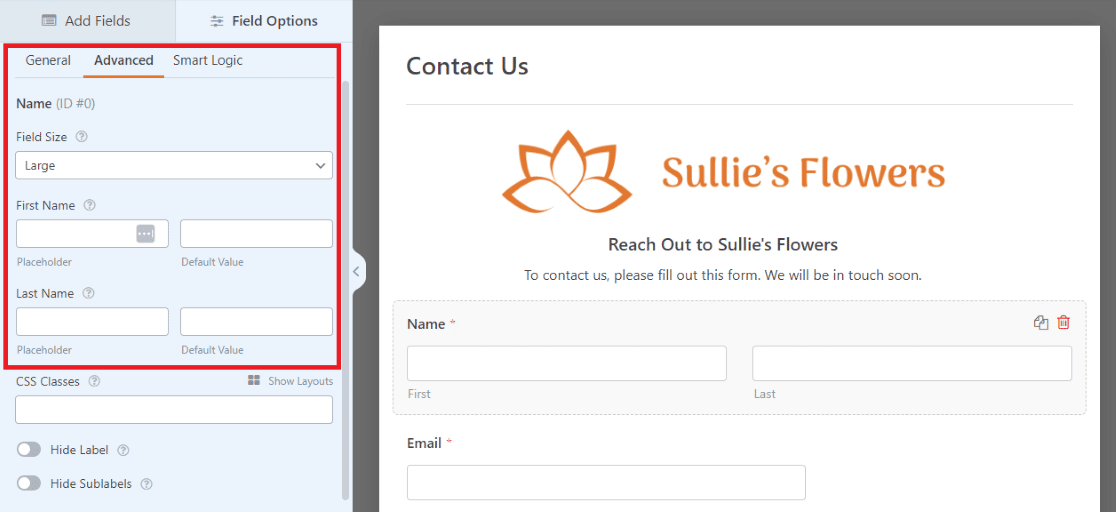
To make sure our image acts as a true form header, we’ve gone to the Advanced tab and set the Field Size to Large.
Then, back in the General tab, we made sure the image is centered in the field using the formatting options within the text editor.
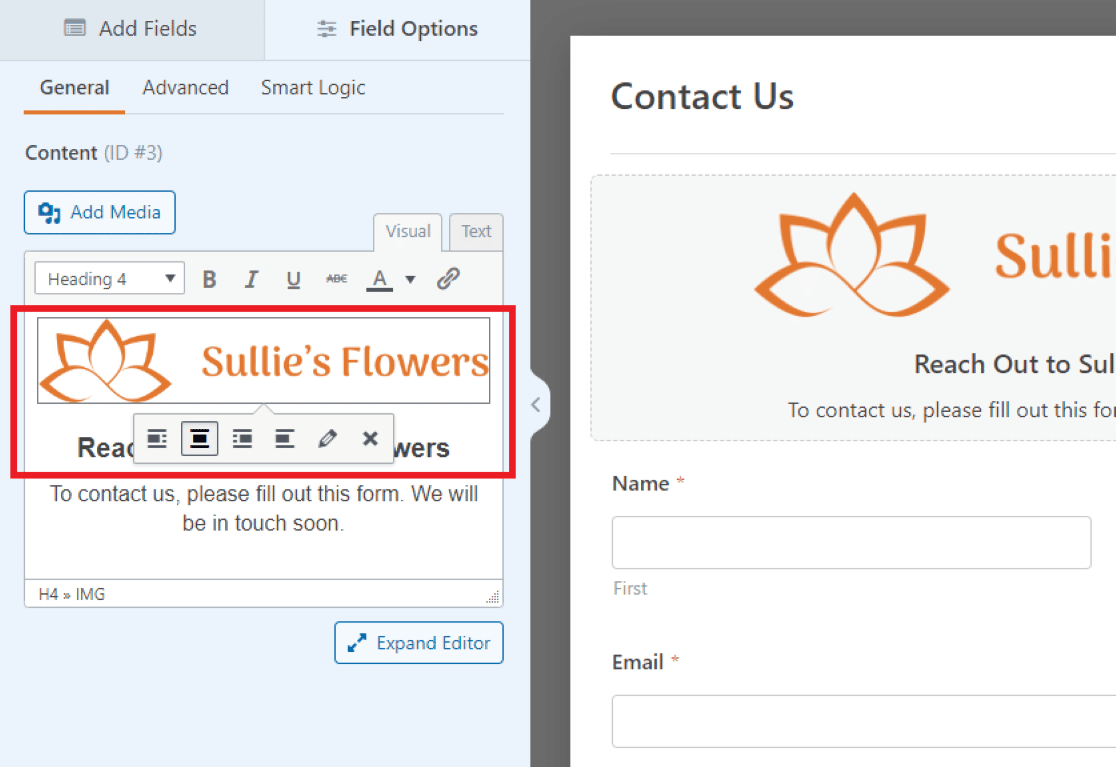
We can also edit the text in the field. We wrote a short welcome message for visitors here, plus a friendly prompt to fill out the contact form.
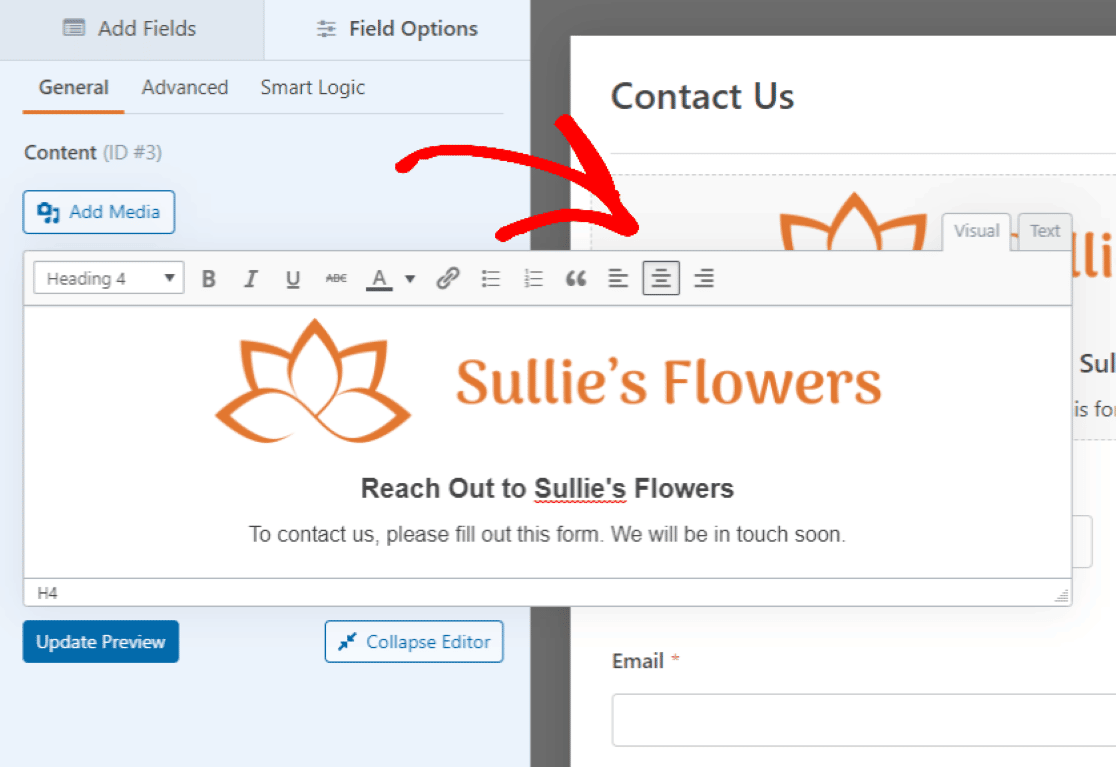
Like the media above it, you can format the text freely in the Content field. Click Expand Editor under the text box for even more editing options.
For our logo here, we’ve centered the text with the rest of the image.
You may want to customize the other fields on the form, too.
For example, we’ve increased the size of the Name field to Large to match the width of our header image above it.
There are plenty of ways to fine-tune the fields on your form, and you can preview your changes as you go.
Be sure to click Update Preview to see the adjustments made to the Content field.
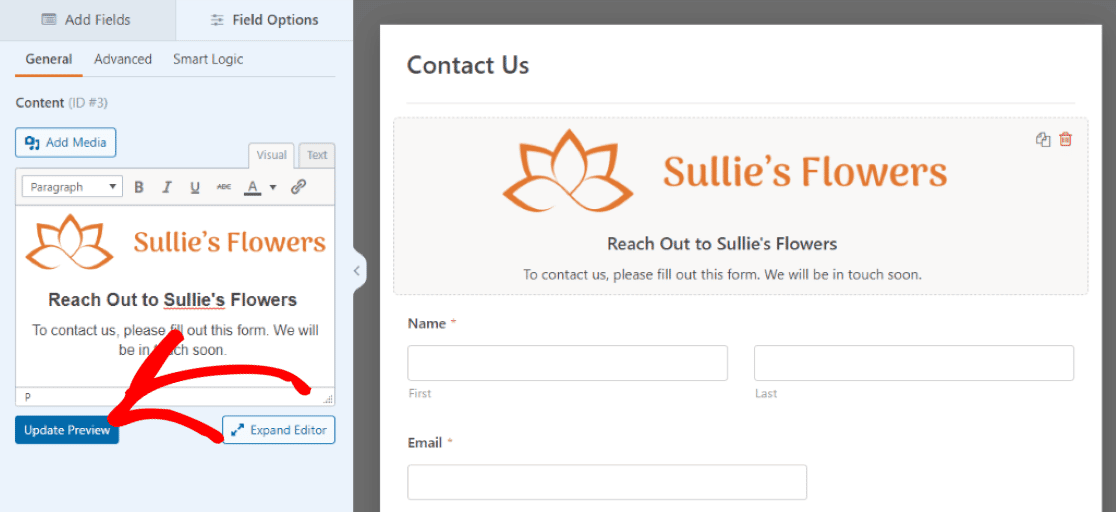
Our header looks great, so let’s get this form onto a page.
Step 5: Save and Embed the Form
Press the Save button in the top right corner of the form builder to lock in your changes.
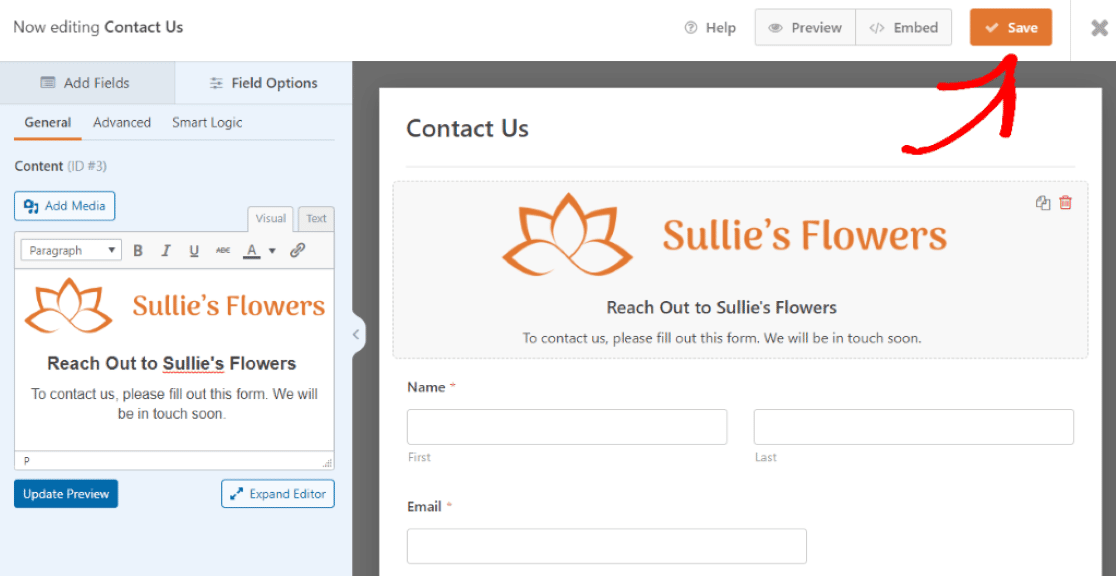
Whether you check out the page preview or not, you’ll need to click Save before you move on.
Now, click the Embed button at the top to add this form to a page on your WordPress website.
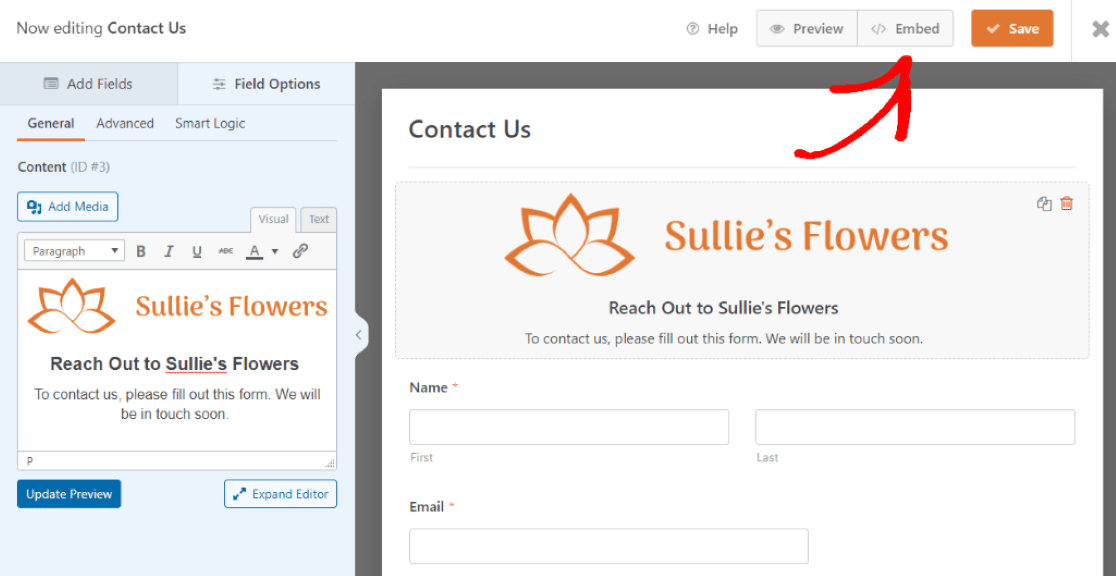
After clicking Embed, we’ll choose where to put the new form.
You can select an existing page or create a new one. For this tutorial, we’re creating a new page, so we’ll click Create New Page.

After that, we’re prompted to name the new page.
We’ll call ours “Contact Us” since that’s what we named this form when we selected the template.
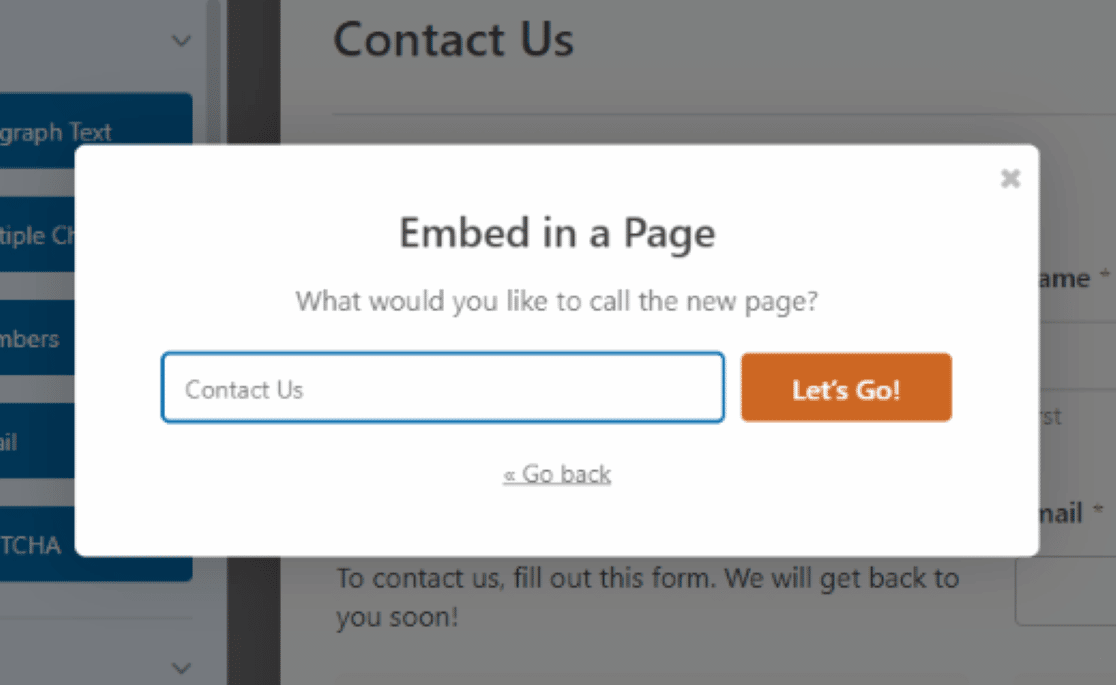
We can now see the form on a newly created page for our WordPress website. From here, we can preview the page, save it as a draft, or publish it.
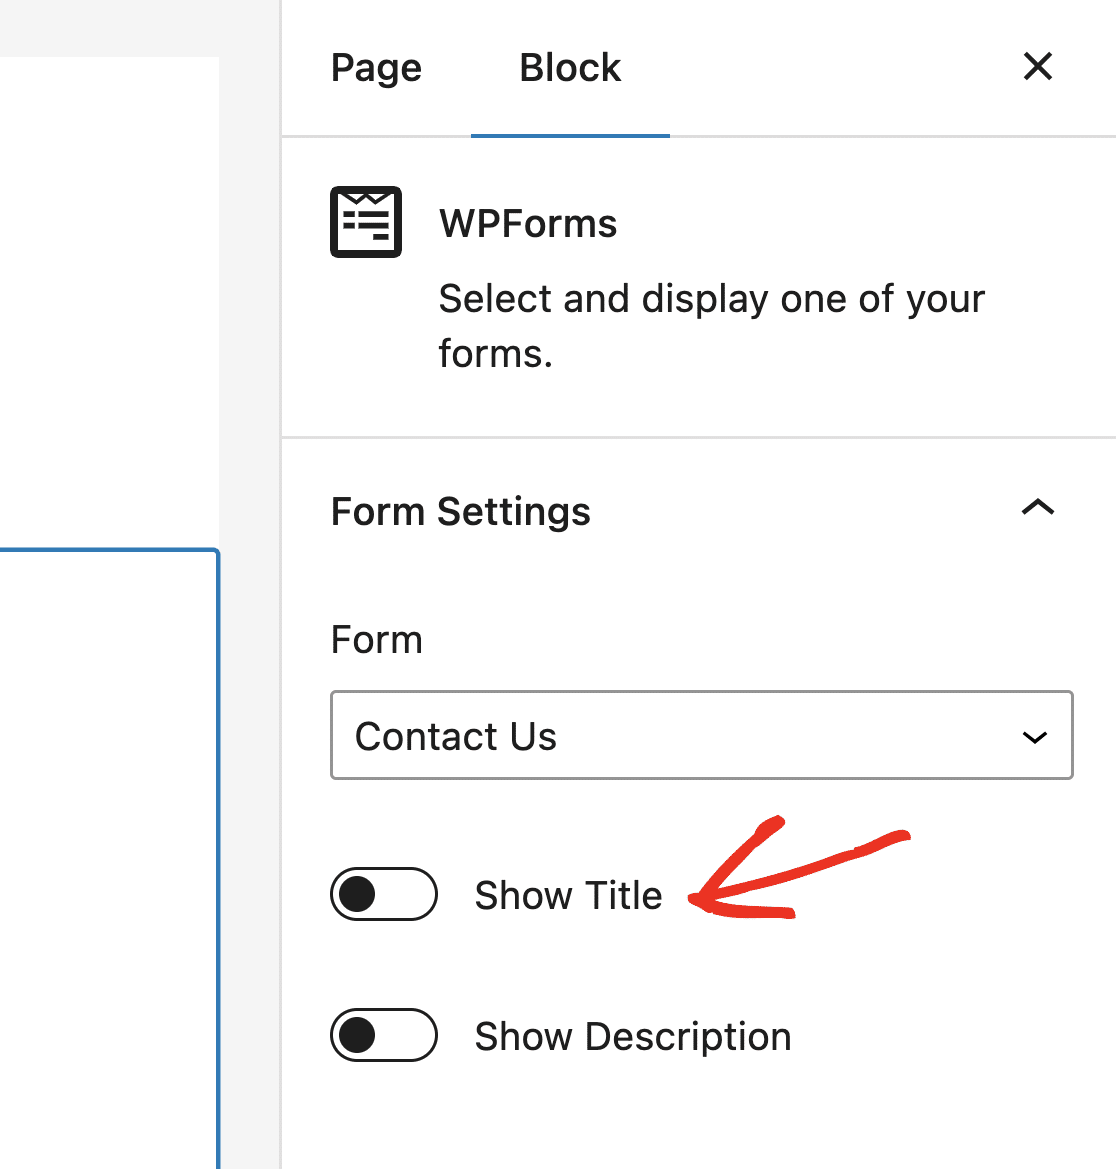
One more recommendation. In the block settings on the right side of the editor, hide the form title so it doesn’t compete with your new header image.
Just make sure the Show Title toggle is in the off position.
When you’re ready, click Publish to make this page live on your site.
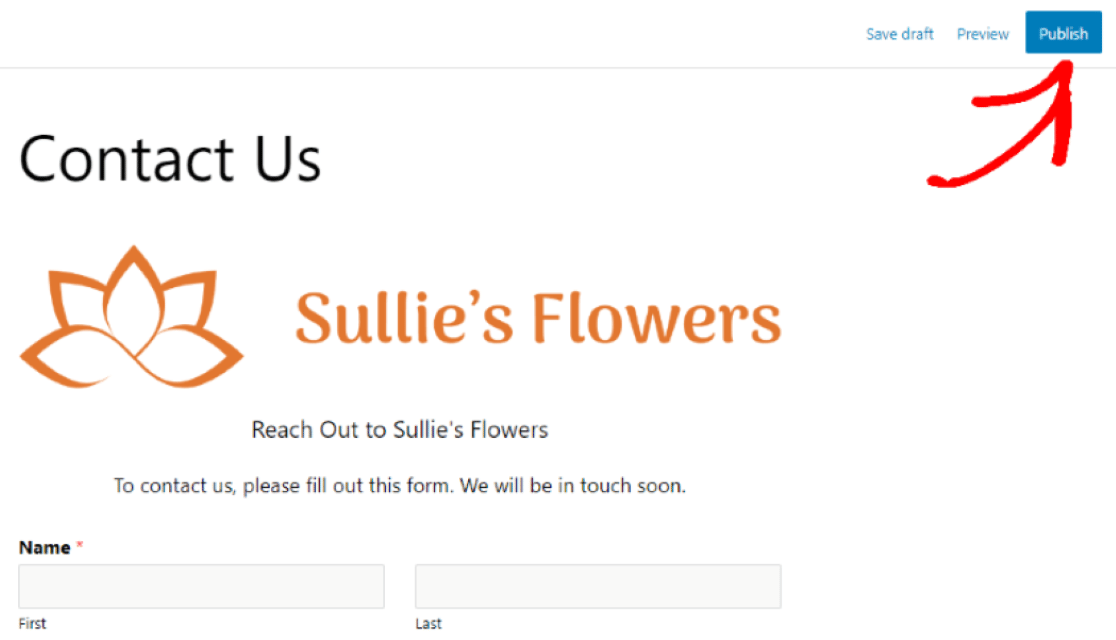
Fantastic! You’ve now got a form with a custom header image or logo, and the whole thing probably took you less than ten minutes.
FAQs About Adding a Form Header Image in WordPress
Adding a header image or logo to your WordPress forms tends to raise the same few questions. Here are quick answers to the ones we hear most often.
Why can’t I find the Content field in WPForms?
The Content field is available on WPForms Basic and higher, so it won’t appear in the field list if you’re using the free Lite version. Upgrade to any paid license and the field will show up in the form builder.
What size should a form header image be?
For a logo, around 200 pixels wide with a transparent PNG background works well. For a banner-style header, match the width of your form, which is usually 700 to 800 pixels in a standard WordPress content area. Starting close to the display size keeps your image looking crisp.
Can I add images anywhere else in my form?
Definitely. The Content field can go anywhere on your form, and you can use more than one. If you want images next to your questions or in other creative spots, here’s how to add images anywhere in your WordPress forms.
Can I style my form to match my site’s branding?
Yes. If you embed your form with the WPForms block, you can change colors, backgrounds, and field styles right in the block editor without writing CSS. Our guide to styling your forms walks through every option.
Can I change my site’s header instead of the form header?
This tutorial covers the header area of a form. If you want to update the header of your whole website, that’s controlled by your theme, and we cover it in our guide on how to edit your site’s header in WordPress.
Next, Stop Contact Form Spam in WordPress
With an attractive new header on your form, you’ll be inviting a lot more visitors to fill it out. You don’t want half of those entries to be junk, though.
To keep spammers away from your shiny new form, check out our guide on how to prevent spam submissions in your WordPress forms.
Ready to build your form? Get started today with the easiest WordPress form builder plugin. WPForms Pro includes lots of free templates and offers a 14-day money-back guarantee.
If this article helped you out, please follow us on Facebook and Twitter for more free WordPress tutorials and guides.





the content field is not found in field list.
Hi Stefan,
The Content field allows you to add extra content to your forms, such as images, videos, headings, and text, without using code.
For more details, be sure to check out our guide to using the Content field.
Hope this helps 🙂