Have you ever wondered if you could allow users to select an image in your WordPress form instead of just text?
Let’s face it. We’re all naturally drawn to interactive and visual elements. A plain text-only form is functionally fine, but a form with selectable images translates to a MUCH better user experience.
And you know what? It’s adding images to radio buttons in a WordPress form is actually pretty easy to do as I’m going to show you in this article.
You can add images to your radio field with WPForms Lite, entirely for free. But if you want to unlock additional features for making your forms more interactive, upgrading to WPForms Pro is well worth it!
How to Add an Image Next to Radio Buttons in WordPress Forms
WPForms makes it super simple to add images or icons to your Multiple Choice radio buttons or your Checkboxes fields. Here are the steps you’ll need to follow:

If you prefer written instructions, continue reading below.
In This Article
Step 1: Create a Simple WordPress Form
The first thing you’ll need to do is install and activate the WPForms plugin. For more details, see this step-by-step guide on how to install a plugin in WordPress.
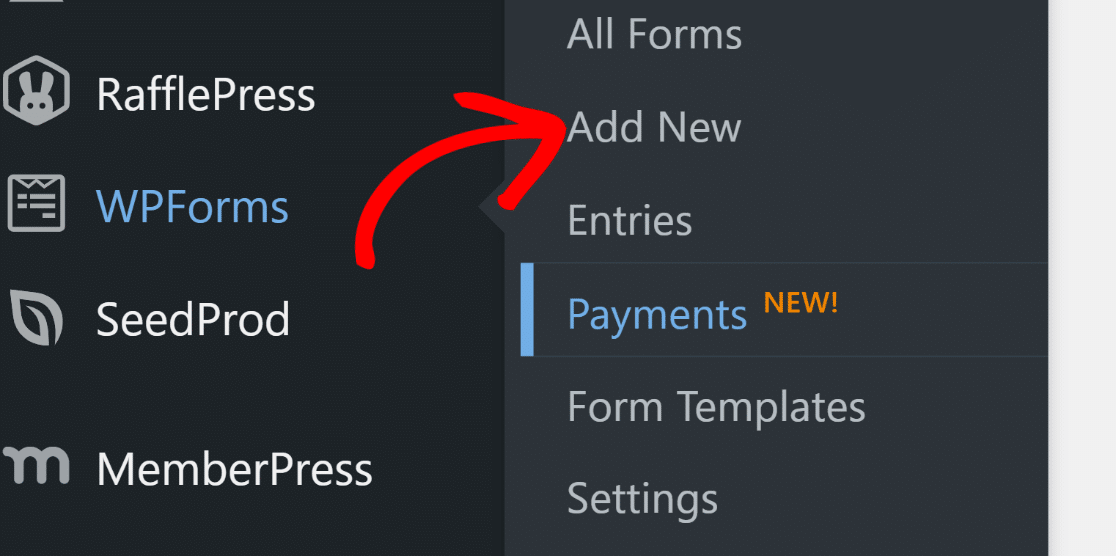
After you’ve successfully installed WPForms on your site, you can start creating your form by opening your WordPress dashboard and navigating to WPForms » Add New.
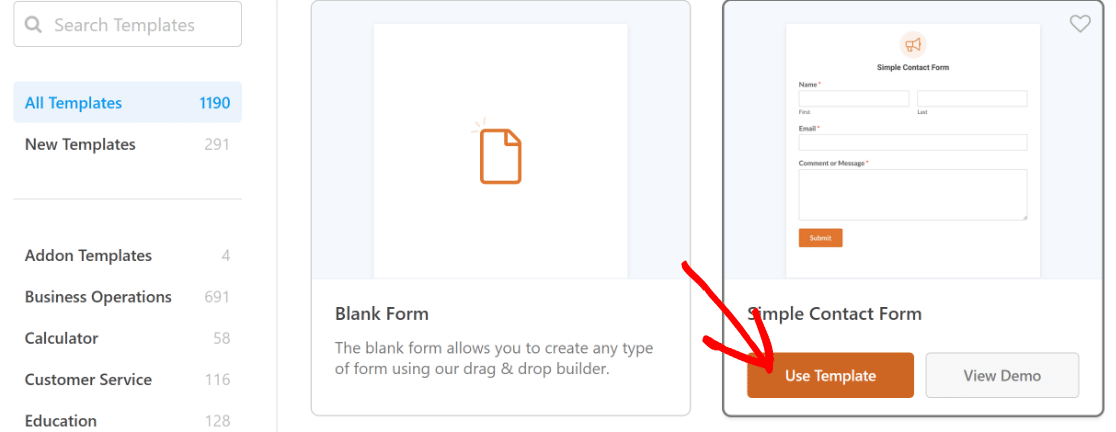
After that, you can start by giving a name to your form and then picking a template. For this example, I’ll use the Simple Contact Form template, which is one of the 2,000+ WordPress form templates available.
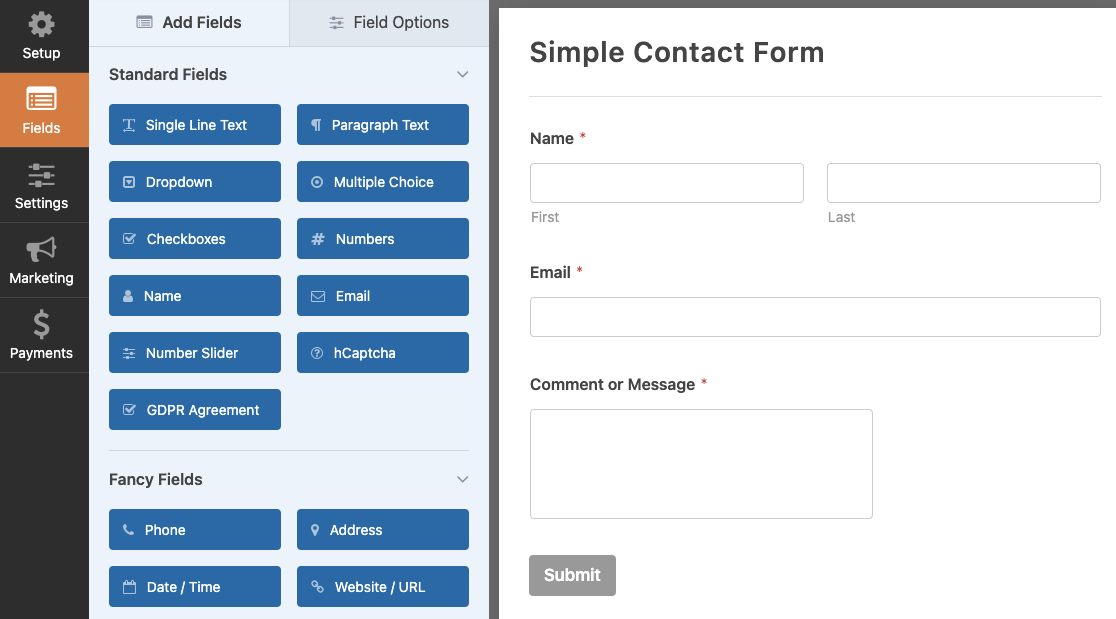
As soon as you select a template, it will load up inside the form builder.
You can also see our tutorial on how to create a simple contact form as an example to get started.
Step 2: Customize Your WordPress Form
The Simple Contact Form template comes with the following default form fields:
- Name
- Comment or Message
In our example, we’ll add a Multiple Choice form field to our simple contact form and change the label and choices to ask why the user is contacting us.
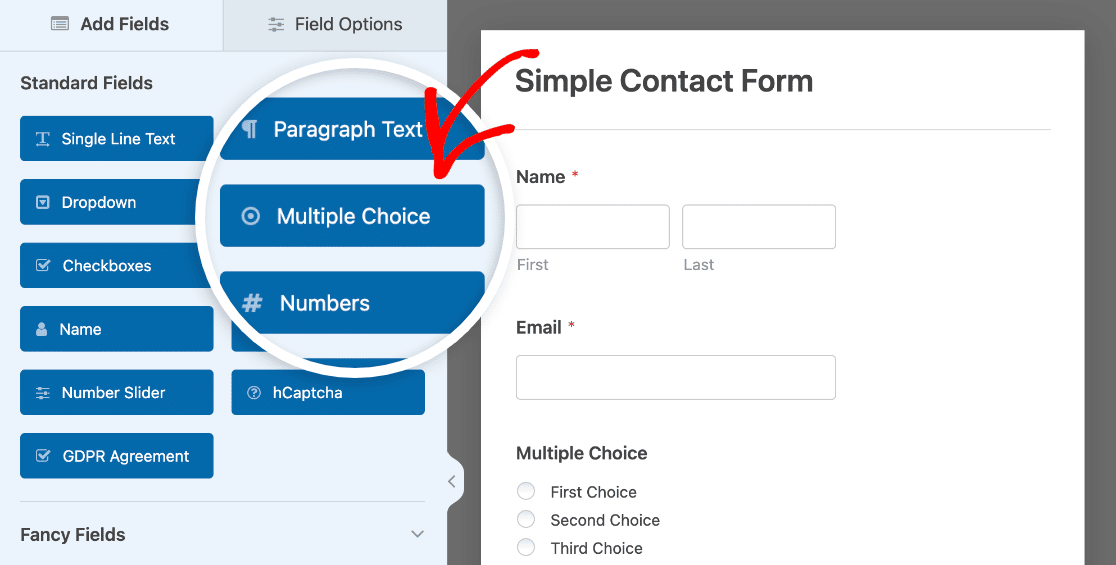
You can add additional fields to your form by dragging them from the left-hand panel to the right-hand panel.
Then, click on the field to make any changes. You can also click on a form field and drag it to rearrange the order of the fields in your contact form.
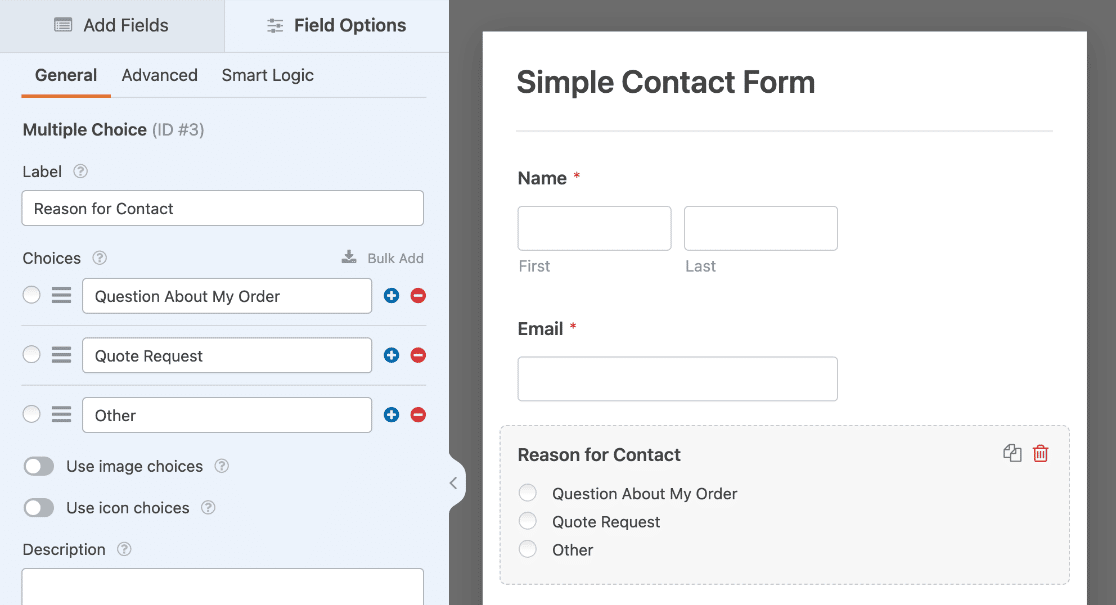
You can add images next to the Multiple Choice and Multiple Items form fields, which are radio buttons, as well as the Checkboxes and Checkbox Items form fields.
The difference between a radio button and a checkbox is that radio buttons only allow site visitors to select one option, whereas people can choose more than one option from a list of checkboxes.
Now it’s time to add the images next to each radio button.
Step 3: Add Images to Radio Buttons
To add an image to your form’s radio buttons, open the Field Options for your Multiple Choices field and then enable the Use image choices toggle.
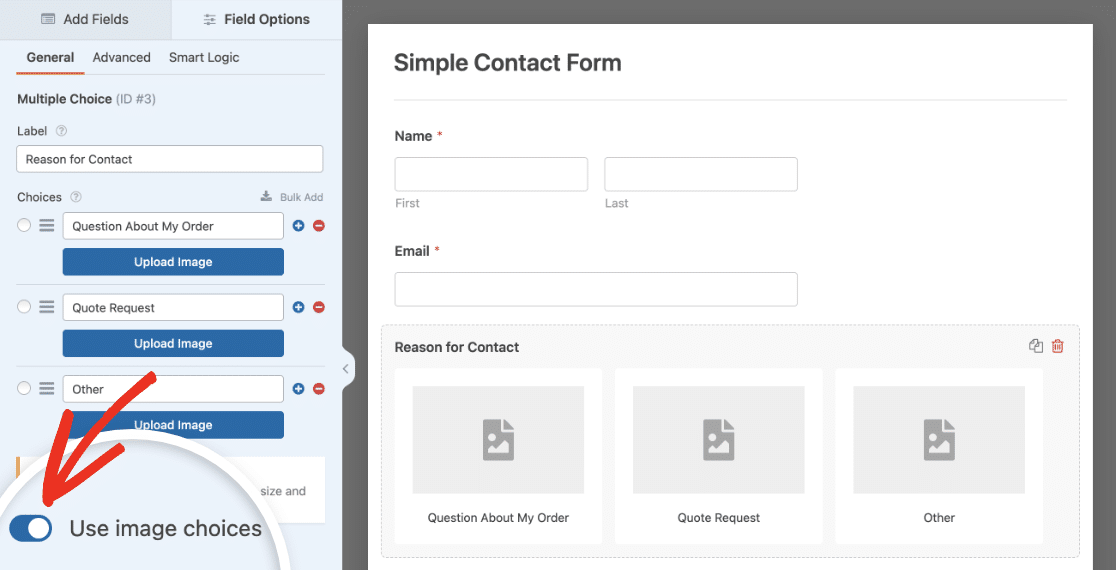
After enabling Image Choices, you can upload an image for each choice in your field.
To add an image, click on the Upload Image button. This will open your WordPress Media Library so you can upload a new image to WordPress or choose from your existing ones.
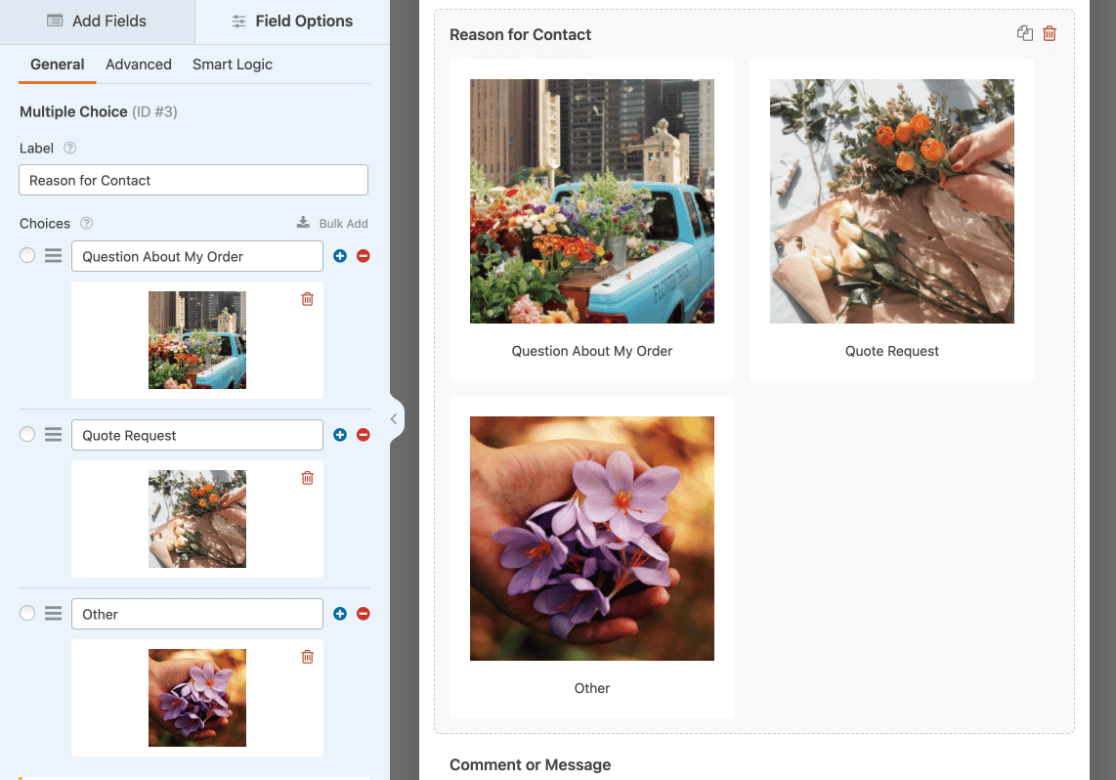
Note: Images will not be cropped or resized when you add them to your form. For best results, we recommend making all image choices the same size and 250×250 pixels or smaller.
Add Icon Choices to Radio Buttons
Depending on your form, it might make more sense to use icon choices than image choices. You can easily turn on this option the same way you did the image choices by selecting Use icon choices in the Field Options panel.
![]()
WPForms uses an extensive library of ready-made icons, so you don’t have to upload these. You can simply select the icon you need from the available options.
For more details, see our guide on using icon choices in WPForms.
Step 4: Customize Your Image Choices
WPForms makes customizing your image choices super simple thanks to the built-in customization options.
First, choose your preferred Image Choice Style.

The Modern style displays selected images in a shadowed box and adds a green checkmark to the center.
Classic style displays selected images with a thick, grey border. The None option will not add any special styling; instead, you’ll see traditional radio buttons next to each image for site visitors to choose from.
Then you can view more options by clicking on the Advanced tab.
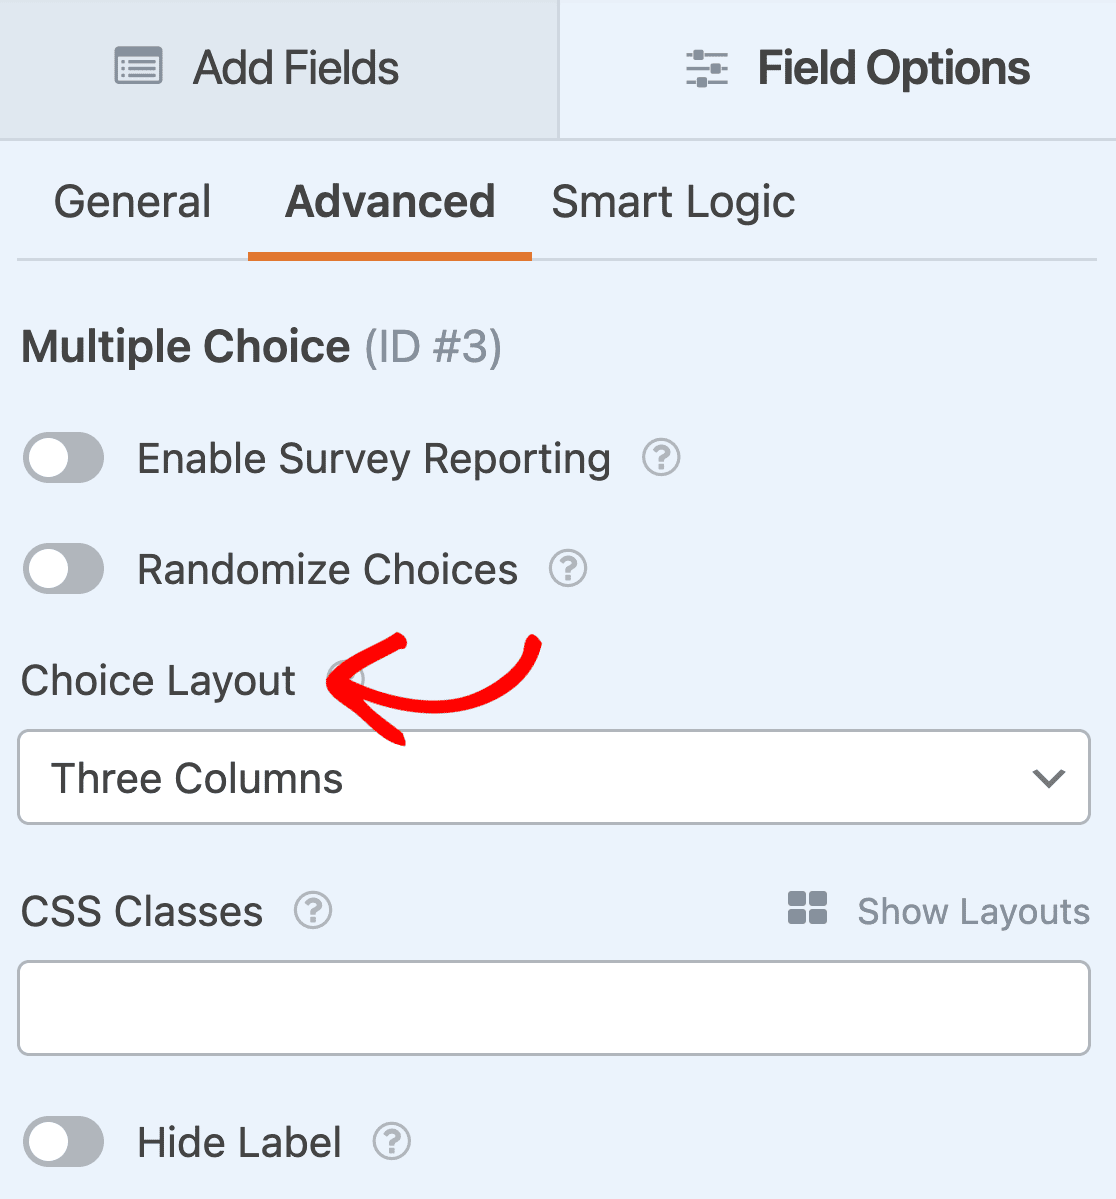
Importantly, make sure to select your preferred Choice Layout. You can pick from 1, 2, or 3 columns.
You also have the option to choose Inline, which places as many options as possible in each row before adding another. Inline is the default Choice Layout for all WordPress forms displaying image choices.
You can also select the Randomize Choices option if you want to randomize the order of the image choices every time a new user visits your website.
Step 5: Enable Survey Reporting
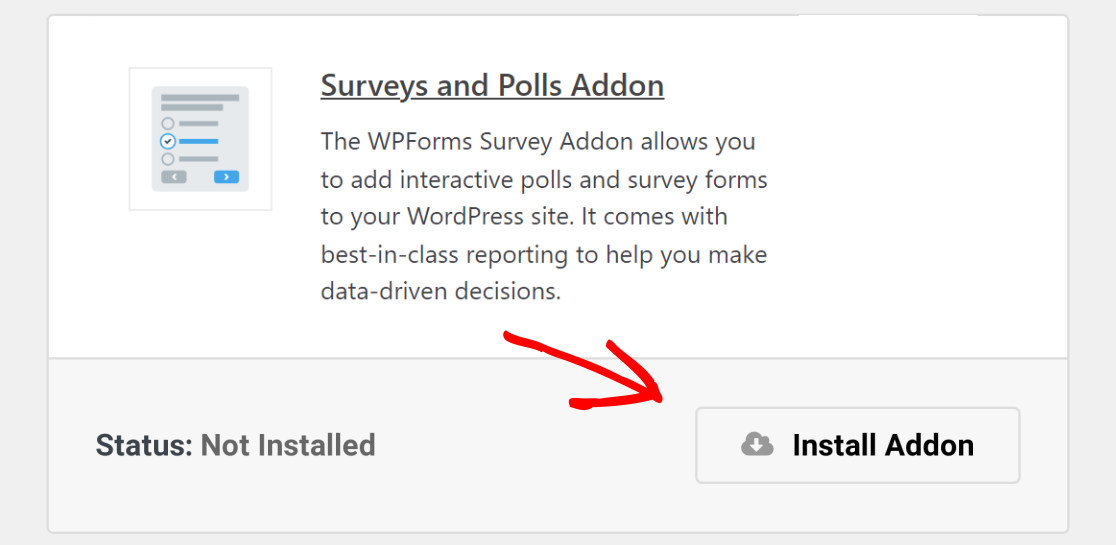
If you want to see how many people choose each image choice you offer, you can enable survey reporting for your forms by installing and activating the Surveys and Polls addon.
To do this, go to WPForms » Addons and find the one labeled Surveys and Polls Addon.
Click Install Addon and then Activate.
WPForms lets you collect survey results for the following form fields:
- Single Line Text
- Paragraph Text
- Dropdown
- Checkboxes
- Multiple Choice
- Rating
- Likert Scale
- Net Promoter Score (NPS)
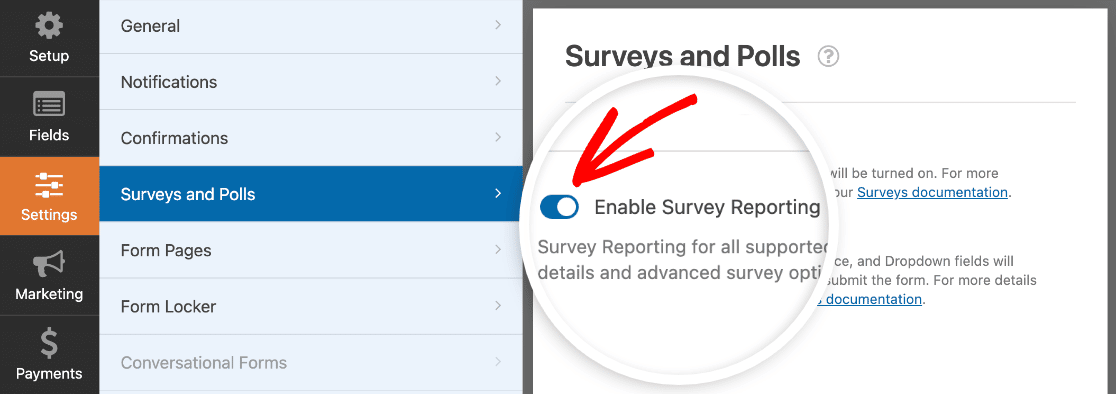
To enable survey reporting for all compatible fields in a form, go to Settings » Surveys and Polls in the form builder and select the Enable Survey Reporting option.
If you only want to collect data for a particular field, open its Field Options panel and click on the Advanced tab. Then toggle on Enable Survey Reporting.

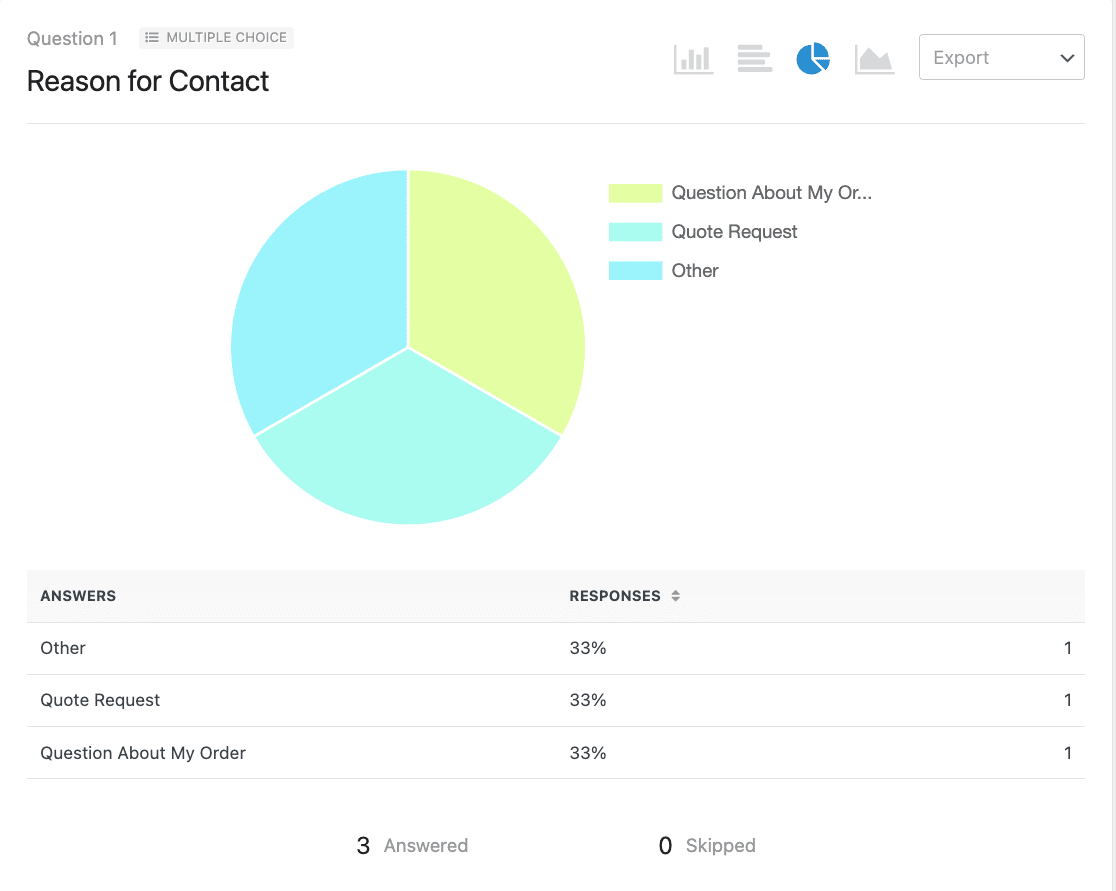
Once people start filling out your form, complete with images next to the radio buttons, you’ll be able to generate survey reports in the WordPress dashboard to see the results.
To generate a survey report, go to WPForms » All Forms and hover over your form to display the options. Then, click on Survey Results.

Once you click that, you’ll see your form’s results:
Adding Images Next to Radio Fields – FAQs
I’ve put together a few common questions that our team has received lately about radio fields and images. Give these a read if you have additional questions on this topic.
Why should I add images next to radio buttons in WordPress forms?
Images work wonders as visual aids in WordPress forms; they’re much more easily noticeable and immediately draw the visitor’s eyes. As a result, forms that have visual elements are easier to fill out because it takes less time to read and understand them, leading to higher user engagement and improved overall experience.
Do I need any coding experience to add images to my form?
If you’re using a user-friendly plugin like WPForms, you don’t need a single line of code to add images to your forms. Adding images to your form with WPForms is just like uploading images to your WordPress Media Gallery. Anyone can do it!
Will adding images slow down my website?
While adding images does affect page load speed, a lot of it depends on your particular website. If you’re careful about the amount of images you’re adding and ensuring that they’re all optimized, there will be no negative impact on your page speed.
Can I customize the appearance of the radio buttons and images?
Yes, you can customize the appearance of radio buttons and images in WPForms. For instance, you can choose from different field layouts such as inline, 1-column, 2-column, and 3-column arrangements.
Besides, WPForms also gives lets you choose between Modern and Classic styles for radio field choices, which display images in slightly different styles.
Do images next to radio buttons affect accessibility?
Images accompanying radio buttons can affect accessibility if you ignore some considerations like color contrast between your background and images.
I recommend adding descriptive alt texts to your images and running a basic eyeball check to ensure the images are immediately visible with a high contrast. If it takes you effort to see the image clearly, it’s a sign that you need more contrasting colors to ensure ideal accessibility.
Next, Make More Money Online
And there you have it! You now know how to add an image next to radio buttons in WordPress forms.
If you’re interested in making money online, you can check out our tutorial on how to create a simple order form in WordPress and add images next to each item you have for sale.
Create Your WordPress Form Now
So, what are you waiting for? Get started with the most powerful WordPress forms plugin today.
And don’t forget, if you like this article, then please follow us on Facebook and Twitter.




radio image is not displayed in payment fields … its working fine in “standard fields” but not working in payment fields.
any idea why ??
Hi Raju,
Sorry about that! Yes, this is currently prevented intentionally because of how our payment integrations handle these labels (HTML will cause issues when that data is sent to Stripe or PayPal). This is on our team’s radar, though, and our developers are working on a way around this. I don’t have an ETA on that, but we hope to address it soon!
In case it helps, images can still be added to each item option with some custom CSS. This requires some form-specific CSS styling, but if you’d be willing to get in touch with our support team we can help you to accomplish this 🙂
Is “Image Choices to WPForms” a basic form capability?
My site contains several galleries of unchanging images to a user. There are between 5 and 30 images on a form and 50 forms(galleries). I want the user to select an image on a form then move to the next form; select an image and so on. Every image selection corresponds to a paragraph of text that I want to provide to the user in a report. Can this be done with WPForms? With only minor code additions?
Hi Richard,
I apologize, but I’m not sure I understand exactly what you’re looking to do. When you get a chance, would you please reach out to our support with some extra details?
Thanks! 🙂
This is a great feature, however both modern and classic style are very poorly designed. On classic the grey frame is very difficult to see and on modern, the check is on the image and often difficult to see, it shows black check icon on many phones which makes it even more difficult to see and the making bold of the text moves fields around sometimes when they are on mobile…
Just keep it simple and make a bold COLORED frame that does not change the fields width
Hey Martin – Thanks for the feedback & suggestions! I have noted it in our tracker so dev team can consider it while working on our roadmap for future updates, meanwhile if you wish you can reach out to our support team for some help on it and they can assist you with some custom CSS code to make it look like you need.
If you have a WPForms license, you have access to our email support, so please submit a support ticket. Otherwise, we provide limited complimentary support in the WPForms Lite WordPress.org support forum.
Thanks 🙂
Hello,
I used the image choice together with checkboxes. It works fine on desktop and tablet mode, but not on mobile. The whole checkbox section with all images and checkboxes disappears from the breakpoint 600px down. I have some custom CSS, I thought it might be my CSS that somehow caused the issues and removed them but no luck.
I use the free version of WPFrom.
Any idea ?
Hi Daniel,
In that case, I’d recommend you to use the CSS class for mobile as shown in this guide
Hope this helps! 🙂