
AI Summary
Do you want to create an easy email signup for your site visitors using Constant Contact and WordPress forms? It’s a super quick process that’s simple to execute. It also makes it a breeze for your visitors to subscribe to your emails with just a quick click of a checkbox.
Hang out with me for a few and I’ll show you how to easily add a signup checkbox to your form so you can start growing your email list in no time.
Constant Contact and WordPress Forms: Add a Signup Checkbox
Connecting Constant Contact and WordPress is quick and easy using WPForms, which is what I’m going to use in this tutorial. WPForms integrates seamlessly with Constant Contact, so you’ll have a form published, collecting email addresses within minutes. There are 3 quick steps. That’s it!
Ready? Let’s get started.
Setup
To speed up the process, let’s make sure you have a few things set up and ready to go before we get started. This will keep things running smoothly as we go through the tutorial together.
- WPForms. Please make sure you register for an account (you will need Basic or higher to access the Constant Contact integration) and install the WPForms plugin on your WordPress site.
- Constant Contact. Because this particular tutorial is geared toward Constant Contact users, make sure you have an account that’s up-to-date, and have your login information ready.
Difficulty Level: Beginner
Step 1: Connect WPForms and Constant Contact
Although you can also complete this step later — and I’ll mention where when we get there — I always like to make sure my integrations are connected at the start.
From your WordPress dashboard, navigate to WPForms » Settings and then click on the Integrations tab.
On that screen, locate the Constant Contact integration option.
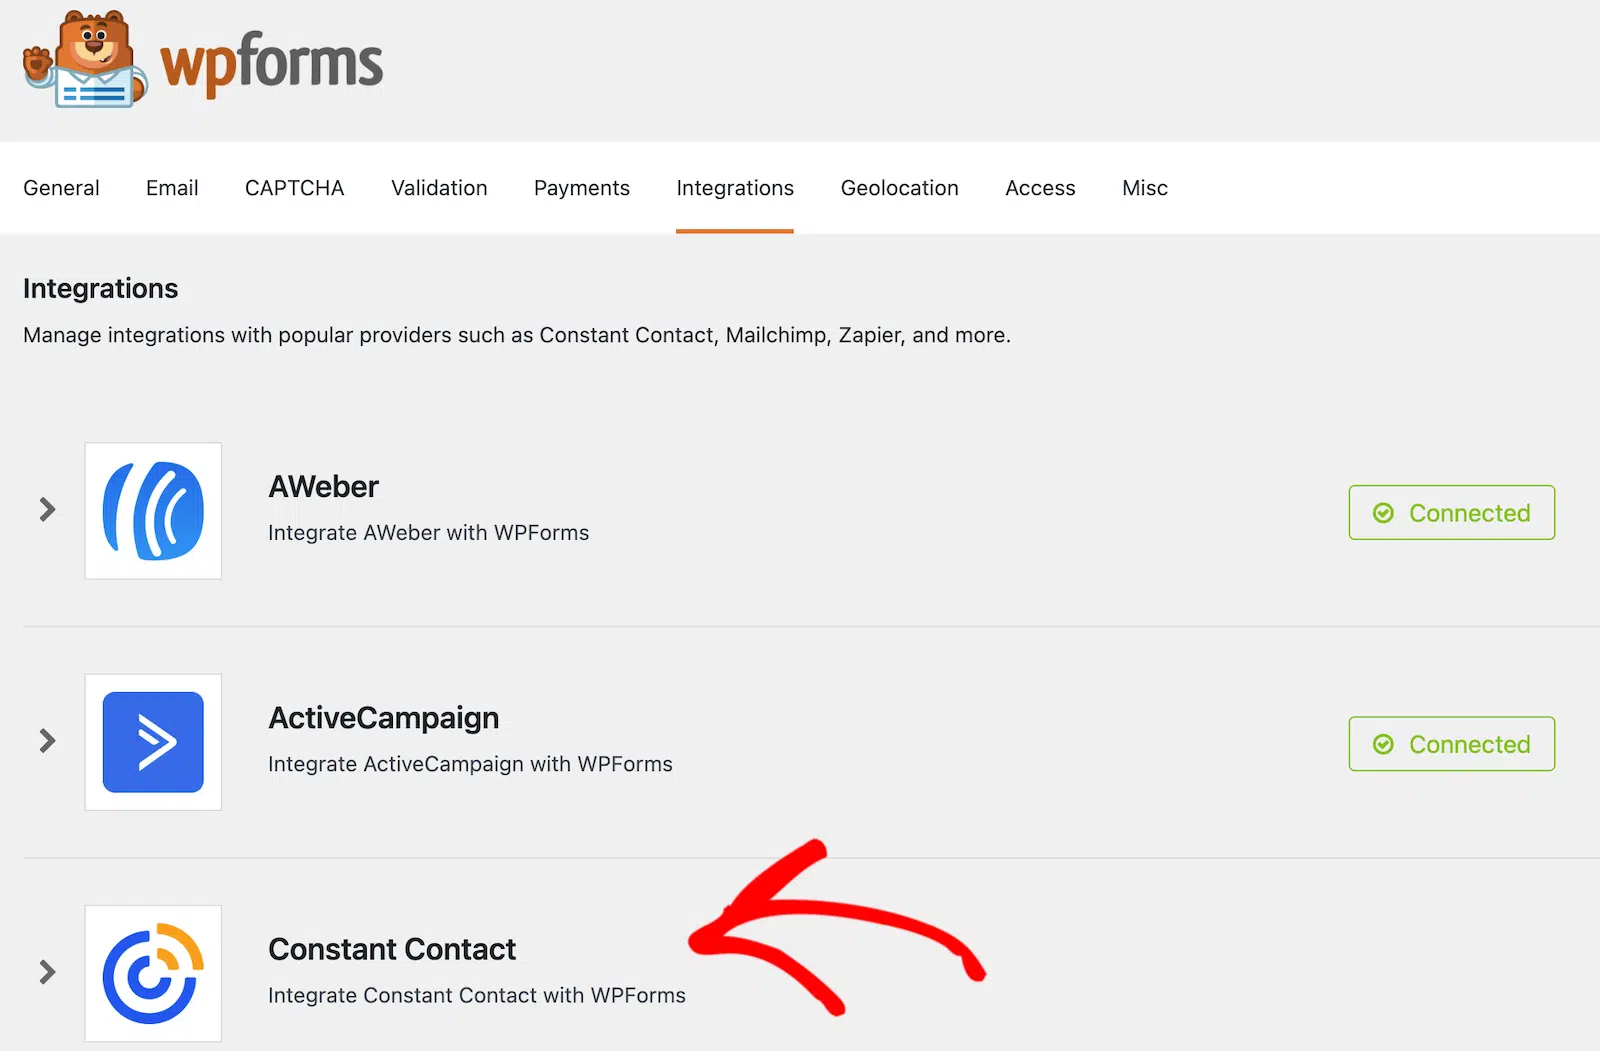
Click on Constant Contact to begin setting up the integration.
When the options appear, click on the link that says Click here to register with Constant Contact. You’ll see a prompt to log in to your Constant Contact account, and then you’ll go through the setup process.
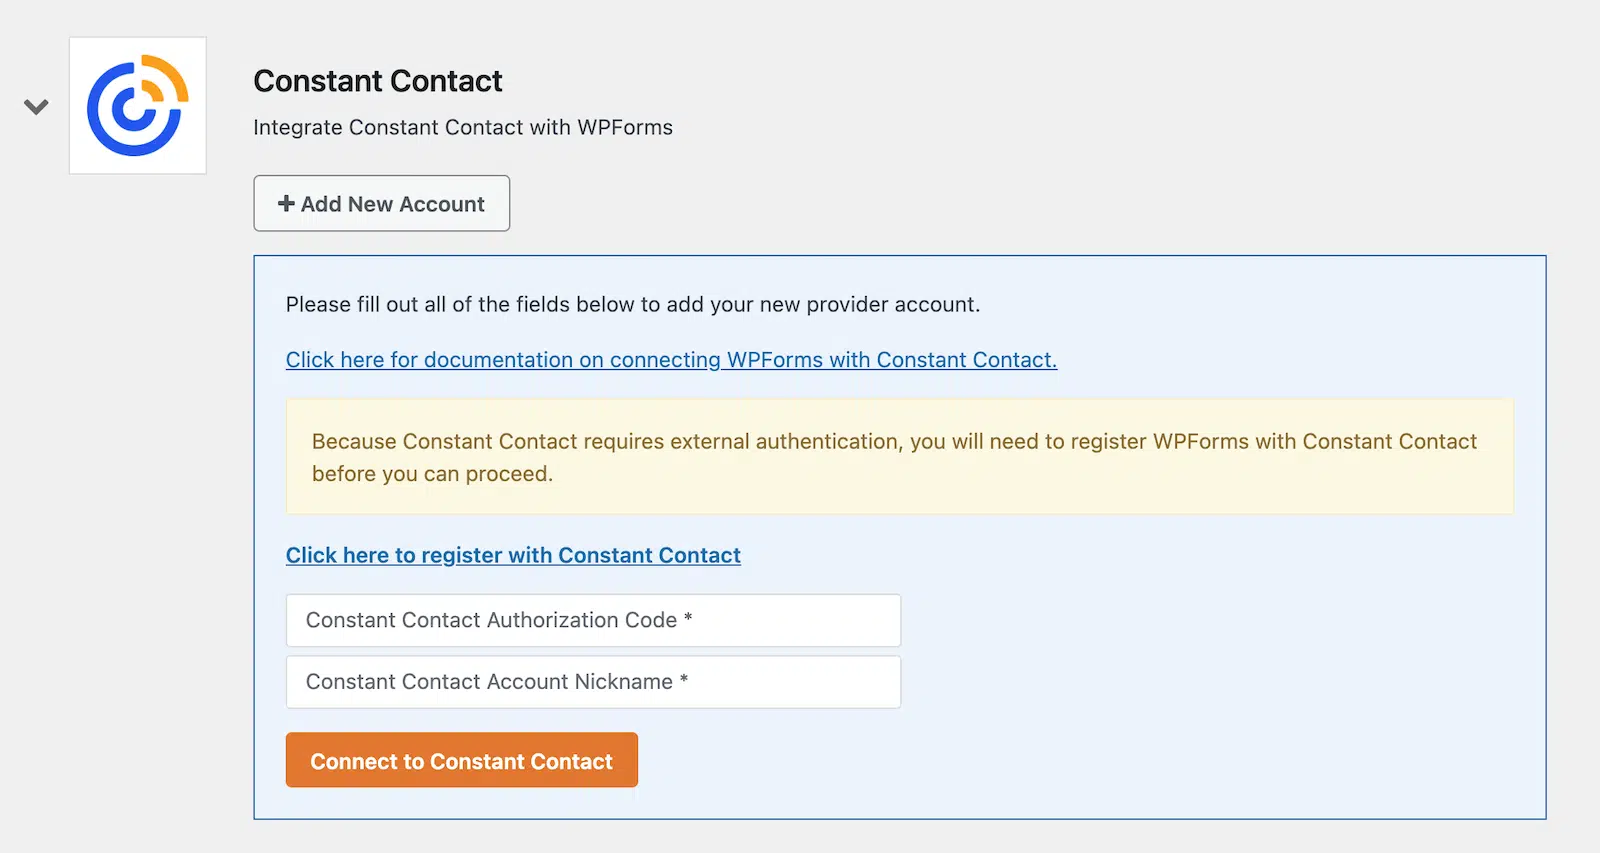
When you finish authenticating your account, you’ll receive a Constant Contact authorization code. Copy and paste that into the corresponding field, give your account a nickname, and click Connect to Constant Contact to finish setting up.
When the process is successfully completed, you’ll see an indicator letting you know that you’re connected.
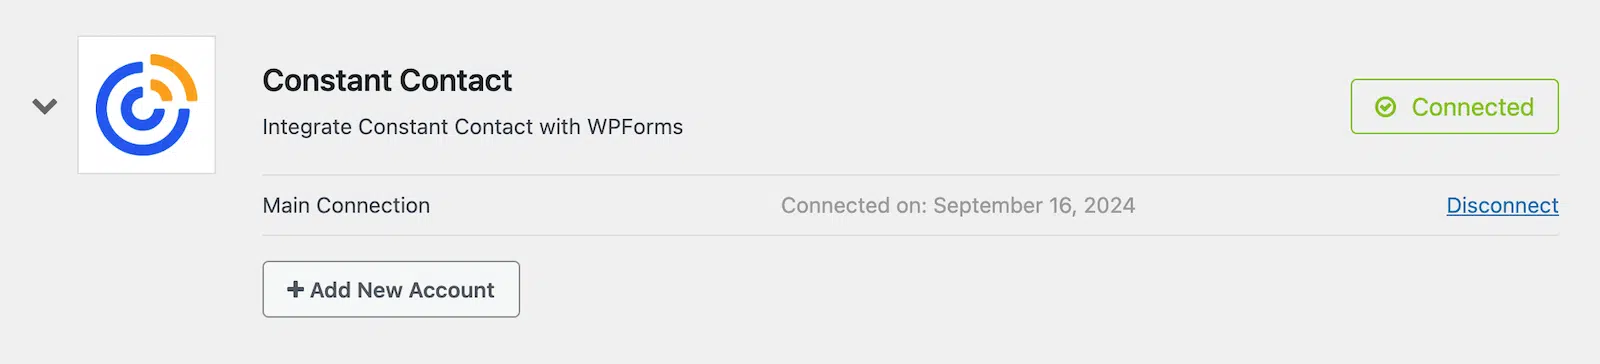
Pretty easy, right? With the connection established, let’s move on and set up your form.
Step 2: Create a Form
From the left navigation bar on your WordPress dashboard, go to WPForms » Add New.
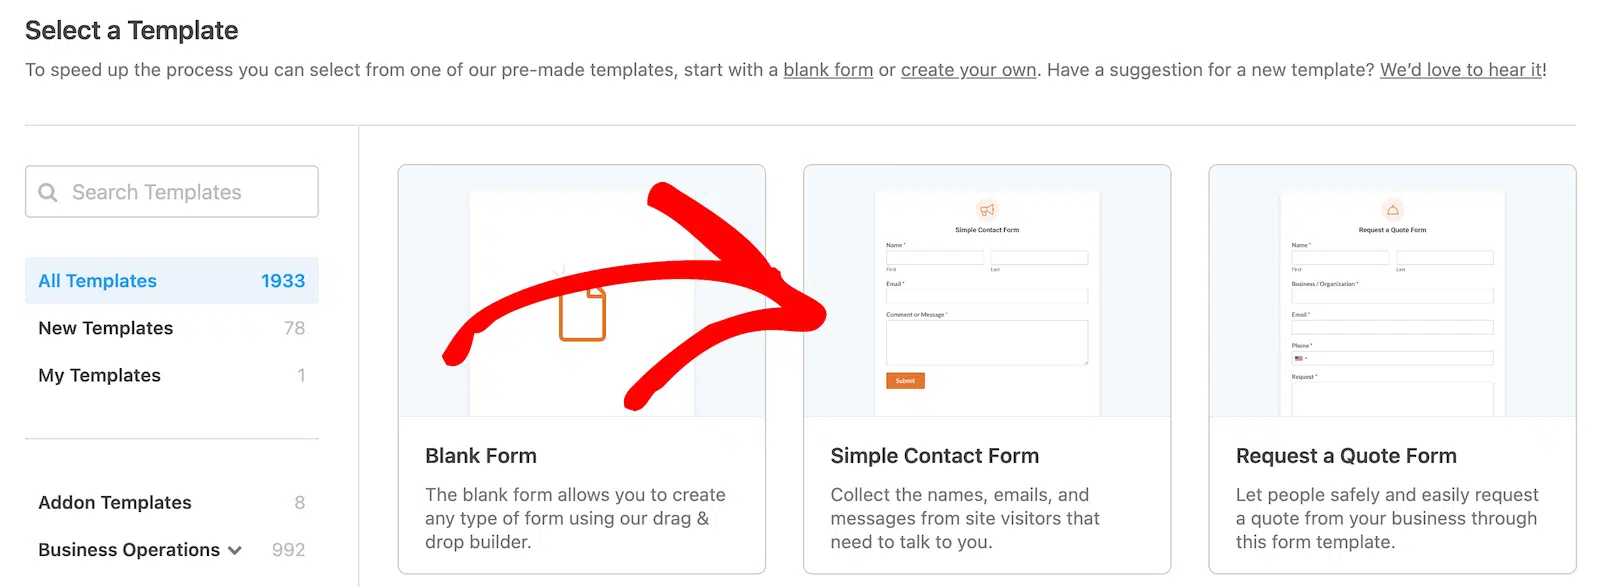
You’ll see a screen with template options. WPForms comes with 2,100+ form templates. You can use them as-is or edit them to make them your own. Templates can save you a ton of time, so that’s what we’re going to do here.
Select the Simple Contact Form template. If you don’t see it near the top of your template options for some reason, you can also search for it.
When you select the template, it will open in the form editor. You’ll see that it includes fields for Name, Email, and Comment or Message. Feel free to add or remove fields as you see fit. All you need to do is drag and drop them from the field options on the left into the form builder.

This form looks pretty good to me as-is, so all I’m going to do is add a checkbox that will let people subscribe to my emails.
To do this, I’ll just drag a Checkboxes field from the Standard Fields options and drop it in the form builder where I want it to be.
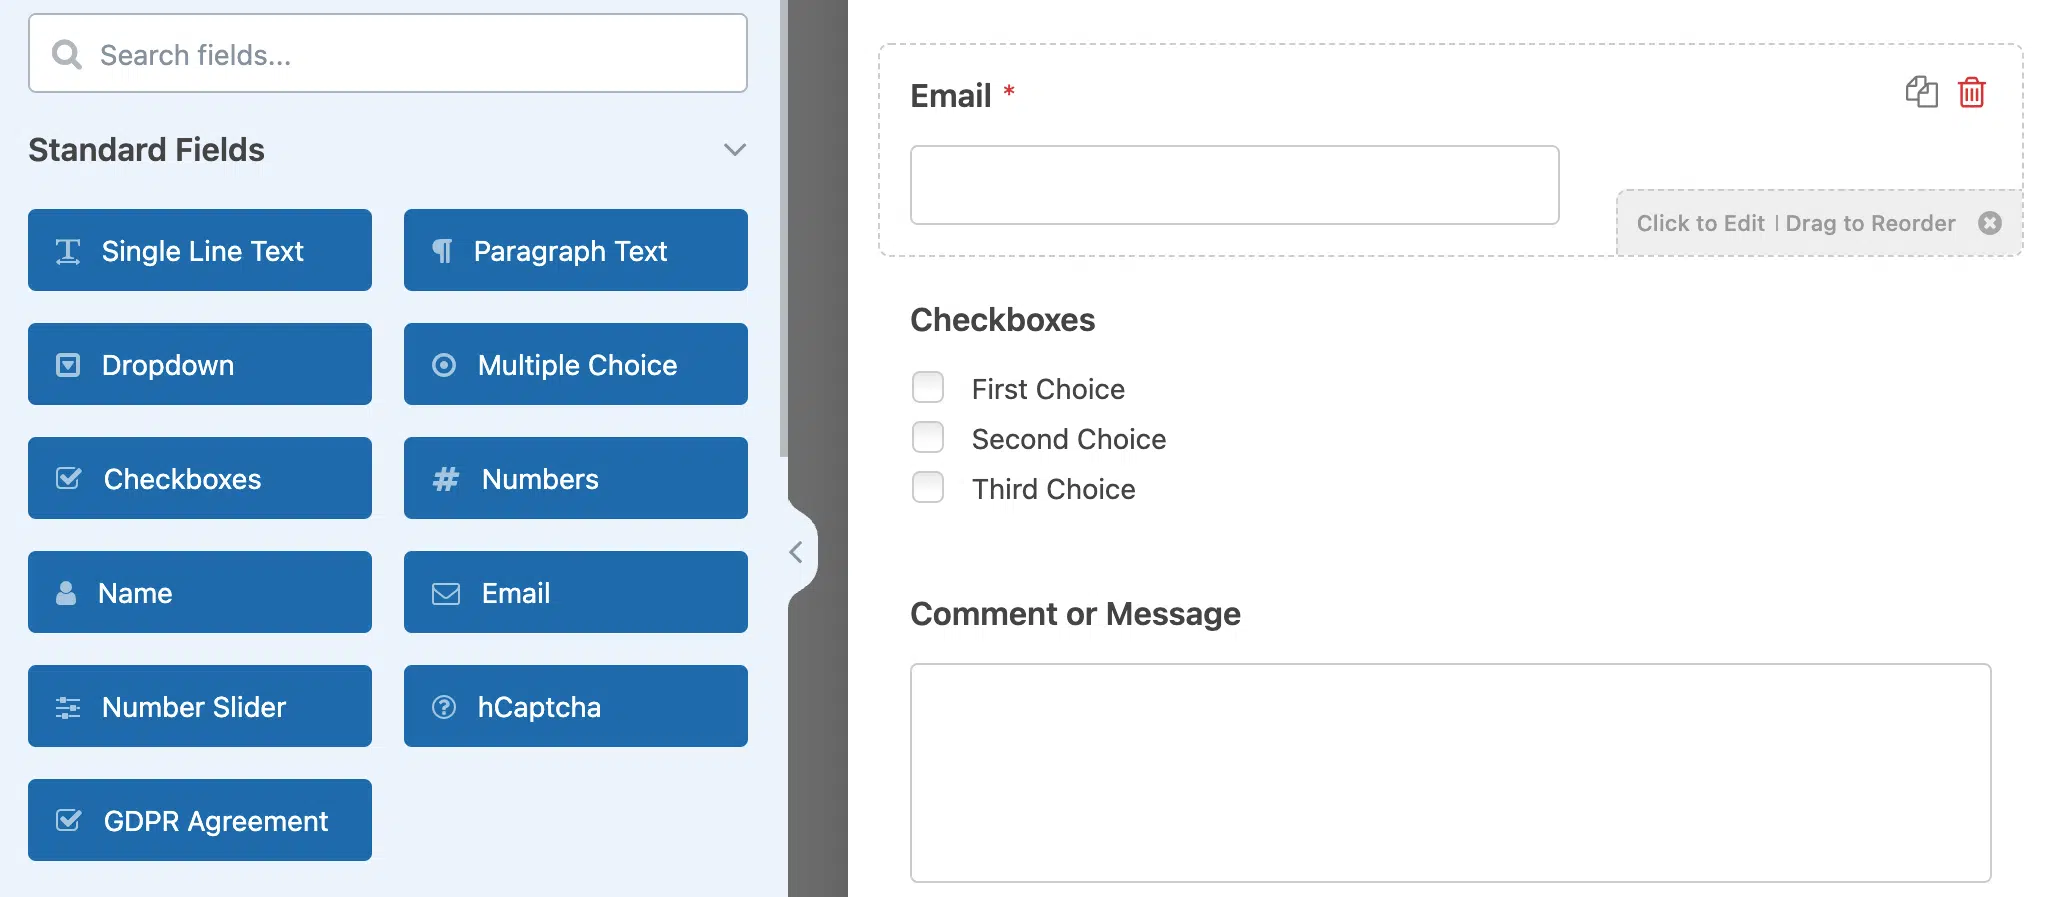
There are 3 choices by default. If you click on the field, you can remove 2 of them and change the remaining choice to whatever text you want to use for the subscription optin. I’m going to use “Subscribe to Our Email!” for mine.
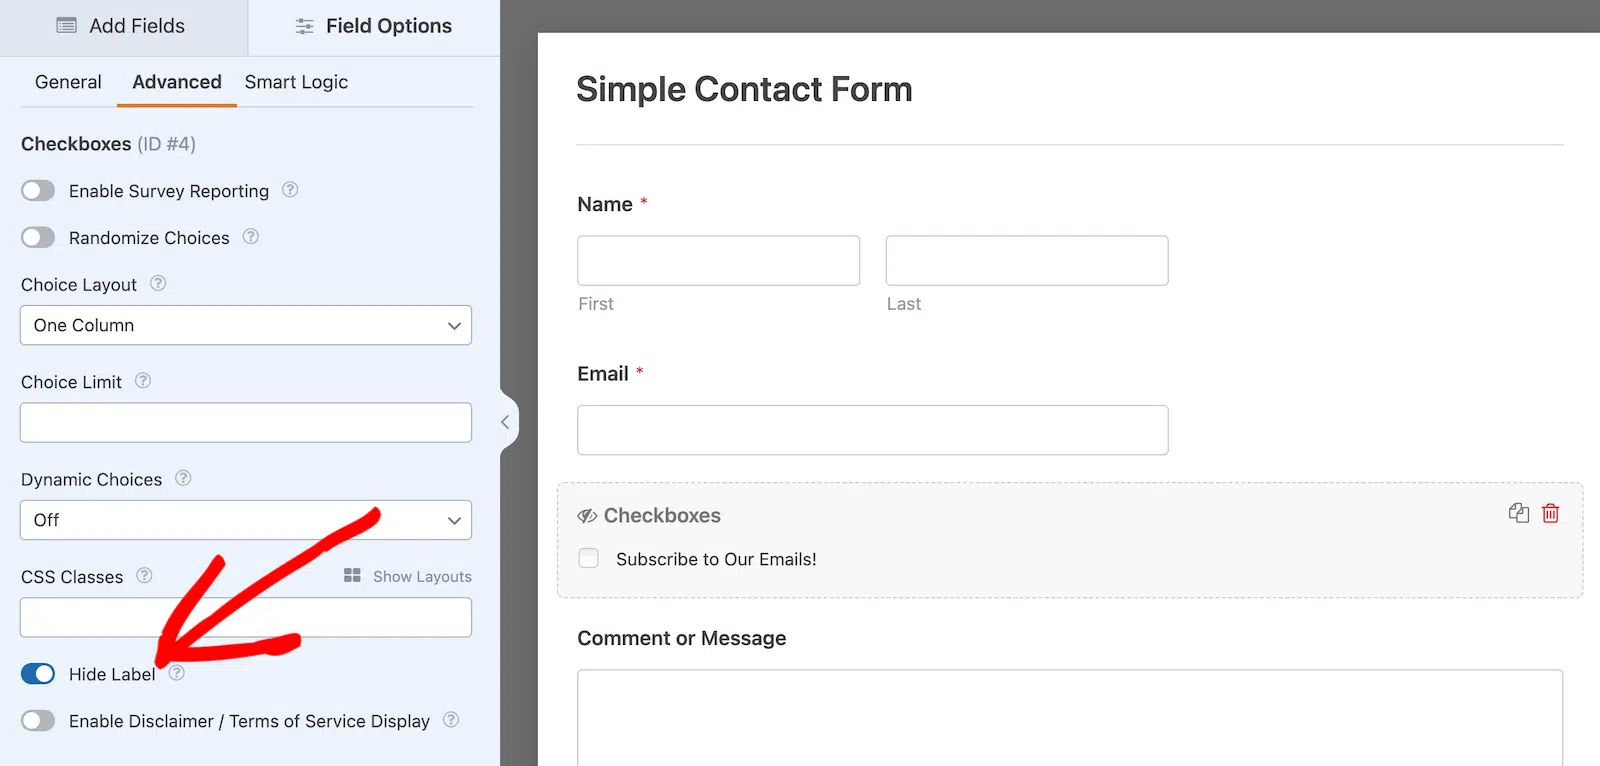
We don’t want users to see the Checkboxes heading on the form, however, so let’s hide that.
With the checkboxes field options still open, click on the Advanced tab. Then scroll down until you see a toggle option for Hide Label. Go ahead and enable that. Then you’ll see that the checkboxes heading is hidden from public view.
Now click on the orange Save button in the top right.
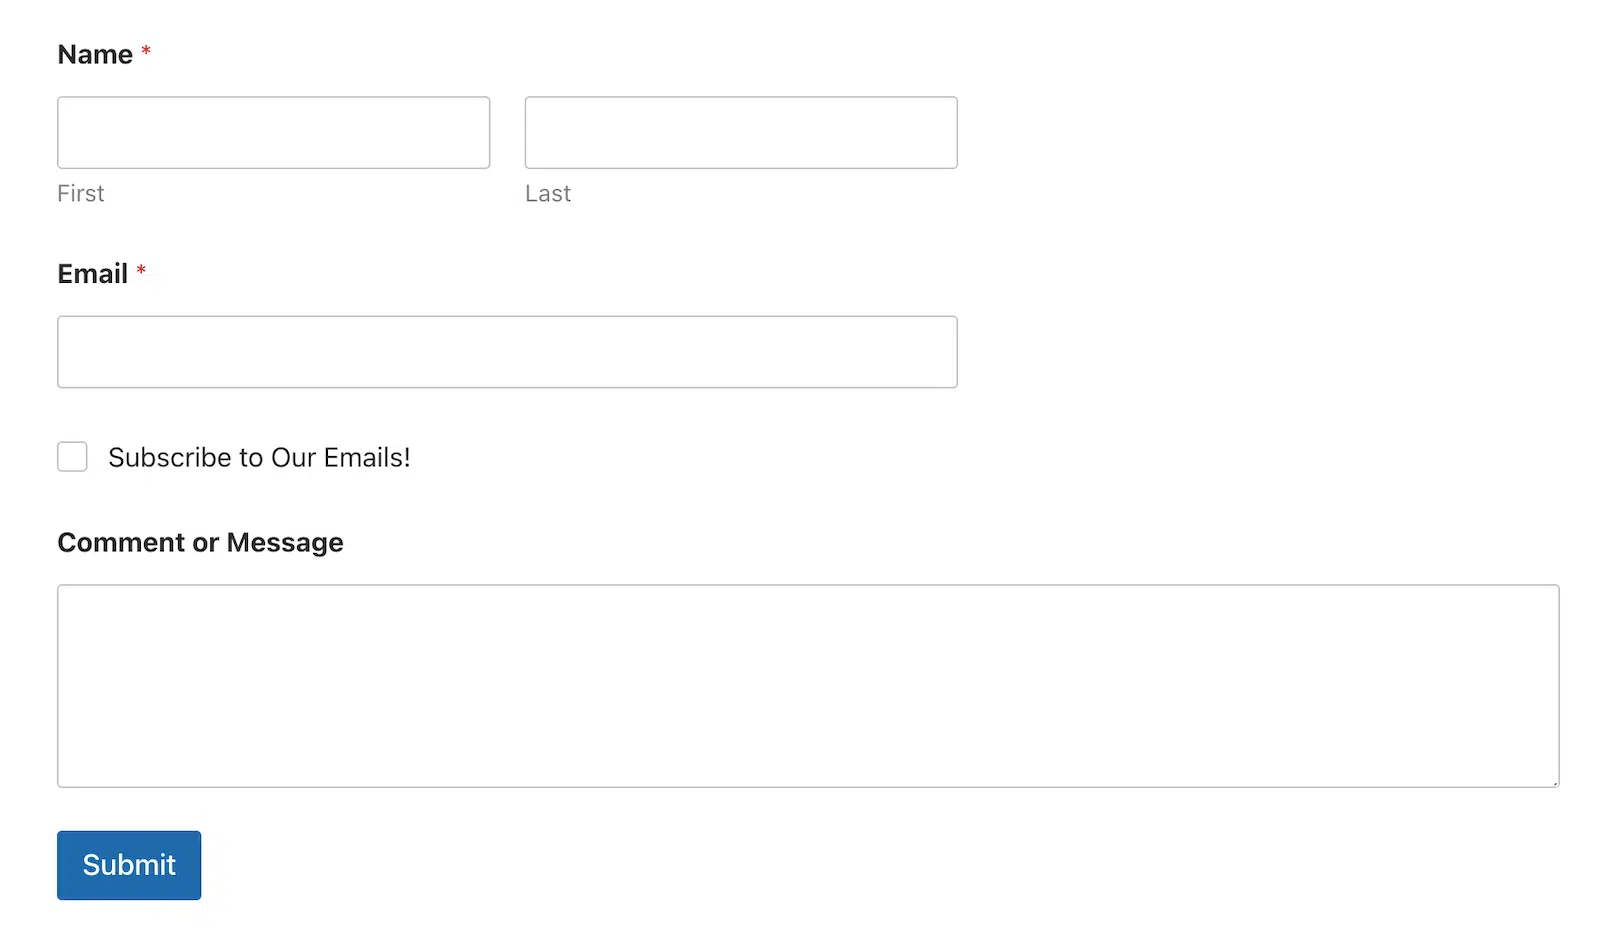
If you preview your form, you should see the checkbox without the heading.
We’re almost finished! All we have to do is map the form fields to Constant Contact and enable conditional logic. But don’t worry, even though this sounds like it could be complicated, it’s quick and painless.
Step 3: Map Form Fields to Constant Contact
If you didn’t set up the Constant Contact integration prior to starting this tutorial, this is where you’ll set it up. It will walk you through the steps, if needed.
I’m going to assume that you have it set up already, so we’re just going to pick up with the next step.
With the form builder still open, navigate to Marketing » Constant Contact from the WPForms sidebar navigation. Click on the Add New Connection button, and you’ll be prompted to enter a connection nickname. This is only for your use.
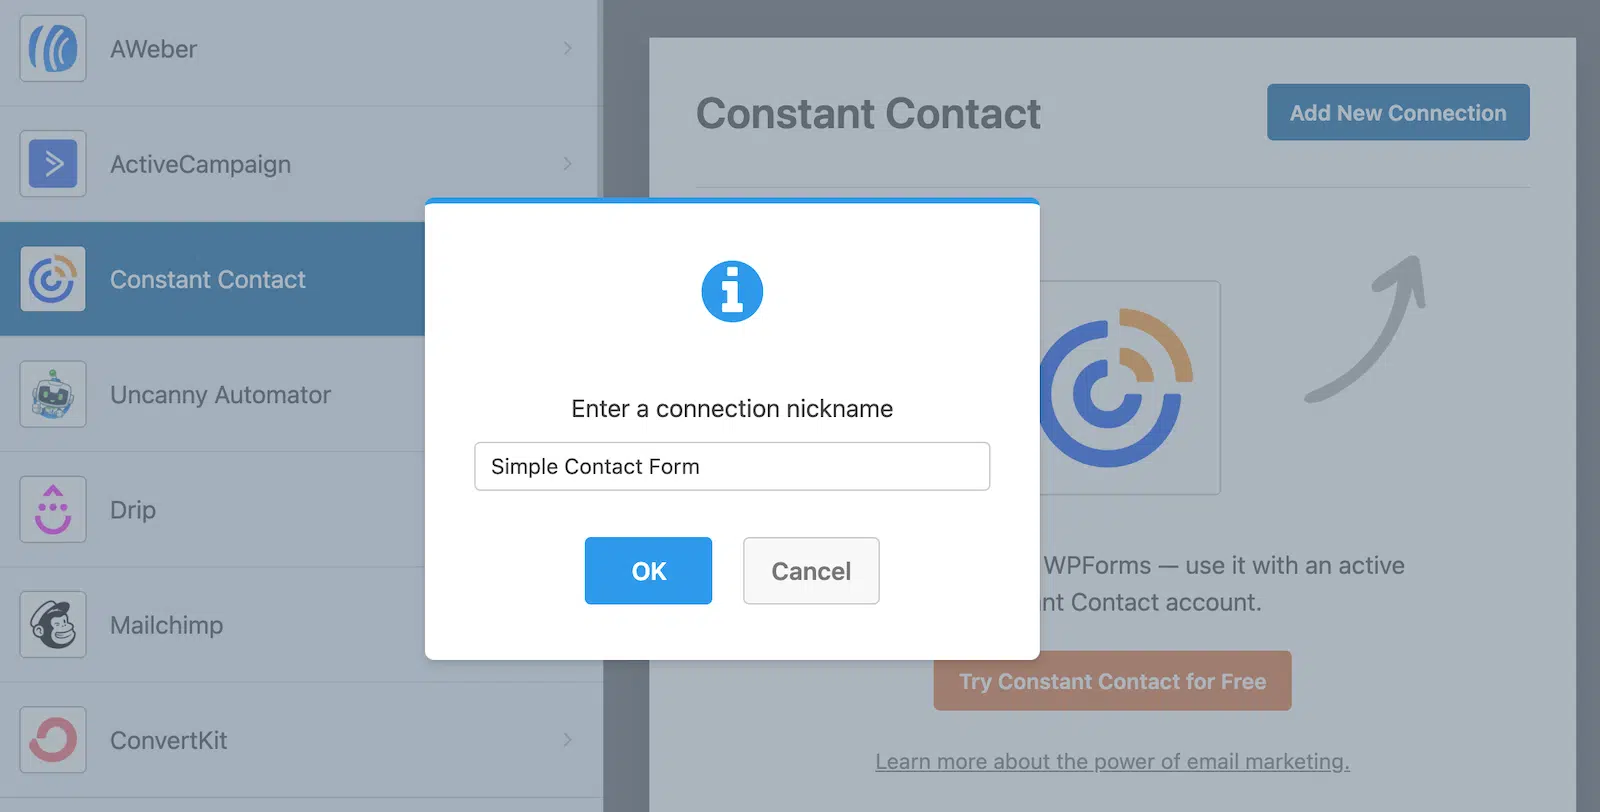
Once you’ve given the connection a nickname, you’ll see options for mapping form fields between the form you created on WPForms and your Constant Contact account.
Select the account and email list where you want to send the information collected on your contact form. Then you can map the List Fields. An email address is required, but I recommend also mapping the name field so the subscriber’s name goes into Constant Contact.

After you select the fields you want to map, scroll down until you see a toggle switch for Conditional Logic. Click the switch to Enable Conditional Logic.

Once you enable conditional logic, you can tell it what to do with specific information from your form. In this case, when someone selects the checkbox to subscribe to emails, we want to make sure the name and email address are added to our Constant Contact list.
We’ll do this by telling it to process the connection if the checkboxes field is Subscribe to Our Emails! In other words, process the connection if the option to subscribe is selected.

Your form is now complete! Go ahead and click the orange Save button in the top right corner. All you have to do now is embed the form on your site. You can do this using the Embed button in the form builder. If you need some help, check out our guide on 3 ways to embed a form on your WordPress site.
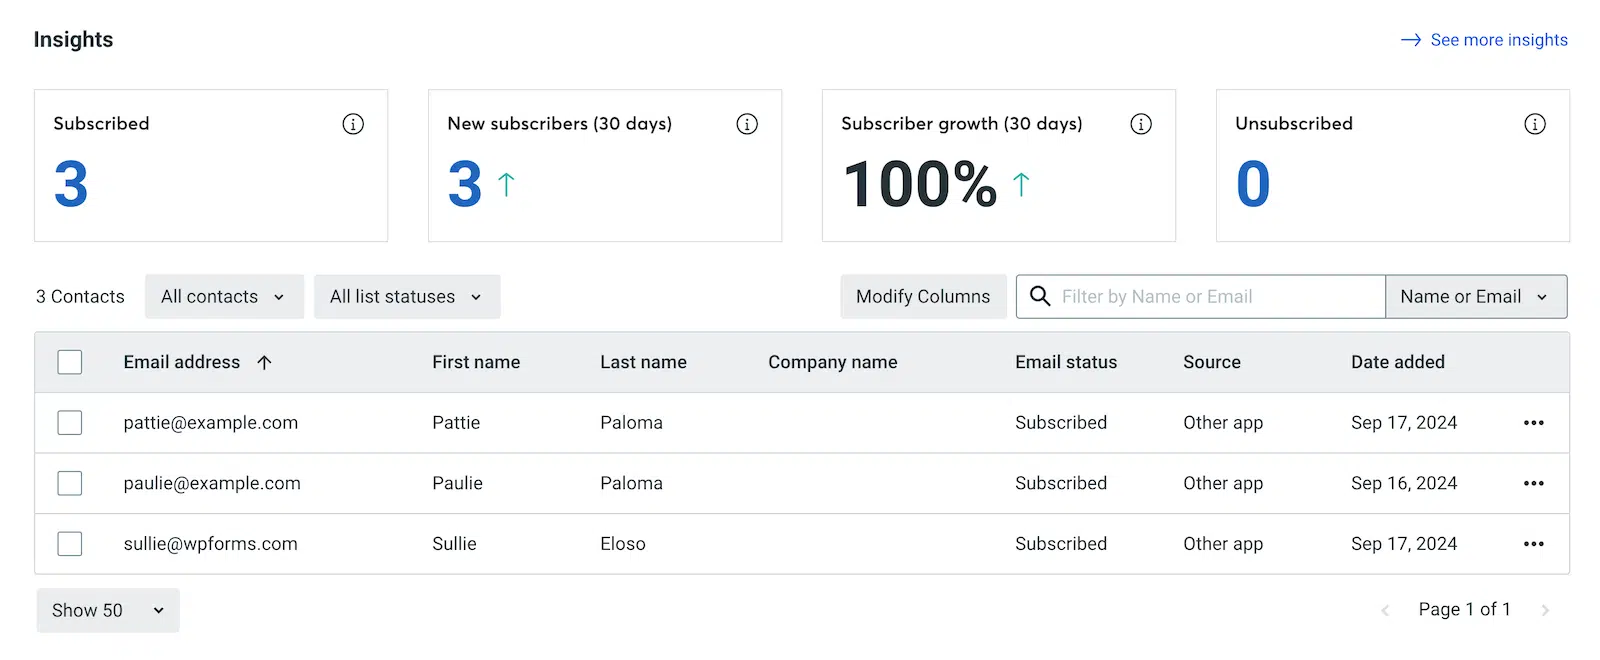
Once your form is live on your site, you can go to your Constant Contact account to see who is subscribing.
And that’s all there is to it! Even though we walked through it step-by-step, it was still pretty easy, right? Connect Constant Contact and WordPress using WPForms, and then just 3 quick steps. Nothing to it. 🙂
Does the Constant Contact integration work with WPForms Lite?
No — you’ll need at least the WPForms Basic license to use the Constant Contact integration and add a signup checkbox to your forms.
Can I add subscribers to more than one Constant Contact list at the same time?
You’ll select one list per Constant Contact connection, but you can add multiple connections to a single form. So if someone checks the box, you can push them to a newsletter list and a customer list at once.
Should I pre-check the signup checkbox for visitors?
It’s better to leave it unchecked. Pre-checked opt-in boxes don’t comply with GDPR and similar consent rules, and Constant Contact’s own anti-spam policies expect explicit opt-in. Let the visitor make the choice themselves.
What happens if someone is already a subscriber and fills out the form again?
Constant Contact won’t create a duplicate. It updates the existing contact record with any new info from the form, so your list stays clean.
Can I use this on forms other than a contact form?
Yes. The same checkbox + conditional logic setup works on any form you build with WPForms — registration forms, quote requests, lead magnet forms, checkout forms, comment forms, anywhere you collect an email address.
What if I don’t see Constant Contact under my integrations?
Head to WPForms » Addons and install the Constant Contact addon first. Once it’s active, the integration option shows up under WPForms » Settings » Integrations, ready for you to connect your account.
Can I tag subscribers based on which form they came from?
Constant Contact uses lists rather than tags for segmentation, so the cleanest approach is to send each form’s subscribers to its own dedicated list (e.g., “Blog Signups” vs. “Lead Magnet Downloads”). You can then segment your campaigns from there.
Do I need to set up a separate confirmation email?
Constant Contact handles the welcome email on its end — you can customize it inside your Constant Contact account under list settings. WPForms also sends its own form confirmation message to the visitor, which you can edit in the form’s Settings » Confirmations tab.
Next, Grow Your Email List to Boost Conversions
Email marketing is an important part of any marketing strategy. If you’re on the fence about its importance, check out some of these recent email marketing statistics.
For more on building and growing your email list, have a look at our posts about why you should build an email list and how to grow it fast.
Ready to build your form? Get started today with the easiest WordPress form builder plugin. WPForms Pro includes lots of free templates and offers a 14-day money-back guarantee.
If this article helped you out, please follow us on Facebook and Twitter for more free WordPress tutorials and guides.


Hi great article – must you have wp pro to populate email subscribers to constant contact? this seems to be talk on other articles and I can’t get a real answer. I don’t want to waste time if I go “lite” and I can’t integrate the two. Thank you
Hey Suzie,
Very valid question. Our Constant Contact integration works with WPForms Lite. Hope this helps🙂