Do you want to translate your WordPress contact forms into another language?
Translations are really important if your website serves people from different regions of the world where English may not be their first language.
The good news is that handling translations is really easy in WordPress. Remember, you’re not just translating words; you’re also opening doors to a wider audience. 🌐
In this article, we’ll show you how to translate your WordPress contact forms.
Create Your WordPress Form Now
How to Translate Your WordPress Contact Forms
For this tutorial, we’ll assume that you already have WPForms installed. Translations are handled slightly differently by every contact form plugin, so the steps below may not be accurate for other forms plugins.
In This Article
Step 1: Create a Simple Contact Form
With WPForms installed and activated on your site, you can go ahead and start creating a form to translate.
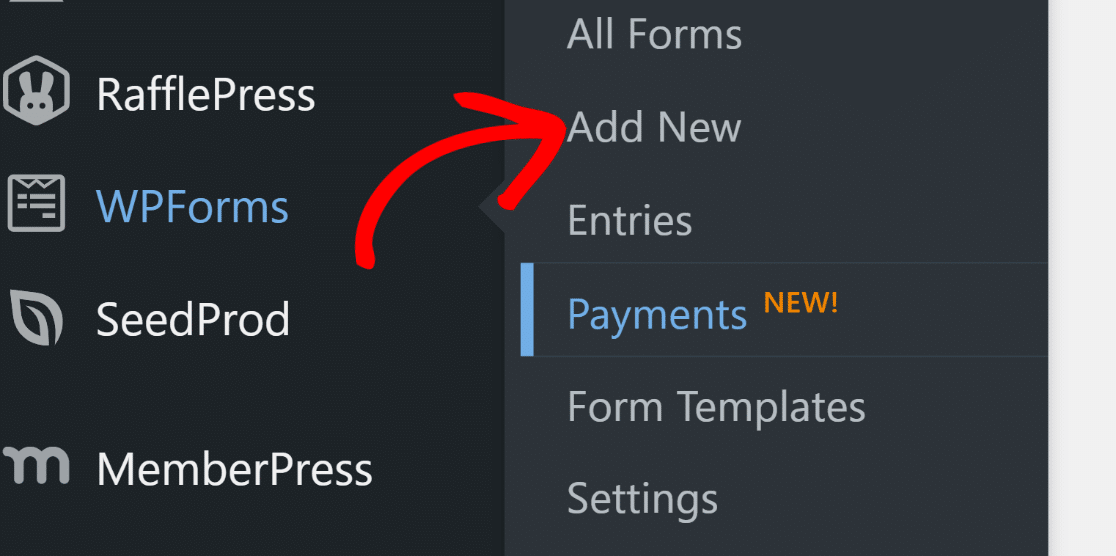
Open your WordPress admin menu and go to WPForms » Add New.
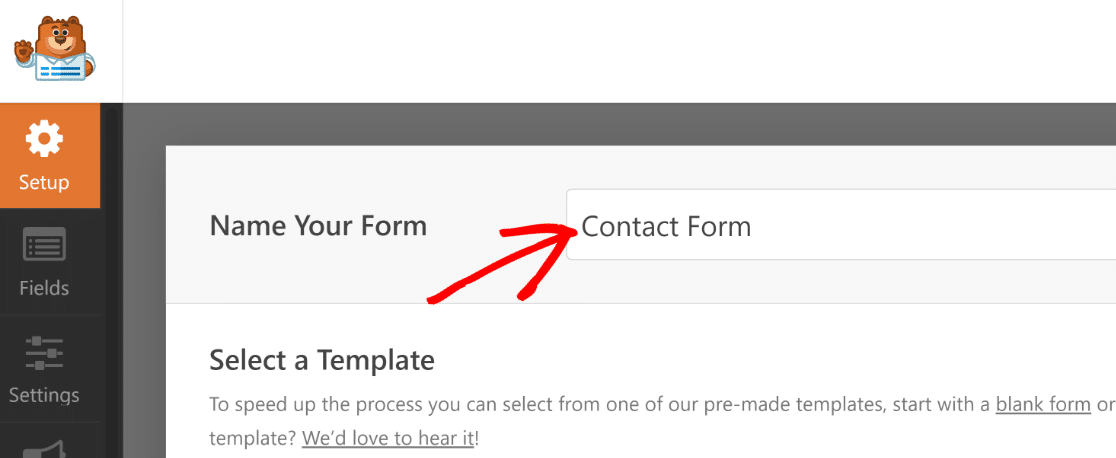
Once you’ve done that, you’ll be taken to the form setup screen. Start by giving a title to your form.
After that, scroll down to the template section and select one from over 2,000+ WordPress form templates. We’ll select the Simple Contact Form template for the purposes of this tutorial.
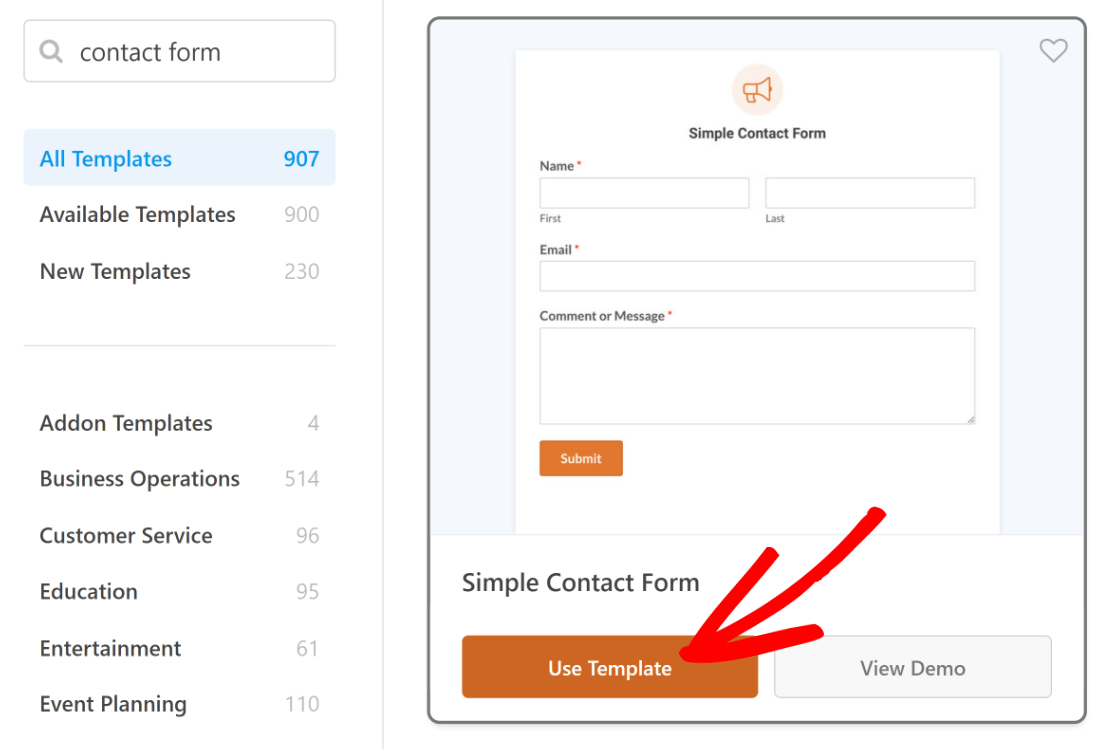
As soon as you press Use Template, the form template will start loading inside the form builder.
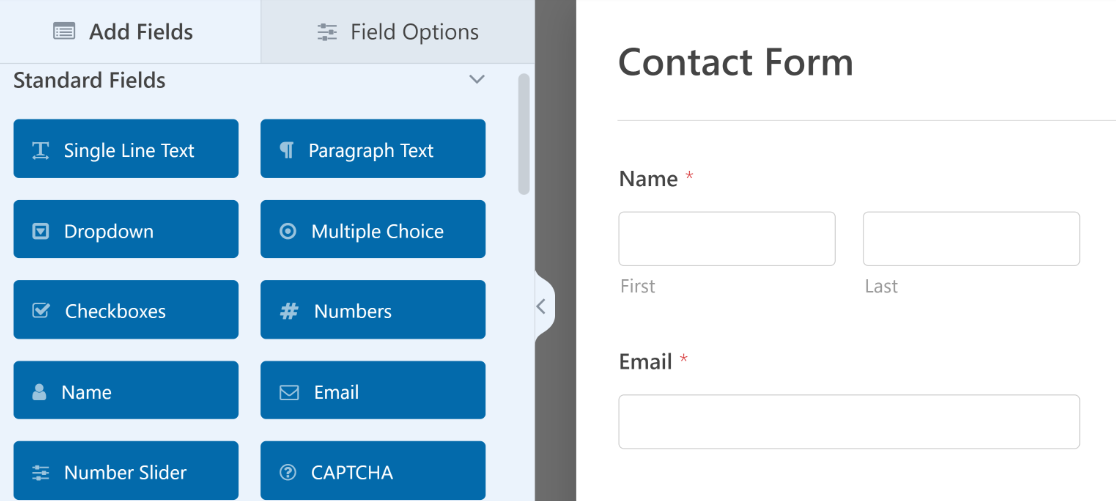
You can add additional fields to your contact form by dragging them from the left hand panel to the right hand panel.
Make sure to press the Save button to save the changes you’ve made to your form up until this point.
Step 2: Translate Your Form Fields
Translating your contact form’s fields is really easy to do in WPForms, and there are a few ways to do this.
Automatic Translation
If you’re following this method of translation, you should first publish your form using one of the embedding options offered by WPForms. Then follow the instructions below.
The fastest way to translate your form fields into any language is to use the Weglot plugin.
Weglot is a paid plugin that can instantly translate content on your site into any language simply by clicking a language switcher button.
It works with all kinds of content on a WordPress site, including forms built with WPForms. You can install Weglot using the same steps you followed to install WPForms.
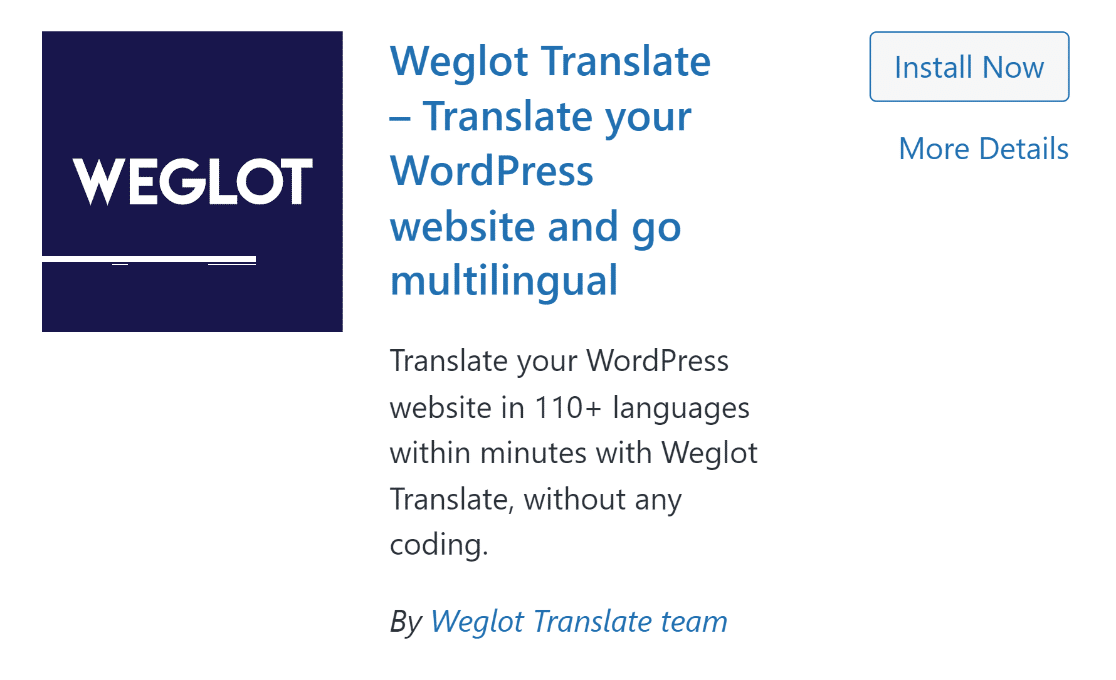
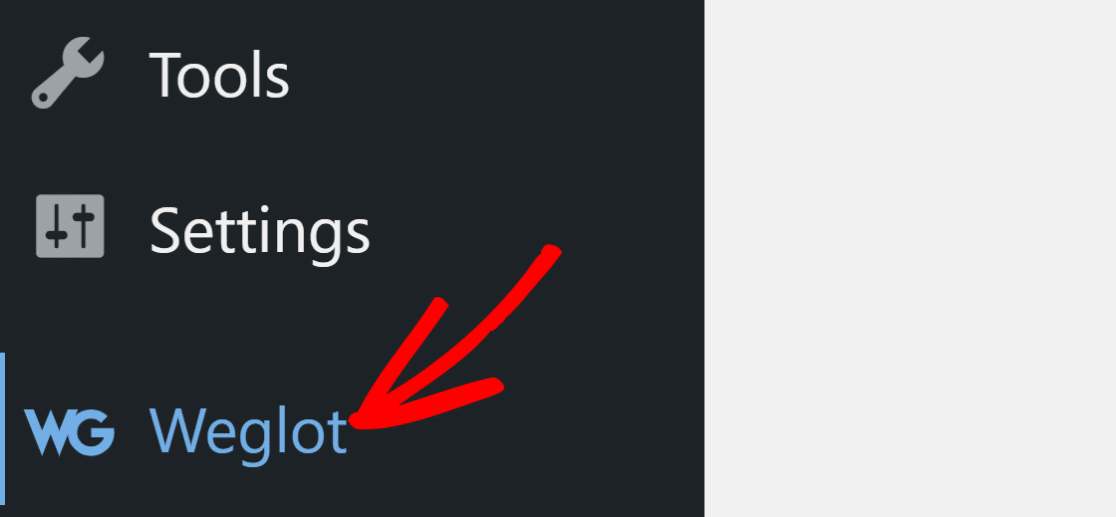
After installing the plugin, click Weglot from your WordPress admin menu sidebar.
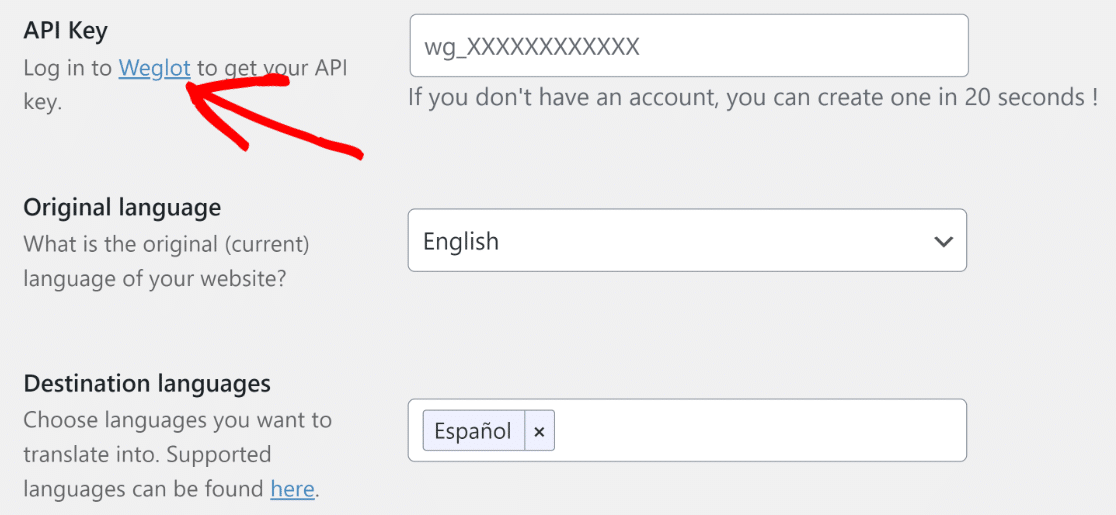
You’ll now see the Weglot settings screen.
In order to use Weglot’s translation services, you need to create an account with Weglot and use your API key to connect your account with WordPress.
Click on the Weglot link under API to create your Weglot account and get your API key.
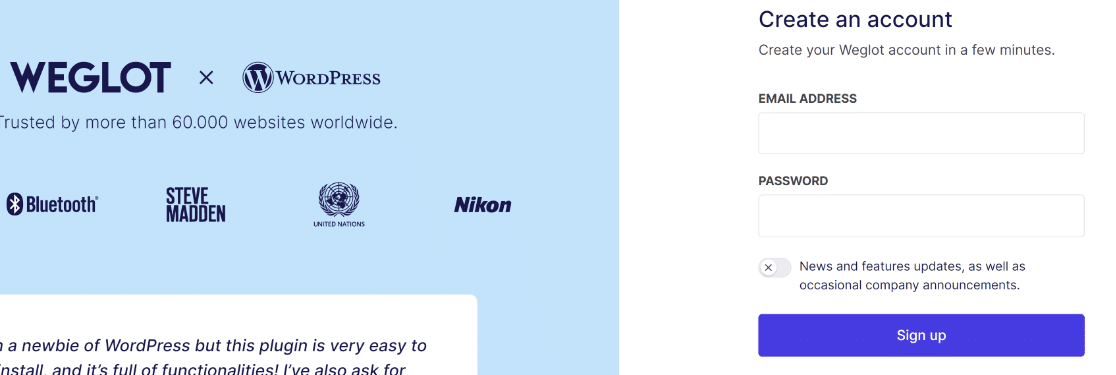
Create your new account by entering your email address and password.
Weglot will send you a confirmation email. Click on the link inside the email and you’ll be redirected to your Weglot dashboard, where you can copy your API key.
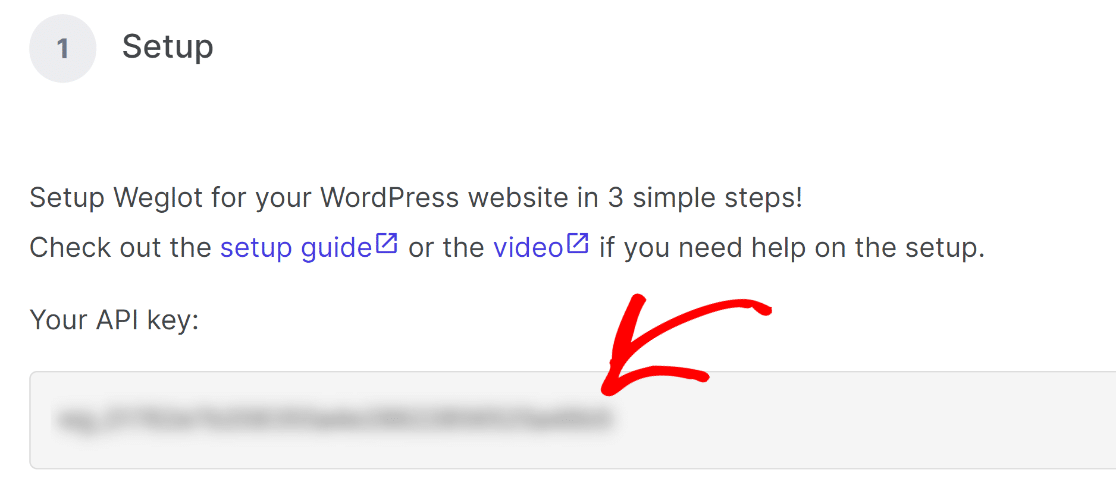
Now, switch your browser tab back to Weglot’s settings page on your WordPress site and paste your API key.
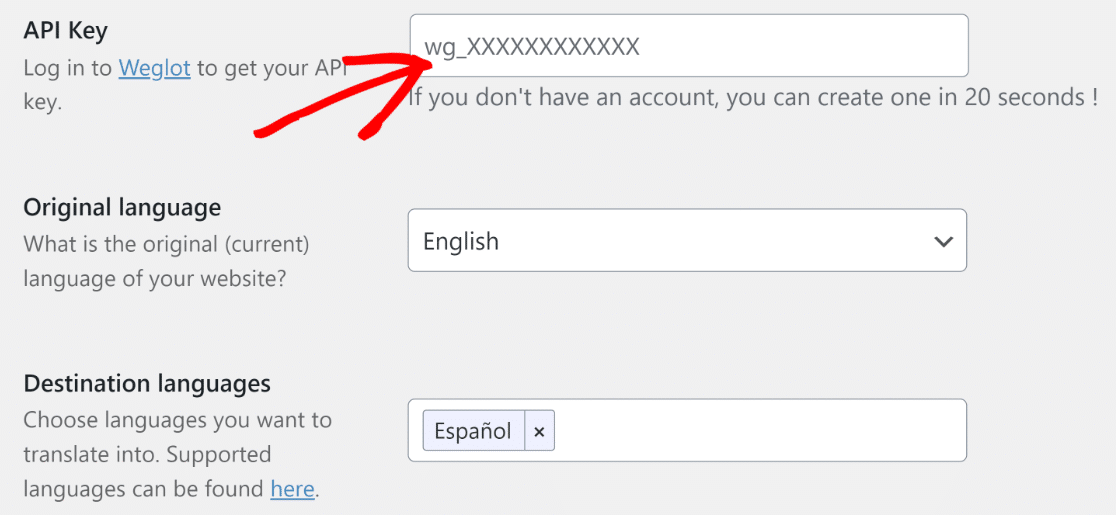
You’ll also need to select the original language of your site. Then, select the destination language(s), which are the languages that you’d like to translate your content and forms into.
Then press the Save Changes button at the bottom.
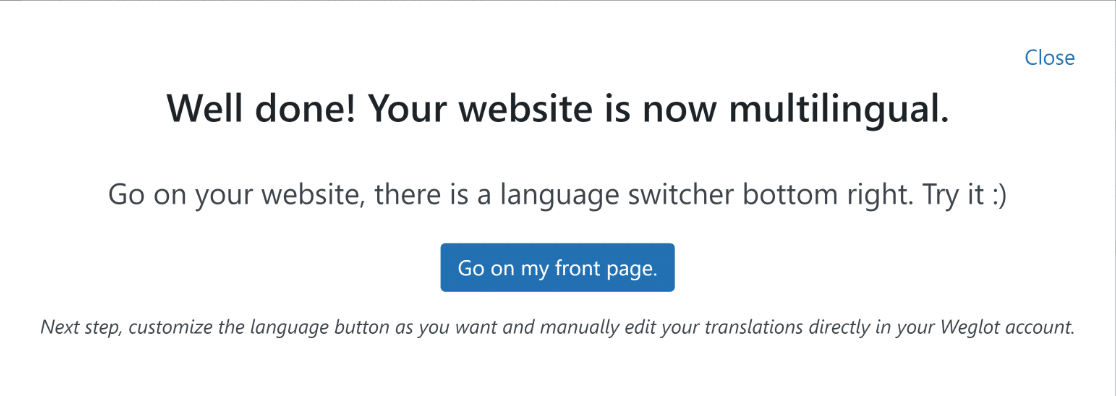
Weglot will display a modal confirming that your site is now multilingual.
Now, visit the page where you just published your contact form and use the language switches at the bottom to translate your form into another language.
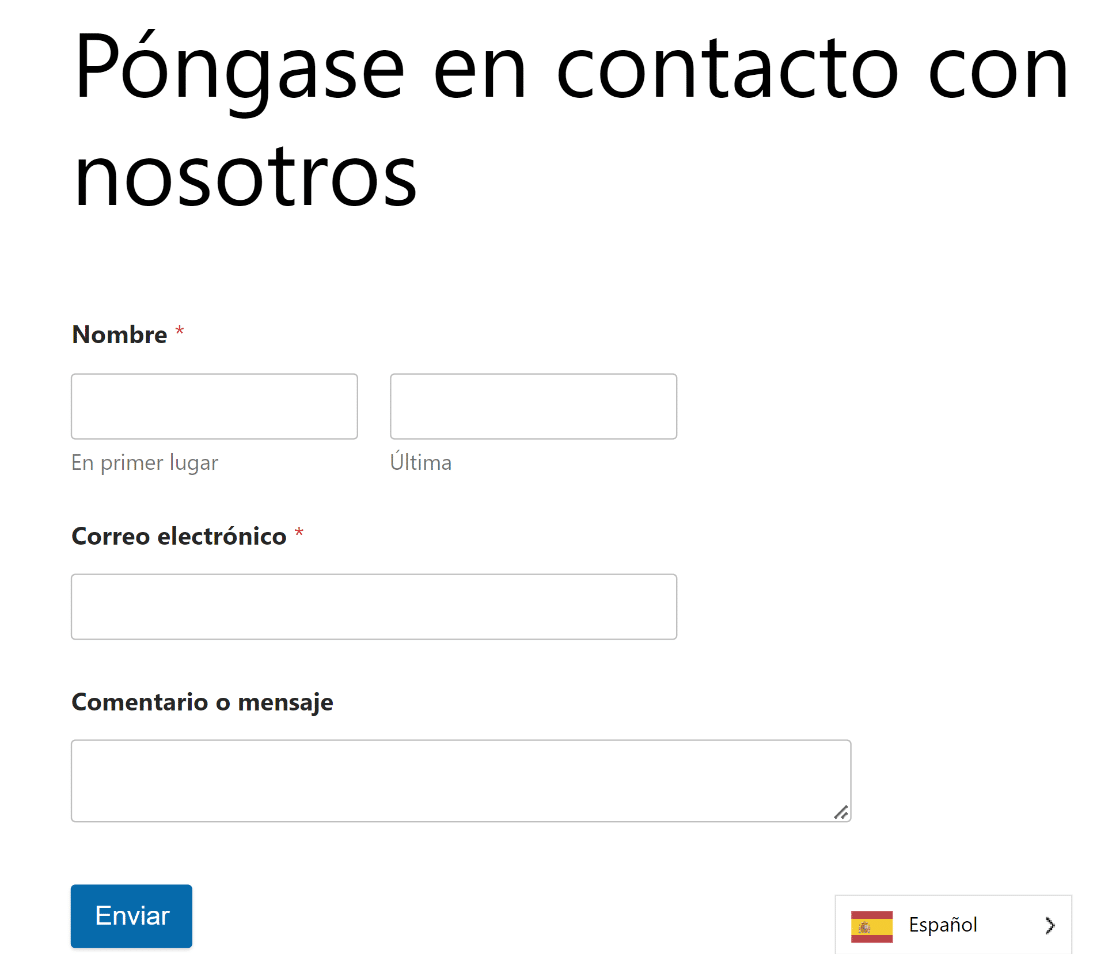
As you can see, Weglot will translate your form field label, button text, and sublabels in your desired language.
However, no translation plugin can automatically translate validations and error messages in WPForms.
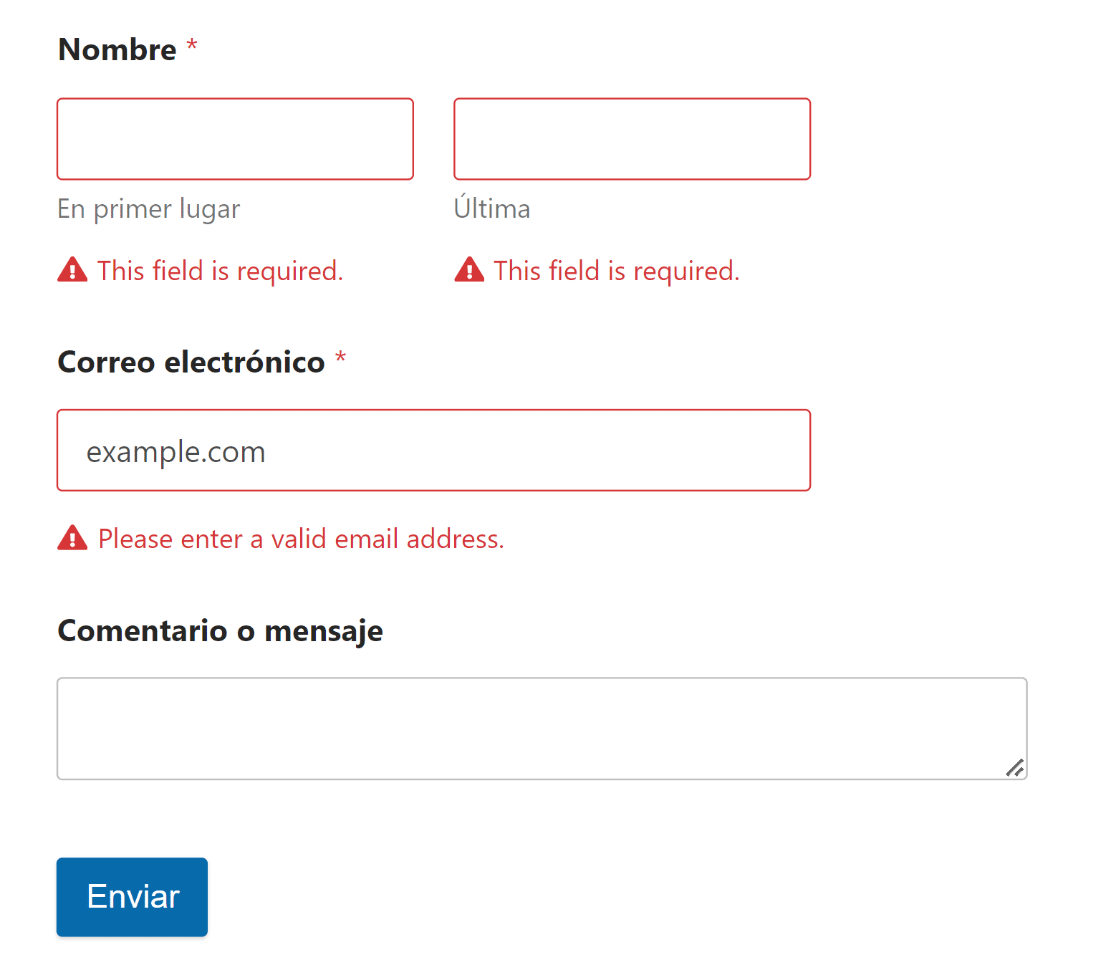
So you’ll need to translate validation messages manually as shown in step 3.
Also, please bear in mind that Weglot is a paid plugin with a free trial for 10 days. To continue using its translation features after 10 days, you’ll need to purchase a paid plan.
If this isn’t the best option for you, we’ll show you how to translate your contact forms free of cost manually.
Manual Form Translations
It’s very easy to translate your forms manually in WPForms. To change the labels for any form field, all you have to do is click on the form field in the form editor and replace the default label with the language you want to translate your form into.
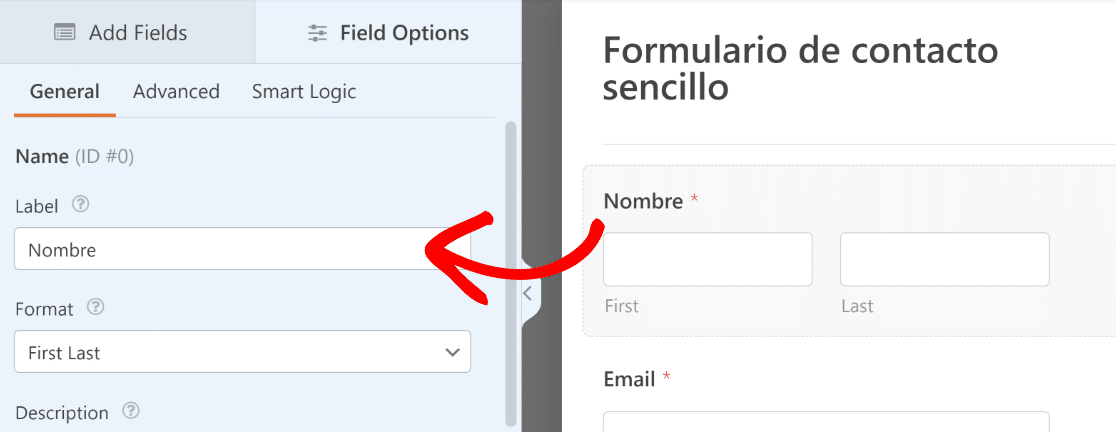
If you need help with translating, you can use online translation tools like Google Translate to assist you.
After translating your form labels, you need to do something about the Name sublabels (the labels under the form fields like “First” and “Last”). While you can’t edit Name sublabels in WPForms, there is a way around this.
Click on a field you want to change the sublabel of to access its Field Options on the left-hand pane. Then click on the Advanced tab.
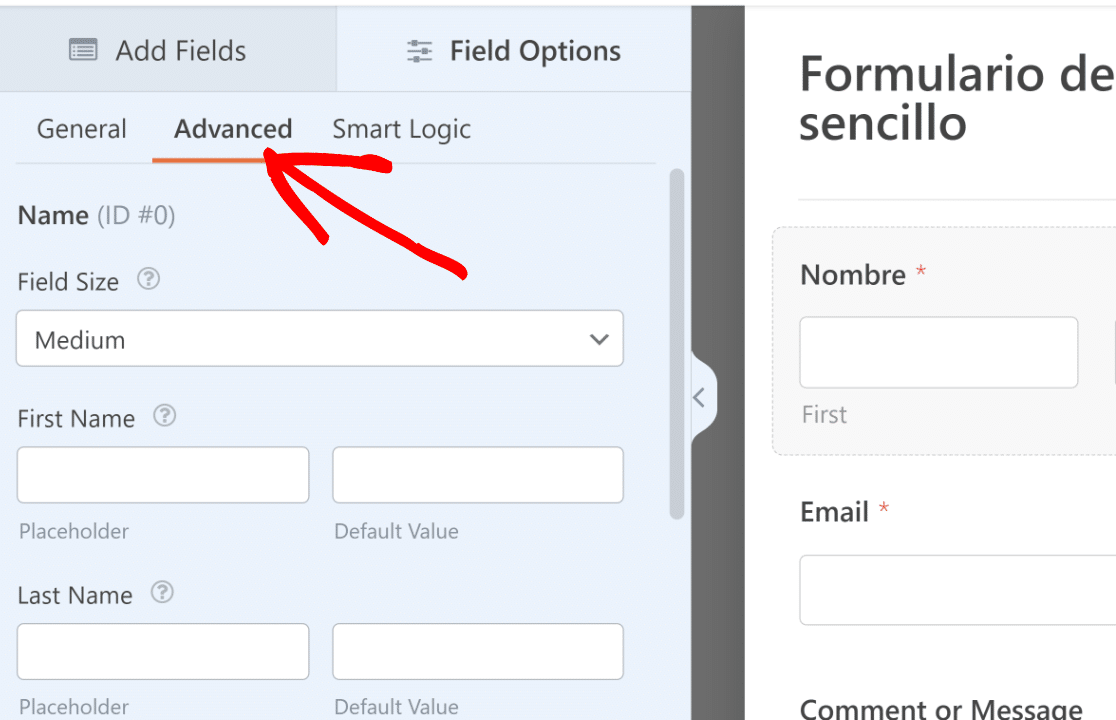
While we can’t translate sublabels, we can still use custom placeholders instead of sublabels.
Insert your translations in the placeholder fields.
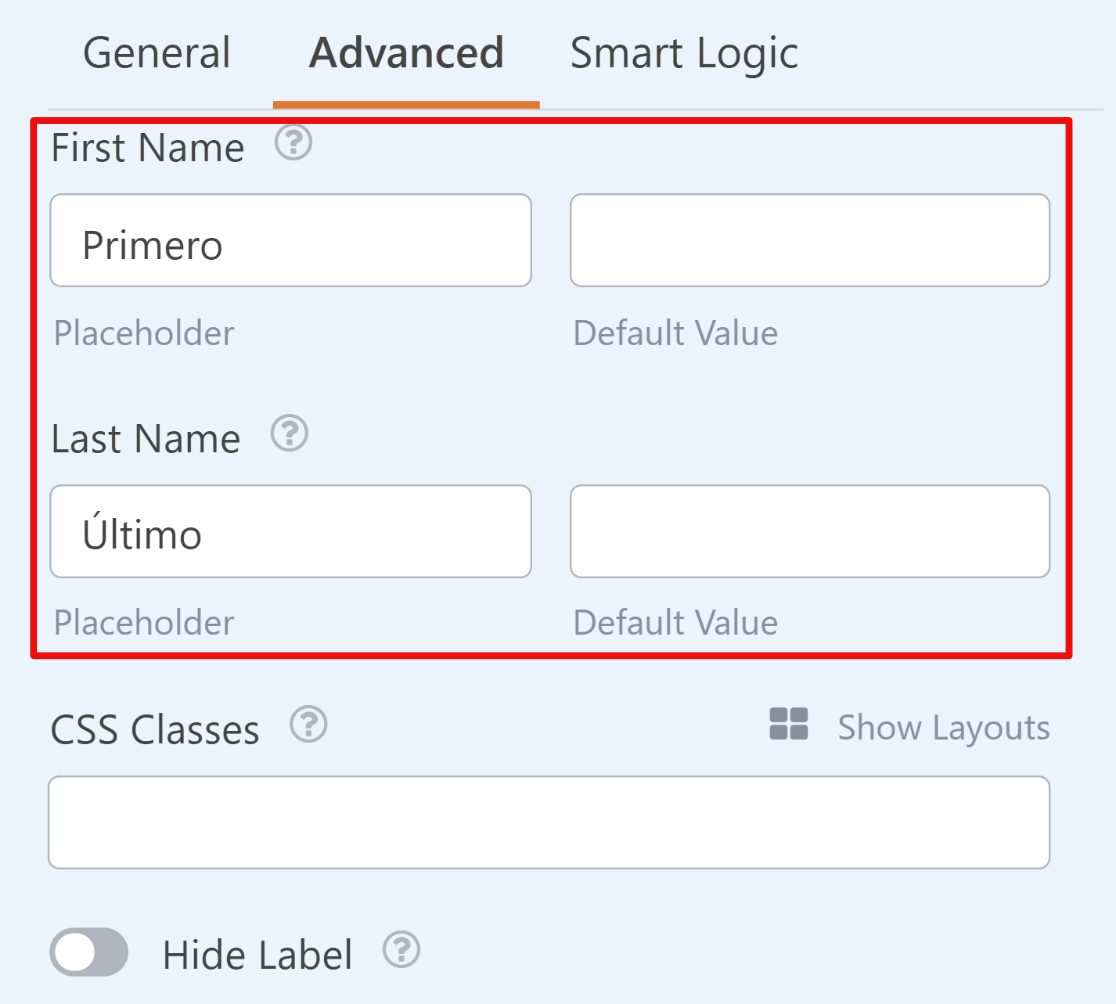
Then scroll down to the bottom and click on the Hide Sublabels toggle button.
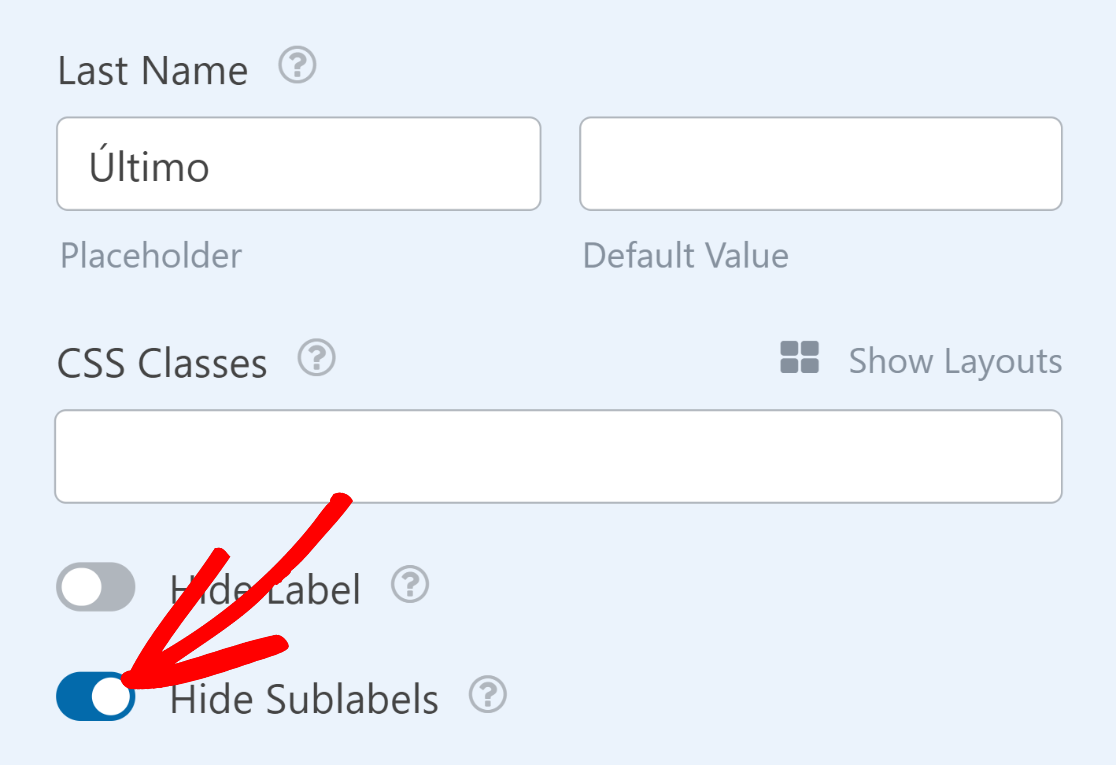
You should also translate the Submit button text and the form name (if you originally used an English name for your form).
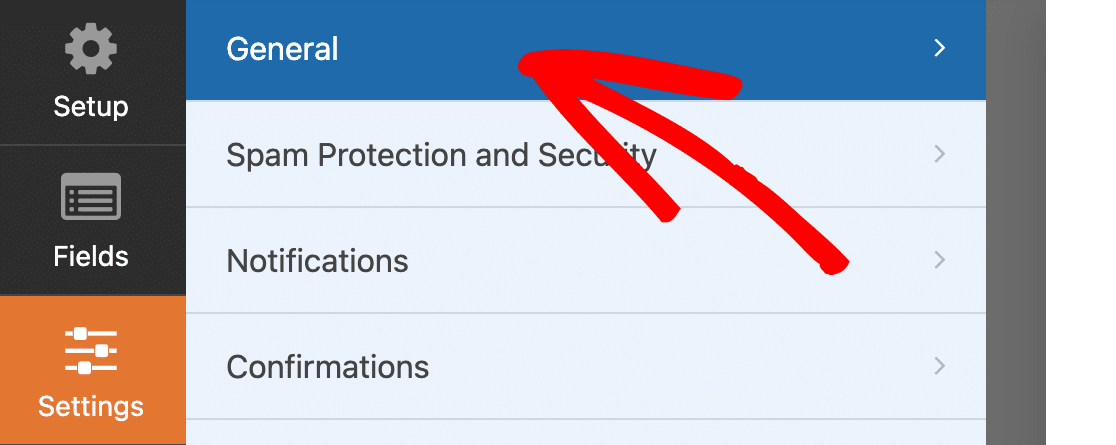
To do that, go to Settings » General from within the form builder.
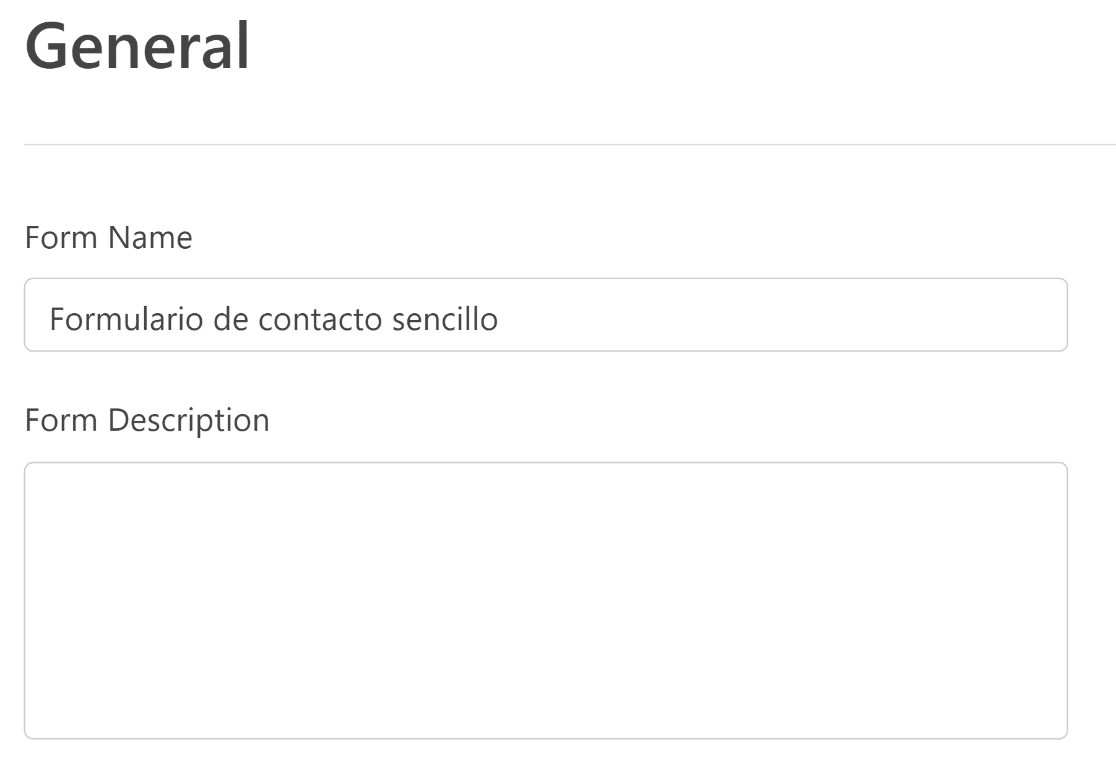
On the right-hand pane, simply enter your translation inside the Form Name text box.
Scroll down to the bottom and repeat the same steps for the Submit Button Text and Submit Button Processing text boxes.

Excellent! You’ve now translated all the labels and text inside your form. Go ahead and press Save and move on to the next step.
Step 3: Translate Your Form’s Validation Messages
A validation message is a text that appears when a required form field is left empty, or someone inputs incorrect data into a form field.

To translate your contact form’s validation messages, exit your form builder and navigate to WPForms » Settings from your WordPress dashboard. Then click on the Validation tab.
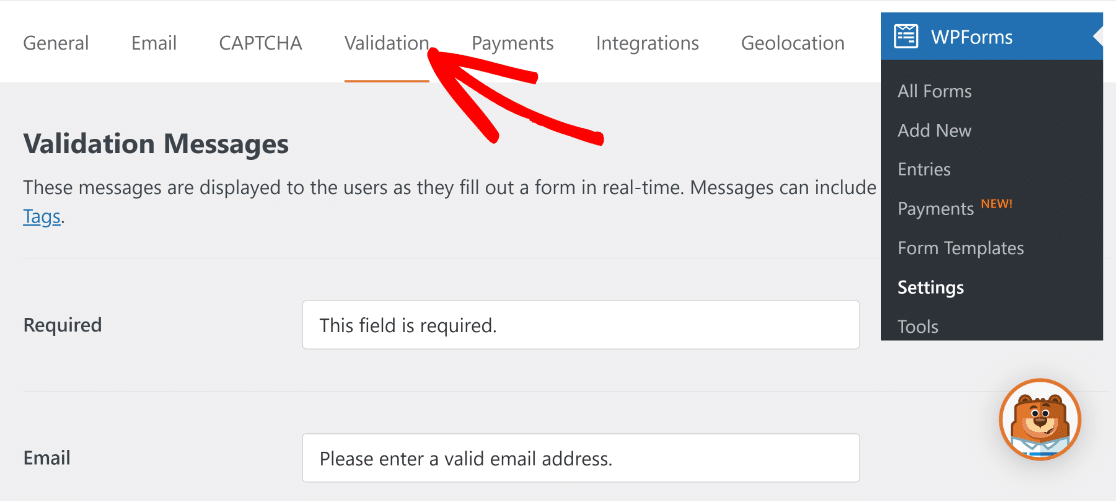
From there, all you need to do is change the current validation messages (in English by default) to the language you’re translating your contact forms into.
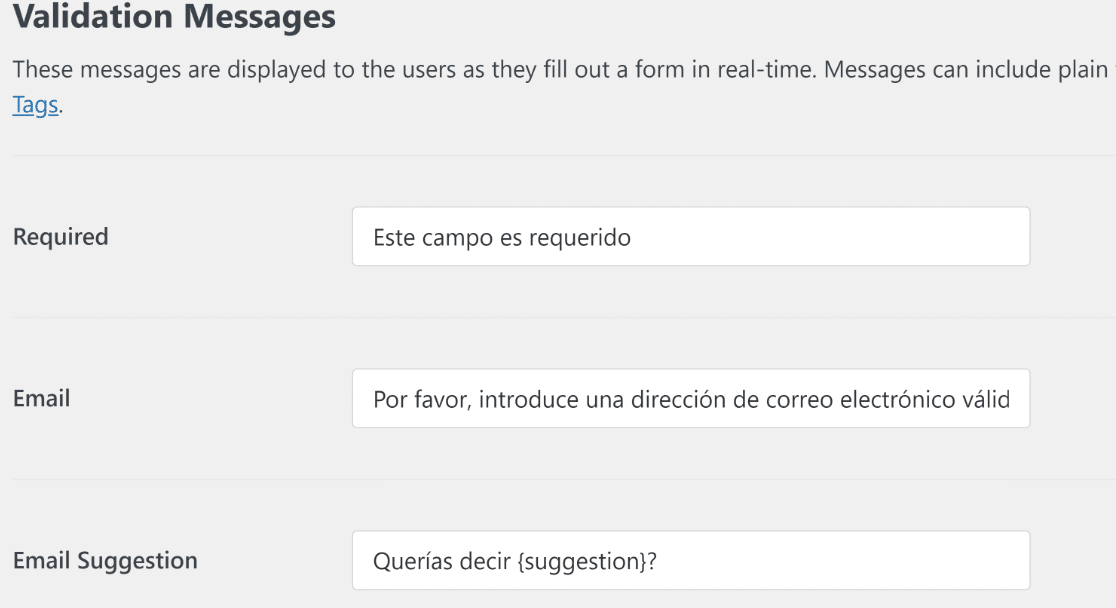
Note: Make sure not to translate the text enclosed in curly brackets like {suggestion}. Changing this placeholder text can display gibberish in your error messages.
When you’re done, press Save Settings.
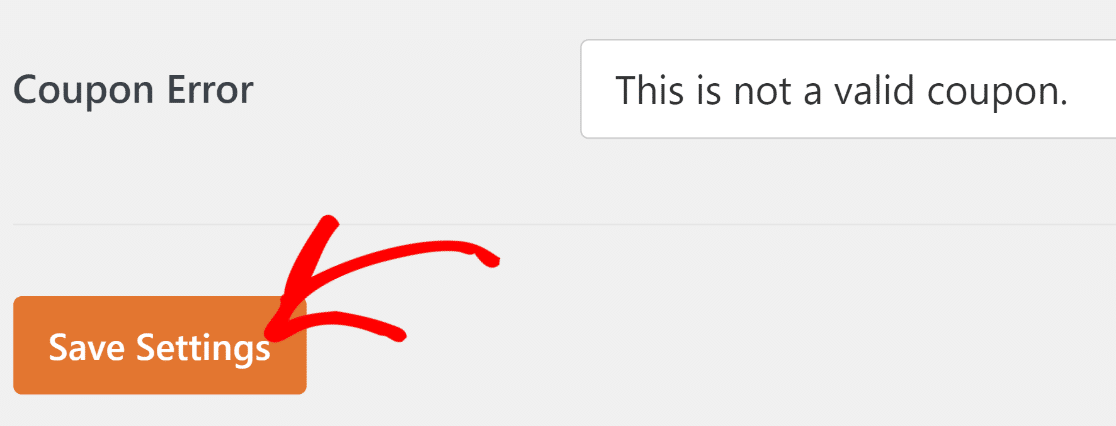
Now, if you go and check your form by entering the wrong inputs or skipping a required field, you’ll see the translated validation messages appear.

And there you have it! You now know how to translate your WordPress contact forms.
While the above steps should be sufficient for most sites, there are certain special cases where you may need to use some PHP code to translate certain special fields.
We’ll show some of these in the next section so you can simply copy and paste code snippets even if you’ve never used any code before.
Bonus: Advanced Translation Options
Before we go into the details of different special scenarios, let us first explain how you can insert custom code snippets in your WordPress site in the easiest way possible.
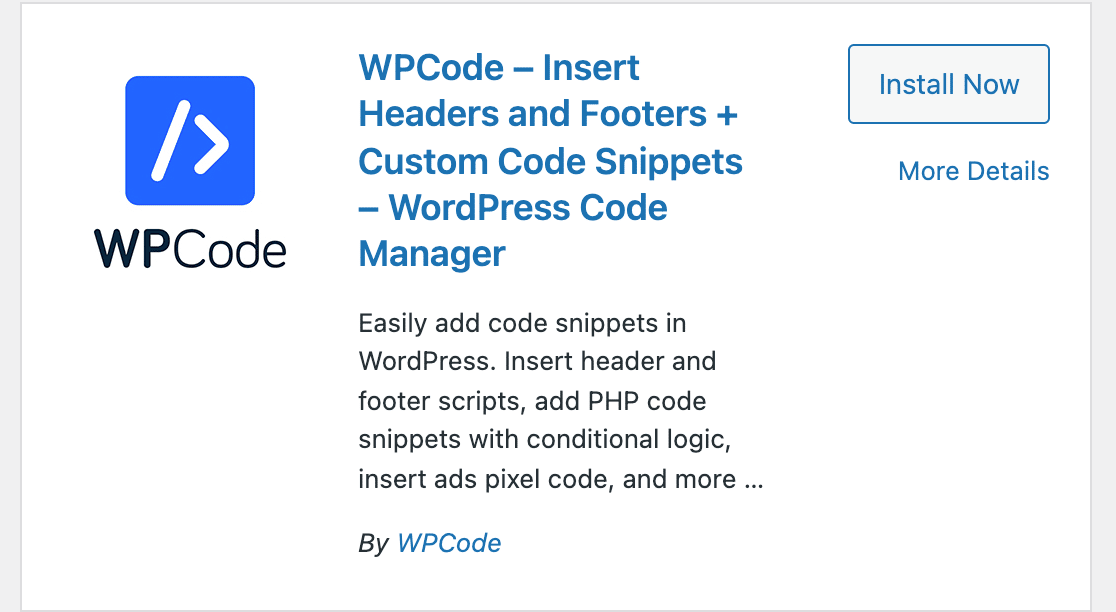
To do this, you’ll need a plugin called WPCode. Install this plugin on your site.
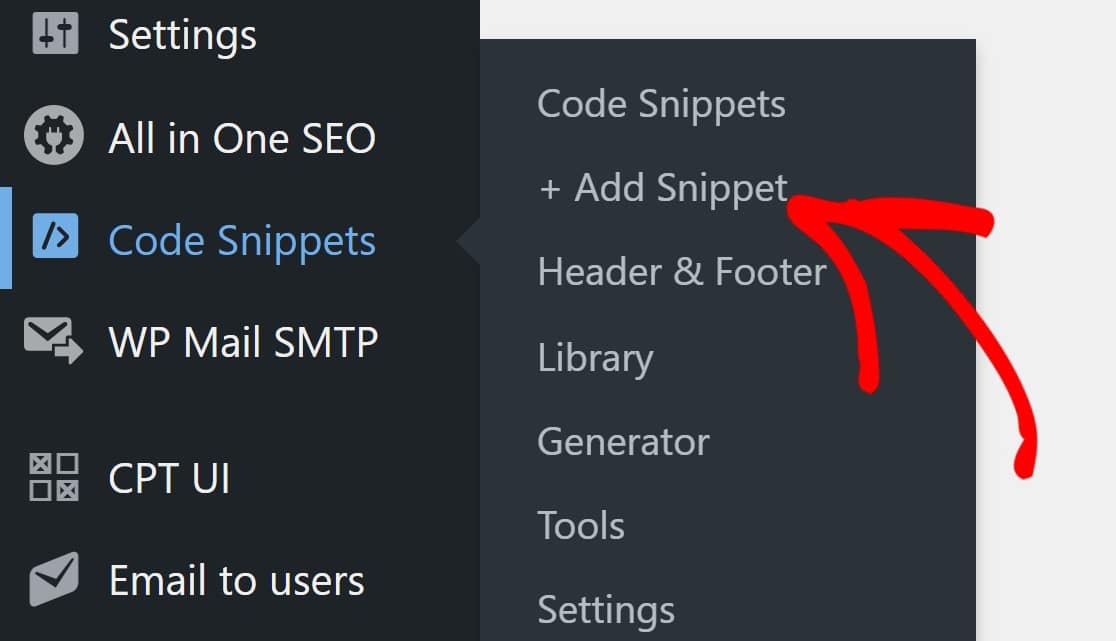
After installing the plugin, hover your cursor over Code Snippets in your WP admin sidebar and click on Add Snippet.
Then, press the Use Snippet button under Add Your Custom Code (New Snippet)
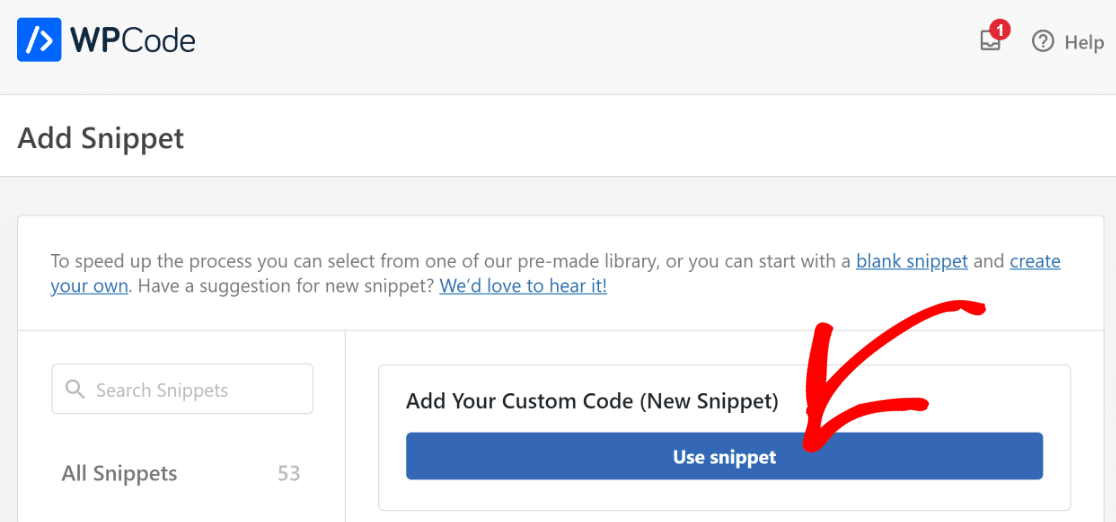
This will open the code editor window.

At the top, you can give a name to your snippet to help you reference it later. In the middle, you have the code editor, where you can write your own code or copy-paste it from another source.
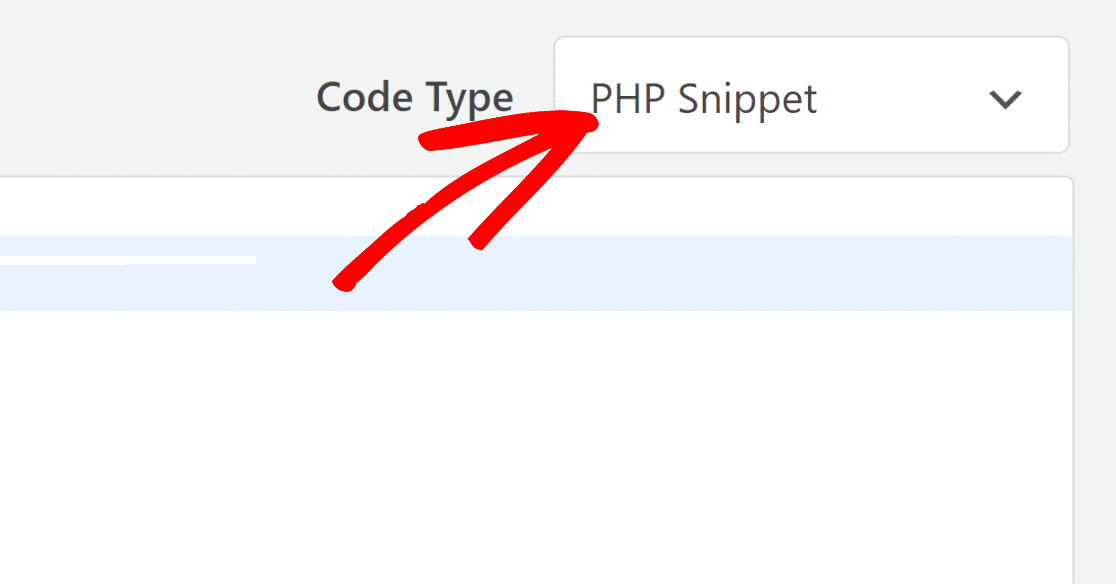
At the top right, you can select your code type depending on the nature of your code. For these scenarios, we’ll be using PHP codes, so select PHP Snippet from the dropdown.
Excellent. Now, we’ll go through a few common scenarios where you may need to use PHP code in order to translate certain parts of your form.
Translating Validation Messages into Multiple Languages
Let’s consider a website that has forms in different languages on the same site. While you can easily change the labels manually or with the Weglot plugin as we’ve shown above, the validation messages can’t be changed for individual forms with these methods.
To change validation messages based on the specific language selected by a user on your site, you’ll need to insert a PHP code snippet.
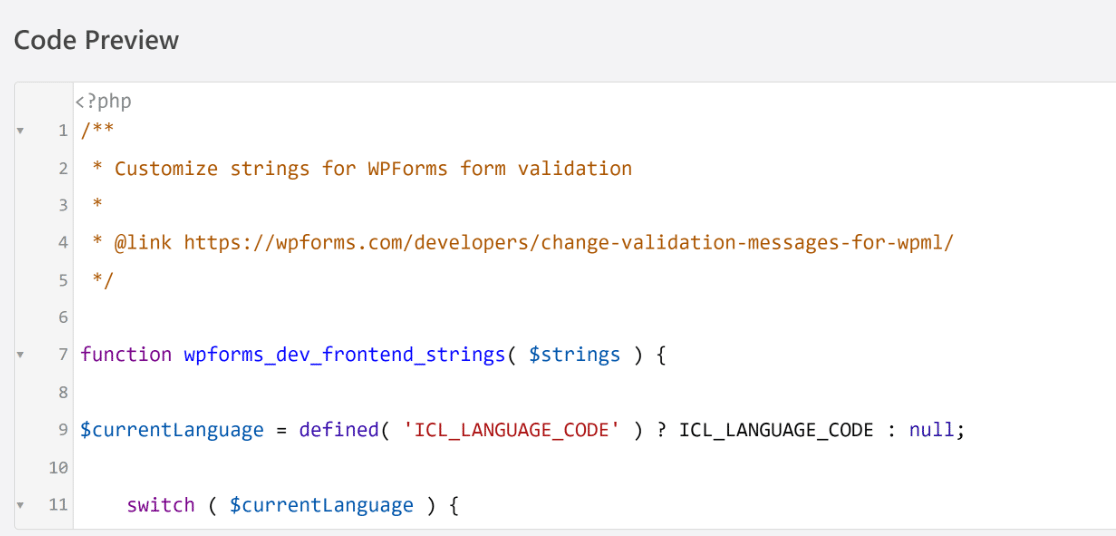
We’ve created a code snippet that translates your form validation messages into Spanish or French based on the language selected by the user.
Follow the steps we’ve shown above to add a new snippet using WPCode, and then insert the following snippet inside the code editor:
Select the code insertion method (auto-insert, run everywhere).

Then, scroll back to the top and press the toggle button to set your code snippet to Active. Click on the Save Snippet button.

Congratulations! Your forms will now display validation messages in the selected language.
If you’d like to add translations for other languages, you’ll need the ICL language code for that language (this is ‘es’ for Spanish and ‘fr’ for French). Simply add a line of code starting with:
case '[insert your language code]':
Then, use the same blocks of code as appear in our example code above, right after the case line.
Add the translations for each validation message to the right of the equal sign inside square brackets as below (the specific validation message type is indicated by the double forward slashes):
//valid number

$strings[ 'val_number' ] = '[Enter your translation]'
And repeat for each line of code.
We’ve tested this code for WPML and Polylang plugins. Compatibility with other language translation plugins isn’t guaranteed.
Translating Email Confirm Field Sublabels
If you’re using the Email Confirm field, you may want to translate the sublabel into another language.
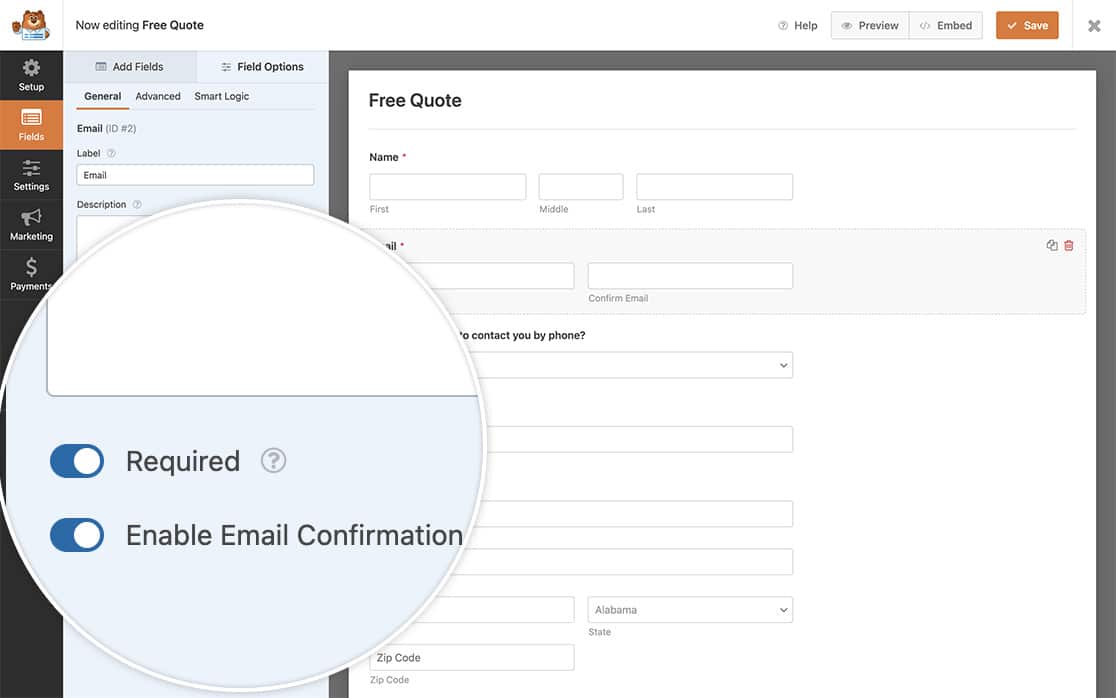
As shown in the previous example, you can do this with some custom PHP code inserted using WPCode.
Here’s the code you’ll need:
The translated text for the sublabels needs to be inserted on the right-hand side of the equal signs in the $properties functions.
For example, here’s how you’ll need to modify the above code for Spanish sublabels for the email confirmation fields:
$properties[ 'inputs' ][ 'primary' ][ 'sublabel' ][ 'value' ] = __( 'Introduce tu correo electrónico', 'plugin-domain' );

$properties[ 'inputs' ][ 'secondary' ][ 'sublabel' ][ 'value' ] = __( 'Para confirmar, vuelva a ingresar su dirección de correo electrónico aquí', 'plugin-domain' );
The code above will change the validation message for the email confirmation field globally on your site’s forms. However, it’s also possible to change it for individual forms only by modifying the above code slightly.
/**
 * Customize email field properties.
 *
 * @link https://wpforms.com/developers/how-to-change-sublabels-for-the-email-field/
 */

function wpf_dev_email_field_properties( $properties, $field, $form_data ) {

    // Only process this snippet on the form ID 123
    if ( absint( $form_data[ 'id' ] ) !== 123 ) {

        return $properties;
    }

    // Change sublabel values
    $properties[ 'inputs' ][ 'primary' ][ 'sublabel' ][ 'value' ] = __( 'Enter Your Email', 'plugin-domain' );
    $properties[ 'inputs' ][ 'secondary' ][ 'sublabel' ][ 'value' ] = __( 'To confirm, re-enter your email address here', 'plugin-domain' );

    return $properties;

}

add_filter( 'wpforms_field_properties_email' , 'wpf_dev_email_field_properties', 10, 3 );
In the line of code if ( absint( $form_data[ 'id' ] ) !== 123 ), simply replace “123” with the actual form ID of the form you’re interested in.
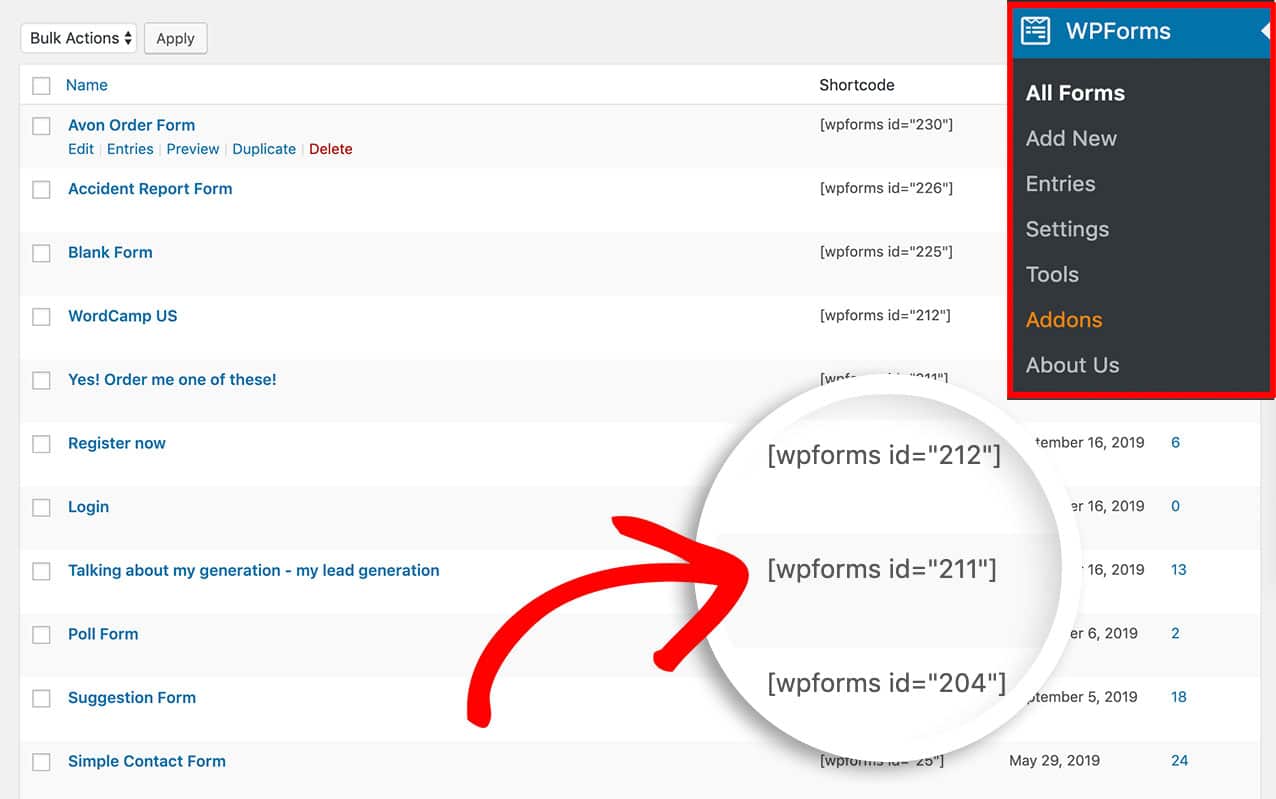
You can locate the form ID by going to WPForms » All Forms and looking at the ID in the shortcode for your desired form.
Other Translation Options
If you’d like to translate some other specific fields and validations associated with only certain kinds of forms, you can check the following dev docs:
Next, Create Accordion Forms
An accordion design is a fantastic way to make a long form easier to fill with collapsible sections. Our detailed guide on creating accordion forms shows you all the steps for creating an accordion form in WordPress.
Create Your WordPress Form Now
Ready to build your form? Get started today with the easiest WordPress form builder plugin. WPForms Pro includes lots of free templates and offers a 14-day money-back guarantee.
If this article helped you out, please follow us on Facebook and Twitter for more free WordPress tutorials and guides.



Delete the “*/</code>” as it doesn’t work.
Hey Ana – When you get a chance, please drop us a line with more details about the issue you are facing in support so we can assist further.
If you have a WPForms license, you have access to our email support, so please submit a support ticket.
Otherwise, we provide limited complimentary support in the WPForms Lite WordPress.org support forum.
Thanks 🙂