


AI Summary
Are you looking to style WPForms using the block editor for visually appealing, user-friendly forms on your WordPress site?
WPForms is an intuitive plugin that simplifies form creation and management while offering extensive customization options. By leveraging the block editor, you can effortlessly style your forms to improve your user experience.
Follow this step-by-step tutorial to master styling WPForms using the block editor and enhance your site’s overall functionality.
Create Your WordPress Form Now
Why Do You Need to Style Your Forms?
By styling your forms, you can enhance your website’s aesthetic, ensuring it contributes to a positive user experience. Here are some other key reasons why form styling is crucial for your website:
- Consistent Branding: Creating a branded form to match your website’s design and color scheme ensures a consistent brand image.
- Better User Experience: Well-designed forms make it easy for users to navigate/ submit the required info, leading to higher form completion rates.
- Responsive Design: A well-styled form effortlessly adapts to various screen sizes and devices, ensuring a smooth user experience for all visitors.
- Increased Conversions: A visually appealing form can capture a user’s attention and motivate them to complete the desired action, whether it’s signing up for a newsletter, making a purchase, or submitting a query.
- Enhanced Accessibility: Styling your forms with clear labels, adequate spacing, and contrasting colors can improve accessibility for visually impaired users, ensuring that your website caters to a broader audience.
Now that you understand the importance of styling your WPForms, it’s time to dive into the step-by-step process to effectively style your forms using the block editor and make the most of the WPForms plugin.
How to Style WPForms Using the Block Editor
Follow these steps to learn how to style your WPForms using the Gutenberg block editor without the need to write any custom CSS.
Step 1: Install and Activate WPForms
WPForms simplifies the process of creating and managing forms on your website. The plugin effortlessly creates various forms, including contact forms, surveys, polls, and registration forms, without coding knowledge, and it gives you 2,100+ ready-made templates to start from.
What I like most about styling WPForms is that every control sits in the block sidebar, right next to the form you’re editing. Change a border radius or a button color and the form updates as you watch, so you’re never stuck in a save, refresh, and check loop.
You also don’t need a paid license for any of this. Form styling and the full library of 40+ themes are available in WPForms Lite, the free version, so every step in this guide works the same whether you’re on Lite or Pro.
To get started with WPForms, you must install the plugin on your WordPress site. Once you have activated it, follow the simple steps below to create and customize the styling of your form.
Step 2: Create a Form or Use a Template
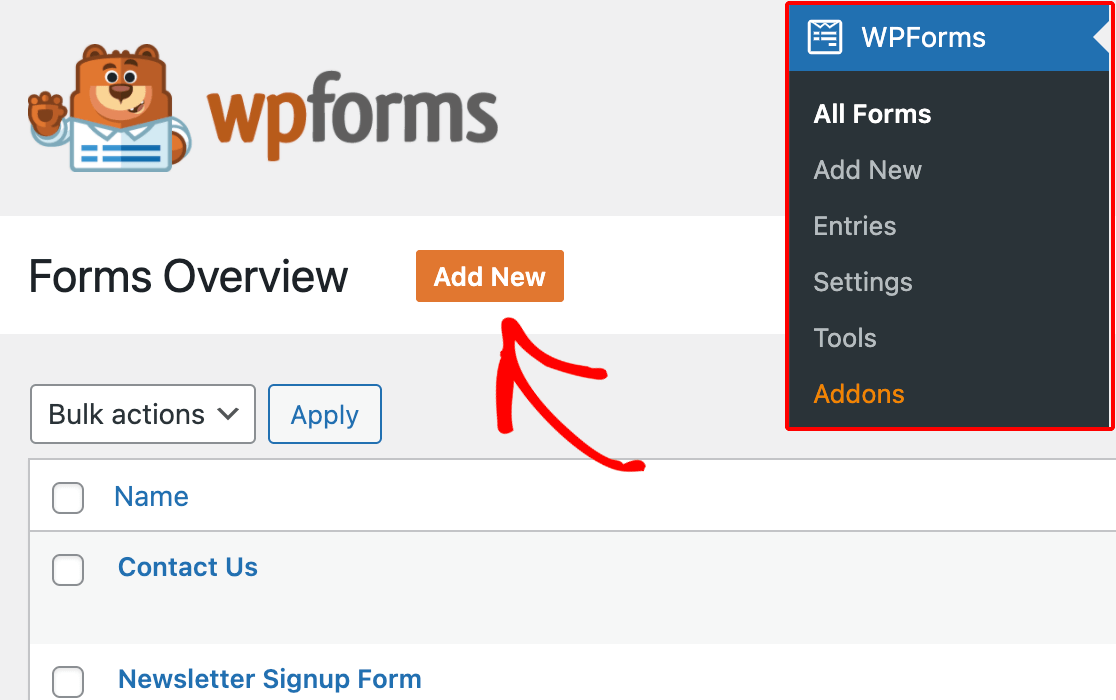
Let’s start creating your form! From your WordPress dashboard, navigate to WPForms and click the Add New button.
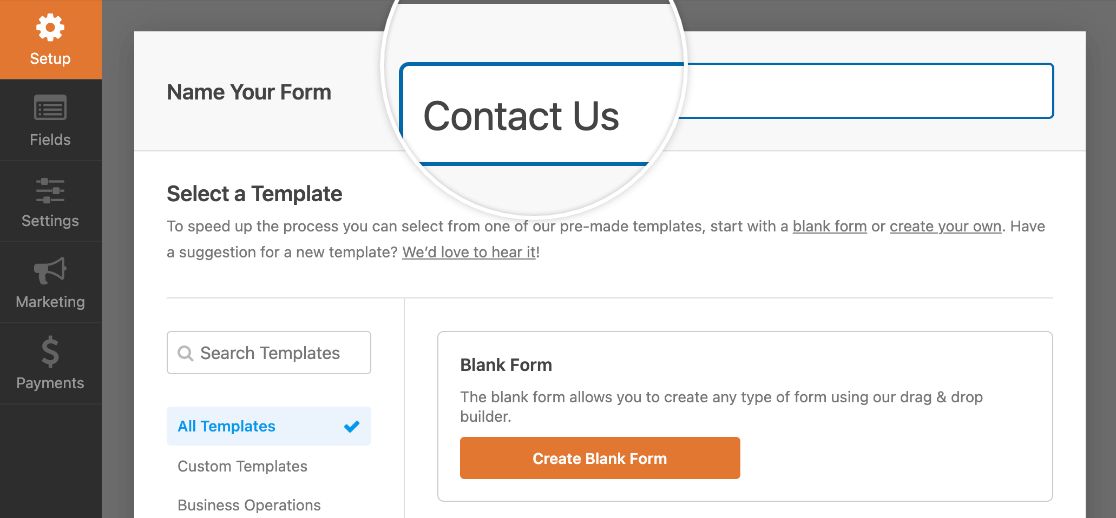
When prompted, give your form a name that reflects its purpose. Then, you have the option to choose a pre-existing template or Create Blank Form.
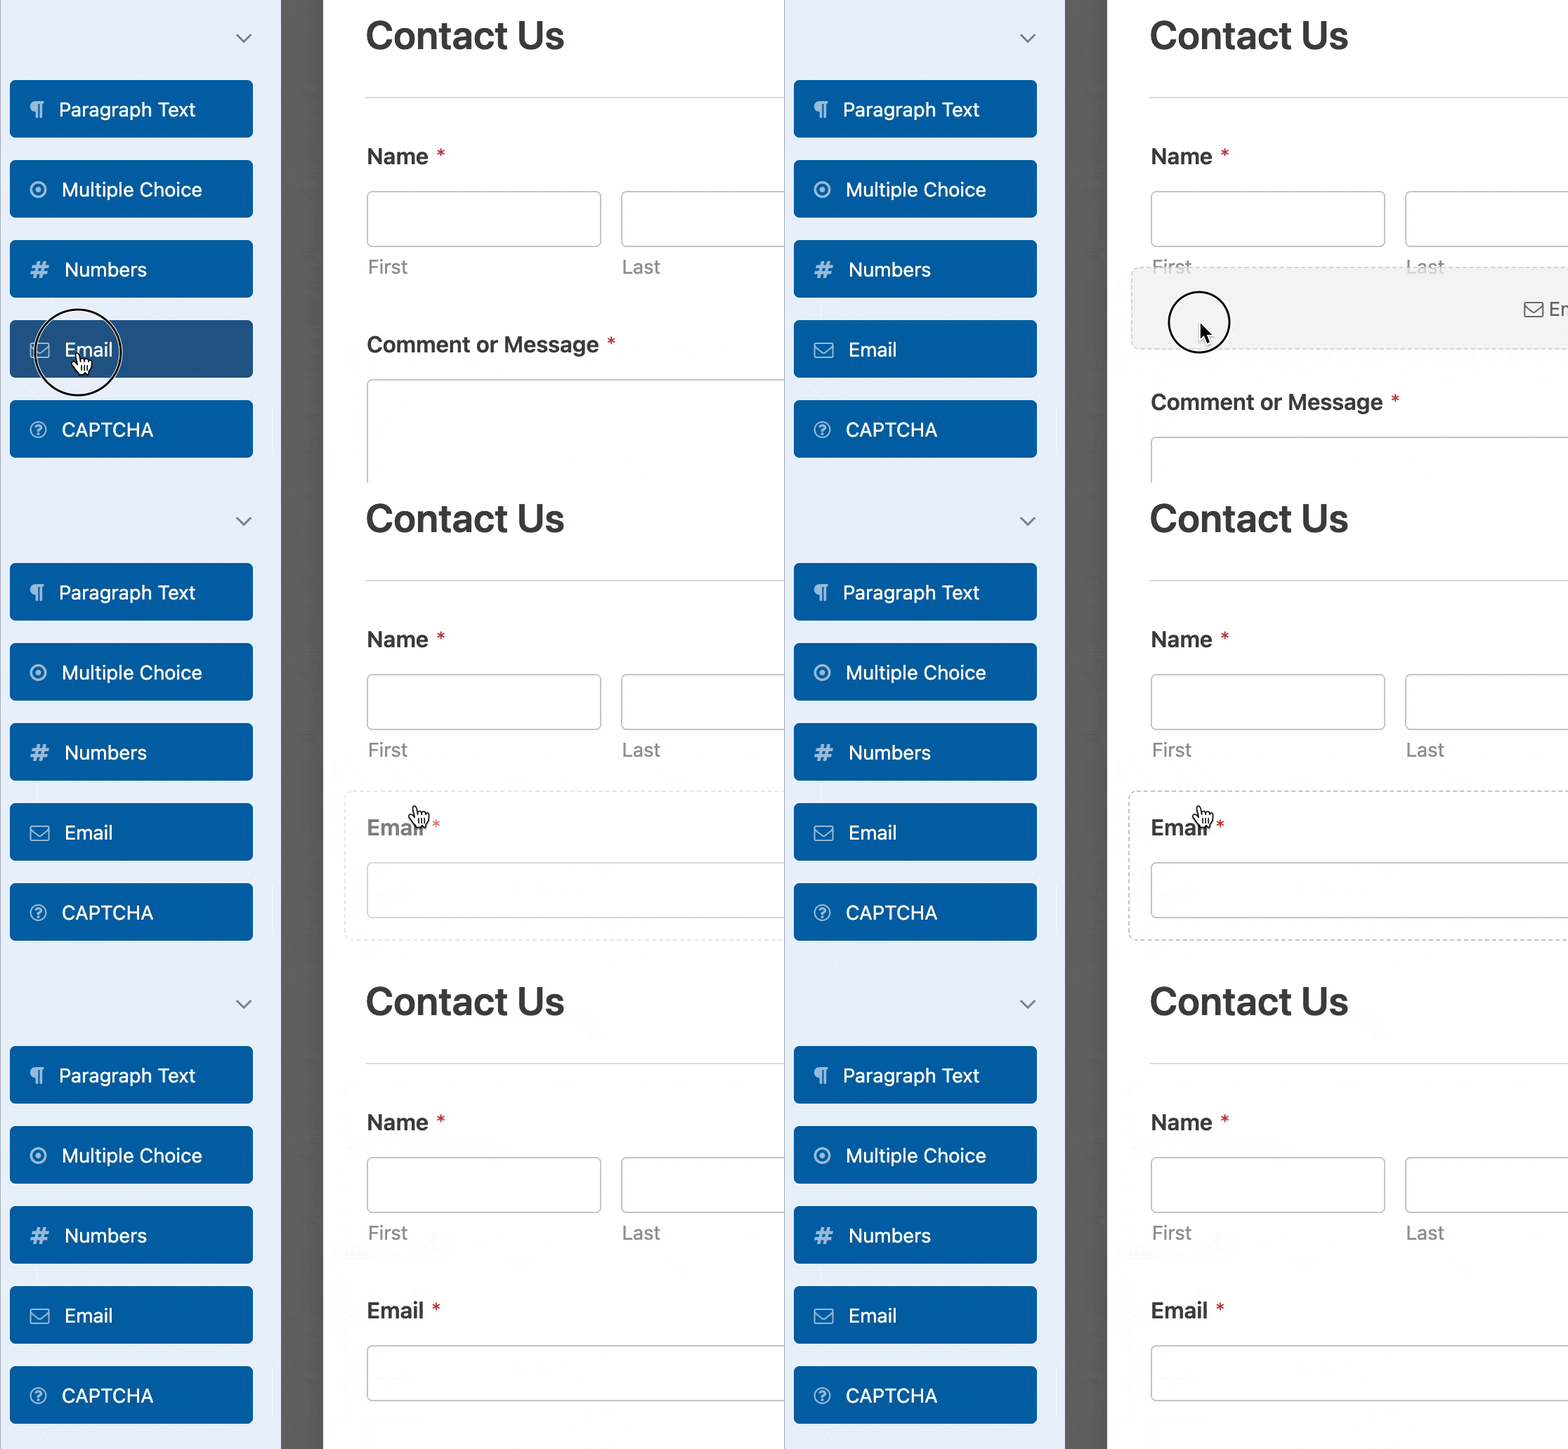
Next, WPForms will open its intuitive Form Builder interface, where you can customize your form by adding, editing, deleting, or repositioning any form field.
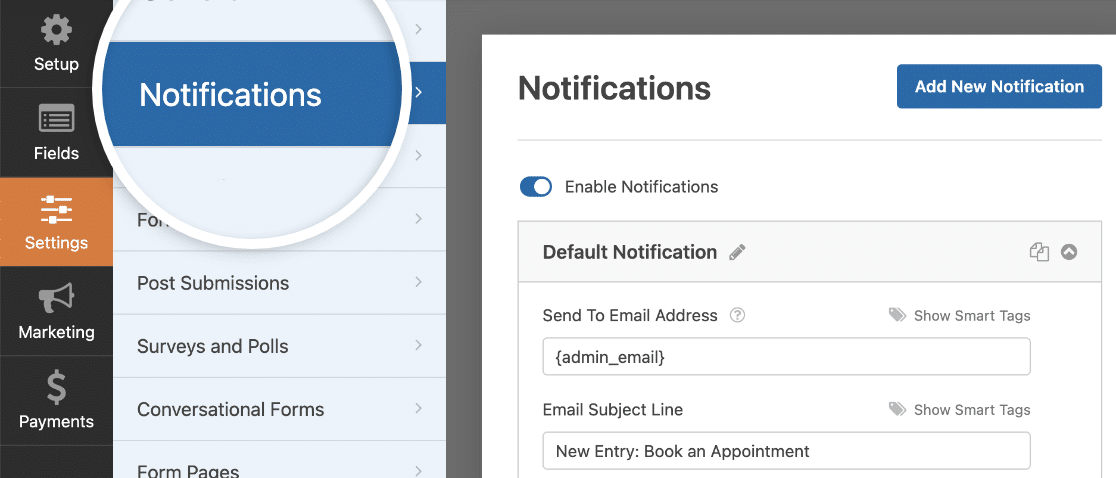
After configuring the form fields, you’ll need to set up Email Notifications to alert you when someone fills out the form and hits the submit button.
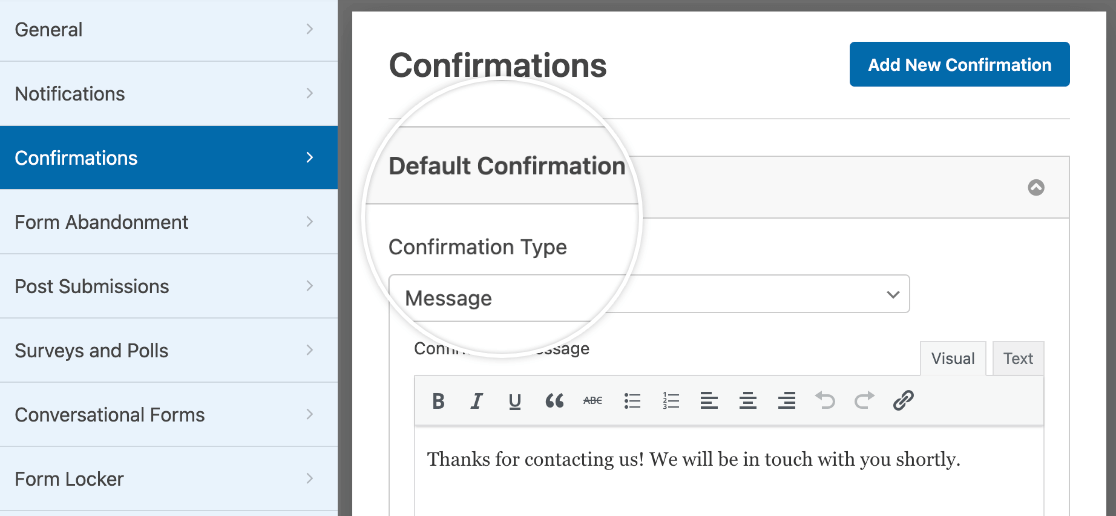
You can also configure the Confirmation Message users see once the form is submitted to improve the user experience.
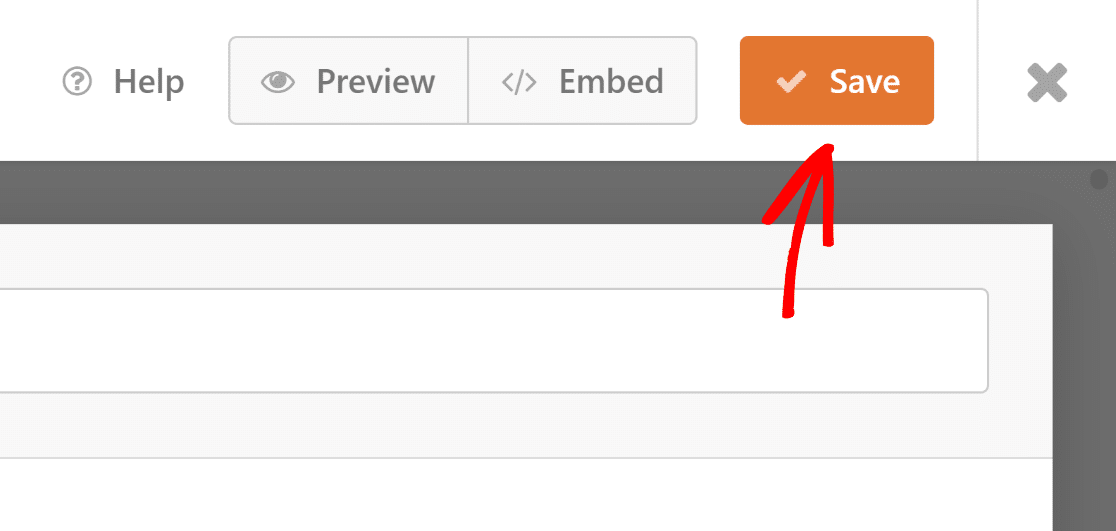
Before proceeding to the next step, save your form settings to avoid losing your progress. Click the Save button located at the top of the screen.
Step 3: Enable Modern Markup
To enhance accessibility and enable visual customization of forms within the block editor, WPForms offers Modern Markup.
To enable Modern Markup in WPForms, go to WPForms » Settings and select the General tab.
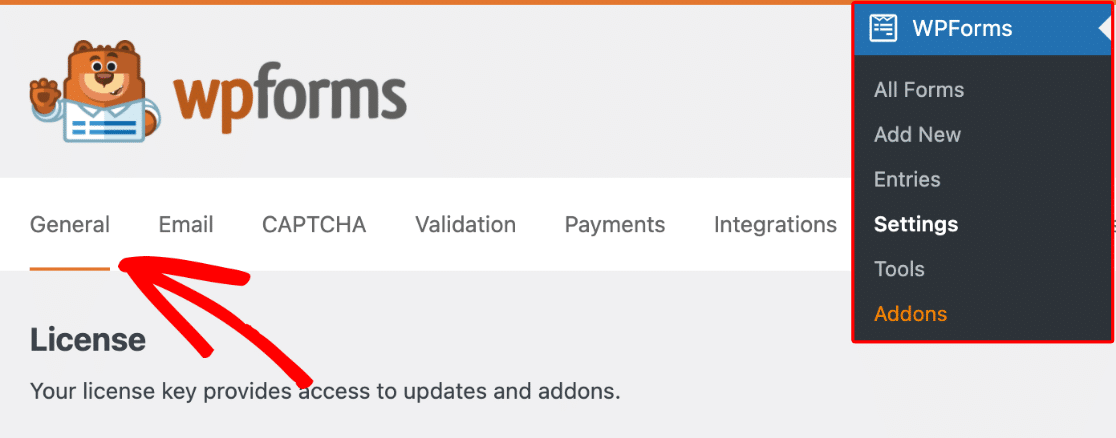
Scroll down to the General section, where two settings work together to switch on block editor styling. Start with the Include Form Styling setting and set it to Base and form theme styling.
This is the option that loads the CSS your styling controls depend on, and when it’s set to anything narrower, your changes either won’t appear in the block editor or won’t carry through to the front end.
Next, enable the Use Modern Markup option. With this enabled, you’re all set for styling your form via the block editor. Save your changes before you leave the page.
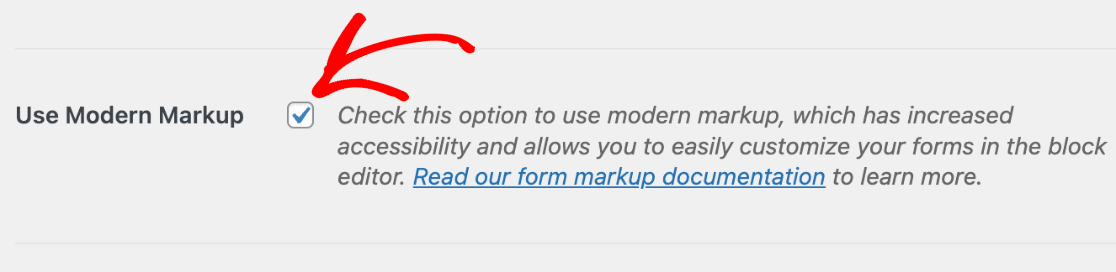
WPForms version 1.8.1 and later enable modern markup by default for new users, and the option to disable it is not available.
So, if you’re using the latest version of the plugin and don’t see this setting, you’re already good to go and can start styling your forms.
Begin customizing your forms in the block editor to take advantage of modern markup features, but first, let’s embed the form on your site!
Step 4: Embed the Form on Your Site
To embed the form you created earlier, open an existing page or create a new one. Look for the Add Block button and search for the WPForms block.
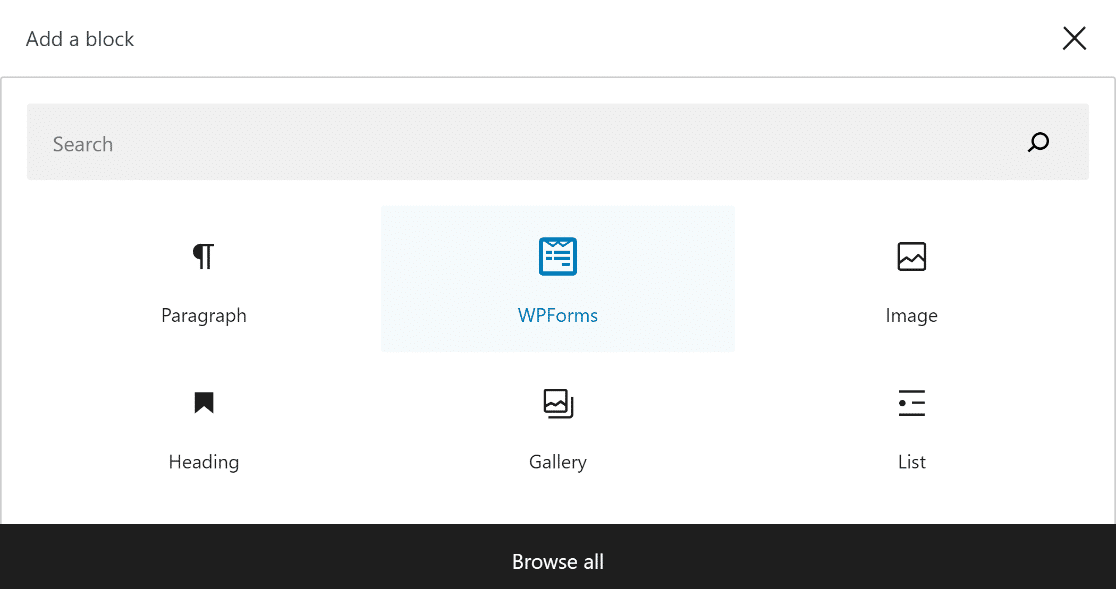
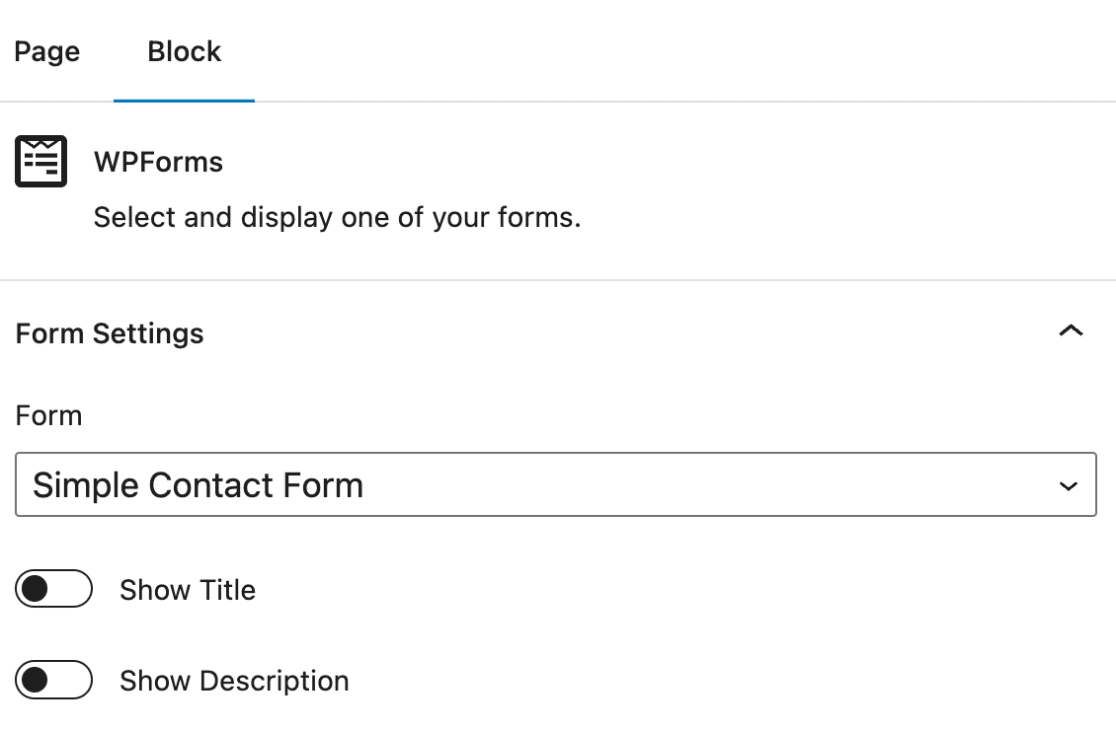
After inserting the WPForms block into your page or post, select your desired form from the dropdown menu. We can now begin styling your form with the block editor!
Step 5: Edit Styles from the Block Editor
Open the page or post that contains your WPForms in the block editor. Click on the WPForms block to open the additional options.
You’ll discover a variety of options for styling themes, form fields, labels, buttons, and the container and background your form sits in, all to match your brand’s aesthetic.
The Advanced section also lets you copy style settings between forms, which saves time when several forms need the same treatment.
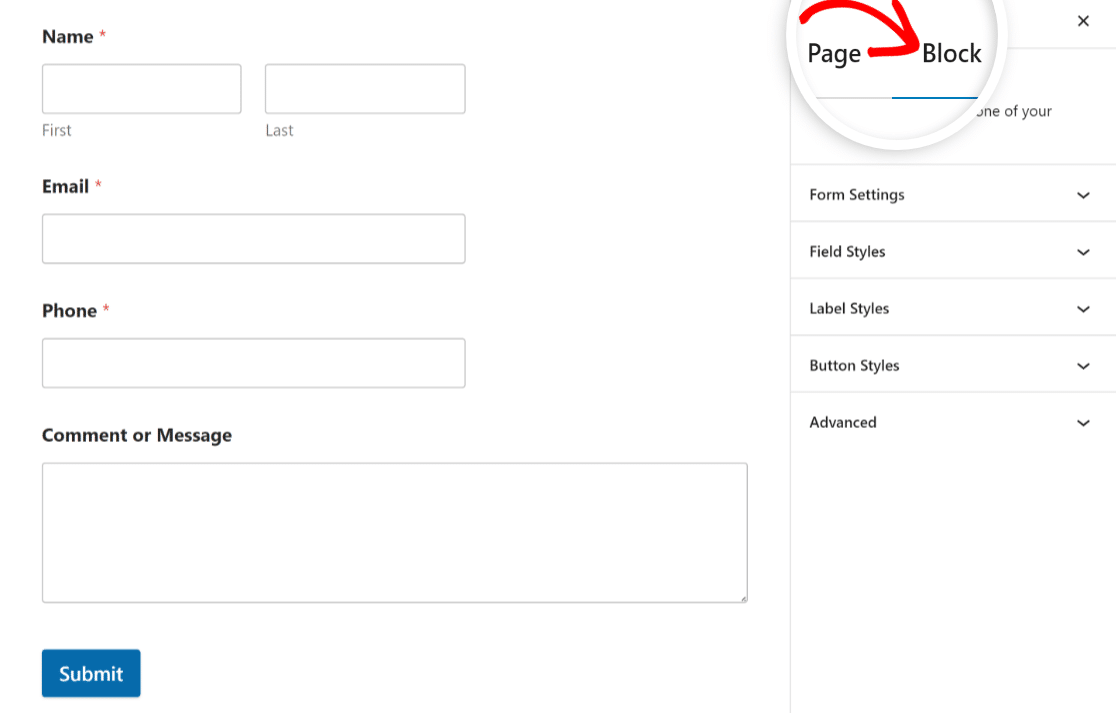
Learn how to use these various styling options below to customize the appearance of your form and match your website’s design in no time:
Themes
The Themes panel is the quickest route to a restyled form. WPForms ships with 40+ pre-made form themes, and applying one takes a single click.
Each theme carries its own mix of colors, borders, background, and button styling, so picking one recolors your fields, labels, buttons, container, and background together.

If you’d rather browse before committing to one, you can see every theme side by side first. Once you apply a theme and then change any individual setting, WPForms saves your version as a new custom theme and adds it to your theme list.
Use the Theme Name field to rename a custom theme so you can tell it apart later on. To get rid of one you no longer want, click the Delete Theme text next to the theme’s name.
Field Styles
Open the Field Styles options in the WPForms block settings. Here you’ll find controls for Size, Border, Border Size, Border Radius, and Colors.
Size
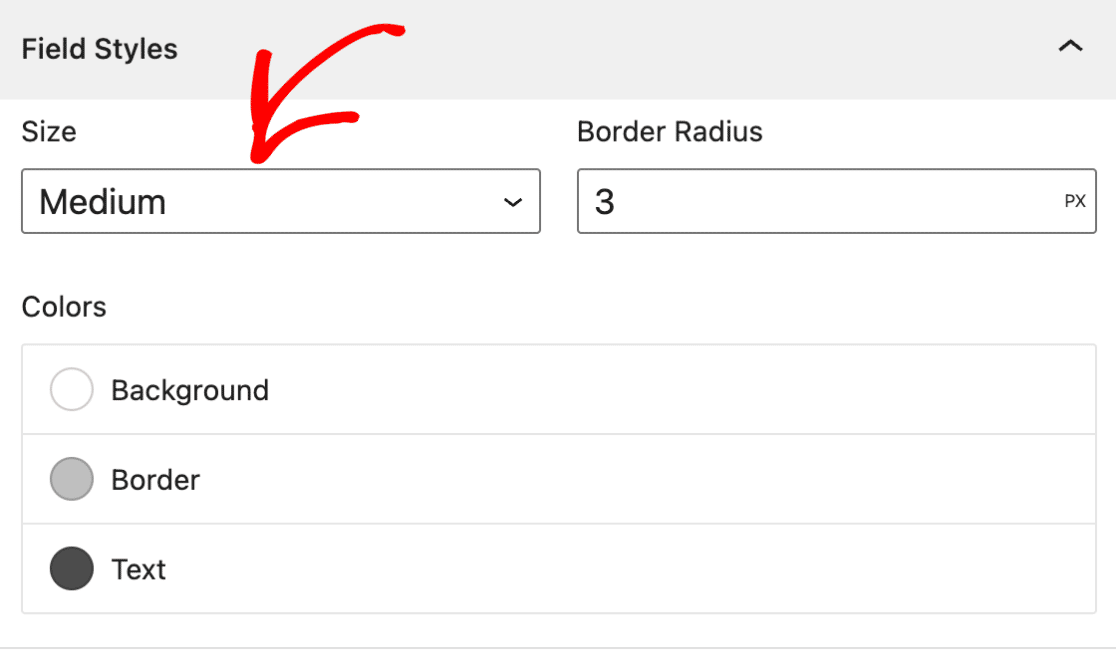
To adjust the size of your form fields, select the desired size from the Size setting. Available sizes include Small, Medium, and Large.
Border Radius
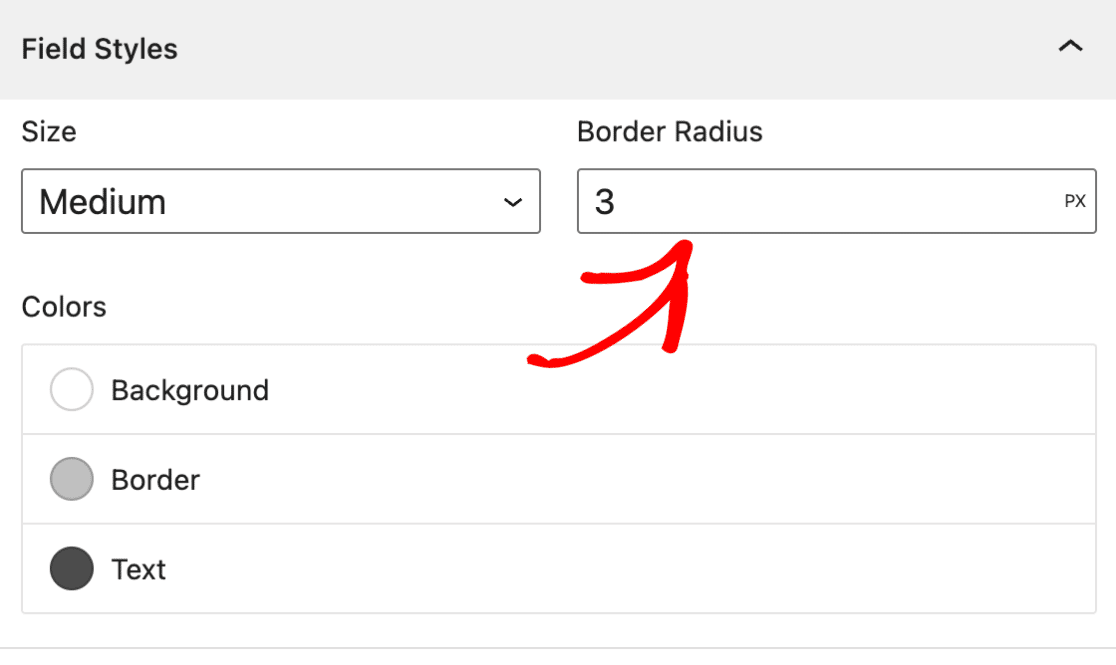
To adjust the border of your form fields, use the Border Radius setting to set the desired radius value. Your forms can now have nice, rounded edges thanks to this.
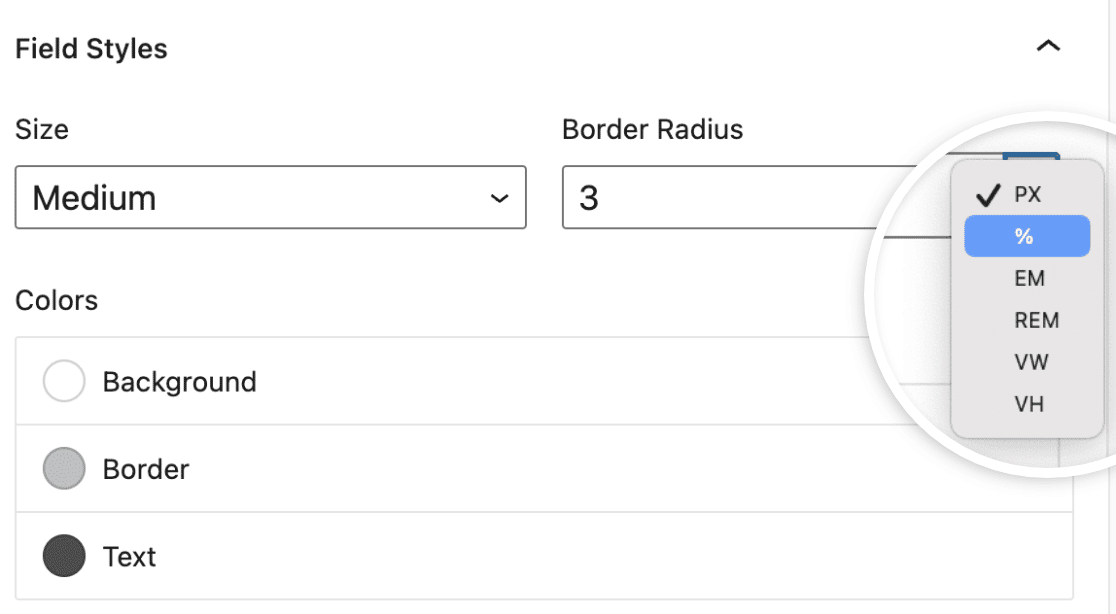
By default, the unit for sizing form elements in WPForms is set to pixels (px). Click on the Unit of Measurement to reveal a dropdown menu with different options, such as:
- Pixels (PX)
- Percentage (%)
- Em quadrat (EM)
- Roentgen equivalent man (REM)
- Viewport width (VW)
- Viewport height (VH)
Colors
To adjust the background, border, and text color of your form fields, open the Colors setting in the WPForms block settings.
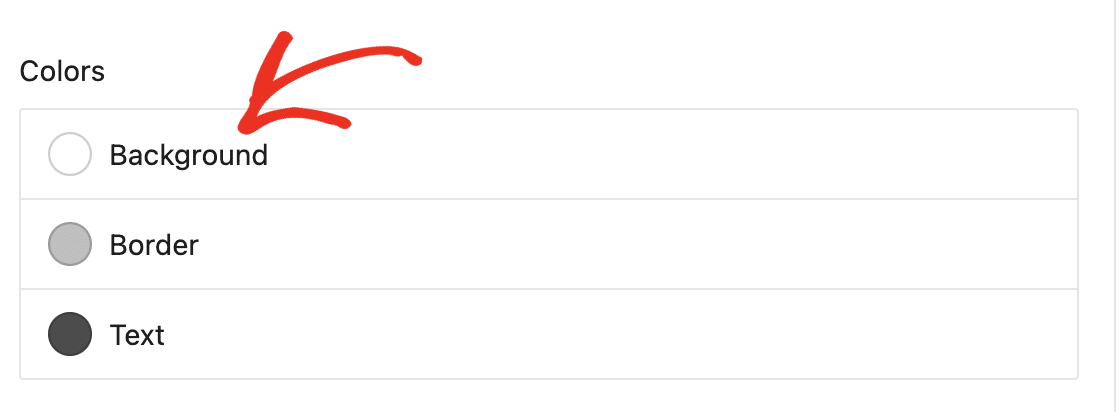
Click on the specific color option you want to update, such as the background color. An overlay will appear, showing available theme colors to choose from.
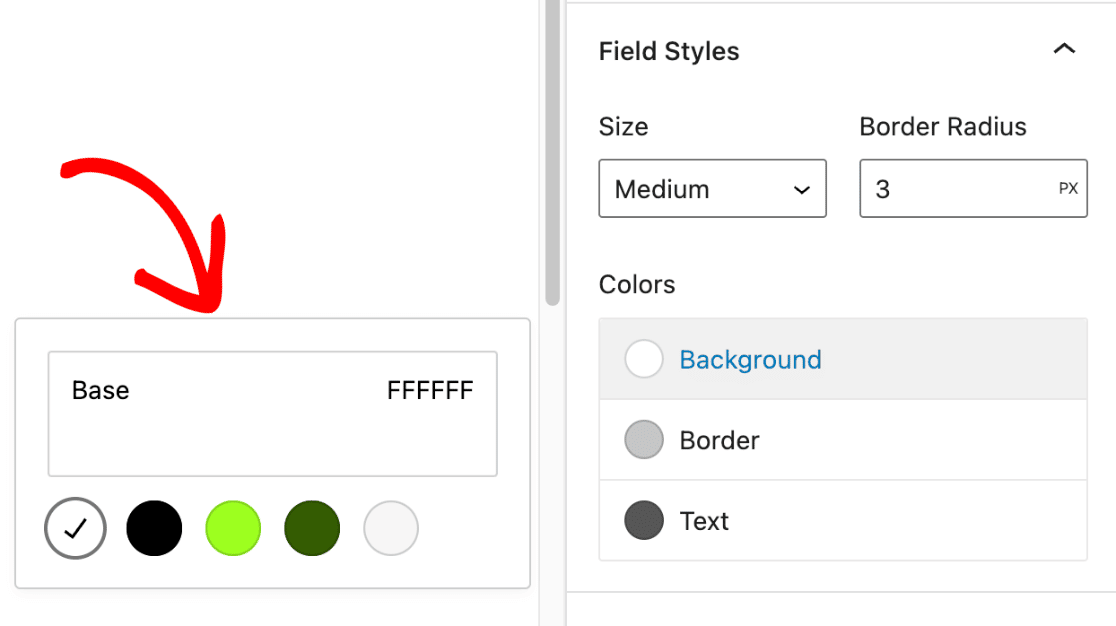
Next, click on the color swatch to open the Color Picker, where you can further fine-tune the color.
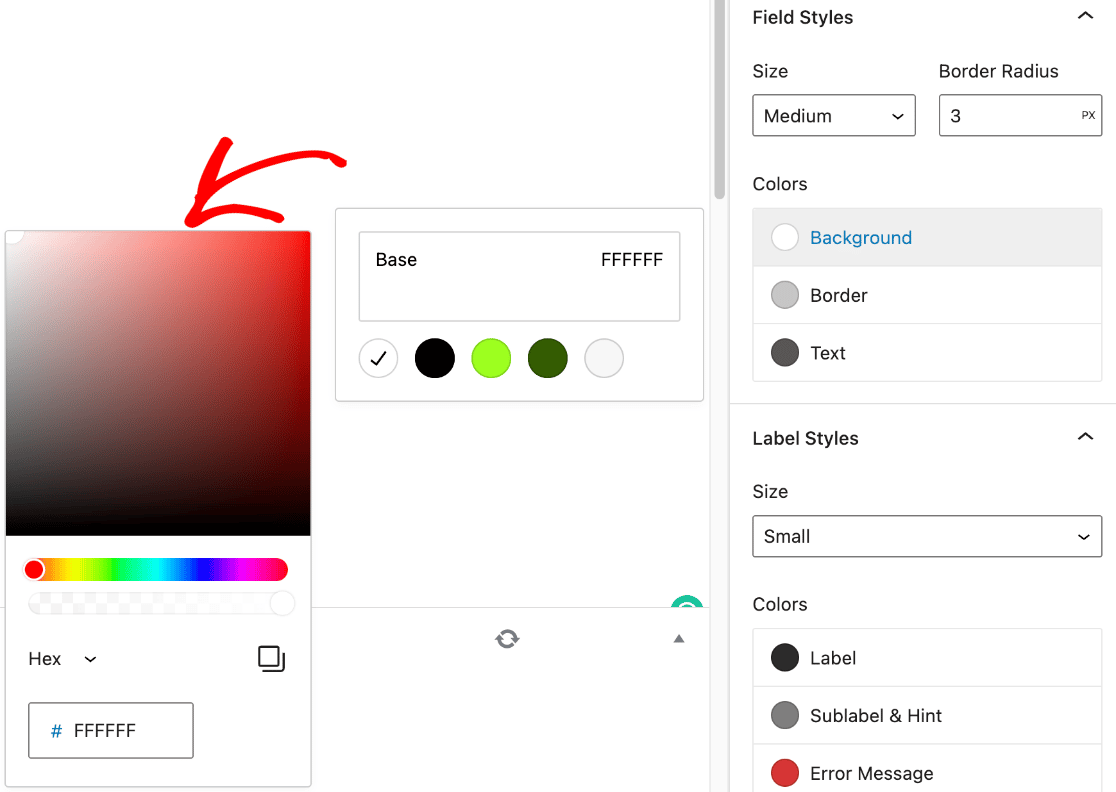
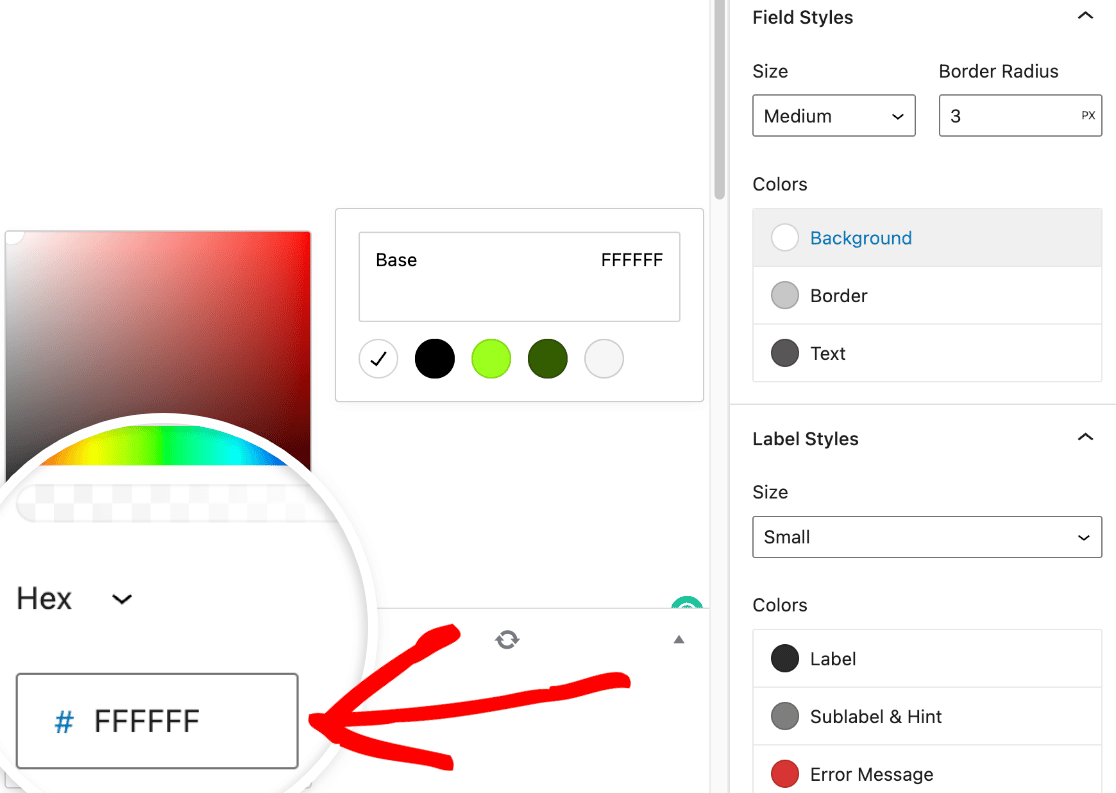
A hex color code can be pasted into the Hex box if you already have a brand color in mind for your forms.
Label Styles
You may now change the font size and color of your form labels here in the Label Styles section. The sizes available range from Small to Large.
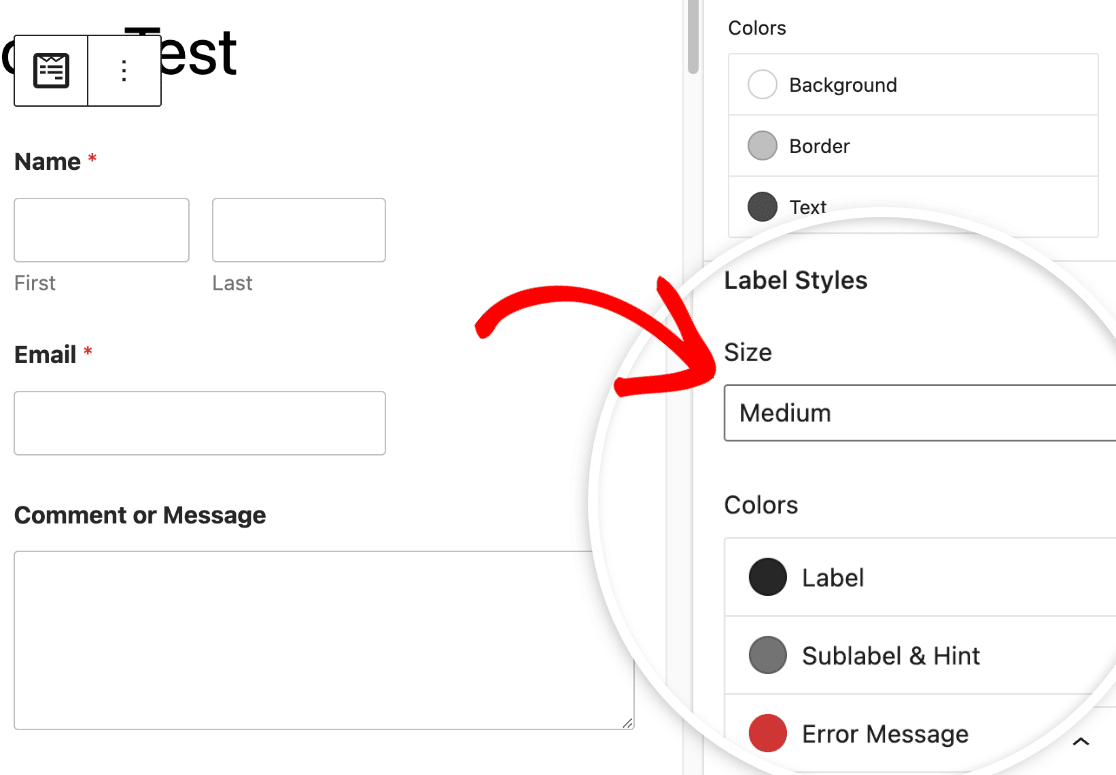
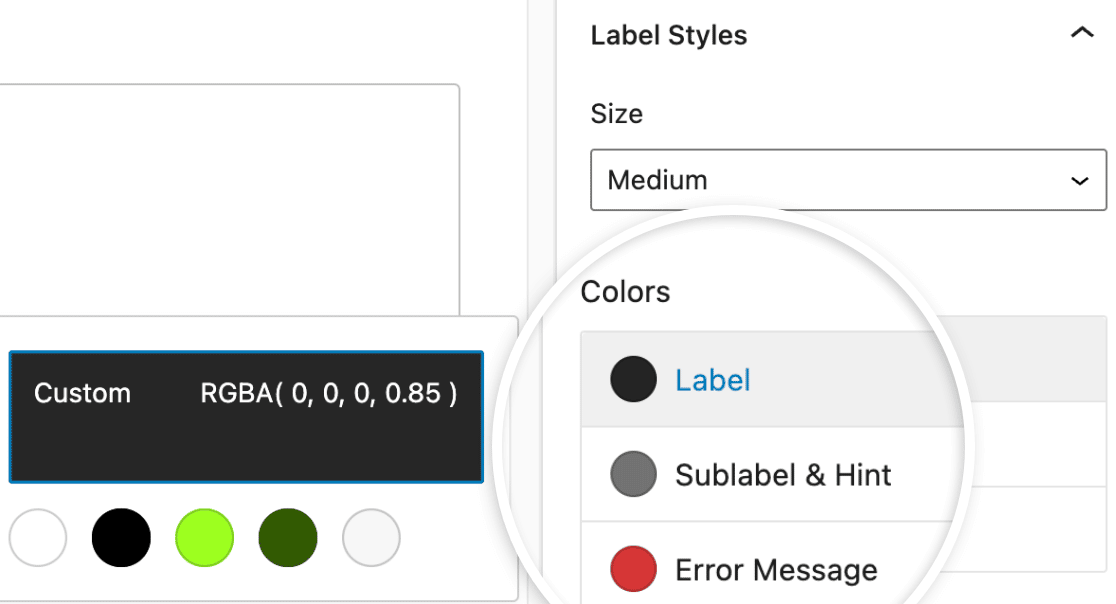
To update the colors for labels, sublabels, and error messages, navigate to the Colors section. Following is a description of the available label color options.
- Label: This setting determines what color the primary label for your field will be.
- Sublabel & Hint: This setting determines the hue used for field sublabels and hints when WPForms makes frontend value suggestions.
- Error Message: The text color that appears if a user makes a mistake in filling out your form.
Button Styles
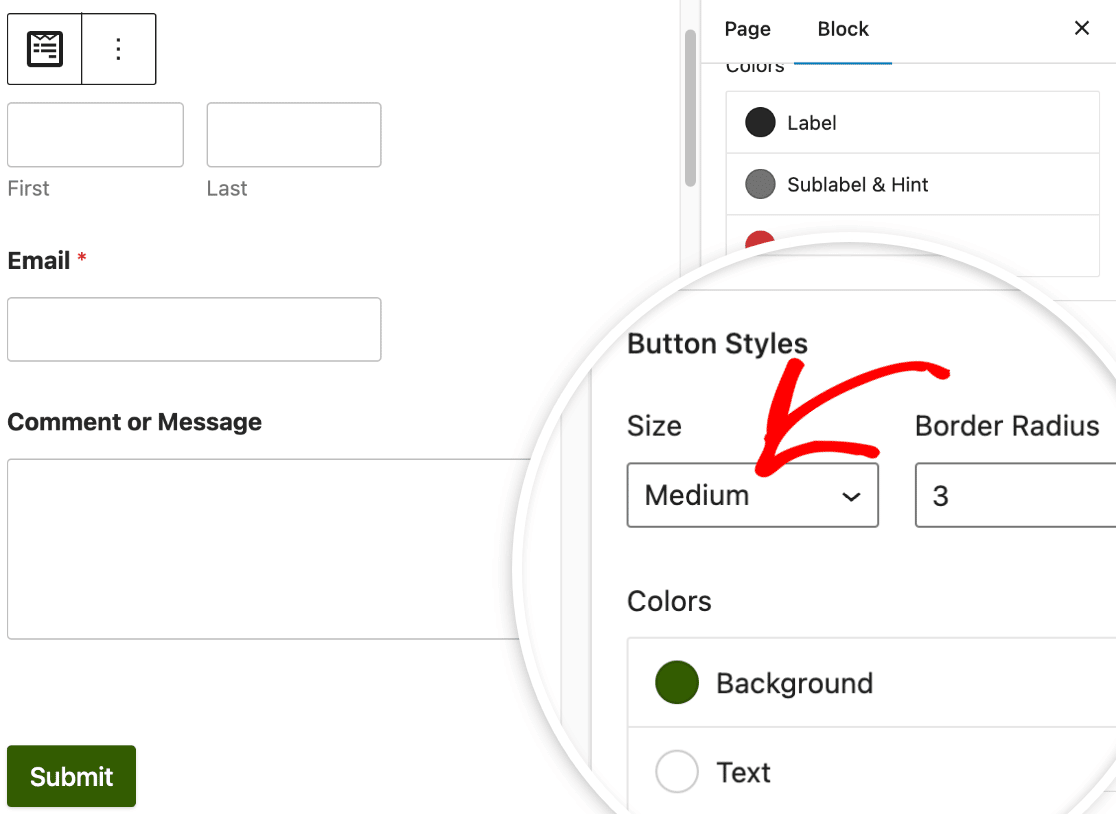
To change the design of your form buttons in WPForms, navigate to Button Styles. Click on the dropdown menu below Size to open it and select the button size.
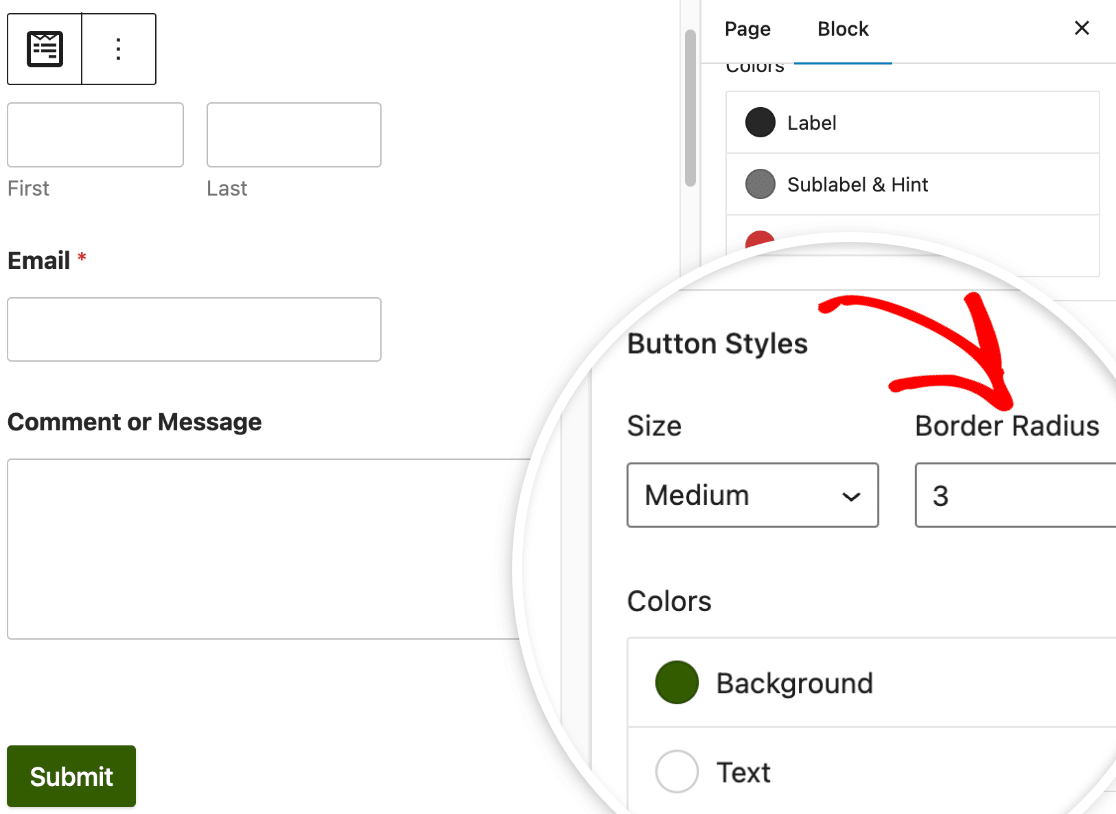
If you want to give the button a border radius, all you need to do is put the desired value into the field labeled Border Radius.
Next, under the section labeled Colors, you’ll find the opportunity to modify both the background color and the text color of your button.
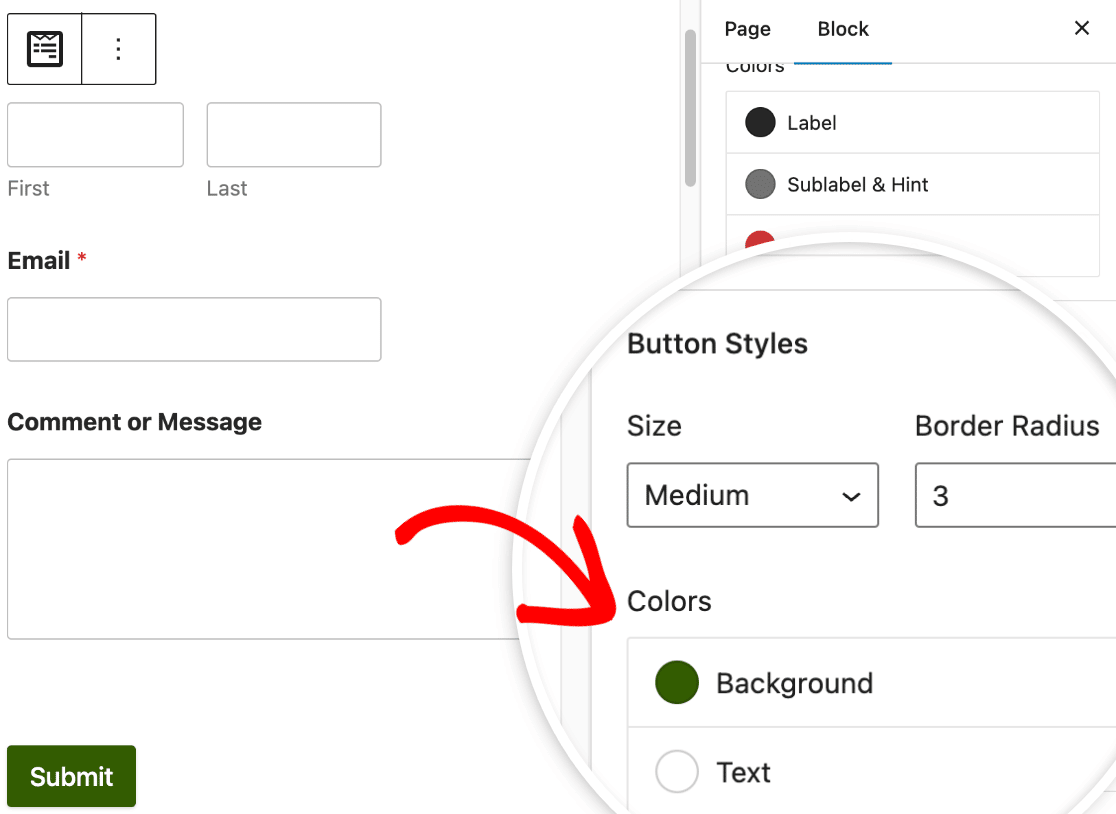
In most cases, the button’s background color will also serve as its accent color. As a result, the background color of the button will also be used as the primary color for checkboxes, radio buttons, progress bars, and fields.
Container Styles
Container Styles governs the box your form sits in rather than the fields inside it. This is where you give a form some breathing room, a defined edge, or a bit of lift off the page behind it.
- Padding: Sets the space inside the container’s borders, between the edge of the box and your form content. Increase it when the fields feel cramped against the edges.
- Border Style: Outlines the container with a Solid, Dashed, or Dotted edge.
- Border Size: Determines how thick that outline is. Pixels are the default here too, and the same unit options apply.
- Border Radius: Rounds the container’s corners. Higher values give you a softer card shape, while lower values keep the edges crisp.
- Shadow: Adds depth behind the container, with sizes running from none up to large. A small shadow is usually enough to lift a form away from a plain background.
- Colors: Sets the border color of the container so its edge sits comfortably with the rest of your design.

Background Styles
Background Styles hands you control over what sits behind your form, either a flat color or a full image. To start with an image, open the Image dropdown and choose where it should come from.
Media Library opens your own uploads, so pick that when the image already lives on your site or you want to upload a fresh one. Stock Photos opens a library of professional images instead.

The first time you choose Stock Photos, WPForms shows an overlay asking you to download the stock image library. Click Continue on that notice and the photos become available to browse.
Once you’ve made your selection, click Choose Image to pick the actual file. With an image in place, four more settings appear in the panel:
- Position: Aligns the image inside the form using options like Top Center and Bottom Center, so you control which part of the photo shows.
- Repeat: Decides how the image tiles. No Repeat shows it once, Tile repeats it across the whole background, and Repeat Horizontal and Repeat Vertical repeat it along a single axis.
- Size: Controls how the image fits. Cover scales it to fill the background whatever size the form is, and Dimensions lets you enter an exact width and height.
- Colors: Sets a plain background color, which is what shows when no image is in use.
Advanced Styling
Under the Advanced settings, you can access the CSS code that includes all the custom styles you’ve applied to your form.
If you want to simply move those styles to another form, look for the option to copy and paste the style settings.
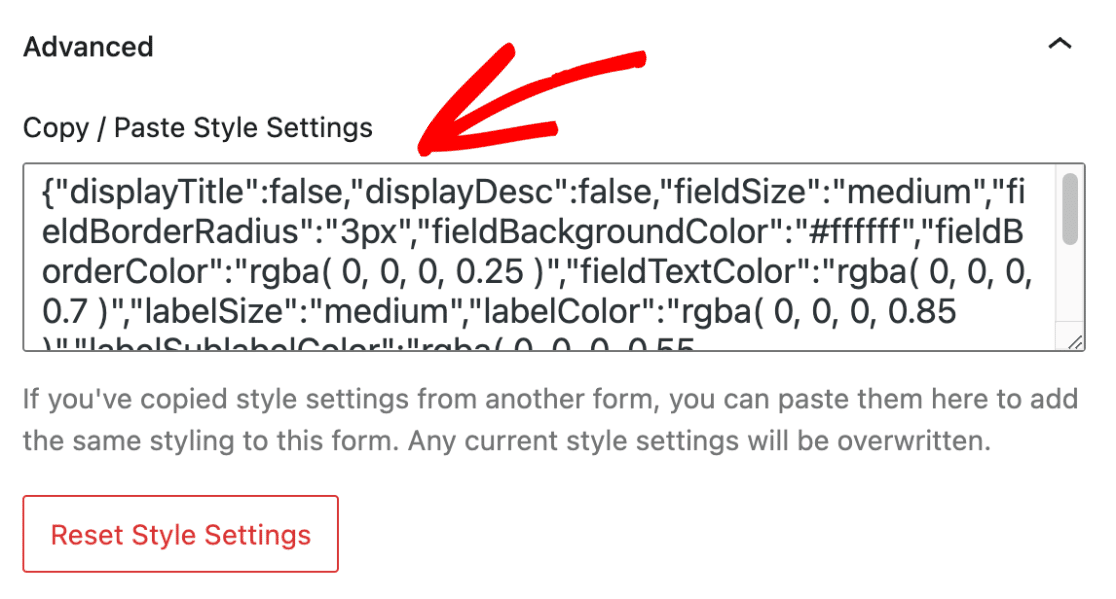
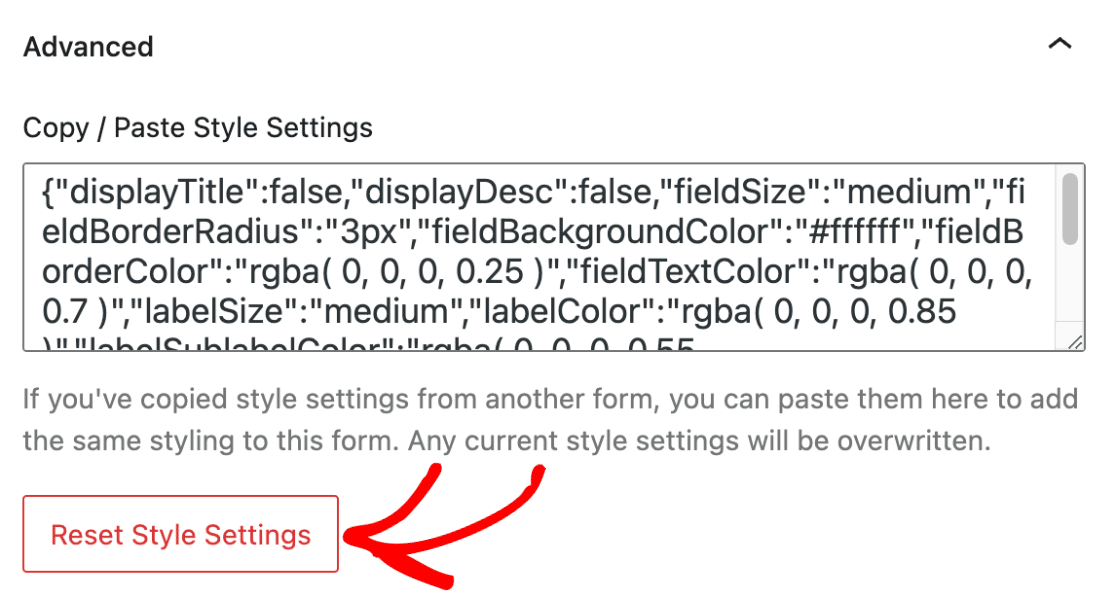
In case you want to undo the changes made to your form, click the Reset Style Settings button. This will revert your form to its default style, undoing any previous customization.
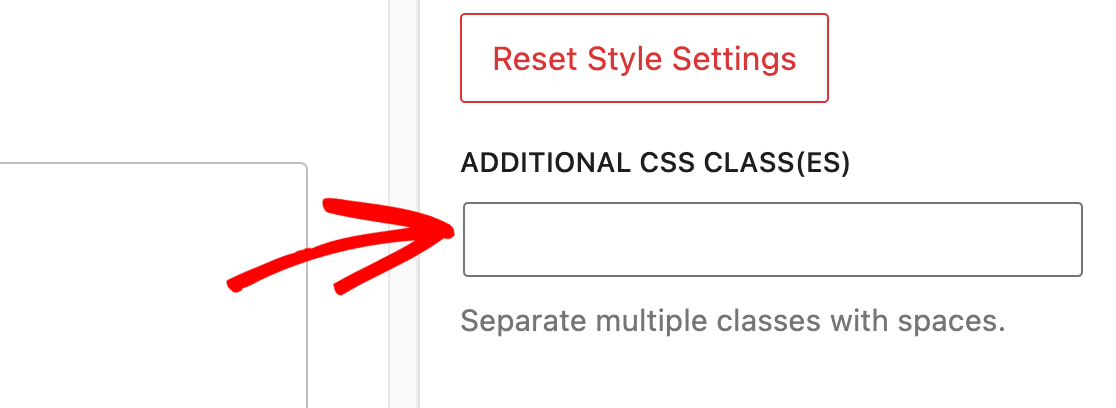
The Additional CSS CLASS(ES) field is where you can freely enter any other CSS classes you’ve developed. Read our guide on how to implement new CSS classes to find out more.
Step 6: Test and Publish the Form
Now, it’s time to save your changes by either publishing the page or saving it as a draft. Lastly, run a quick test to ensure your form looks and works the way you expect it to.

Once the page is saved, click Preview to see the real form with your styles applied. The block editor gets you close, but the preview shows what your visitors will actually see.
FAQs on Styling WPForms in the Block Editor
Here are answers to the questions that come up most often about WPForms form styling, modern markup, and form themes.
Why don’t I see any styling options for my WPForms block?
Two settings control this, and both live under WPForms » Settings » General. Include Form Styling has to be set to Base and form theme styling, and Use Modern Markup has to be enabled.
If you installed WPForms at version 1.8.1 or later, modern markup is already on and the checkbox won’t appear at all, so check the styling setting first.
The one genuine blocker is the deprecated Credit Card field, which isn’t compatible with modern markup, so a form still using it can’t be styled in the block editor until that field is swapped out.
Do I need WPForms Pro to style my forms?
No. Form styling and all 40+ form themes work on WPForms Lite, the free version, so every step in this guide runs on a free install.
Pro adds capabilities like payment addons, surveys, and conditional logic on payments, though none of that is required to change how your forms look.
Will my form keep its styles if I embed it on another page?
Styles applied in the WPForms builder under Settings » Themes save with the form and follow it everywhere, covering shortcode embeds, the WPForms block, and the Divi module. Styles applied in the block editor stay with that one embed only.
So you can style a form once in the builder for a consistent look across your site, then override the colors on a single landing page without touching the original.
Can I style WPForms without the block editor?
Yes. The WPForms builder has the same panels under Settings » Themes, and anything you set there applies site-wide.
Elementor has its own styling controls, so you can customize your forms in Elementor instead, and those changes stay on that page.
Divi works differently, since its WPForms module only exposes Divi’s own sizing and spacing settings, so style the form in the builder and the Divi embed picks it up.
How do I make style changes the block editor doesn’t offer?
Add your own classes in the Additional CSS Class(es) box under the Advanced panel, then write the CSS to match them.
The custom CSS guide linked in the Advanced Styling section above covers the classes WPForms already applies, which is what you’ll want to target.
Next, Create Interactive Forms that Boost Engagement
Looking for more ways to customize your WPForms? Check out these tips to take your forms to the next level. Whether you’re looking to enhance your form’s appearance or functionality, we’ve got you covered.
Style Your WordPress Forms Now
Ready to build your form? Get started today with the easiest WordPress form builder plugin. WPForms Pro includes lots of free templates and offers a 14-day money-back guarantee.
If this article helped you out, please follow us on Facebook and Twitter for more free WordPress tutorials and guides.


