AI Summary
Do you want to set up login and registration redirects for your WordPress site?
By default, WordPress will take your users to a specific admin page after registering or logging in, which may not always be convenient.
In this article, we’ll show you how to redirect people to the pages that you want them to visit after registering or logging in. We’ll also show you how to redirect people so they never see your default registration page.
Create Your Custom Login and Registration Forms Now
How Do I Redirect a WordPress User After Registration?
The easiest way to redirect users after registration is to use the WPForms User Registration addon.
The addon allows you to customize the registration process and create redirects without writing code.
With the User Registration addon, you can develop custom registration pages to bypass the default registration form in WordPress. You can then hide those pages so that your visitors never see them.
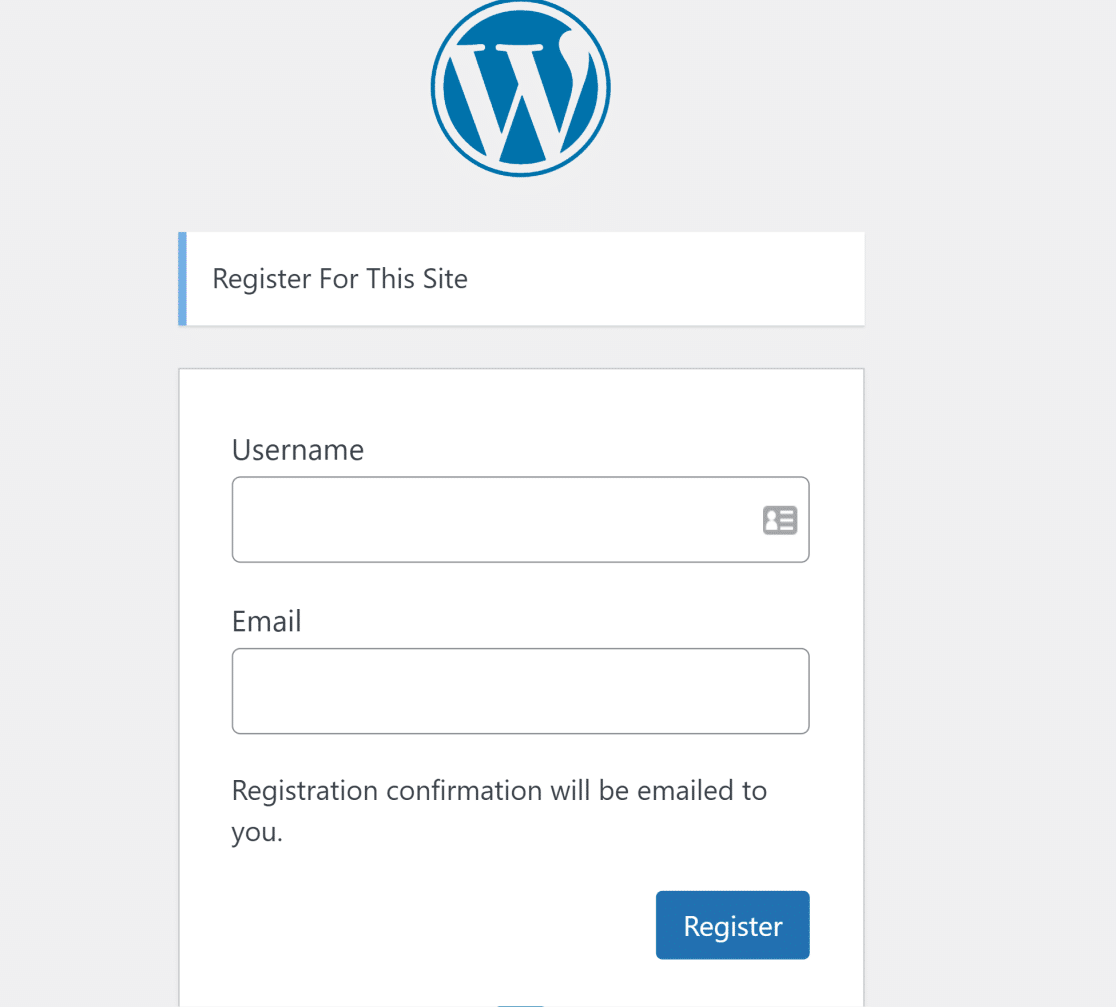
First, we’ll show you how to redirect your users after they register or log in to your site. At the end, we’ll show you how to create redirects to hide your default login and registration pages.
How to Add Login and Registration Redirects in WordPress
We’ll start by creating registration and login pages and then explain different ways to redirect your visitors.
In This Article
Let’s dive right into it.
1. Install WPForms
The easiest way to create custom login and registration forms is by using WPForms. WPForms is the most highly rated and user-friendly form builder plugin for WordPress. One of its many features is the User Registration addon which allows you to create login, registration, and password reset forms.
You’ll need at least the WPForms Pro license to access the User Registration addon.
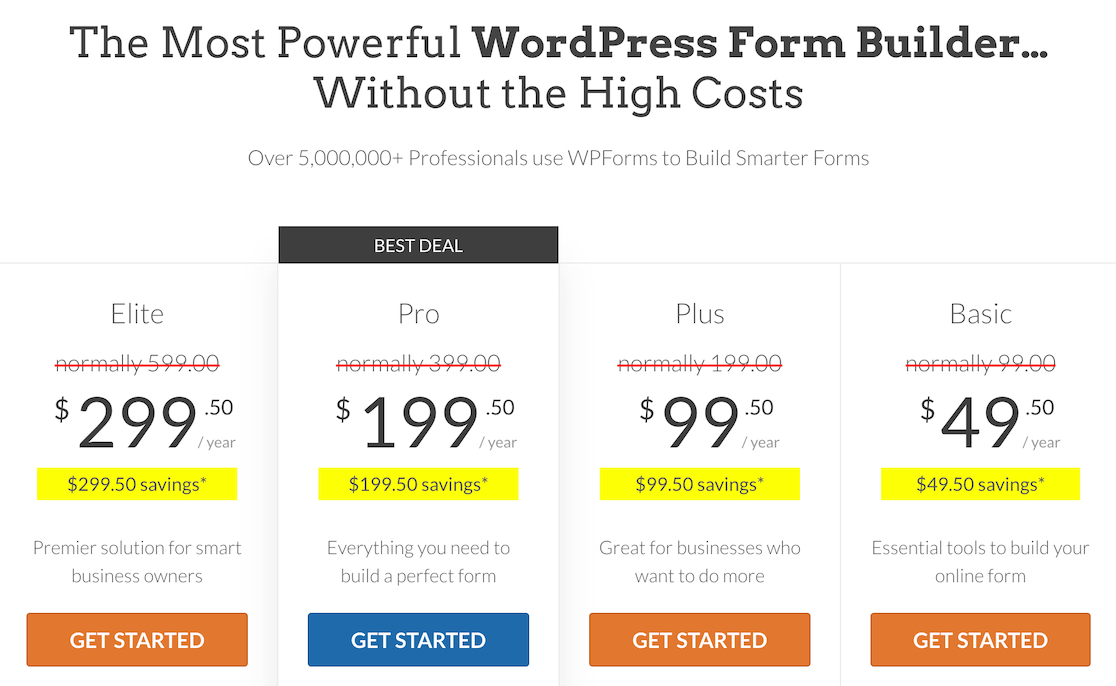
Once you’ve purchased a WPForms license, see these instructions for installing WPForms and set it up on your site.
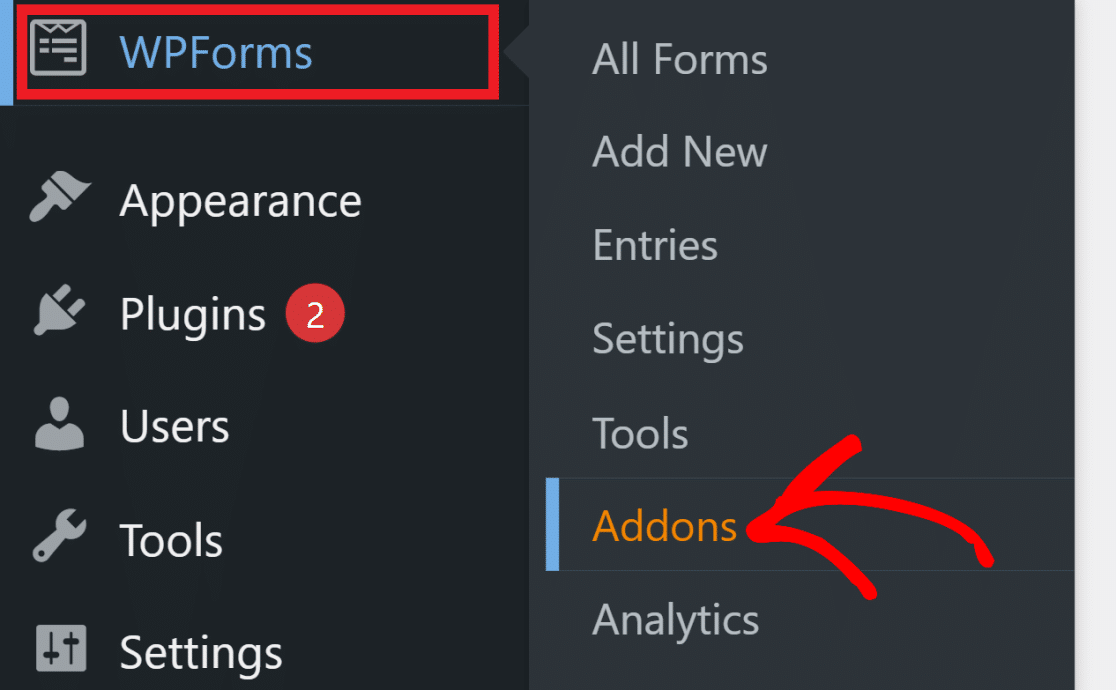
After activating WPForms on your site, you’ll need to install the User Registration addon. For this, navigate to WPForms » Addon from your WordPress admin area.
Now, search for User Registration in the search bar on the right to find this addon. Then, click on Install Addon under it.
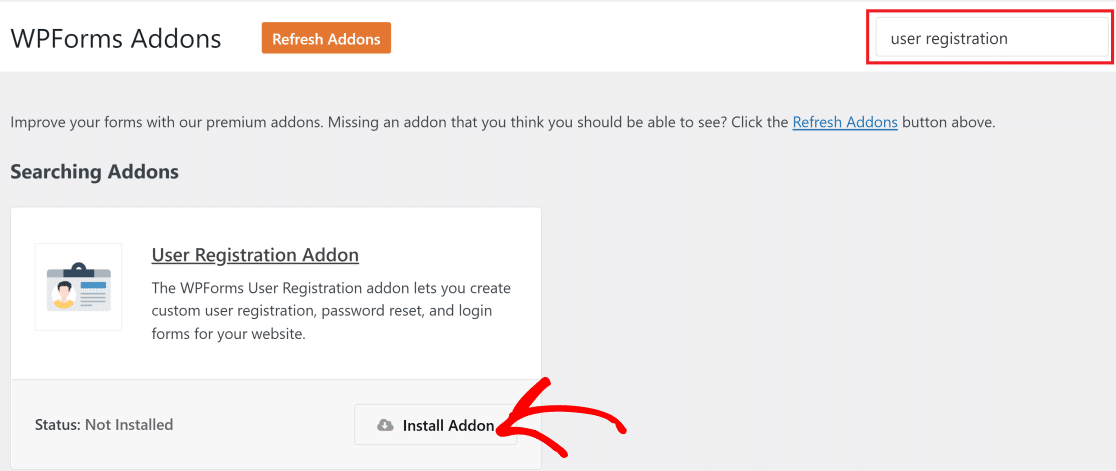
The User Registration addon will then install in less than 5 seconds. You can now start creating a registration form using WPForms.
2. Create a Registration Form
To begin, go to WPForms » Add New to open the visual form builder interface. Then, choose a name for your form.
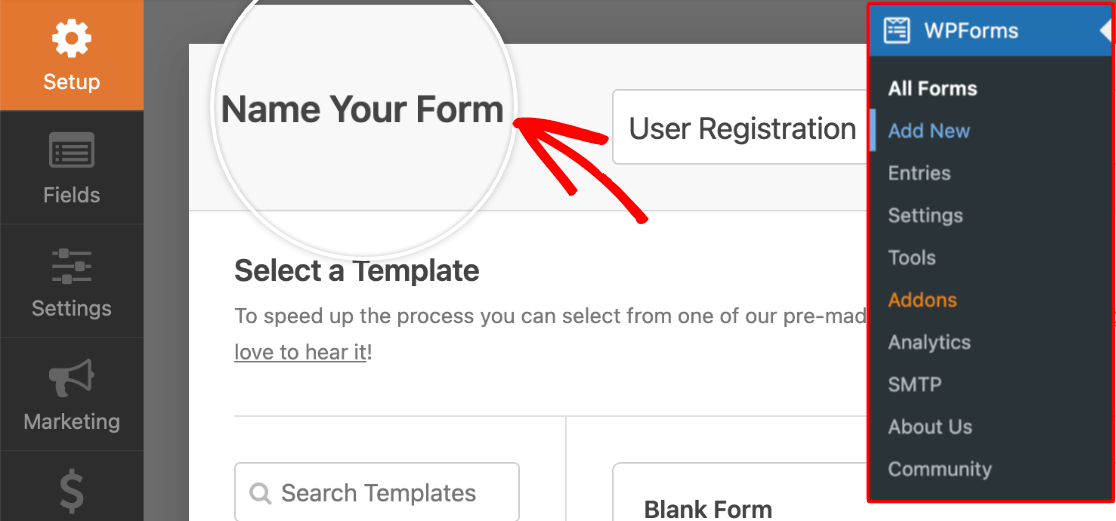
Below, you’ll find a library of hundreds of form templates. Choose the User Registration Form from the list.
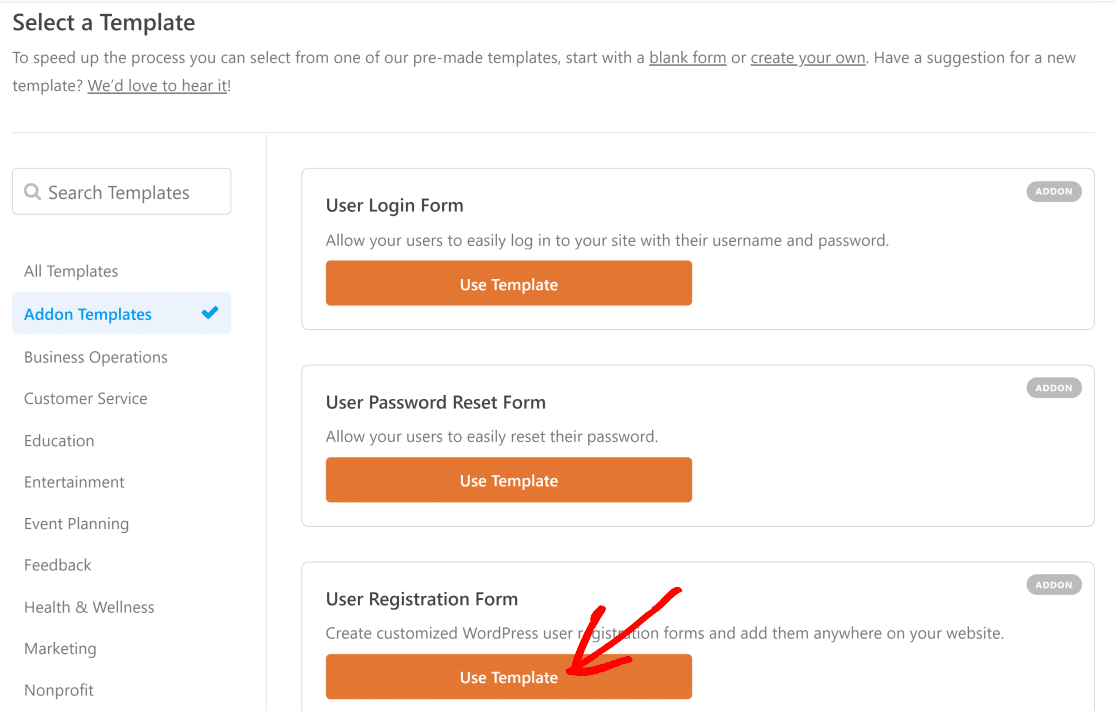
This will quickly generate a registration form with all the necessary fields already included in the form.
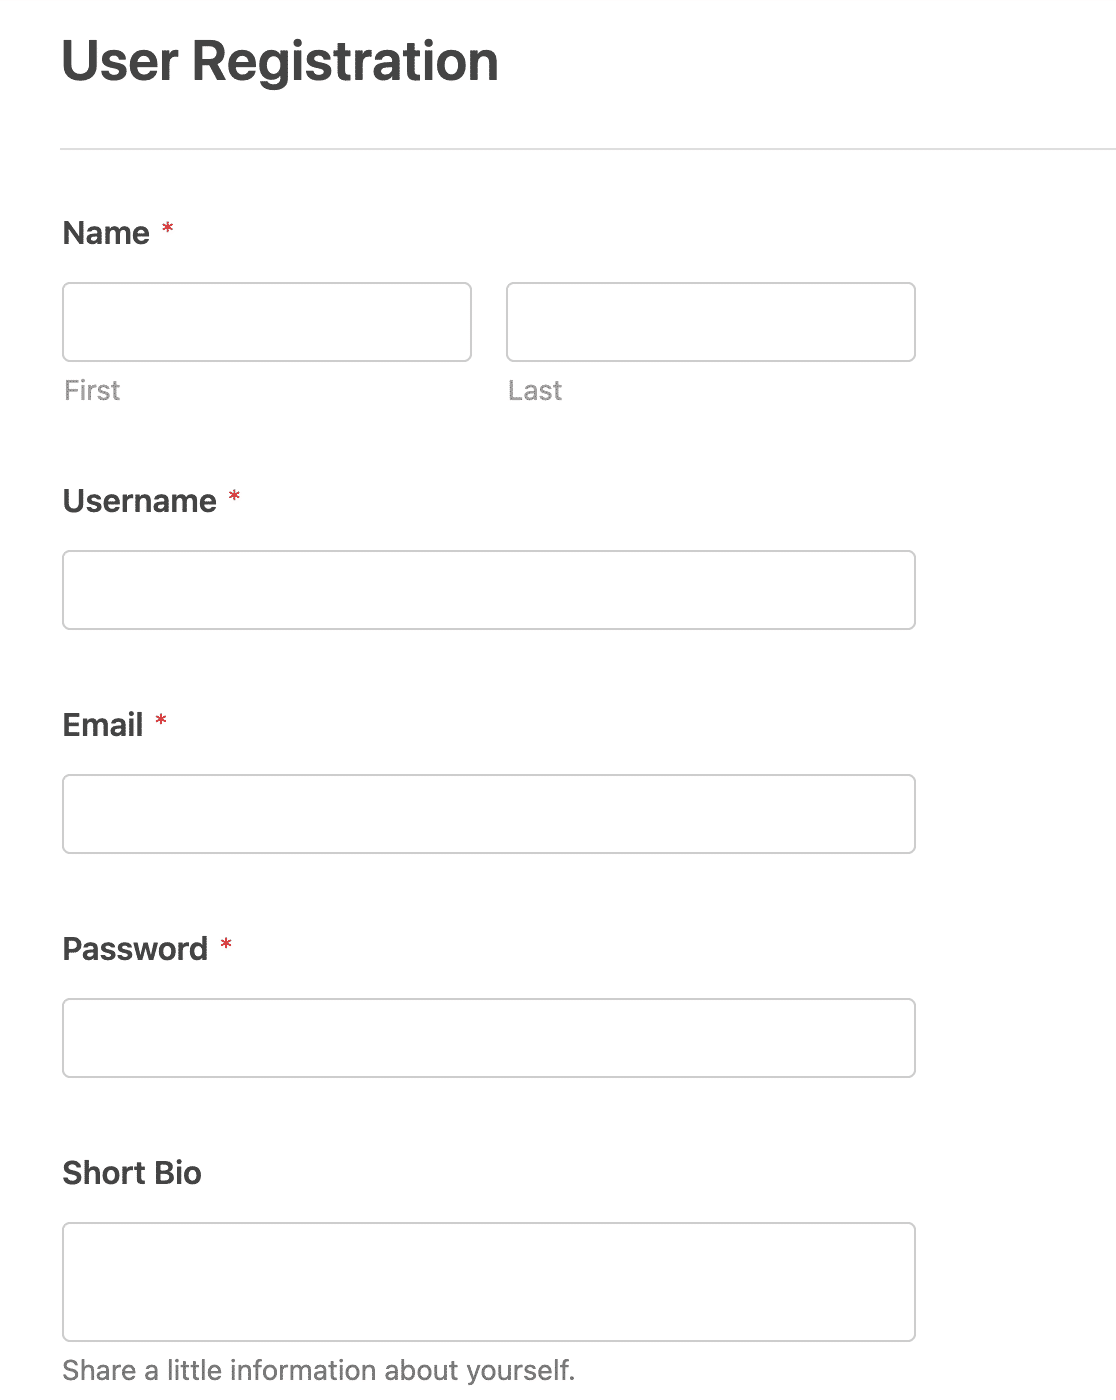
Since all WPForms templates are 100% customizable, you can add more fields or remove non-essential fields (like short bio) as per your preferences. See our in-depth guide on how to create a user registration form to see a glimpse of some customization possibilities.
Next, let’s configure form settings to ensure a convenient and secure registration experience for your users.
3. Customize Registration Form Settings
WPForms gives you a lot of flexibility over how you’d like your users to register an account on your site and log in afterward.
To access these settings, click on Settings » User Registration.
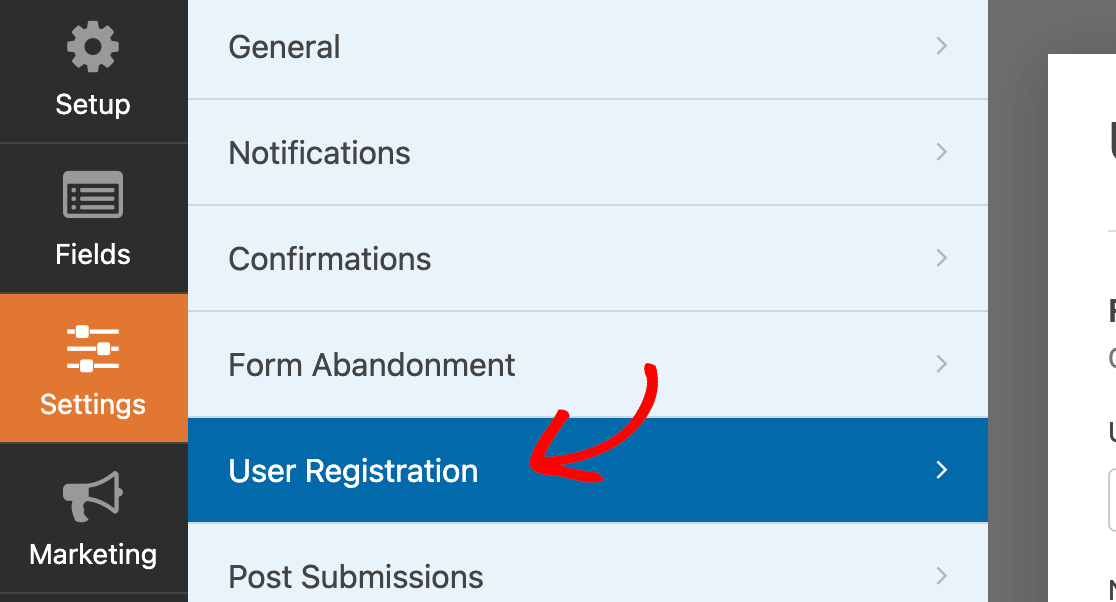
Here, you’ll see Field Mapping options. These will allow you to select form field values that should correspond to your user’s WordPress account details.
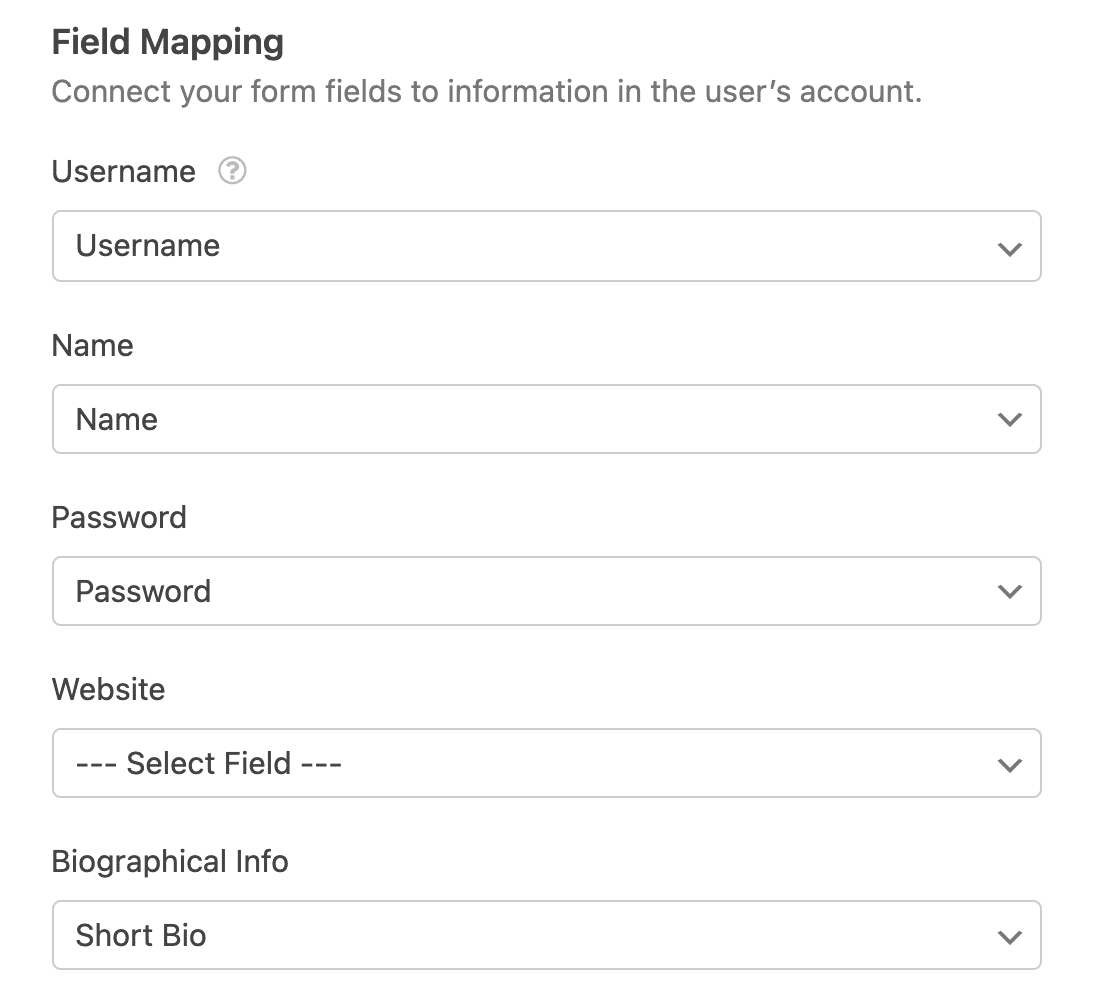
Scroll down the User Roles section. Here, you can choose the WordPress user role and access level that an individual should be assigned when they sign up using this form.
If this is a registration form for your subscribers, select Subscriber from the dropdown menu.

The next setting right below User Roles is User Activation & Login. This is a very useful option that gives you a lot of flexibility in how you want to deal with account activation for new users.
It’s disabled by default, which means that a new account will be immediately created when a user submits the registration form.
However, we recommend enabling user activation because it makes the registration process more secure by eliminating spam registrations.
To enable it, turn on the toggle button next to Enable User Activation.
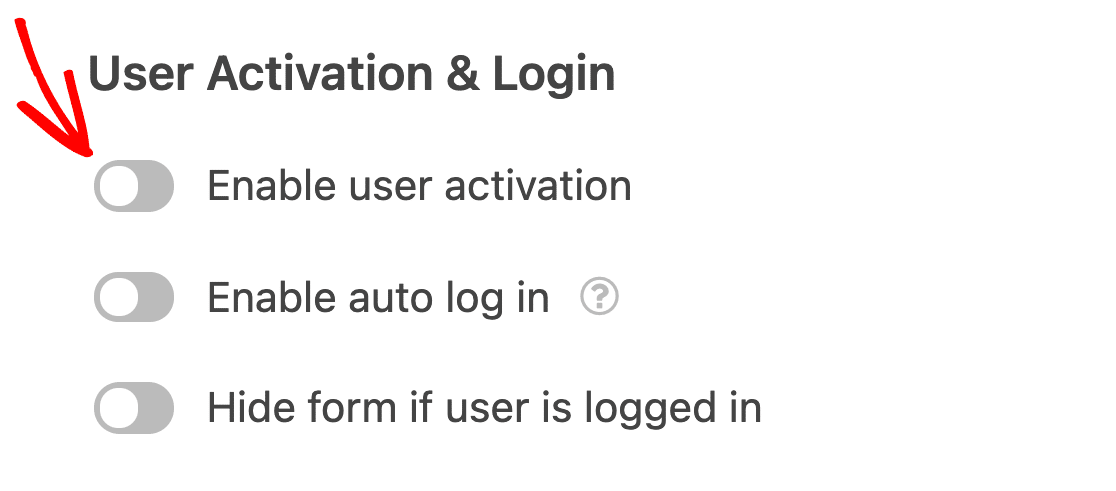
This will reveal a new dropdown menu where you can select the activation method. With Manual Approval, you’ll have to manually approve each new user account to activate it.
On the other hand, the User Email method sends a message with an activation link to the user’s provided email address.

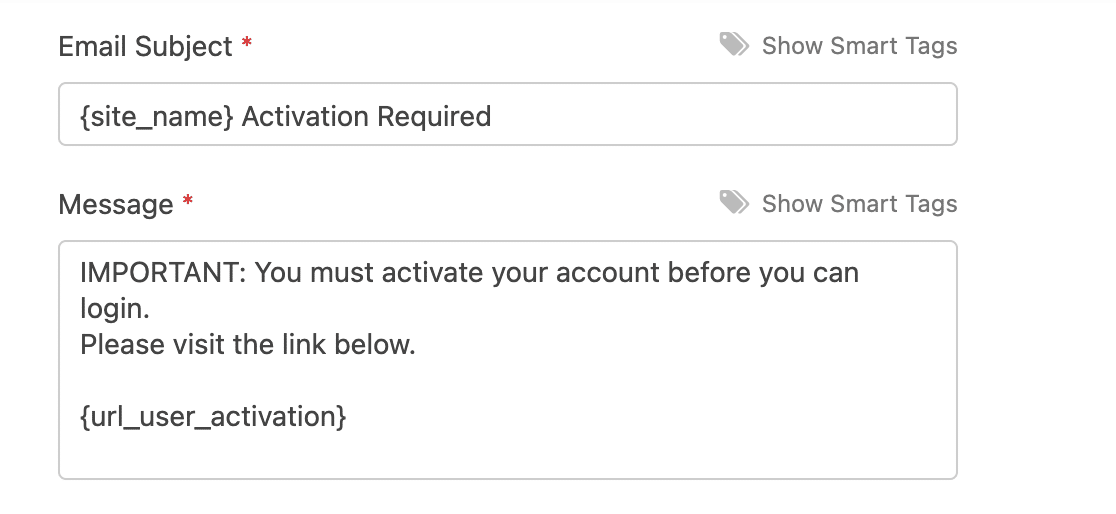
If you select User Email, you will see more options for customizing the email message that will be sent to the user for account activation.
You can change anything in this email, but make sure that the {url_user_activation} tag is included. The user will need this link to activate their account.
Next, select the confirmation page that users should be redirected to when they click the account activation URL. You can use the dropdown to select an appropriate page on your site.

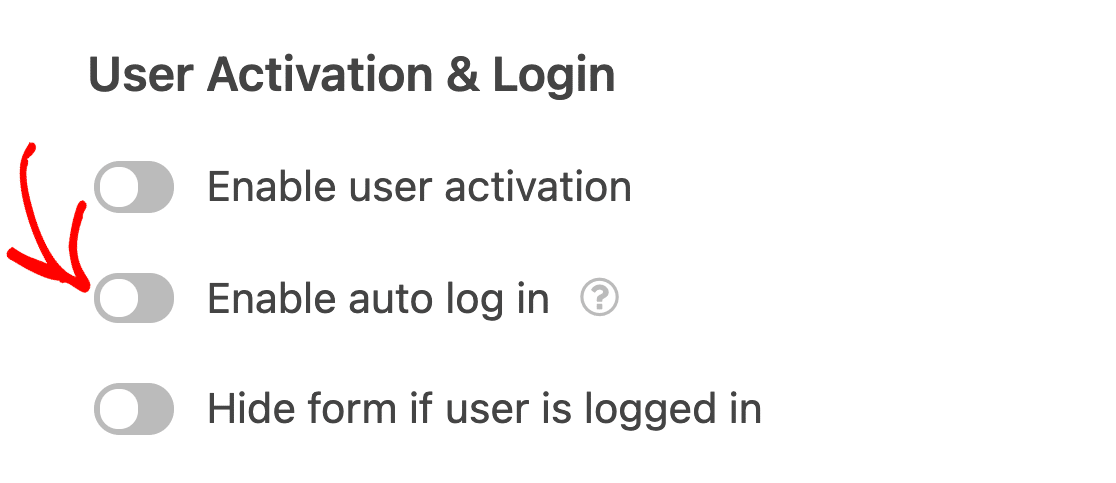
You may also want to let your users log in automatically as soon as their account is created. To turn on this setting, click the Enable Auto Log In toggle button.
You can also control email notifications that you’d like to receive and also send to the user after they’ve filled the form.
Find the Email Notifications section near the bottom of user registration settings and use the toggle buttons to choose different types of email notifications. You can also click on the Edit Template link next to each email type to change the message content.

When you’re done click on Save on the top-right corner to save your settings and customizations.

In the next step, we’ll quickly create a login form to match.
4. Create a Login Form
Now that the registration form is ready, we also need a login form for registered users. This time, we’ll pick the User Login Form template from WPForm’s Select a Template screen.

This is a very simple form consisting only of a username and a password field. It also has a Remember me option which makes future logins faster for users by securely saving their username and password.
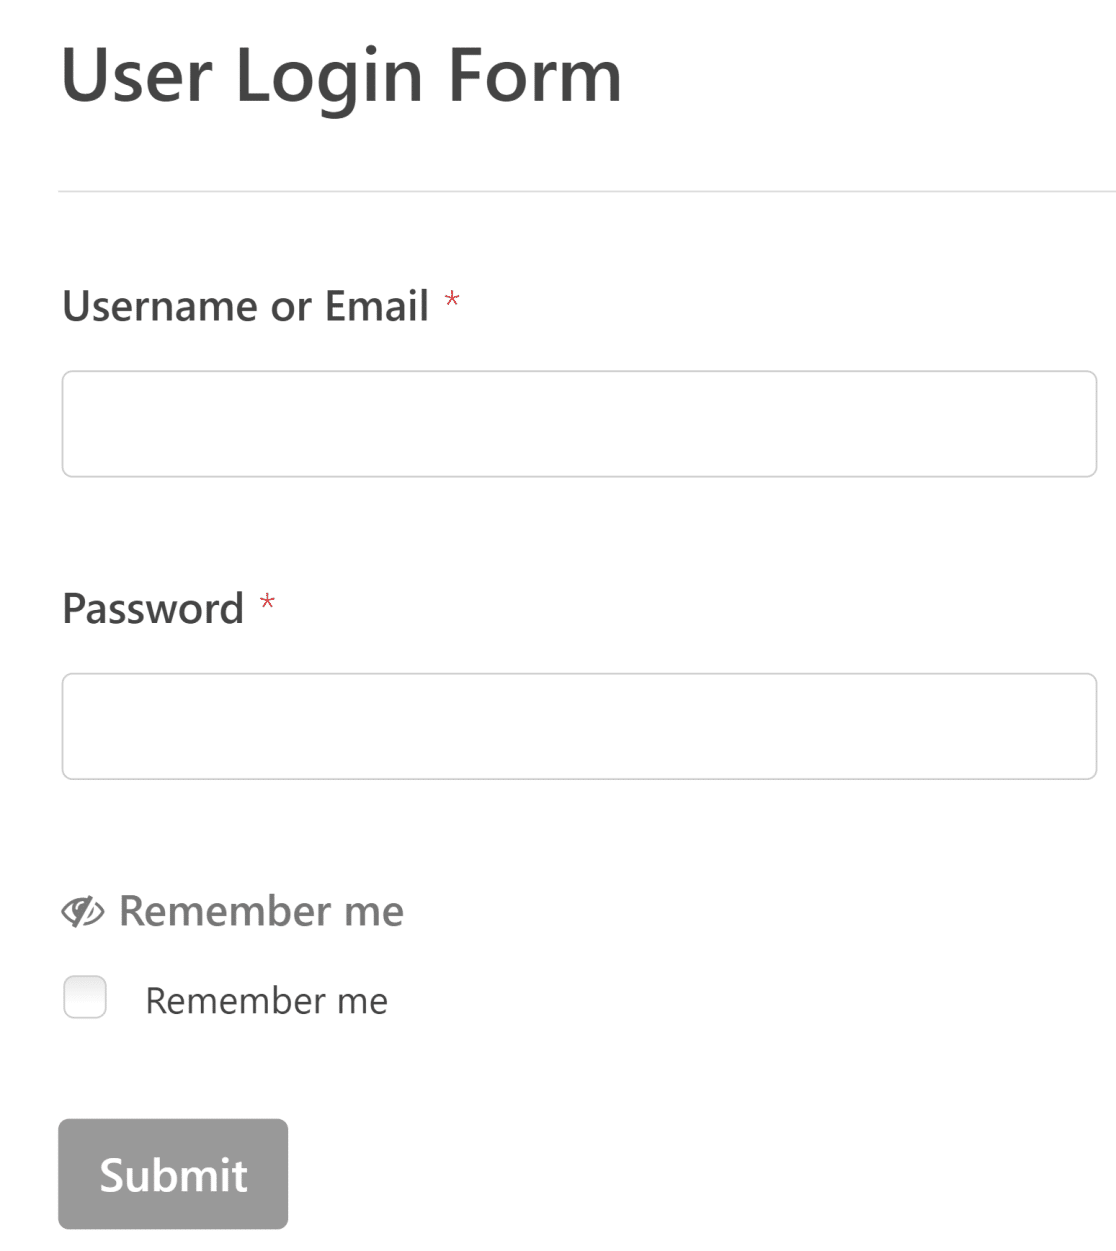
To view settings for the login form, click on Settings » User Registration.

Here, you can choose if you’d like to hide the form for logged-in users and display a message instead. You can enable this setting by using the toggle button next to Hide Form if User Is Logged In.
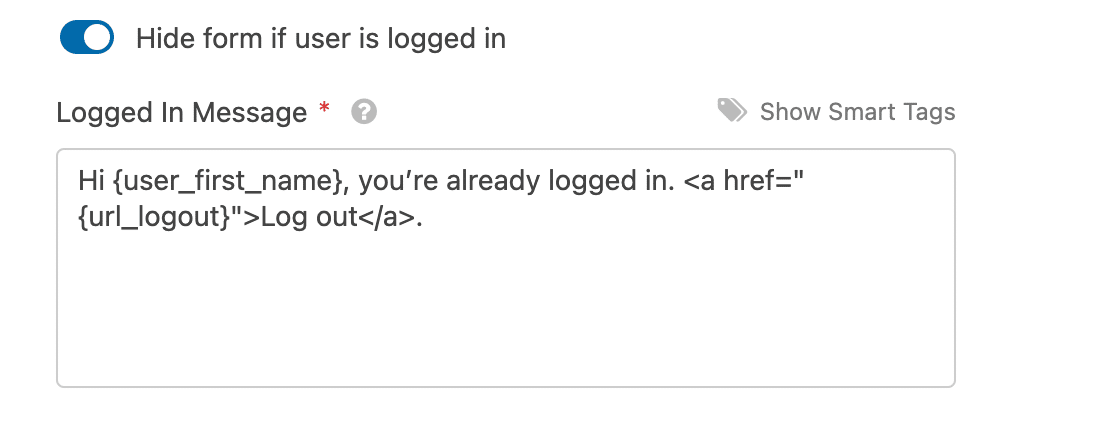
Don’t forget to Save the form it’s customized to your liking.
5. Embed Registration and Login Forms
Now we’re ready to embed and publish our forms. Like everything else, WPForms makes this super easy as well.
Click on the Embed button on the top-right corner of the form builder interface.

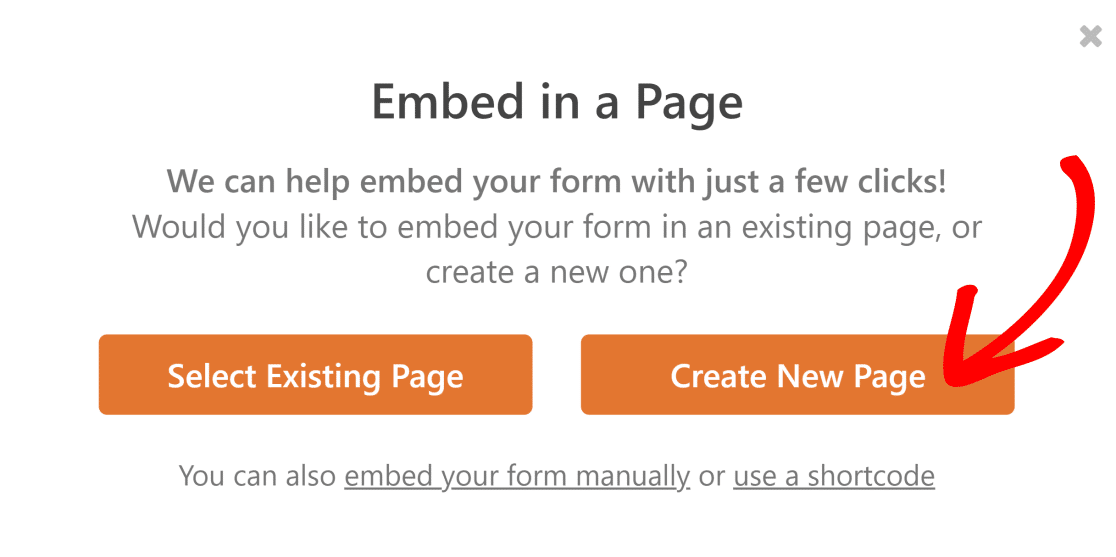
Next, click on Create New Page since we’re going to be embedding our forms to new registration and login pages with redirects to bypass the default WordPress login page.
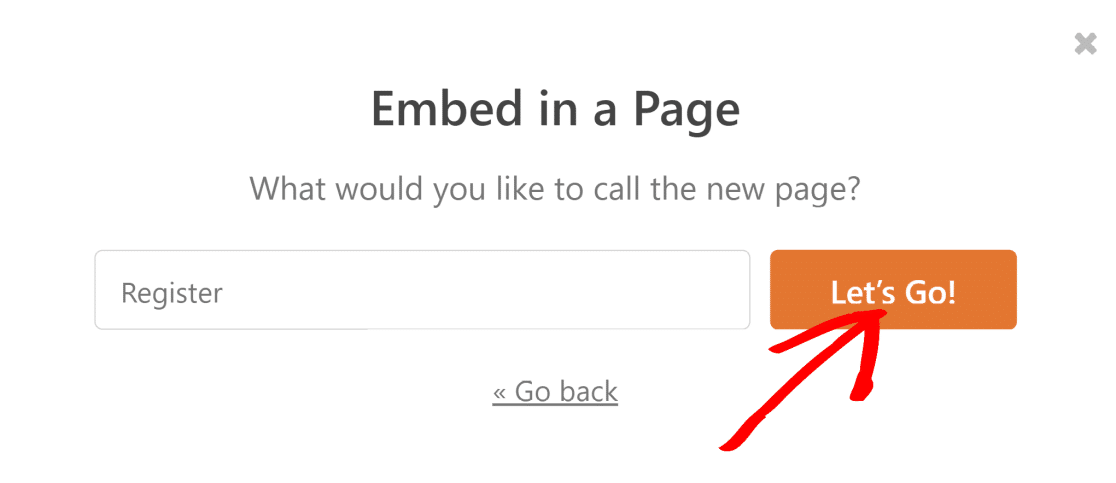
Enter a name for your new page and then press Let’s Go.
You’ll now see your form automatically embedded within your page content. Click on Publish to proceed.
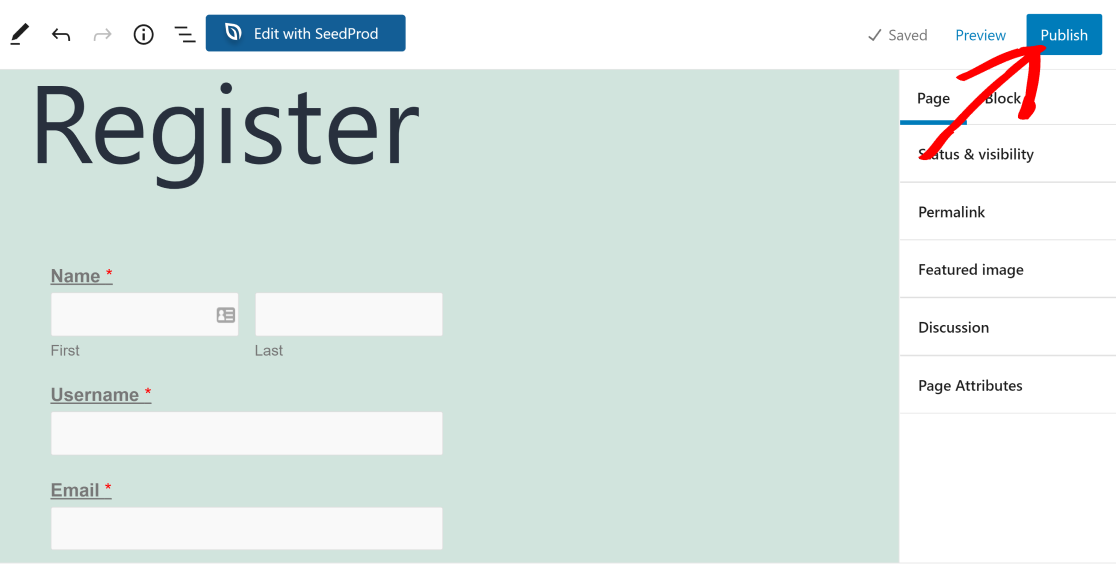
Congratulations! You’ve successfully created and published your registration form.
Notice that the form reflects the theme of our WordPress site (Twenty Twenty-One) and includes customized fields, unlike the default WordPress registration page with fixed fields and a generic design.
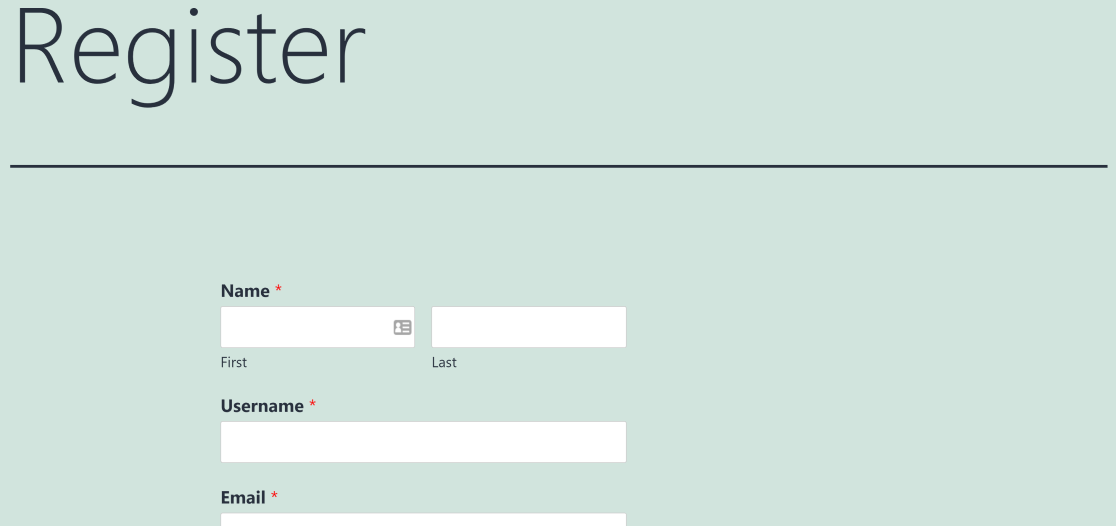
Repeat the same steps as above to embed and publish your login form as well.
Next, we’ll show you how to redirect users after they’ve registered or logged in – without writing or pasting any code.
6. Redirect Users After Registration or Login
WPForms allows you to control redirection after registration or login in WordPress. That means you can decide which page they’ll be taken to after they submit the registration or login form.
To set this up, we’re going to edit the registration form that you already created.

Next, head to the Confirmations settings for your user registration form.
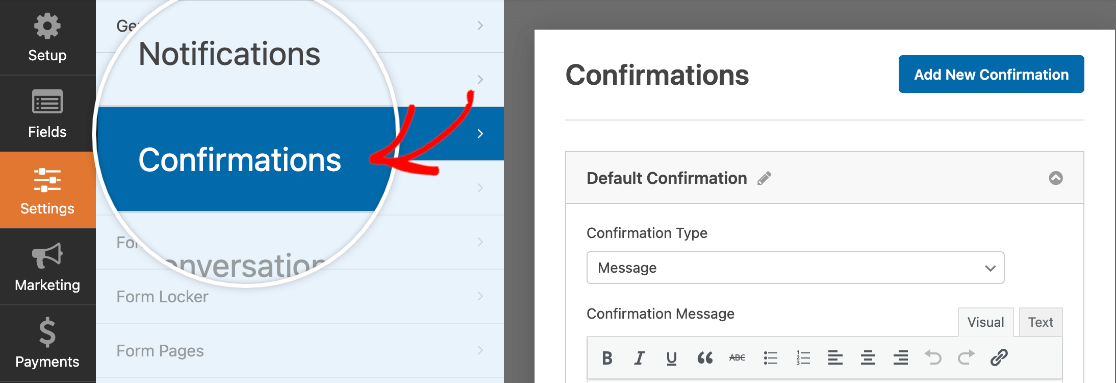
By default, WPForms will show a confirmation message after registration. If you want, you can change this to Show Page so that your new users are automatically forwarded to a different page on your website.
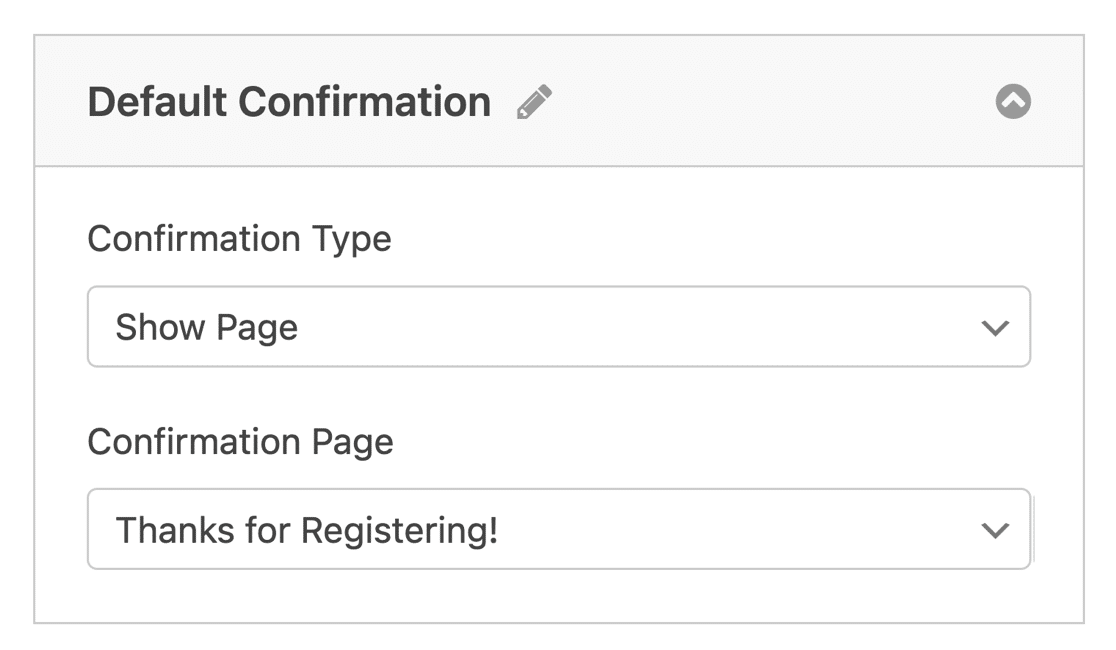
And that’s it! Now, every time someone registers on your site, they’ll see your custom page instead of the confirmation message.
You can use the exact same redirect trick to redirect users to any page after they log in to your site as well.
For a final tip, we’ll show you how to redirect users to your brand new, custom registration and login pages.
7. Redirect Users to the Custom Registration and Login Page
After you’ve created custom registration and login pages on your site, users can still access the default registration and login pages using direct URLs, which you might not want.
- For the registration page, the URL is:
http://example/wp-login?action=register - And the login page URL is:
http://example.com/wp-login.php/
We’ll show you how to add redirects from these URLs to your new ones.
To enable this redirection, all you need to do is to add the following code snippet to your functions.php file. This code snippet redirects your users to the custom registration page with its URL slug when they try to access the default registration page.
If you’re not sure how to add the code, see this guide on how to paste code snippets into your functions.php file to prevent any WordPress errors.
Registration Page Redirection
Note: Replace /registration-url in the code below with the new URL of your custom registration page.
// Redirect Registration Page
function my_registration_page_redirect()
{
	global $pagenow;

	if ( ( strtolower($pagenow) == 'wp-login.php') && ( strtolower( $_GET['action']) == 'register' ) ) {
		wp_redirect( home_url('/registration-url'));
	}
}

add_filter( 'init', 'my_registration_page_redirect' );
Code credits: 2bearstudio
Login Page Redirection
Note: Replace /login-url in the code below with the new URL of your custom login page.
function my_redirect_login_page() {
$login_page = home_url( '/login-url' );
$page_viewed = basename($_SERVER['REQUEST_URI']);

if( $page_viewed == "wp-login.php" && $_SERVER['REQUEST_METHOD'] == 'GET') {
wp_redirect($login_page);
exit;
}
}
add_action('init','my_redirect_login_page');
Code credits: PressTigers
And that’s it! Your visitors will now be redirected to your custom login and registration pages on WordPress.
Next, Explore HubSpot CRM Integrations
Integration HubSpot with other tools and apps is an extremely powerful way of making your workflows more efficient. See our post on best HubSpot CRM integrations to explore some great options.
You may also want to check out our tutorial on how to create a custom WordPress theme.
Create Login and Registrations Forms Now
Ready to build your form? Get started today with the easiest WordPress form builder plugin. WPForms Pro includes lots of free templates and offers a 14-day money-back guarantee.
If this article helped you out, please follow us on Facebook and Twitter for more free WordPress tutorials and guides.



Redirecting /wp-login?action=register works great when using this code but how would I go about doing the same for the /login and /wp-login.php pages?
I tried doing it with this code but I really have no idea what I’m doing. Basically just guessing here.
// Redirect login Page
function my_login_page_redirect()
{
global $pagenow;
if ( ( strtolower($pagenow) == ‘wp-login.php’) && ( strtolower( $_GET[‘action’]) == ‘login’ ) ) {
wp_redirect( home_url(‘/my-account’));
}
}
add_filter( ‘init’, ‘my_login_page_redirect’ );
Hi John,
Great question. We’ve actually shared the code you’d need for this over in our custom login page tutorial (please see #2 in that article).
Hope that helps! 🙂
Hi,
Is it possible to redirect the user to a specific location based on the button he just clicked to register/login?
That mean that each different button would be linked to a different register/login form, each redirecting to a specific address.
Would that be possible?
Thanks in advance
Hi Sowx,
I’m afraid I’m not 100% sure of your question but yes, you can link buttons on your website to different forms and then once those forms are submitted, have them redirect the user to a different URL. If you need any more information on redirecting a user upon submitting a form, please check out our guide!
I hope this helps!
Hi, the auto login and redirection works great but for some reason im not receiving the notification emails. ( users are not available in the entries section as well )
and when i disable the auto login, it works again.
Hi Kami,
I’m sorry to hear you’re having issues with email notification deliverability. I’d recommend checking out our article which shows you show to fix this issue using the WP Mail SMTP plugin.
I hope this helps! 🙂
Hi, thanks for the reply, the email notifications are working fine now, but the other problem still remains, the form is still not storing the entries for users, i’ve tested it many times, the auto login and redirection is working great, and the email notifications as well, but for some reason its not storing users entries in the form, kindly suggest what to do Thanks.
Hi Kami,
If you have a paid WPForms license, please contact our support team so they can look into the issue further.
Thanks! 🙂
Hey! I’m getting an error when I try to add this copied code to the “snippits” plugin detailed in the “how to paste code snippets into your functions.php file”.
Code:
// Redirect Registration Page
function my_registration_page_redirect()
{
global $pagenow;
if ( ( strtolower($pagenow) == ‘wp-login.php’) && ( strtolower( $_GET[‘action’]) == ‘register’ ) ) {
wp_redirect( home_url(‘https://date.intro-social.com/new-user/’));
}
}
add_filter( ‘init’, ‘my_registration_page_redirect’ );
Error Message:
Don’t Panic
The code snippet you are trying to save produced a fatal error on line 6:
syntax error, unexpected ‘;’
The previous version of the snippet is unchanged, and the rest of this site should be functioning normally as before.
Please use the back button in your browser to return to the previous page and try to fix the code error. If you prefer, you can close this page and discard the changes you just made. No changes will be made to this site.
I found a workaround. By using a global redirect manager, I was able to redirect the login from wordpress to my wpform.
Hey Tyler – Thanks for letting us know! Glad to know you were able to sort it out, please feel welcome to reach out to us for any other questions!
Hey Tyler, We had a small glitch on the site for a short span of time, that inserted some special characters in the code. I assume you tested the code during that time.
Code formatting is fixed now, could you please try that code again and it should work fine.
Apologies for the inconvenience!
I think you need to add “exit”, e.g.
if ( wp_redirect( home_url(‘/registration’) ) ) {
exit;
}
If not, a multisite site will still put up the wp-signup.php page.
Hi George!
Thanks for your feedback regarding this. I’ve noted it to our team and we’ll review your suggestion.
We appreciate you taking the time to reach out to us with this 🙂
after the user login, the HOME (the main page) is not accessible; in other words, it redirects to a profile page persistently
all other subpages (like contact) is accessible, only the HOME is not, as I said after login
Hi Gabor,
Sorry for any trouble you are facing here! If you are paid license holder, could you please reach out to our Support Team and we will be happy to assist.
Thanks,