AI Summary
Do you want your visitors to preview their form entries before submitting them?
Letting users preview their entries greatly reduces the chances of errors and inaccuracies while they’re filling out forms.
WPForms has an Entry Preview field that you can easily add to your forms, so your users can see a quick summary of their entries during and after submission.
In this post, we’ll show you how to add the Entry Preview field and customize it in different ways in WPForms.
Create a Form With Entry Previews Now
How to Preview a Form Entry Before Submitting It
Go through our step-by-step tutorial to learn how you can add a submission preview to your forms.
In This Article
Let’s begin.
1. Install WPForms
To start with, choose a suitable WPForms plan and register your account. Then, log into your WPForms account area and click on the Downloads tab. This will open a page where you can press Download WPForms button to download the zip file.
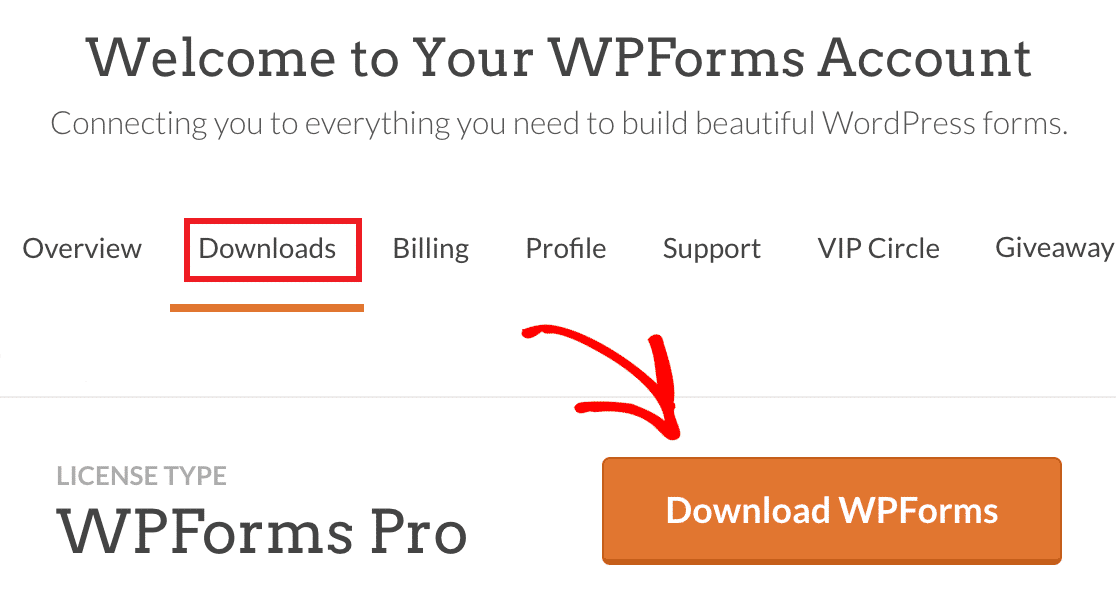
While you’re on this page, make sure to copy your license key. You’ll need this later when you’re activating WPForms Pro on your WordPress site.

After the zip file has downloaded on your computer, open your WordPress admin dashboard and click on Plugins » Add New. Then, click on the Upload Plugin button.

Now, click on the Choose File button and pick the plugin file that you just downloaded.

Click on Install Now when the file is uploaded.
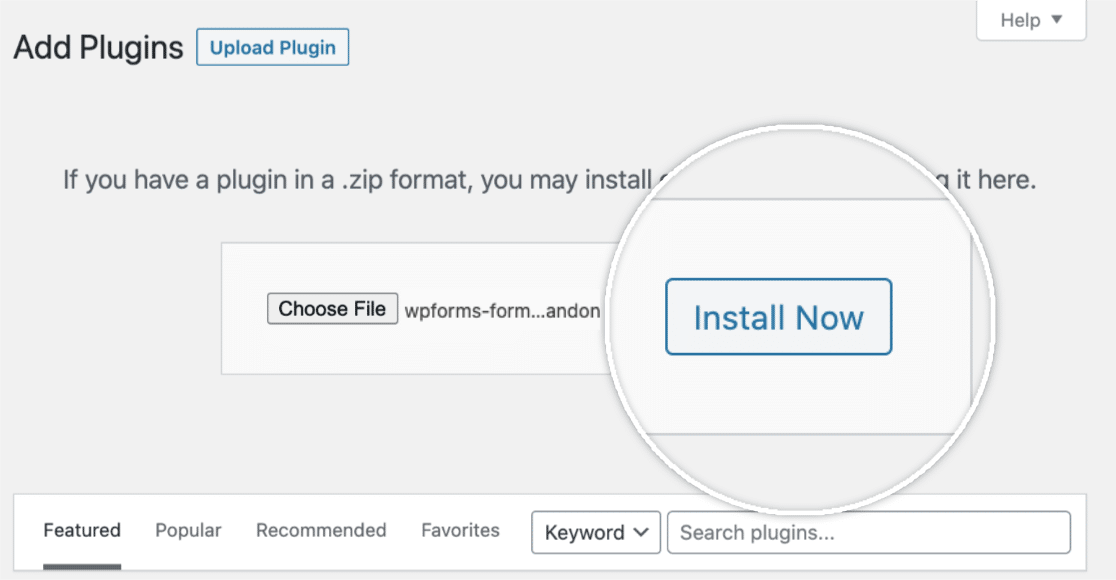
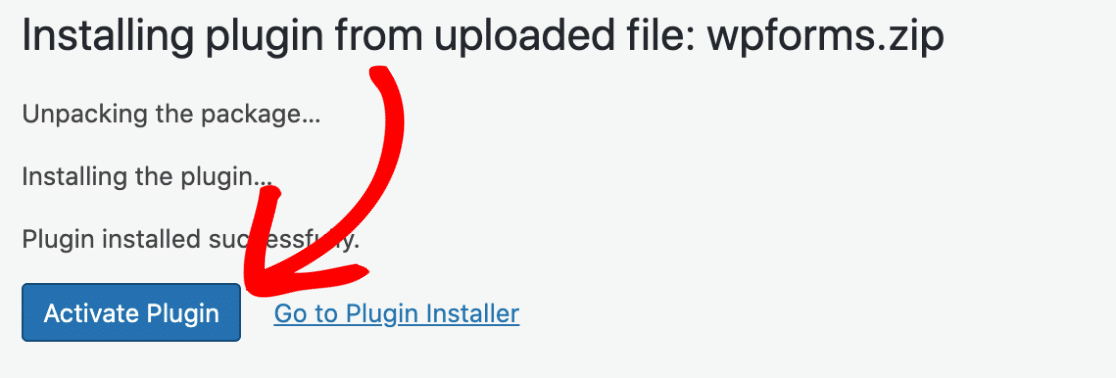
WPForms will now install on your WordPress site. This should take only a few seconds. When the installation finishes, press the Activate Plugin button.
Now click on WPForms » Settings. This will open the General settings tab by default. Scroll down to find the License Key field and enter your key here (which you copied earlier).
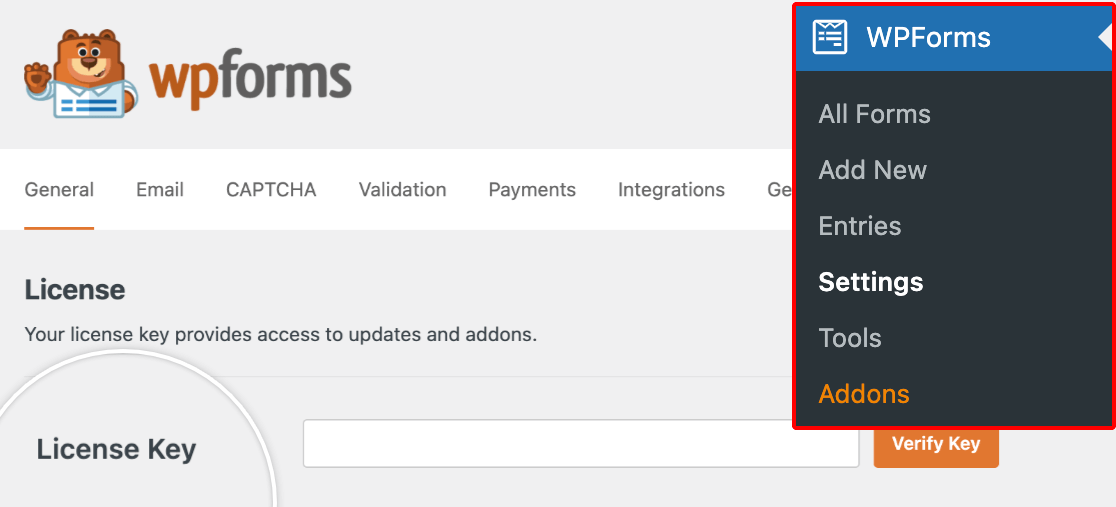
Then, click on the Verify Key button. This will complete your WPForms Pro installation on your site.
2. Add a New Form
Now, open your site’s WordPress admin area and click on WPForms » Add New in the left-hand sidebar. You can now give a name to your form to make it easy for you to find it later.
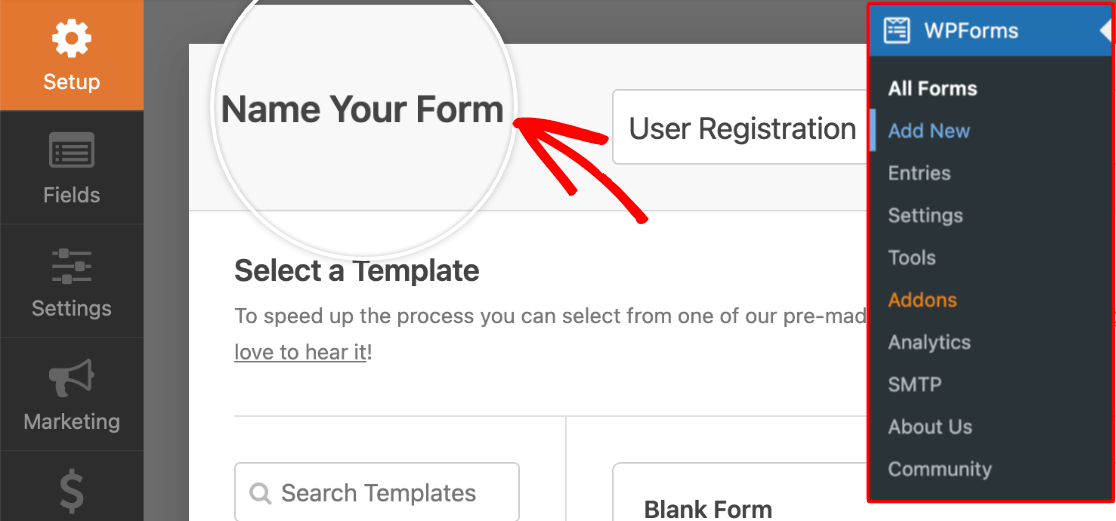
Scroll down to select a template to start building your form. Like all WPForms fields, the Entry Preview field is supported across most of the 2,000+ form templates available.
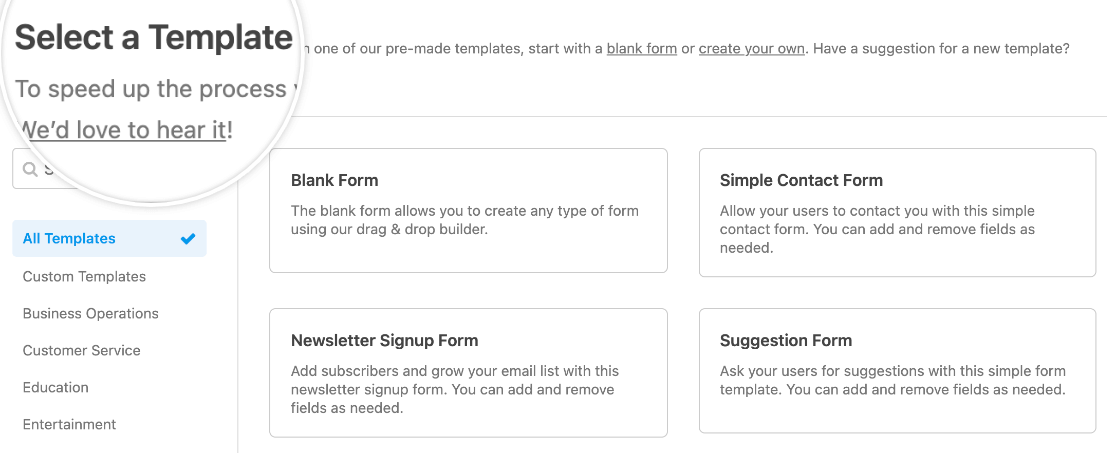
When you’ve selected a template, we’re going to add the Entry Preview field in the next step.
3. Add the Form Entry Preview Field
In the following example, we’re using a custom appointment booking form, but you’re free to use any form template of your choice.
To add a preview feature to your form, simply drag and drop the Entry Preview field from the left-hand pane of the builder to the right-hand pane, where your actual form fields are.
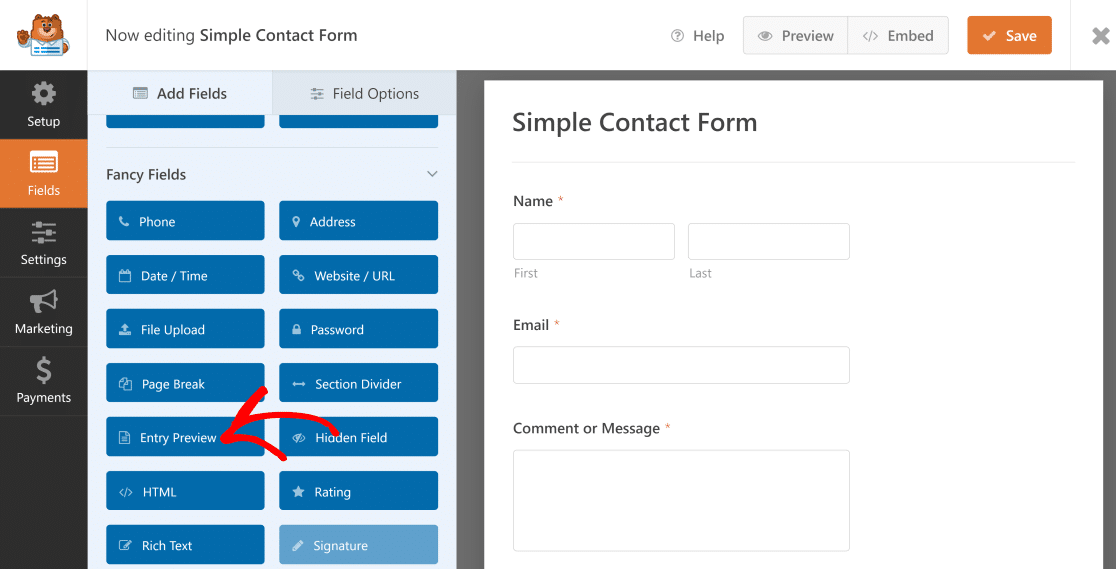
When you add the Entry Preview field to your form, it will automatically add a new page where the preview will appear.
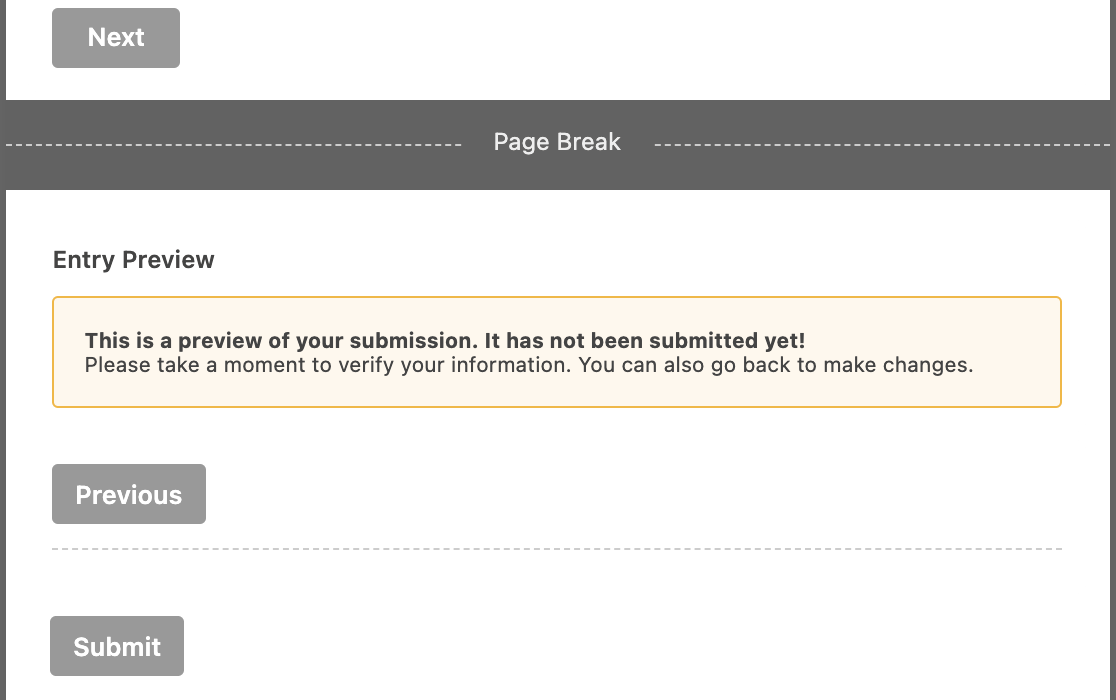
This is how the preview appears in action when a user is filling out a form:
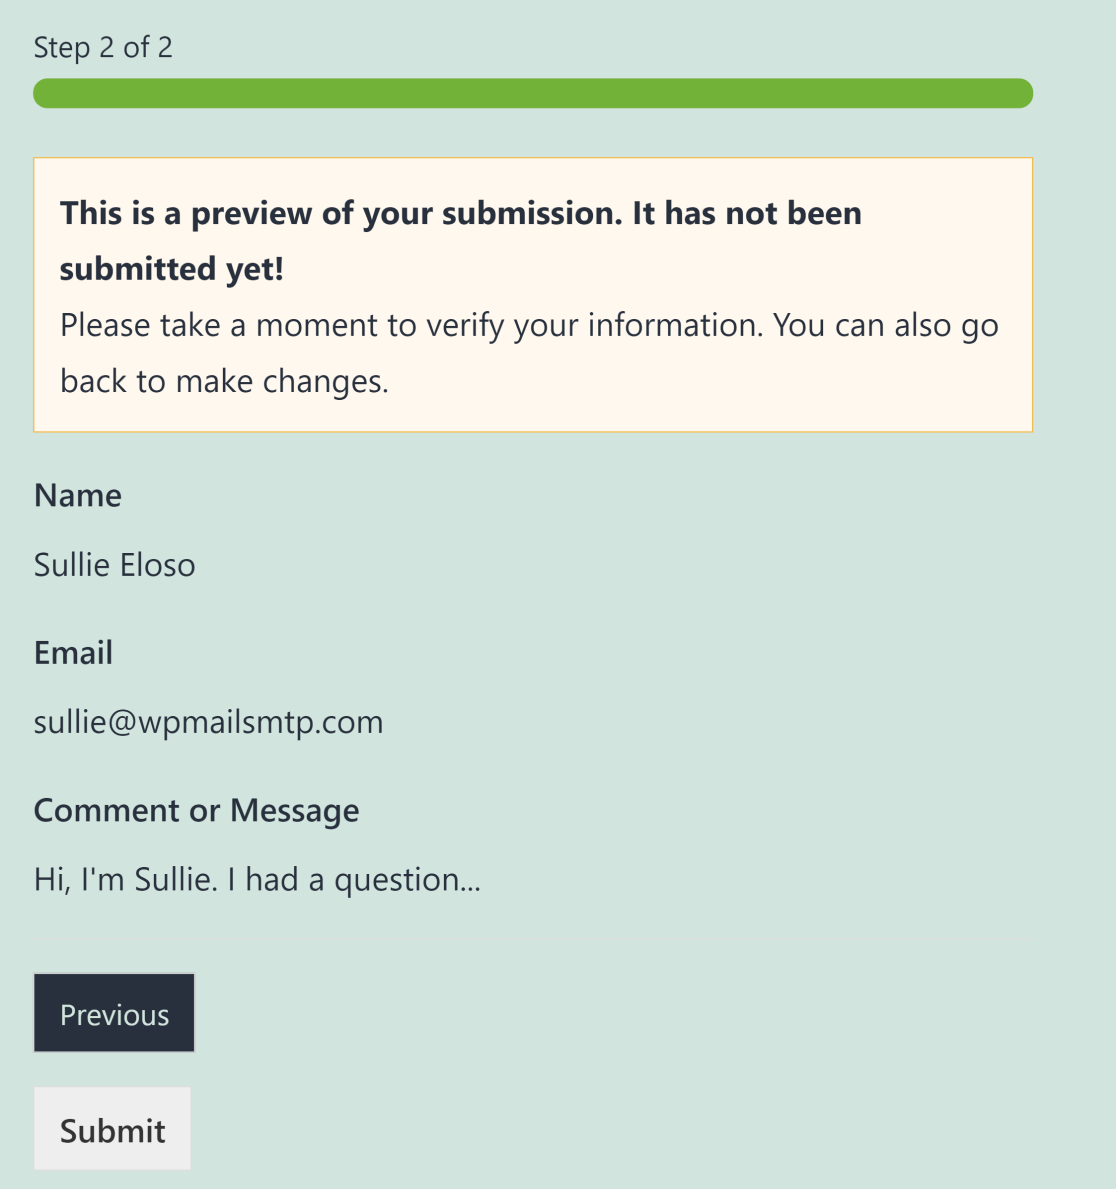
You can also place the Entry Preview field multiple times within your form. For example, if you have a multi-page form, you can place an Entry Preview field after every page. This means that your users can preview the information they’ve filled in the previous pages as they continue filling the rest of your form.
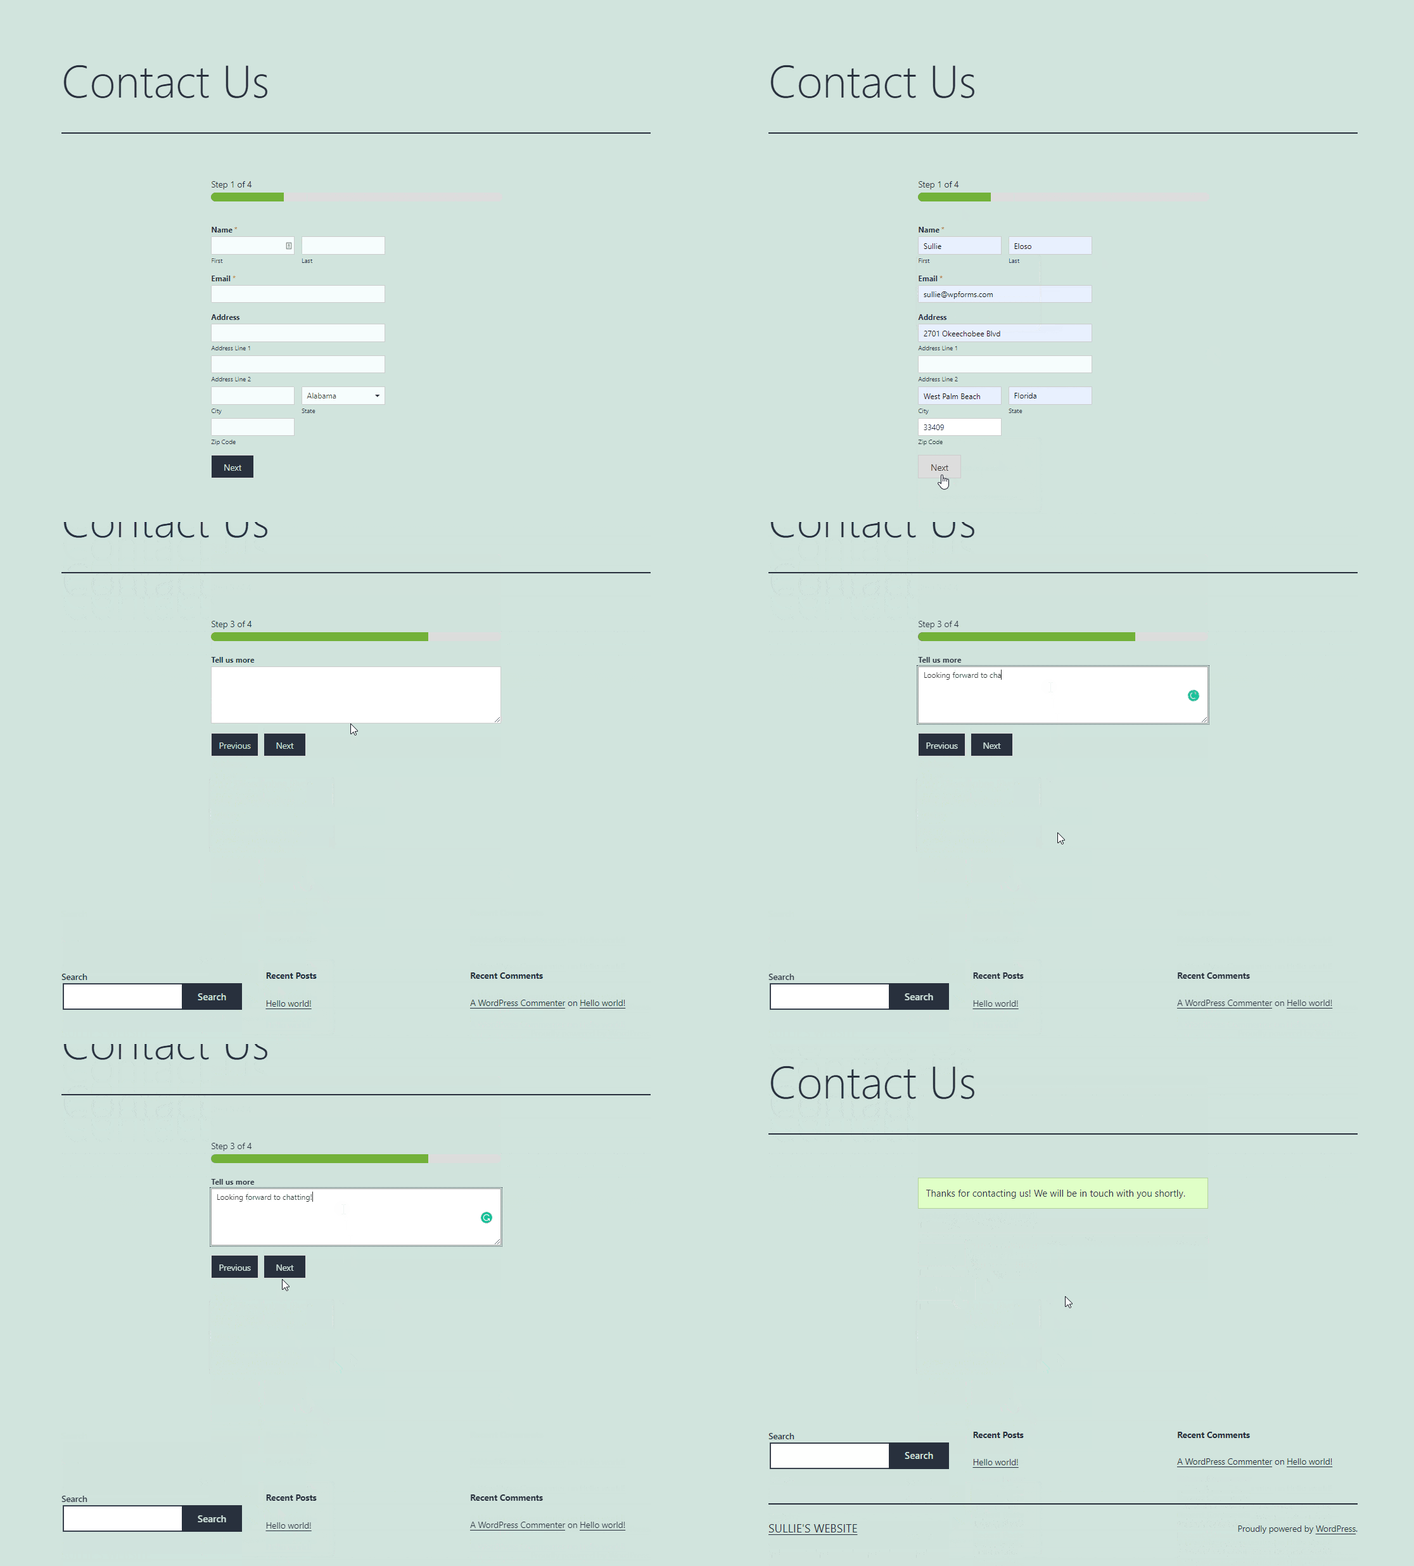
Adding multiple Entry Preview fields throughout your long forms is a great way of making sure that your users are able to preview their entries and go back any time to make changes if needed.
4. Customize Preview Notice and Style
WPForms allows you to customize the preview notice. Simply click on the Entry Preview field in your form builder view to open its field settings.
You can use the Display Preview Notice toggle button to show the message above the entry preview or hide it entirely.
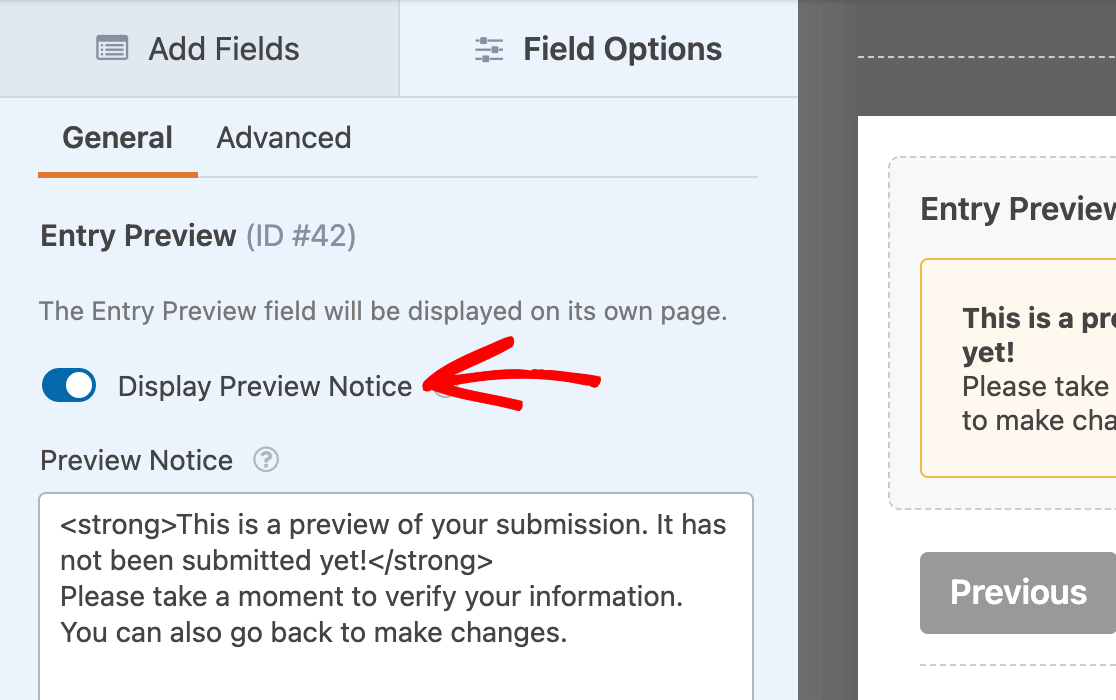
Also, you have the freedom to edit the preview notice to your liking or leave the default message as it is.
Next, you might want to change the Entry Preview style. Click the Advanced tab in the Entry Preview field options to choose from 4 different preview styles:
- Basic
- Compact
- Table
- Table, Compact
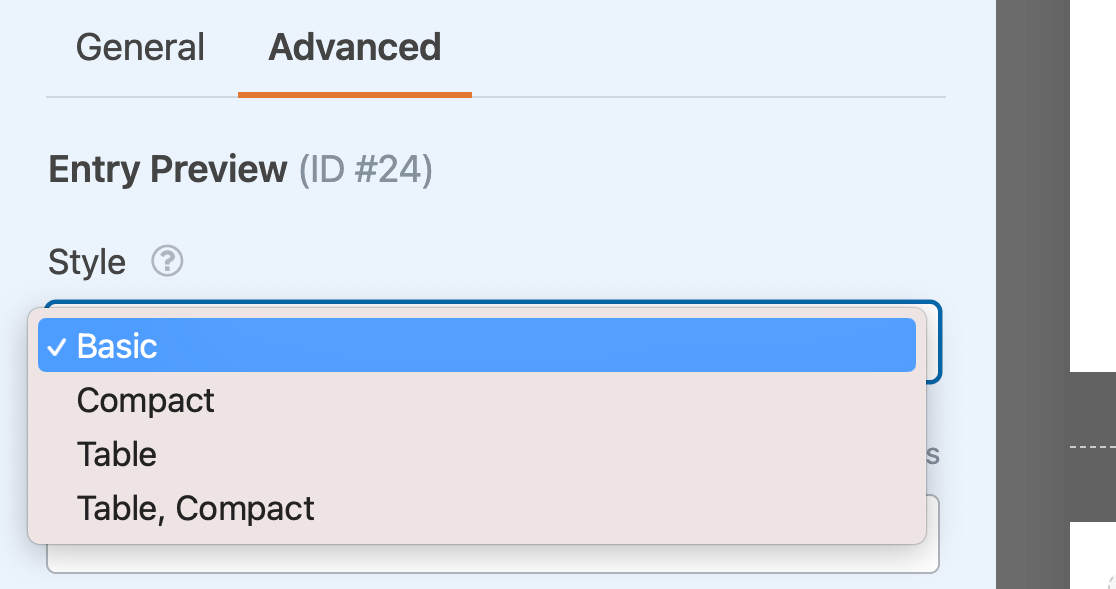
The default style is Basic, which displays a line-by-line preview of the form entry.

If you want to give your preview a tighter look, you can go with the Compact style option.
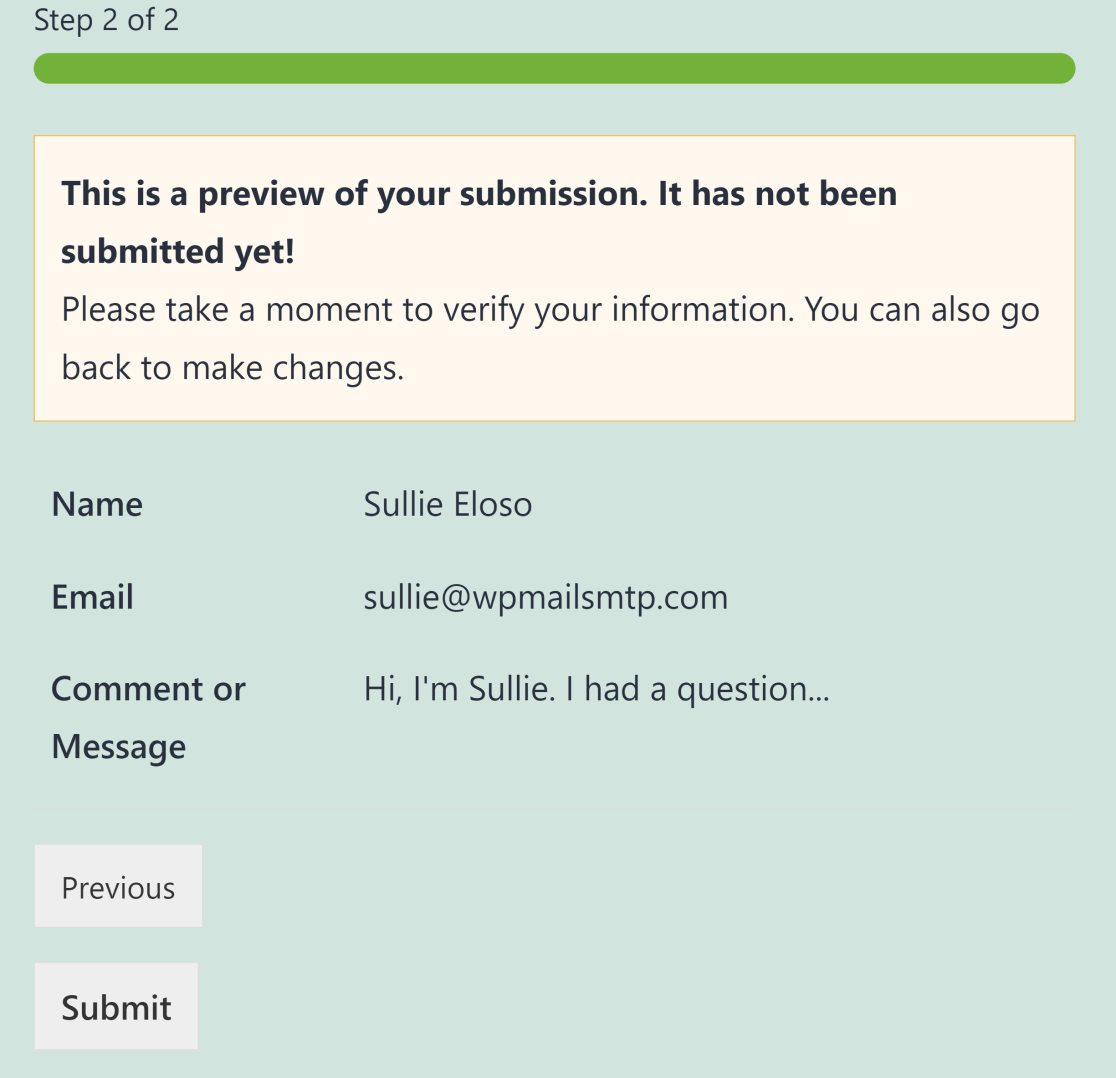
This completes the Entry Preview field setup within your forms. But there’s another type of entry preview that you can add, as we show in the next step.
5. Add Entry Preview Confirmation
Other than Entry Previews that appear when you’re filling in a form, WPForms also allows you to display previews after a user has submitted a form.
Unlike the Entry Preview field, your users don’t get the ability to change their entries when a preview confirmation is displayed. Instead, it only shows your users a copy of their submission that can no longer be changed.
To set up entry preview confirmations, head over to Settings » Confirmations in the WPForms form builder. Here, you can toggle on the Show entry preview after the confirmation message button.
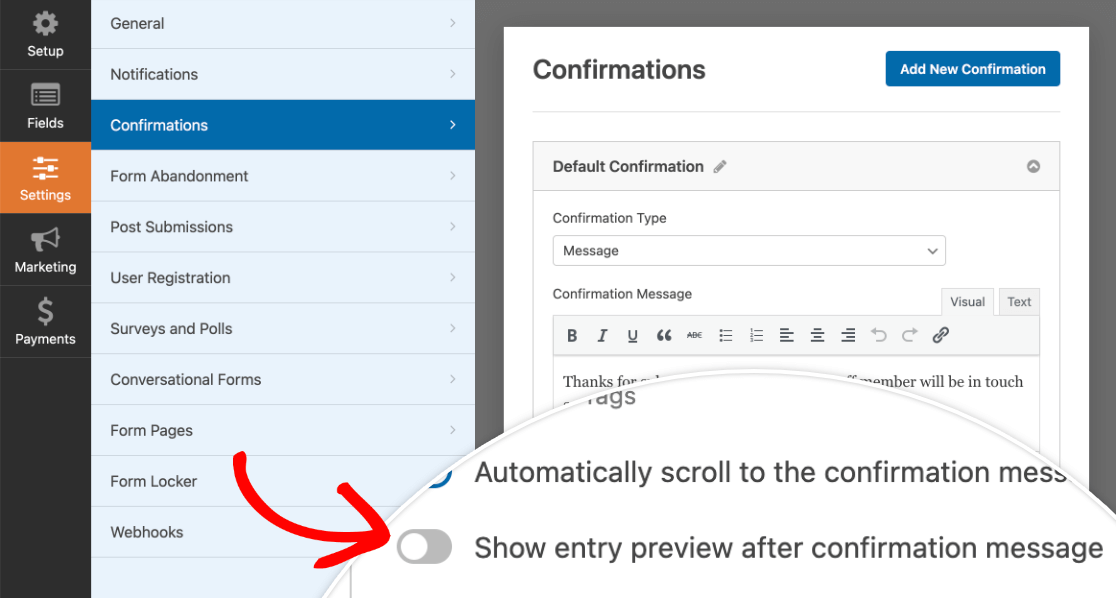
When you’ve enabled this option, you will see a dropdown appear which lets you choose a preview style as we showed above for Entry Preview fields.

You can still use Entry Previews (which appear when a form is being filled) along with preview confirmation (which only appears after entries have been submitted). Or you can only use one or the other of these options. It all depends on your preferences and what you’re trying to achieve with your forms.
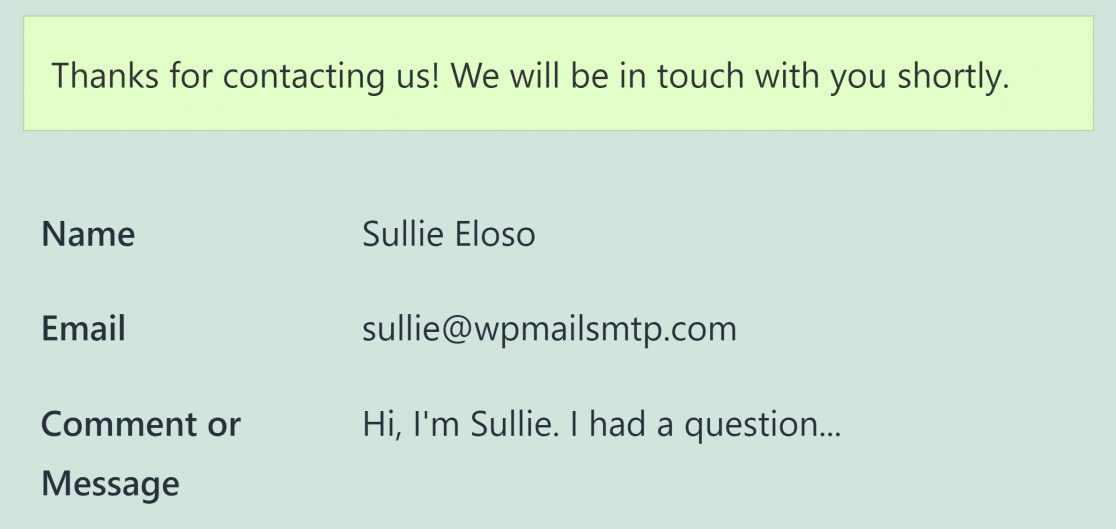
And that’s it! You can now allow your users to preview a form entry before submitting it.
Why Should You Show an Entry Preview?
The ability to preview entries is very useful, especially when it comes to longer and more complex forms.
It’s normal to make typos and mistakes while filling out a form, but a preview before submission lets you review the information for accuracy before you press the submit button.
So, if you want to minimize errors and give your users the ability to correct any mistakes before submission, you should include the Entry Preview field offered by WPForms.
Next, Enforce Access Restrictions on WordPress Forms
Do you want to restrict your WordPress forms to only logged-in users? WPForms lets you select user permission levels by their login state. See our article on how to restrict WordPress forms to logged-in users to learn more.
You might also want to read our guide on the best WordPress notification bar plugins to promote your sales and special offers on your site.
Create a Form With Entry Previews Now
Ready to build your form? Get started today with the easiest WordPress form builder plugin. WPForms Pro includes lots of free templates and offers a 14-day money-back guarantee.
If this article helped you out, please follow us on Facebook and Twitter for more free WordPress tutorials and guides.


The info is cool, however it is not totally clear how to make a total form confirmation. Situation: we have a multipage form and we want to confirm the whole form in the end. Not every page separately.
Hi Karina,
Entries preview should work just fine with multi-pages. For multi-pages, we recommend placing the entry preview on its own page at the end of your form so users won’t see it until after they’ve filled out the rest of the fields. This way you will be able to view the entire form preview instead.
In case it helps, here is our great article on the same.
I hope this helps!
is it possible to show field description too in preview? At the moment we can show them, tahnk you
Hi Claudio,
We currently, do not have a native feature to display the field description on the Entry Preview before submission. I have gone ahead added your vote to consider this a feature for future.
Thanks!
I am using the Stripe multi-item radio buttons. Is there a way to stop the preview showing the amount they will be charged within this?
eg I have the amount in the text of the radio button. It’s confusing to show it twice.
Hey Sharon – We currently don’t have the feature to disable/hide the price on form preview. I do agree this would be a handy feature, and I’ll add this into our feature request tracker so that it’s on the radar of your developers.