AI Summary
Do you want to create a custom login page for your WordPress website? Having a custom login page is a great way to replace the generic WordPress login and add your own branding.
In this article, we’ll show you the easy way to create a completely custom login page for your business site.
Create Your WordPress Form Now
Why Create a Custom Login Page in WordPress?
All WordPress websites have the same login page. It’s a simple login form with the WordPress logo above it.
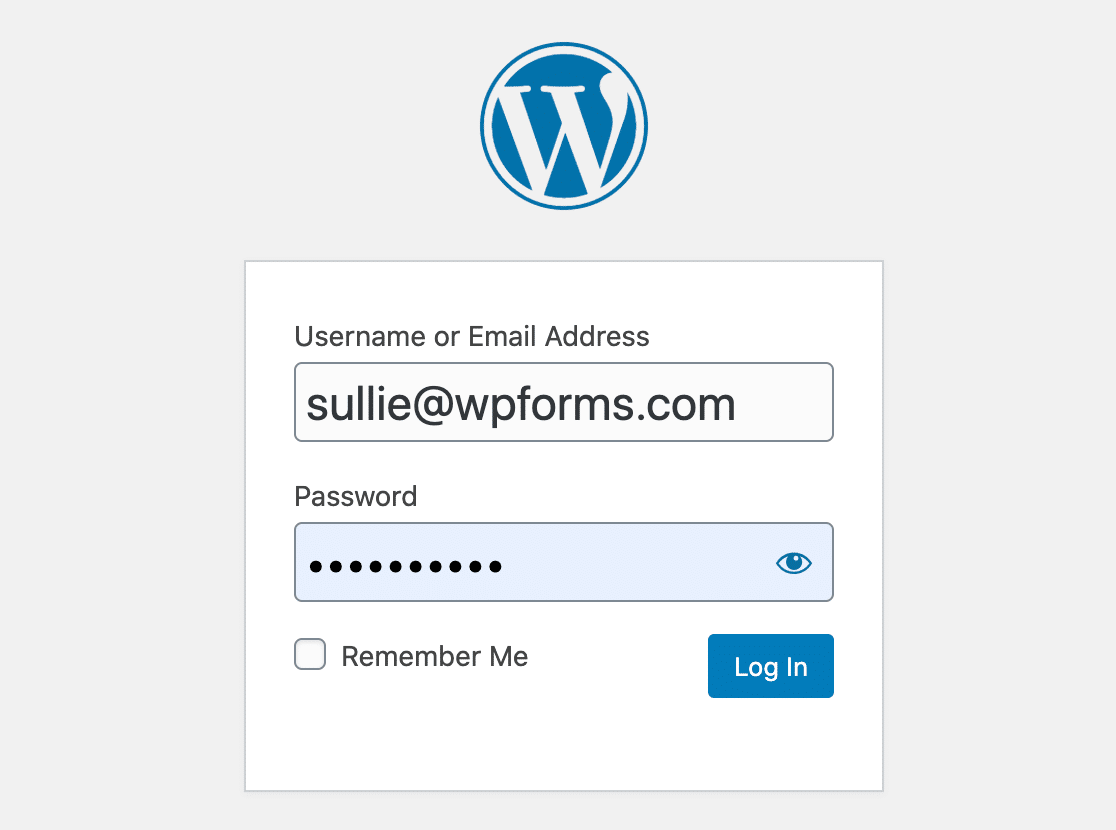
This page is generic, so it’s difficult to tell which website you’re actually signing into. The WordPress logo also links to WordPress.org, which could take users away from your site if they click on it.
However, if you create a custom WordPress login page for your site, you could use it for:
- Promotions
- Notifications
- And more.
At WPForms, we use the extra space on our custom login page to let users know about exciting new features.
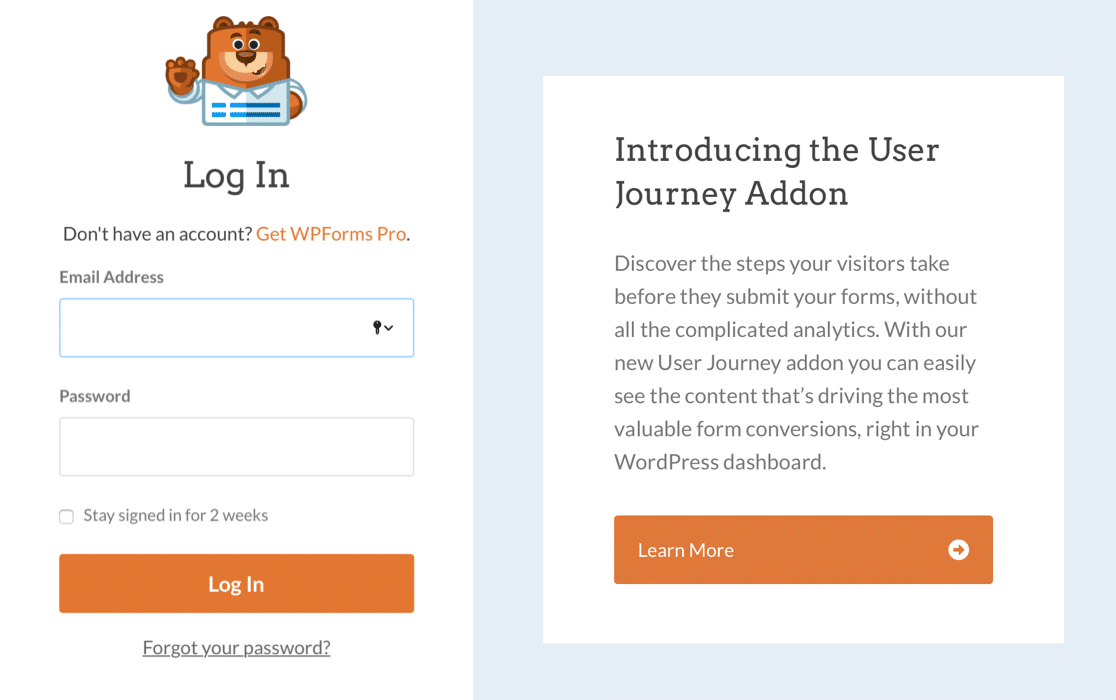
It’s super easy to make a custom login page, and it’s also effective for improving website security. By creating a custom login page, you can hide the default one to reduce login spam and keep your WordPress site secure.
Now we know why you need a custom login page, let’s make one for your site.
How to Make a WordPress Custom Login Page
We’re going to use WPForms to make a completely custom login form for your site. Then we’ll show you how to create your custom login page.
In This Article
- Step 1: Install the WPForms Plugin
- Step 2: Create a Custom WordPress Login Form
- Step 3: Add a Branding Image to Your Login Form
- Step 4: Customize Your Custom Login Form Settings
- Step 5: Publish Your Custom Login Form
- Step 6: Add the Login Form to Your Navigation Menu
- Step 7: Redirect the WordPress Login Page to Your Custom Login Page
- Optional: Create a Password Reset Form
OK, let’s get started by installing the custom login page plugin for WPForms.
Step 1: Install the WPForms Plugin
The first thing you’ll need to do is install and activate the WPForms plugin. For more details, see this step-by-step guide on how to install a plugin in WordPress.
To access the user registration and login features, you’ll need WPForms Pro or higher. The Pro version includes the User Registration addon which makes it a breeze to create custom login pages.
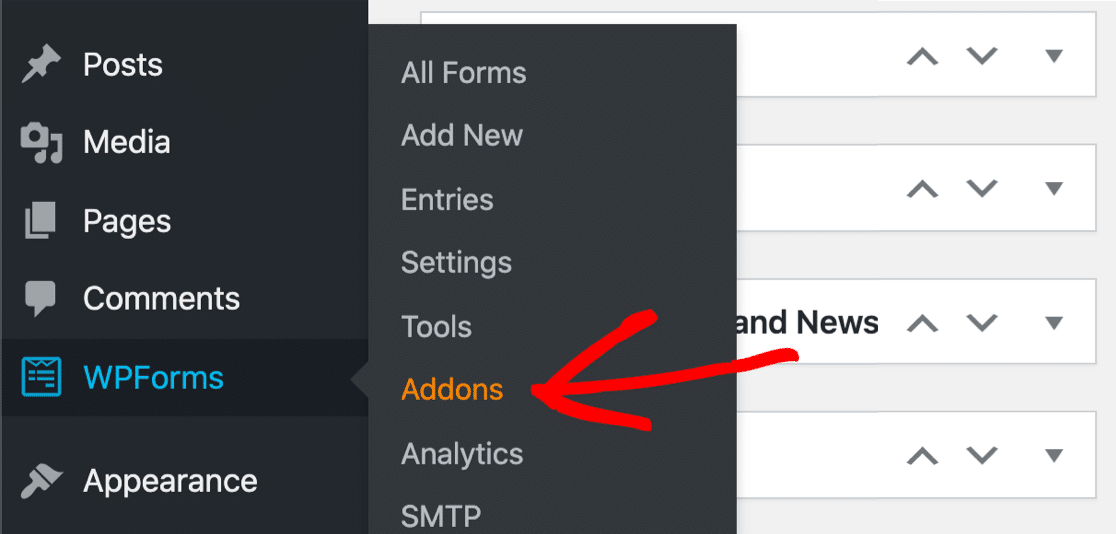
Once you’ve installed WPForms, go to WPForms » Addons.
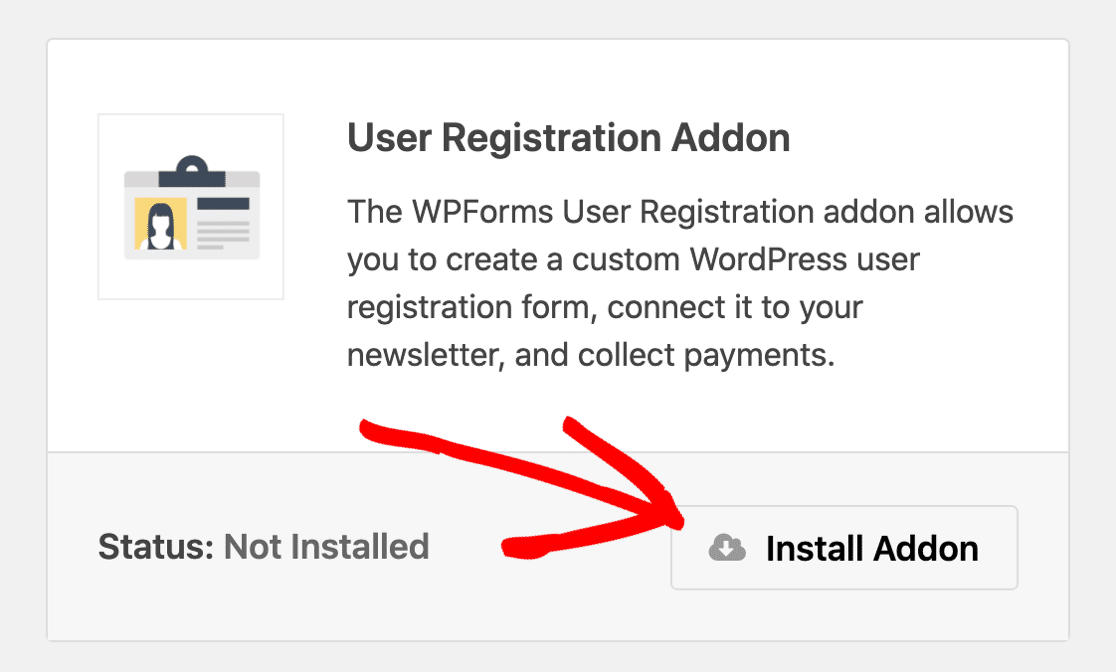
Scroll down until you find the User Registration Addon. Click on the button to install it.
If you want, you can restrict access to WordPress while you’re building your new login form. To find out how to do this, check out our guide on how to hide your WordPress site until it’s ready.
We’re all set! Let’s make our new custom login form.
Step 2: Create a Custom WordPress Login Form
Now that we have WPForms installed, let’s create a new login form for WordPress.
Click WPForms » Add New to start.
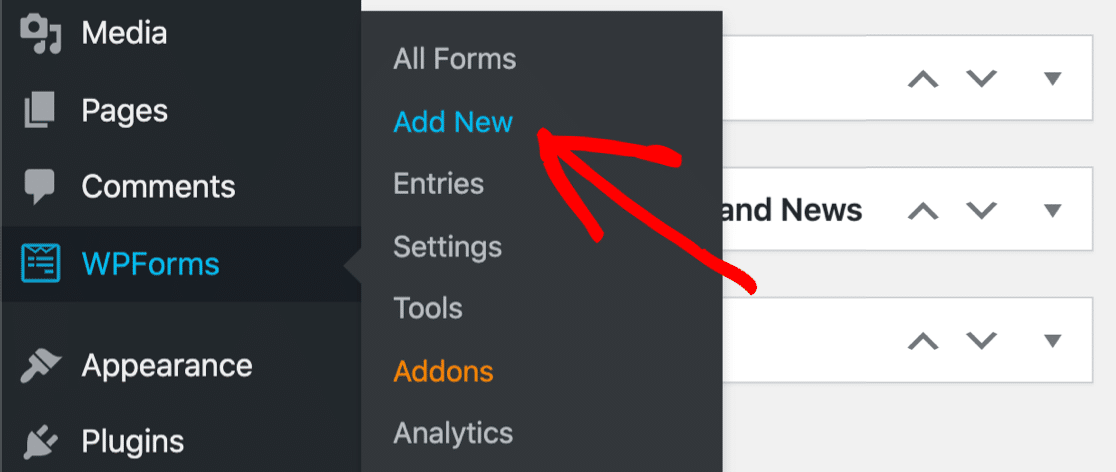
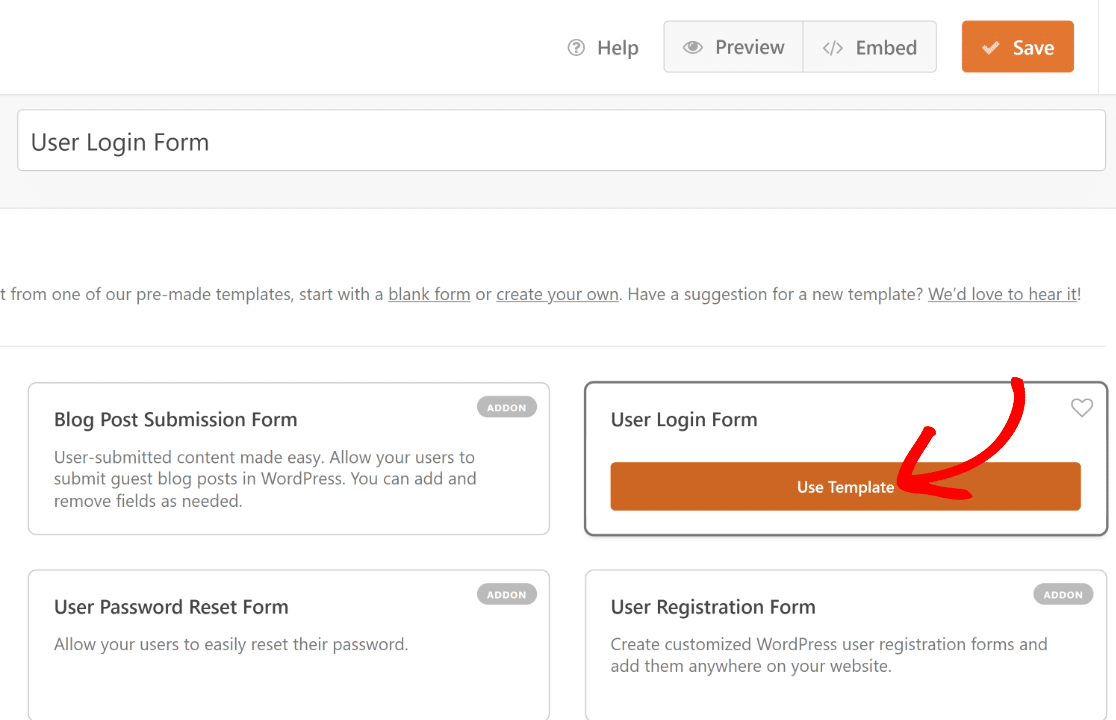
You’ll now be taken to the WPForms template selection screen. The User Registration Addon gives you a few special templates with unique capabilities, as shown below.
Enter a name for your form, and then select the User Login Form template.
You’ll see the form open up in the form builder. The custom login form comes with a Username field, Password field, and a Remember Me field.
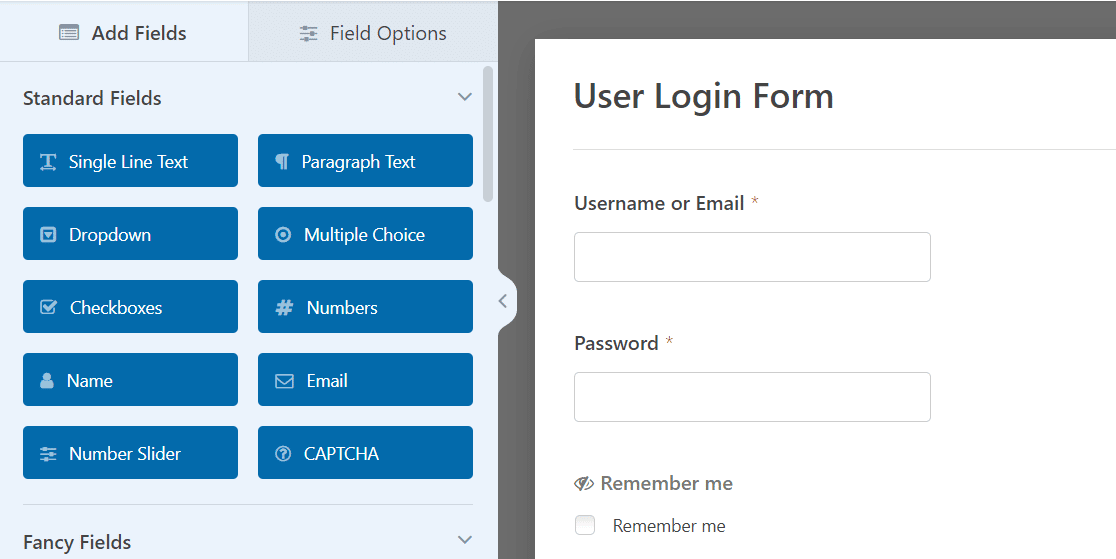
The Remember Me field is special and unique to this template. It allows users to auto-login every time they visit your website after submitting this form.
You can use this template as-is or customize it if you’d like to add any extra elements to it. We’ll show you how to do that in the next step.
Step 3: Add a Branding Image to Your Login Form
WPForms makes it really easy to edit any existing template or build a form from scratch. For instance, we can easily insert branding elements into our login form to make it stand out.
One way to do that is to add a header image representing a hypothetical brand. Simply drag and drop the Content field on the top of your form, right under the title.
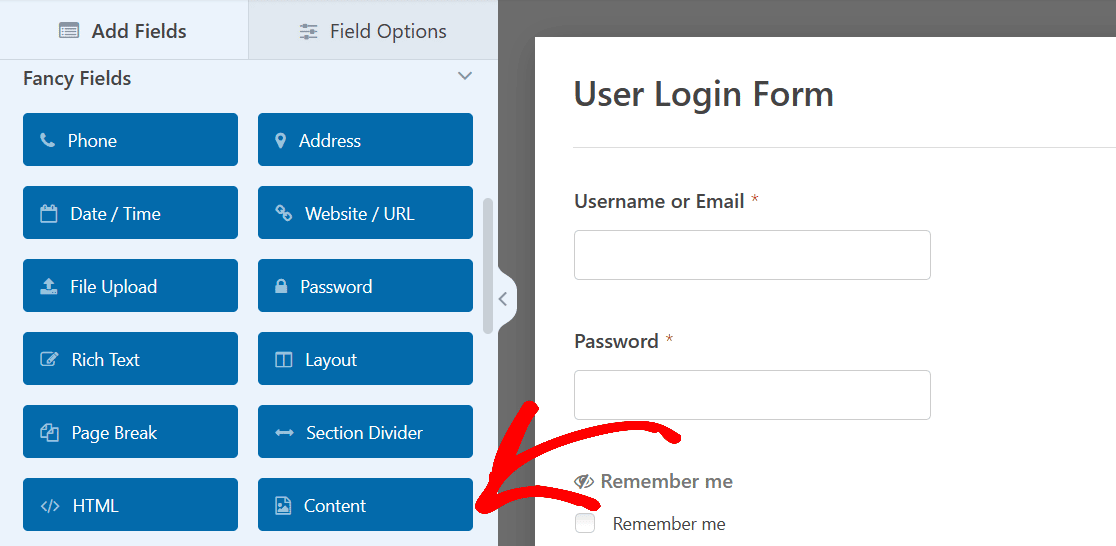
Once you’ve placed the Content field inside your form, click on it to open its Field Options.
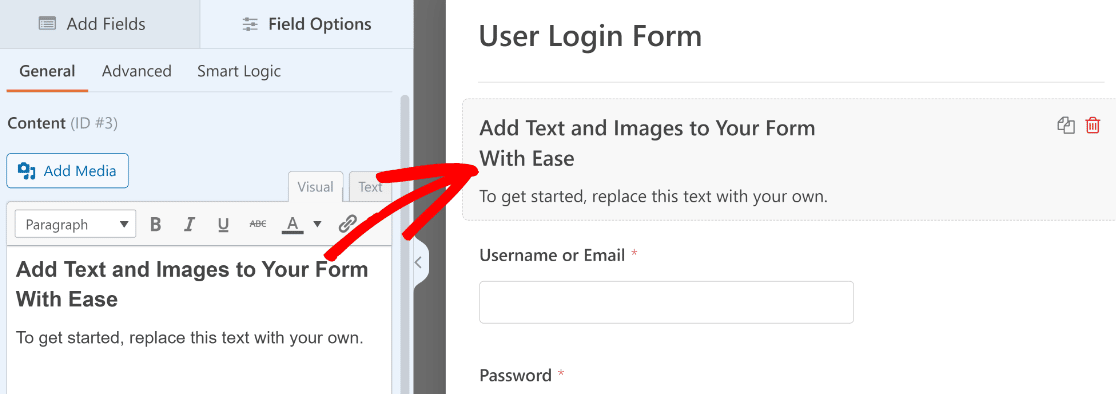
Now, you can use the WYSIWYG editor on the left-hand pane to insert images or add any custom text to your form.
We want to add a branding image to our WordPress login form. So, we’ll use the Add Media button to upload a custom image.
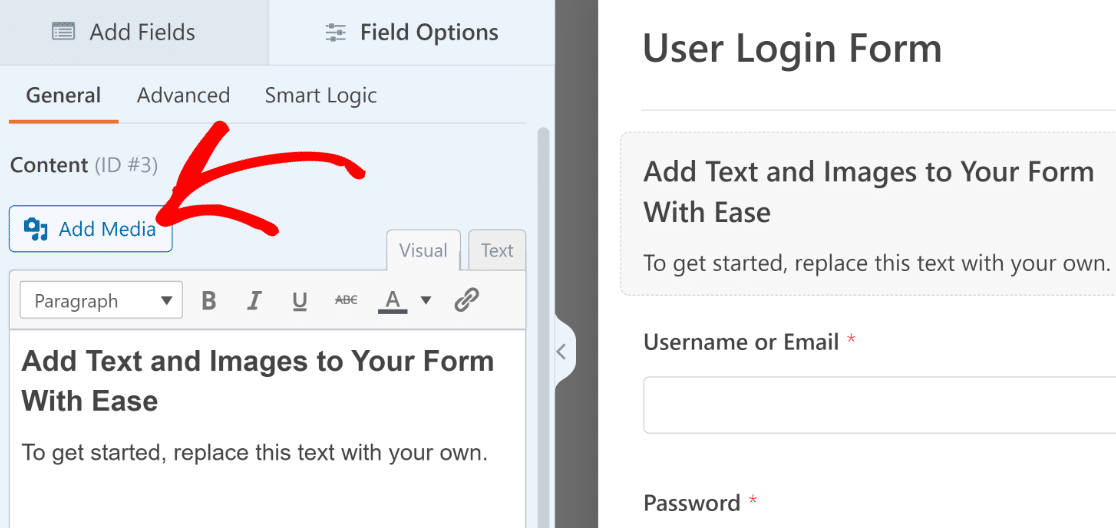
When you press the Add Media button, you’ll see the WordPress Media Gallery modal window open. You can upload an image here like you usually do in WordPress.
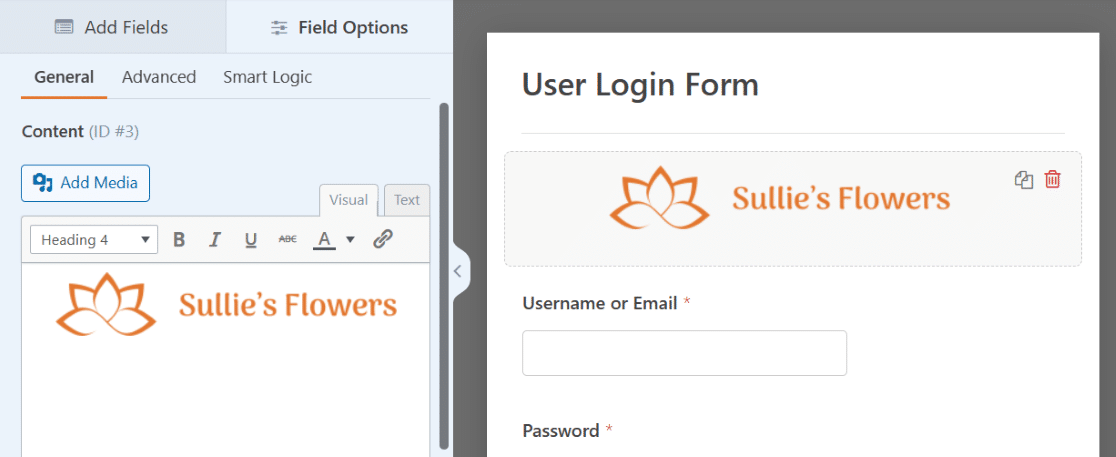
When you’re done with the customizations, make sure to press Save.

With a header image added, our custom WordPress login form looks much more professional and tailored to a specific brand.
If you need more ideas about customizing your login forms, see our post on login page examples.
Before we proceed further with the login form, it’d be a good idea to create a password reset form as well.
Step 4: Customize Your Custom Login Form Settings
In this step, we’ll look at the login form settings. This will let us control the button on the form and the page that our visitors will be redirected to.
Start by clicking Settings on the left-hand side of the form builder.
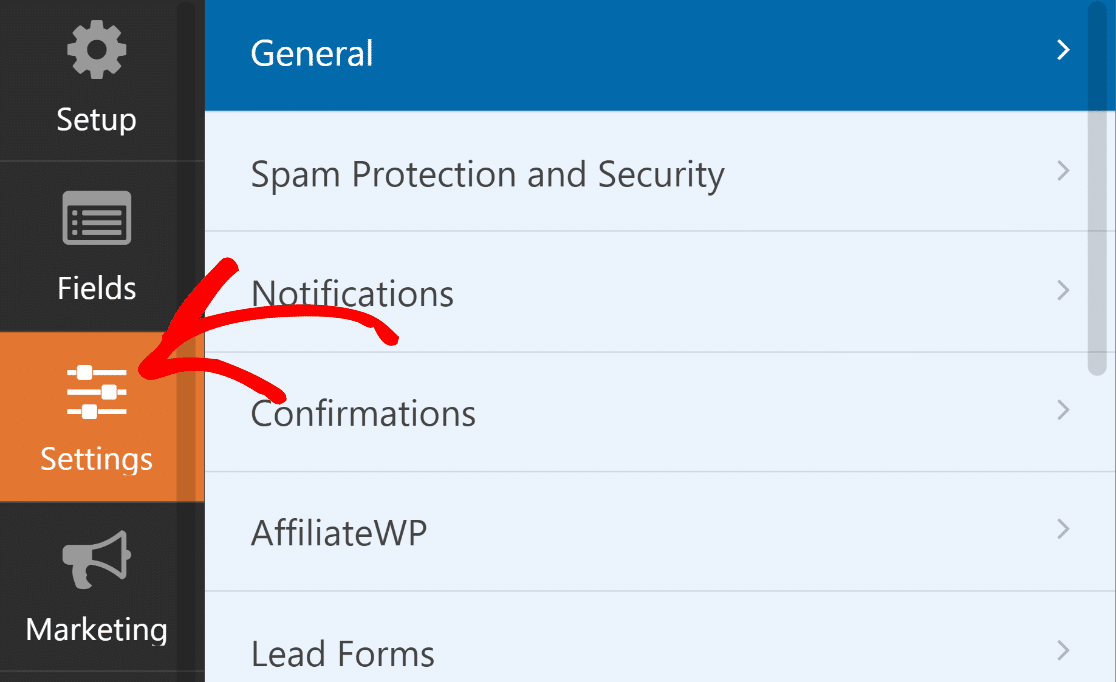
The General tab will be preselected when you go into settings, which is just what we want.
Within the General settings, scroll down to Submit Button Text and change this to say Log In.
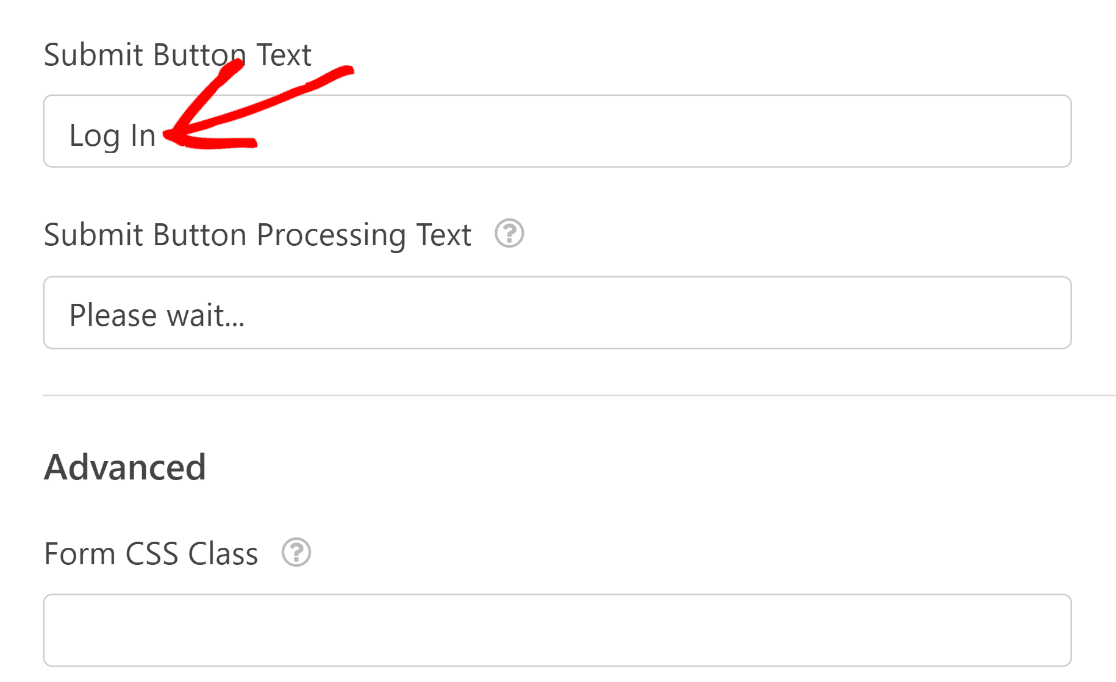
We also changed the Submit Button Processing Text so that the user can see the login is in progress. You can type something else here if you want to.
Next, let’s click Confirmations.
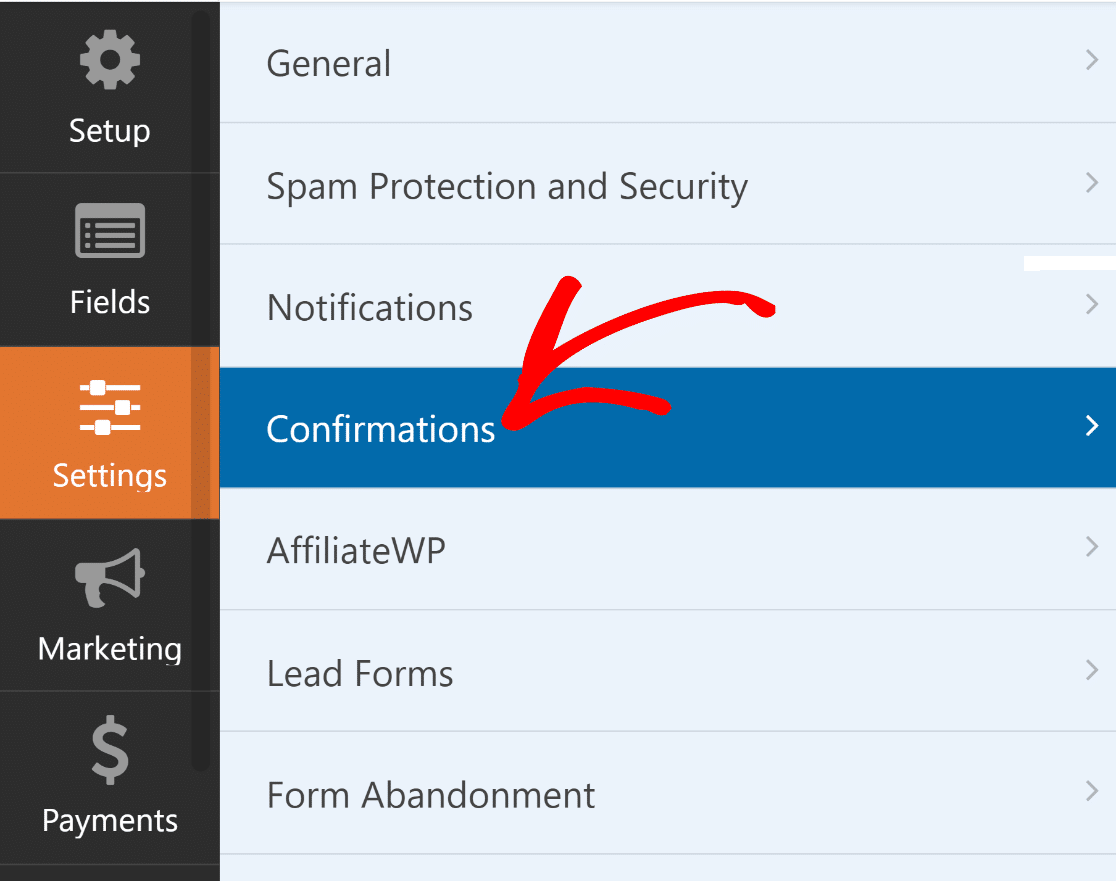
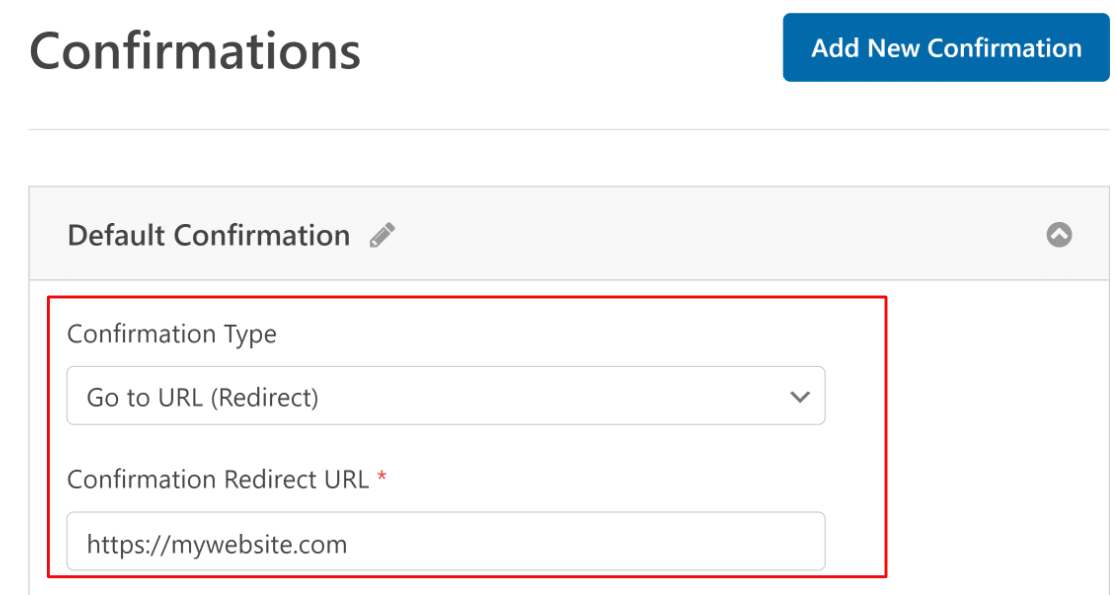
On this screen, we can choose what happens when the login form is submitted. You can have your users open up the WordPress admin if you want. For most sites, it makes sense to redirect them back to the frontend.
So in this example, we’re going to redirect the user to the homepage.
There’s one more setting to check before we proceed.
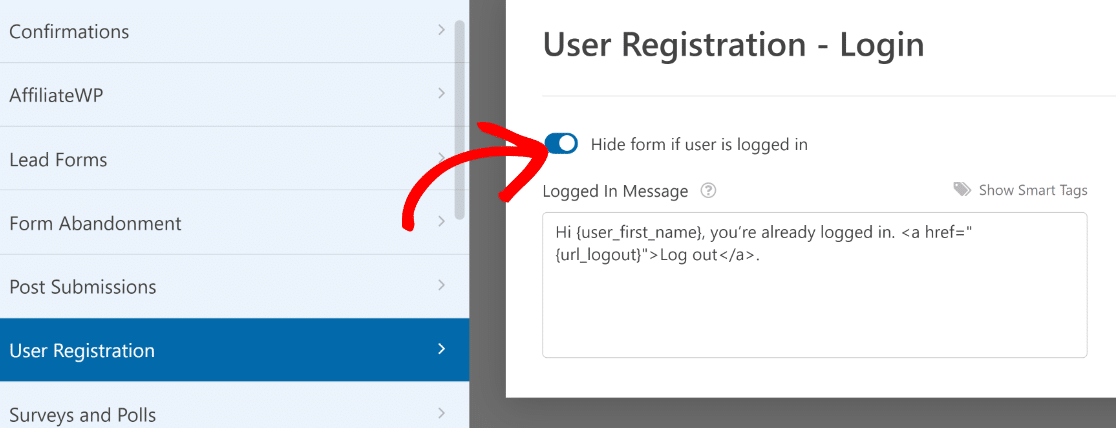
If you scroll down the Settings tab in the form builder, you’ll see the User Registration menu. Click on User Registration to expand its options.
You can choose to hide this form from logged-in users by setting the toggle button to on. Use the text box to edit the message to display in place of the form when a user is already logged in.
Great! Take time to review the other settings and make any changes you want to make. Then click Save at the top of the form builder.
Step 5: Publish Your Custom Login Form
Now we’re ready to publish your new login form.
You can embed your custom login form anywhere on your site, including:
We’re going to create a WordPress custom login page in this example. To start, click the Embed button at the top of the form builder.

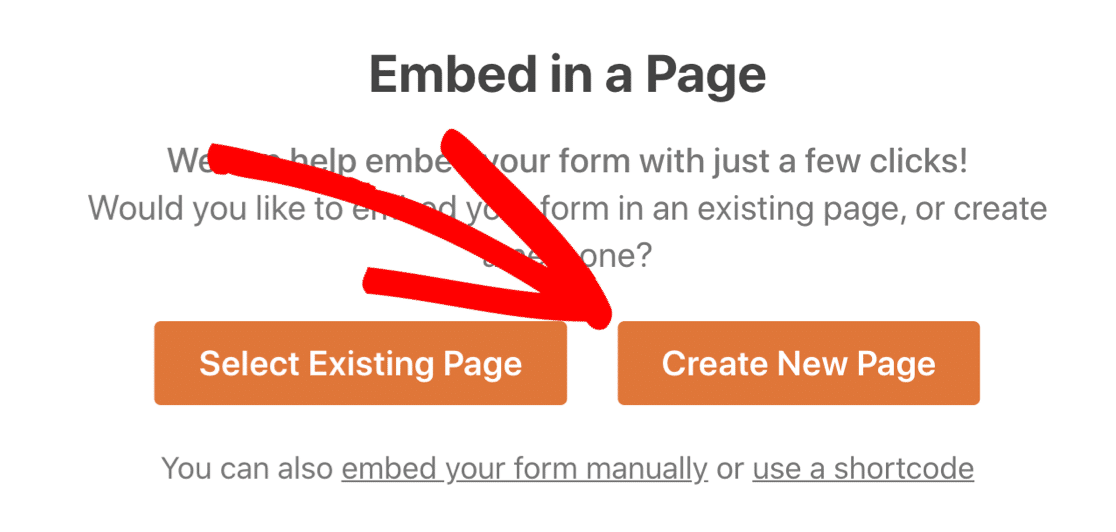
At this point, you’ll see a modal asking where you want to embed your form. For this example, we’ll create a new page. So go ahead and click on Create New Page.
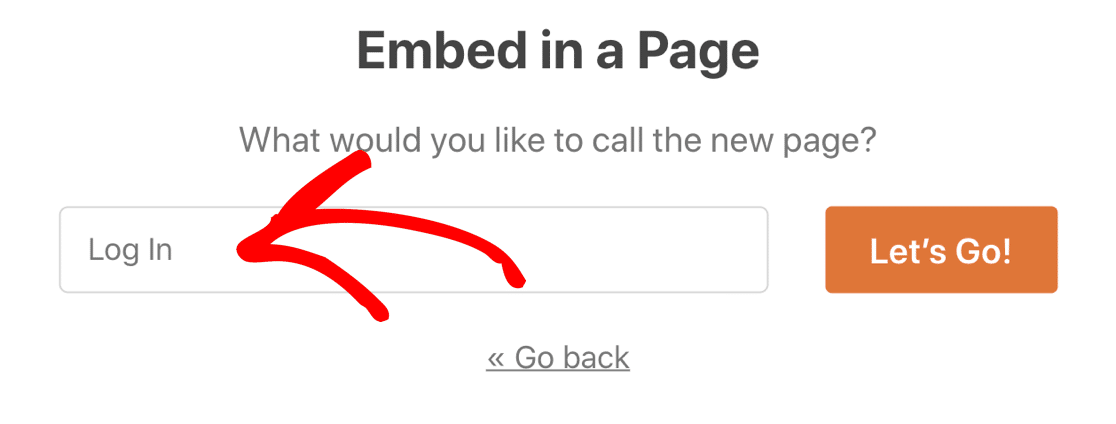
And now give your page a name. Once that’s done, click Let’s Go.
This will take you to the WordPress block editor with the login form already embedded within.
This is a great spot to use the form styling options in the WPForms block to easily customize the appearance of your fields, labels, and buttons.
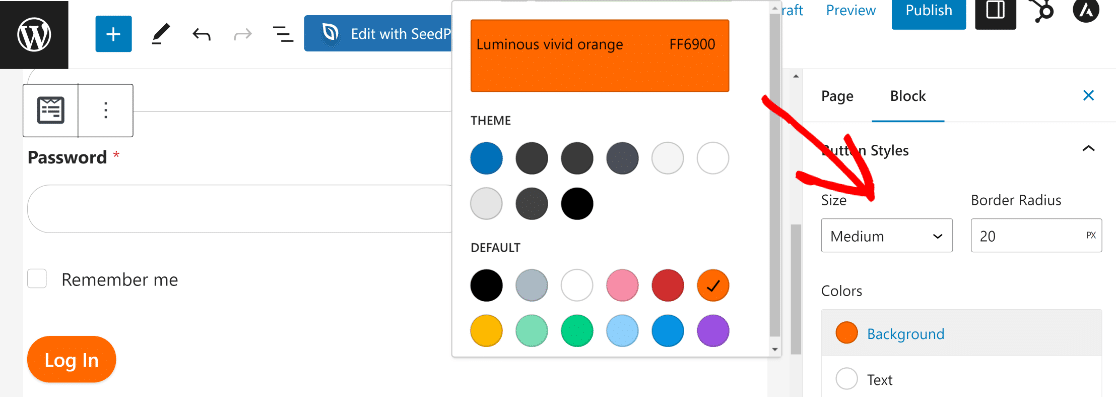
When you’re happy with the appearance of your custom login form, just click the Publish button to publish your custom login page.
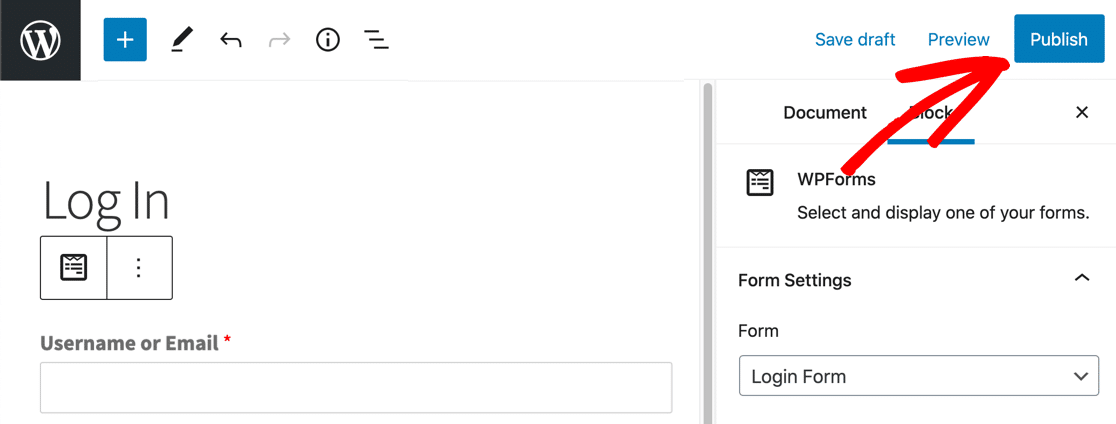
That’s it! Your custom WordPress login page is live and ready to use.
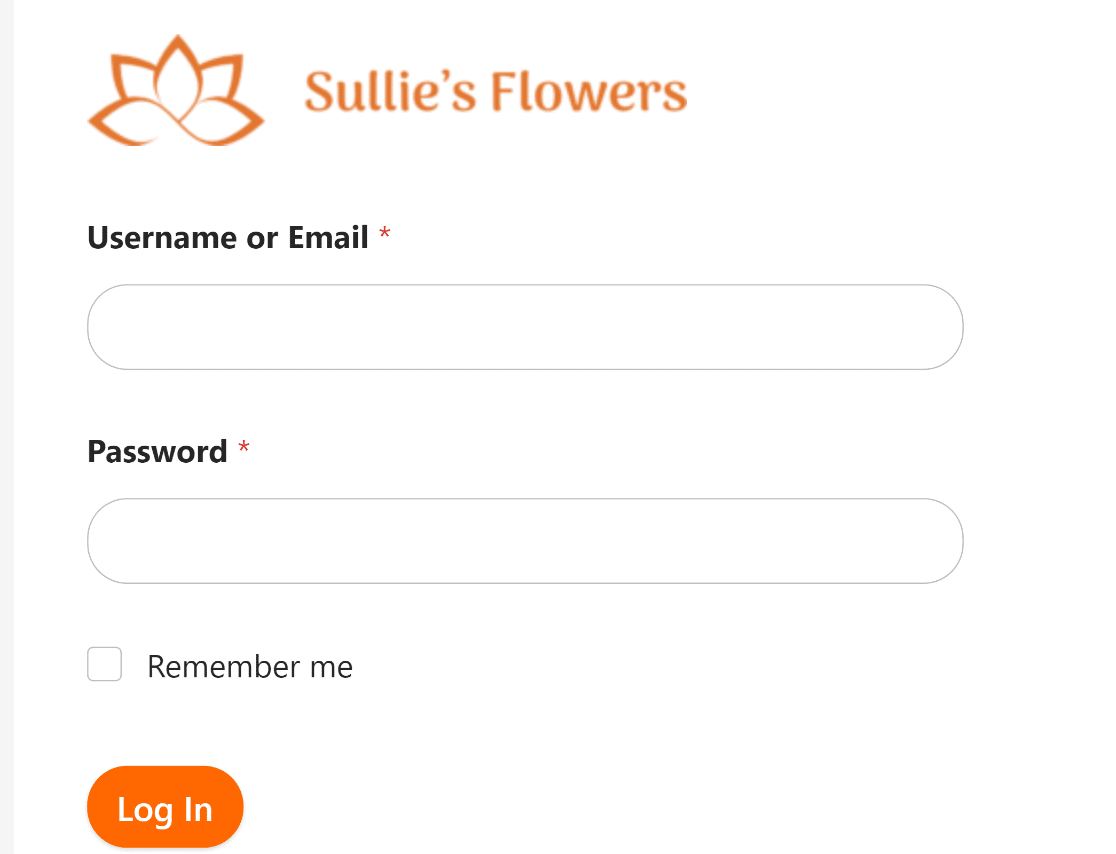
Remember: you’ll need to log out of WordPress to see your finished form if you used the Hide if Logged In option. If you’re logged in, you won’t see the login screen.
If you want, you could use a landing page plugin to create a custom login page and embed your login form. This would let you easily set up a background image and custom colors.
You’ve just created your custom branded login form. That’s perfect!
But it’s also important to make it easy for visitors to locate and access your custom login page.
The best way to do that is to add your login form to your website’s navigation menu.
To do that, open your WordPress dashboard and click on Appearance » Menus.
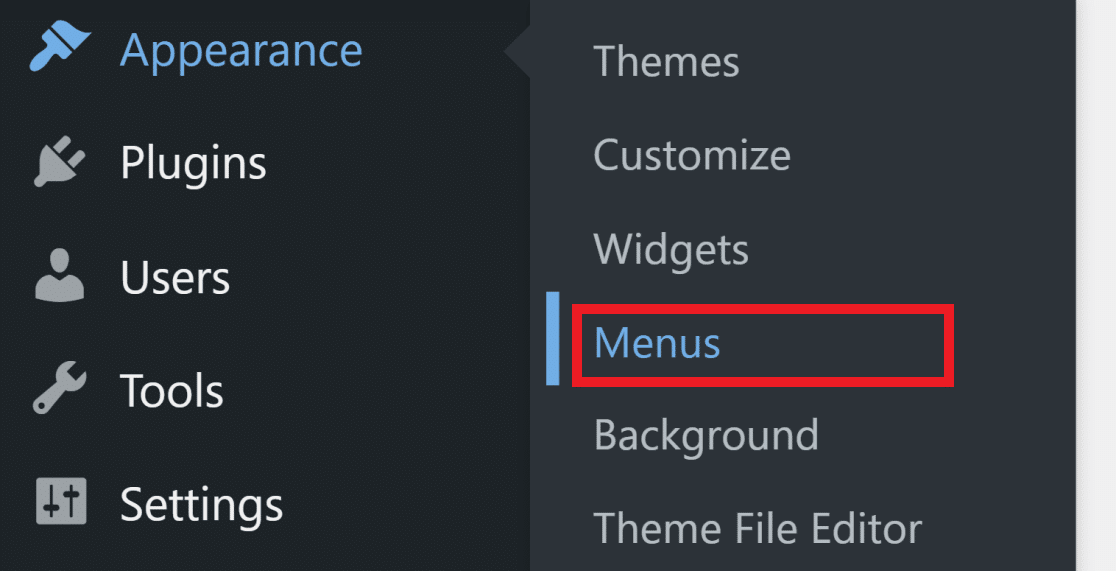
If your theme already has a navigation menu created, you can simply add your new form page to the existing menu. Simply checkmark your login page from the column on your left and then select Add to Menu.
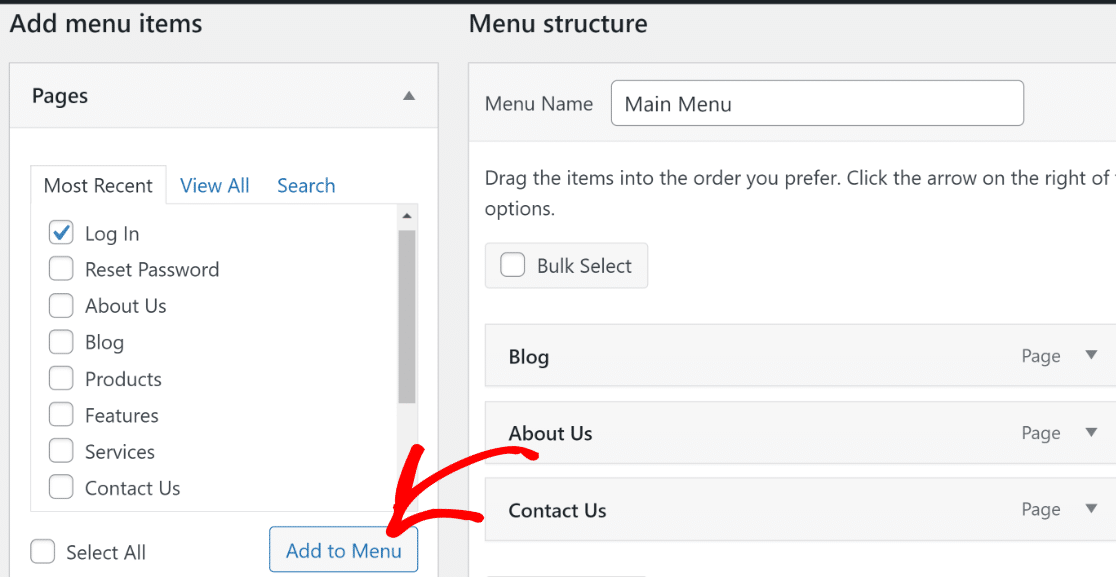
The login page will now appear on your right, along with other pages on your menu. If you want, you can rearrange the order of menu items by dragging and dropping.
After that, you’ll need to select a location where you want the menu to appear. Most themes support up to 5 display locations for the menu, including the header and the footer, which are the most common.
In this example, we’ll add the menu to the header. This is usually called the “Primary” menu in WordPress. Click on Primary Menu to select your display location and then press the Save Menu button at the bottom to update your menu.
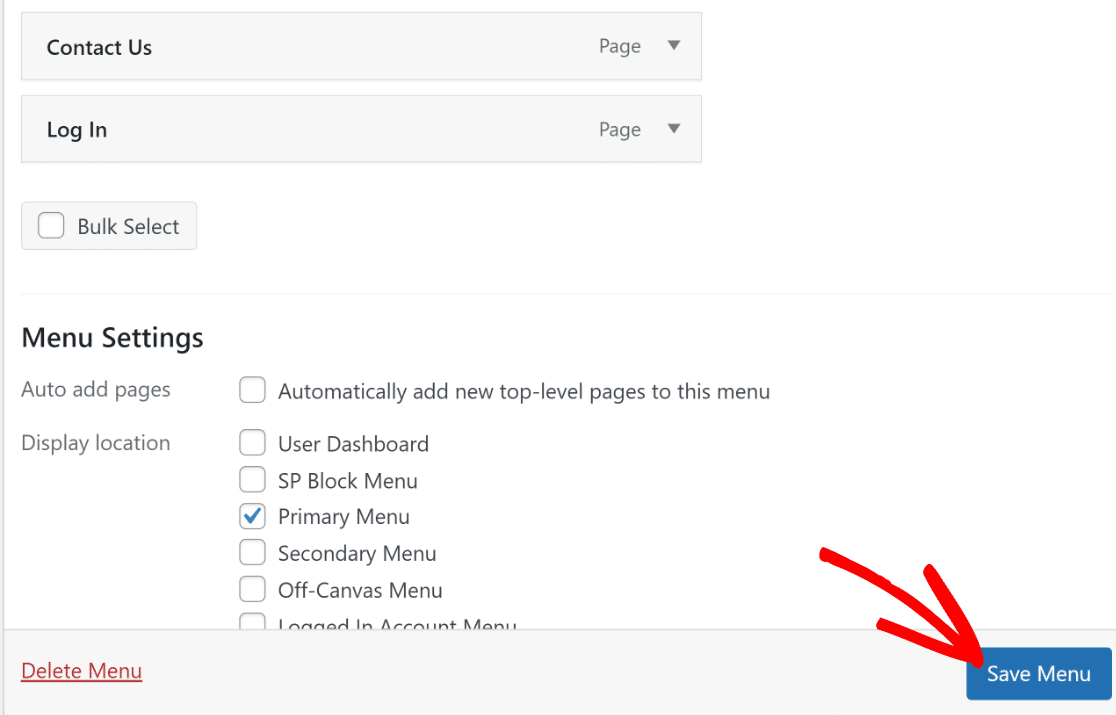
The navigation menu will now include your new login page. It’s a good idea to visit your homepage after updating or creating your menu and ensure everything looks OK.
In case your website doesn’t already have a menu, the process for creating a new menu is very similar to the steps above. The only difference is you’ll have to first give a name to your new menu under the Menu Structure section.
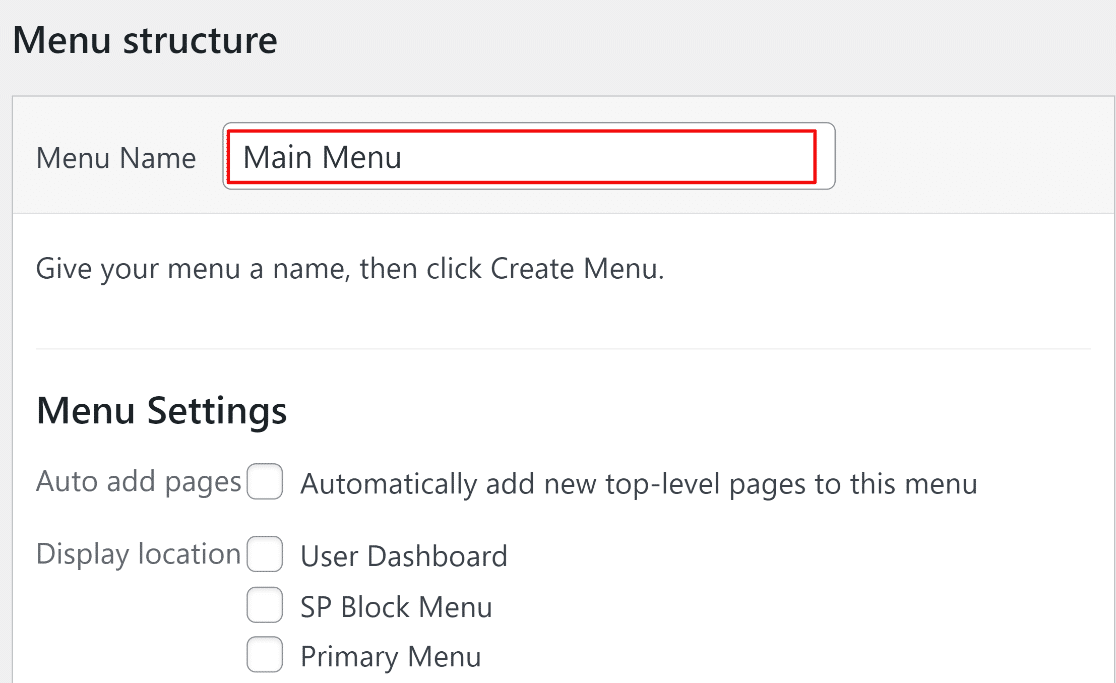
Once that’s done, simply click on the Create Menu button at the bottom.

Now just follow the same steps for updating an existing menu to add the login page to your navigation.

If you also created a custom password reset form, you might want to add it to the menu too.
Step 7: Redirect the WordPress Login Page to Your Custom Login Page
One last step you might want to take is redirecting the default WordPress login page to your custom login page. This makes it so that anyone who tries to access the default WordPress login page will be sent to your new one instead.
To do this, we will add a bit of code using the WPCode plugin.
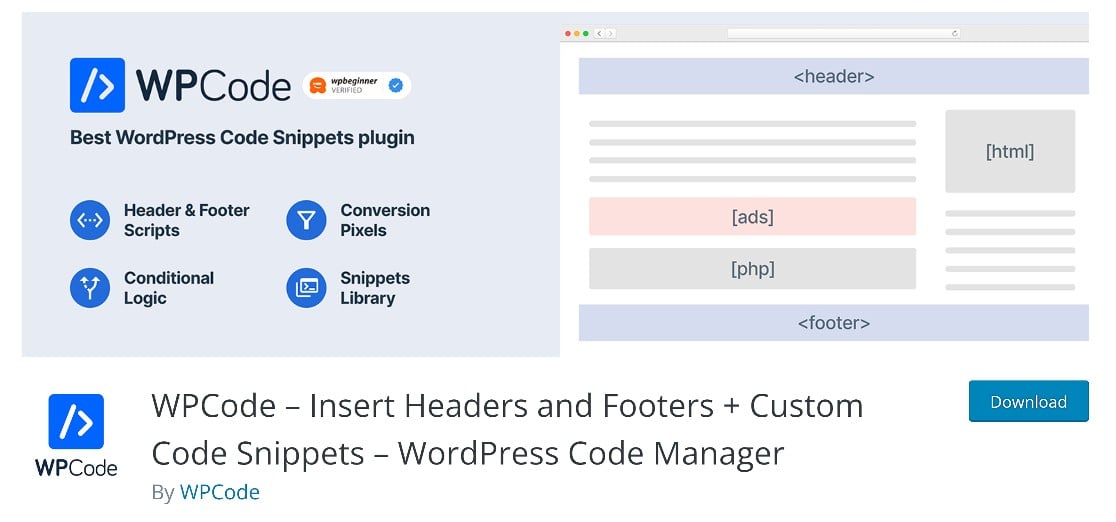
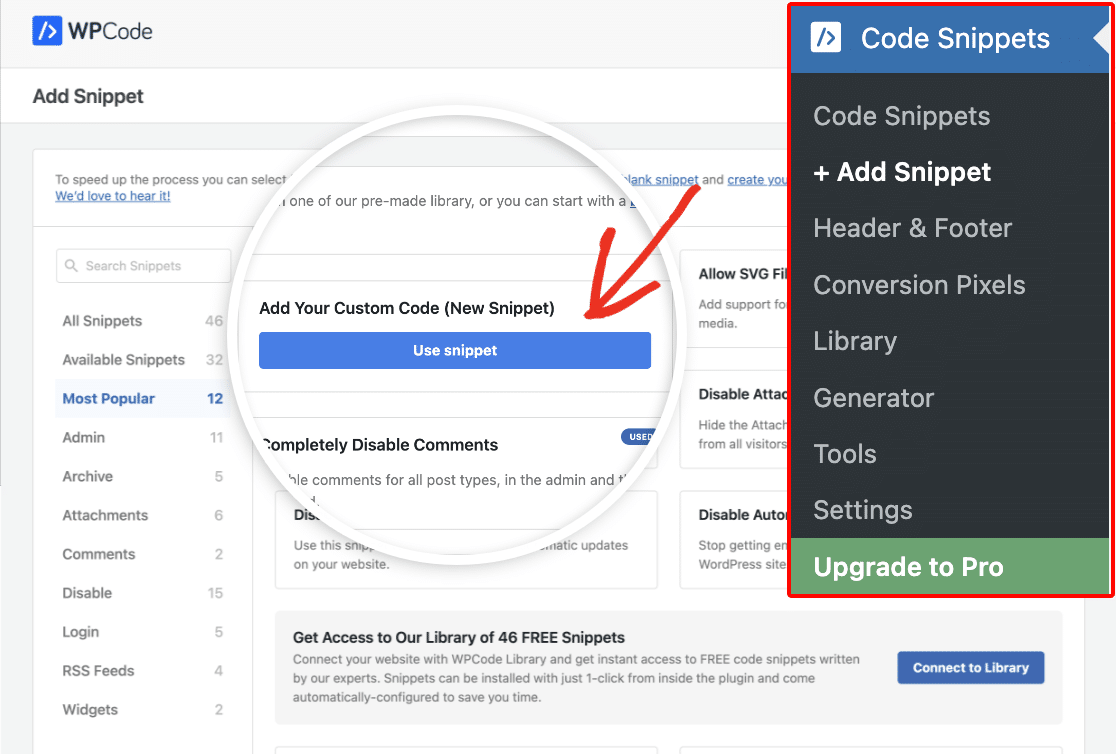
This is a free plugin that lets you easily add custom code to your WordPress site. After you install and activate it, go to Code Snippets » + Add Snippet. Then choose Add Your Custom Code (New Snippet).
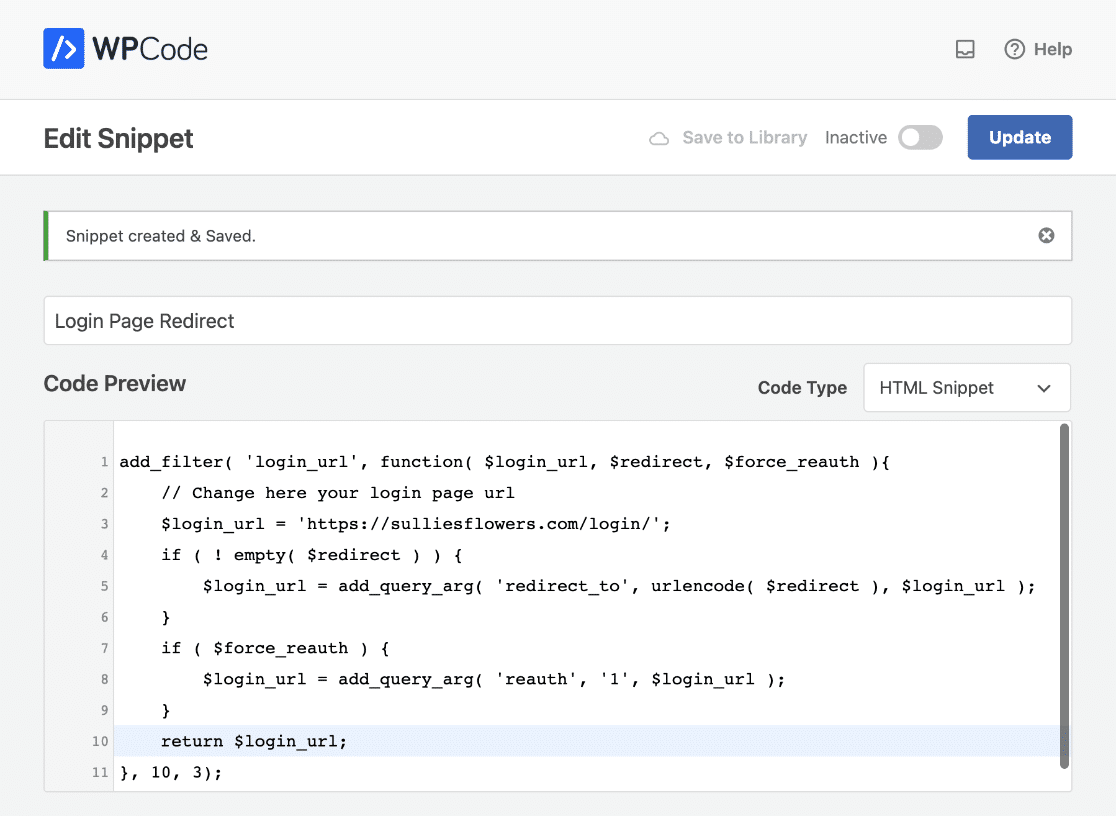
On the next screen, give your snippet a name you can find it easily. We’ve called ours “Login Page Redirect.” Then paste in the following code:
Make sure to change https://sulliesflowers.com/login/ to the URL for your custom login page. Now click Save Snippet.
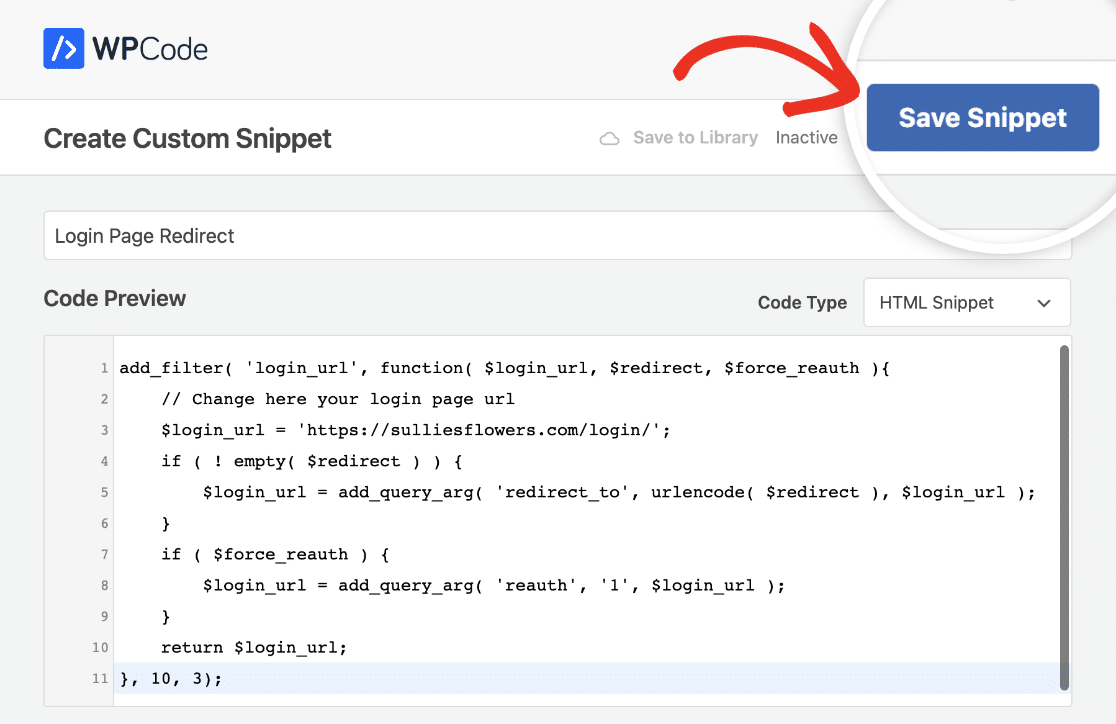
You should see a success message once your redirect has been saved and applied.
Finally, toggle on the setting at the top of the screen to make your snippet Active.
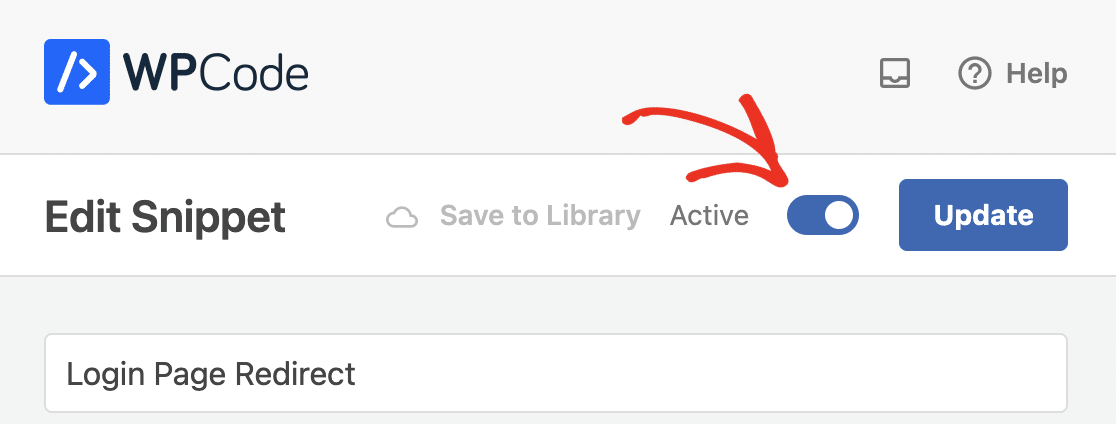
Great! Now users will be sent to your custom page when they try to log in.
Optional: Create a Password Reset Form
If you accept user registrations and allow people to log into your site, we strongly recommend adding a password reset form to your site as well. A reset form enables users to reclaim their account if they’ve forgotten their password or if they suspect they’ve been hacked.
The good news is that the WPFroms User Registration addon also gives you a special password reset form.
Go back to your WordPress dashboard and click on WPForms » Add New. This time, select the User Password Reset Form template.
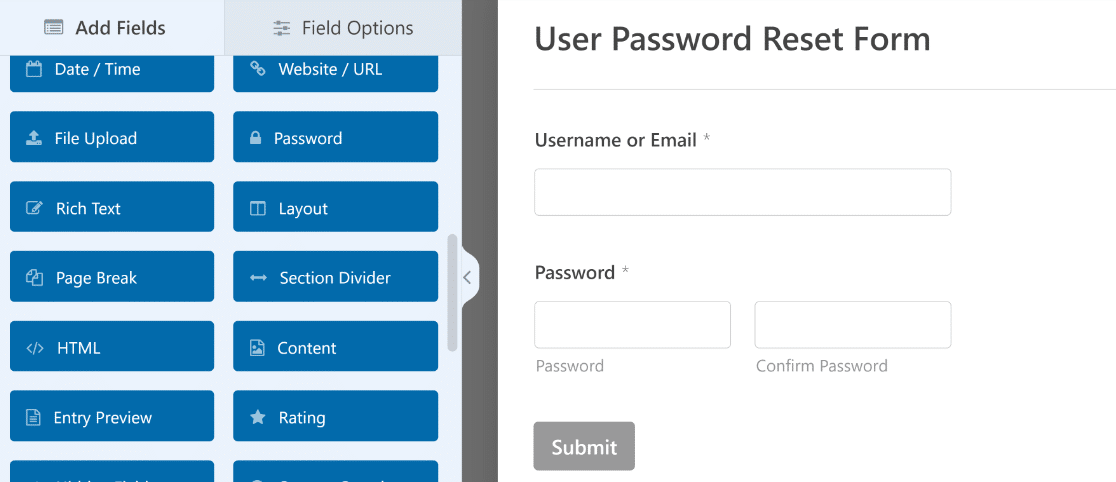
For a complete tutorial on password reset forms, see our guide on customizing password reset form in WordPress.
And there you have it! You now know how to create a custom login form in WordPress. You can use this as a starting point to develop the branding on your login page.
Next, Customize Your Registration Form
Next, check out how to create a user registration form for your site. Making a custom registration form is a great way to make your site look more professional.
You might also want to learn how to prevent unauthorized password resets in WordPress.
Create Your WordPress Form Now
Ready to build your form? Get started today with the easiest WordPress form builder plugin. WPForms Pro includes the User Registration addon and offers a 14-day money-back guarantee.
If this article helped you out, please follow us on Facebook and Twitter for more free WordPress tutorials and guides.



For some reason the password reset fields are not showing up with my form, I inspected the page and they are not being rendered at all. What might be the cause?
Hey Matthew – We’d be happy to help! When you get a chance, please drop us a line in support so we can assist.
If you have a WPForms license, you have access to our email support, so please submit a support ticket.
Otherwise, we provide limited complimentary support in the WPForms Lite WordPress.org support forum.
Thanks 🙂