Do you want to create a free Elementor contact form?
A contact form is vital for all kinds of websites. By including appropriate fields within your form, you can collect the exact information you need from your leads, ensuring effective communication.
Create Your Elementor Contact Form Now! 🙂
In this tutorial, we’ll show you the best way to add a contact form to your Elementor page for free. This option works great with all versions of Elementor, and it’s completely ‘no-code’!
How to Make a Free Elementor Contact Form
Elementor allows you to build a contact us page very easily, but you’ll need more than just Elementor to add a contact form for free on your site.
In This Article
Step 1: Install and Activate WPForms
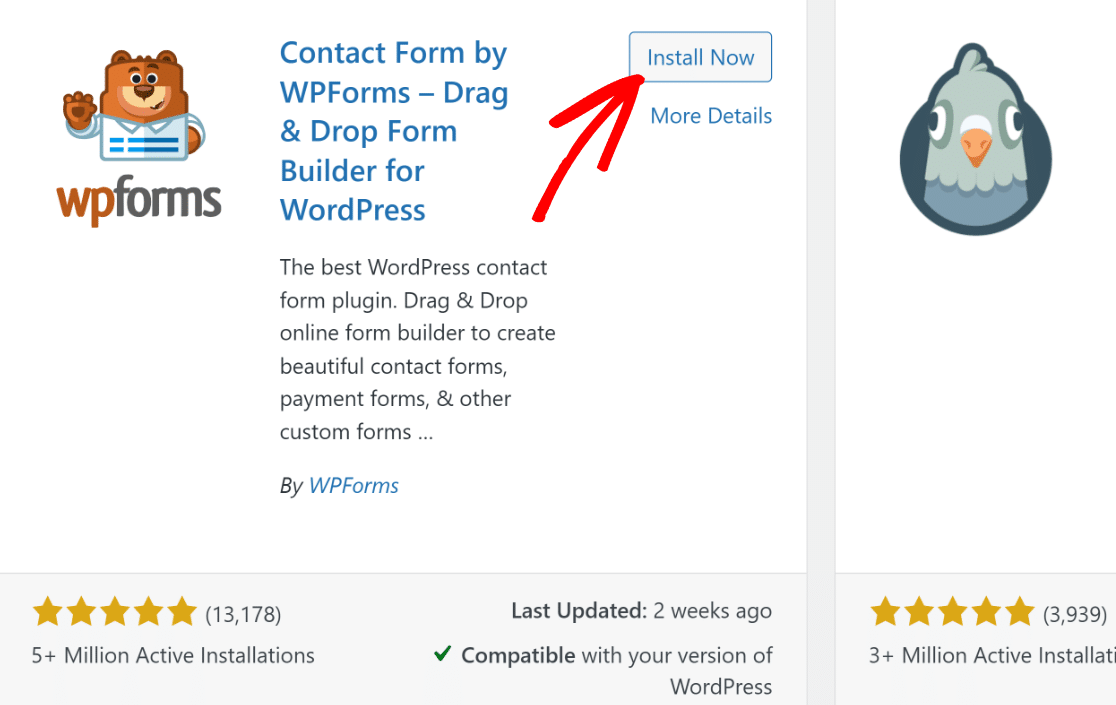
The first thing you’ll want to do is install the WPForms plugin. To do this, open your WordPress dashboard and navigate to Plugins » Add New.

Now, search for WPForms and click on Install when you find it. The installation will take only a few seconds.
Once that’s done, the Install button will now read Activate. Press Activate to finish setting up WPForms on your site. It’s that simple!
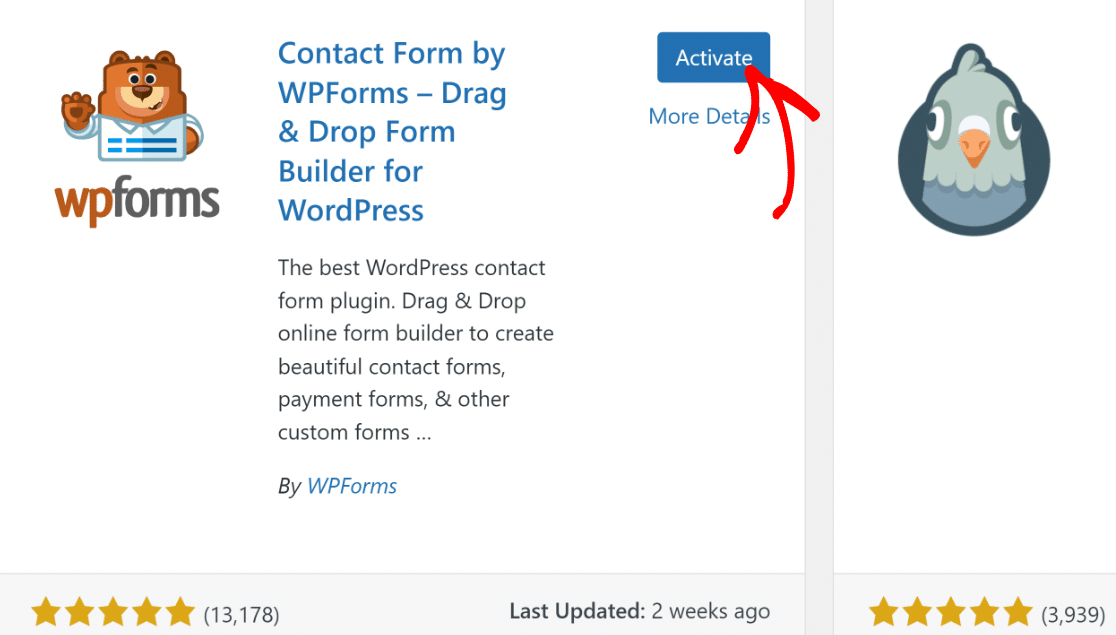
Great! WPForms is now ready to use on your site. Before creating your first form, let’s install Elementor.
Step 2: Get the Elementor WordPress Plugin
You can install Elementor by following the exact same steps as highlighted above. Simply go to Plugins » Add New, look for Elementor, and install it.
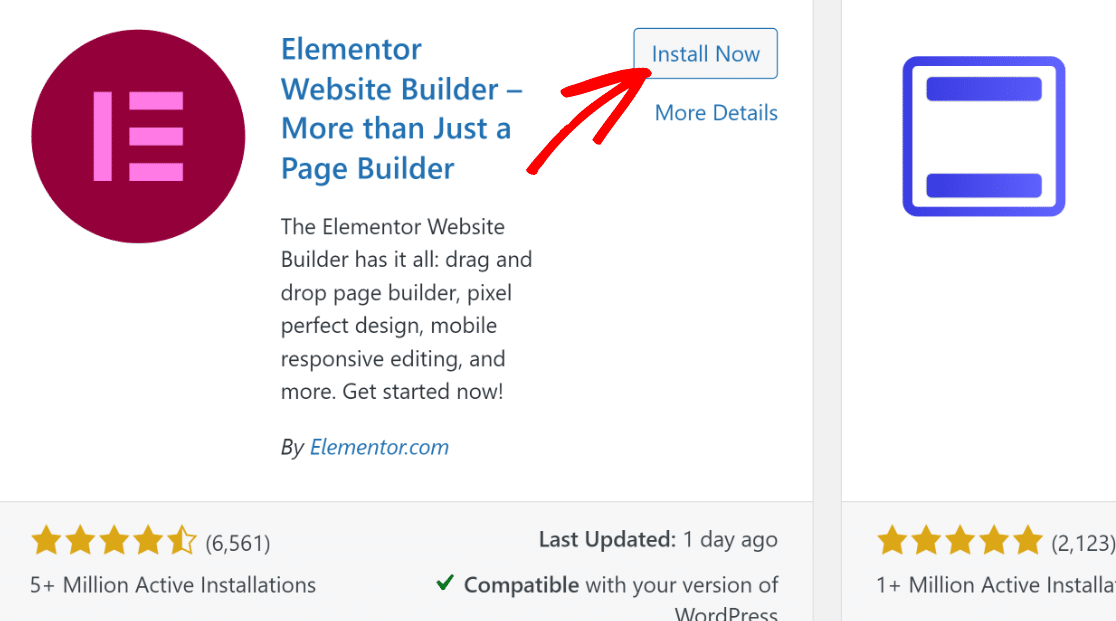
With the installations out of the way, you can now go ahead and create your contact form, as we show in the next step.
Step 3: Make Your Elementor Contact Form
You can immediately start creating your contact form by navigating to WPForms » Add New.
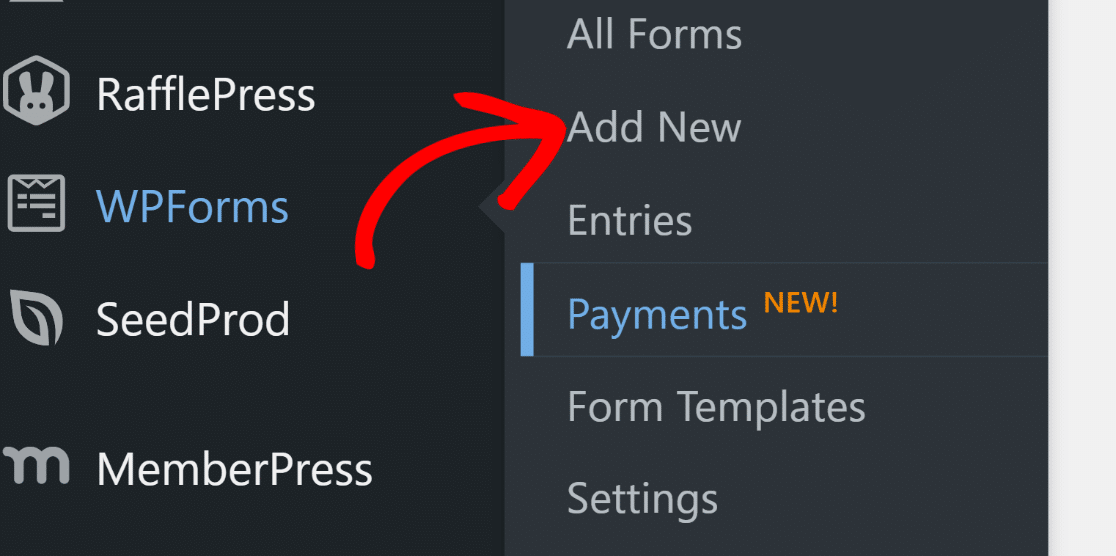
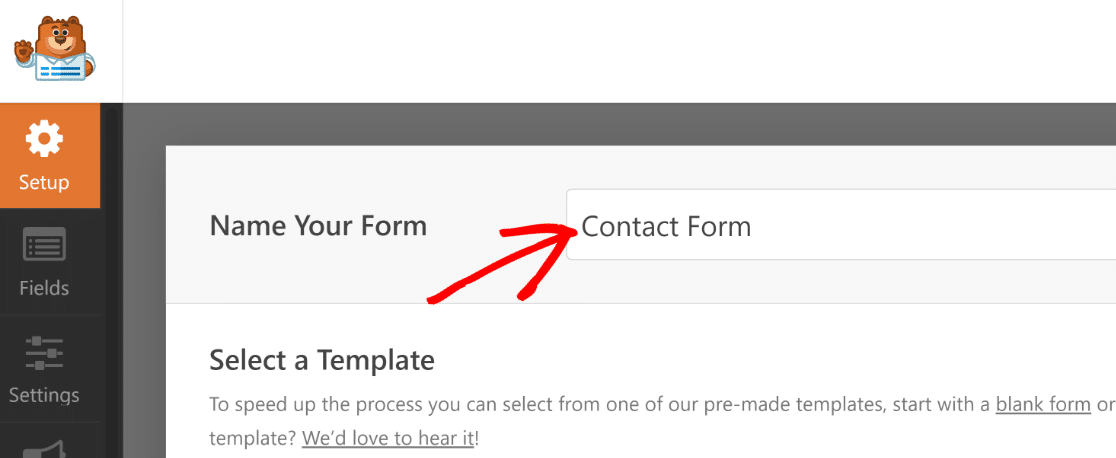
This will load up the WPForm builder in a few seconds. Start by naming your form so you can easily identify it if you later need to make any edits.
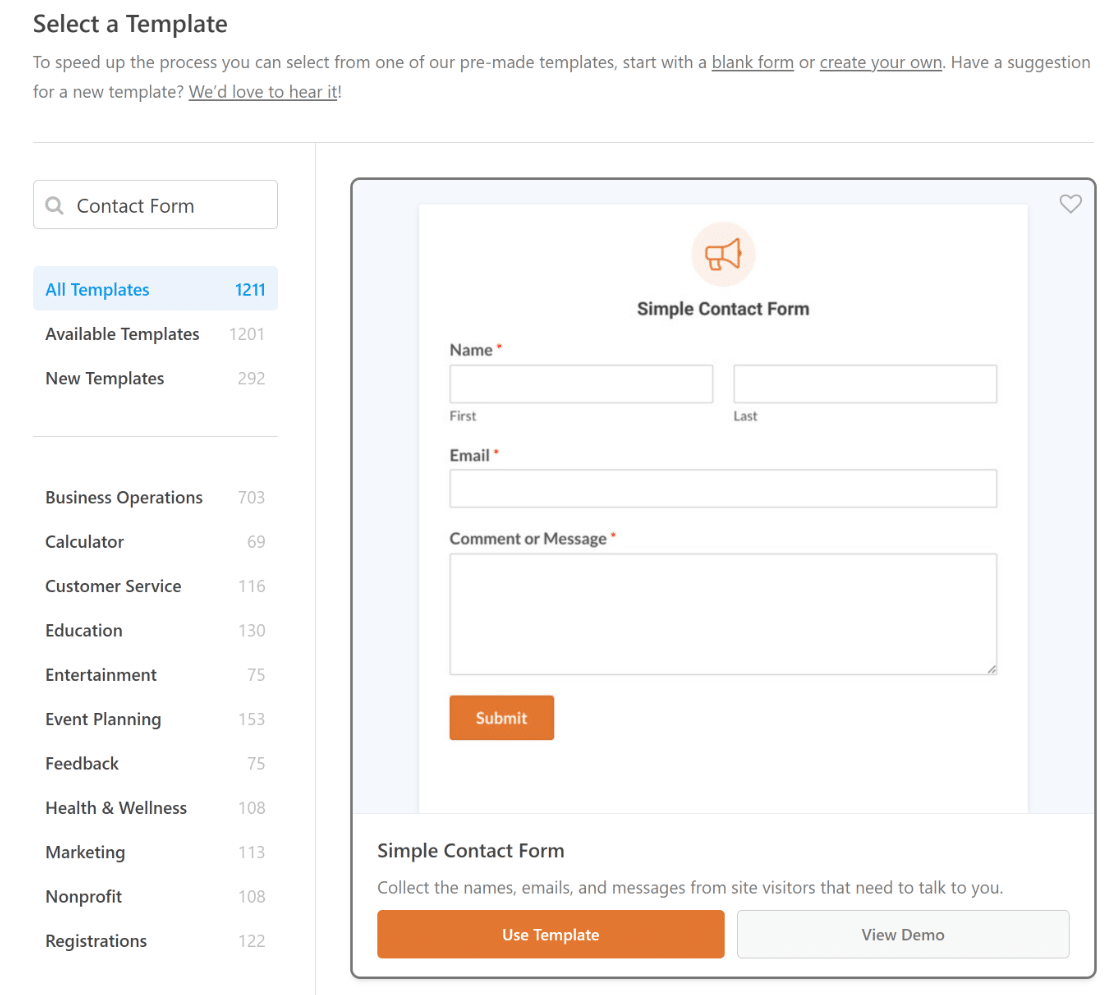
Scroll down a little, and you’ll see the form templates. If you’re using WPForms Lite, you’ll have dozens of free templates to choose from.
Later on, you can upgrade to Pro to access 2,000 WordPress form templates for customer service, marketing, and various other categories.
Because we need a contact form, the free Simple Contact Form Template is ideal for our purposes in this post.
You can search for this template in the search box and click on the Use Template button when it appears on your screen.
After you’ve chosen a template, the WPForms builder will open. The WPForms user interface is designed to be super easy for anyone to use.
On the left, you can see all of the fields that are available to add to your contact form. On the right, you can see a live preview of your form.
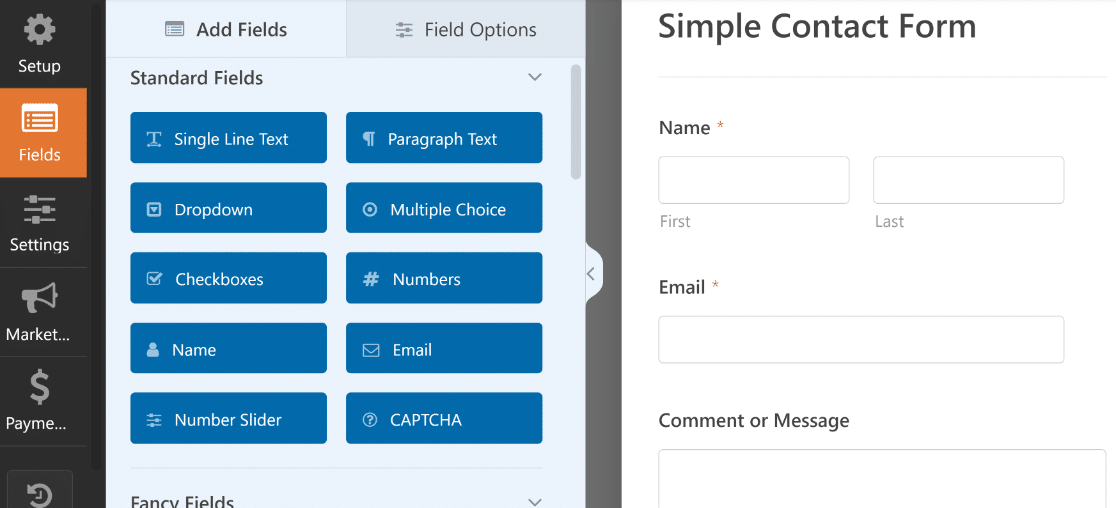
If you want to customize the template, just drag any form field from the left-hand panel to the form on the right.
You can add dropdown lists and multiple-choice questions and also drag fields up and down to move them around on your form.
If you want to open the field settings, click on the field once in the builder. The settings will appear next to the form preview in the left-hand panel.
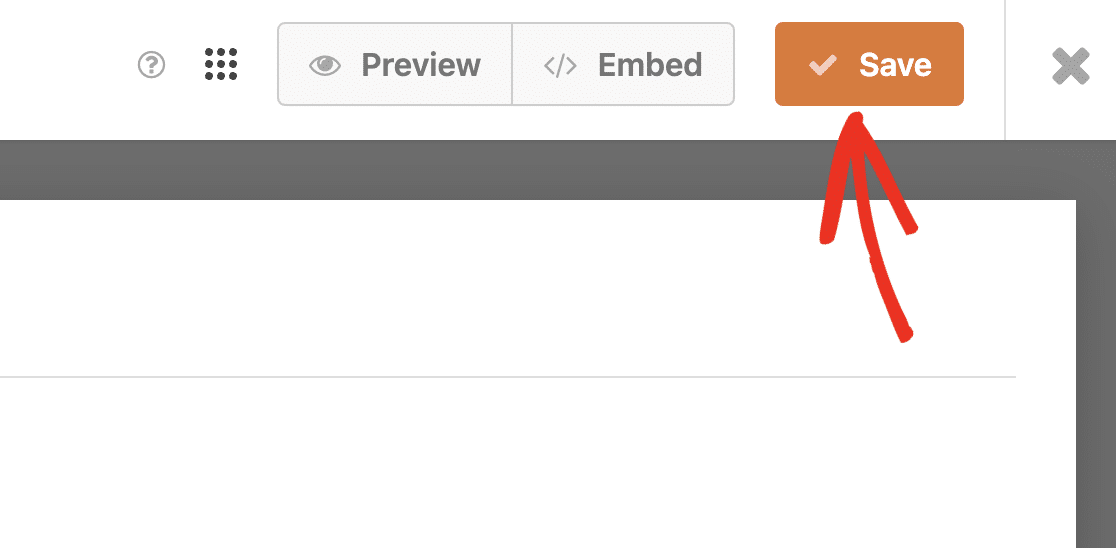
Go ahead and click on each field to set it up the way you want it. When you’re done, click Save at the top.
Creating a signup form instead? We’ve got a separate tutorial for creating a custom Elementor signup form.
There’s all sorts of conveniences you can enjoy with WPForms. For instance, you can even use it as a gateway to connect Elementor Forms with Google Sheets!
Step 4: Set Up Form Confirmation Email & Message
Now let’s check the messages that will be sent when the form is submitted. In the form builder, click Settings, and then click the Notifications menu item on the left.
On the right, you can see the notification email that will be sent to you when your form is submitted. You can customize the email here if you want to.
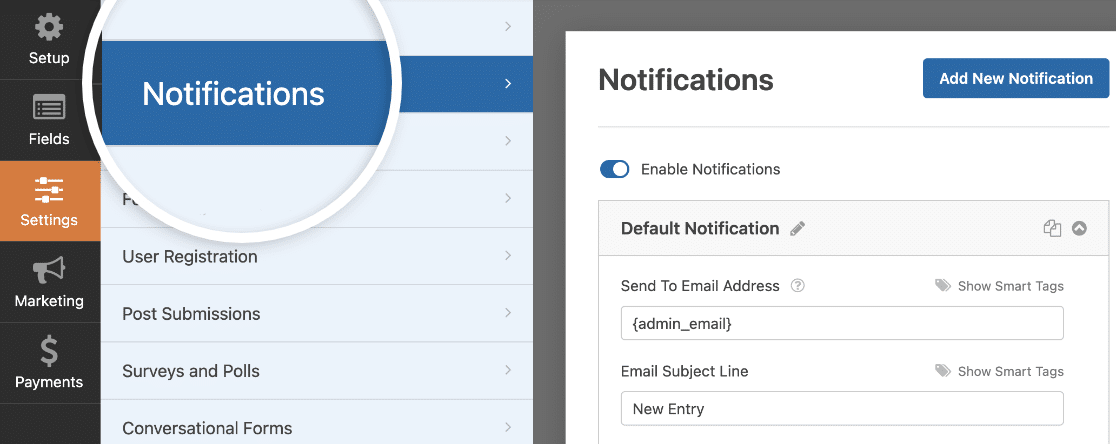
Did you notice that the email will be sent to {admin_email}? That’s a placeholder for the Administrator email address in WordPress.
You can delete {admin_email} and type in your business email address here, or change the admin email address in WordPress if it’s wrong.
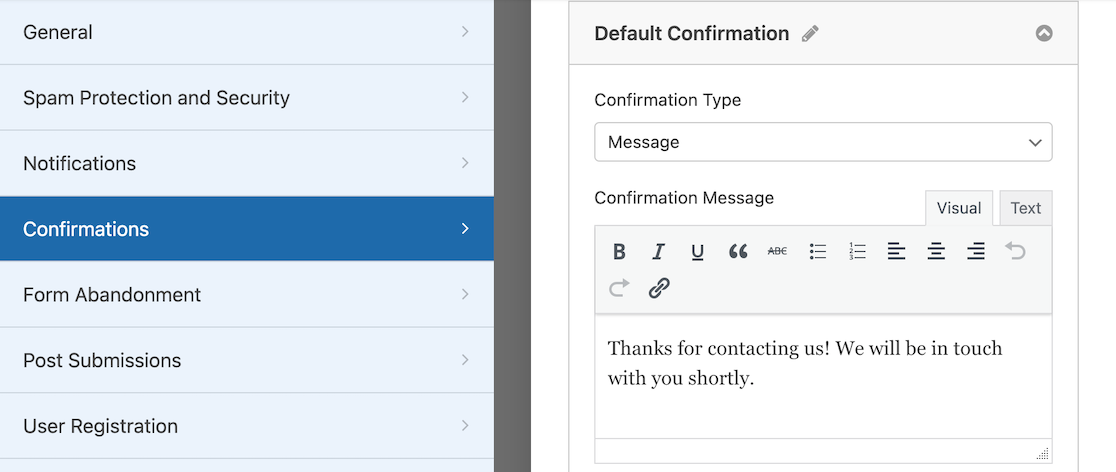
Next, click Confirmations. On this screen, we can customize the message that shows up on the front end when the form is submitted.
This is optional, so you can just leave the default message if you’re happy with it.
And that’s it! It’s time to click the Save button at the top. You can close the form builder by clicking the X at the top-right of the form builder window.
Great job! Your Elementor form is ready, and we just need to publish it to make it go live and start collecting information.
Step 6: Create Your Elementor Contact Us Page
In this step, we will build a custom Contact Us page using Elementor. From the WordPress dashboard, click on Pages and then press the Add New button.
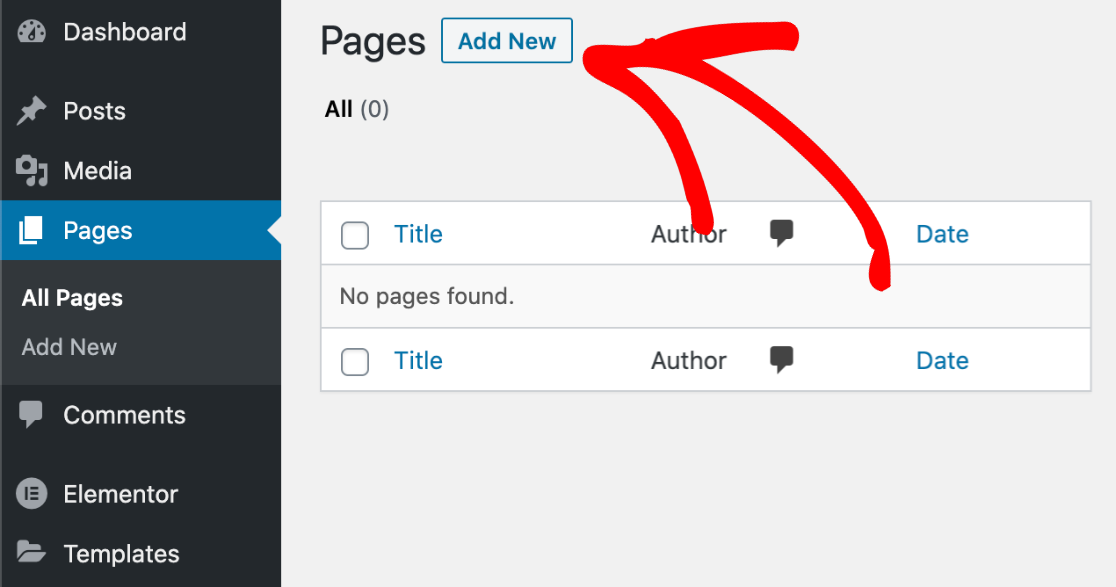
Go ahead and type your page title at the top. After that, click on the blue Edit with Elementor button.
This will launch the Elementor page builder interface, where you can add a contact form and customize other elements of the page.

Wait a few seconds for Elementor to load up in your browser. On the left, you’ll see different elements that you can add to your page.
Look under the Basic section to find the WPForms block, which you can use to add the form you’ve created earlier.
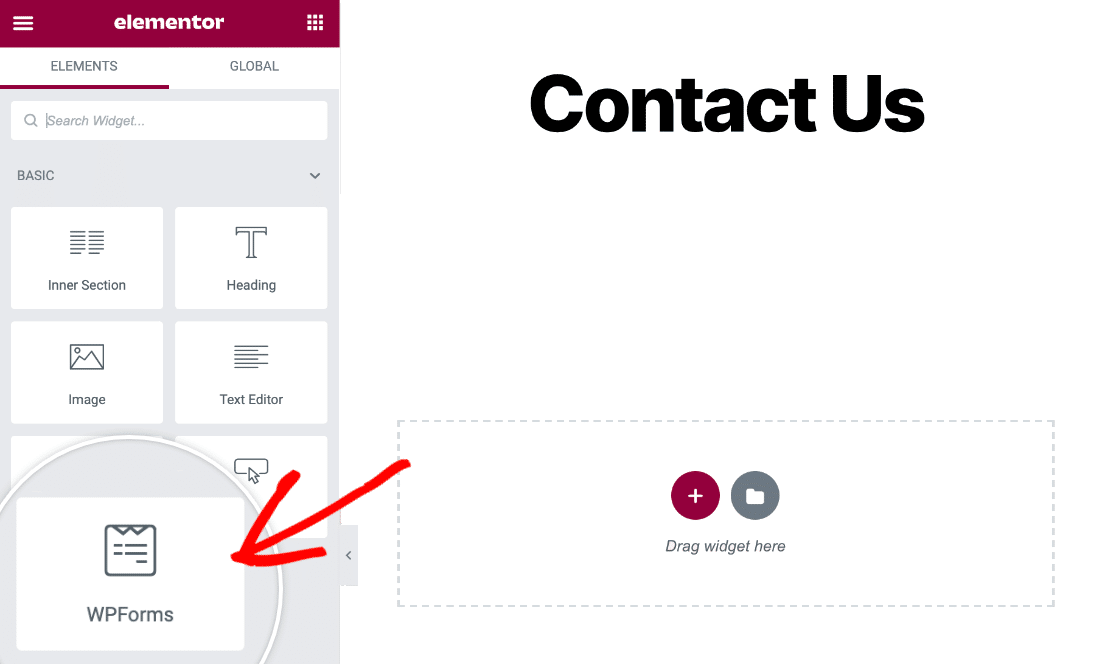
Go ahead and drag and drop the WPForms block onto your page, then click on the dropdown to select the form you just created.
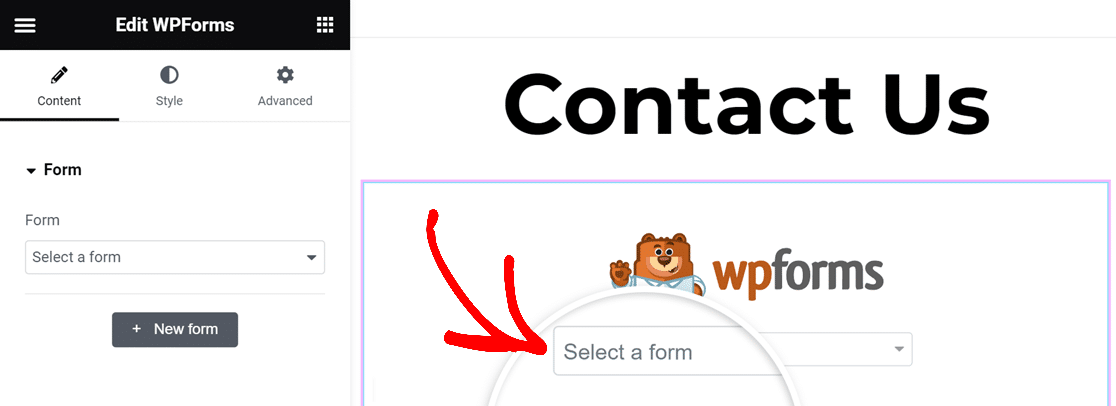
As soon as you select the form, it will appear on the page. Great job! And we’re done using the form builder. All we need to do now is publish the Contact page.
Step 7: Style and Publish Your Elementor Contact Us Page
Publishing the contact page is a breeze with Elementor. But did you know that you can also style your form using Elementor’s WPForms block options?
To do that, click on the area around the embedded form on your page to open block options on the left-hand pane. Then click on the Style tab.
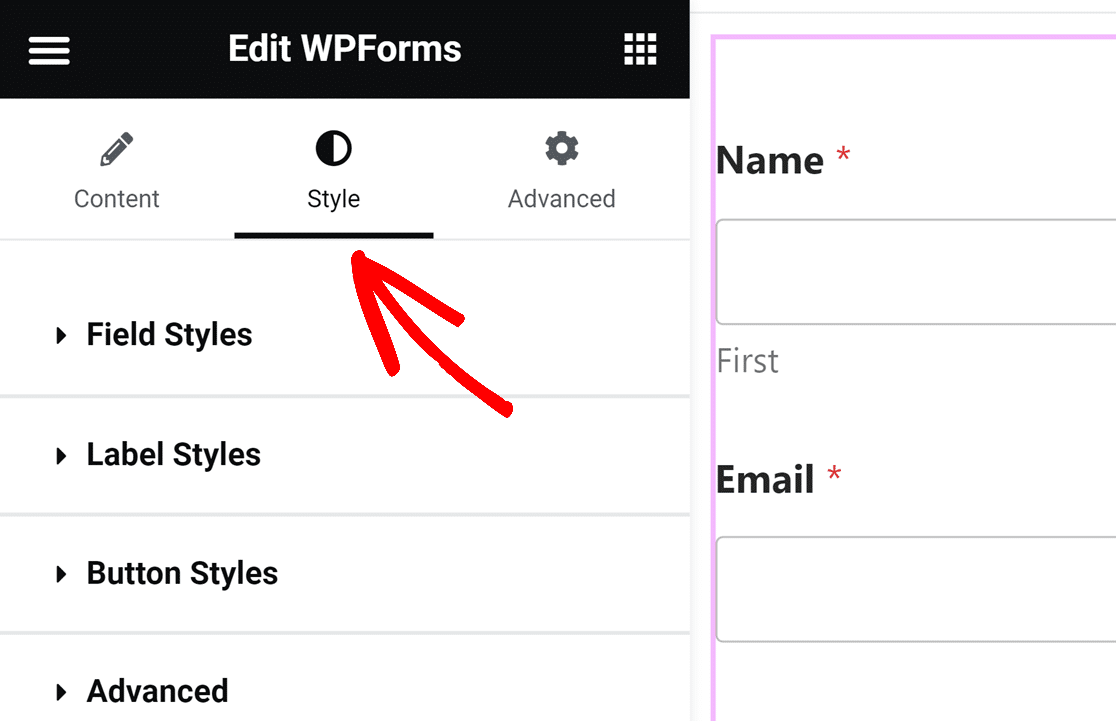
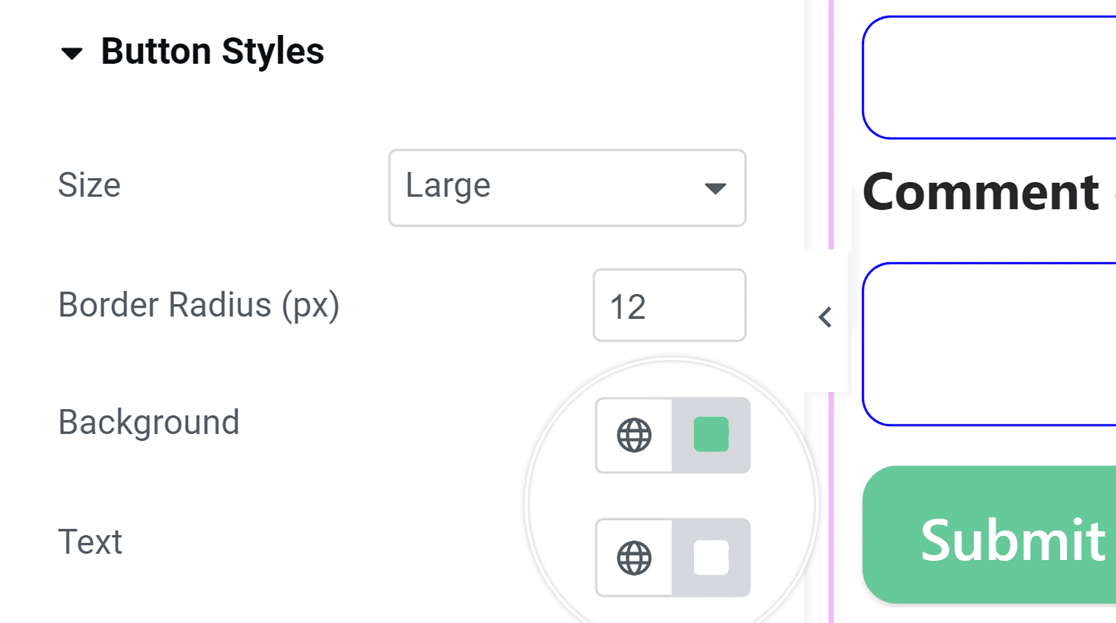
Under the Style menu, several settings are associated with different aspects of your form design. These options can be used to change the styles of your field, label, or button.
For instance, we used the Button Styles settings to increase the size, border radius, and color of the button in just a few clicks.
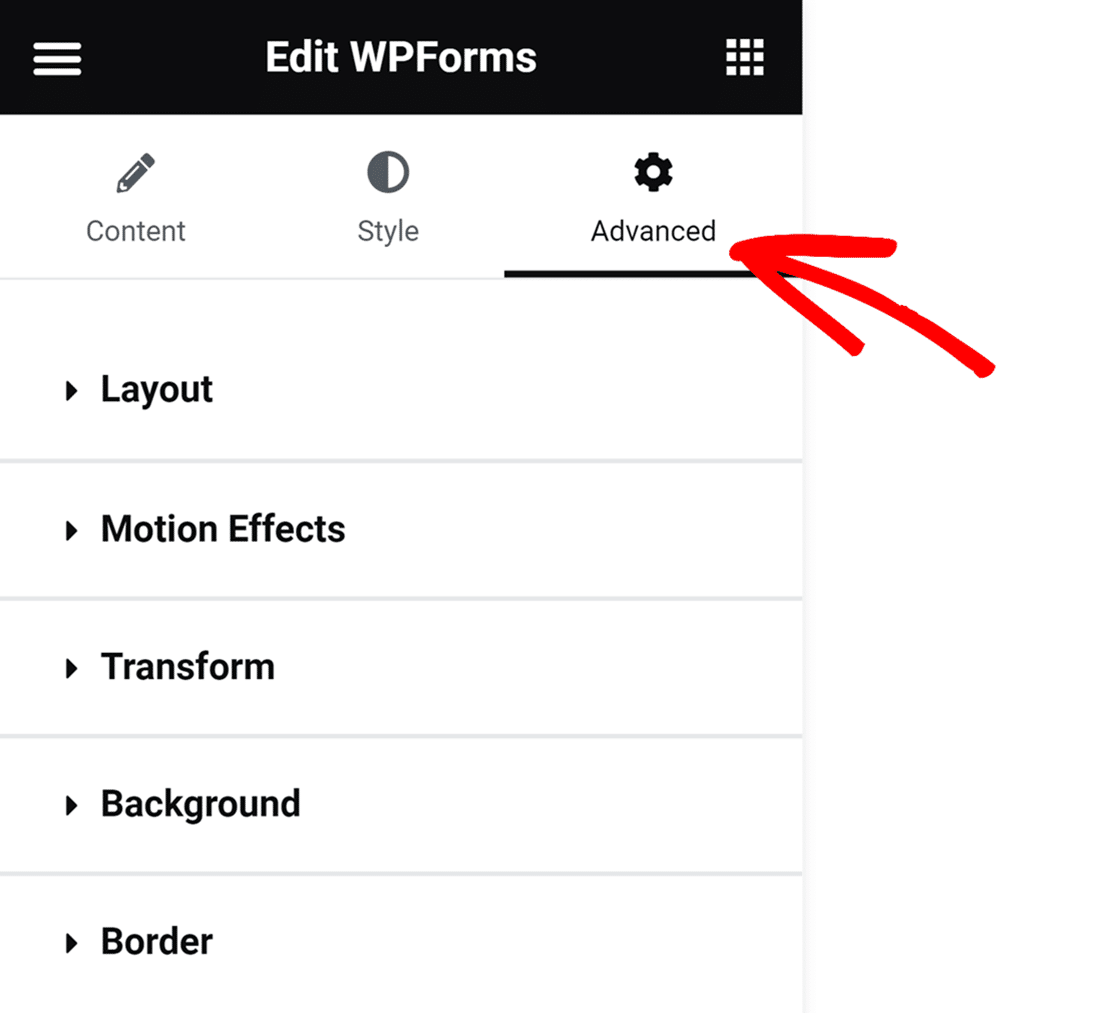
You can access even more advanced options by clicking the Advanced tab. This includes settings for form layouts, motion effects, page backgrounds, and more.
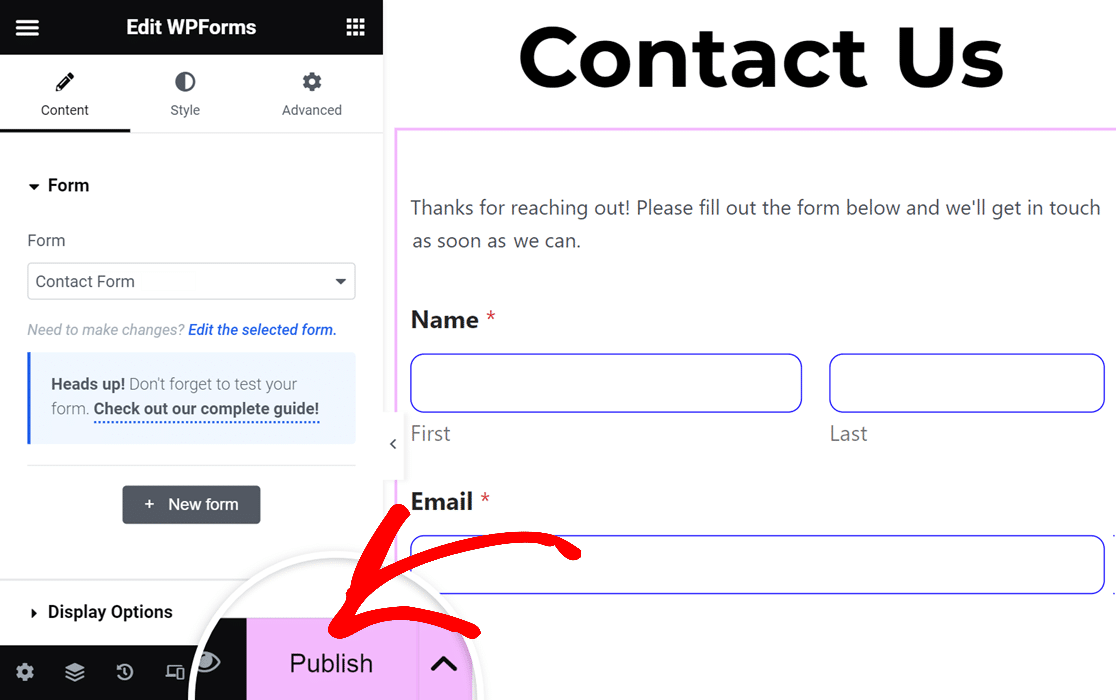
When you’re done with customizing the form styles, it’s time to publish your form. Simply click on the Publish button at the bottom toolbar.
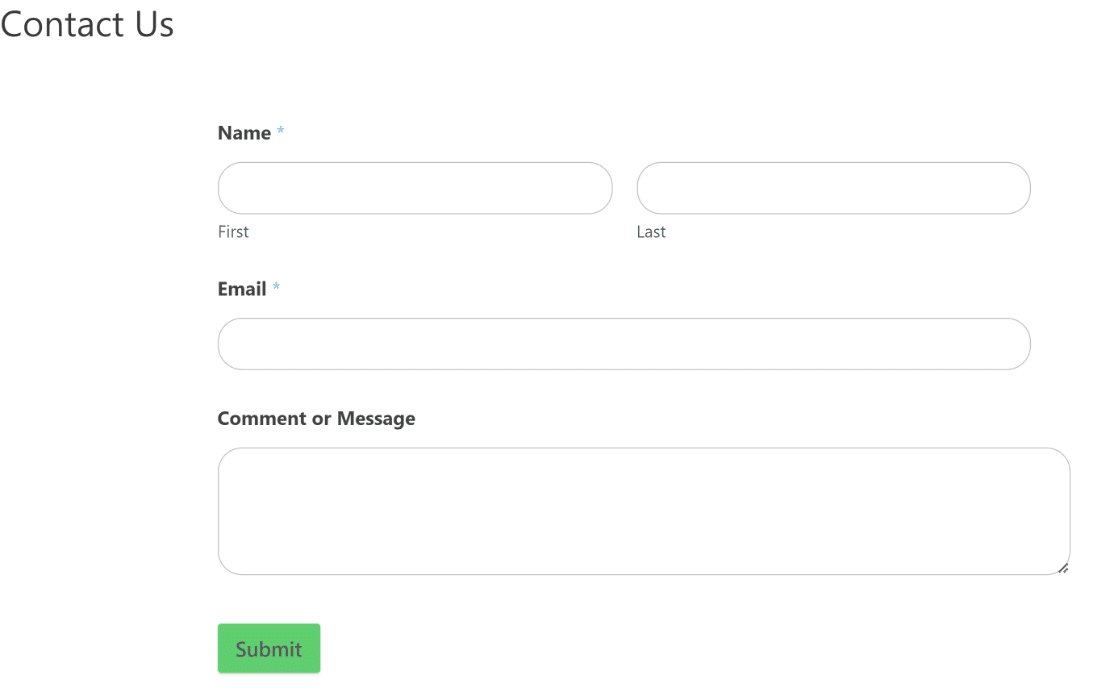
Finally, click Have a Look to see your contact form on your website. And that’s it! Your Elementor contact us page is live and ready to get responses.
Create Your Elementor Contact Form
FAQs about Creating an Elementor Contact Form
Elementor contact forms are a popular topic of interest among our readers. Here are answers to some common questions about it:
Does Elementor Have a Contact Form?
Yes, Elementor has a contact form block available in the Pro version. You can use this block to easily add a form to your page while you’re editing the page in Elementor.
While Elementor’s form block is only available for paid users, you can use the WPForms block for free. You’ll need to have both WPForms and Elementor installed to access the WPForms block in Elementor.
How do I add a contact form to my Elementor free?
To add a contact form using the free version of Elementor, you can integrate a plugin like WPForms. First, install and activate the WPForms plugin from your WordPress dashboard. Once activated, create a form using the WPForms builder.
How do I create a form in Elementor?
Creating a form in Elementor can be easily done with the WPForms plugin. Install WPForms from your WordPress plugin section and activate it. Use the WPForms’ simple drag-and-drop interface to create your form.
How do I create a custom contact form in Elementor?
WPForms is highly recommended for creating a custom contact form in Elementor because of its flexibility and ease of use. After installing and activating WPForms, open the plugin and select ‘Add New’ to create your custom form.
Customize your form by adding or removing fields according to your needs. Once completed, save the form. In Elementor, add the WPForms block on the page you’d like the form on, select your form, and publish the page!
Fix Elementor Contact Form Notification Emails
Are you having trouble receiving Elementor contact form submissions by email? It’s easy to fix this problem so you always get your email notifications. Check out this guide to fix Elementor contact forms not sending email.
And if you want to learn about some additional form builders for Elementor, check out this article on contact form plugins that work well with Elementor to improve user engagement on forms and eventually your lead generation.
Create Your WordPress Form Now
Ready to build your form? Get started today with the easiest WordPress contact form plugin. WPForms Pro includes tons of premium addons and offers a 14-day money-back guarantee.
If this article helped you out, please follow us on Facebook and Twitter for more free WordPress tutorials and guides.

