
AI Summary
Want to add a map to your WordPress contact form so visitors can easily find your business location? Adding a map to your form helps visitors know exactly where you’re located before they reach out.
It’s especially useful if you have a physical storefront, office, or service area that customers need to visit. But maps on contact forms can do more than just display your location.
With the right setup, you can also help visitors fill out address fields faster with autocomplete, or even display multiple locations if you have several offices or stores.
In this tutorial, I’ll show you two ways to add maps to your contact forms in WordPress. Both methods use WPForms and its Geolocation addon. Let’s get started!
Why Add a Map in a Contact Form?
Sure, it’s no secret that most small business owners with websites know why you need a contact form. But, you might be wondering why you would add a map to that contact form.
If you run a local business, adding a map to your contact form makes it instantly clear where you’re located. This can be a great idea for several reasons:
- If customers need to visit your business in person, a map removes any guesswork. They can see exactly where you’re located before they contact you, which reduces “where are you located?” questions in your inbox.
- When you enable address autocomplete, visitors can type a few letters and select their full address from a dropdown. This speeds up form completion and reduces typos that could cause communication issues.
- Have more than one office or store? You can embed an interactive map that shows all your locations and lets visitors select which one they want to contact or visit. This routes inquiries to the right team automatically.
- A map on your contact page signals that you’re a real business with a physical presence. This is especially important for local services, retail stores, or professional offices.
The best part? Instead of having to code a map into your website yourself or pay a web developer, you can do it easily with WPForms Pro. It’s one of the best map plugins for WordPress!
How to Add a Map to Your WordPress Contact Form
With WPForms Pro and the Geolocation addon, you can add map features to your contact forms in no time. Follow these easy, step-by-step instructions to get started:
Step 1: Download the WPForms Plugin
WPForms is a powerful form builder that makes it easy to create contact forms, registration forms, and more. It has over 2,100+ WordPress form templates you can use.
What I like most about WPForms is how it combines form building with built-in geolocation tools. You don’t need to piece together multiple plugins or write custom code to add maps to your forms.
To add maps to your contact forms, you’ll need WPForms Pro, which includes the Geolocation addon and all the map features we’ll cover in this tutorial.

To get started, purchase a WPForms Pro license. Then, install and activate WPForms on your website. If you need help with installation, follow this step-by-step guide on how to install a WordPress plugin.
Step 2: Install and Activate the Geolocation Addon
Now that WPForms Pro is installed, you need to activate the Geolocation addon. This is what powers all the map features in your contact forms.
In your WordPress dashboard, go to WPForms » Addons. Use the search bar to locate the Geolocation addon, then click Install Addon. Once it installs (usually just a few seconds), click Activate.
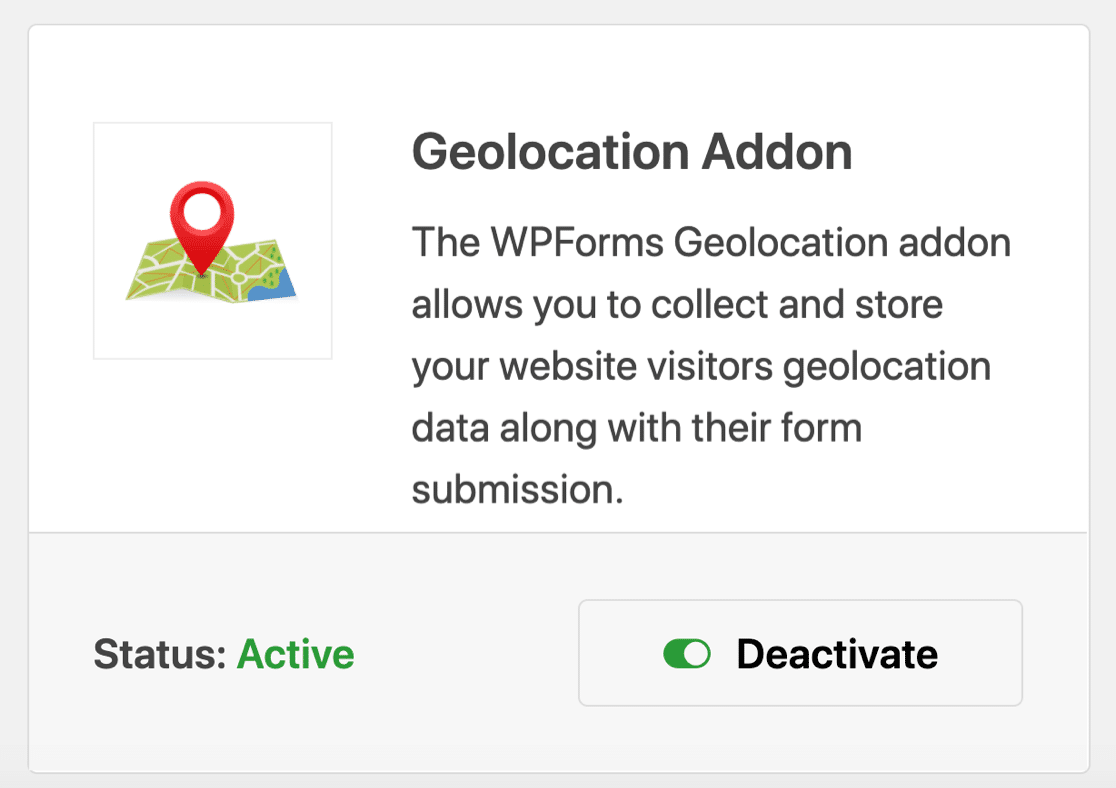
With the addon activated, you now have access to three ways to use maps in your forms:
- Display Your Business Locations: Show visitors exactly where your business is located with an embedded map on your form. This works great for local businesses, offices, or stores where customers visit in person.
- Enable Address Autocomplete: Visitors can fill out address fields faster with autocomplete suggestions. As they type, their full address appears in a dropdown, reducing errors and speeding up form completion.

I know that sounds technical, but WPForms has a step-by-step guide that makes it way easier than it sounds. For complete setup instructions, check out the Geolocation Addon documentation.
Once you’ve added your API key and saved the settings, you’re all set. The Geolocation Addon is now ready to use, and you can start adding interactive maps to your forms.
Step 3: Create Your Contact Form
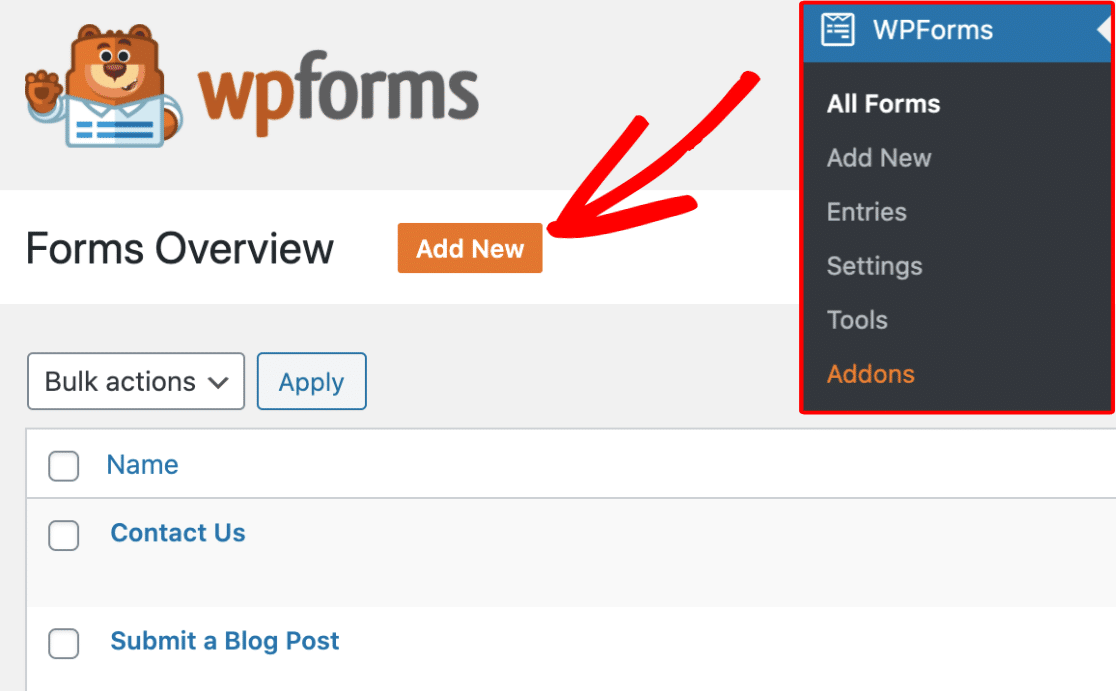
With the Geolocation addon configured, you’re ready to build your contact form. This takes about 5 minutes. Go to WPForms » Add New in your WordPress dashboard to open the form builder.
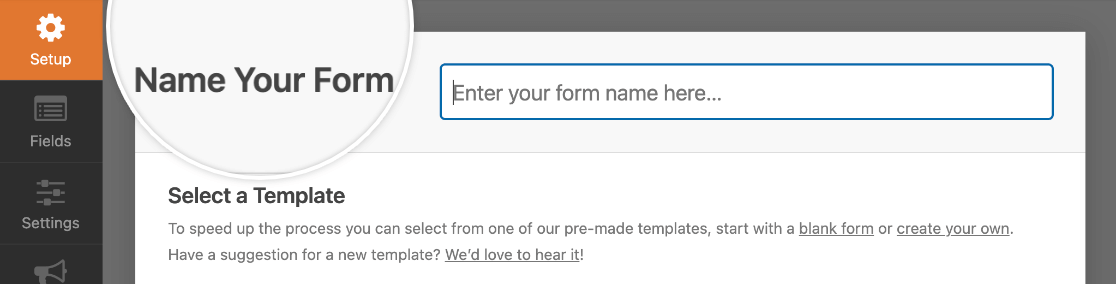
Give your form a name in the Name Your Form field. Something like “Get in Touch” works well. You’ll see a few options here. If you want to save time, you can choose from any of our 2,100+ WordPress form templates.
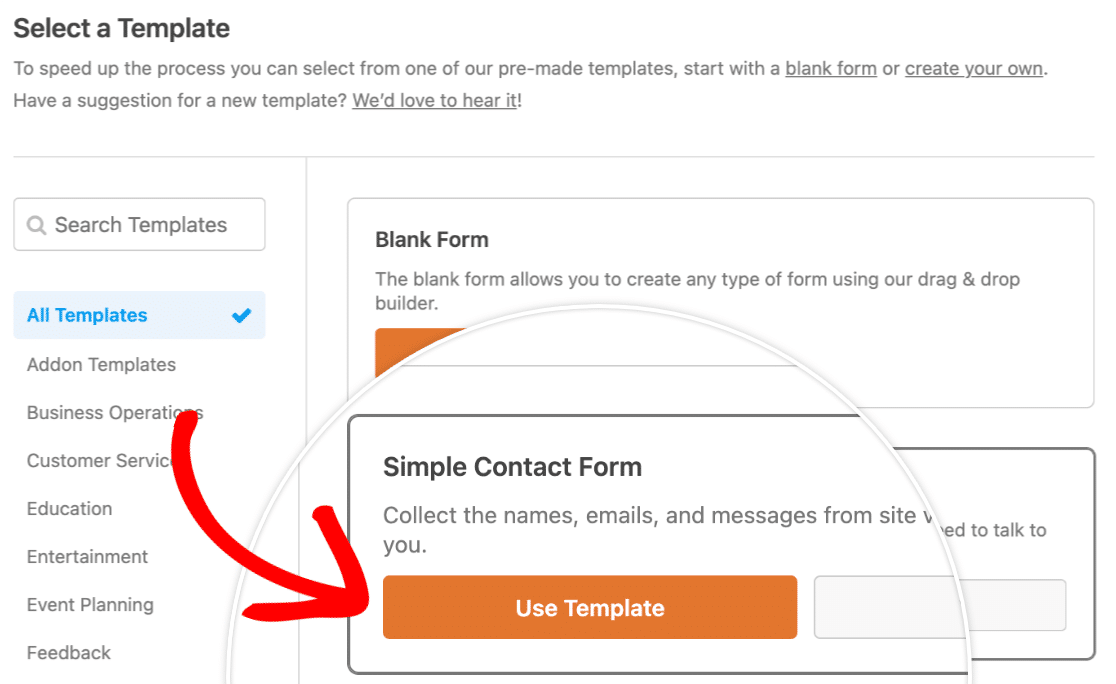
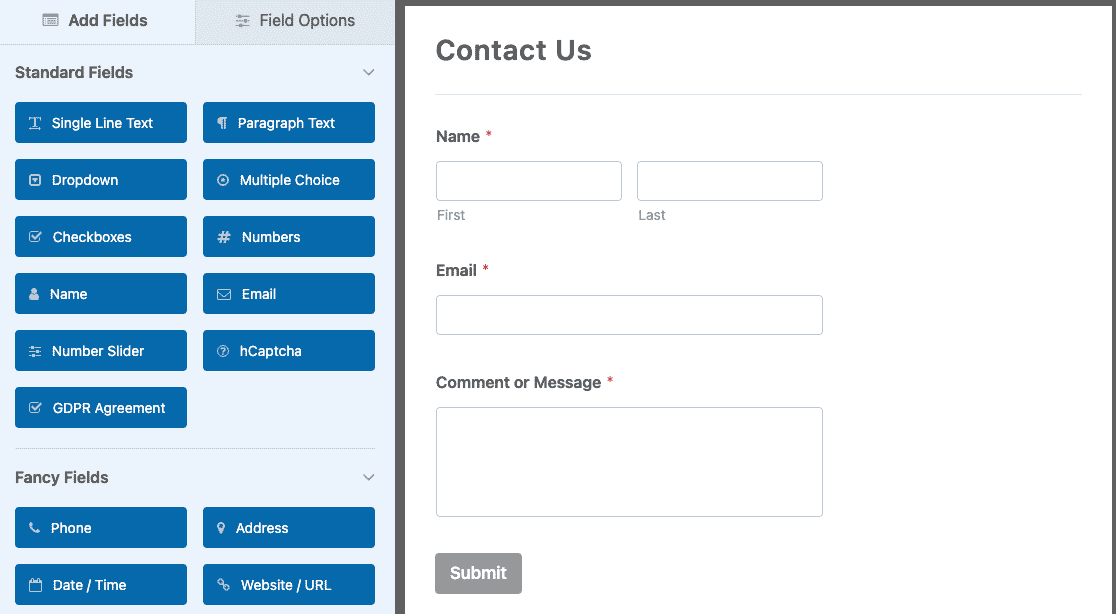
I recommend choosing the Simple Contact Form Template. This gives you a ready-made contact form with the essential fields already added.
The template includes a Name field, Email field, and Comment or Message field. You can customize these fields, add new ones, or remove any you don’t need. The form builder uses drag-and-drop, so rearranging fields is simple.
Now, there are probably a few more things other form settings you might want to configure, like notifications and confirmations. If so, (and I highly recommend this) check out our detailed guide on creating your first form.
Pro Tip
Another option if you don’t want to manually set up every field but have custom requirements is to let the WPForms AI Form Builder handle it for you.
Simply hover over the purple Generate With AI button and click Generate Form. You’ll land on the AI form builder screen. This is where you describe what kind of form you want.
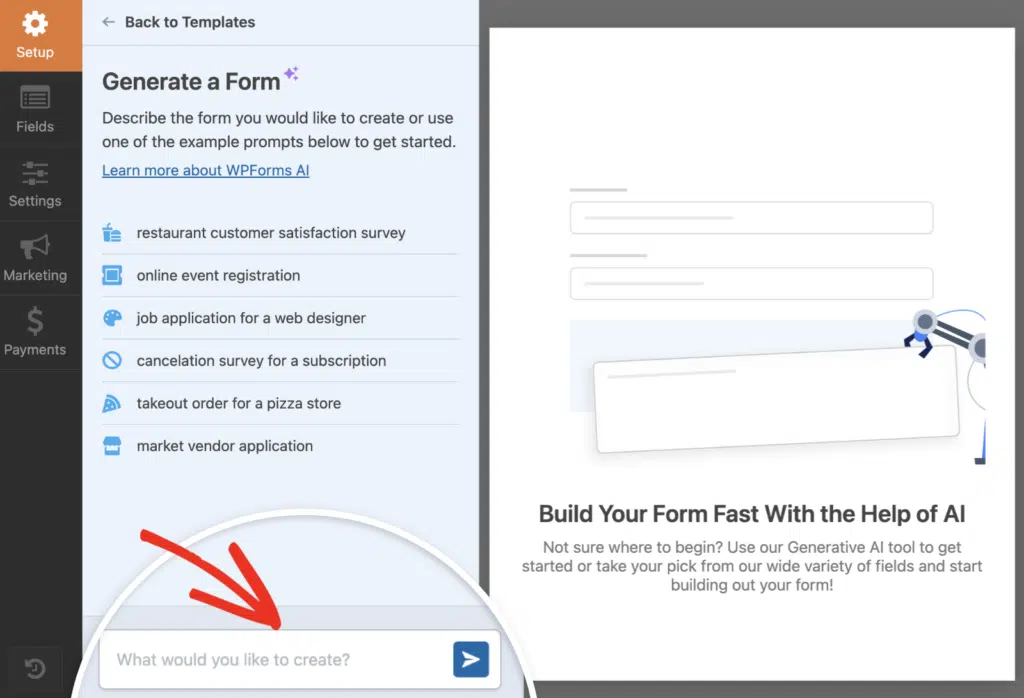
You can type your own prompt or choose from the suggestions on the left. Once you hit generate, the AI takes a few seconds to build your form.
Step 4: Add a Map to Your Contact Form
Now comes the important part of adding a map to your contact form. WPForms gives you two ways to do this, depending on what you want to accomplish:
- Option 1: Display Your Business Location (Map Field)
- Option 2: Add Address Autocomplete for Visitors (Single Line Text or Address Field)
Let’s walk through both options so you can choose the one that fits your needs.
Option 1: Display Your Location with the Map Field
Use this option if you want to show visitors where your business is located. This embeds an interactive map directly on your contact form.
In the form builder, scroll down the left panel to Fancy Fields and you’ll see the Map field listed there. Go ahead and drag it into your form preview on the right.
Where you place it depends on your preference. Some people like putting it at the top so it’s immediately visible. Others prefer it lower down. Pick what feels natural for your form layout.

After adding the Map field, select it to bring up its configuration options on the left. Find the Locations section, as this is where you’ll enter your business addresses.
Click into the Address box and begin entering your location. You’ll notice autocomplete suggestions appearing as you type. Choose the right match to lock in the precise map coordinates.

Now add a Name for this spot. Use something descriptive like “West Branch” or “Corporate Headquarters.” Visitors will see this label when they interact with the marker, so clarity matters.
There’s also a Description field if you’d like to add supplementary information like operating hours, specific contact details, or location-specific notes.

Ready to add another location?
Click the plus button (+) beneath your current entry. A fresh set of input fields appears. Follow the same steps: enter the address, wait for autocomplete, select the match, name it, and optionally describe it.
When finished, the map automatically populates with markers for each address you entered. Visitors can interact with these markers to view the names and descriptions you provided.
Now that you’ve set up your map with multiple locations, you can choose to either display the locations or even make them selectable (mainly ideal for booking forms).
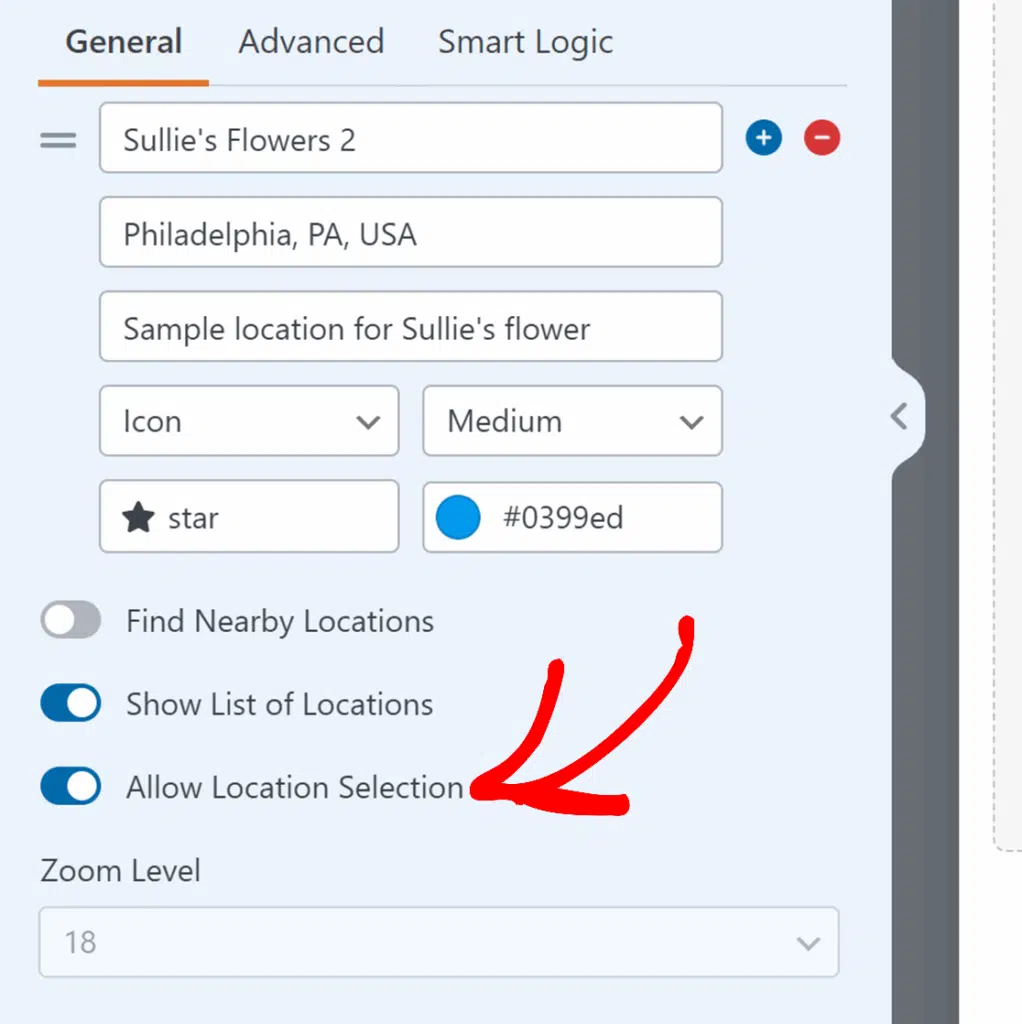
In the Map field options panel, look for the Show List of Locations toggle and switch it on. This displays all your location addresses in a neat list right below the map itself.
You’ll immediately notice something useful appears below that: the Allow Location Selection option. Visitors can now click on any location to select it as their preferred booking spot.
Option 2: Add Address Autocomplete for Visitors
Use this option if you need visitors to fill out an address field on your contact form (like for quote requests, service bookings, or shipping inquiries). The map helps them enter their address accurately.
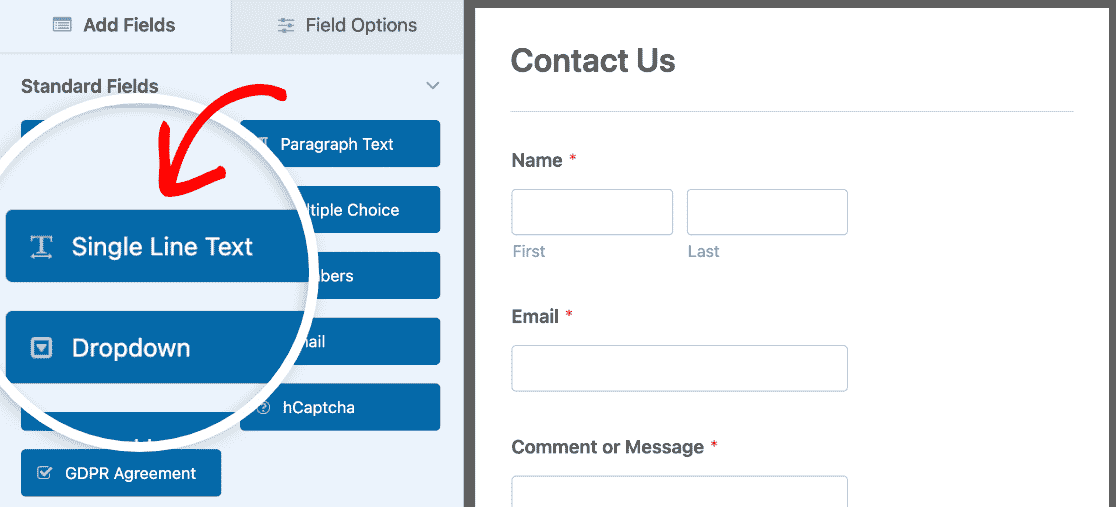
In the form builder, add either a Single Line Text field or an Address field to your form. You can click the field name or drag it onto your form.
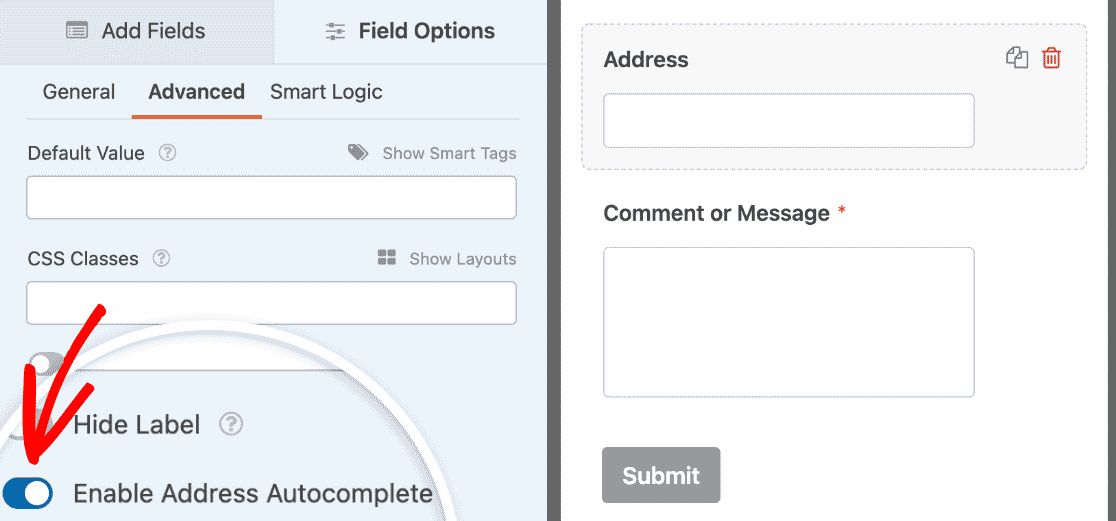
Click on the field you just added to open its settings. Change the label to “Your Address” or something similar. Then click on the Advanced tab in the field settings.

Scroll down and toggle on Enable Address Autocomplete. This lets visitors start typing their address and select it from a dropdown.
Next, toggle on Display Map. You can choose whether the map appears above or below the input field using the dropdown menu.
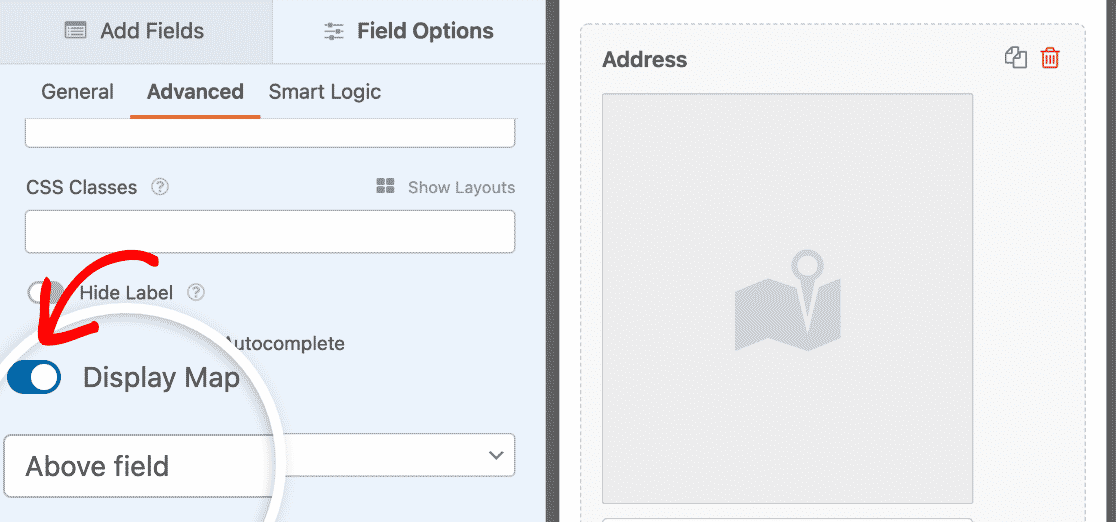
Now when visitors fill out this field, they’ll see a map that updates as they type. They can also drag the map pin to fine-tune their exact location.

This option works great for service businesses, delivery forms, or any situation where you need the visitor’s address. Once you’ve added your map using either option, click Save in the top right corner.
Step 5: Publish Your Contact Form Map
Ready to publish your contact form with a map? With your WPForms Pro plugin, it’s super easy to embed your form on your site. With the form still open in the builder, click the Embed button in the top right corner.

Here, you can select any WordPress page you like, be it an existing page or a new page. In this tutorial, I’ll click on Create New Page.

Give your page a title. something like “Contact Us” or “Get in Touch”, whatever you’d like and fits your needs and then click on Let’s Go! button.
WPForms automatically inserts your form into the page. You’ll see your contact form with the map already in place. From here, you can add introductory text above the form, adjust the page layout, or style your form a bit.

To adjust how your contact form looks, click anywhere around the form in the page editor. This opens the styling panel on the right side where you can customize the form’s appearance.
For quick styling, choose a pre-built design from the Form Theme dropdown. Options like Modern, Classic, or Minimal give your form an instant professional look that matches your site’s design.

If you want more control, the panel also lets you customize individual elements like colors, fonts, spacing, and button styles.
Once everything looks right and the map displays your location correctly, click Publish. Your contact form with map is now live. Here’s an idea of how it will look:

FAQs on How to Add a Contact Form with Map in WordPress
Got questions about adding maps to your WordPress contact forms? Here are answers to the most common questions we hear:
Do I need a Google Maps API key to use maps in WPForms?
Yes, you need either a Google Maps API key or a Mapbox API key to use the map features in WPForms. The Geolocation addon requires one of these to connect to the mapping service.
Don’t worry! WPForms provides step-by-step instructions for getting your API key in the Geolocation addon documentation. The setup usually takes about 10 minutes.
What’s the difference between the Map field and address autocomplete with a map?
- The Map field displays your business location(s) to visitors. It shows them where you are. Use this when you want people to see your office, store, or service area on your contact form.
- The Address autocomplete with a map helps visitors fill out their own address faster. As they type, it suggests their address and shows it on a map. Use this when you need to collect the visitor’s location.
Can I show multiple business locations on one map?
Yes. The Map field lets you add as many locations as you need like multiple offices, stores, branches, or service centers.
Each location gets its own marker on the map, and you can customize the marker icons and colors. Visitors can click on each marker to see the location name and details.
For step-by-step instructions, check out the Map field documentation.
Will the map work on mobile devices?
Absolutely. Maps created with WPForms are fully responsive and work perfectly on smartphones and tablets.
Visitors can zoom, pan, and interact with the map just like they would on desktop. The address autocomplete feature also works seamlessly on mobile.
Does adding a map slow down my contact form?
No. WPForms loads maps efficiently so they don’t slow down your page. The map only loads when needed, and it doesn’t impact your form’s performance.
WPForms is optimized to keep your site fast even with interactive features like maps.
Can I customize how the map looks on my form?
Yes. With the Map field, you can customize marker icons and colors to match your brand.
You can also control which map controls appear (zoom, fullscreen, map type, etc.) and adjust the initial zoom level.
For address autocomplete maps, you can choose whether the map appears above or below the input field.
Will I see where form submissions come from on a map?
Yes. When the Geolocation addon is active, WPForms automatically captures location data (with visitor permission) for every form submission.
You can view this data on a map in your WordPress dashboard when you look at individual form entries. This helps you understand where your leads and customers are coming from geographically.
Next, Check Out Other WPForms Pro Features
Get WPForms Pro today to access the Geolocation addon that lets you add these awesome maps.
You’ll get you access to a ton of other helpful features, too.
- An Easy to Use Builder – Create your own forms in minutes without writing a single line of code.
- Surveys – Gather data through surveys and polls and see it in beautiful reports. You can also add a Save and Continue feature to long surveys so that users can pause and complete their forms later.
- Form Pages – Get more people to finish your forms by creating distraction-free form pages in just a single click.
- Order Forms – Integrate Stripe (all plans), Square (Pro), and PayPal (Pro) right on your forms and accept money online.
- User Journey Reports – See where people were at on your site before they filled out your form.
- Secure Forms – Protect forms with anti-spam options like custom captcha, hCaptcha, or Google reCAPTCHA v2 or v3.
- Conversational Forms – Watch conversion rates skyrocket with highly engaging and modern-looking forms.
- 2,100+ Templates – Never build a form from scratch again with pre-built templates of the most popular form types out there.
- Premium Support – Access a friendly and knowledgeable team that’ll help guide you in the right direction if you need help with your website forms.
- …and so much more.
In fact, if you look at WPForms Lite vs Pro, you’ll see there are a ton of reasons why Pro is so popular.
Ready to build your form? Get started today with the easiest WordPress form builder plugin. WPForms Pro includes lots of free templates and offers a 14-day money-back guarantee.
If this article helped you out, please follow us on Facebook and Twitter for more free WordPress tutorials and guides.


Hi there,
Is it possible to use a custom map as a base reference to check if the address entered by the user falls within a certain area or not?
Hey Elia – We currently don’t have the option to use custom map as reference to see if the address entered by user falls in a area. I do agree this would be helpful, and I’ll add this into our feature request tracker so that it’s on the radar of our developers.