
AI Summary
One of the principles of effective communication is addressing people the way they prefer. And that often means showing professional courtesy by including their preferred honorific or title next to the name.
While asking people for their names and honorifics sounds simple enough, I’ve seen some examples of websites that don’t do a very good job of it from a user experience standpoint.
In this article, I’ll demonstrate how you can add an honorific to the WPForms name field in the simplest way without hassling your visitors.
How to Add an Honorific to Your Form (Step-by-Step)
Step 1: Install WPForms
WPForms’s drag-and-drop editor makes it easy to add honorifics to your form. While you can achieve this with WPForms Lite (free version), you can unlock more powerful features like form abandonment, professionally-designed form themes, and integrations with email marketing tools, Google Sheets, and more with WPForms Pro.

I’ll be using the WPForms Pro license for this tutorial, which is a big help for adding cool styles to the form so it looks more visually impactful.
Here’s how you can install and active WPForms on your website, if you’re new to WordPress plugin installations (I promise, it’s incredibly easy).
After installing the plugin, move on to the next step.
Step 2: Create a New WordPress Form
With WPForms, you have the advantage of a huge library of ready-made form templates that make form creation even faster. However, you can also build your form completely from scratch. The choice is yours.
Either way, you first need to click WPForms » Add New from your WordPress admin dashboard area.

After that, you can name your form on the form setup screen. The name you use can then later be displayed as the title of the published form, or you can just use the name internally as well.
Scroll down to the template selection area, where you’ll find 2,100+ form templates available for your use. I’m using the Simple Contact Form template, but you can pick any other template that best suits your needs. The process for adding honorifics or titles will still be the same.

This form template will then appear on your screen inside the form builder. From here, you can fully customize every aspect of the form using simple drag-and-drop functionality.

You’ll notice that this form includes a Name field, but there’s no field for honorifics or titles. That’s no problem – we’ll simply add a new field above the Name field for the title/honorific manually.
Step 3: Add an Honorific/Title Field to Your Form
There are a few options for adding an honorific field to your form. Commonly, most websites either use a Dropdown field or a Radio/Multiple Choice field for honorifics.
I prefer to use the Multiple Choice field because it’s a more mobile-friendly solution compared to Dropdown. However, the process is the same irrespective of which approach you take.
Inside the form builder, drag and drop the Multiple Choice field above the existing Name field on your form.

After placing the field where you want it, click on it to open the Field Options menu on the left-hand pane.

You can then edit the Label of the field and update the Choices. For example, I’ve labeled this field “Honorific / Title” and added a few common titles that cover the standard choices your visitors will expect.

This is already starting to assume a good shape, but we can do more to improve the layout. I like using an inline layout for honorific choices so they take less vertical space. That will help improve the user experience on mobile even more.
To change the layout of the Multiple Choice field, click on the Advanced tab under Field Options. Then, use the Choice Layout dropdown and select Inline.

Now, you’ll notice all the honorific choices appearing in a single row, eliminating a good chunk of the extra vertical scroll.
You may want to make this field mandatory so your visitors don’t skip it. Just right-click on the Honorific / Title field and select Mark as Required in the menu.

That completes the field setup. But with the honorific field now added, it begs the question: what will you do with it?
You can immediately take advantage of the honorifics by using them to address your customers in the automated form notifications and confirmation messages.
Step 4: Set Up Notifications and Confirmations
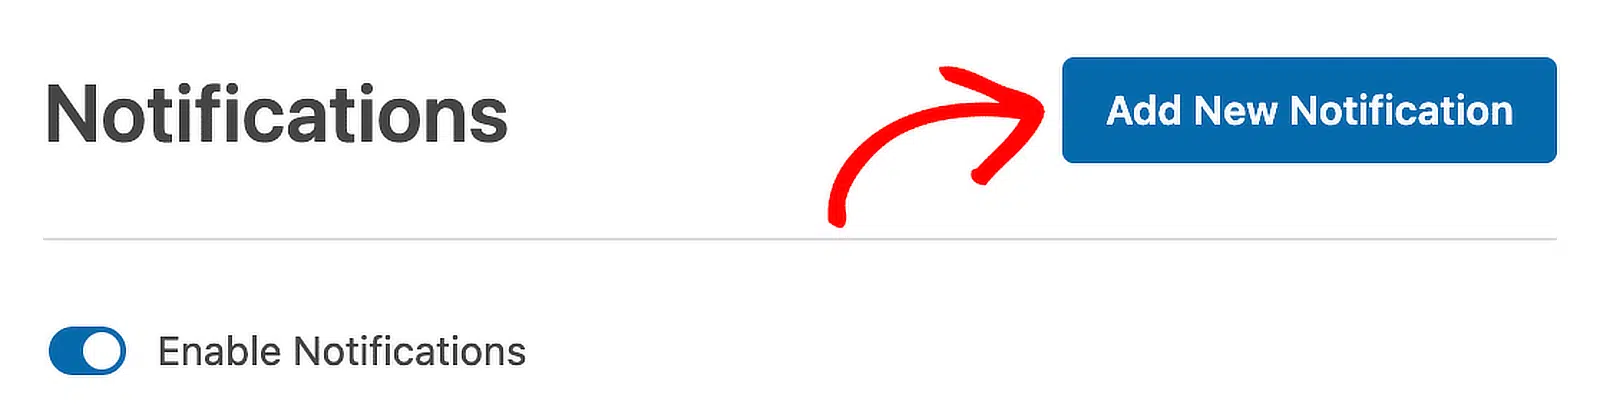
To customize your form notifications, click on Settings » Notifications on the left-hand side of your form builder.

By default, WPForms has a default notification intended for the admin already set up. This way, you’ll instantly know whenever a new submission comes through the form. You can customize the default notification by changing the recipient’s email address, subject line, from name, and message.
At the same time, you can also add a separate notification meant for the visitors. Simply click on the Add New Notification button at the top.
Since the goal is to send this notification to the person who filled the form, the Send to Email Address needs to have the appropriate Smart Tag added. You can click the Show Smart Tags link to see all available field data that can be used as a Smart Tag and click on it.
So go ahead and select Email in the Smart Tag menu, which will populate the tag associated with it automatically.

Here comes the fun part. With the name and honorific information that you’re now collecting, you can personalize the email notification by addressing the person right in the subject line.
Just type in a message, and use both the Smart Tags for Honorific / Title and Name – Last fields, separated by a period (.)

The field IDs you see might not match this example (because these are specific to every form), but the image above is a general format for what the subject line with the honorific and last name data should look like.
You can apply the same concept when editing the email message, which also accepts Smart Tags.
Similarly, you can customize the form confirmation message (which appears on the form immediately after submission). To customize the confirmation message, go to Settings » Confirmations.

Once again, you can take advantage of the Smart Tags to personalize the message and showcase that you honor professional courtesy consistently with your messaging.

On the front end, this is how the confirmation will display:

Make sure to press the Save button to save all your changes up until this point.
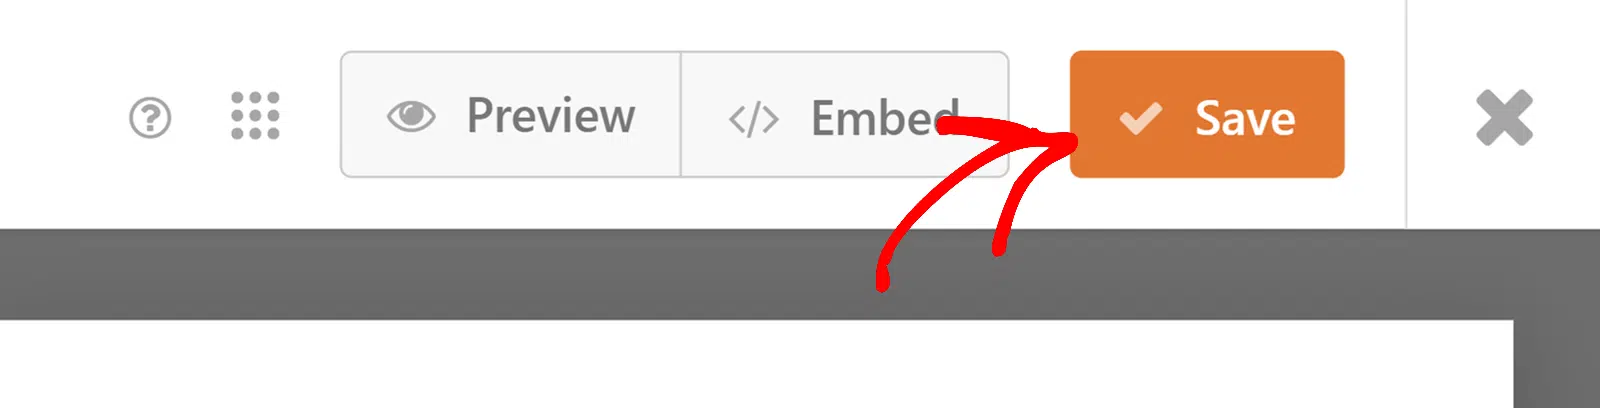
All we need to do now is publish the form on the website.
Step 5: Publish the Form With Honorific Field
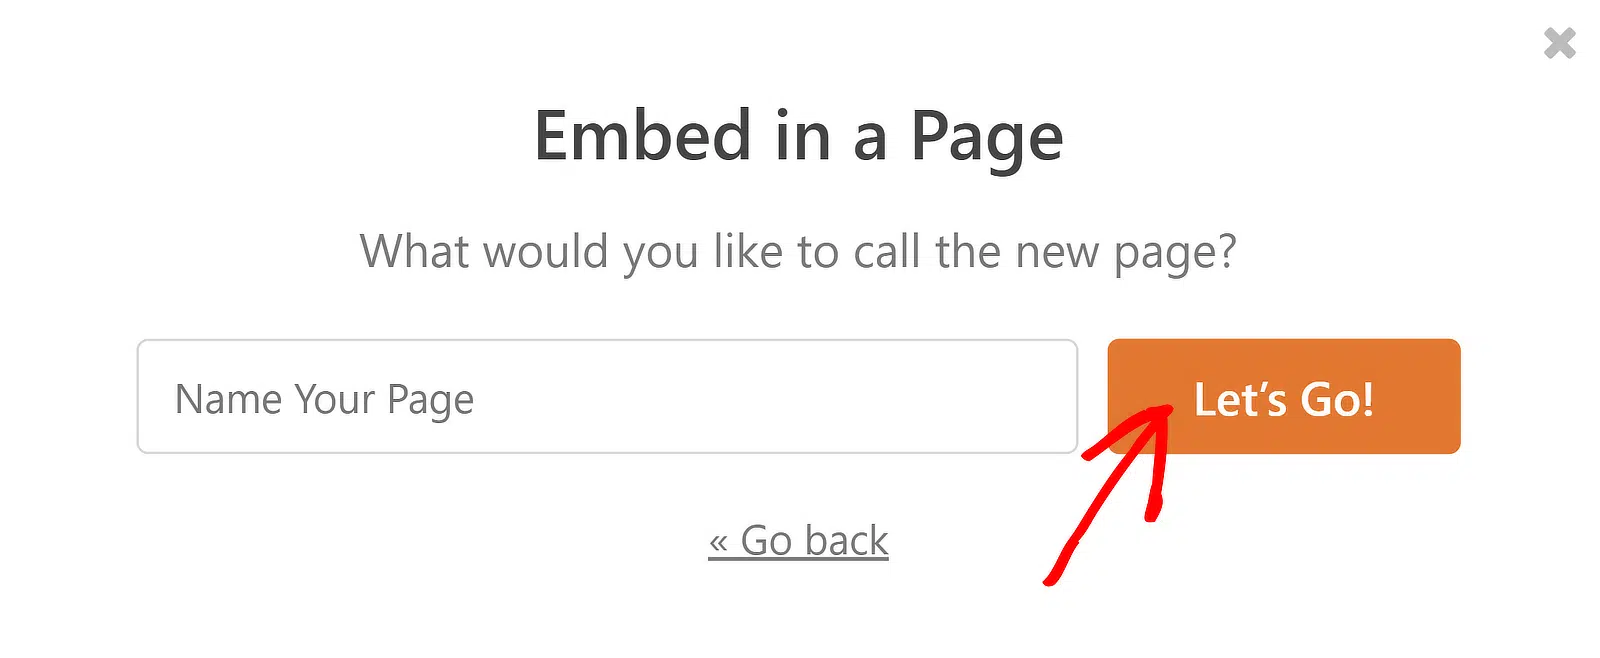
With WPForms. publishing any form is effortless and requires no shortcodes. You can initiate the embed process by clicking on Embed next to the Save button.

At this point, a modal will appear where you can select your embed method. Let’s go with Create New Page to embed this form on a fresh new page.

Next, simply provide the name for your new page and press Let’s Go.
With that, you’ll be taken to the WordPress editor with the form embedded inside. Before you go ahead and publish the form, I recommend trying out the available form themes, or the style adjustment settings to glam up your form.
In my case, I’m using the Spring theme (which I find particularly pleasing to the eye).

When you’re ready to launch, go ahead and click on the Publish button.

And there you have it! You now have a form that lets visitors select an honorific or title for their name, giving you an opportunity to personalize your messaging in ways that resonate with your audience.
More Questions on Honorific Fields
Why should I add an honorific field to my form?
Websites use honorific fields for a number of reasons, including:
- Personalization: Addressing people with their preferred titles enhances the personalization in your messaging, which is a strong component of relationship-building.
- Audience segmentation: If your marketing strategy requires gender-based segmentation, the honorific field can provide the data you need to understand your audience demographics.
- Courtesy: Honorific fields are a way to express professional courtesy.
- Cultural sensitivity: In some cultures, addressing people without their honorific titles may be considered rude.
Is it mandatory to collect honorifics?
Absolutely not. In fact, honorifics should be avoided unless you have a good business reason for collecting them, such as segmentation, or if your audience expects to be addressed with their honorifics. If you don’t have a specific reason for adding the honorific field, you should avoid it. Doing so, you’ll be removing one extra field from your form that serves no particular function for your business, and that will make form filling simpler for your visitors.
What if someone doesn’t identify with traditional honorifics?
You can use inclusive, gender-neutral titles like “Mx” for people who may not identify with traditional titles. At the same time, you can make the title field optional, so visitors who don’t identify with the provided options can skip it altogether. However, be mindful if you’re using smart tags for the honorific field. If this field is left empty, the smart tag will only display a blank value which may make your messaging appear broken. At the end of the day, this decision entirely rests on your nature of business and your audience preferences. If you’re unsure, consider avoiding adding an honorific field entirely.
What are the different ways to add an honorific field in WPForms?
There are three logical ways you can add an honorific field in WPForms. These methods include using a Multiple Choice or radio field, Dropdown, or a Single Text field.
Next, Explore Handy Templates for Power Users
WPForms has a massive library of unique form templates. However, there are some hidden form templates that can be very useful. Feel welcome to explore these templates and reuse them as you see fit for your business or organization.
Ready to build your form? Get started today with the easiest WordPress form builder plugin. WPForms Pro includes lots of free templates and offers a 14-day money-back guarantee.
If this article helped you out, please follow us on Facebook and Twitter for more free WordPress tutorials and guides.

