
AI Summary
One of the most useful automations you can use for your business is having your custom WordPress forms connected with a CRM like Zoho.
This works wonders for putting the process of sending your leads from your WordPress forms to Zoho on autopilot, saving you valuable time and effort.
In this article, I’ll show you how to create a custom form using a native WordPress solution and integrate it with your Zoho CRM.
Create a Custom Zoho WordPress Form Now! 🙂
How to Make Custom Zoho CRM Forms in WordPress
We’re going to use the WPForms plugin to quickly build a Zoho form in WordPress. While Zoho offers a form builder along with a WordPress plugin, it has several limitations, such as fewer spam prevention options.
Many of our customers prefer the easier and wider range of customizability of WPForms and integrate it with Zoho CRM to enjoy the best of both worlds. Here’s what you’ll need to make this integration work.
Step 1: Install the WPForms Plugin
The most beginner-friendly way of creating a custom WordPress form is by using the WPForms plugin. You’ll need an active WPForms Elite license to get started and use the Zoho CRM Addon.
With WPForms Elite, you get access to the native Zoho CRM addon that automatically sends form submissions directly to your CRM without any manual work.
This means every lead gets captured instantly, with all their information properly organized in your sales pipeline. You also get advanced form fields that are perfect for lead qualification.
Think dropdown menus for lead sources, checkboxes for product interests, and custom fields that match exactly what you’re tracking in Zoho CRM.

If this is your first time installing a WordPress plugin, check out this helpful guide with steps on successfully installing WPForms on your site.
Get Your WPForms Elite License Now! 🙂
Step 2: Get the Zoho CRM Addon
After you’ve successfully installed the plugin, navigate to WPForms » Addons from your WordPress dashboard to access the complete list of integrations.
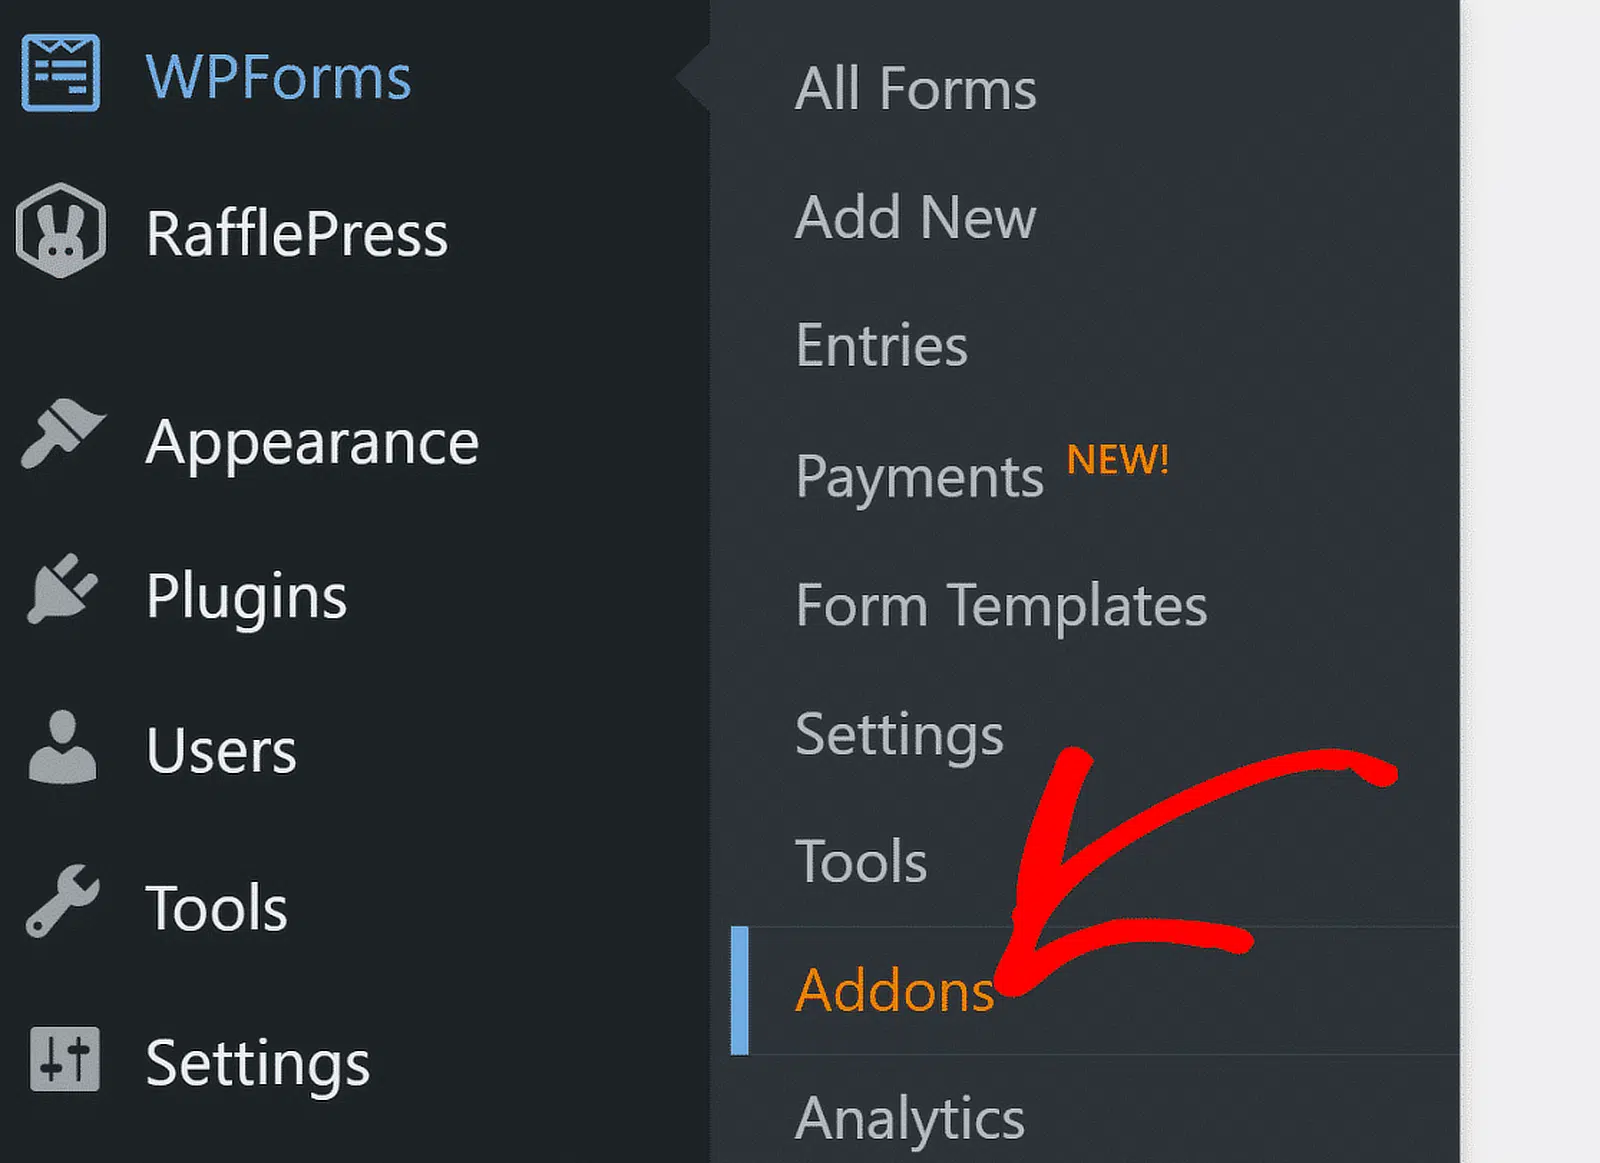
Use the search field and type in Zoho. Once you locate the Zoho CRM Addon on this page, simply click the Install Addon button under it.
It will only take a few seconds for the addon to complete installation. You’ll see the Status change to “Active”. confirming that the addon is now ready to use.
Great! Now, we can move to the next step and start creating a custom WordPress form to connect with the CRM.
Step 3: Create Your Zoho Form in WordPress
Go ahead and create a new form by clicking WPForms » Add New from your WordPress dashboard.

After the form setup screen appears, you can enter a name for your form to identify it and choose a template.
Let’s use the Simple Contact Form template to get started faster. WPForms includes over 2,100 WordPress form templates covering a wide range of scenarios, so feel free to pick any that suits you the best!

The contact form template has 4 fields by default:
- First Name
- Last Name
- Email address
- Message
It’s important to ensure that your form includes at least the Last Name and Company field in order to integrate this form with Zoho FRM.
The contact form template already includes the Last Name field, but you can manually create a Company field here. To do this, drag a Single Line Text field to the form preview on the right.

After inserting the field into your form, click on it to access its Field Options on the left-hand pane. These options will allow you to change the label of the field and control whether it should be a mandatory field.

Simply enter “Company” in the label setting and click the Required toggle button to make this field mandatory.

Go ahead and add more fields to match the data you want to capture in Zoho CRM. You can also use the form builder to:
- Change the order of the fields by dragging them up or down
- Rename your fields
- Remove fields you don’t need.
If you need help, check out this guide on creating your first form in WPForms. Make sure to click the Save button at the top when you’re done.

With the form ready, it’s time to embed it on a page. This will make it possible for you to test the form and its integration with Zapier once we’ve connected the two platforms.
Step 4: Connect WPForms to Zoho CRM
Before you can start sending form data to Zoho CRM, you need to establish the connection between WPForms and your Zoho account.
From your WordPress dashboard, navigate to WPForms » Settings and click on the Integrations tab. You’ll see all your available integrations listed here.

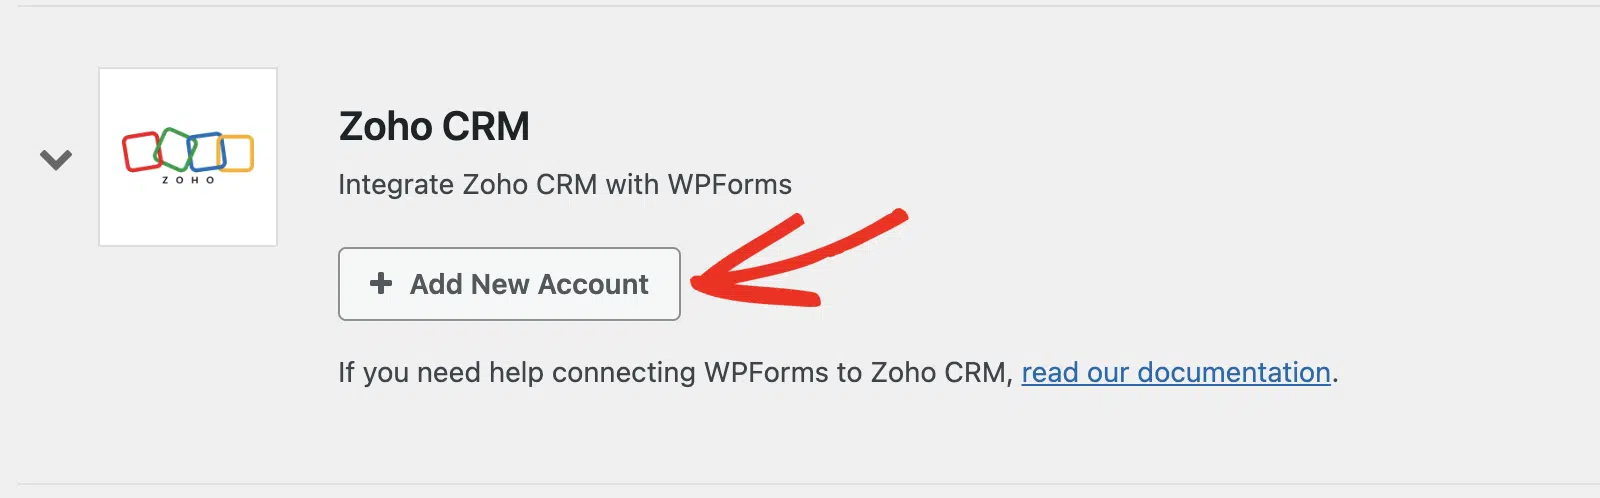
Look for the Zoho CRM option and click on it to expand the settings. From here, click the Add New Account button to start the connection process.
This will redirect you to Zoho’s login page. If you already have a Zoho account, enter your email address and click the Next button to sign in.

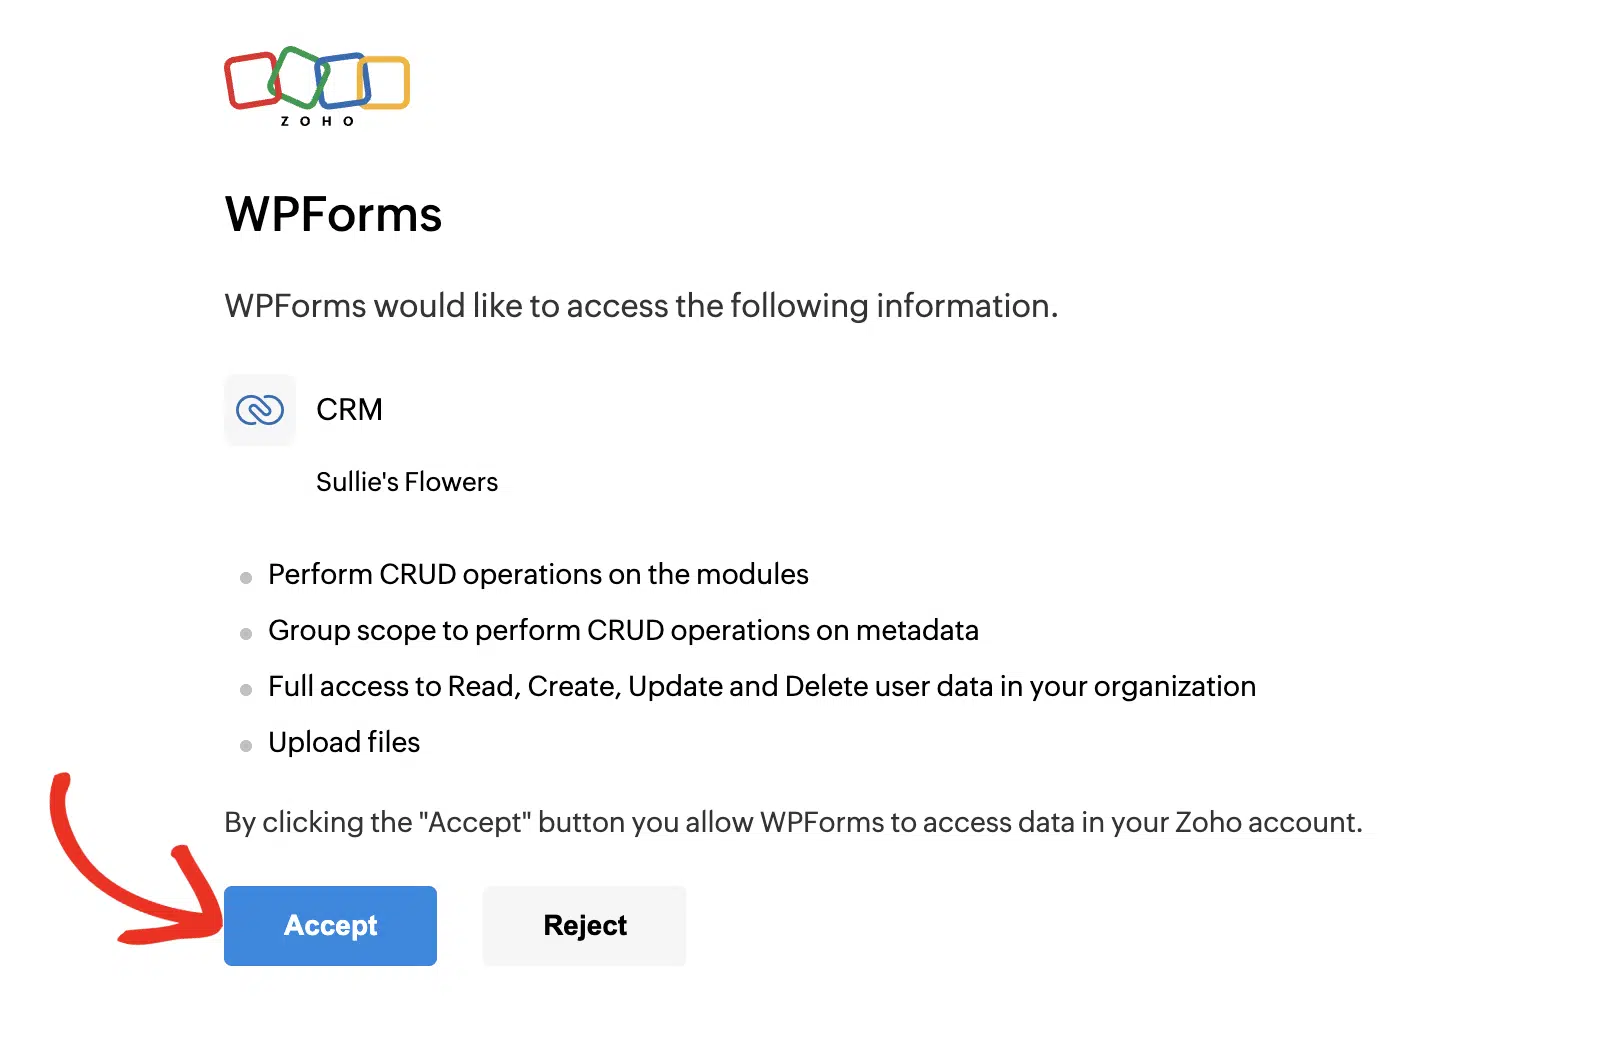
Once you’re logged in, Zoho will ask you to authorize WPForms to access your CRM data. Take a moment to review the permissions.
WPForms only requests access to create and update contacts, not read your existing data. Click the Accept button to grant permission and continue.
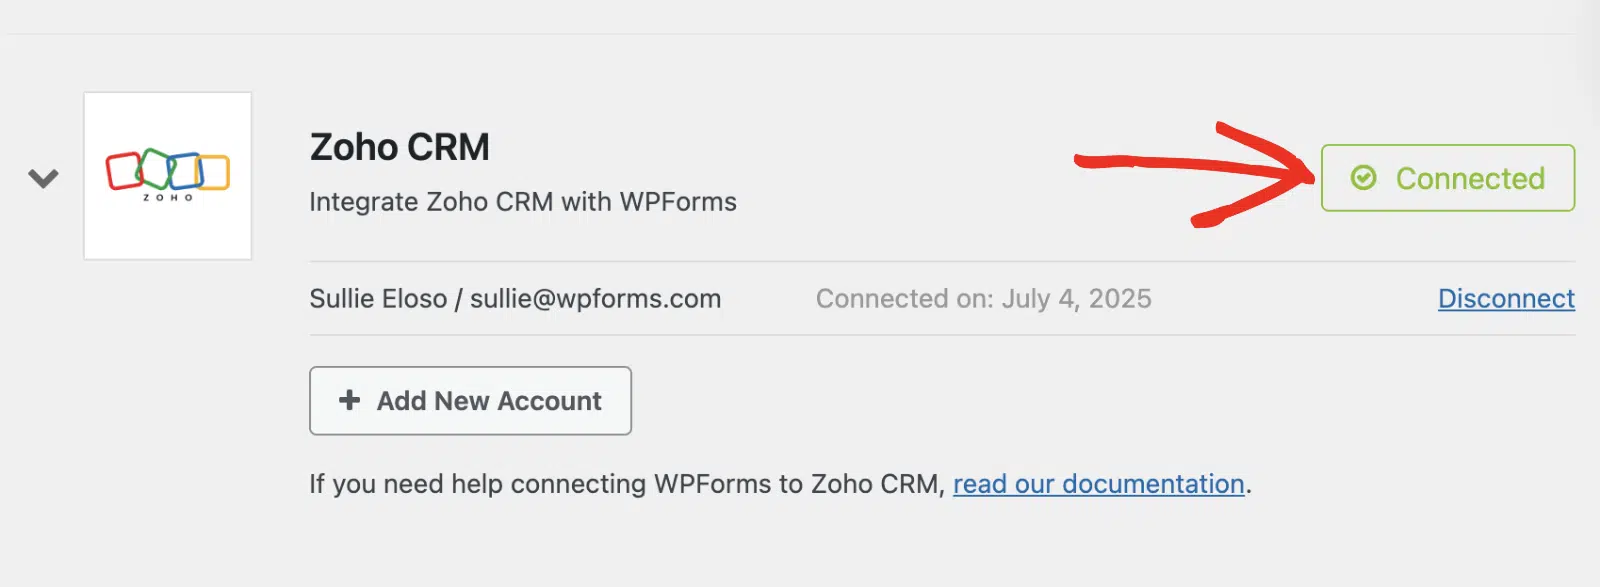
After authorization, you’ll be redirected back to your WordPress admin area. You should now see a green Connected status along with your connection details.
Step 5: Add Zoho CRM to Your Form
Now that you’ve connected WPForms to your Zoho account, it’s time to set up the actual integration on your specific form.
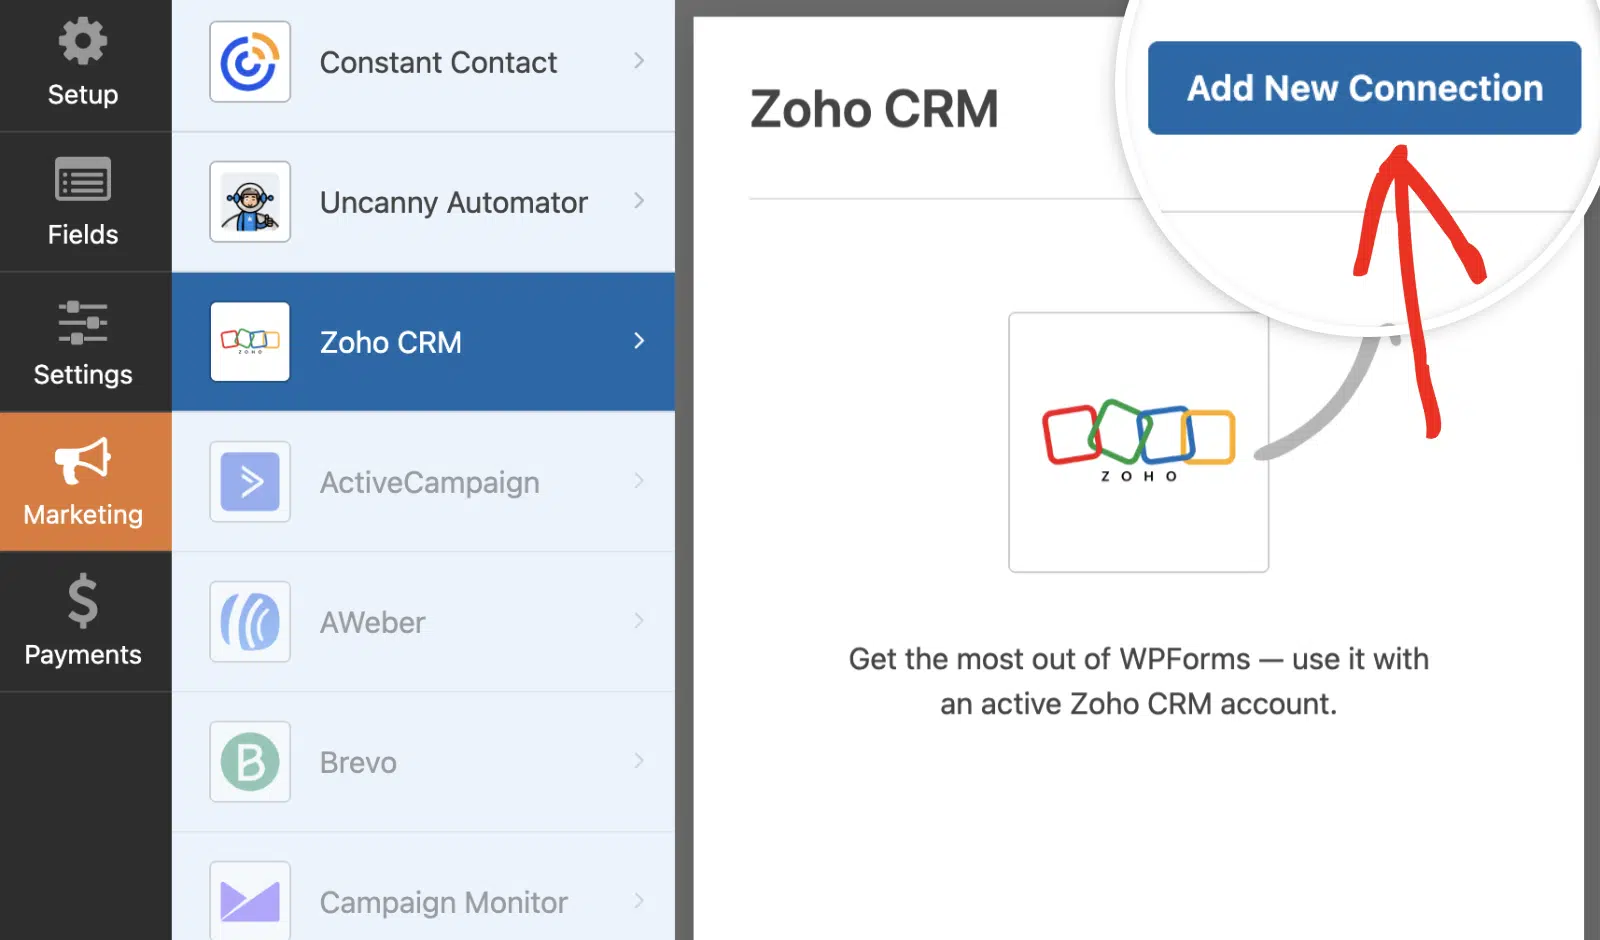
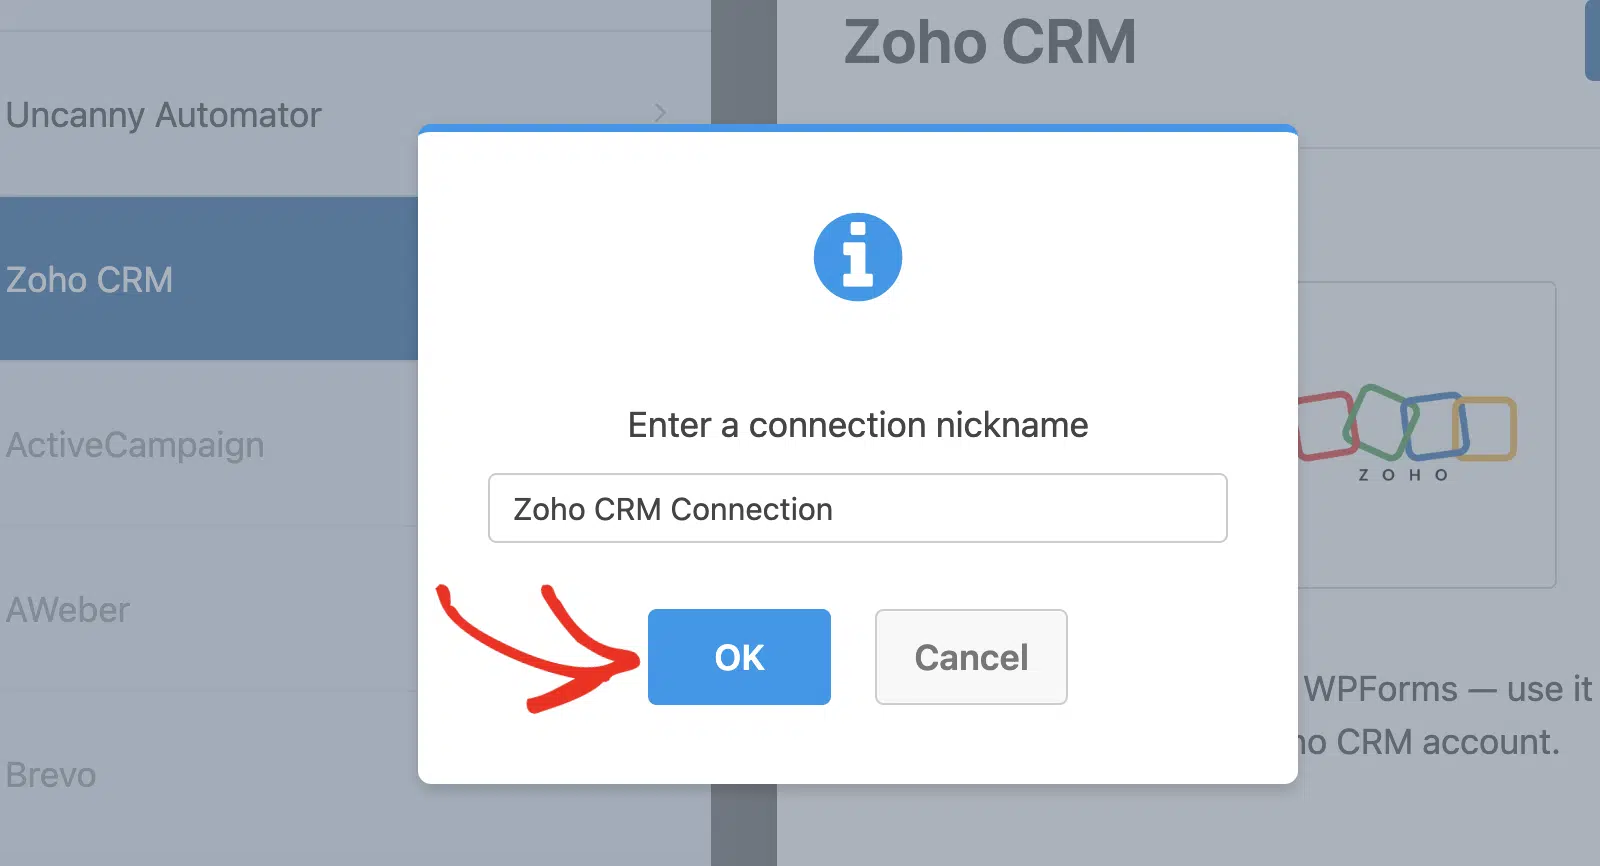
In your form builder, go to Marketing » Zoho CRM and click the Add New Connection button. This opens up a dialog where you can enter a connection nickname.
Use something descriptive like “Lead Generation Form” or “Contact Us Integration” since you won’t see this on the frontend. Then, click on the OK button.
Next, select your connected Zoho account from the Account dropdown. This should show the account you just connected in the previous step.
After that, you’ll need to choose which Action to Perform. This determines what happens in your Zoho CRM when someone fills out your form. The available actions are:
For most lead generation forms, you’ll want to choose Create/Update Lead since these are typically new prospects from your website.
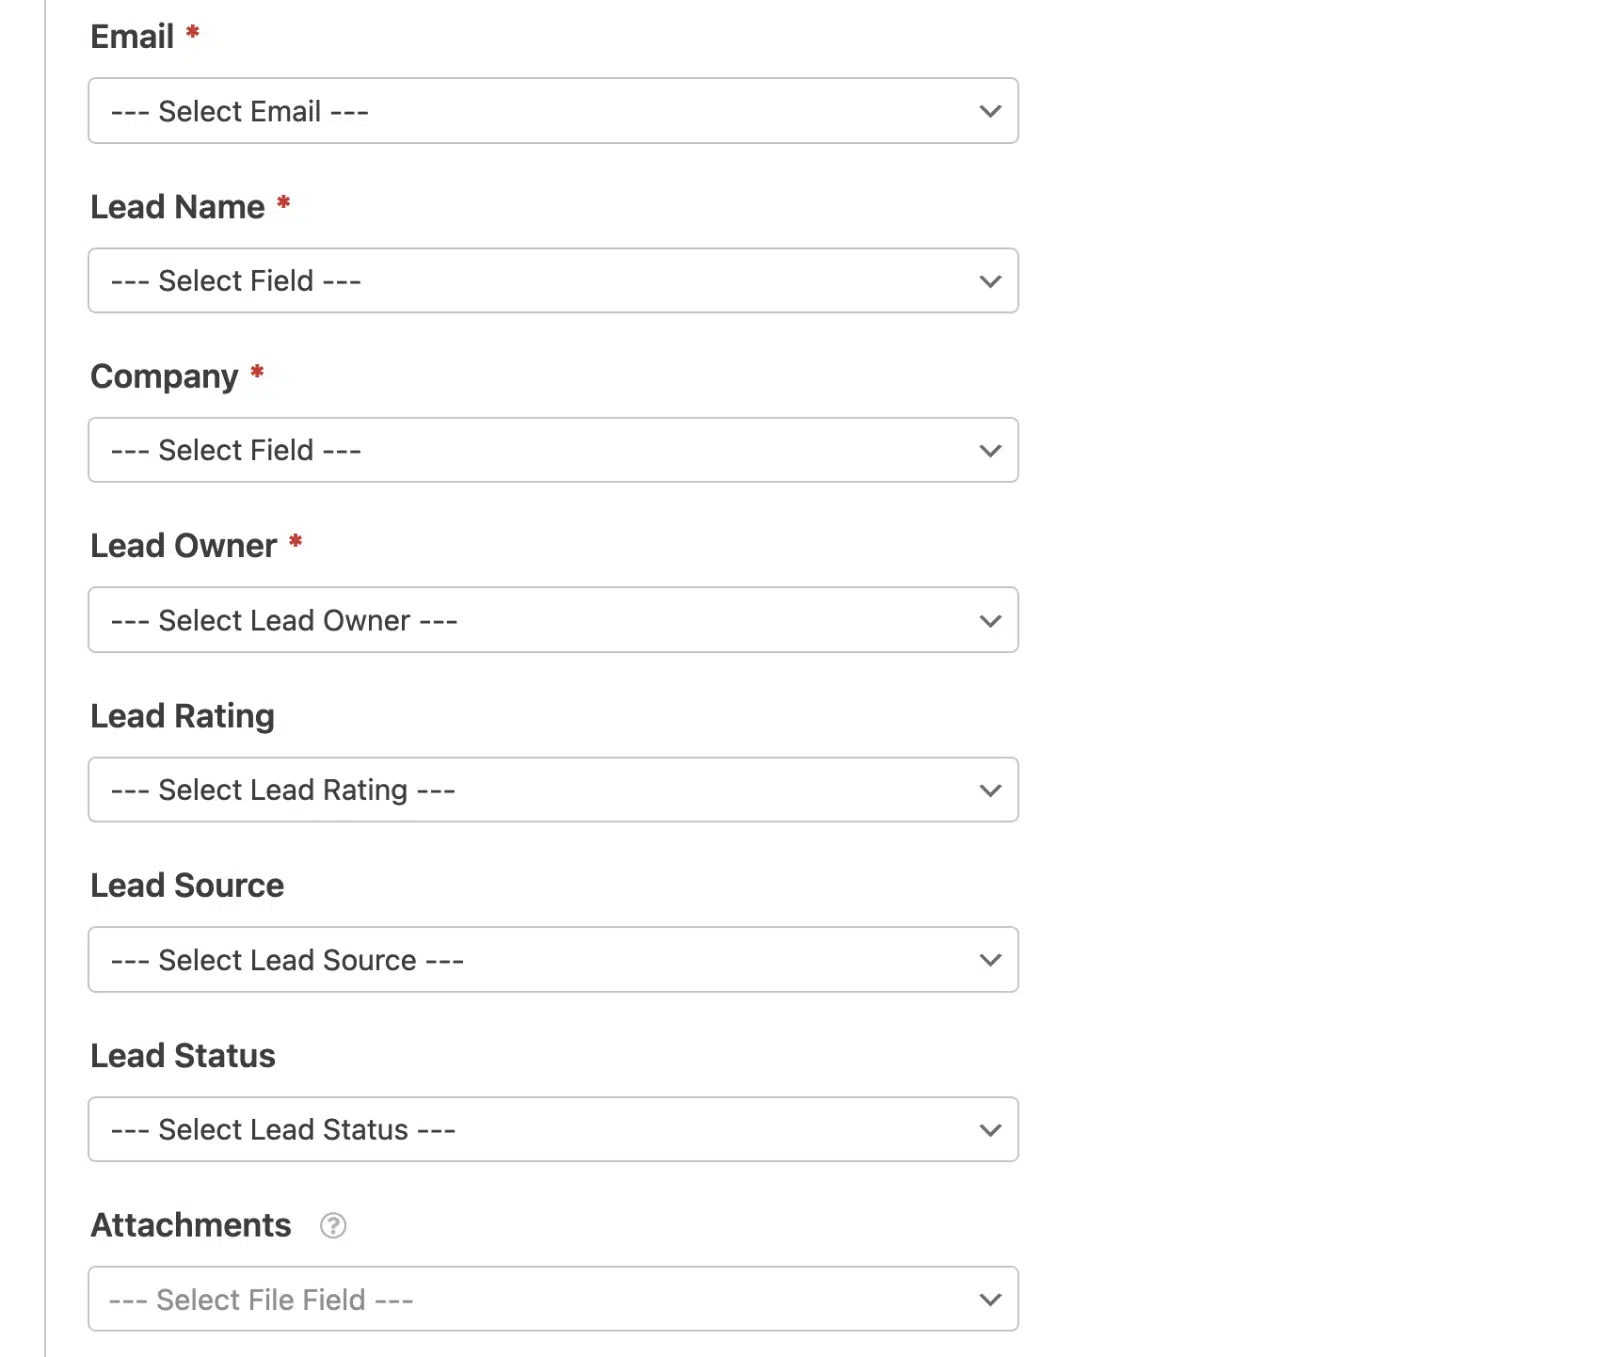
Once you select Create/Update Lead, you’ll see several required and optional fields to configure:
- Email – Choose the email field from your form
- Lead Name – Select the name field that will identify the lead
- Company – Select the field containing the company name
- Lead Owner – Assign the lead to a specific person in your CRM
- Lead Rating – Categorize the lead quality (Hot, Warm, Cold)
- Lead Source – Track where the lead came from (Website, Social Media, etc.)
- Lead Status – Set the initial status (New, Contacted, Qualified)
- Attachments – Include any file uploads from your form
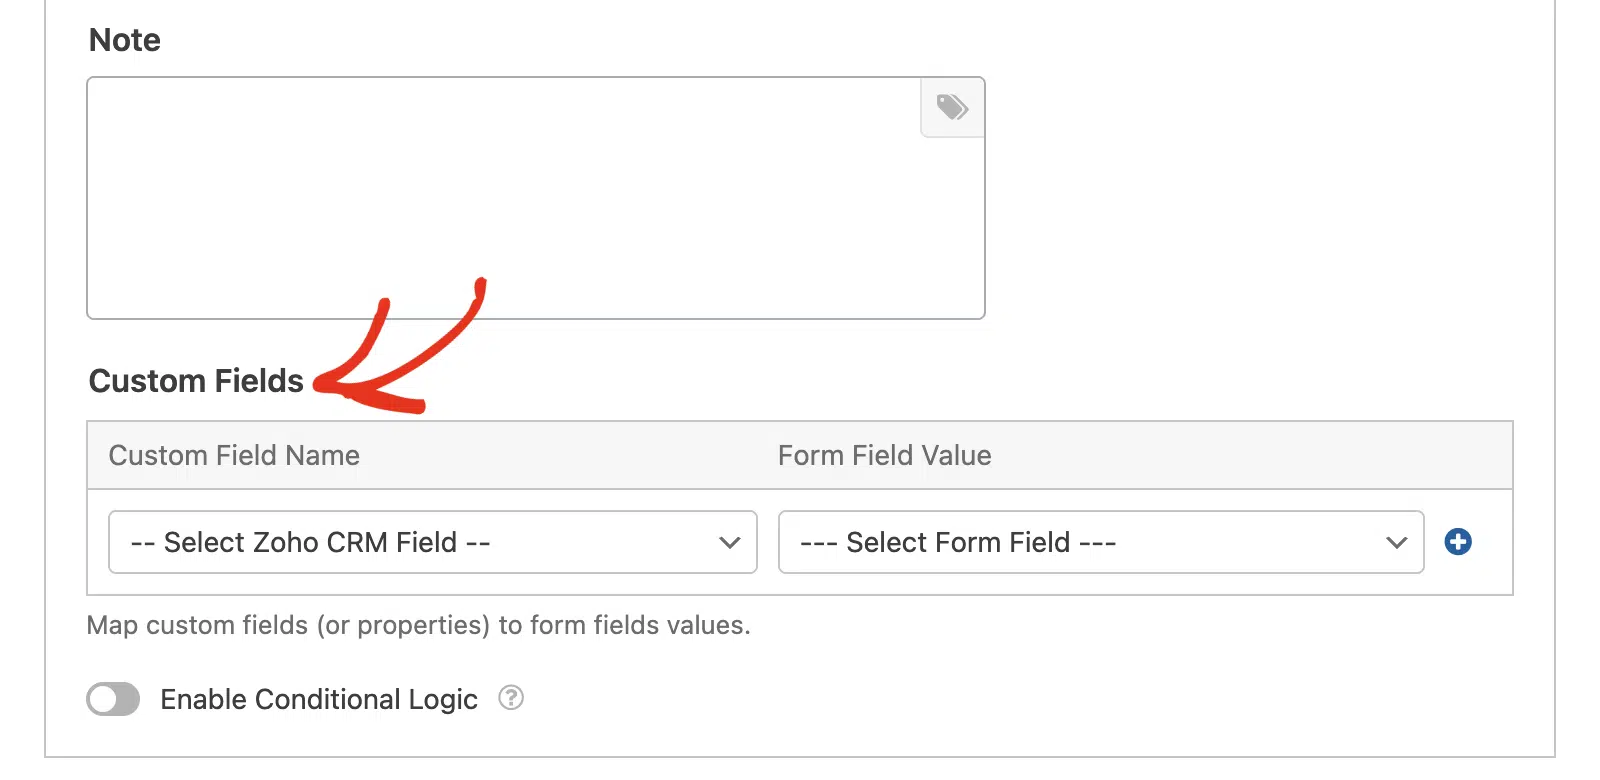
- Note – Add automatic notes to the lead record
The real power comes in the Custom Fields section below. Here you can map additional form fields to any custom fields you’ve created in Zoho CRM.
Got a dropdown for company size? A checkbox for product interest? A text field for specific requirements? You can map all of these to corresponding fields in your CRM.
Step 6: Test Your Zoho CRM Integration
Now all that’s left is to test if your WPForms and Zoho CRM integration works successfully. Visit the page where your form is embedded and fill it out like a real visitor would.
Use a test email address (not your real one) and fill in all the required fields. If you set up file attachments, upload a test document. Make sure to complete every field you’ve mapped to Zoho CRM.

After submitting the form, head over to your Zoho CRM account and check the appropriate module (Leads or Contacts, depending on what you configured). You should see your test submission appear as a new record within a few minutes.

You can use exactly the same technique to build a larger form to capture every field in your Zoho CRM layout. And you can also learn how to get more leads to fill out your forms.
Don’t forget: you can also view your form submissions in the WordPress dashboard. If you’d like more information about this, read how to save contact form data in the WordPress database.
Create a Custom Zoho WordPress Form Now
FAQs about How to Make a Custom Zoho Form
Creating a WPForms + Zoho CRM form is a popular topic of interest among our readers. Here are answers to some common questions about it:
What Is Zoho CRM?
Zoho CRM is a customer relationship management (CRM) application that runs in your browser. It lets you capture and manage leads, track them through your sales pipeline, and convert them into paying customers.
In Zoho CRM you can:
- Manage leads, contacts, and accounts
- Track deals
- Make to-do lists
- Create workflows
- Customize the layout of different modules.
Zoho CRM is free for up to 3 users. If you want to use Zapier with Zoho CRM, you’ll need the Standard plan or higher.
How to create a custom form in Zoho?
To create a custom form in Zoho, you can use Zoho Forms, which allows you to design forms tailored to your needs.
If you’re looking for more flexibility and ease of use, consider using WPForms. With WPForms, you can create custom forms for your Zoho CRM and integrate them seamlessly with your WordPress site.
Does Zoho have a form builder?
Yes, Zoho offers a form builder called Zoho Forms, which lets you create various types of forms that can be integrated with Zoho CRM.
If you’re working with WordPress, WPForms is a great alternative that offers easy integration with Zoho CRM while providing a user-friendly form-building experience.
Is Zoho Forms any good?
Zoho Forms is a solid tool for creating forms, especially if you’re already using Zoho CRM. It offers a range of features for customizing and automating your forms.
However, if you’re using WordPress, WPForms might be a better option due to its ease of use, extensive features, and seamless integration with Zoho CRM.
Next Step, Use Zoho Mail SMTP in WordPress
Do you use other products in the Zoho suite? To improve email deliverability, find out how to use Zoho Mail SMTP to send emails from WordPress.
If you’re looking for more ways to collect leads, you’ll find tons of helpful ideas in this article on the best lead generation tools to get more targeted leads.
We also have a guide on creating a WordPress Salesforce integration, along with some other guides related to using Zapier and WPForms, such as:
- How to Get Microsoft Teams Alerts from Your WordPress Forms
- How to Get an SMS Notification From WordPress Forms
- How to Create a Notion Form in WordPress
Create Your WordPress Form Now
Ready to build your form? Get started today with the easiest WordPress form builder plugin. WPForms Pro includes lots of free templates and offers a 14-day money-back guarantee.
If this article helped you out, please follow us on Facebook and Twitter for more free WordPress tutorials and guides.

