AI Summary
Are you looking for a way to create a multi step lead form to boost conversions on your site?
With a multi step lead generation form, you can simplify the UI of your form, make a well-crafted journey for your users, and help them seamlessly submit the form.
In this article, we will give you a step-by-step guide for setting up a multi-step lead form using WPForms.
Boost Conversions With a Multi-Step Lead Form Now
How to Create a Multi Step Lead Form in WordPress
Here is a step-by-step guide to help you create a multi step lead form in WordPress
In This Article
Step 1: Install WPForms Pro
First, make sure you have WPForms installed and activated on your website. WPForms is the best form builder for WordPress and lets you create various forms including user-friendly multi-step forms. It comes with 2,000+ pre-designed, ready-to-use templates for every business need.
For this tutorial, you will need the WPForms Pro license. It’s packed with features like the Lead Forms Addon, multiple integrations, and more, which are necessary for creating a multi-step lead form in WordPress.
For more details on how to set up this plugin, see this step-by-step guide on how to install a plugin in WordPress.
Step 2: Activate the Lead Forms Addon
Now, we need to activate the Lead Forms addon. This addon will let you easily create unlimited multi step forms on your website. For this, go to your WordPress Admin Dashboard » WPForms » Addons.
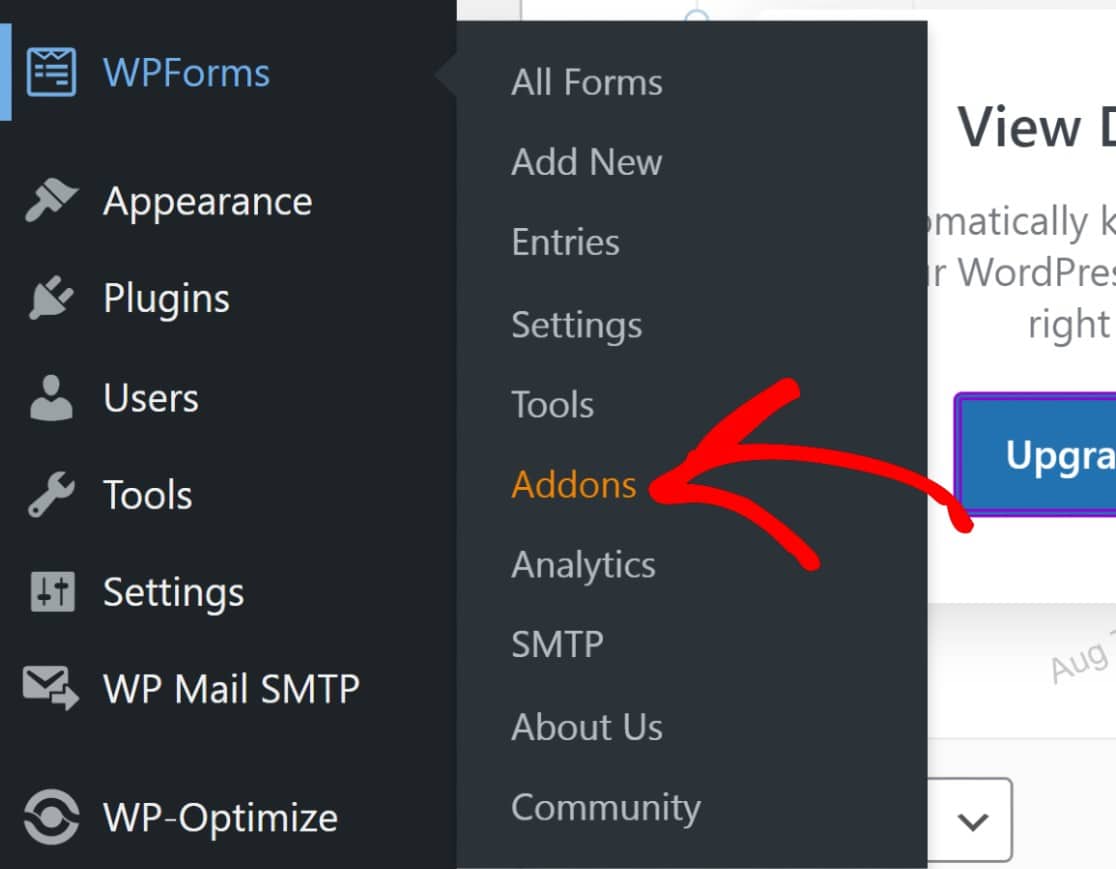
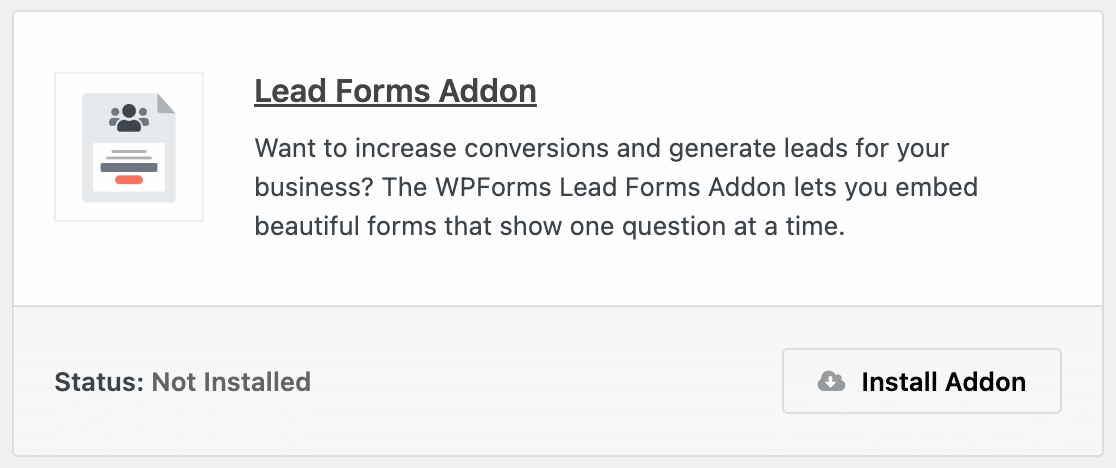
Search for “Lead Forms” in the search bar. Install the Lead Forms addon and activate it.
Step 3: Creating a Multi Step Lead Form
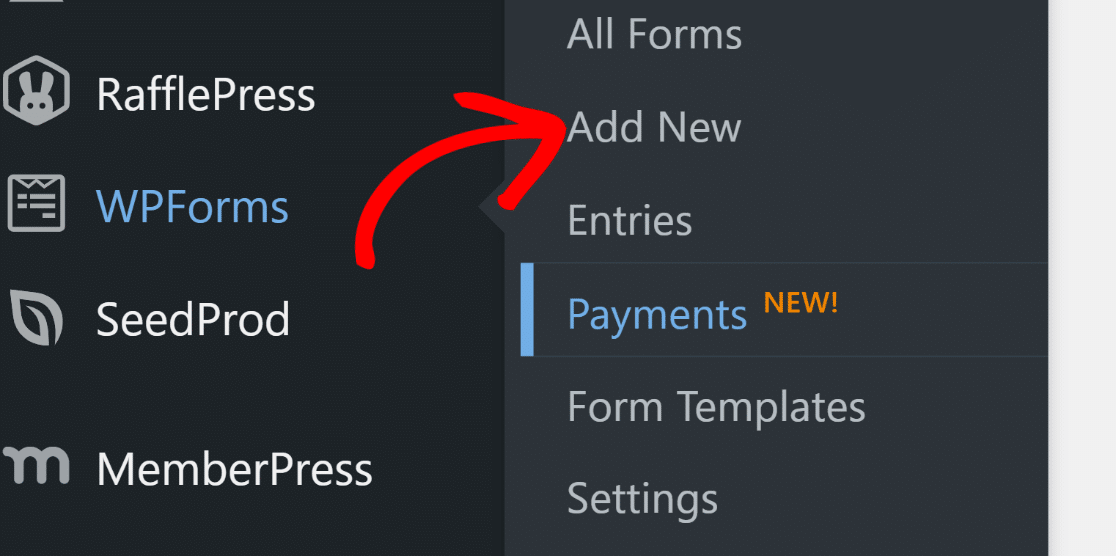
Once you have the addon installed and activated on your website, go to WPForms » Add New to create a new form.
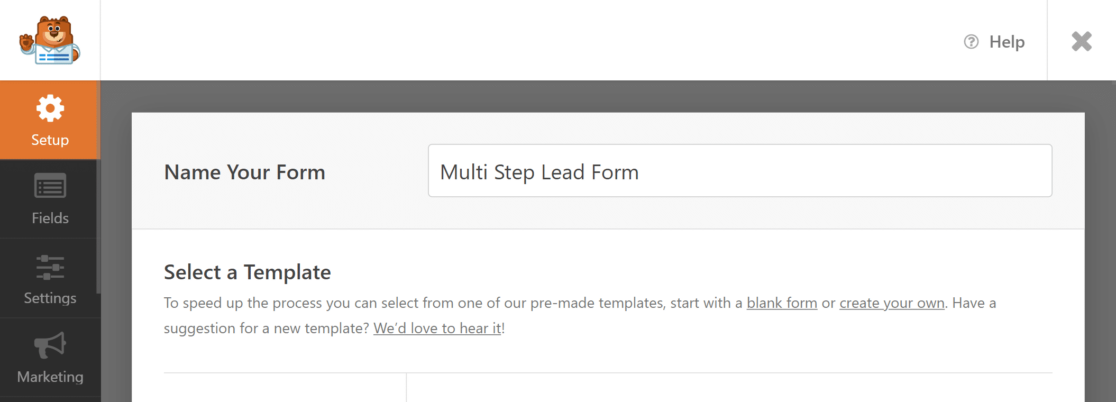
Give your form a proper name. For the purpose of this tutorial, we will name our form “Multi-Step Lead Form”.
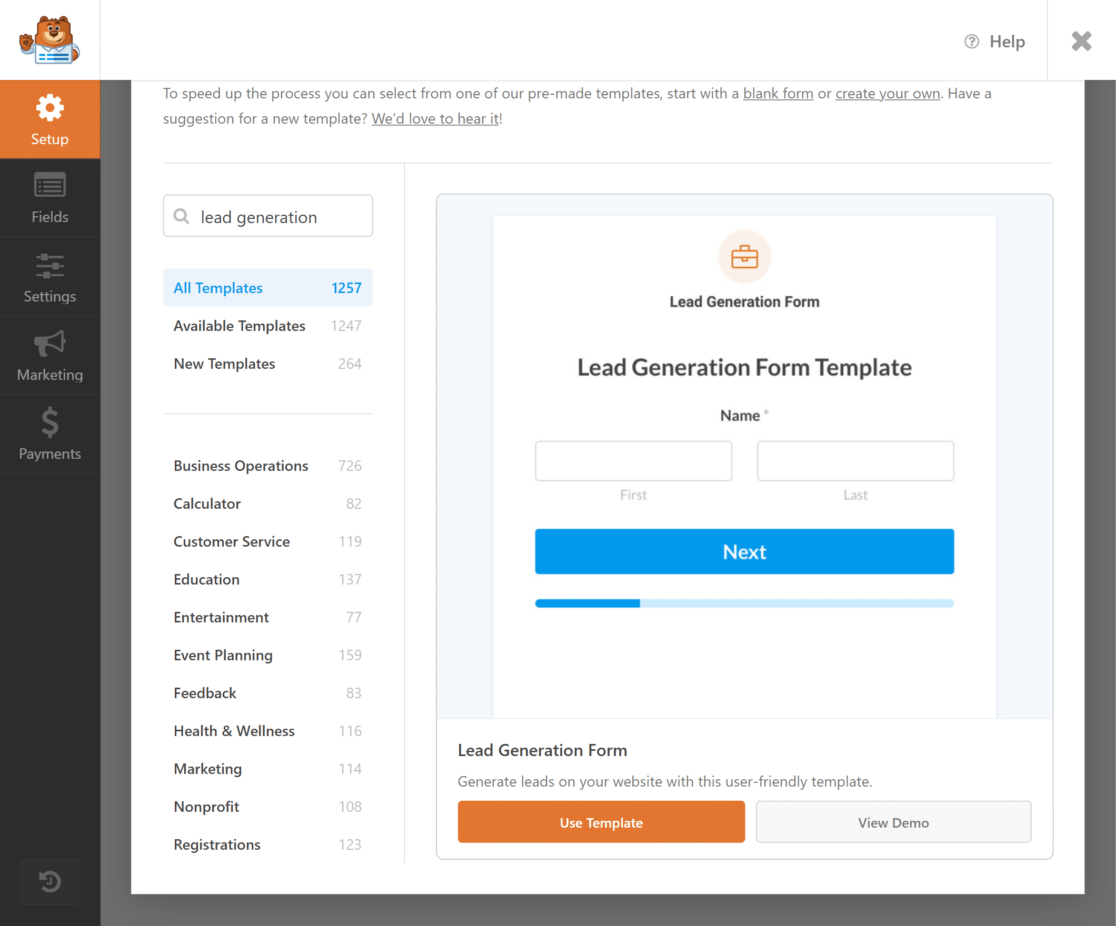
Now, go to the Search bar and search for “Lead Generation Form”. This form is pre-designed to help you build a multi step lead form easily. Click on the Use Template button to import the form.
You can now start editing the template from the Fields tab. Here, you can find all the available form fields on the left and the form builder on the right. Although we have imported a template in the previous step, WPForms lets you take full control over your form design and customize them as per your needs without the need to add CSS or HTML code.
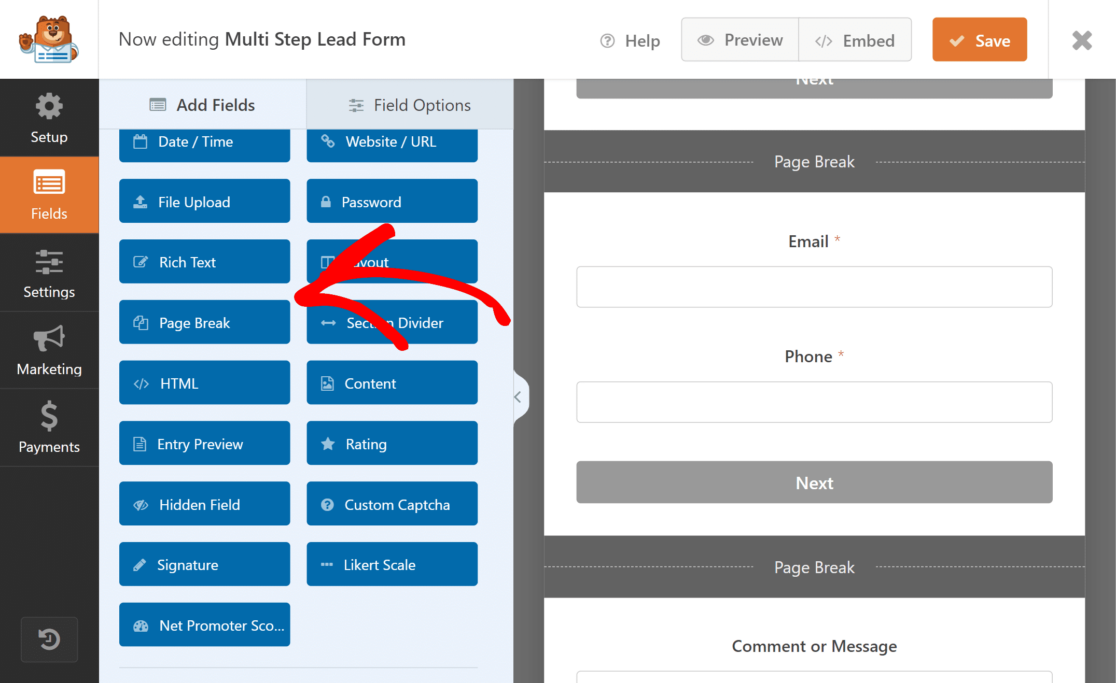
To help you understand how you can customize the template, let’s add one more form field to the form — phone number — to help users leave their contact information. We will add a phone field below the email field on page two. For this, simply drag and drop the Phone field below the email field.
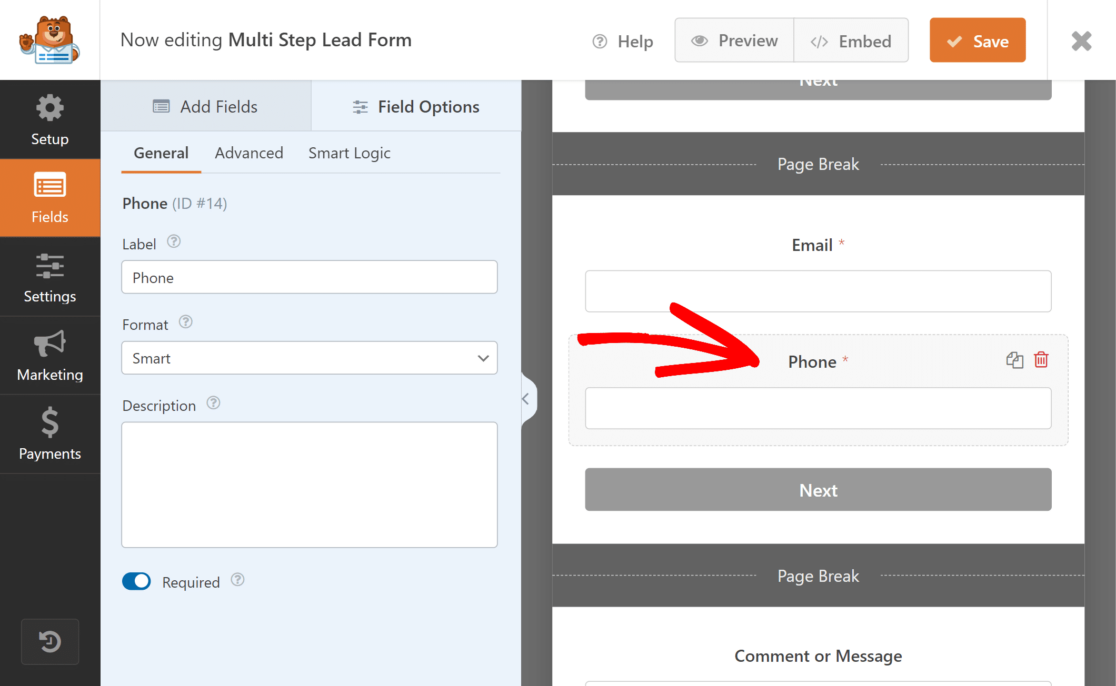
You can also make this a required field by clicking on the Required toggle button in the field options.
Similarly, you can add more fields of your choice to the form.
If you want to add more steps to your form, you can drag and drop the Page Break field on the page to add a new step. You can find the Page Break field under Fancy Fields. Additionally, you can use conditional logic to create more functional lead gen forms and customize the cta button or the submit button from the settings tab.
Step 4: Customize Notifications & Confirmation Message
By customizing email notifications with templates, you can ensure you are notified of every new form submission.
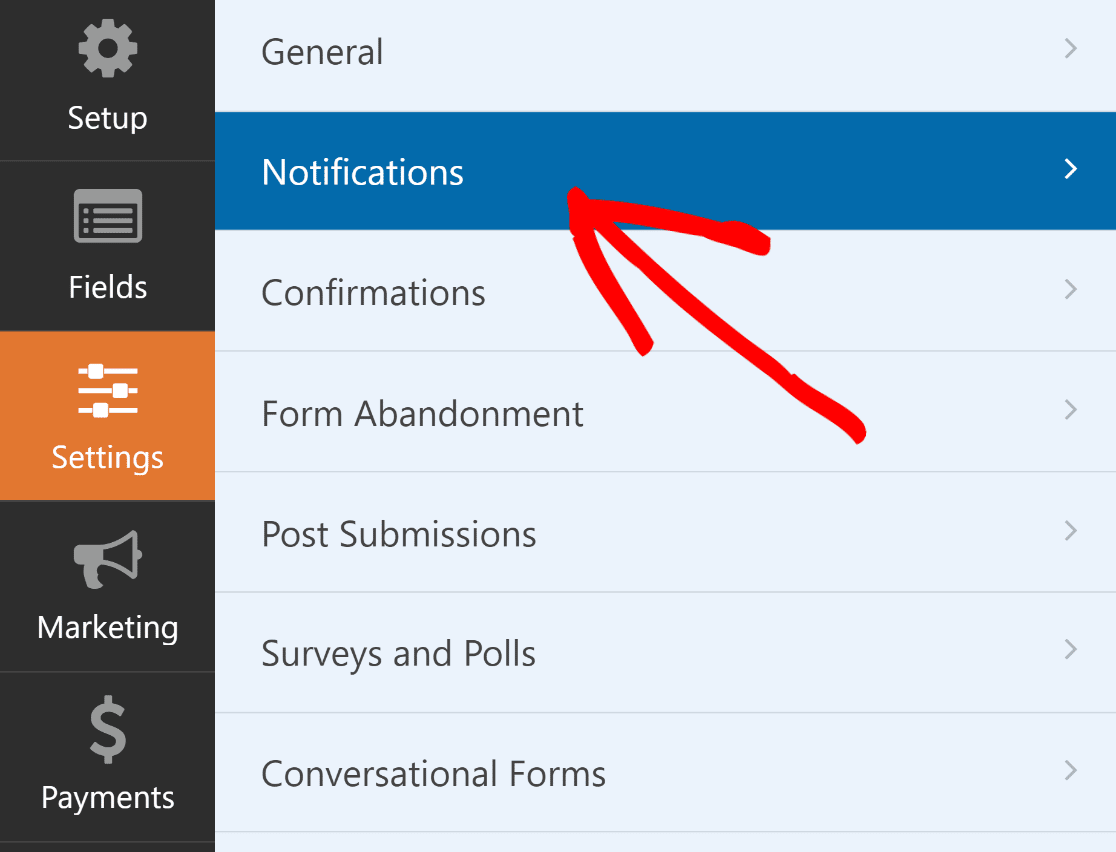
To customize notifications, head over to the Settings tab » Notifications.
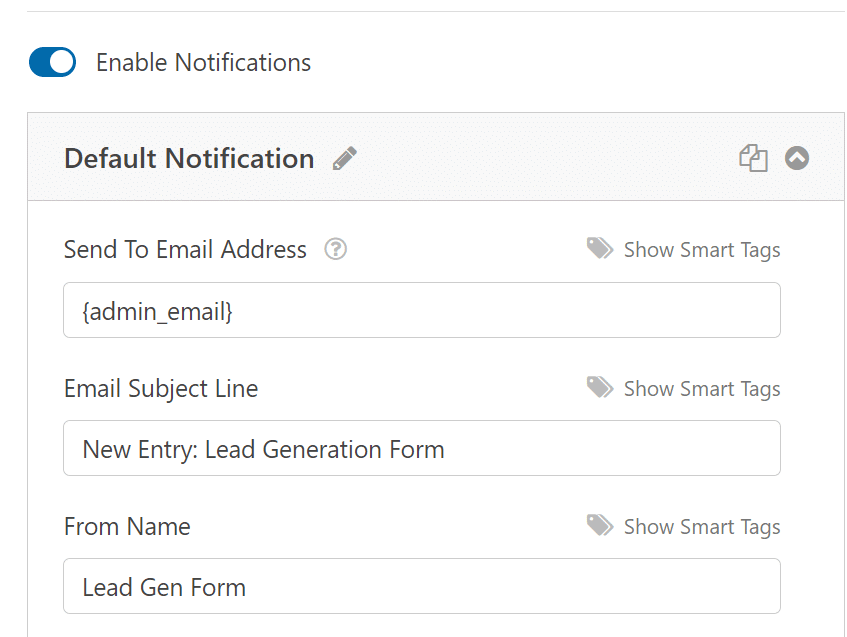
Here, you can change the default notification settings, like the recipient’s email address or the subject line. To learn more about this, check out our guide on how to set up form notifications in WordPress.
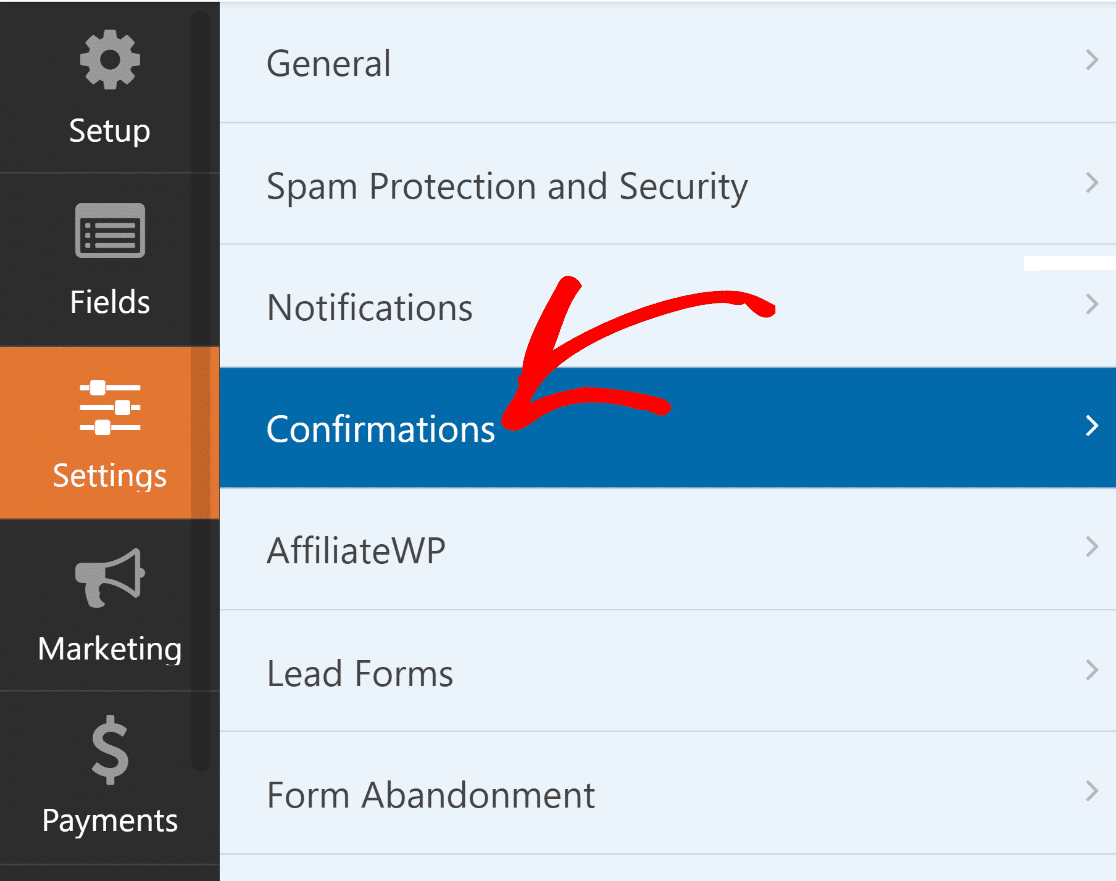
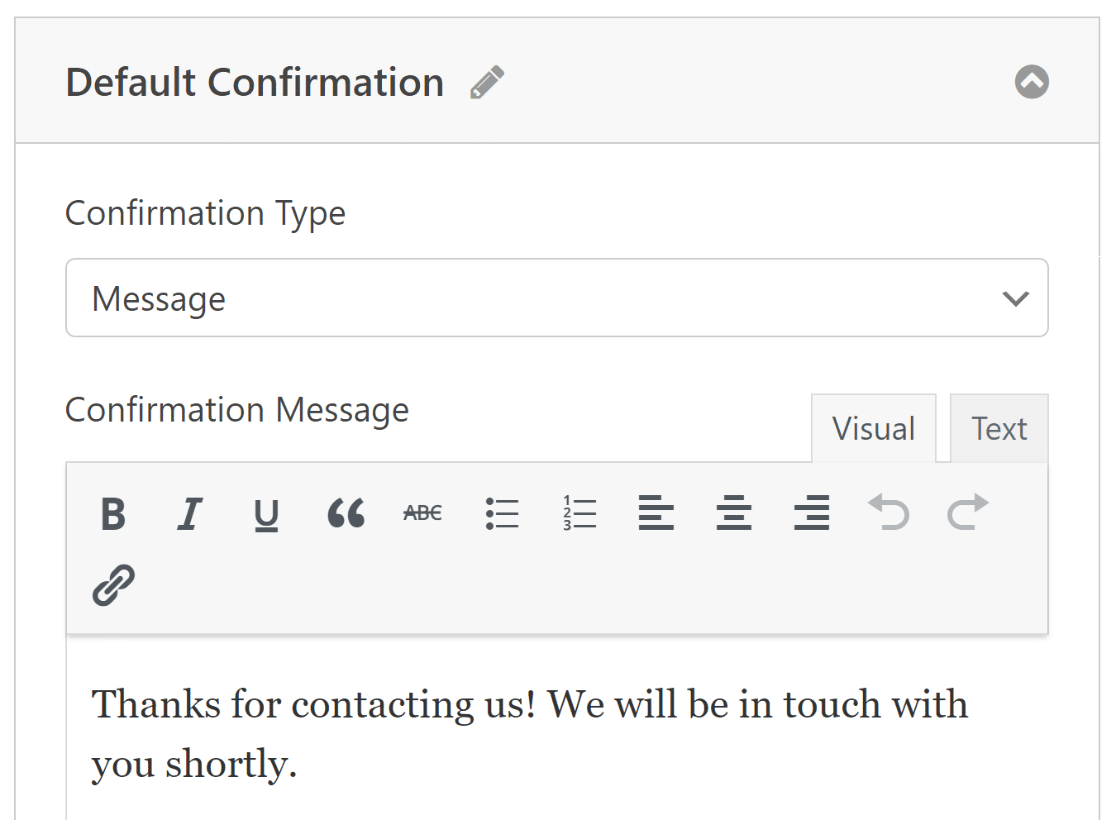
For customizing the confirmation message that is displayed after a successful form submission, go to confirmations.
Here, you can customize the response for successful form submission. You can choose to show a custom message, display a page, or redirect to a URL. For example, if you are using the form as a part of your checkout process on your ecommerce store, you can redirect the users to the thank you page.
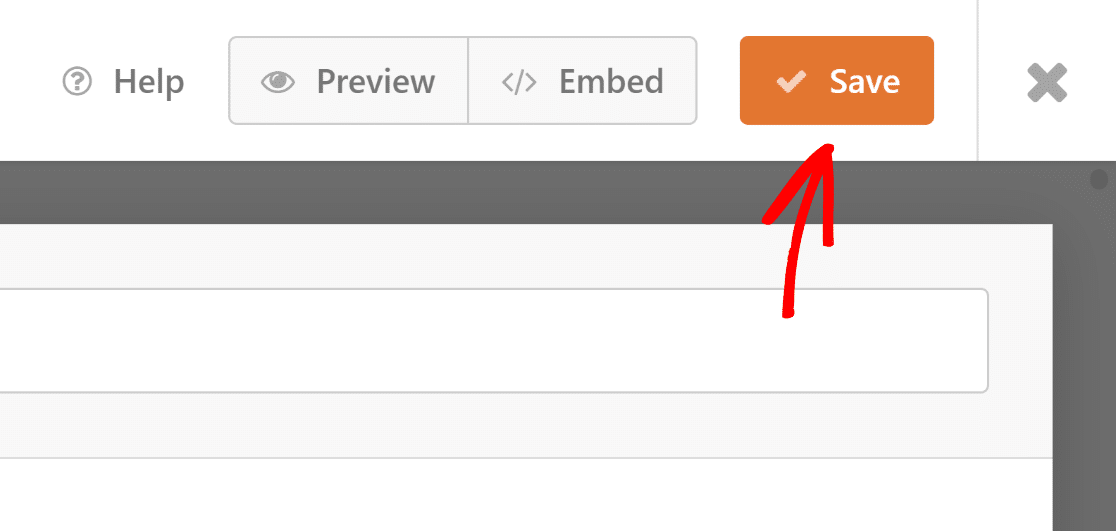
Once you are done making changes, click the Save button to save all your form customizations.
Step 5: Publish Your Multi-Step Lead Form
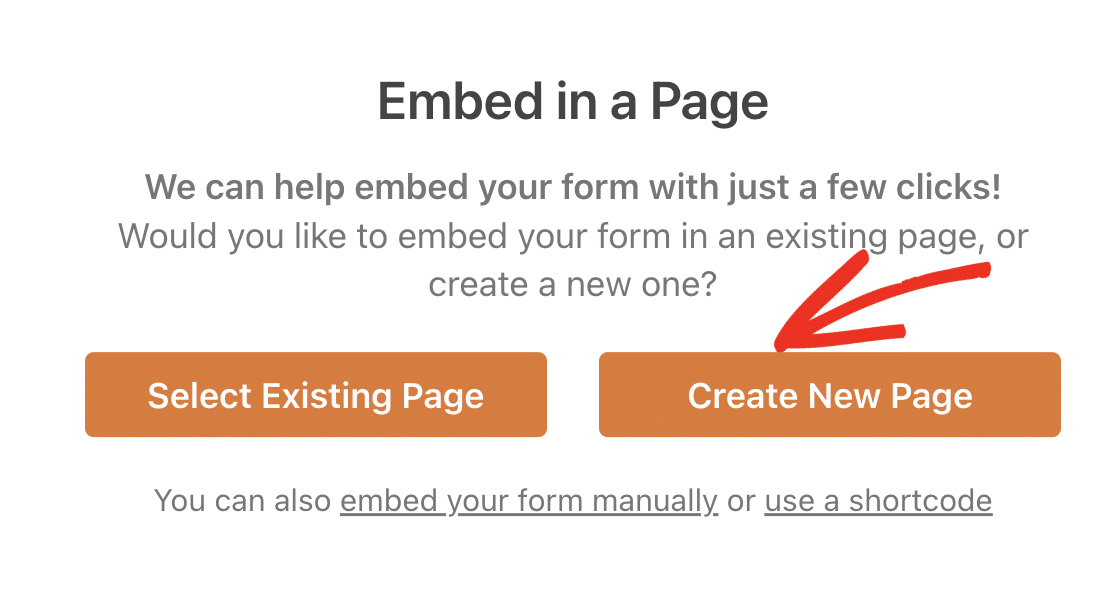
Now you just need to publish your form. You can either embed the form on an existing page on your website or create a new landing page to publish the form.
Click on the Embed option at the top right of the form builder.

If you want to create a new page for your form, click on the Create New Page button and give it a proper name. If you want to add the form to an existing page, click on the Select Existing Page button.
Finally, publish or update the page.
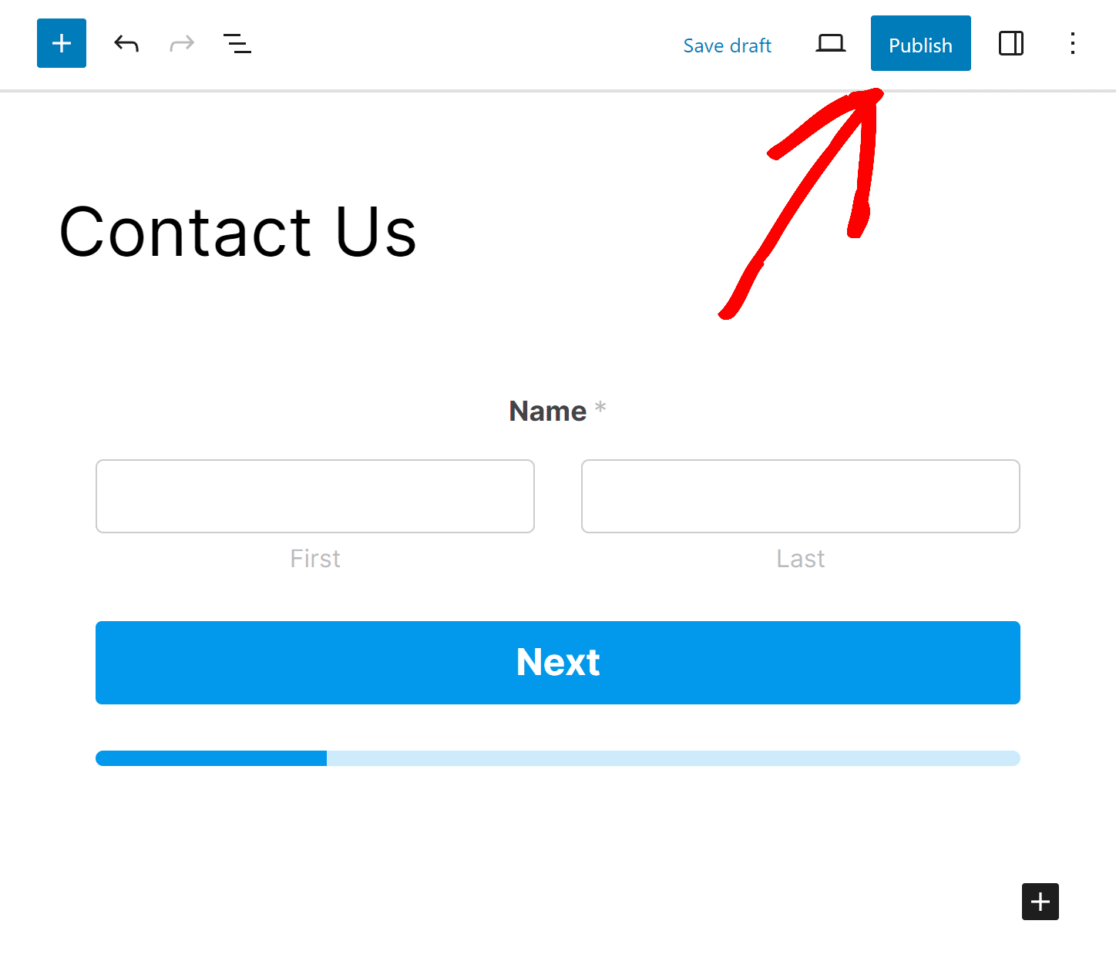
And that’s it! You now know how to create a multi step lead form in WordPress. You can always go back and make adjustments to your form to improve conversions and user experience using the WPForms’ form builder.
FAQs on Multi Step Lead Forms
Here are a few common questions that we receive from our readers about building multi step lead forms.
What is a Multi Step Lead Form?
Simply put, a multi step lead form displays input fields at different steps and shows the overall progress with the help of a progress bar. Generating a lead is the first step for any business and it should be as seamless as possible for the visitors otherwise it can lead to increased form abandonment. It is a smart alternative to a long form with a little too many input fields. By breaking down a single step form into a multi step lead form you can make the form less daunting and user-friendly to complete.
Why Create a Multi Step Lead Form?
If you create multi-step forms, you can increase your conversion rates by simplifying the form-filling process for your users. Since your readers or leads will see only a small batch of questions at a time, it will make the lead form easy to understand and process. If you need to collect multiple details from your leads right away, you can create multiple steps and break down your forms to improve the user interface and overall conversion rates.
When Should I Use a Multi Step Lead Form?
Using a multi step lead form is ideal when you have a long lead gen form for your business. With a multi page form, you can break down your one page contact form and ask questions in batches. Also, if your form conversions are low, you can try turning it into a multi step form to make it more user-friendly. If you want to connect your lead capture form to a CRM of your choice like Hubspot, you can do so with the help of dedicated addons.
Next, See How You Can Track Form Conversions
Now that you will potentially get more form submissions, you need to pay attention to how you can track and optimize those conversions. This step-by-step guide will show you how to track form conversions on your site for all use cases.
Ready to build your multi step lead form? Get WPForms Pro today to create unlimited attractive and user-friendly online forms on your WordPress site. WPForms Pro comes with hundreds of high-converting, pre-designed, ready-to-use form templates for attractive pricing, and a 14-day money-back guarantee.
Boost Conversions With a Multi-Step Lead Form Now
If this article helped you understand how to create a multi step lead form on WordPress, please consider following us on Facebook and Twitter for more free WordPress tutorials and guides.

