

One of the most useful automations you can use for your business is having your custom WordPress forms connected with a CRM like Zoho.
This works wonders for putting the process of sending your leads from your WordPress forms to Zoho on autopilot, saving you valuable time and effort.
In this article, I’ll show you how to create a custom form using a native WordPress solution and integrate it with your Zoho CRM.
Create a Custom Zoho WordPress Form Now! 🙂
How to Make Custom Zoho CRM Forms in WordPress
We’re going to use the WPForms plugin to quickly build a Zoho form in WordPress. While Zoho offers a form builder along with a WordPress plugin, it has several limitations, such as fewer spam prevention options.
Many of our customers prefer the easier and wider range of customizability of WPForms and integrate it with Zoho CRM to enjoy the best of both worlds. Here’s what you’ll need to make this integration work.
Step 1: Install the WPForms Plugin and Zapier Addon
The most beginner-friendly way of creating a custom WordPress form is by using the WPForms plugin. You’ll need an active WPForms Pro license to get started.

If this is your first time installing a WordPress plugin, check out this helpful guide with steps on successfully installing WPForms on your site.
Get Your WPForms Pro License Now! 🙂
After you’ve successfully installed the plugin, navigate to WPForms » Addons from your WordPress dashboard to access the complete list of integrations.

Use the search field and type in Zapier. Once you locate the Zapier Addon on this page, simply click the Install Addon button under it.
It will only take a few seconds for the addon to complete installation. You’ll see the Status change to “Active”. confirming that the addon is now ready to use.

Great! Now, we can move to the next step and start creating a custom WordPress form to connect with the CRM.
Step 2: Create Your Zoho Form in WordPress
Go ahead and create a new form by clicking WPForms » Add New from your WordPress dashboard.

After the form setup screen appears, you can enter a name for your form to identify it and choose a template.
Let’s use the Simple Contact Form template to get started faster. WPForms includes over 2,000 WordPress form templates covering a wide range of scenarios, so feel free to pick any that suits you the best!

The contact form template has 4 fields by default:
- First Name
- Last Name
- Email address
- Message
It’s important to ensure that your form includes at least the Last Name and Company field in order to integrate this form with Zoho FRM.
The contact form template already includes the Last Name field, but you can manually create a Company field here. To do this, drag a Single Line Text field to the form preview on the right.

After inserting the field into your form, click on it to access its Field Options on the left-hand pane. These options will allow you to change the label of the field and control whether it should be a mandatory field.

Simply enter “Company” in the label setting and click the Required toggle button to make this field mandatory.

Go ahead and add more fields to match the data you want to capture in Zoho CRM. You can also use the form builder to:
- Change the order of the fields by dragging them up or down
- Rename your fields
- Remove fields you don’t need.
If you need help, check out this guide on creating your first form in WPForms. Make sure to click the Save button at the top when you’re done.

With the form ready, it’s time to embed it on a page. This will make it possible for you to test the form and its integration with Zapier once we’ve connected the two platforms.
Step 3: Publish the Zoho CRM Form on Your Website
It’s really easy to publish a form in WPForms. You can add your form to a page, a post, or even place it in the sidebar.
In this example, I’ll show you how to embed your form in a new page. Start by clicking, the Embed button located at the top right.

This will open a modal where you can choose to embed the form either in a new page or in an existing one. Let’s go with the Create New Page option.

Go ahead and write a name or your page and then press the Let’s Go button.

Press the Publish button when you’re ready. You can also defer publishing the page if you’d like to test the integration out first. In that case, you can simply Preview this page.

Regardless of the approach you take, you’ll need to fill out a test entry yourself here. This is important for Zapier to properly configure the integration.

Once you’ve submitted your entry, it’s time to start creating the automation in Zapier.
Step 4: Connect WPForms to Your Zapier Account
Before logging in to Zapier, it’d be helpful to grab the API key you’ll need to establish a connection between Zapier and WPForms.
You can find your key by going to WPForms » Settings from your WordPress dashboard.

Click on Zapier here to find your WPForms Zapier API key, along with your full site URL (you’ll also need to enter this later).

Great! Now, you can leave this window open and start a new tab in your browser. Then, log in to your Zapier account.
At the top-left, click Create.

Next, click on the Trigger.

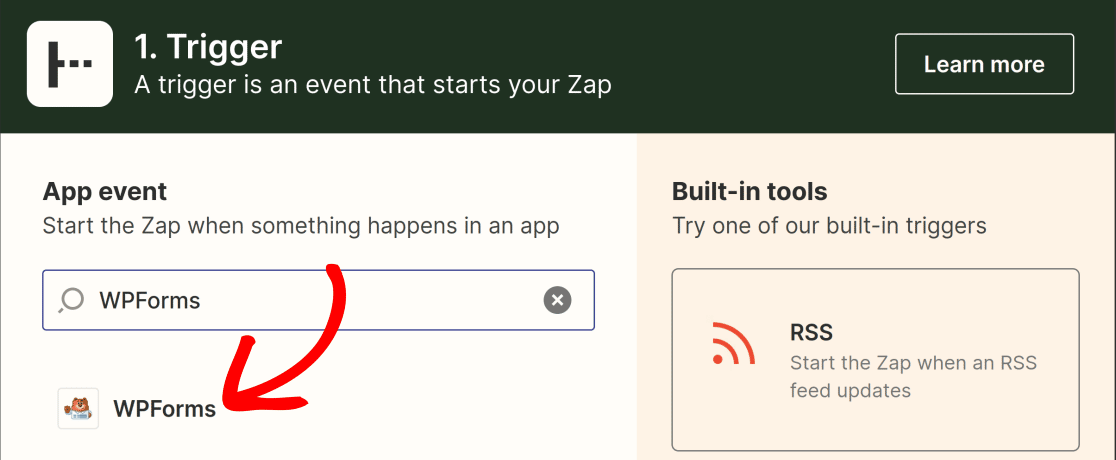
Search for WPForms under the App event box and click on it when it appears in the results.
After that, select New Form Entry as the trigger event, so that this automation kicks off every time a user submits your form. Press Continue after setting the trigger event.

Click on the Sign In button in order to begin the process of connecting Zapier with your WordPress account.

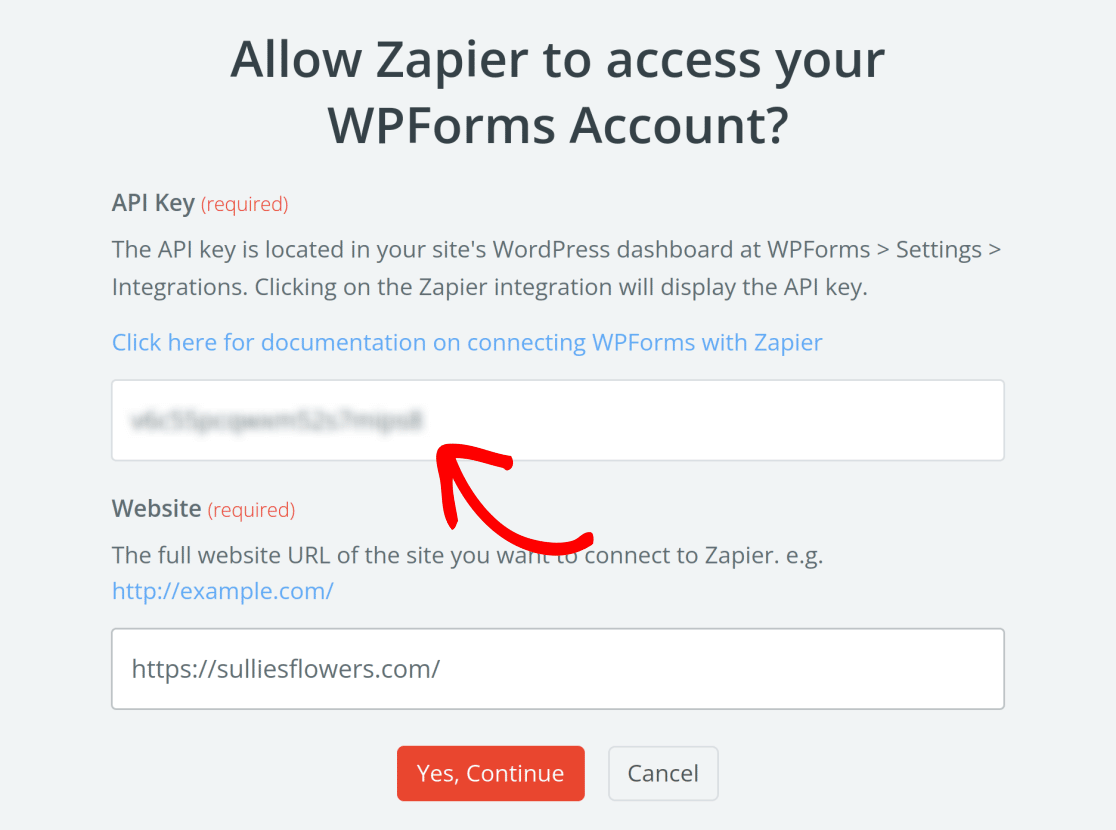
You’ll now see a new window open where you’ll need to enter your Zapier API key and your website’s URL.
Click on Yes, Continue after pasting the required information.
Your WPForms account should now appear as successfully connected with Zapier. Press Continue again at the bottom to proceed.

At this point, you’ll have to select the exact form that you want to connect with your Zoho CRM. This will be the form that you just created. So in my case, this form is called “Zoho CRM Form”.
Use the dropdown to select the form (you’ll find all the forms you’ve previously created and saved appear here), then click on Continue again.

After that, Zapier will ask you to test the trigger to ensure your form is able to communicate with Zapier. Go ahead and press Test Trigger.

If you sent a test entry from the form like I showed you in a previous step, Zapier will now fetch that record and display it. This should perfectly match the test entry you sent.
Check to make sure the entry is correct, then click on Continue with selected record.

Fantastic. This brings us to the end of the trigger setup. The puzzle piece left now is the action event, i.e. Zoho CRM, which needs to be connected with Zapier to make this whole system work like a well-oiled machine.
Step 5: Connect Your Zoho CRM With Zapier
As soon as you move on to the next step, Zapier will ask you to choose an action for the trigger that you just set up. You can use the search box to find Zoho CRM here and click on it when it appears.

Then, select the Create/Update Module Entry action event from the dropdown. This essentially just means this action will create or update the contact information of a lead in Zoho CRM every time the associated form is submitted from your WordPress site.
Press Continue.

Now, it’s time to connect your Zoho account with Zapier. Click on the Sign In button to start this process.

When the new window opens, you’ll first need to select your Zoho CRM domain. Depending on the region you’re in, your Zoho URL could be ending with .eu, .au, .uk, .com, and so on.
You can check this simply by directly opening your Zoho CRM account and looking at your URL. Since my Zoho CRM URL ends with .com, I’ll select zoho.com from the dropdown.
Once you’ve made your selection, click on Yes, Continue to Zoho CRM.

After that, simply sign in to your Zoho account using your credentials to continue.

Accept the permission requests to finish your Zoho CRM connection with Zapier.

If your account was successfully connected, your Zoho CRM name will appear here and the Continue button at the bottom will become available.

Once you click Continue, you’ll now have to make a few selections to map the fields correctly between WPForms and Zoho CRM.
The first two important settings here:
- Module – Select “Leads” as your module
- Layout – Select the “Standard” layout.
If you have a separate workflow configured in Zoho as well, you can select the trigger for that workflow here. Otherwise, you can leave this option blank.

Scroll down further to find additional field mapping options. There are 2 mandatory fields you need to map here:
- Last Name – Select the Last Name field from the dropdown
- Company – Select the Company field from the dropdown.
These field mappings will allow Zoho to correctly identify what the data coming from each field in your form represents.
Depending on the amount of fields you have in your WordPress form and the data you’re capturing, you can also map additional fields here. But the Last Name and Company fields are the only two mandatory fields if you’re using the Leads module.
When you’re done with the field mappings, click on Continue.

Now, Zapier will pull the information from the test entry you earlier created using WPForms and prepare that data to be sent into your Zoho CRM.
Click on Test Step to check and confirm the data is passing correctly from your custom WordPress forms to your CRM.

In just a few seconds, you should see a message appear confirming that the module entry was successfully sent to Zoho.
All that remains now is to open your Zoho CRM and check your dashboard. You should see the test lead that Zapier just sent to your account.
Aaaand it worked! Here’s my WordPress form data in Zoho:

You can use exactly the same technique to build a larger form to capture every field in your Zoho CRM layout.
And you can also learn how to get more leads to fill out your forms.
Don’t forget: you can also view your form submissions in the WordPress dashboard. If you’d like more information about this, read how to save contact form data in the WordPress database.
Create a Custom Zoho WordPress Form Now
FAQs about How to Make a Custom Zoho Form
Creating a WPForms + Zoho CRM form is a popular topic of interest among our readers. Here are answers to some common questions about it:
What Is Zoho CRM?
Zoho CRM is a customer relationship management (CRM) application that runs in your browser. It lets you capture and manage leads, track them through your sales pipeline, and convert them into paying customers.
In Zoho CRM you can:
- Manage leads, contacts, and accounts
- Track deals
- Make to-do lists
- Create workflows
- Customize the layout of different modules.
Zoho CRM is free for up to 3 users. If you want to use Zapier with Zoho CRM, you’ll need the Standard plan or higher.
How to create a custom form in Zoho?
To create a custom form in Zoho, you can use Zoho Forms, which allows you to design forms tailored to your needs.
If you’re looking for more flexibility and ease of use, consider using WPForms. With WPForms, you can create custom forms for your Zoho CRM and integrate them seamlessly with your WordPress site.
Does Zoho have a form builder?
Yes, Zoho offers a form builder called Zoho Forms, which lets you create various types of forms that can be integrated with Zoho CRM.
If you’re working with WordPress, WPForms is a great alternative that offers easy integration with Zoho CRM while providing a user-friendly form-building experience.
Is Zoho Forms any good?
Zoho Forms is a solid tool for creating forms, especially if you’re already using Zoho CRM. It offers a range of features for customizing and automating your forms.
However, if you’re using WordPress, WPForms might be a better option due to its ease of use, extensive features, and seamless integration with Zoho CRM.
Next Step, Use Zoho Mail SMTP in WordPress
Do you use other products in the Zoho suite? To improve email deliverability, find out how to use Zoho Mail SMTP to send emails from WordPress.
If you’re looking for more ways to collect leads, you’ll find tons of helpful ideas in this article on the best lead generation tools to get more targeted leads.
We also have a guide on creating a WordPress Salesforce integration, along with some other guides related to using Zapier and WPForms, such as:
- How to Get Microsoft Teams Alerts from Your WordPress Forms
- How to Get an SMS Notification From WordPress Forms
- How to Create a Notion Form in WordPress
Create Your WordPress Form Now
Ready to build your form? Get started today with the easiest WordPress form builder plugin. WPForms Pro includes lots of free templates and offers a 14-day money-back guarantee.
If this article helped you out, please follow us on Facebook and Twitter for more free WordPress tutorials and guides.

