


AI Summary
If you run a WordPress site that needs to verify who someone is before letting them in, you’ve got a real problem to solve.
Contests, age-restricted shops, member sign-ups, and freelancer onboarding, they all need ID collection, but none of them need a $300/month KYC platform to pull it off.
The good news is that WPForms has a clean way to do this through a regular form. This guide walks through exactly how to build that form.
Build Your Photo ID Collection Form! 🙂
How to Collect Photo ID Verification With WordPress Forms
Once WPForms is on your site, building the form takes around 15 minutes from start to finish, The centerpiece is a single field called the Camera field that lets visitors snap a photo of their ID right inside the form.
When a WordPress Form Is Enough for ID Verification
There’s a real question to answer before you build anything. Should you handle ID verification with a form on your site, or should you pay for a dedicated KYC service?
A form is the right choice when you need to capture an ID for human review, and when the volume is manageable enough that a person actually looks at each submission.
Contest entries, freelancer onboarding, contractor verification, age-restricted member sign-ups, internal vendor onboarding, and most light KYC use cases where you’re not bound by specific regulatory mandates.
On the other hand, a dedicated KYC service is the right choice when you need automated authenticity checks on the ID itself, when you’re regulated under financial AML rules, or when you need to cross-reference against government databases or sanctions lists.
For most WordPress sites, a form should be enough. Reach for the SaaS layer when the form stops being able to keep up with your volume or your compliance requirements.
Step 1: Install the WPForms Pro Plugin
WPForms is a drag-and-drop form builder for WordPress that powers more than 6 million sites. It comes with form templates for almost every use case, plus a long list of fancy fields that go well beyond basic contact forms.
For ID verification specifically, you get the Camera field, File Uploads for supporting documents, and conditional logic for branching by ID type.
What I like most about WPForms for ID verification is that you don’t need to glue together a SaaS plugin, a separate form builder, and a storage service.

Everything from capture through validation and access control lives inside the same plugin, which is a meaningful cut in moving parts when you’re handling sensitive data.
To get started, buy the Pro license, as the Camera field itself is part of WPForms Basic, but a real ID verification workflow benefits from Pro features like Form Locker for page-level password protection and Google Drive or Dropbox for off-site storage.
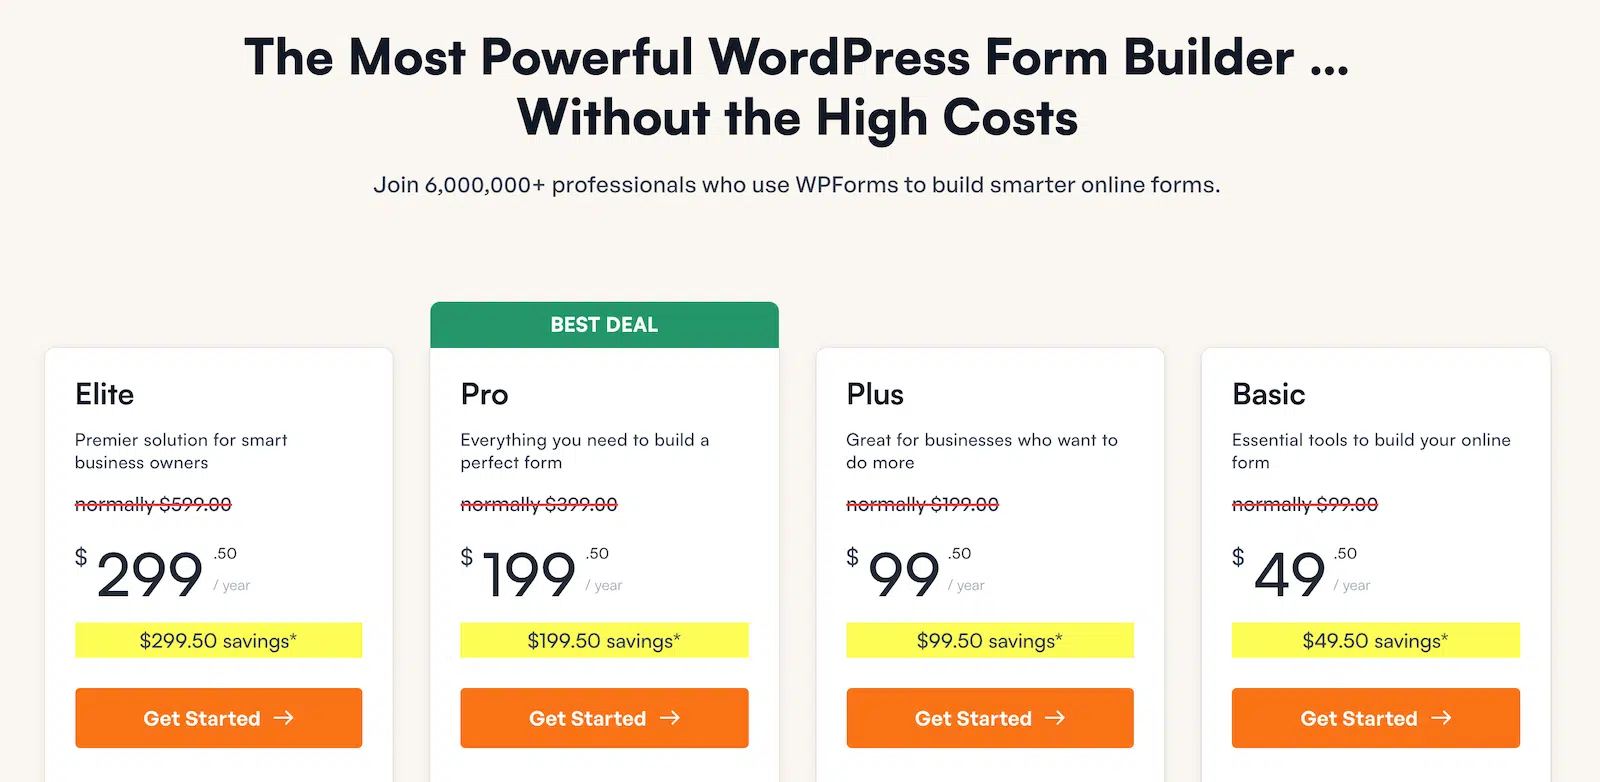
Once your license is active, install WPForms on your website. If you need help, follow these instructions on how to add a plugin to WordPress.
Step 2: Create Your ID Verification Form
Inside your WordPress dashboard, go to WPForms » Add New and either pick a form template that’s close to what you need, or click Blank Form to start from scratch.

For ID verification specifically, the simple contact template is a clean starting point because most of the fields you’ll add are the same. A practical ID verification form needs roughly these fields, in this order:
- Name (split into First Name and Last Name)
- Email Address so you can confirm receipt and follow up
- Phone Number as an optional field, useful for verification calls when a photo is unclear
- ID Type dropdown (Driver’s License, Passport, National ID, and so on) for downstream routing
- Camera field for the ID photo, which is the centerpiece and gets configured in the next step
- Camera field for a selfie, only needed if you’re doing identity matching where you compare the ID photo to a live photo
- GDPR consent checkbox with a clear statement of what you’ll do with the photo and how long you’ll keep it

If you’re collecting additional documents like a proof of address, add a separate File Uploads field below the Camera fields.
The File Uploads field accepts PDFs and images visitors already have on their device, while the Camera field is built specifically for live captures.
Skip Everything!
If you’re short on time (or just don’t want to manually set up every field), you can let the WPForms AI Form Builder handle it for you.
From your WordPress dashboard, go to WPForms » Add New. Then, hover over the purple Generate With AI button and click Generate Form.

You’ll land on the WPForms AI form builder screen. This is where you describe what kind of form you want.
Step 3: Add and Configure the Camera Field
The Camera field is the photo capture engine for this form. You’ll find it in the form builder’s left sidebar under the Fancy Fields section. Click it or drag it into the form preview area to add it to your form.
Once the Camera field is in your form, click on it to open the Field Options panel. Then, customize the Label to be specific. “Photo of Your ID” or “Driver’s License Photo” tells visitors exactly what to capture.
Right below that, you’ll also see a Format setting at the top with two choices, Photo and Video. For ID verification, keep this on Photo. Video is great for spoken declarations and witness statements, but it’s overkill for an ID snapshot.

Next, set the Max File Size. The default uses your server’s upload limit, which is typically 64 MB. For ID photos that’s far more than you need, and you don’t want to encourage giant uploads.
Set this to 5 or 10 MB. Modern phone cameras produce images that fit comfortably in that range, and a tighter cap protects your server.

Open the Advanced tab next, and you’ll find a Style dropdown for how the capture control displays (button or link), and a Button Link Text field where you can customize the label that appears on the capture button.
If you’re collecting both an ID photo and a selfie for identity matching, repeat this whole step for the second Camera field. Use a different label like “Take a Selfie for Verification” so visitors don’t confuse the two captures.

Step 4: Lock Down Storage and Access
Click on the Camera field, open the Advanced tab, and scroll down to the storage and access toggles. Two settings matter most for ID verification.
The first is Store File in WordPress Media Library. Off by default, it keeps the photo in the WPForms folder. Toggling it on moves the file to your Media Library, where it appears in the standard WordPress media interface.

The tradeoff is that Media Library files have more predictable URLs and show up in your Media Library list, which can be a privacy concern for sensitive ID data.
For ID verification specifically, leave this toggle off and let the file stay in the more obscure WPForms folder. The second is Enable File Access Restrictions, toggle this on.

Once it’s enabled, you can restrict access to the uploaded file in two ways. The first restricts viewing to specific WordPress user roles (typically Administrator and Editor for ID files).
The second password-protects the file so only people with the password can view it. For sensitive ID data, the role-based restriction is usually the better default since it doesn’t require you to manage and share passwords with reviewers.

Step 5: Set Up Confirmation & Notifications
Head to Settings » Notifications in the form builder. The default notification sends an email to your WordPress admin. For ID verification, you usually want this routed to a specific team.
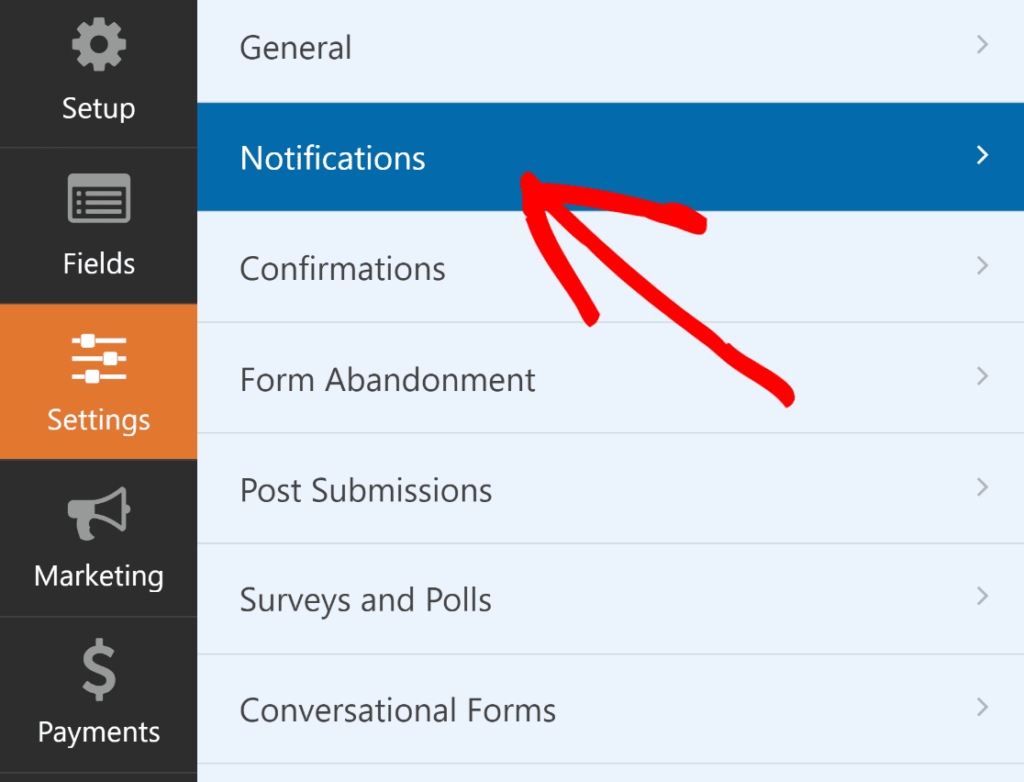
Change the Send To Email Address to your verification team’s inbox or shared alias.
Make the Email Subject specific so reviewers can spot these submissions in a busy inbox. Something like “New ID Verification Submission From {Name}” pulls the visitor’s name into the subject line.

While you’re in Settings, also check the Confirmations tab. Update the default thank-you message to set expectations.
“Thanks for submitting your ID. Our team will review it within 24 hours and email you a confirmation” is clearer than the default “Thanks for contacting us!”
Step 6: Test and Embed Your Form
Before publishing, test the form on both desktop and mobile. The mobile test matters most because most ID submissions happen on phones.
Click Preview in the top right of the form builder. Open the preview in a private browsing window on your desktop and mobile, and try the Camera field with your webcam.
Once you’re happy with how your form looks and works, click Save in the top right corner of the form builder. Now, you’re ready to take your form live on your website!
Click the Embed button at the top of the form builder. You’ll see two options: add your quiz to an existing page or create a new page from scratch.

WordPress will open the block editor with your form already embedded on the page. Now’s a good time to style things if you want using WPForms’ native black editor styling options.
To make quick work of styling your form, you can select a ready-made theme under the Form Theme section. In this example, I’m using the Sonic theme (which is one of my favorites).

When you’re happy with how everything looks, click the Publish button at the top right of the editor. Your ID verification form is now live and ready for visitors to fill out.
FAQs on Photo ID Verification With WordPress Forms
Photo ID verification with WordPress forms comes up a lot for site owners who want a simple workflow without paying for a dedicated KYC service. Here are answers to the most common follow-up questions.
Can WordPress do real KYC compliance?
For light KYC workflows where a person reviews each submission, yes. A WordPress form with the Camera field captures the photo, your team reviews it manually, and you approve or reject the user.
The picture changes when you need automated checks like OCR, document authenticity scoring, or watchlist screening.
At that point, a dedicated KYC service is the right tool. WordPress works as a starting point until your compliance requirements outgrow manual review.
Is the Camera field secure enough for sensitive ID data?
The Camera field on its own captures the photo securely over HTTPS and stores it in a private folder. To make it genuinely secure for ID data, combine it with File Access Restrictions (built in), HTTPS on your site, a strict retention policy, and ideally off-site storage via the Google Drive or Dropbox addon so sensitive files don’t sit on your WordPress server long-term.
Can users upload an ID from their gallery instead of taking a new photo?
The Camera field is specifically for live captures from the webcam or phone camera. For uploading existing files from a phone’s gallery or computer, use the standard File Uploads field.
You can have both on the same form, so users with stored ID photos can upload them while users without can capture live.
What happens if a visitor’s camera doesn’t work?
If a visitor denies the camera permission prompt or their device doesn’t have a working camera, the Camera field won’t function.
The cleanest fallback is to include a File Uploads field next to the Camera field so visitors who can’t use the camera can upload an image they already have. A short Paragraph Text field with troubleshooting tips next to both fields is helpful too.
How long should I store photo IDs on my site?
Use the shortest reasonable retention period for your use case. For most workflows, 30 to 90 days after verification is enough time to handle disputes or rechecks.
After that window, delete the entry (or just the file attachment) to limit your exposure. GDPR and CCPA both push toward minimum retention, so a documented short-window policy is also the compliance-friendly answer.
Next, Build a Complete Verification Workflow
The Camera field handles the photo capture, but a complete verification workflow has a few more moving pieces around it.
If you want sign-off at the end of the process, the digital signatures feature lets visitors sign a confirmation statement after their ID is reviewed.
For age-gated access more than identity matching, the age verification plugins for WordPress roundup compares the dedicated tools side by side.
Readers new to the Camera field can also dig into the step-by-step Camera field tutorial for every option in more depth.
Ready to build your form? Get started today with the easiest WordPress form builder plugin. WPForms Pro includes lots of free templates and offers a 14-day money-back guarantee.
If this article helped you out, please follow us on Facebook and X (Twitter) for more free WordPress tutorials and guides.





