AI Summary
Submit buttons are one of the most easily ignored aspects of form design. Even though they’re a small part of forms tucked into the bottom, submit buttons can still make a big impact on your form’s overall visual appeal.
After testing tons of different kinds of lead forms to boost conversions, I can tell you that a well-crafted submit button can make all the difference in catching your visitors’ eye.
In this article, I’ll share some tips and best practices based on my experience optimizing lead forms for conversions. Let’s dive in.
Basic Submit Button Styling Tips in WPForms
WPForms gives you different ways to style the submit button in your form. I prefer using the Form Style options in the WordPress block editor. It’s the easiest way to customize pretty much every component of your form.
The button style customizations are available in all versions of WPForms. But I recommend using WPForms Pro to unlock the full range of style options including ready-made form themes as well as settings for your form background and containers.
You can find the settings for submit button styles on the right-hand panel of your form options inside the block editor.
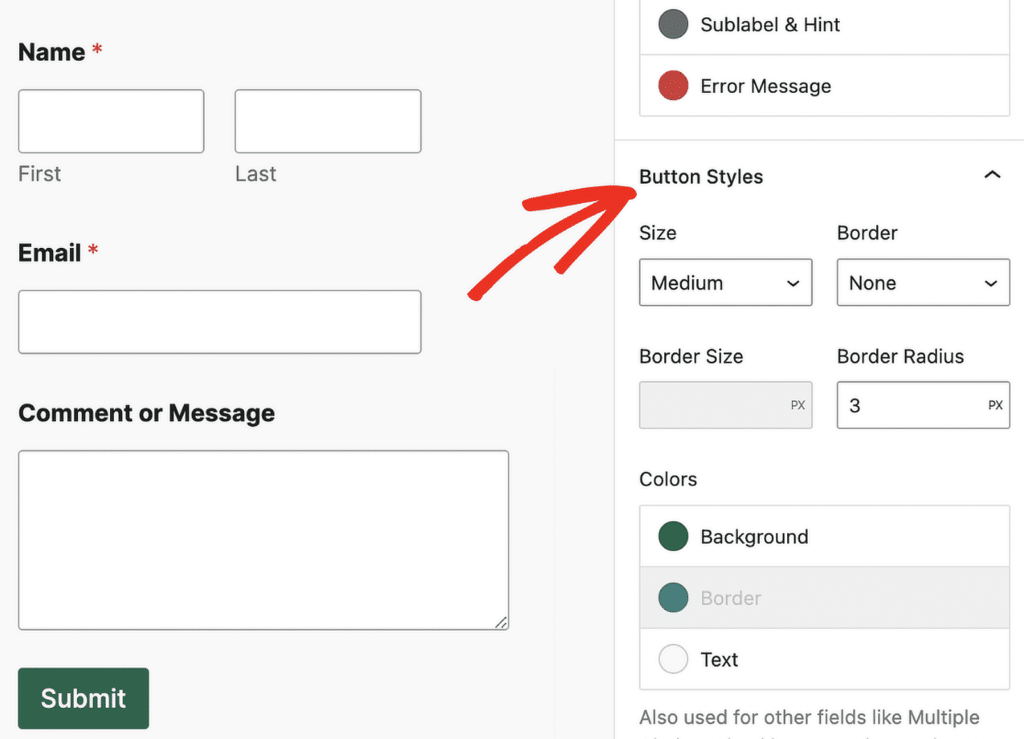
These settings let you control the submit button size, border, and colors without any code.
Submit Button Size
WPForms gives you three presets for button size: small, medium, and large.
All 3 options are perfectly viable from a design standpoint. You won’t be violating any best practices by picking any size of the button here.

What’s more important here is design consistency. For example, if you’re using small field sizes and large buttons, your form might look a bit disproportionate in places.
For the best balance, try to use consistent sizing for all elements in your forms.
Our guide on form styling using the block editor explores the different customization options for each form component. All of these different aspects come together to create the perfect form design.
Border Type
Border types are entirely a stylistic choice. If you’ve noticed, it’s increasingly common to use a borderless design for a clean and minimal style.
However, you also have options to use less common border types in WPForms:

- Solid borders are quite popular and give your forms a professional and refined look.
- Dashed or dotted borders are less common, but they add a touch of playful creativity. Use it if your website theme is more casual but be careful not to overuse it.
- No border designs are sleek and modern, often used to emphasize minimalism or to integrate the button seamlessly with the background. When going borderless, make sure there’s enough contrast or shadow to distinguish the button from surrounding elements.
Border Size
You can also adjust the size of your border. It’s good practice to have border thickness that complements the button size. When I’m using a small button size, I make sure to complement it with a thin border of size 3-4px. This creates the most visually balanced look in my experience.
For large buttons, a border width of 4-6px is more suitable. A good rule to follow is to use subtle borders that add structure without overwhelming the button design.

Border Radius
The border radius setting in WPForms gives you full control over how rounded you want your buttons to look. Rounder buttons work great in themes using modern styles.
In fact, some studies have found a correlation between round buttons and higher conversions. It’s worthwhile to experiment with round buttons if you’re optimizing for conversions.
You can use a border radius size of around 15-20 px to attain the capsule-style button look that many modern sites today use.

If you’d rather stick with a formal vibe, feel free to keep the border radius at 0px to keep your button square-shaped.
The important thing is to balance the curvature of your button with your overall website design theme.
I have a theory that rounder shapes work better when used sparingly. This way, they’re more likely to stand out from the popular geometric shapes you generally use on other parts of your site.
Button Background Color
In WPForms, the button background color is easy to select with the color picker. Choosing the color is important because this affects your button’s visibility.
Select a background color that contrasts with your form background to make your button as comfortably visible as possible for every device.
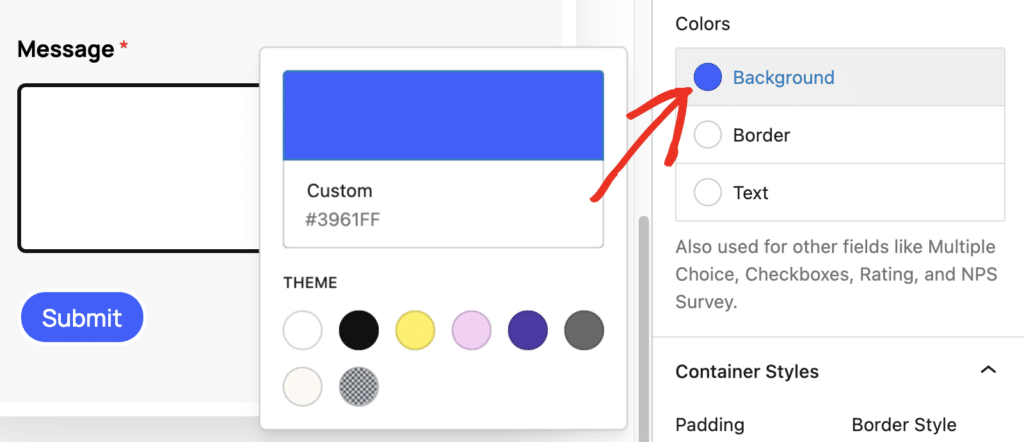
Your branding also plays a role in color selection. If your web design is grounded on a brand color palette, it’s generally a good idea to stick close to your brand’s theme colors.
At any rate, make sure to avoid overly bright or clashing colors that might distract users unnecessarily.
Border Color
The border is only a small fraction of the submit button. But it’s a great place to add accent colors to boost your form’s visual appeal.
Borders look most attractive when they contrast nicely with your button’s background color. This not only adds personality to your design but also enhances visibility of your button.
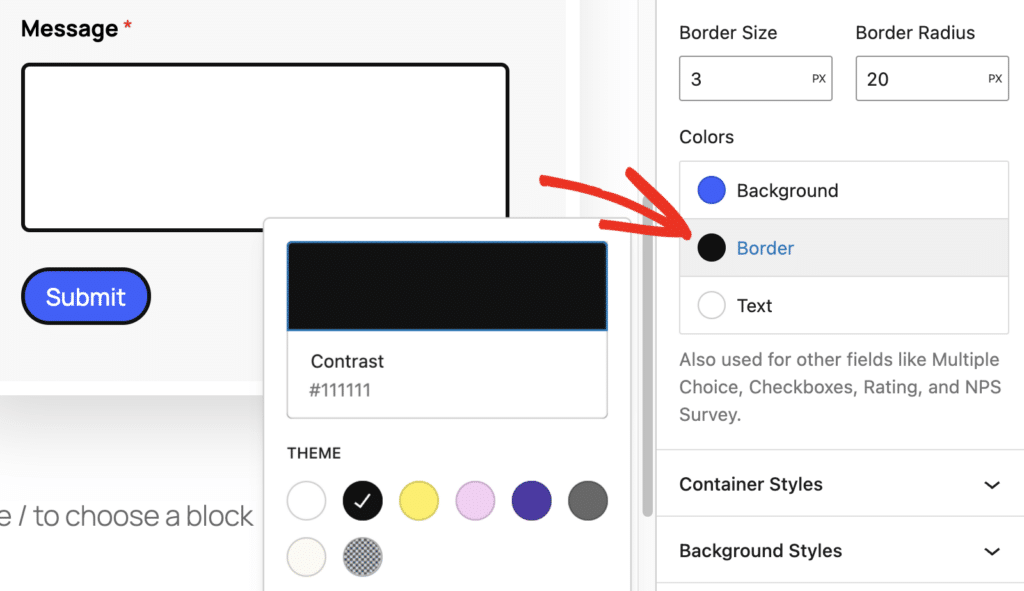
I recommend using subtle tones to avoid drawing too much attention to the border itself. The goal is accentuate the button rather than increasing distractions with flashy button borders.
Button Text Color
With the button text color, you should have a single goal: prioritizing readability. The easiest way to make your button text easy to read is by using text color that contrasts sharply with the button’s background.
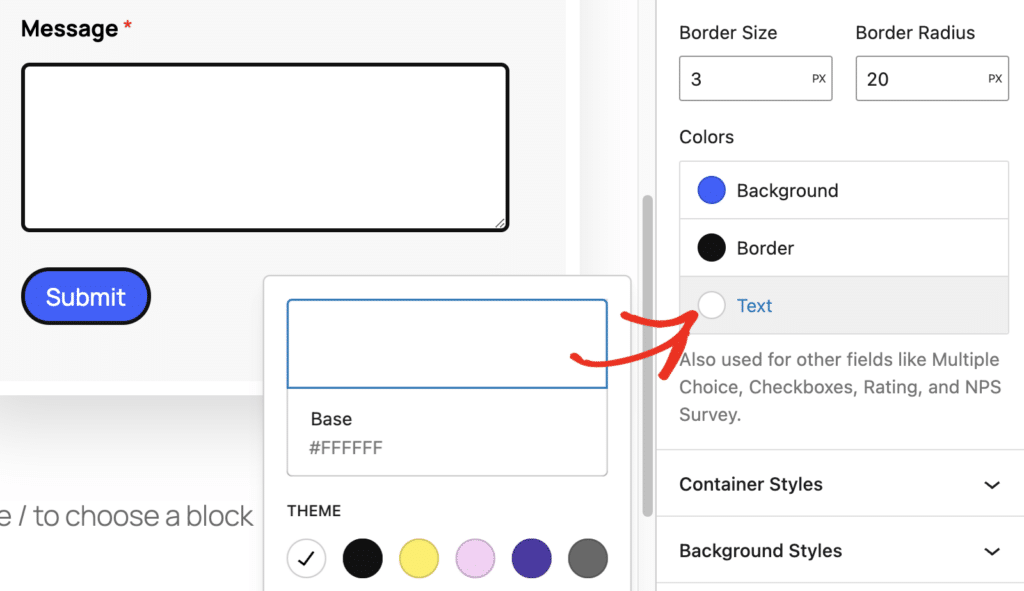
A good general rule to follow is to use white text for darker button backgrounds and black or dark gray text for lighter shades of backgrounds.
While you can get away with bold and vibrant colors in other components of the submit button, it’s best to avoid straying too far from standard neutral colors for text color to maintain good readability.
Advanced Styling Techniques for Submit Buttons
WPForms doesn’t require you to use any code for basic styling of your button. However, you’ll need to use simple CSS for some advanced effects like gradient colors.
This is much easier than it sounds. First, you’ll need the WPCode plugin installed on your site, which will allow you to easily insert code snippets for changes to your submit button styles.
Install WPCode
Open your WordPress dashboard and go to Plugins » Add New.

On the Add Plugins screen, use the search box to search for WPCode. Then, press the Install Now button to add the plugin to your site.
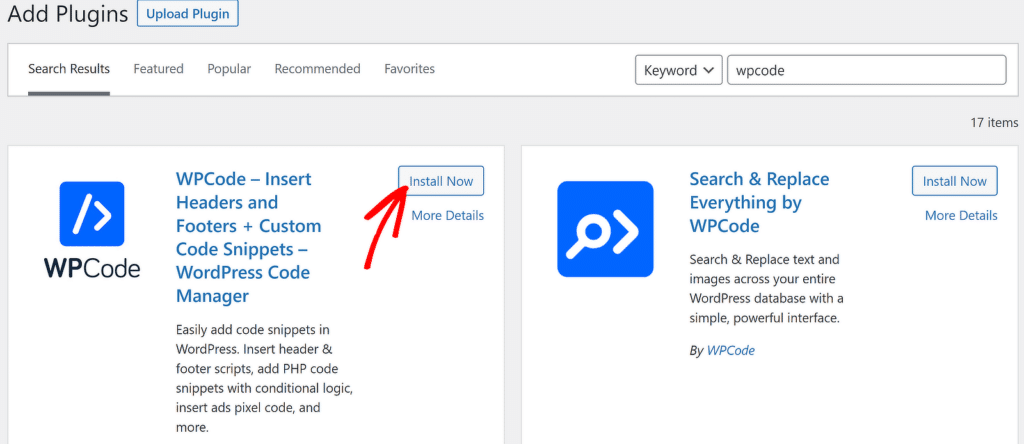
The “Install Now” button will change to “Activate” after it’s finished installing. Press the Activate button and you’re ready to use WPCode to add code snippets to your site.
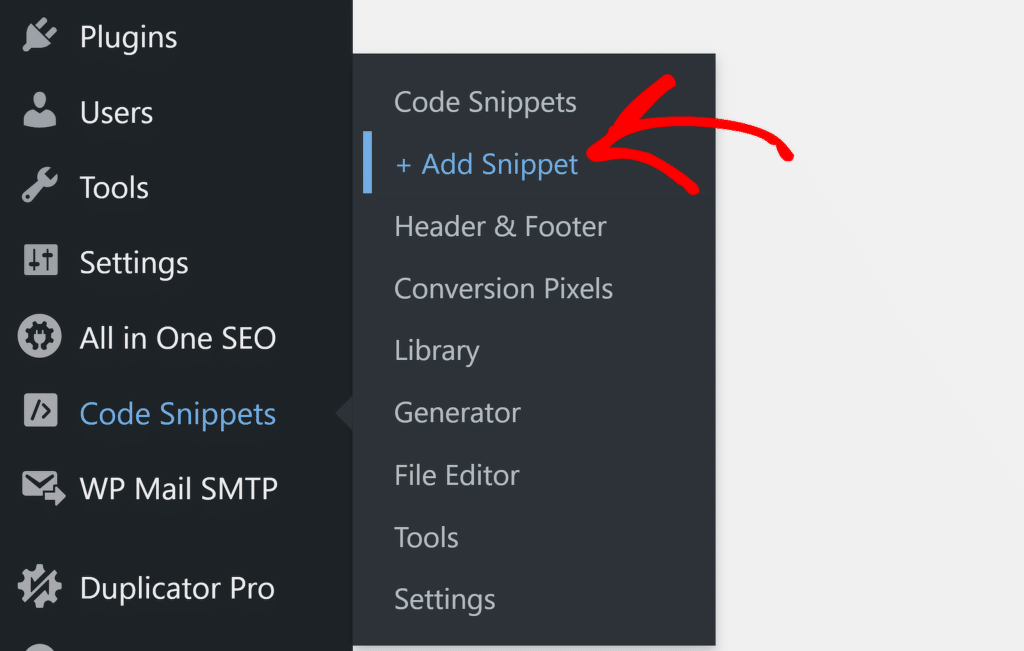
After that, hover your cursor over Code Snippets on the side panel of your WordPress dashboard and click on + Add Snippet as the menu expands.
Then, click on Use Snippet under Add Your Custom Code (New Snippet)

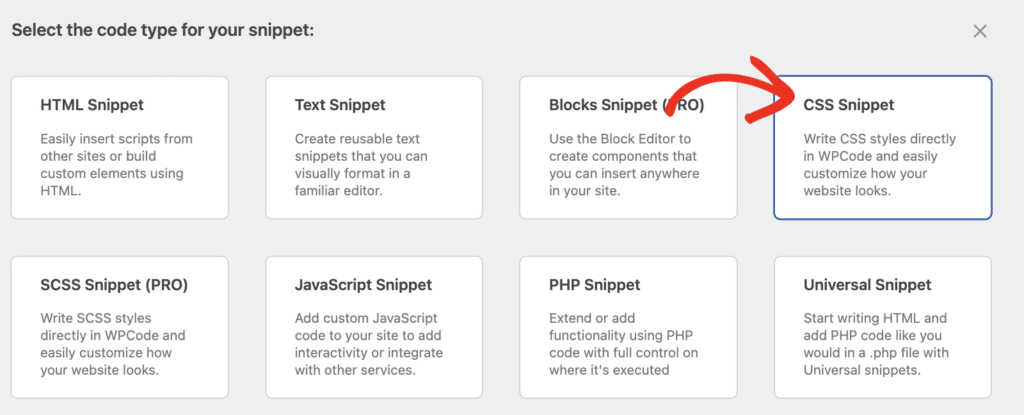
You’ll then need to select the snippet type. For style adjustments, you’ll be adding CSS custom snippets. So go ahead and select CSS Snippet from the available options.
Now, you’ll just need to copy and paste code snippets in the code editor window to apply style changes to your forms. I’ll share examples of common CSS codes you can use to change your submit button styling.
Add Gradient Colors to Submit Button
A color gradient is quite eye-catching and usually indicates a highly professional form design. This is great when you want to convey your professionalism and attention to detail with gradient colors for buttons.
Here’s the code for snippet that you can use for adding a linear gradient to the submit button color:
#wpforms-8 .wpforms-submit {
  background: linear-gradient(45deg, #066aab, #0f88d4); /* Gradient colors */
}
In this code, “#wpforms-8” refers to the Form ID of the your specific form. The form that I’m editing has the ID of 8. If your Form ID is different, let’s say 17, you can add the correct number to this piece of code (i.e., “#wpforms-17”).
You can find the Form ID of your form by looking at the number mentioned in a specific form’s shortcode. This is mentioned in the Shortcode column of your form in the Form Overview screen.
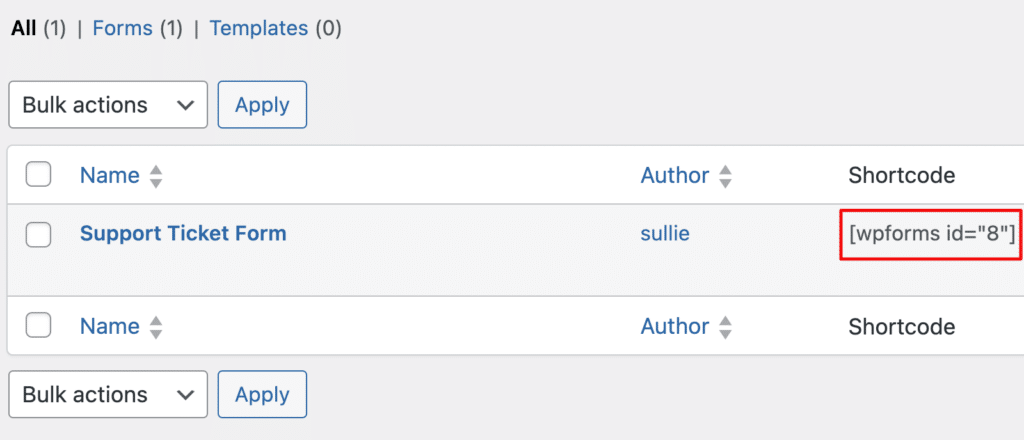
The second customizable part of this code are the values for linear-gradient. These three values inside the parenthesis separated by commas are:
- The angle of gradient
- Hex code of first color
- Hex code of second color
You can change these values as desired. If you need to find the exact hex codes for the colors you need, you can use this HTML color generator.
After you’re done creating your customized CSS snippet, click the Save Snippet button and the toggle button next to it to save and turn the snippet on.

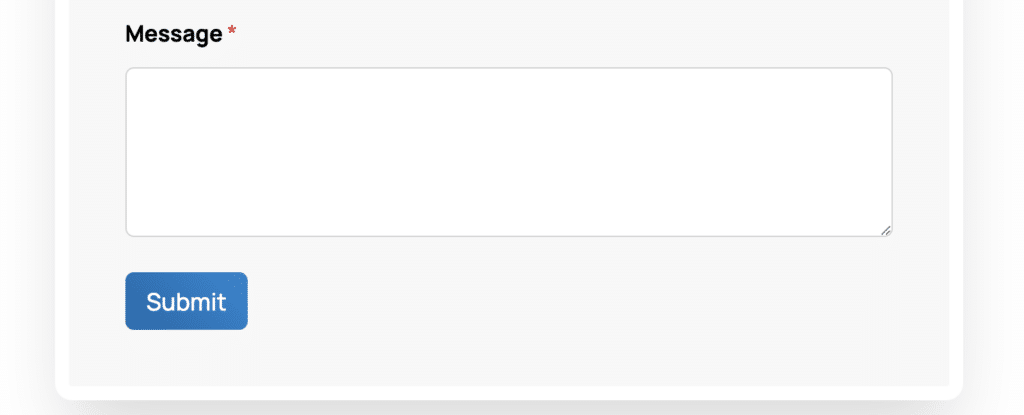
Your form will now have gradient colors applied to its submit button.
Add Hover Effects to Submit Button
By default, WPForms adds a hover effect to the Submit button to indicate that it’s interactive and provide immediate visual feedback to a visitor intending to click.
But if you want add a hover effect when using a gradient, you can use this code:
#wpforms-8 .wpforms-submit {
  background: linear-gradient(45deg, #066aab, #0f88d4); /* Gradient colors */
  transition: background 0.3s ease; /* Smooth transition on hover */
}

#wpforms-8 .wpforms-submit:hover {
  background: linear-gradient(45deg, #0f88d4, #066aab); /* Changes gradient on hover */
}
This code also includes a transition effect to ensure the interactions with the button feel polished. Generally, a transition effect of 0.3s – 0.4s provides the smoothest effect.
If you just want to change the default hover effect on a button with solid colors, you can use the WPForms Form Styles settings in the block editor to set the base background color you want.
Then, use this simplified code to change colors on hover by adding the hex code of your desired color:
#wpforms-8 .wpforms-submit:hover {
  background: #0f88d4; /* Solid color on hover */
  transition: background 0.3s ease; /* Smooth transition */
}
Make sure to click Save Snippet and activate it to apply the hover effects on your form submit button.
If you’re looking for a more unique hover effect, you can apply the pulse effect with this code:
@keyframes pulse {
  0% {
    box-shadow: 0 0 0 0 rgba(15, 136, 212, 0.4);
  }
  70% {
    box-shadow: 0 0 0 20px rgba(15, 136, 212, 0);
  }
  100% {
    box-shadow: 0 0 0 0 rgba(15, 136, 212, 0);
  }
}

#wpforms-8 .wpforms-submit:hover {
  animation: pulse 1.5s infinite;
}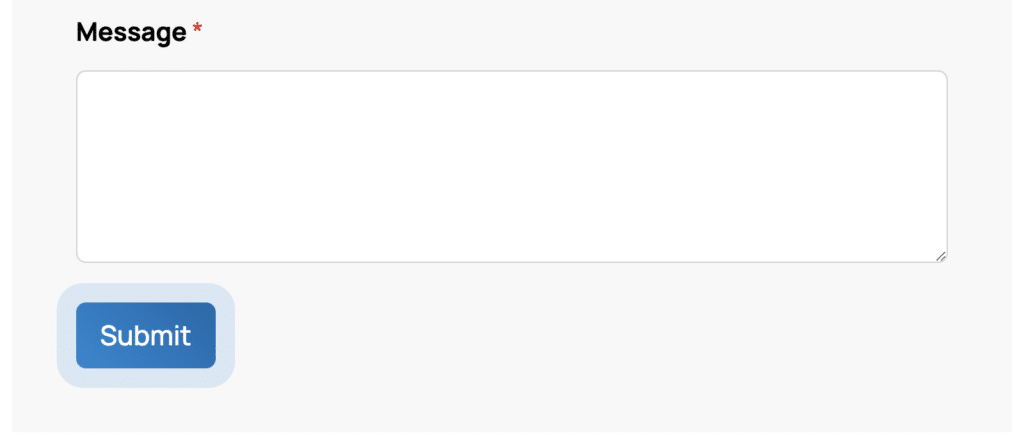
This adds a creative touch with a button that pulsates on hover, inviting clicks from visitors.
Optimizations Tips for Submit Button Text
Styling is one aspect that influences submit button clicks. The second important component is the submit button text. These few words can be the tipping point where your users decide whether to act or bounce.
Good button text inspires action by focusing on a specific benefit your visitor can expect by clicking through. Avoid simply using a generic “submit”. Instead, use direct and action-oriented language pointing towards a goal.
Here are few examples of conversion-optimized submit button text:
- Get My Free Quote
- Download My eBook
- Join the Community
- Start My Journey
- Access Free Templates
- Save 20% Today
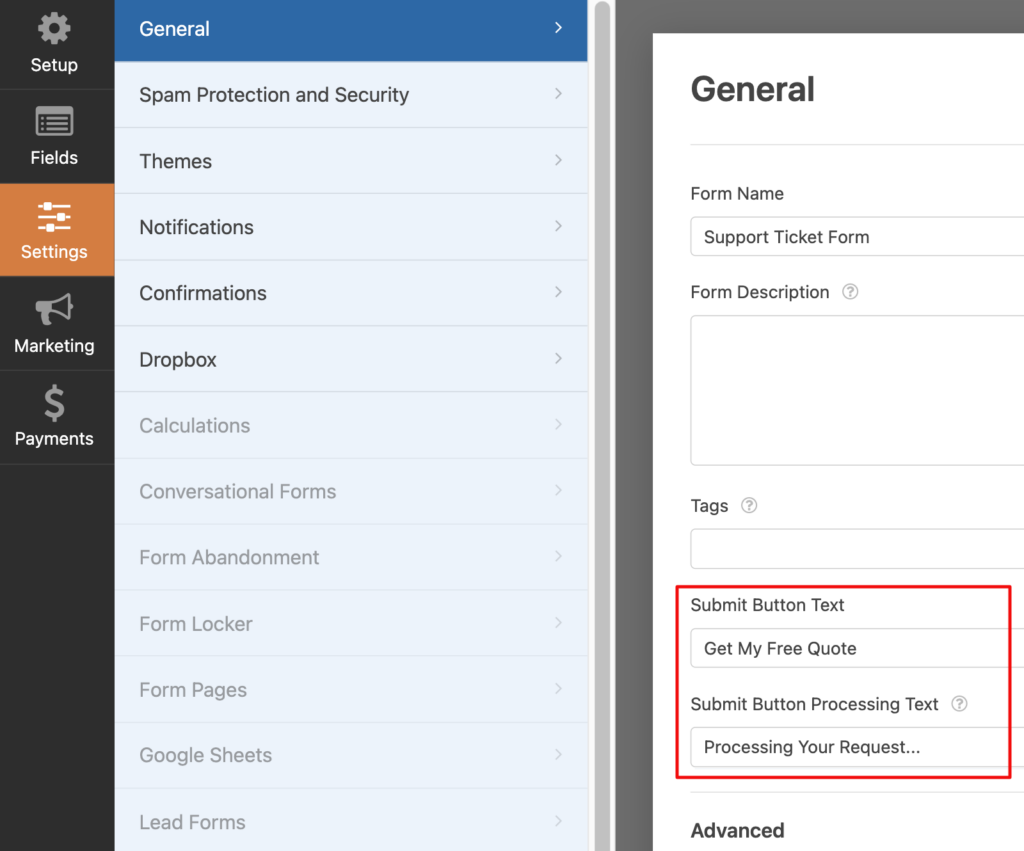
But how do you actually edit submit button text in WPForms? This easy. In the form builder, click on the Submit button at the bottom of the form to instantly move to Settings » General.
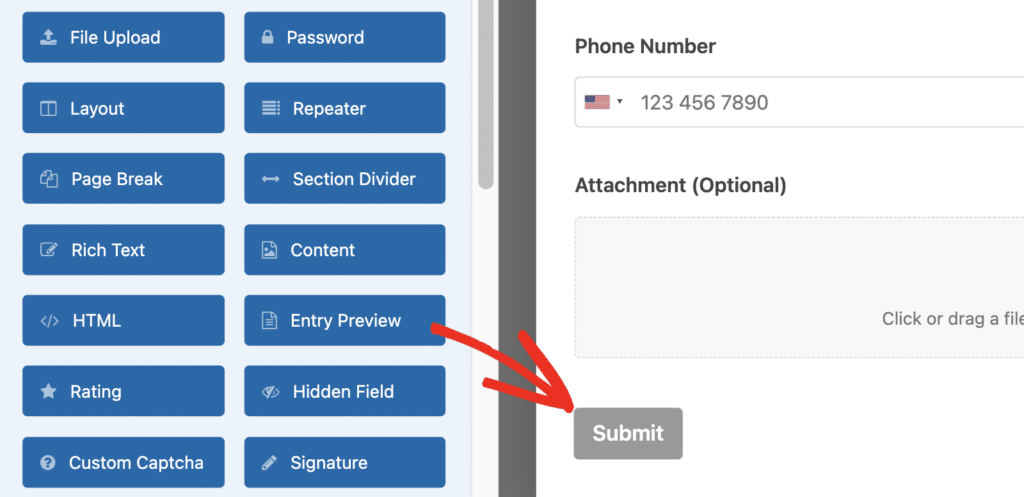
Then, simply type in your text in the Submit Button Text box. You can also edit the text that appears during the time the form is submitting in the Submit Button Processing Text box.
And that’s it.
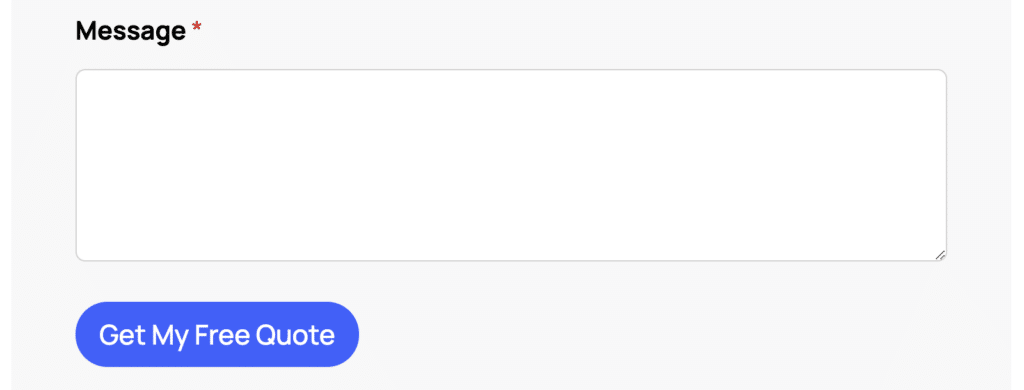
Now that you have a better idea about submit button best practices and how you can apply these to your forms, it’s time to optimize your button text for more clicks.
Also Read: How to View Your Form History in WordPress
Creating effective submit buttons for your forms isn’t a hard science. Don’t be afraid to experiment with different styles and button texts and monitor your results (this could be as simple as A/B testing a form and measuring the difference in form submission rates).
Next, Style WPForms Email Notifications
Styling forms with WPForms is a quick and effortless process. But this customization flexibility also extends to your email notifications. With customer-facing notifications, you have a great opportunity to incorporate your branding to notifications to add a more professional appearance that your customers can trust.
Our guide on customizing form email notifications walks you through the easiest way to style your notifications.
Ready to build your form? Get started today with the easiest WordPress form builder plugin. WPForms Pro includes lots of free templates and offers a 14-day money-back guarantee.
If this article helped you out, please follow us on Facebook and Twitter for more free WordPress tutorials and guides.

