AI Summary
Are you looking for the best ways to create the perfect form for your website?
There are lots of things to consider when building your form. How will you style and organize the content? Are you utilizing the full functionality of the form?
You have all kinds of options for customization, but that doesn’t mean it’s complicated. WPForms offers all of the tools for you to create your perfect form easily — and with no need to code any of it. Let me show you!
WPForms Best Practices: How to Make the Perfect Form for Your Site
1. Dividers and Labels
Let’s just start at the top and work our way down the form, shall we?
Depending on how much information is on your form, you may want to break it into sections. Your form user’s name, email address, and phone number, for example, can be organized into a section called Contact Details.
To create this structure, drag over the Section Divider field and place it at the top of your form.
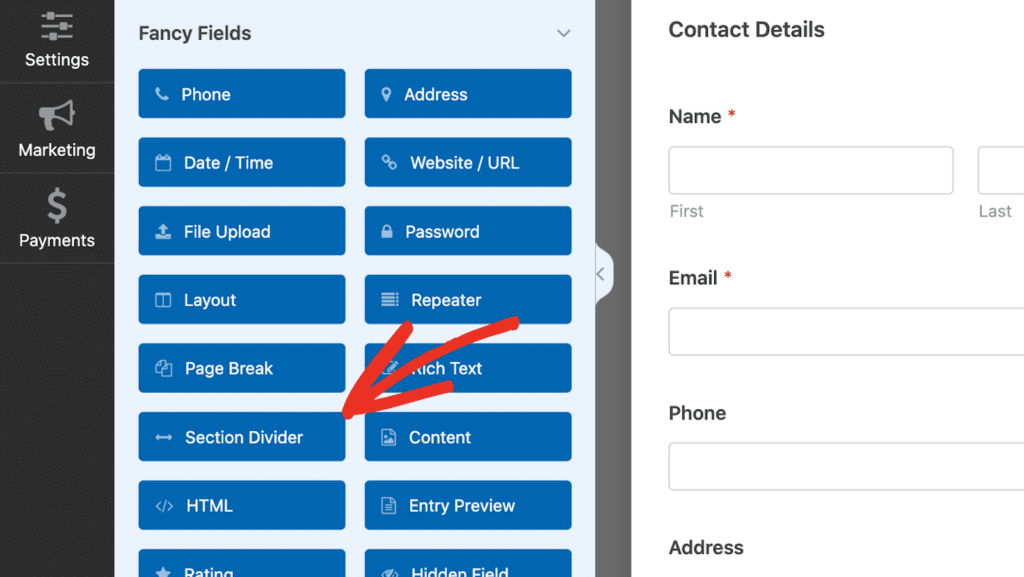
Then, divide the rest of your form into sections as needed. Section Dividers are simply a way to visually organize your form, making it easier for users to digest the information. Not only does this improve the form’s usability but it also increases the likelihood that users will complete the form.
As for the fields themselves, it should go without saying that the field label needs to be clear, concise, and informative. Avoid vague or overly technical terms — your users should immediately understand what information is being requested.
Create Your WordPress Form Now
2. Field Sizes
When adding fields to your form, you might notice that most fields can be resized. Fields can be Small, Medium, or Large, with most of them set to medium by default.
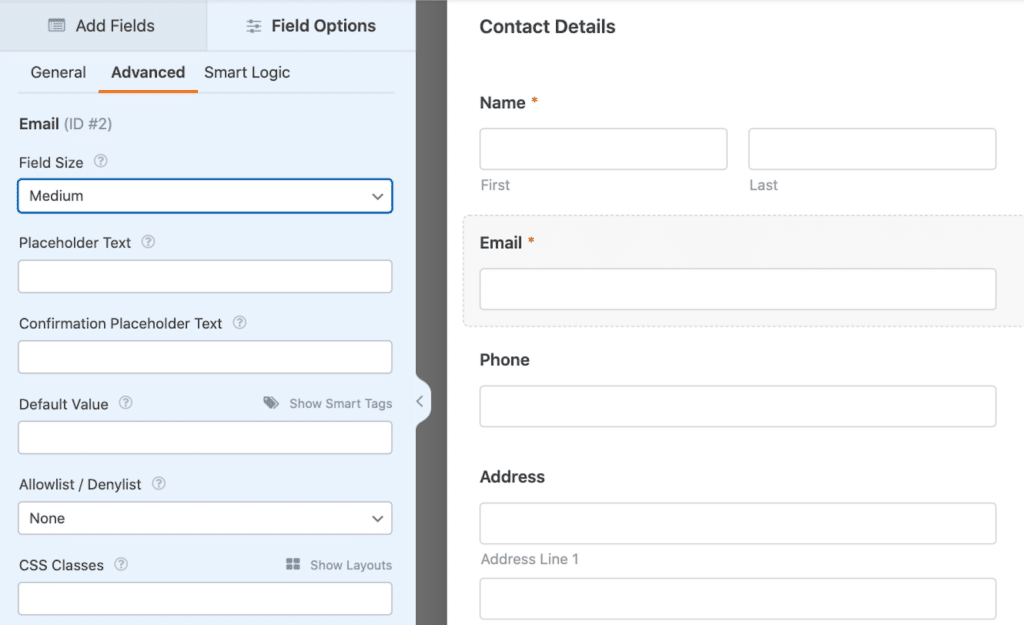
When you embed the form on your website or preview it, these medium fields may not fill the entire width of your form.
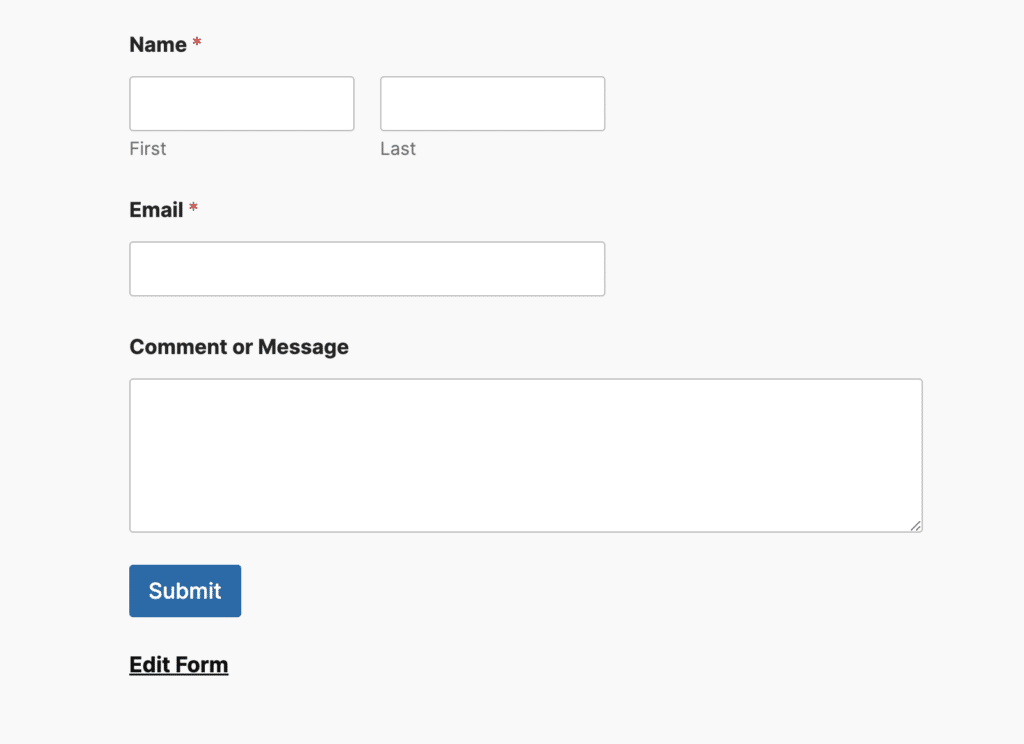
In some cases you may not mind this, but if you want all your fields to span the entire width of your form, you can make sure to change their Field Size to Large.
Also Read: Creative WPForms Ideas to Grow Your Business
3. User Choices and AI
Another thing to consider when building your form is which type of field you’ll provide for your form user to select answers from.
You might want all of the given choices displayed upfront with checkboxes or multiple choice radio buttons. Or, you may keep some particular choices contained in a dropdown selection. It really just depends on the purpose of the form.
Luckily, once you’ve settled on the user choice field, you can employ our built-in AI feature that will immediately generate the appropriate choices for you. Say you’re building a pet grooming appointment form and you’re unsure about which pet options to include. You can prompt the AI to generate options like “Dog,” “Cat,” or even “Exotic Pets” instantly.
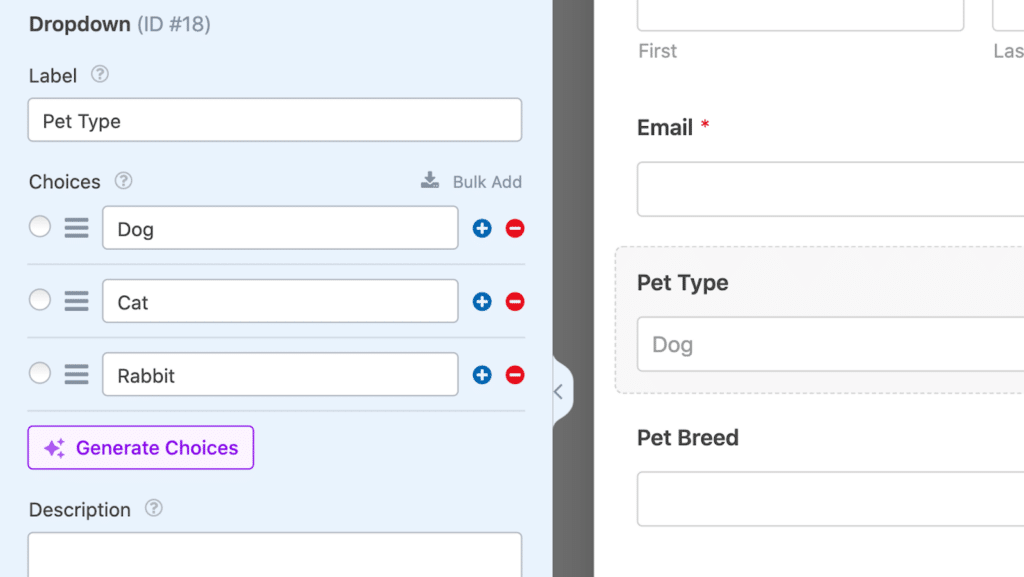
Keep in mind, though, that all AI is sensitive to the prompt that its given. So, the results it provides can vary by prompt.
Personally, when using the AI assistant in the form builder, I find it easiest to be literal with my prompt. I’ll just request the exact data point for that form, like “Popular pet choices for a pet grooming appointment form” or something similar.
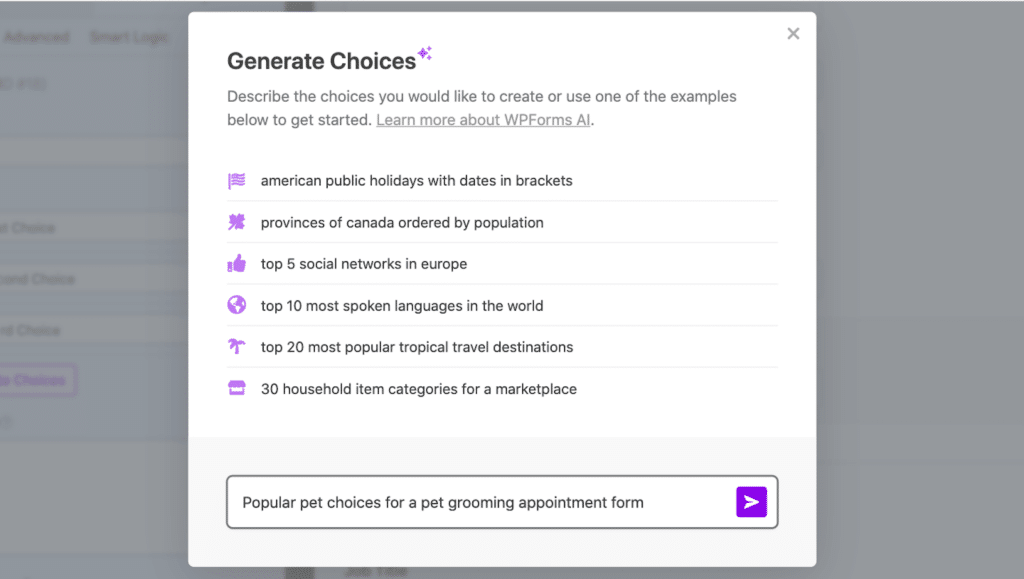
It’s an easy and instant way to guarantee that you’re not leaving out any choices that your form user should get to choose from.
Also Read: How to Randomize Form Fields in WordPress
4. Content Field Customization
Brand consistency is key when it comes to user experience. WPForms allows you to incorporate your branding on your forms using the Content field. This includes adding your logo, selecting fonts, and even adjusting the sizing and orientation to match your brand’s aesthetic.
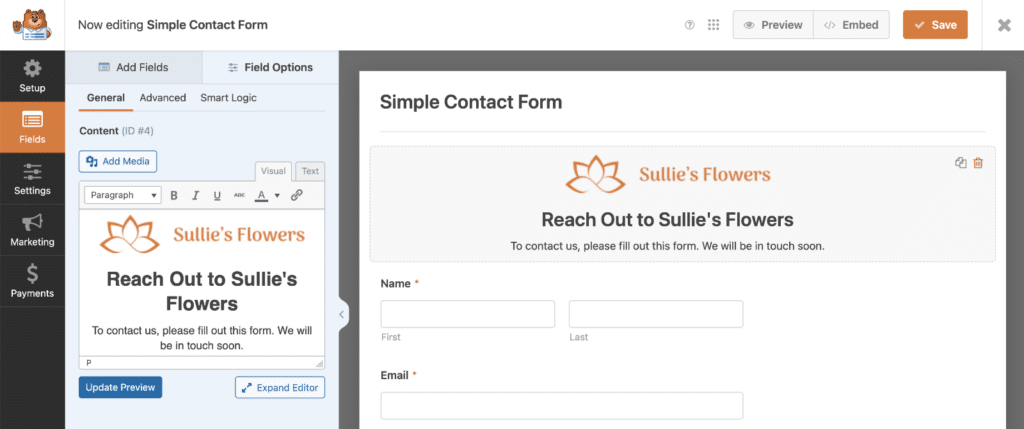
The Content field is a flexible way to communicate information, highlight important messages, or showcase your branding without distracting from the form’s functionality. You can even use this space to display promotional banners or seasonal messaging.
If branding is a major part of your own marketing best practices, then be sure to utilize this customizable field.
Also Read: How to Add a Form Header Image or Logo in WordPress
5. Layout and Repeater Options
Similar to field size considerations, you have various form Layouts to utilize if you’d like.
Your form can be laid out in a single column or multiple columns, with the latter including a whole selection of shapes and sizes.
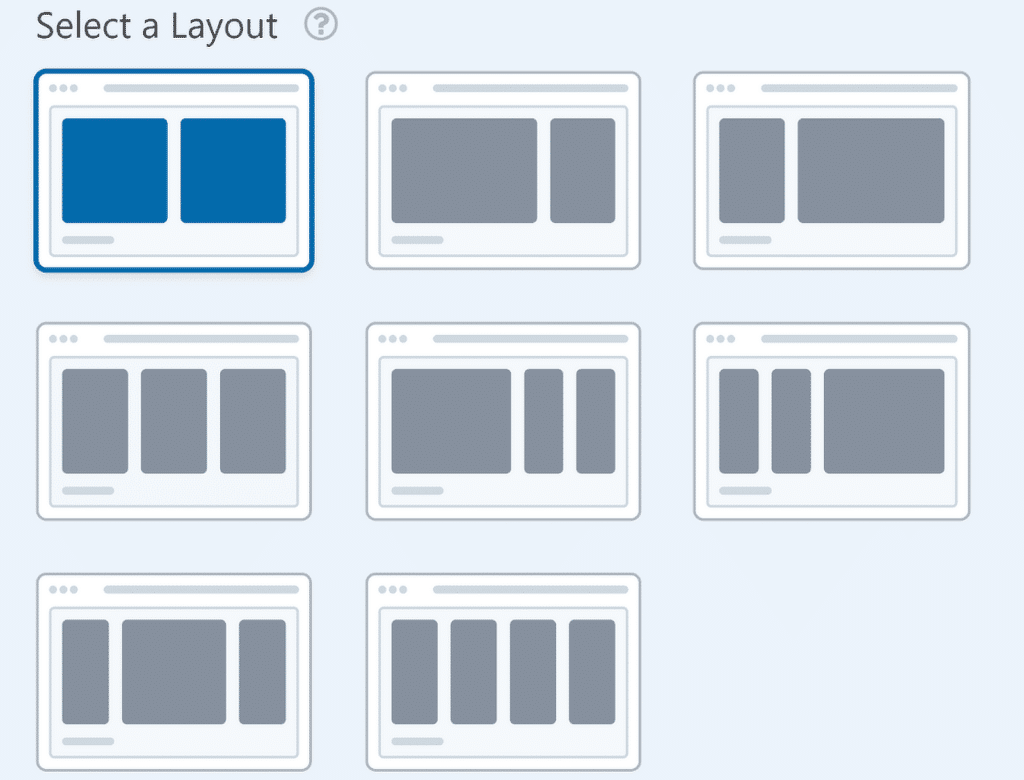
And for all the reasons that I like to keep my fields uniform by adjusting the field sizes as needed, I also like to use the Layout option to keep parts of my form in concise columns.
But wait, there’s more!
You also have the Repeater field option to keep things organized. If you anticipate your form user entering the same type of information multiple times — like job experiences on a recruitment form — you can use the Repeater field to allow your form user to simply repeat this field with the click of a button.
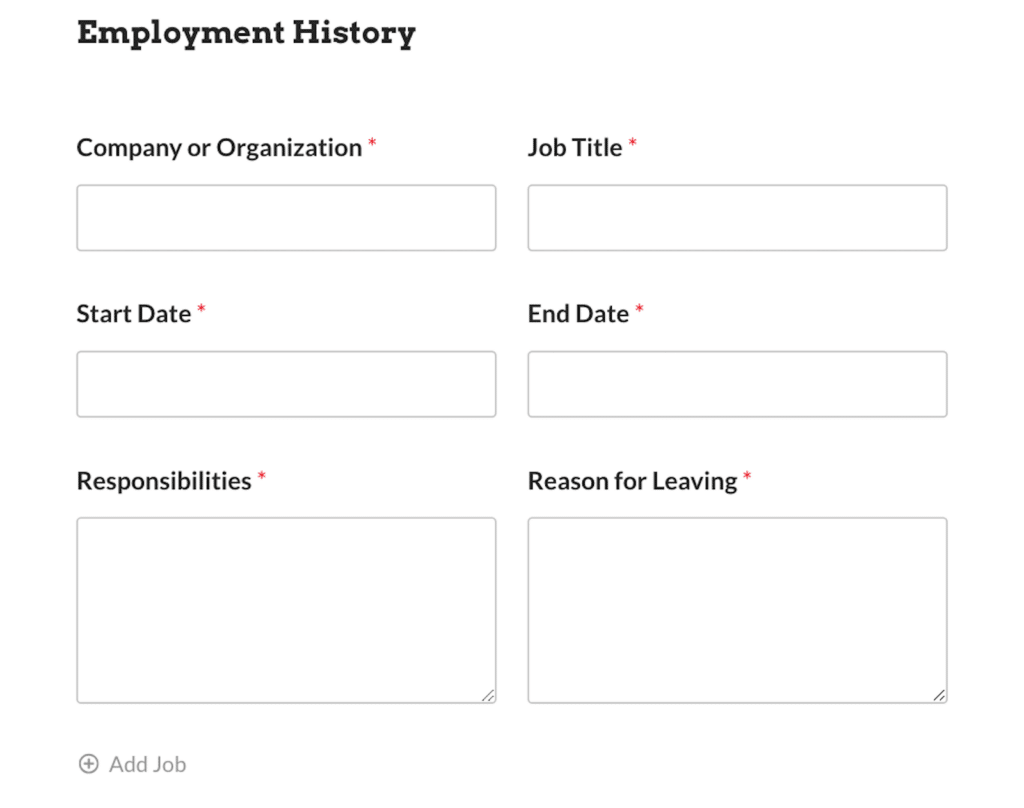
Instead of overloading your form with empty fields and creating a trail of conditional logic settings to hide them, you can just drag the needed fields into the overarching Repeater field zone. Here, you can choose which type of layout you want these repeatable fields to follow.
Also Read: WPForms Repeater Field vs Layout Field With Conditional Logic
6. Required Fields
A quick and easy thing you want to keep in mind with each field you add to your form is whether or not you’ll make it required for your user.
In the field settings, you’ll find a toggle option that gives the field a red asterisk and makes it a required field.
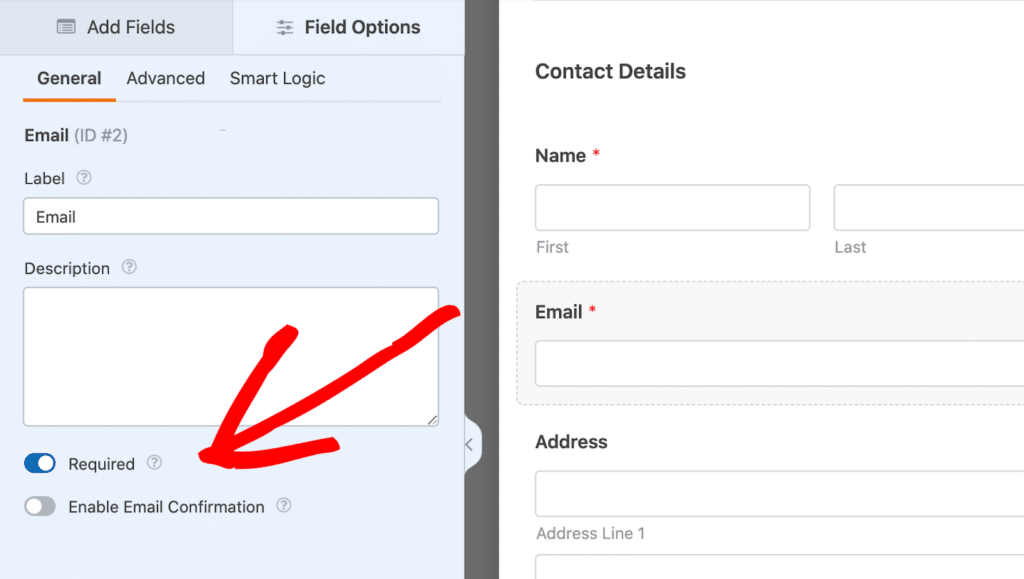
So, your form user must fill in the field before submitting the form. They can’t submit without these required fields, and usually — at the very least — the email address field is required.
7. Instructional Text
When building your form, there are a handful of different ways to include instructional text.
Instructional text clarifies what information you’re asking for and makes the form-filling process more intuitive. It can be an example, directions, or some other information.

In my experience, the 2 best places to include instructional text are within each field’s placeholder or description. The placeholder displays inside the input field itself, while the description sits directly below it.
This is where you might provide an example of the information you’re requesting from your form user. So, for the Email field, you could display something like “[email protected].”
The same thing goes for the description area of each field, which is also found within each field’s settings.
Just keep in mind that too much text all over your form can overwhelm your user, and its best to keep your form as clean as possible.
8. Notification Emails
Another area of your form that you don’t want to forget about is the notification email. This is the email message your form user receives after they submit a form on your website. You can use it like a confirmation that the form has been submitted.
You can customize this message directly in the form builder for each form by going to Settings » Notifications. You can take the opportunity to further connect with your user and promote your brand.
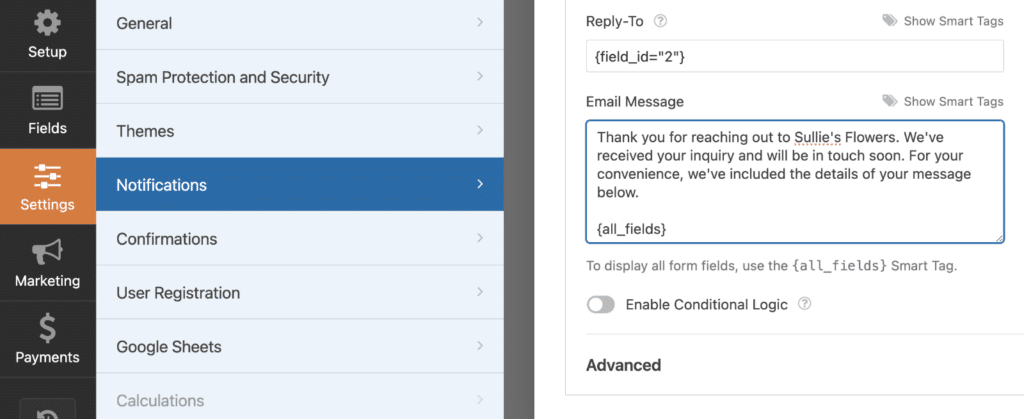
WPForms Smart Tags let you easily pull information from the form submission into your notification email so you can include personalized details.
There are tons of different things you can include depending on the type of form you’re building, like:
- A simple thank you for signing up for your newsletter
- A custom confirmation message for an order form
- Coupon codes and exclusive offers for new leads
The possibilities are endless!
Also Read: How to Automate Form Submission Follow-Up Emails
9. WPForms Templates
The best part about everything I’ve covered here? You can use all of these best practices to customize WPForms templates, which already come with many of these features built-in.
We offer thousands of form templates in our gallery, so we very well may have the form you’re looking to create prebuilt for you.
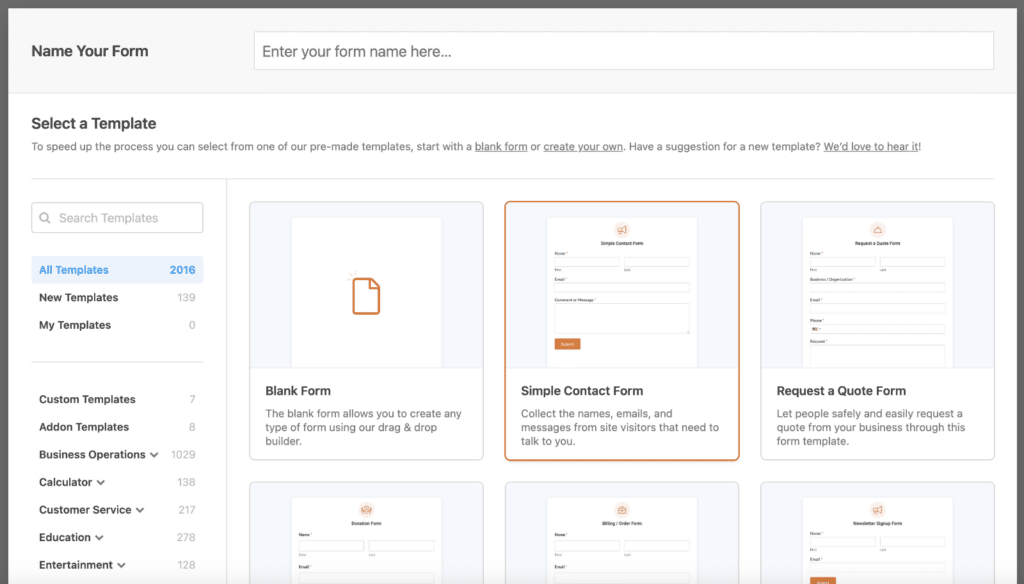
From simple contact forms to more complex applications like surveys or payment forms, WPForms templates are designed to save you time and effort while also guaranteeing that your form is optimized.
So, it’s a good idea to start with a form template as your foundation. Styling and organization choices, necessary addons, appropriate confirmation messages — all of this and more has been carefully considered with each form template.
10. Preview Form
Before you publish your form, always take time to preview it. You can preview your form on both desktop and mobile to make sure it looks perfect no matter where it’s displayed.
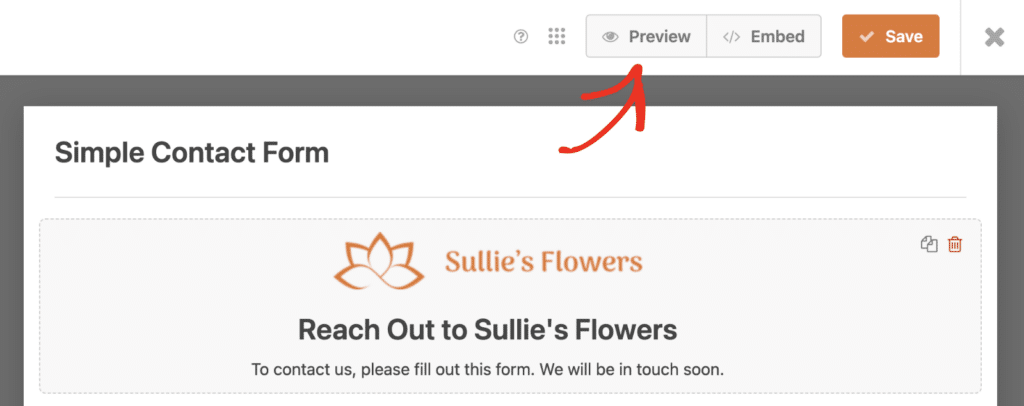
Keep in mind that the theme on your site might affect how the form looks, so test it in real-time. Field sizes or layouts might appear differently when embedded on a full page versus a sidebar widget, for instance. When you’re happy with how your form looks in the various areas of your site and on different devices, you’re set.
And that’s all there is to it!
By following these WPForms best practices, you’ll be well on your way to creating forms that not only look great but also convert. Whether you’re using one of our pre-built templates or starting from scratch, WPForms gives you all the tools you need to customize your forms.
Create Your WordPress Form Now
WPForms Best Practices FAQ
These are some of the top questions we see about WPForms best practices.
How do I customize a template in WPForms?
After selecting a template, you can customize it by adding or removing fields, adjusting field sizes, and enabling additional settings like payment or subscription options.
Can I use WPForms to collect payments?
Yes, WPForms integrates with popular payment gateways like PayPal and Stripe. You can collect one-time payments or set up recurring subscriptions.
Is WPForms mobile-friendly?
Absolutely! WPForms is fully responsive and mobile-friendly, guaranteeing that your forms look great on any device.
Next, Discover More Hidden Features
I’ve shown you my personal tips for building the best forms for your site, but we’ve barely scratched the surface of all the WPForms capabilities. There are even more features to discover and uses to explore.
Take a look at our fun write-up on hidden features of WPForms and see what you find!
Ready to build your form? Get started today with the easiest WordPress form builder plugin. WPForms Pro includes lots of free templates and offers a 14-day money-back guarantee.
If this article helped you out, please follow us on Facebook and Twitter for more free WordPress tutorials and guides.


