AI Summary
Displaying payment fields based on specific dates is a common requirement for many WordPress websites. This is particularly useful to those handling event registrations, seasonal bookings, or time-sensitive services.
Using the WPForms Calculations addon, you can display a payment field in your form only if your customer selects certain dates in the Date / Time field.
In this guide, I’ll walk you through how to show a payment field based on date input on your WordPress site.
How to Show a Payment Field Based on a Date in WordPress
Step 1: Install and Activate WPForms Plugin
WPForms is the best drag and drop form builder plugin for creating basic and advanced forms in WordPress.
From simple contact forms to more advanced features like conditional logic, it’s a reliable tool that has worked well for me on multiple sites.
The Pro license of WPForms includes access to the Calculations addon, which lets you perform simple and complex mathematical operations on your WordPress forms.
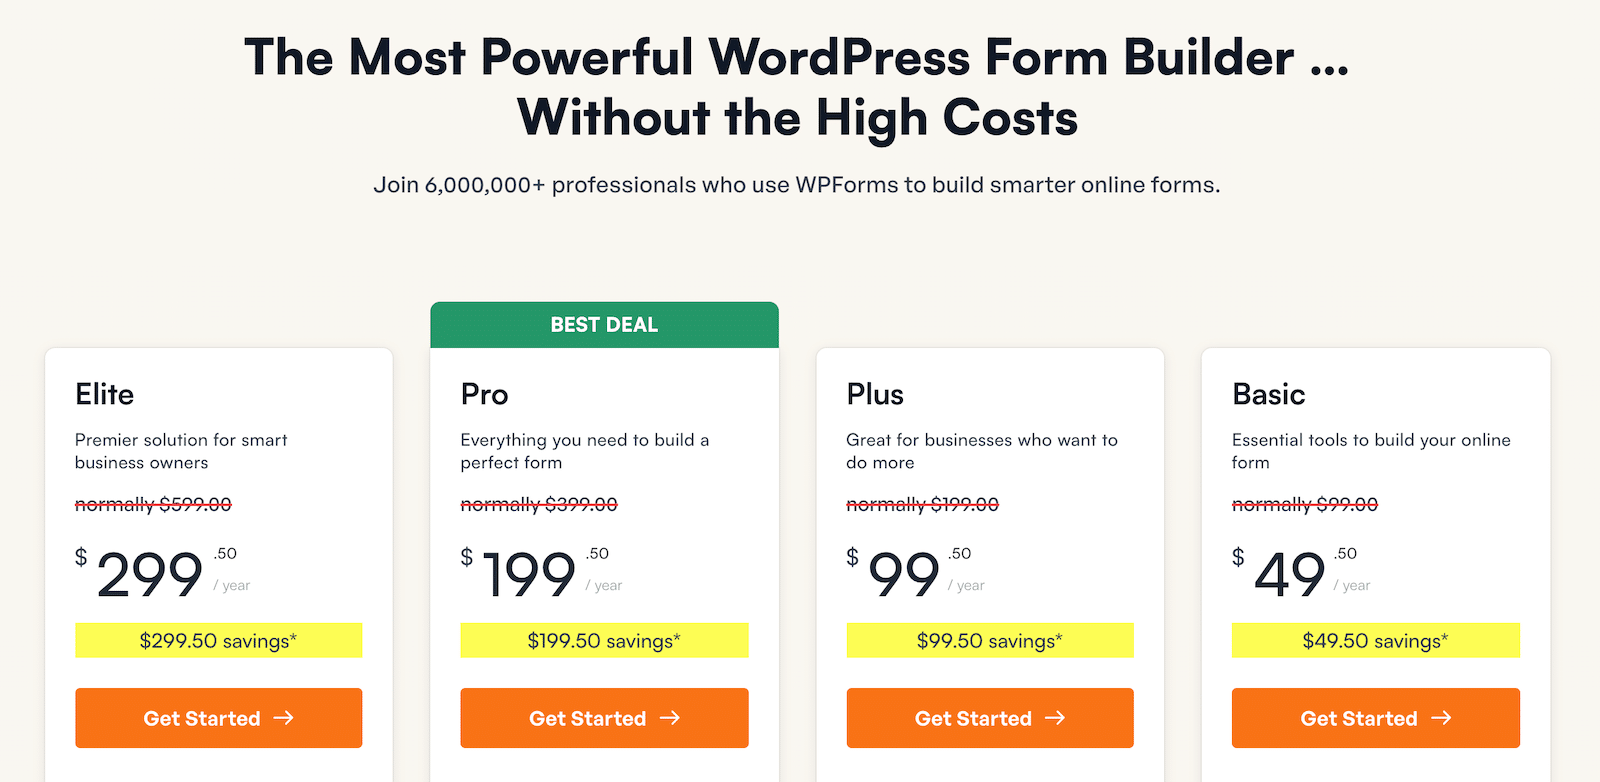
Once you’ve purchased the Pro license, you should install and activate WPForms on your WordPress site. If this is your first time, check out this guide to learn how to install WPForms.
Step 2: Install the Calculations Addon
After installing the WPForms plugin, you’ll also need to install the Calculations addon.
To install the addon, head into the WordPress admin area and go to WPForms » Addons. Then scroll down till you find the Calculations addon, or use the search bar. When you find it, click Install Addon.
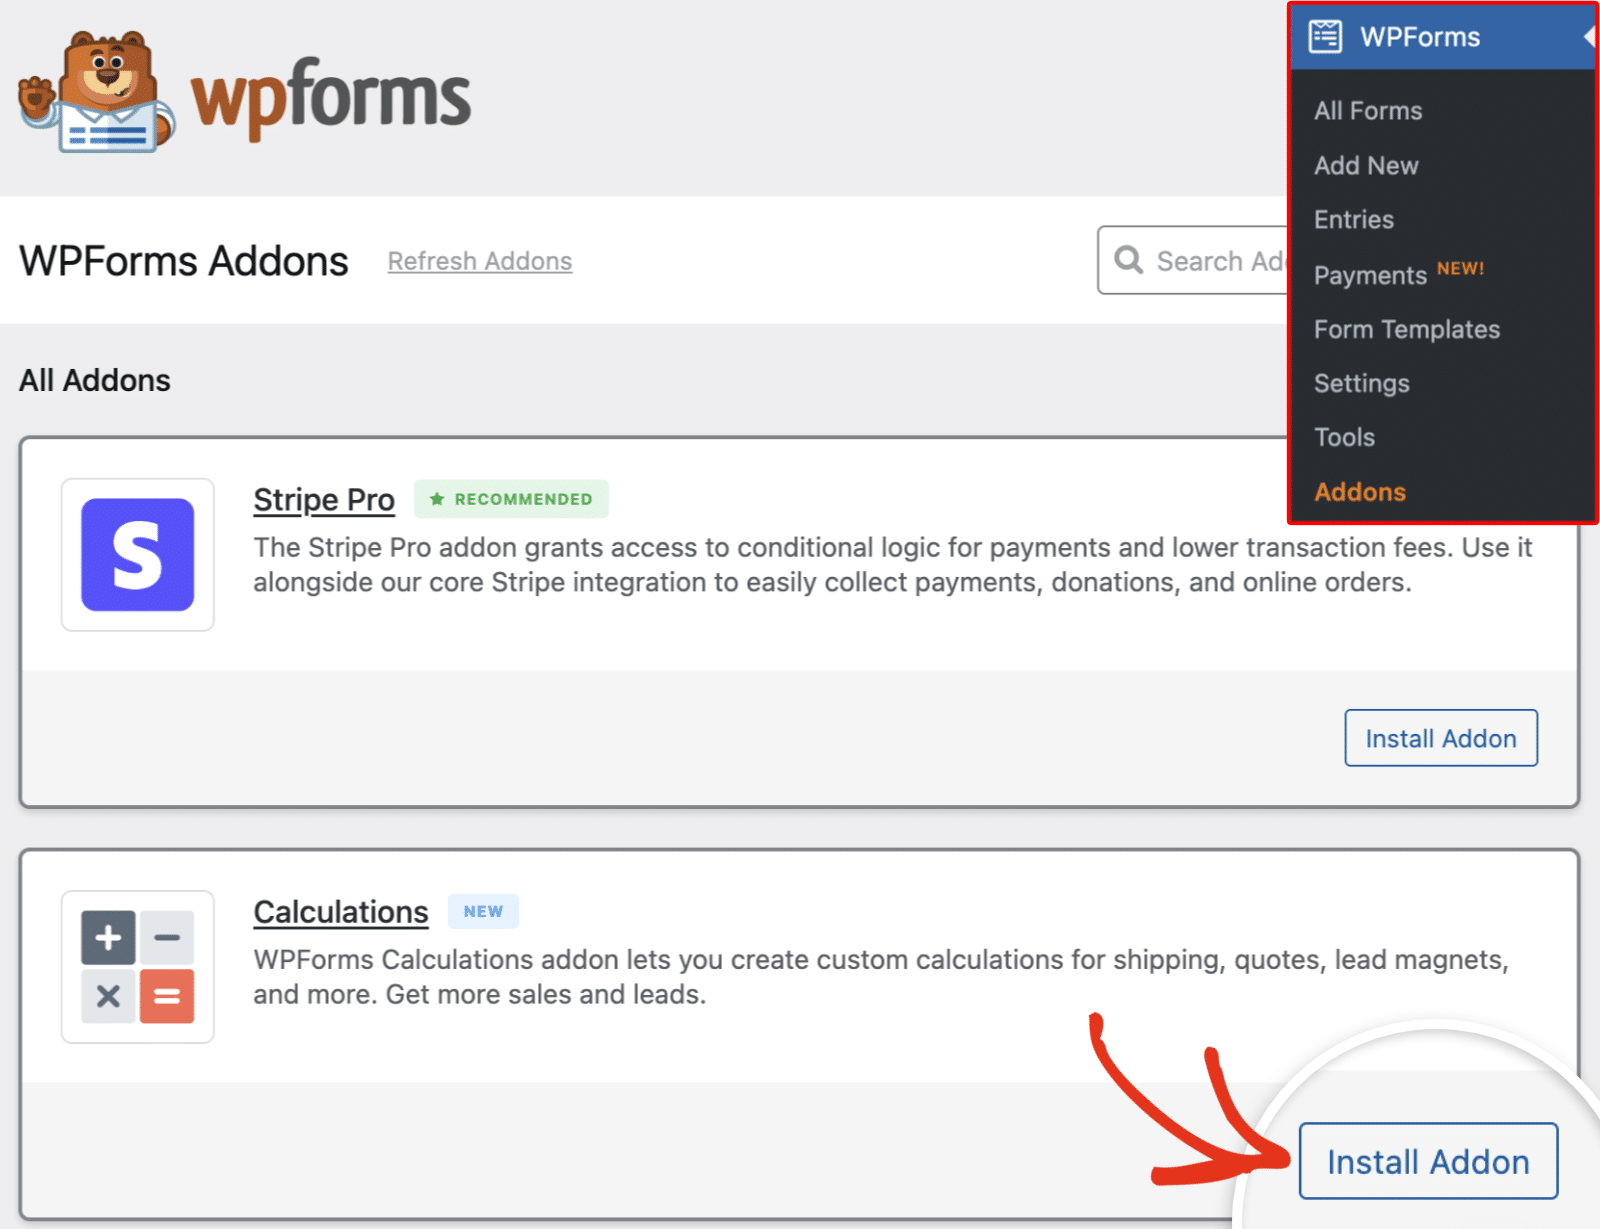
Once you’ve installed and activated the Calculations addon on your site, proceed to create your WordPress form.
Step 3: Creating Your Payment Form
You can build your form from scratch, use a form template, or generate forms with WPForms AI. For this tutorial, I’ll create a new form from scratch.
To start, navigate to WPForms » Add New. Then, hover over the Blank Form widget and click Create Blank Form.
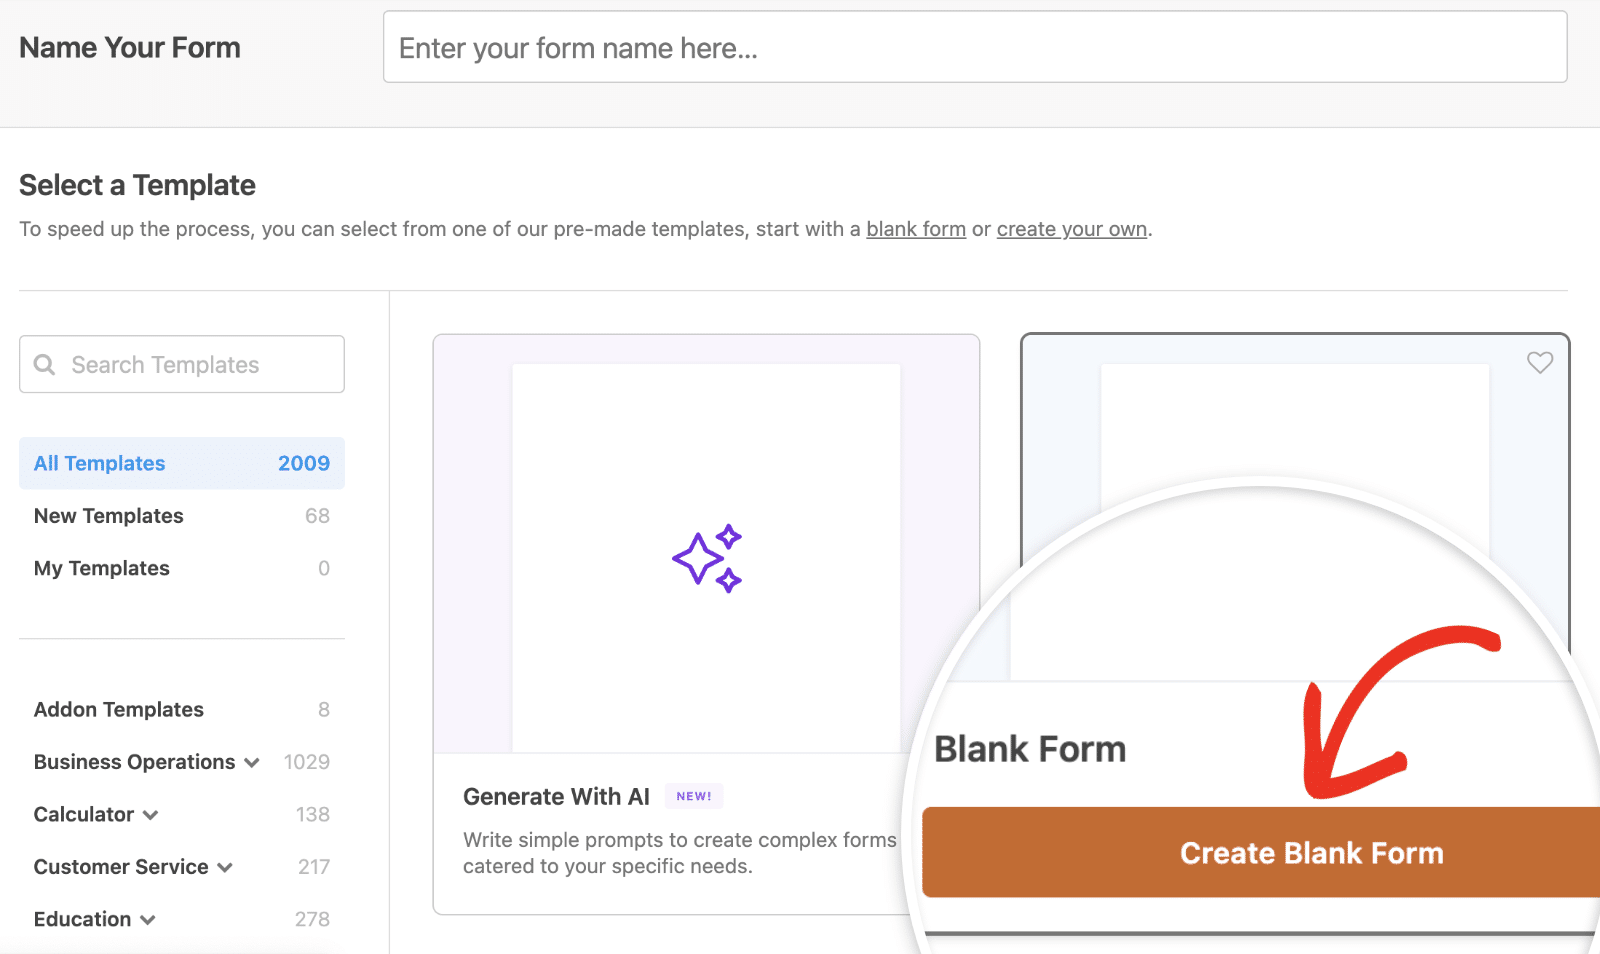
In the form builder, go ahead and add the fields you need to your form. You can drag and drop a field or click on it to add it to the form builder.
For this tutorial, I’ll assume you’ve already added your payment fields and configured your payment and field settings. We’ll focus on implementing the logic to hide/show the payment field based on a date input.
Also Read: How to View Your Form History in WordPress
Step 4: Enable Logic to Show a Payment Field Based on Date Input
In this section, I’ll show you two practical examples of how you can hide/show a payment field on your form based on input from the Date / Time field.
Showing a Payment Field Based on Date Input
To do so, I’ll start by adding a Date / Time field and 2 Hidden fields to my form. I’ll use the Multiple Items field as my payment field. So, make sure to include it in your form as well.
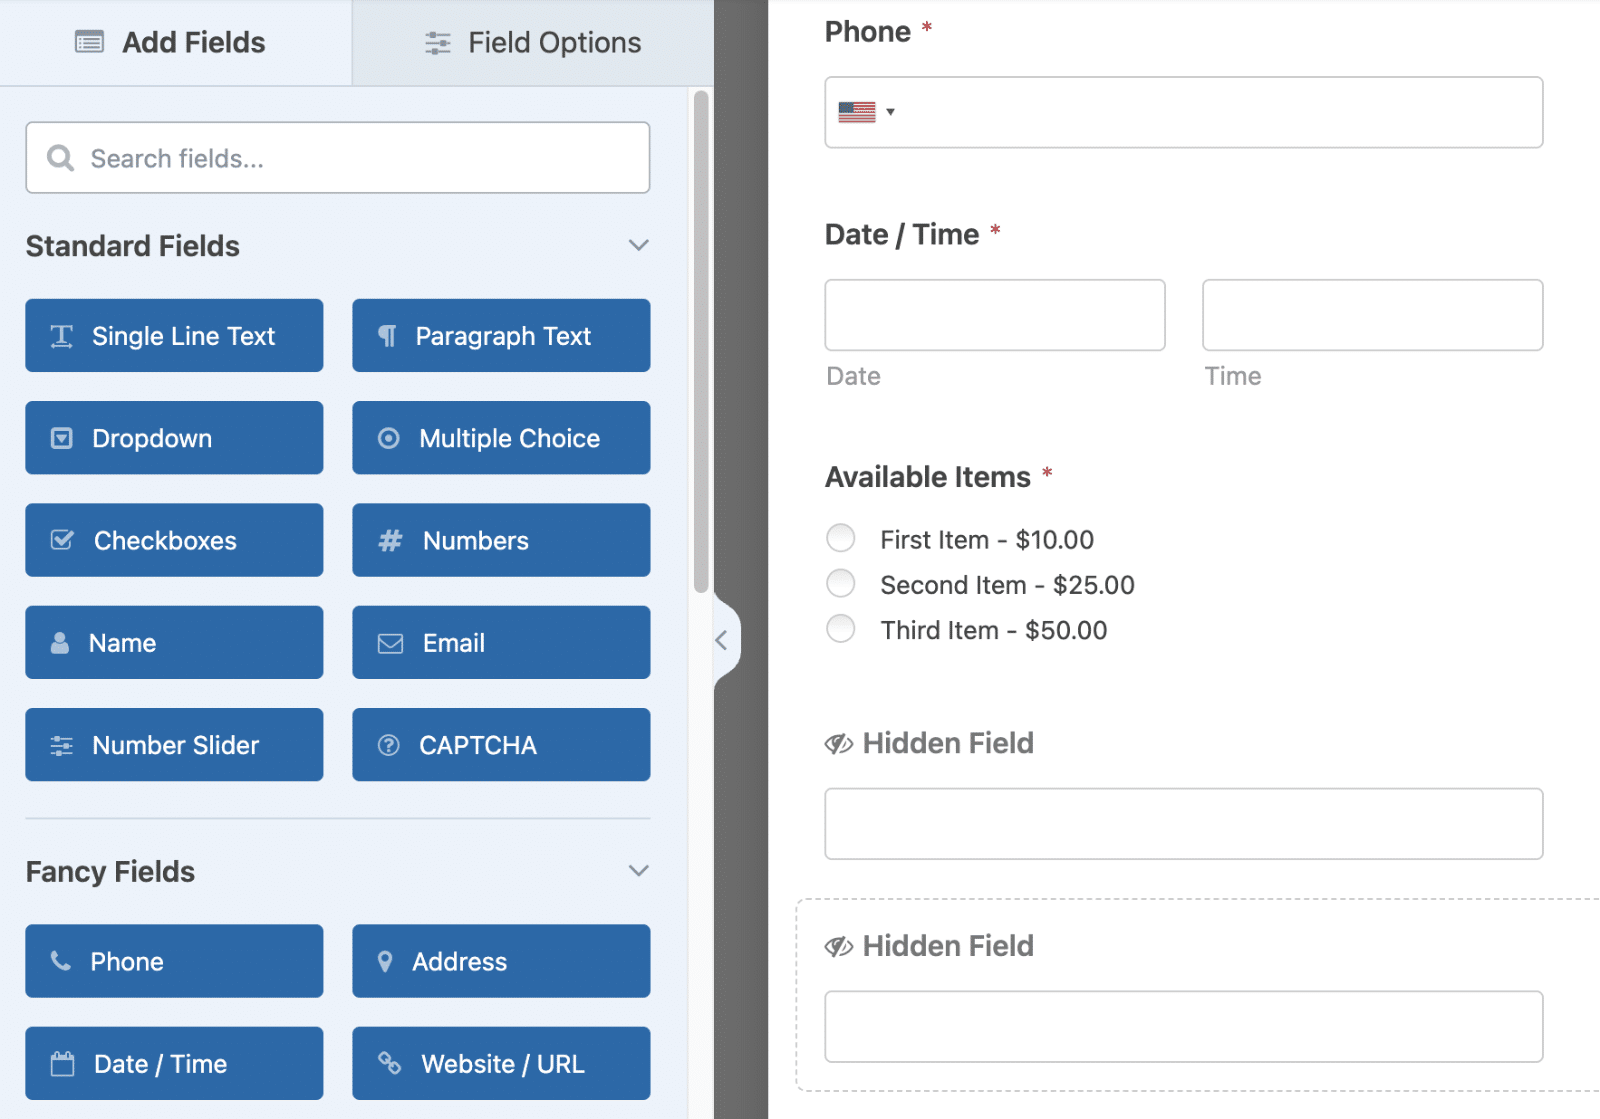
Now click the Date / Time field to access its Field Options panel. Then select the Advanced tab.
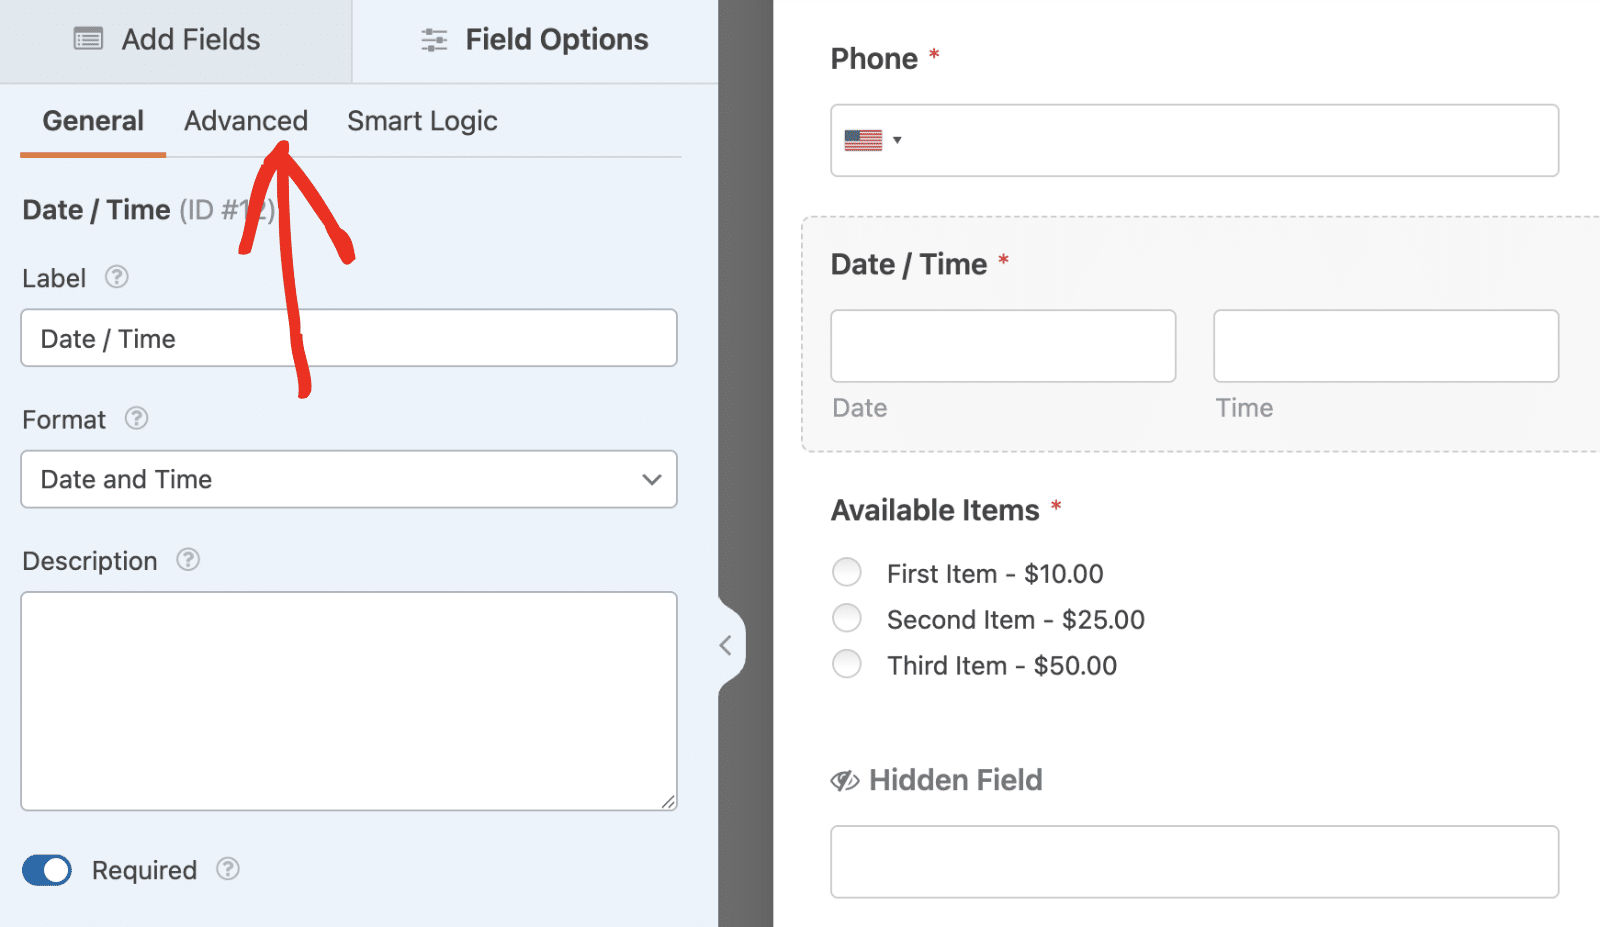
Once here, confirm the date format. By default, this is set to m/d/Y, where m stands for the month, d represents the day, and Y represents the year.
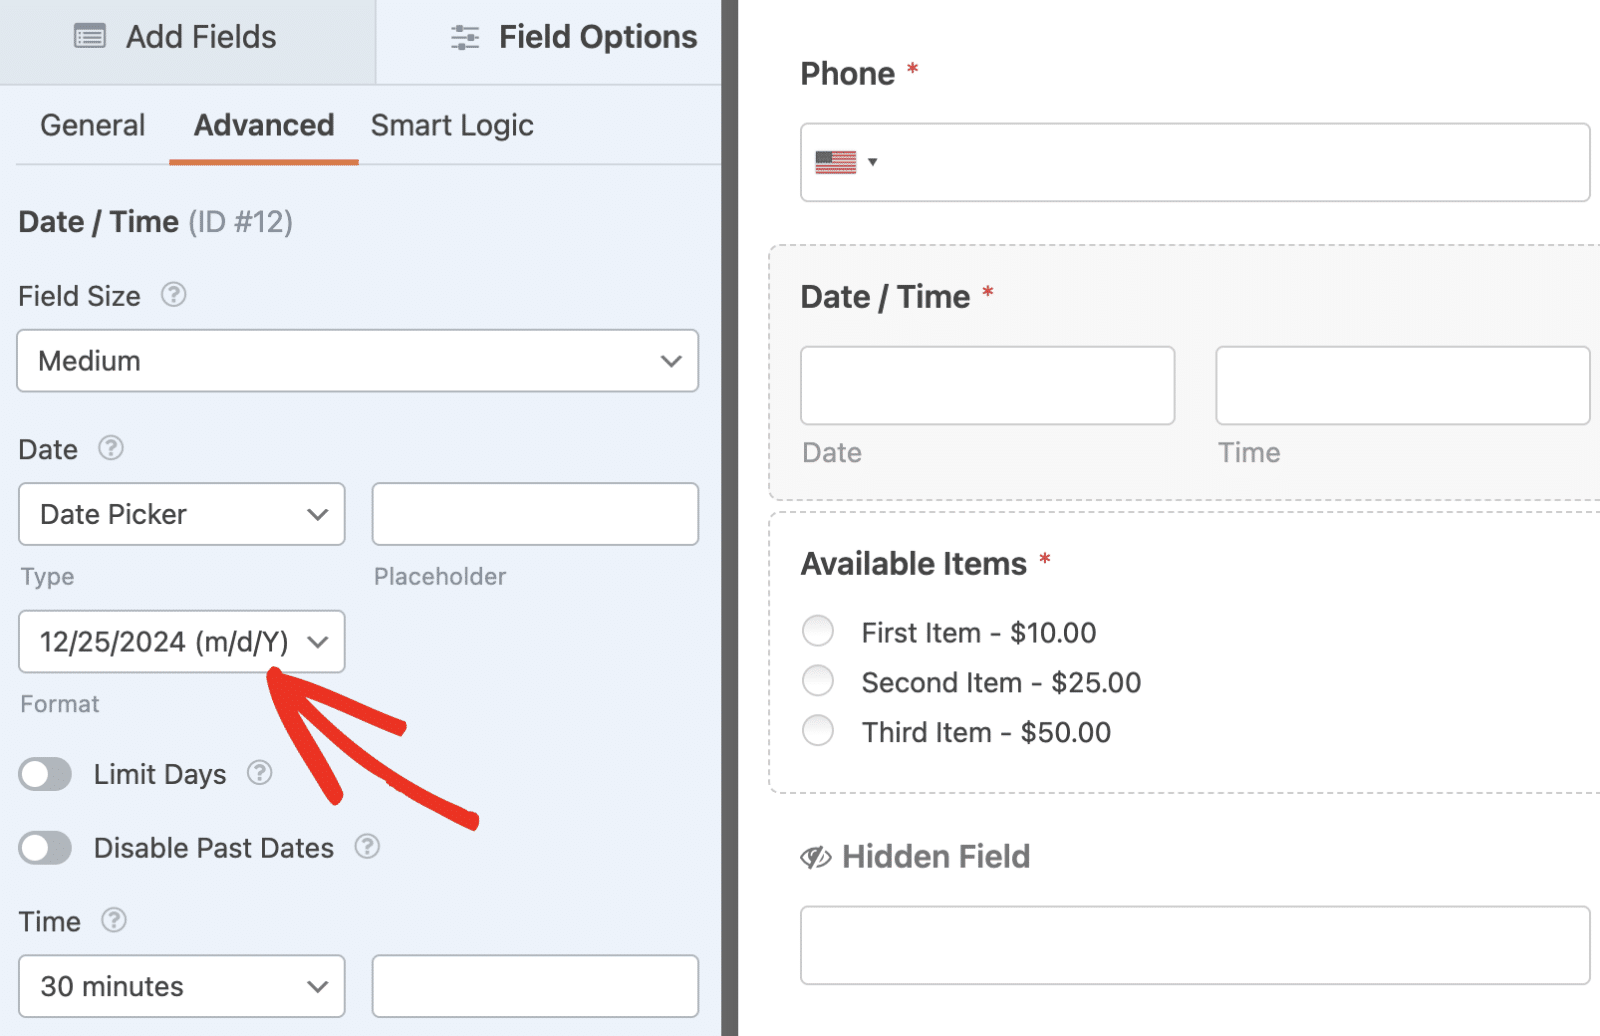
After confirming the date format, click on one of the Hidden fields you added to your form and change the field’s label. I’ve named mine Default Date, but you can choose any name you want.
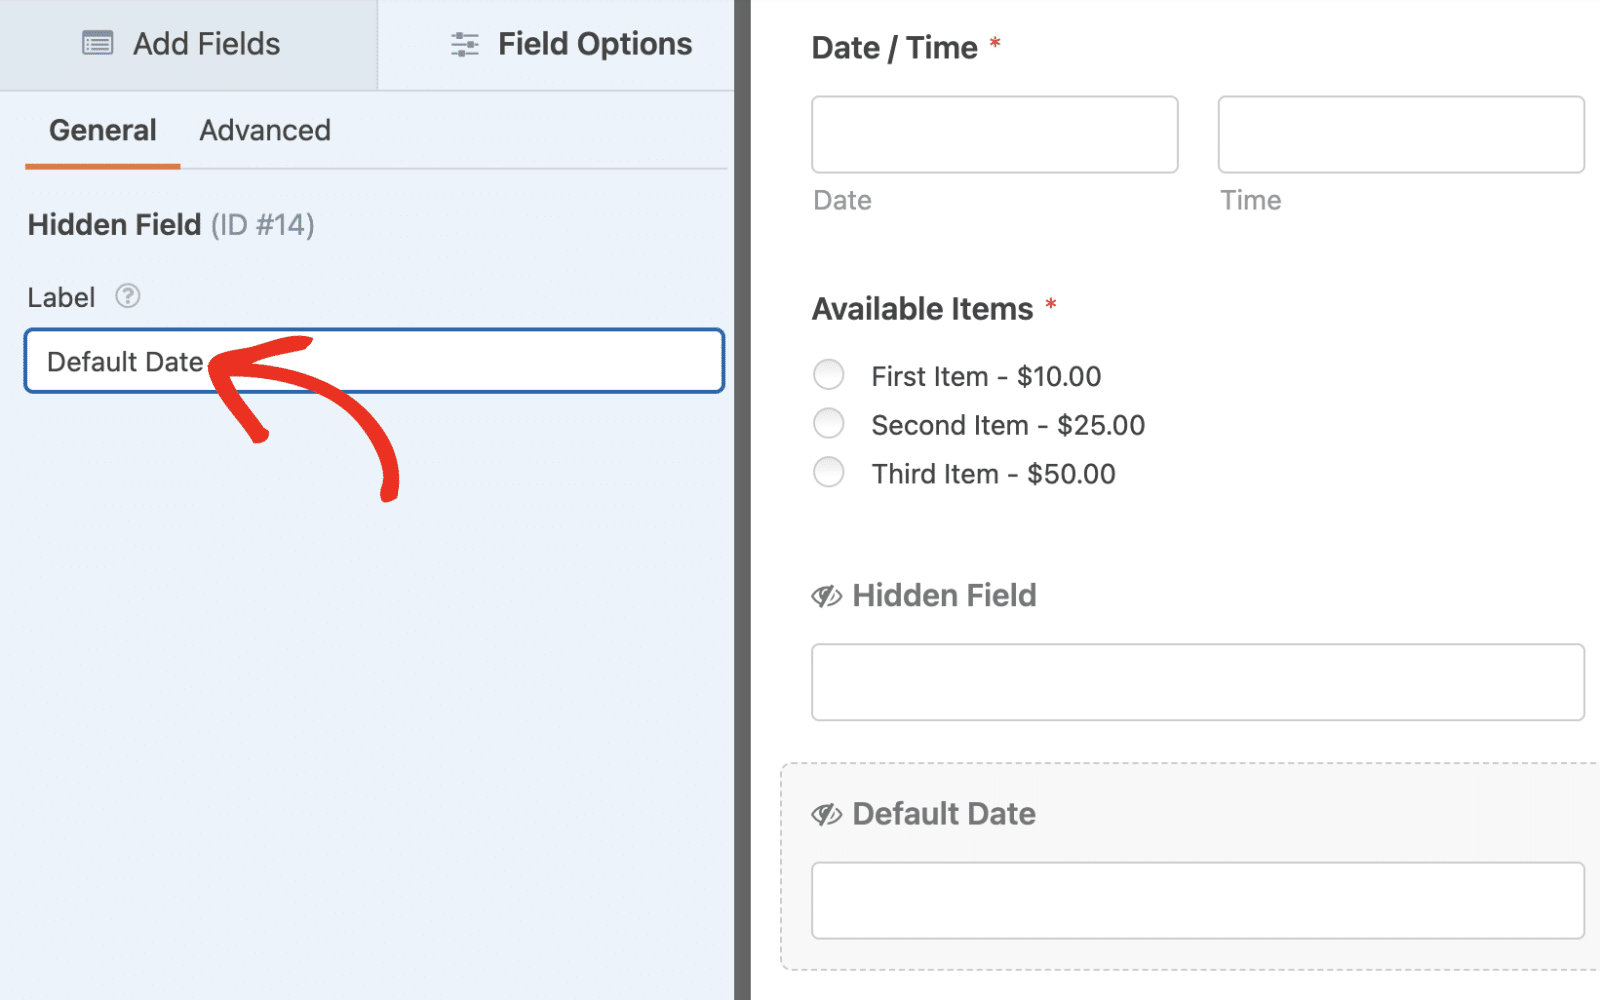
Next, click the Advanced tab and set the Default Value of the field to the date you want to check in the conditional logic.
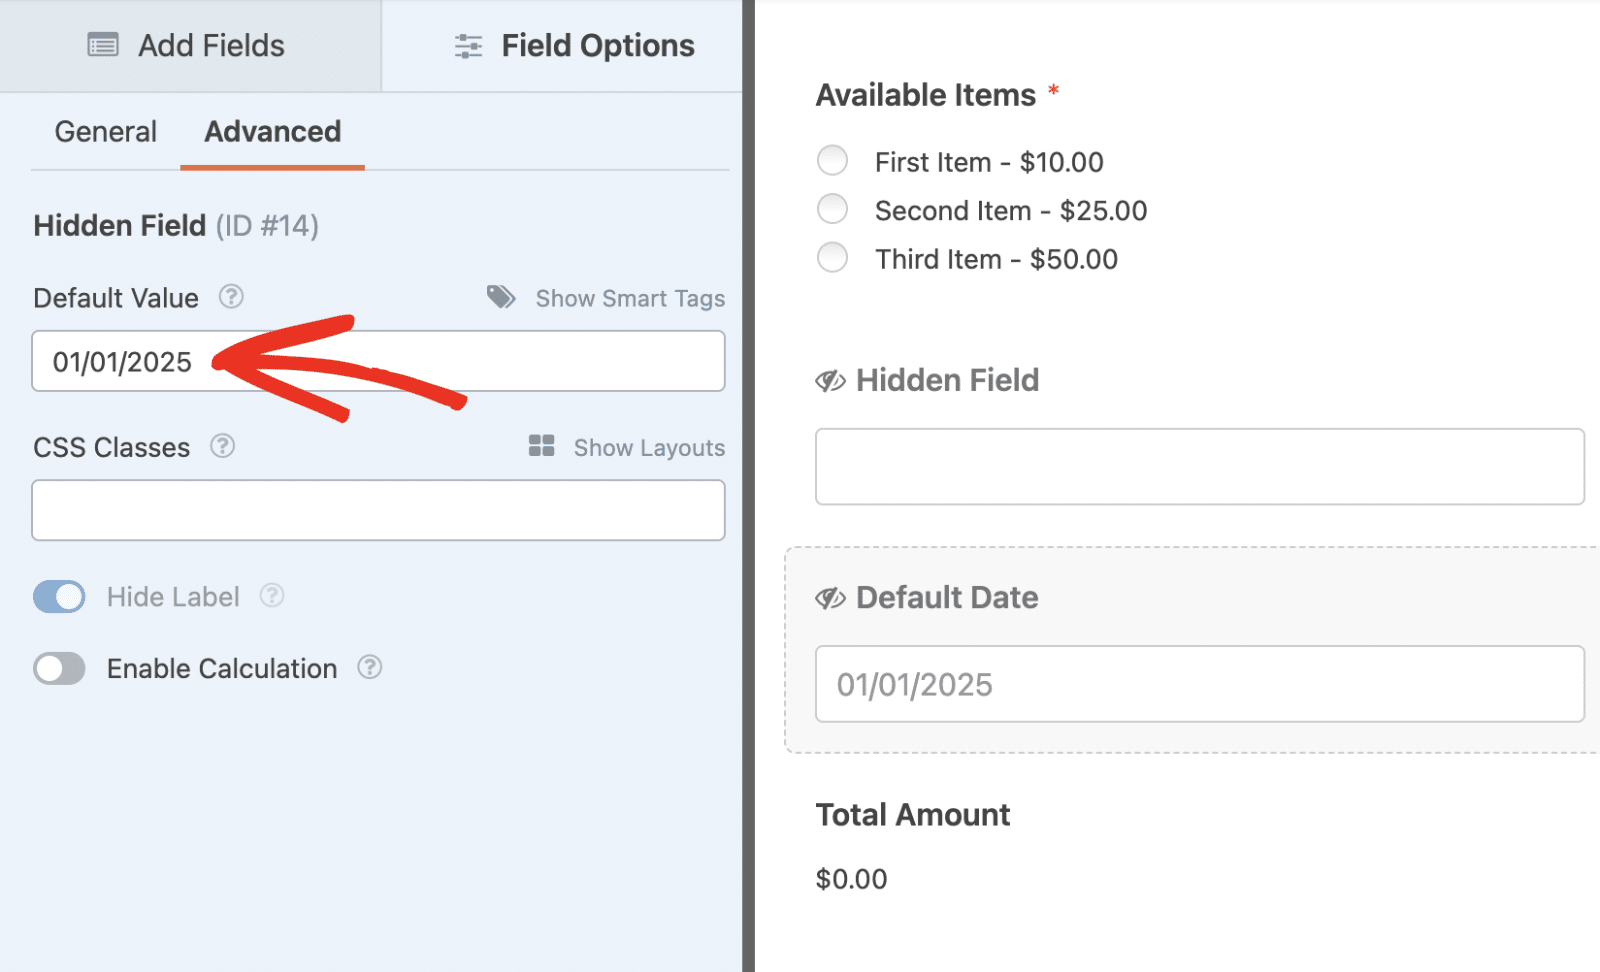
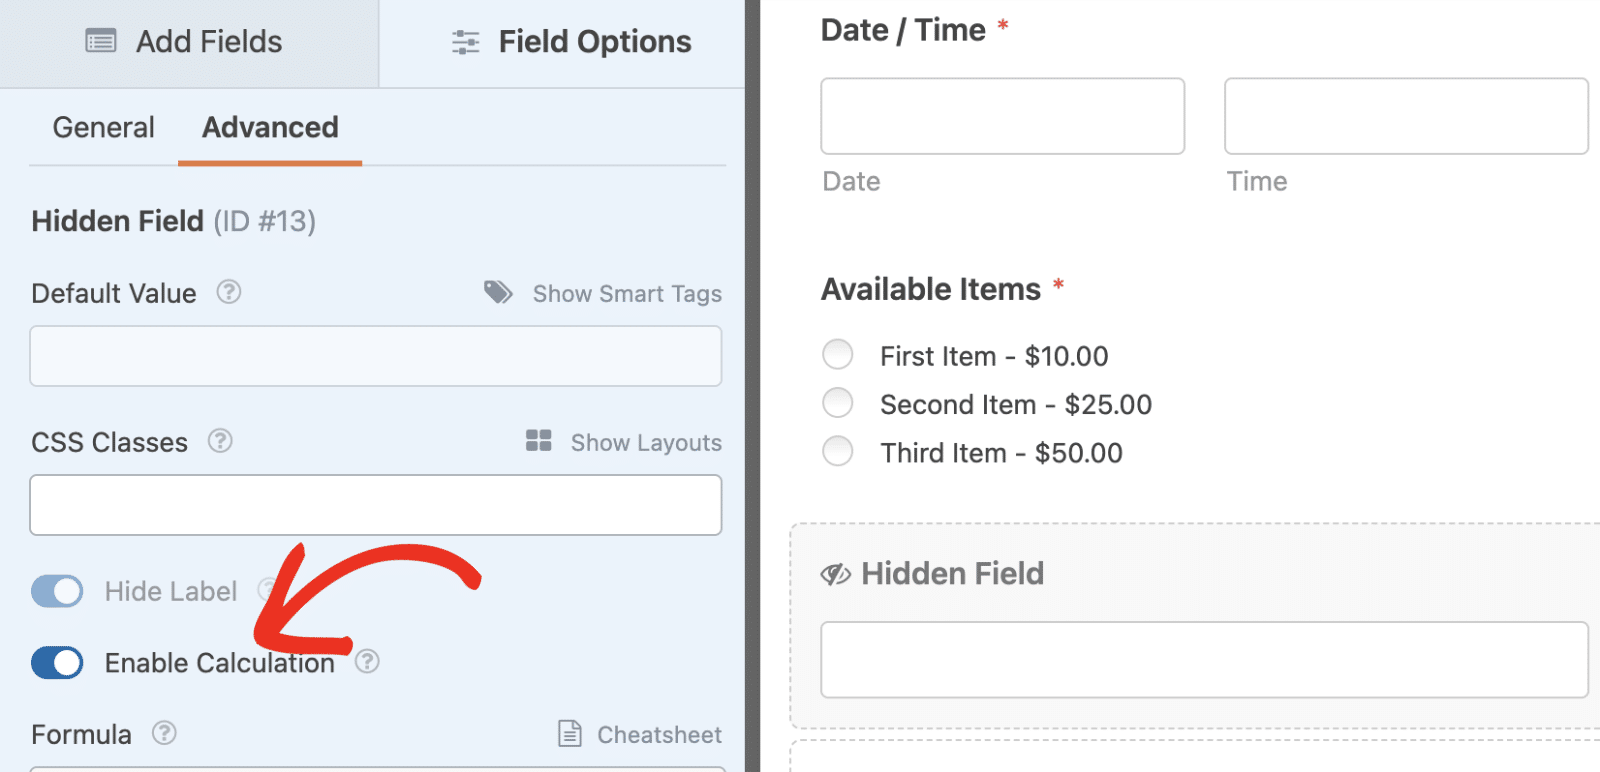
After that, click on the second Hidden field on your form and select the Advanced tab. Then, toggle the Enable Calculation option to the on position.
In the calculation formula builder, I’ll write a logic to compare the value the user selects on the Date / Time field with the default date I specified in the first Hidden field. If they match, we’ll set the field’s value to 1. Otherwise, the calculation will return 0. Here’s the formula to implement this logic:
if (  $F12_date ==  $F14  ):
	1
else:
	0
endif;
In the formula above, the variable $F12_date references the date subfield in the Date / Time field. While $F14 represents the Hidden field where I specified a default date.
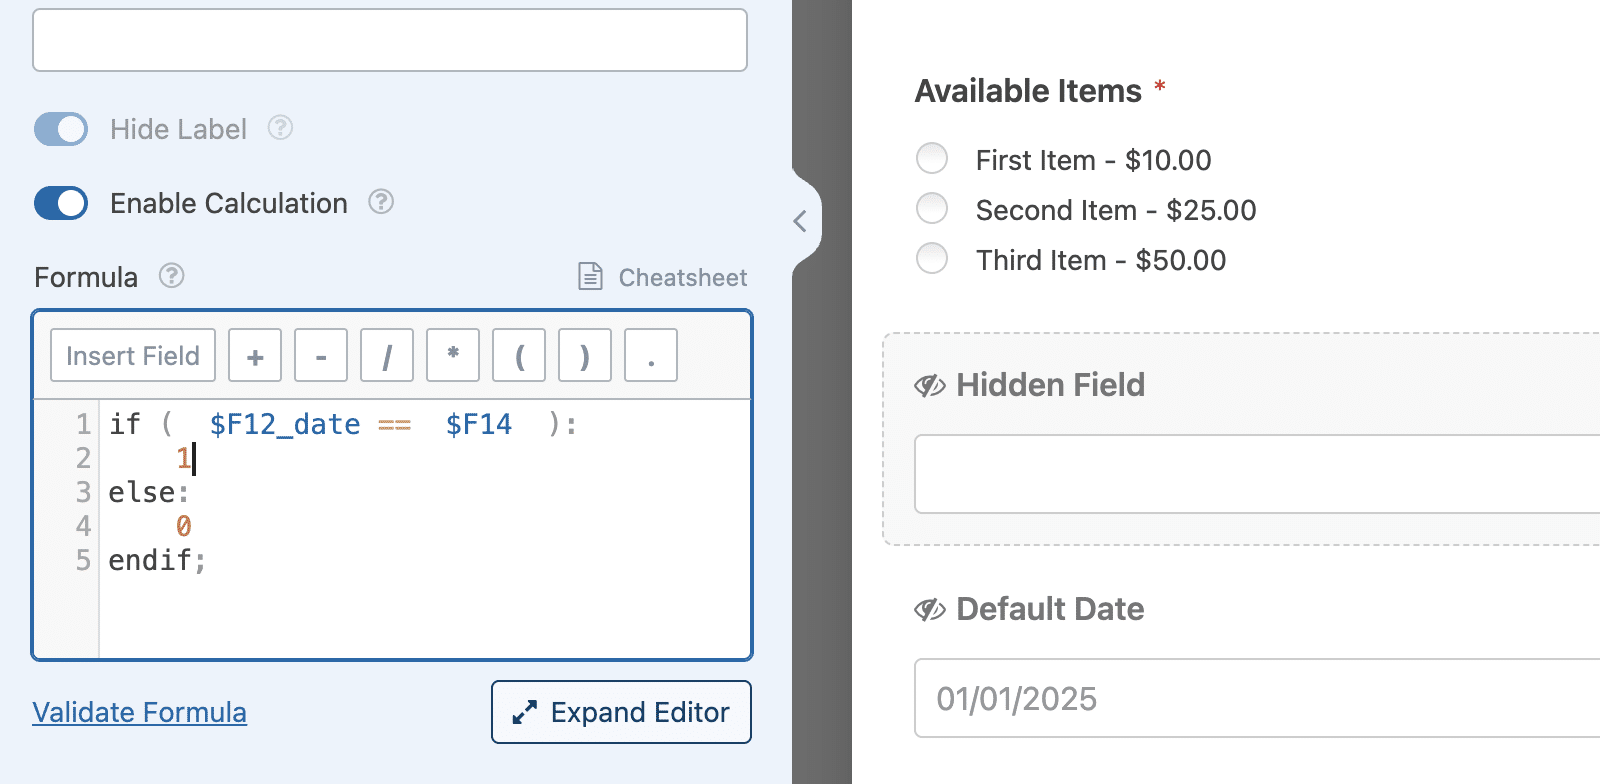
You’ll need to replace the numbers in the variable names so they match with the fields on your form. Please see our tutorial to learn more about building formulas with the Calculations addon.
After adding the formula, click on the payment field you’d like to enable conditional logic. Then select the Smart Logic tab and toggle the Enable Conditional Logic option to the on position.
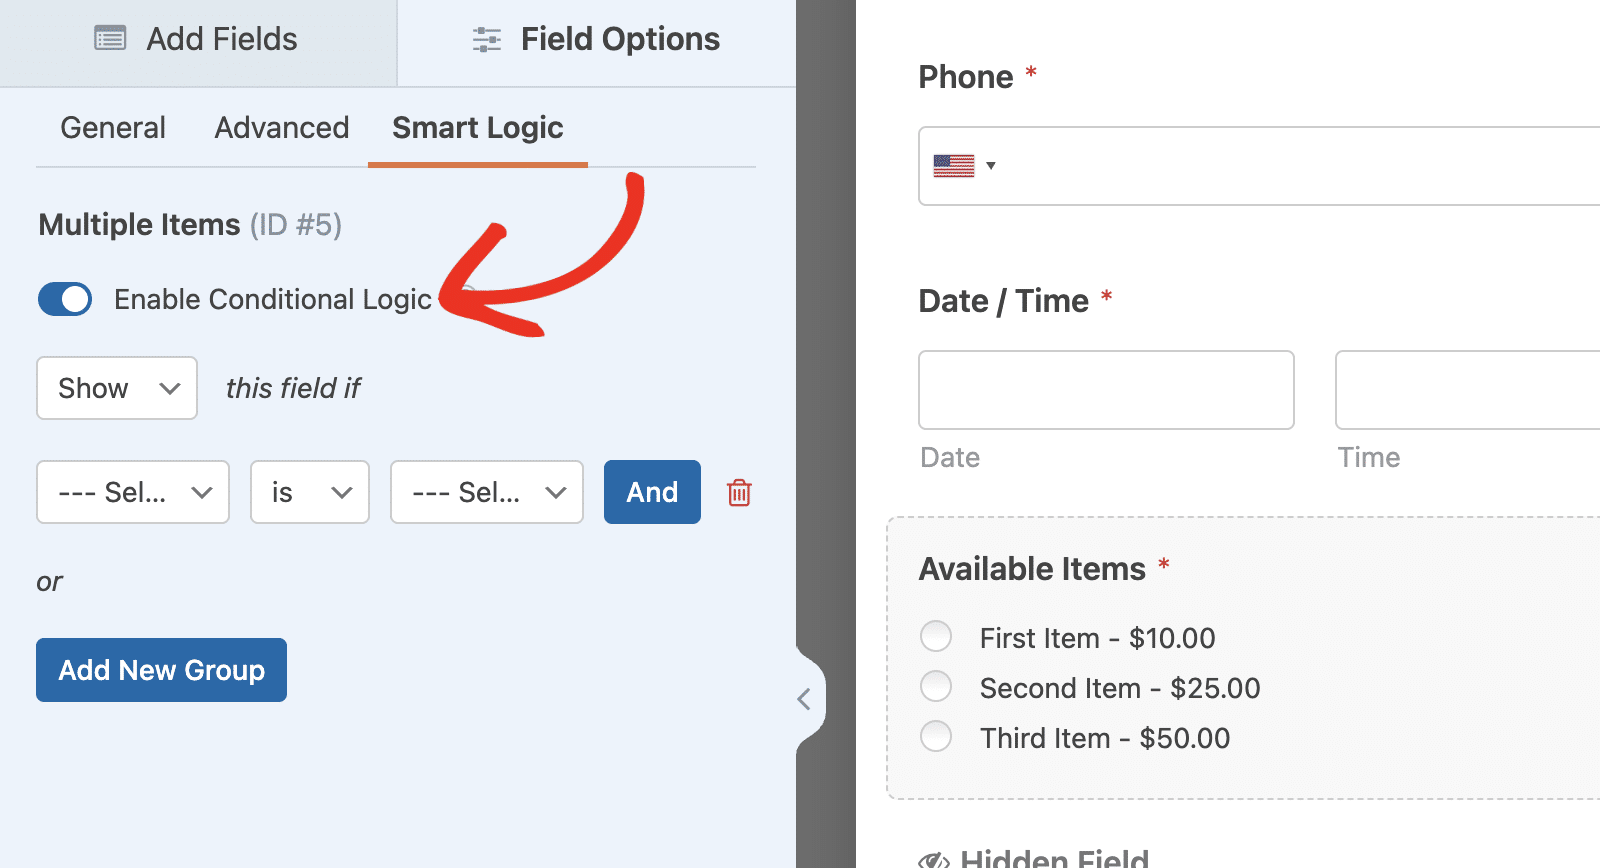
Once enabled, you’ll need to set the condition so it checks the Hidden field with calculations enabled. I’ve set the logic to Show this field if Hidden field is 1. This means if the formula that compares the Date / Time field value against the default date I specified is true, the Payment field will show in the form.
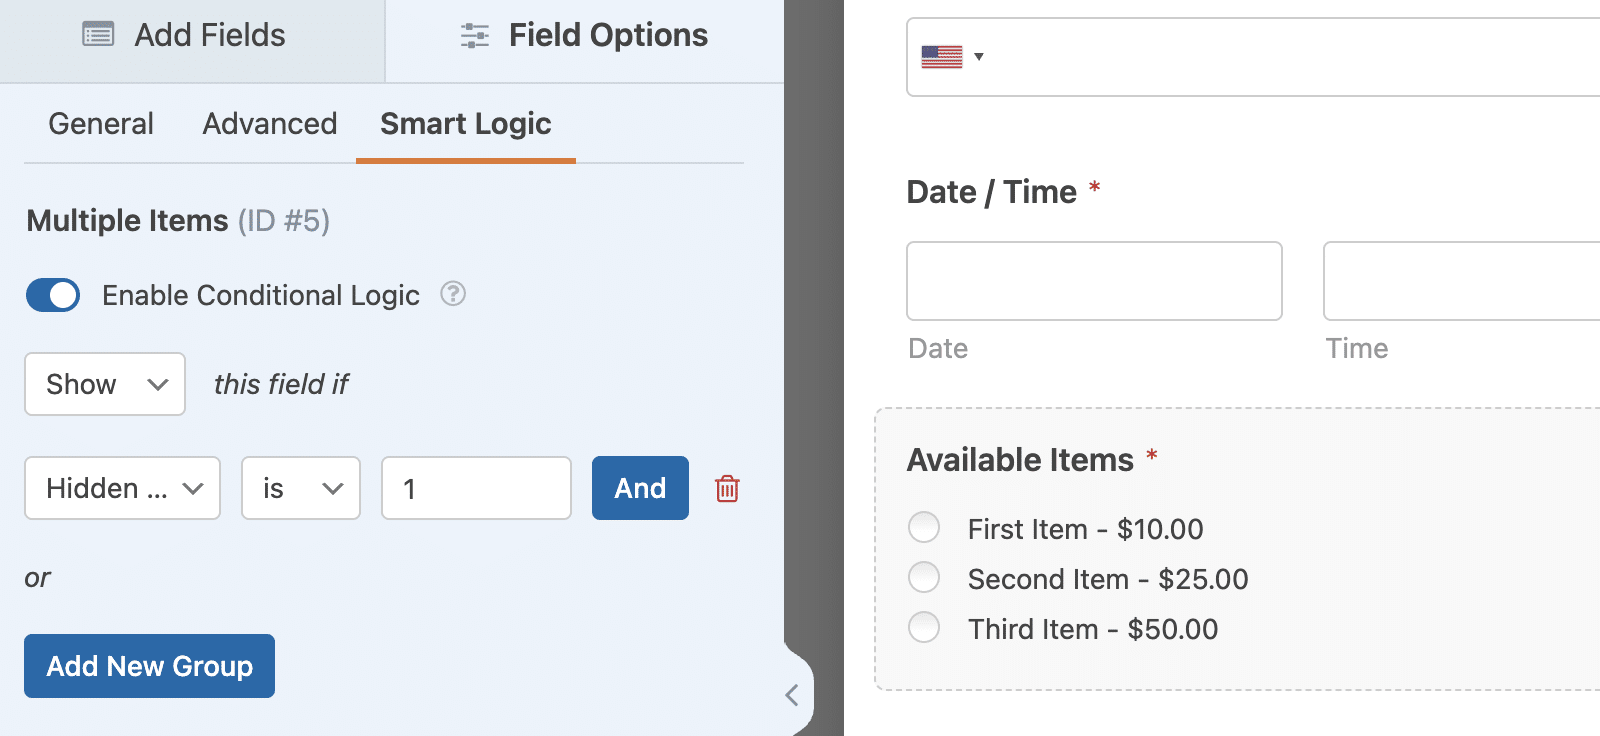
After enabling the conditional logic, make sure to save your changes by clicking the Save button.

When you preview the form in your site’s frontend, the payment field will be hidden by default until you select a date from the Date / Time field.
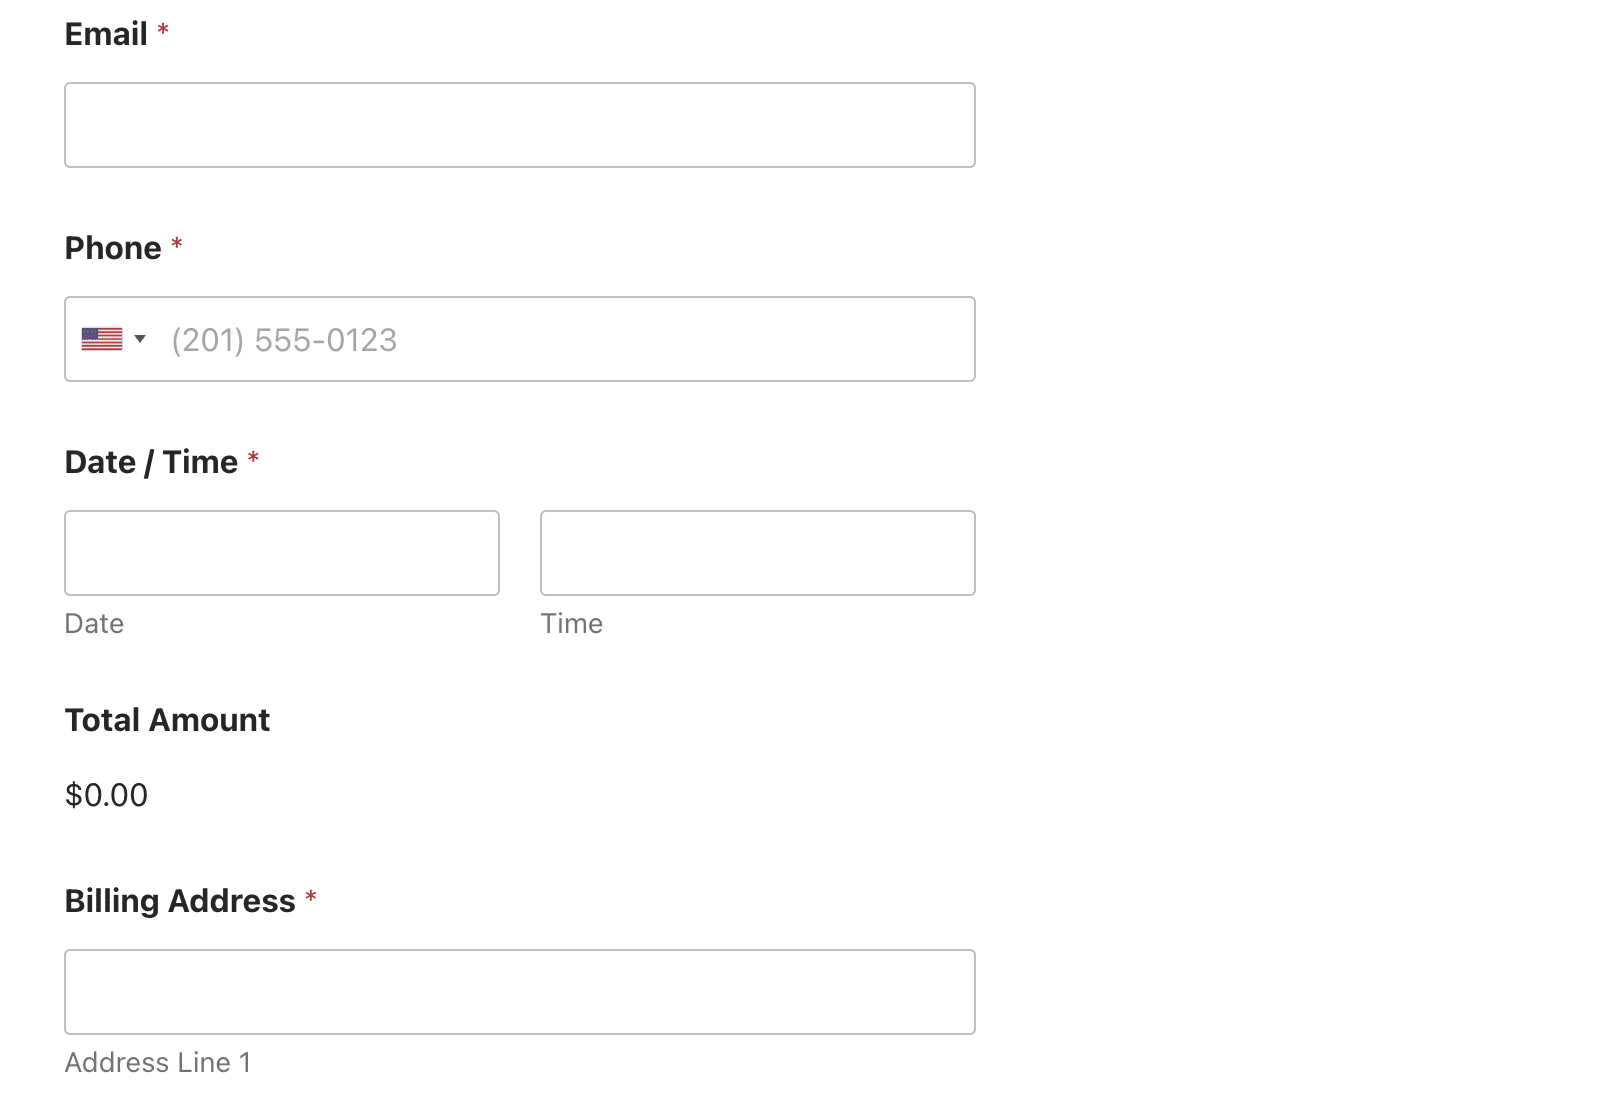
If the date you select matches the one specified in the Default Date Hidden field, the payment field will appear. Users can now proceed to select a payment option and complete their purchase.
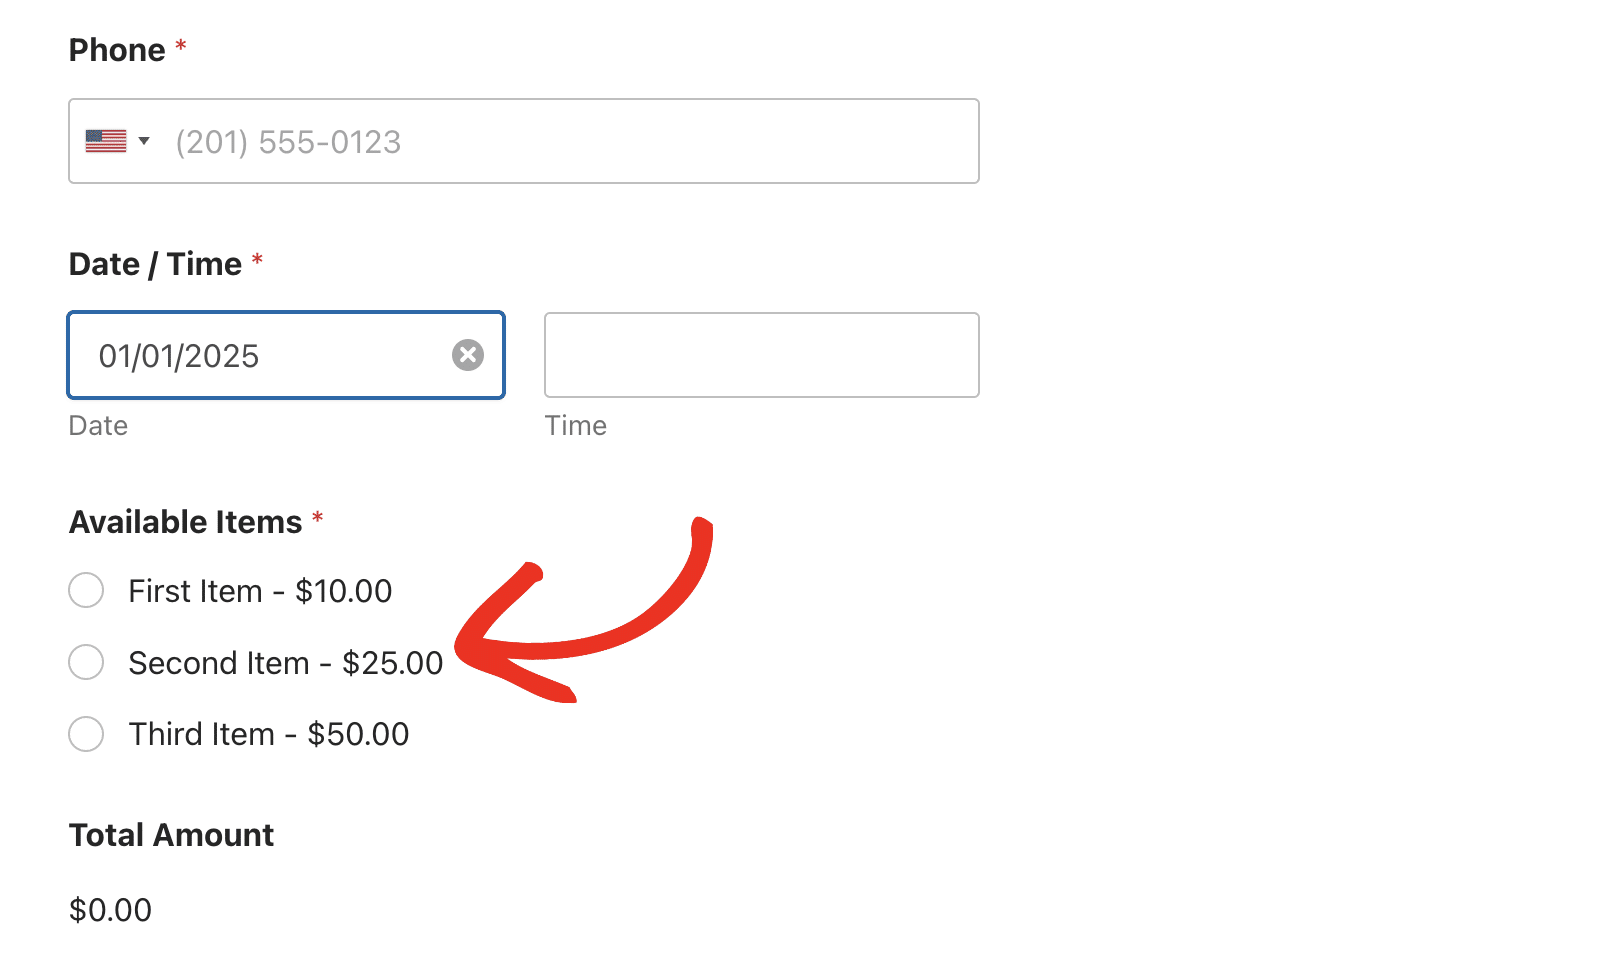
Showing Payment Field Based on User Age
In this example, we’ll only show the payment field if the user is above 18 years. To get started, I’ll add 2 Hidden fields, a Date / Time field, and the Single Item field.
Then select one of the Hidden fields and change the label to Current Date.
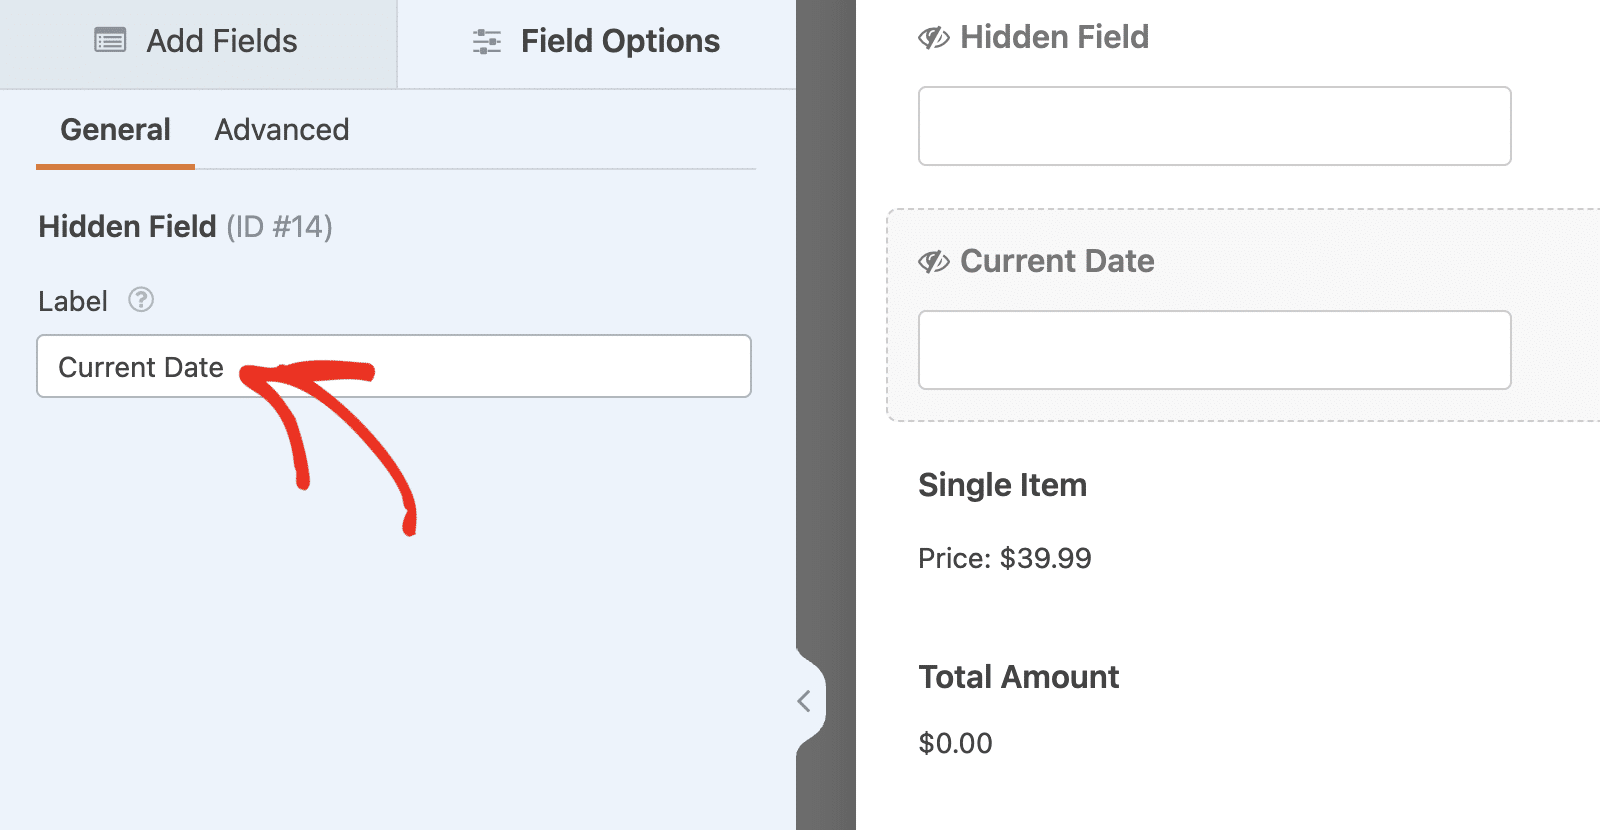
Next, click the Advanced tab and toggle on the Enable Calculation option.

In the formula builder, go ahead and add the function below.
now()
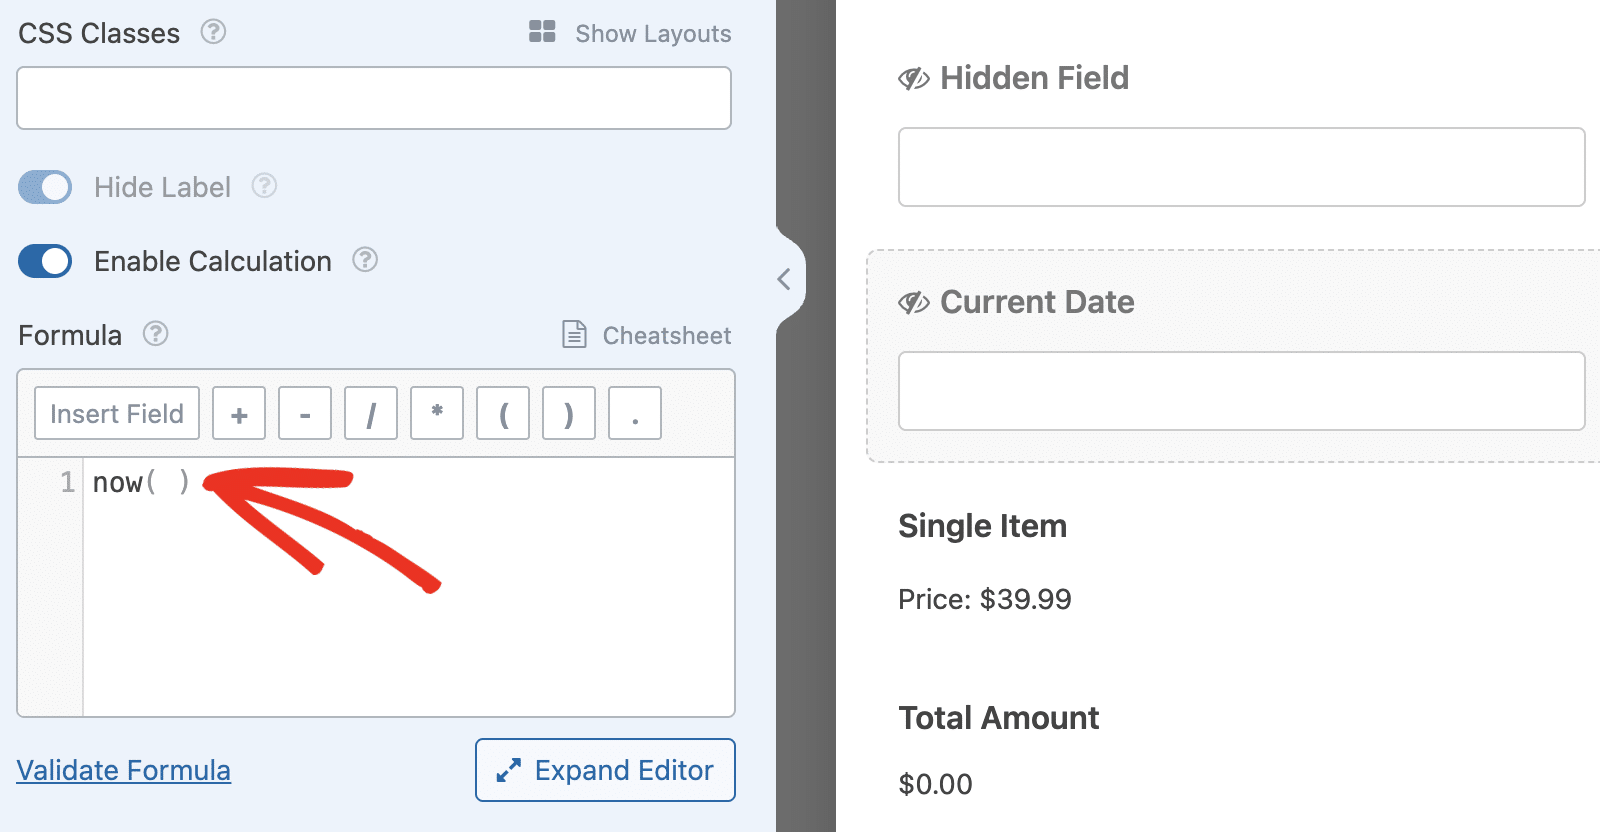
This function will set the value of the Hidden field to the current date and time.
Next, select the second Hidden field and set the Label to Age Calculator.
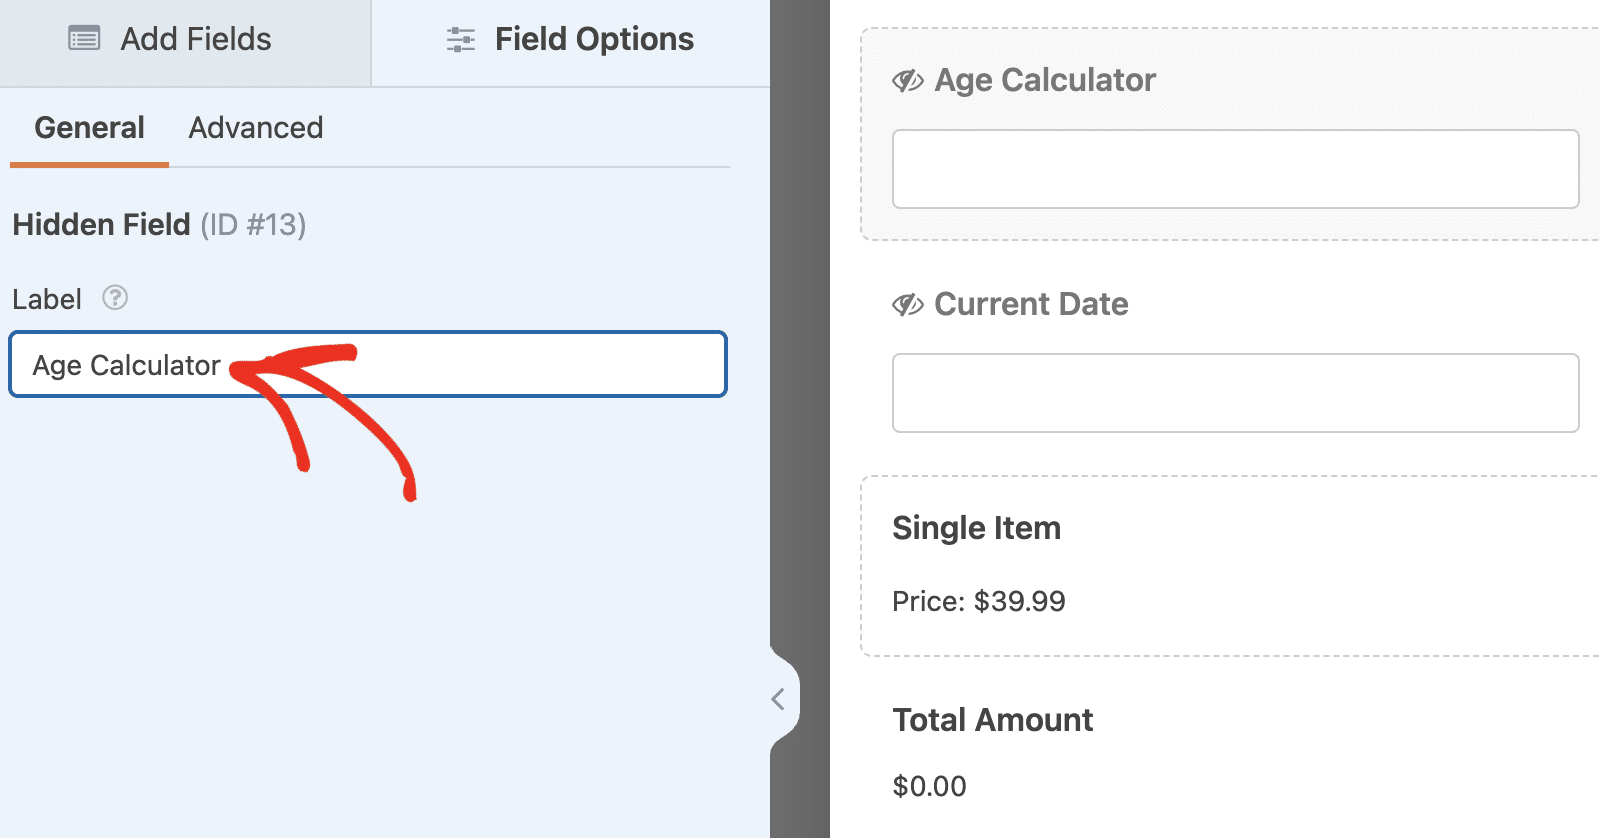
Then select the Advanced tab and toggle on the Enable Calculation option. In the formula builder, add the function below.
years( $F12, $F14 )
The years() function will check the date difference between two dates and return the difference in years.
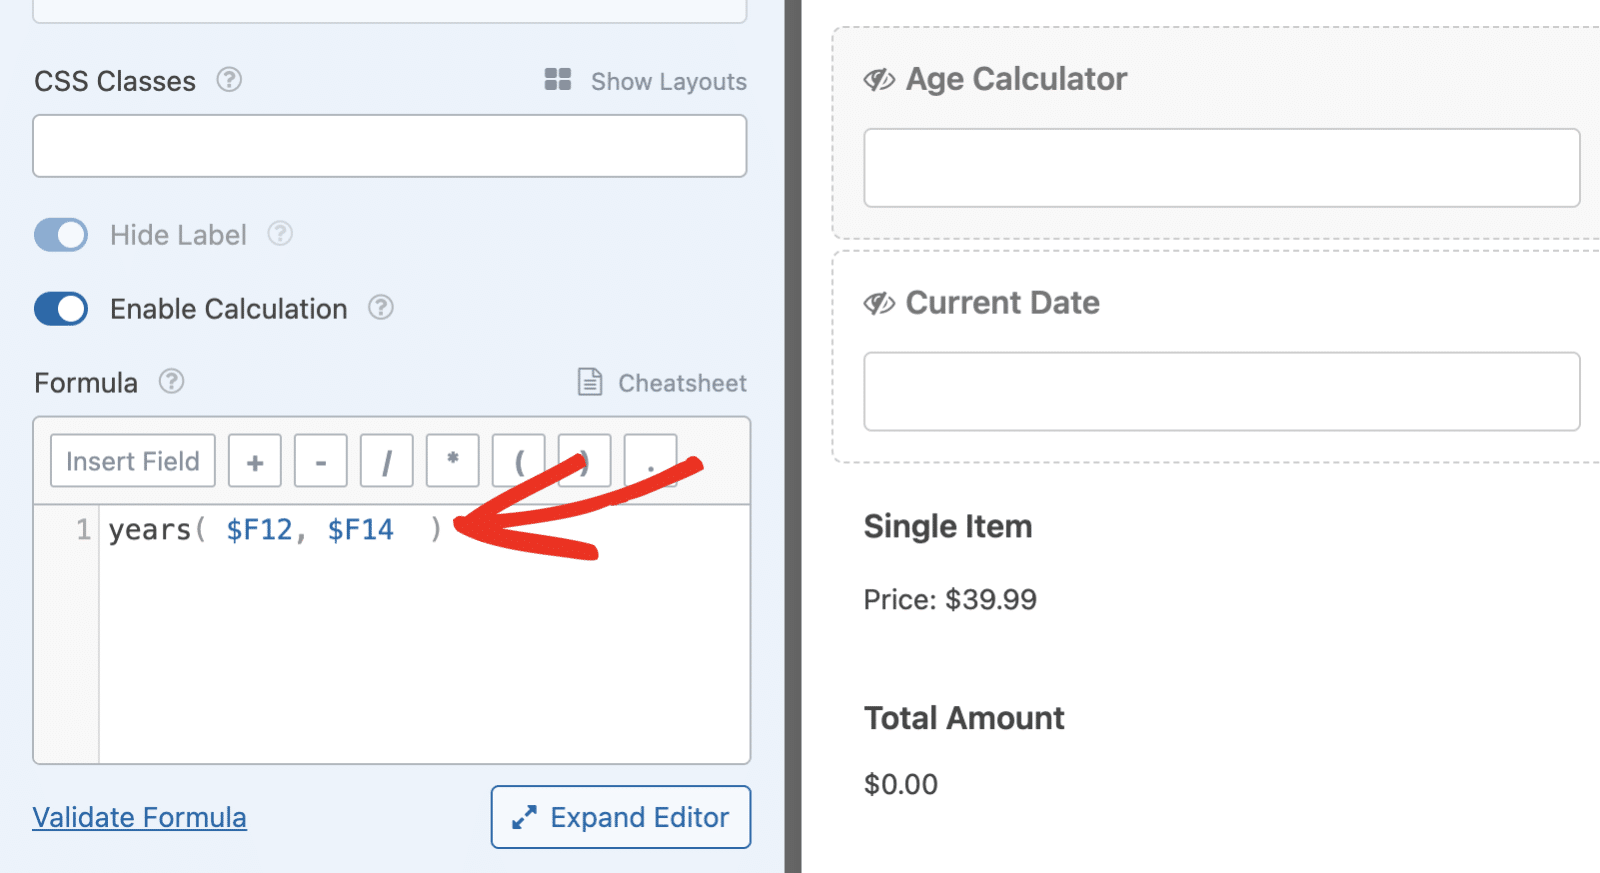
$F12 and $F14 are the variable names for the Date / Time and the Current Date fields, respectively. Make sure to replace the numbers to match the ones on your fields.
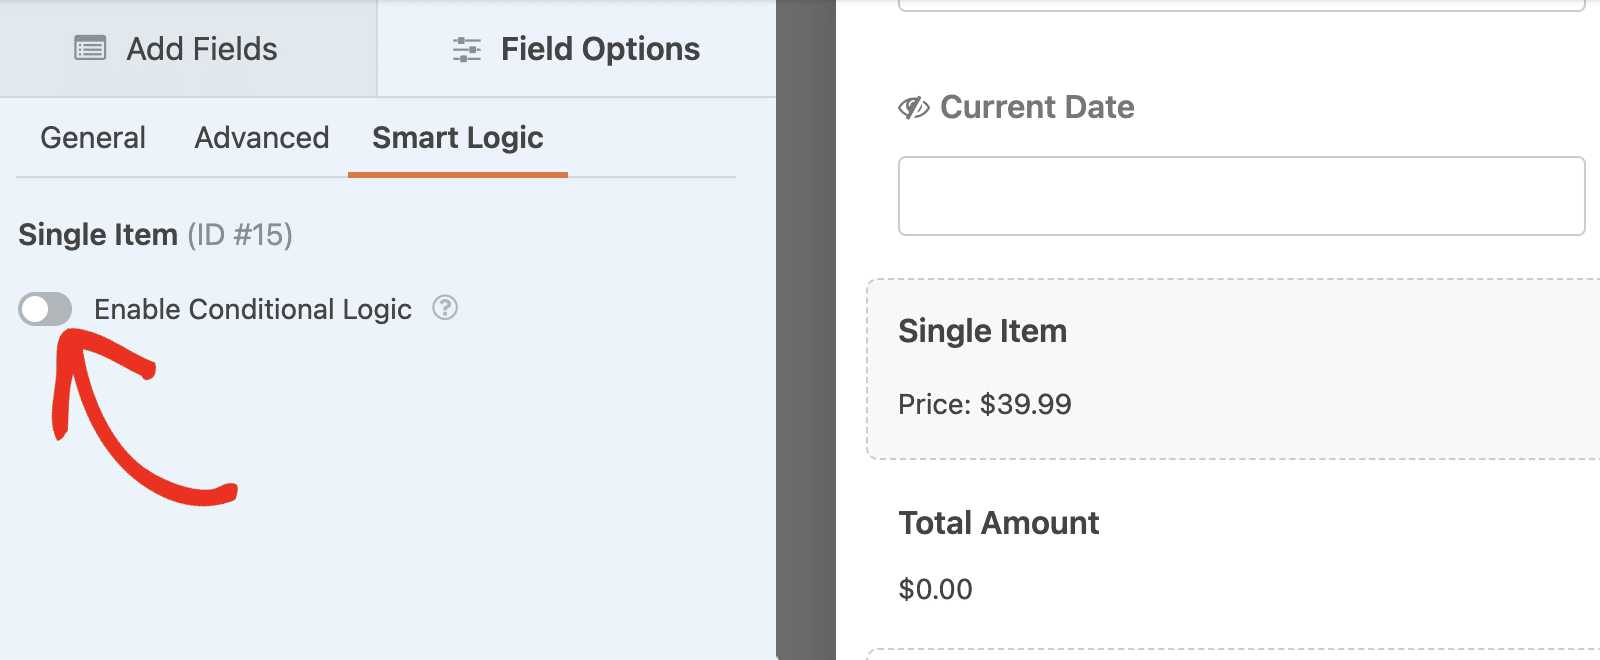
After adding the formula to the Age Calculator, select the payment field on your form to open its Field Options panel. Then, navigate to the Smart Logic tab and toggle on the Enable Conditional Logic option.
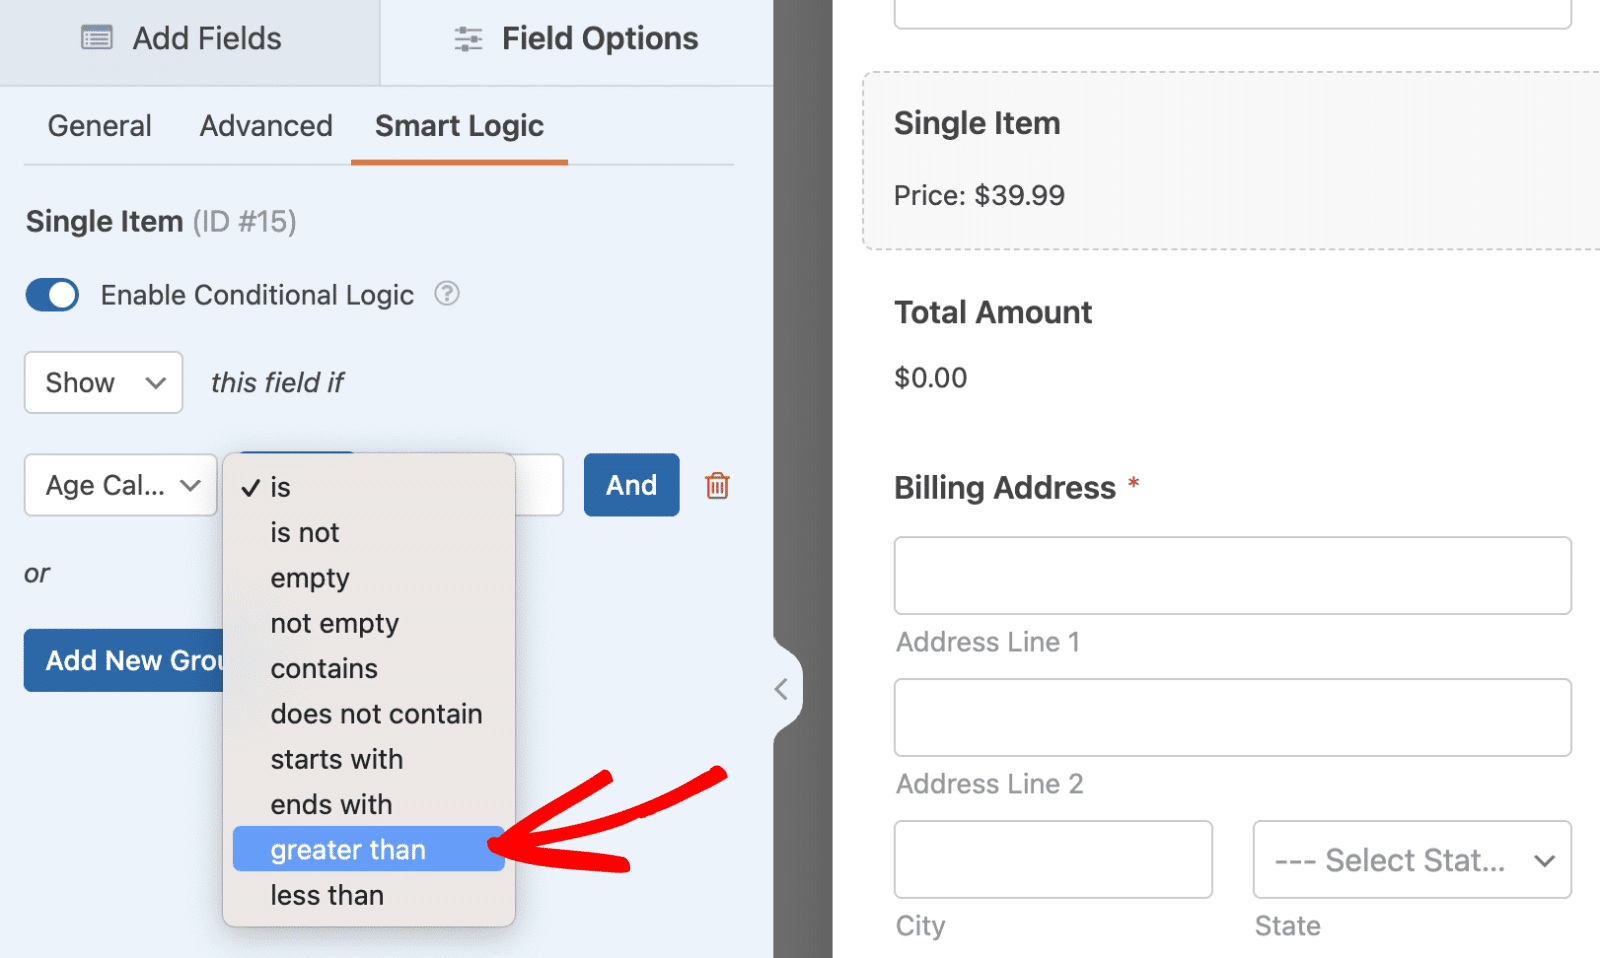
Next, choose the Age Calculator field from the dropdown in the conditional logic rule.
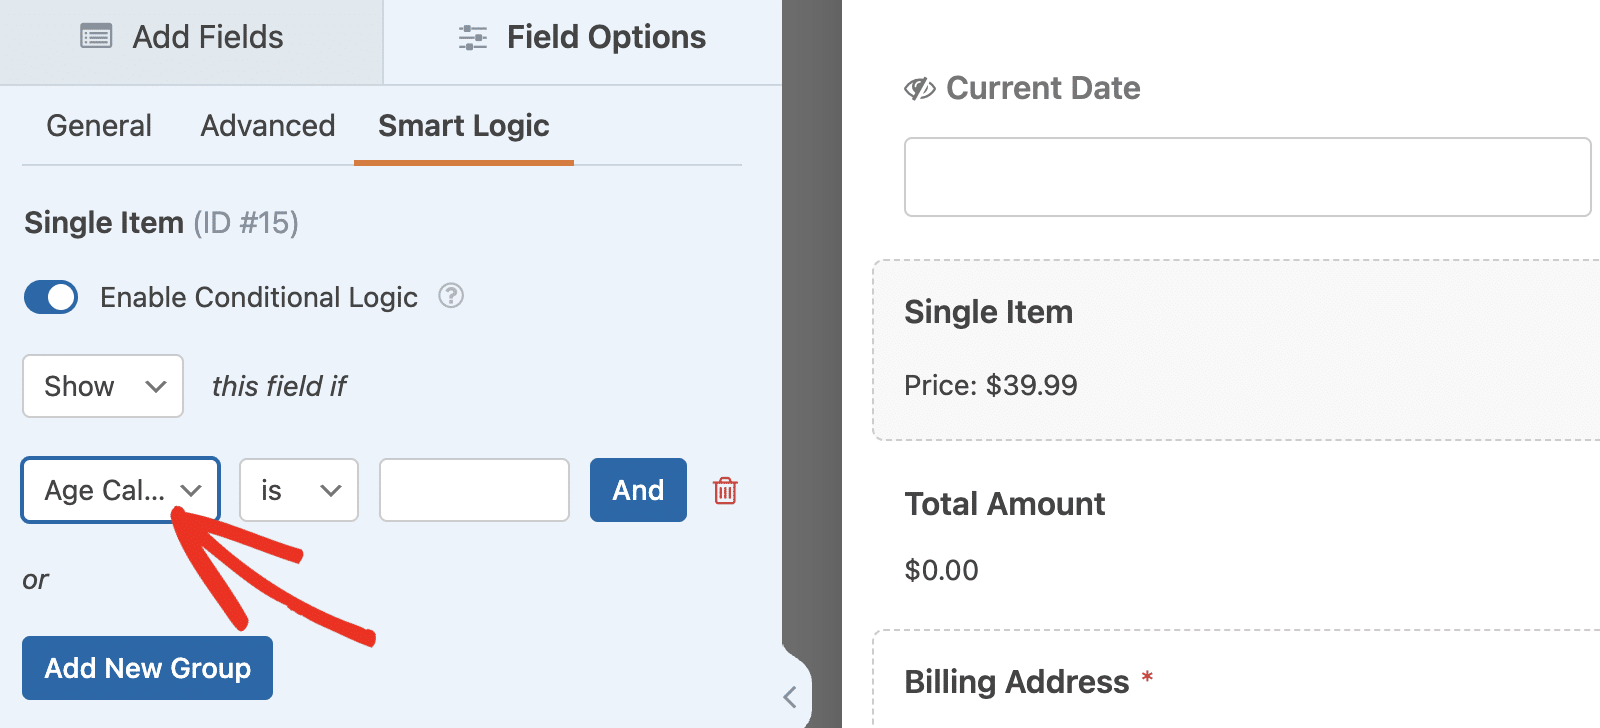
After that, choose the greater than operator from the dropdown.
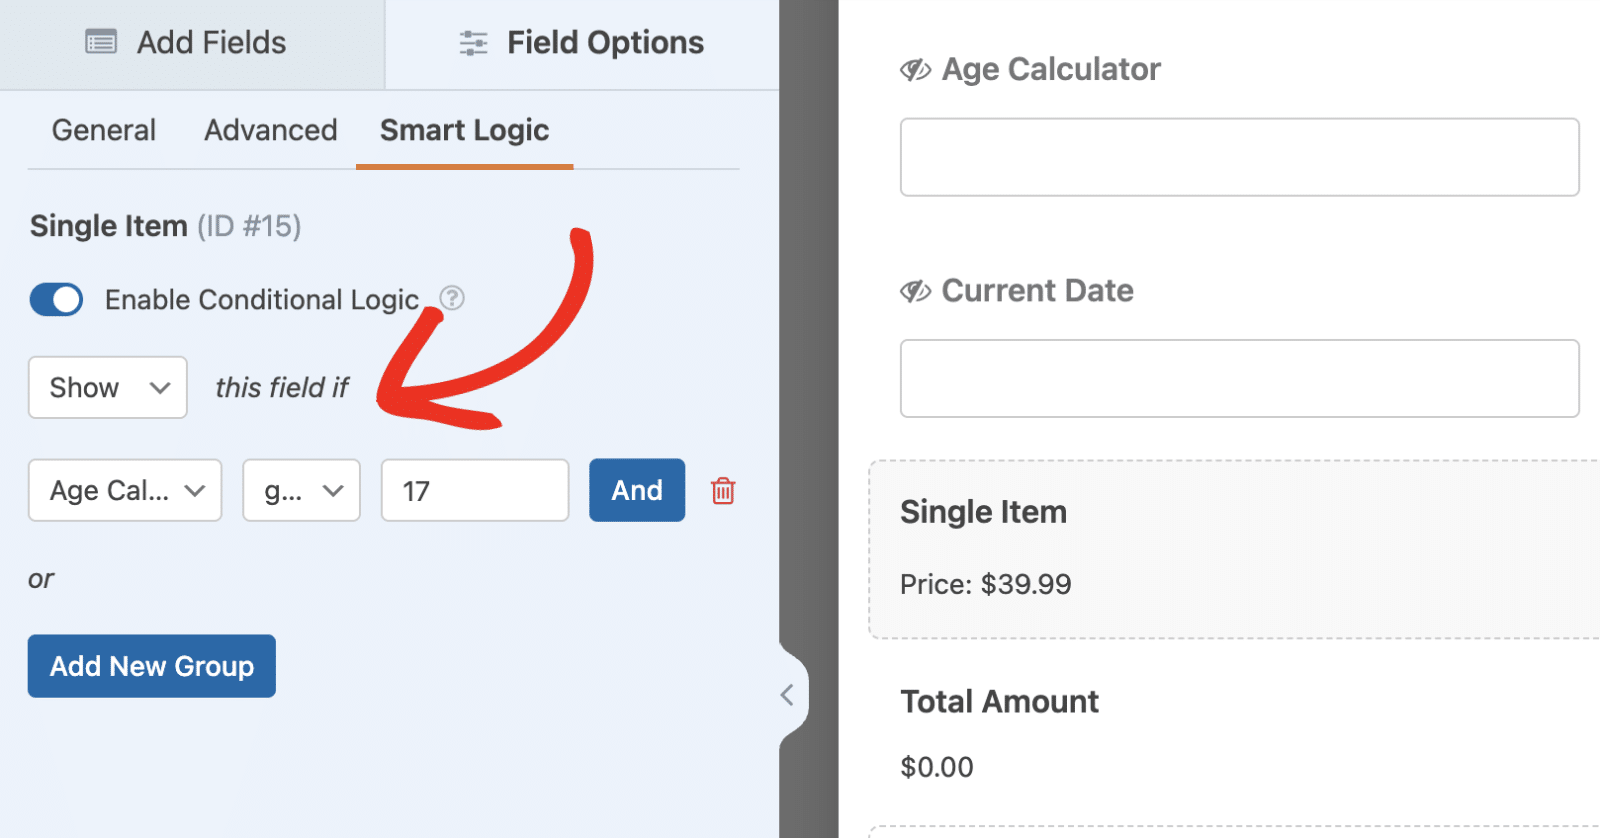
Finally, enter 17 in the value. The rule should be Show this field if Age Calculator is greater than 17. This logic is useful for regulating online payments and ensuring appropriate payment status compliance.
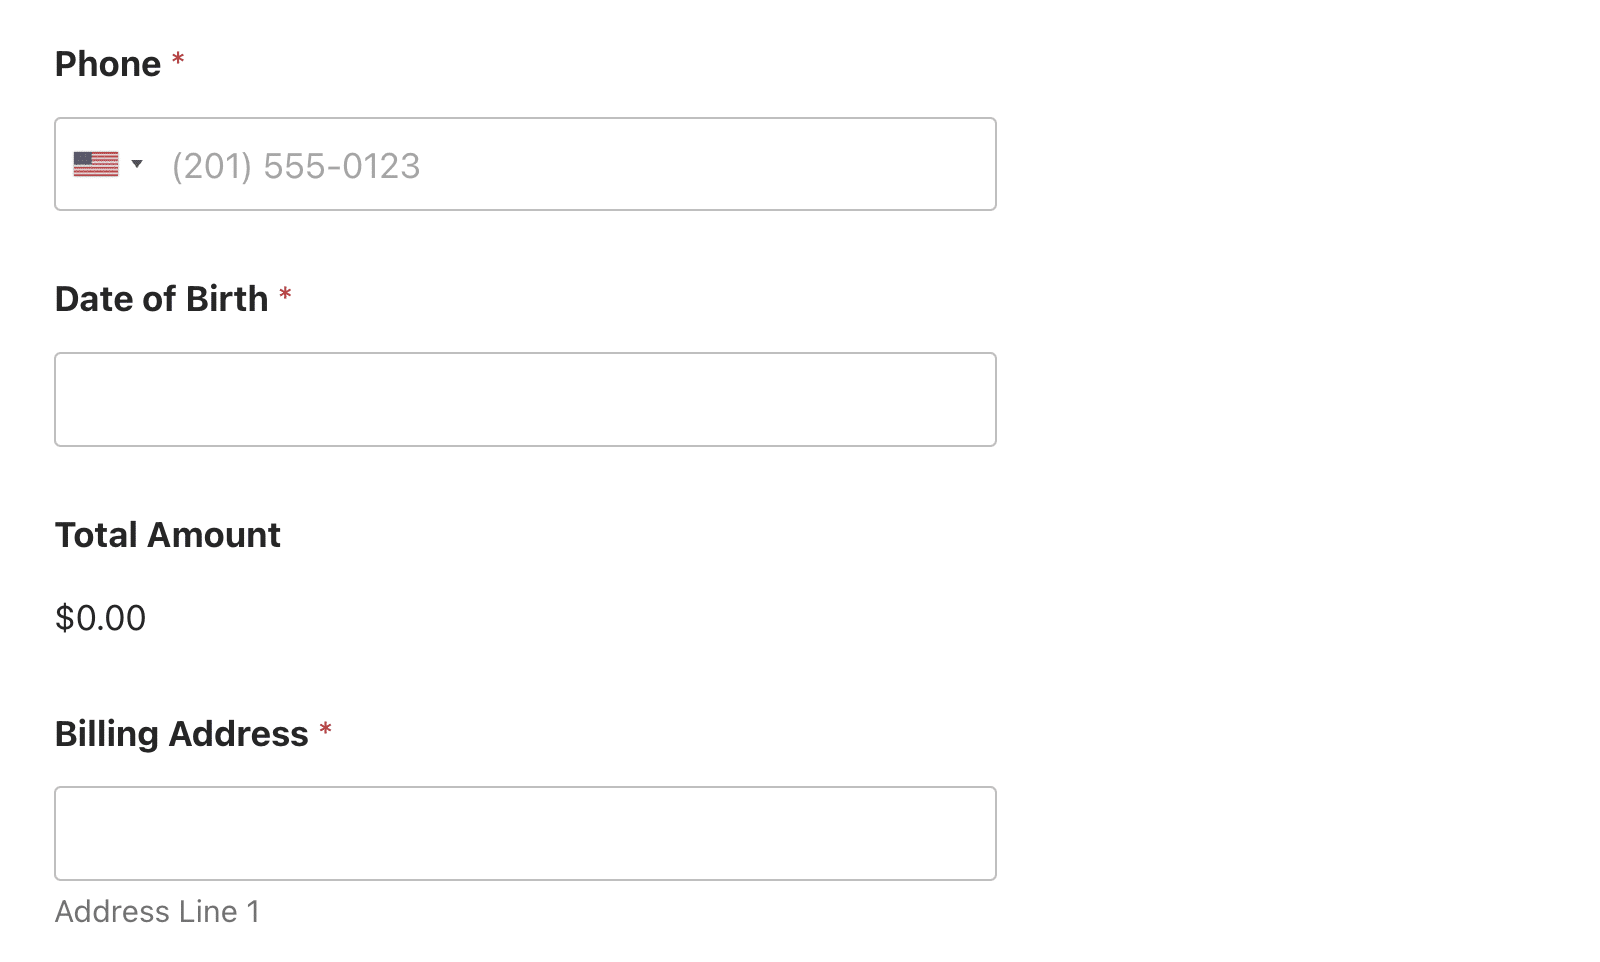
After adding the logic, be sure to save your changes. When you preview the form, the payment field will be hidden by default until the user specifies their age.
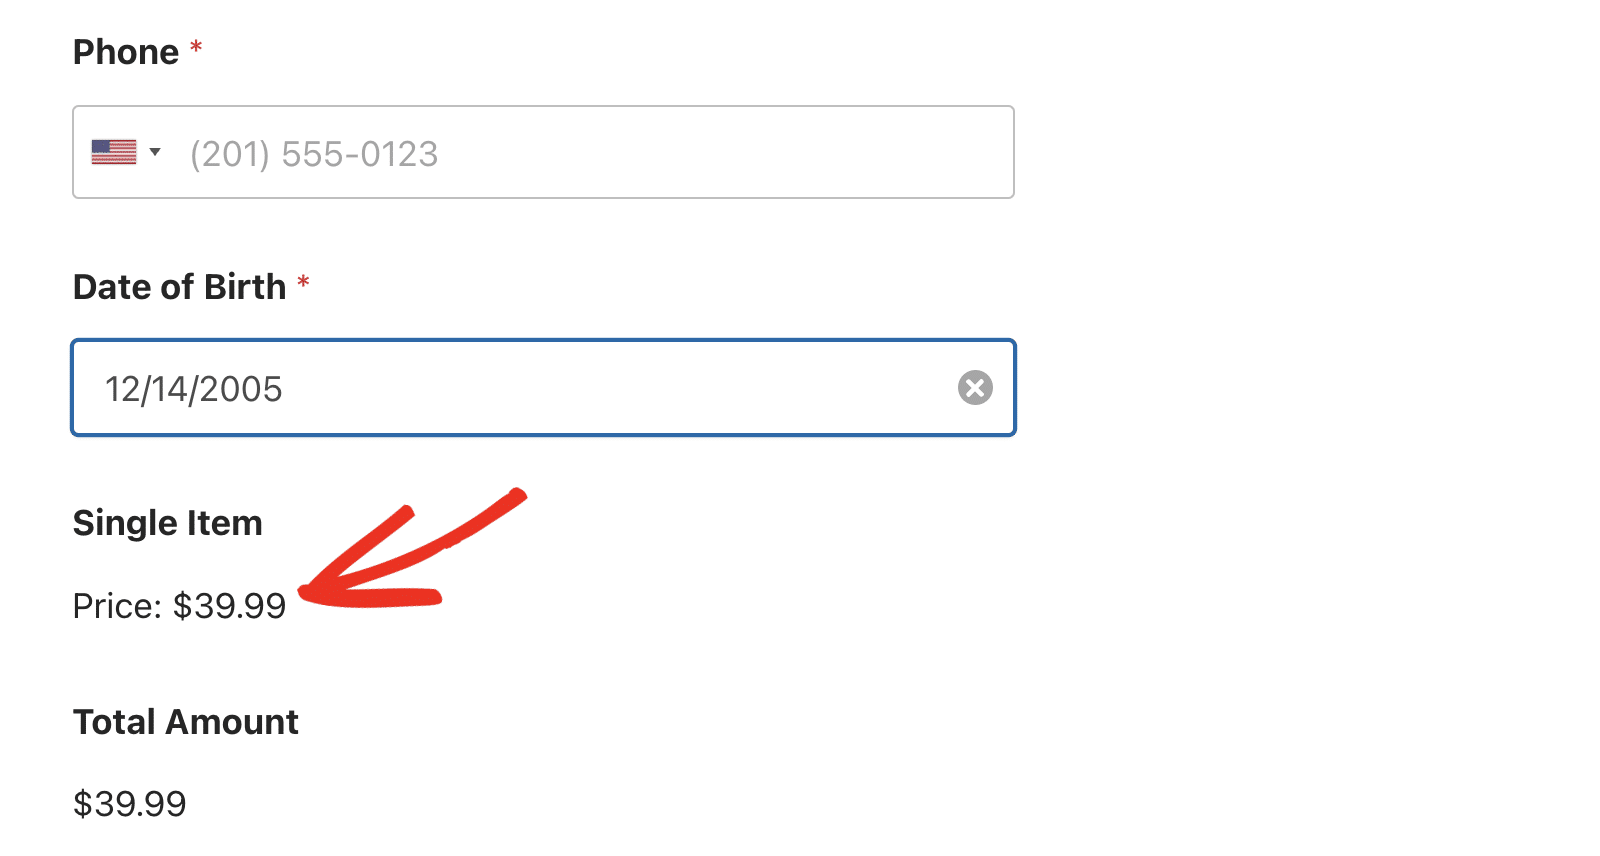
The field will only show if the user’s age is 18 and above.
Step 5: Publish Your Payment Form
Finally, let’s add the payment form to a page. To do so, click the Embed button at the top right corner of the form builder.

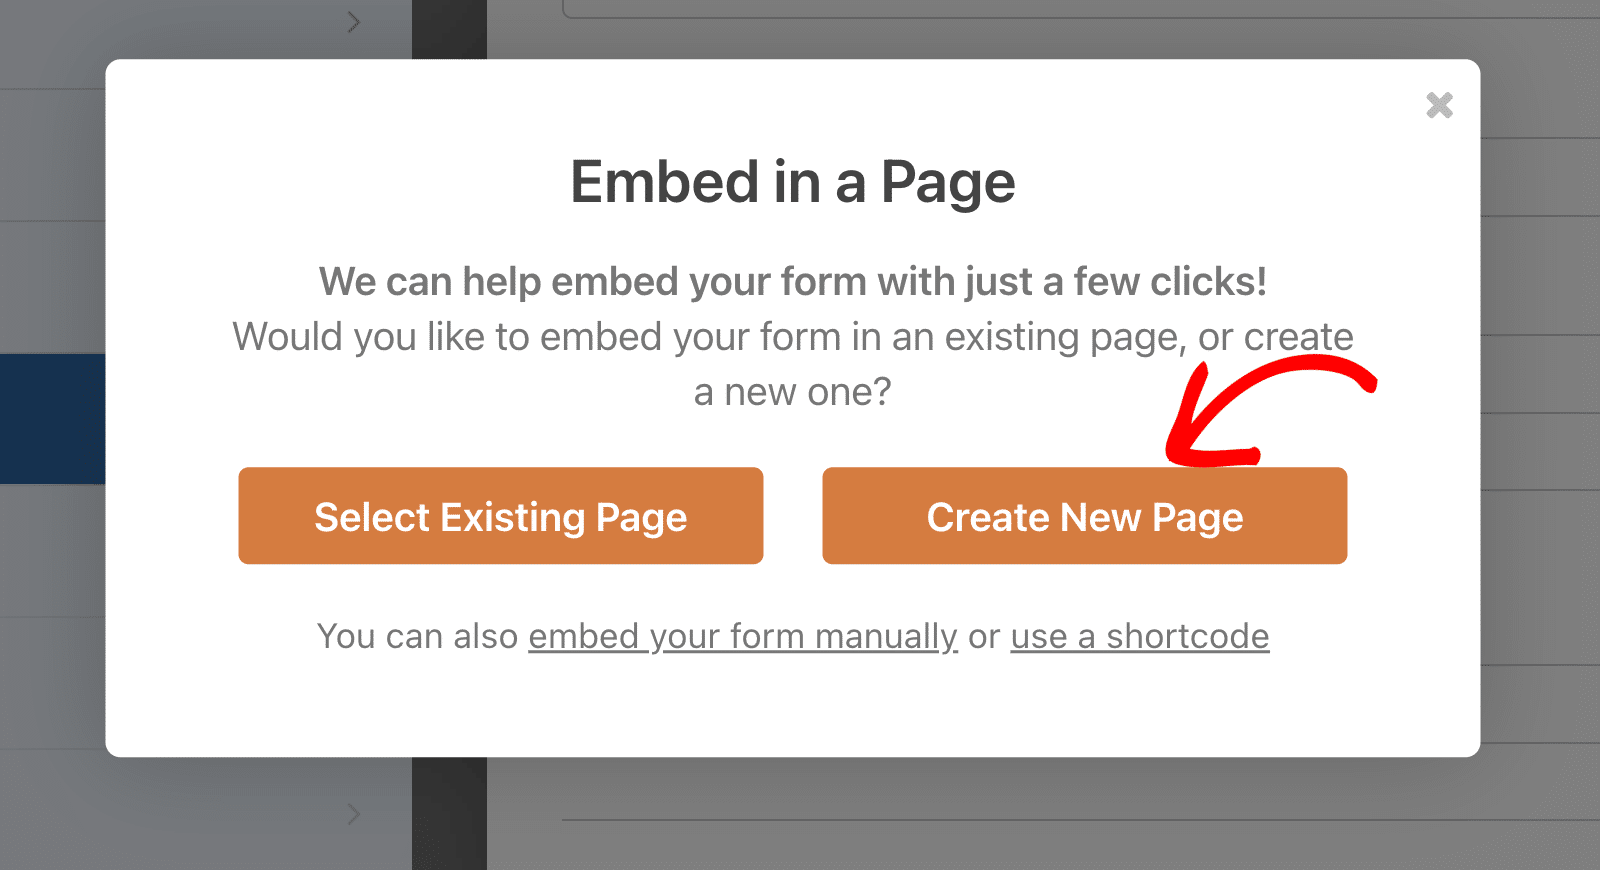
You’ll have the option of publishing your form on a new or existing page. For this guide, I’ll choose the Create New Page option.
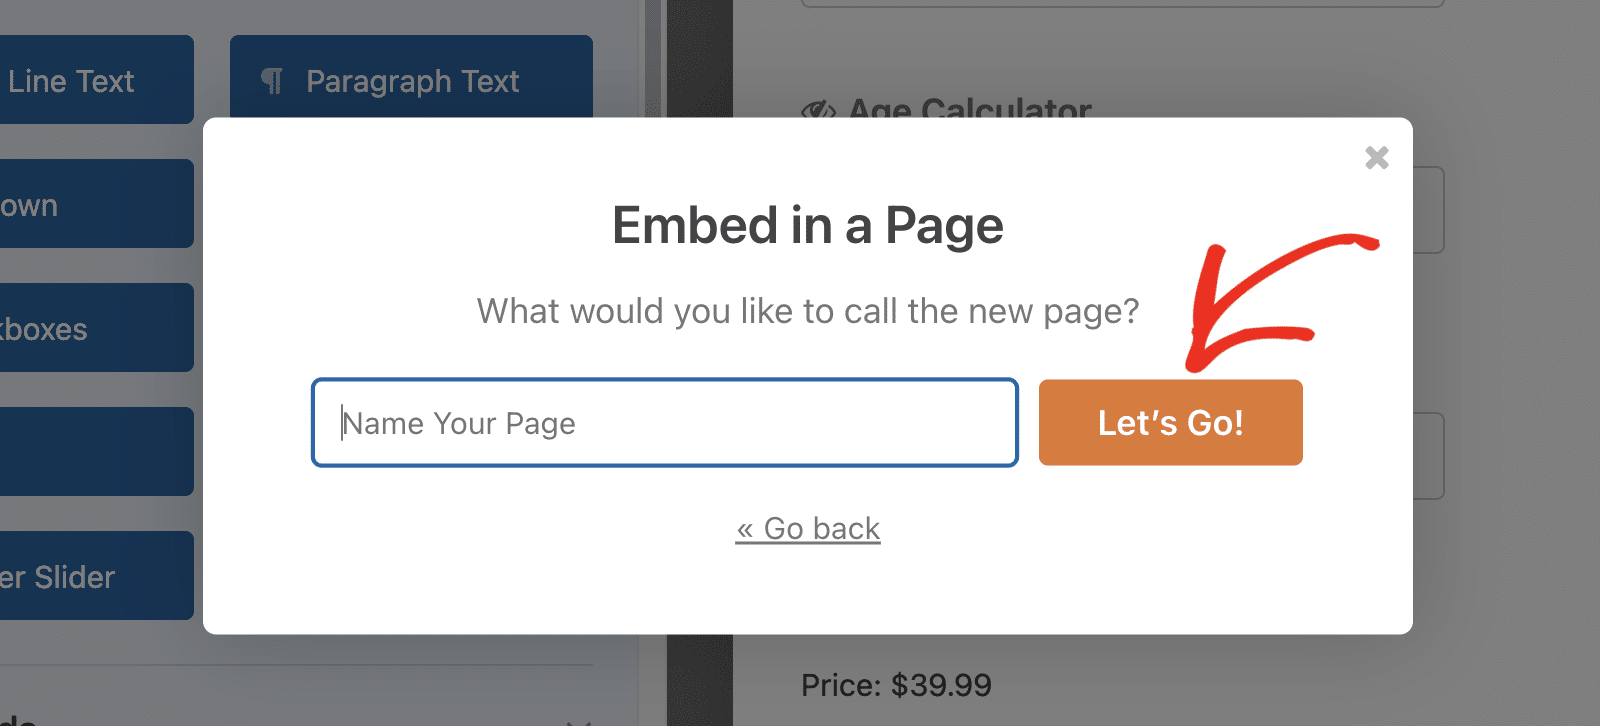
Give your new page a name and click Let’s Go.
You’ll be directed to the WordPress page editor with your form embedded on the page. Click the Publish button to publish your page.

When you check this page on the frontend, the payment field on your form will be hidden until the Date field’s value matches the one specified in your conditional logic rule. Note that it’s also possible to embed your forms using a shortcode or widget, as well.
FAQs — Conditionally Show a Payment Field Based on Date Input
These are answers to some of the top questions we see about showing a payment field based on date input.
What happens if the date field is left empty?
If the date field is empty, the calculation will return 0, effectively hiding the payment field. I recommend making the date field required to prevent this situation.
How do I show the date in WordPress?
If you’re using the Calculations addon in WPForms, you can show the date using the now() function. When you enter the function in the formula builder, the field’s value will be set as the current date and time.
Next, Accept Recurring Payments in WordPress
And that’s it! You’ve now learned 2 practical ways to show a payment field based on date input in WordPress. The process I explained in this tutorial can also be applied to subscription-based payment forms.
You can check out our tutorial to learn how to accept recurring payments in WordPress for details on how to sell subscriptions with WPForms.
Ready to build your form? Get started today with the easiest WordPress form builder plugin. WPForms Pro includes lots of free templates and offers a 14-day money-back guarantee.
If this article helped you out, please follow us on Facebook and Twitter for more free WordPress tutorials and guides.

