AI Summary
I see you working hard on your new WordPress website, perfecting every detail before the big launch. But what about visitors who stumble upon your domain in the meantime? You don’t want them to see a half-finished site or, worse, an error page. This is where knowing how to create a coming soon page in WordPress becomes your secret weapon!
In this guide, I’ll walk you through creating a professional, engaging coming soon page that looks great and works hard for your business. We’ll use SeedProd, my favorite WordPress coming soon page builder, to create something that’ll make your visitors say “Wow!” and hit that subscribe button faster than you can say “website launch.”
How to Create a Coming Soon Page in WordPress
A coming soon page isn’t just a placeholder. It’s your first impression, your digital “We’re getting ready for you!” sign. Most importantly, it’s an opportunity to start building relationships with your audience before you even launch. You can generate buzz, collect leads, and keep people excited about what’s coming.
Here’s a quick overview of what I’ll cover in this guide. I know you’re busy, so I promise you’ll love how easy this is.
What You’ll Need for this Tutorial
As I mentioned, I’m going to use SeedProd to create a coming soon page.
Why SeedProd? Well, aside from the fact that it’s beginner-friendly and lets me create a page quickly, it’s also like a Swiss Army knife. It has so many great features that come in handy at various stages of website maintenance.
Here are a few things I love about it, and why I’m using it today:
- A drag-and-drop builder that makes page creation a breeze (no coding required!)
- Smart access controls that let you decide who sees what (perfect for sharing with clients or team members)
- Integration capabilities that connect your page with email marketing services, CRM systems, and more
- A huge library of professional templates that make your site look amazing in just a few clicks
So before we start, make sure you install and activate SeedProd on your WordPress site. Need some help with installing WordPress plugins? Check out this beginner’s guide to walk you through the process.
Ready?
Step 1: Create a Coming Soon Page for Your WordPress Site
Alright, let’s roll up our sleeves and get started! The first step is setting up your coming soon page, and I promise it’s easier than making a cup of coffee (well, almost).
Navigate to your WordPress dashboard and look for SeedProd in the left menu. Click on the Landing Pages option and you’ll see 5 different types of pages you can create:
- Coming Soon mode – perfect for sites under construction
- Maintenance mode – ideal for temporary site updates
- Login page – for custom login experiences
- 404 page – for stylish error pages
- Landing page – for specific marketing campaigns
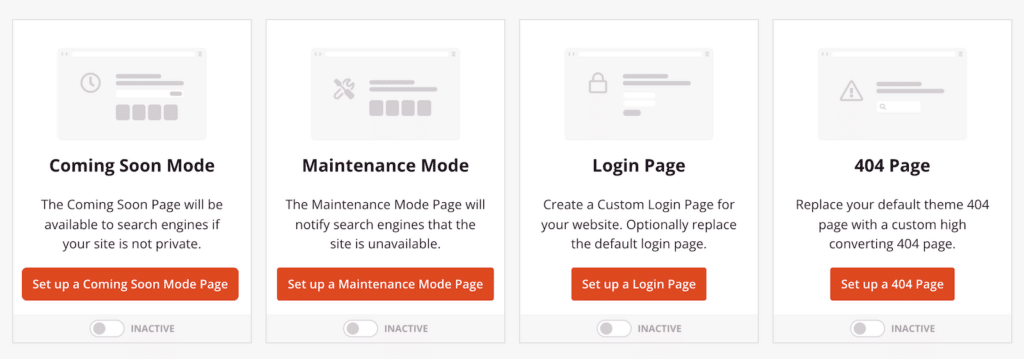
For our purposes, I’ll select Coming Soon Mode. Now, here’s where the fun begins! You have 2 options:
- Start with a blank canvas and let your creativity run wild
- Choose from SeedProd’s collection of professionally designed templates (my recommended approach for new users)
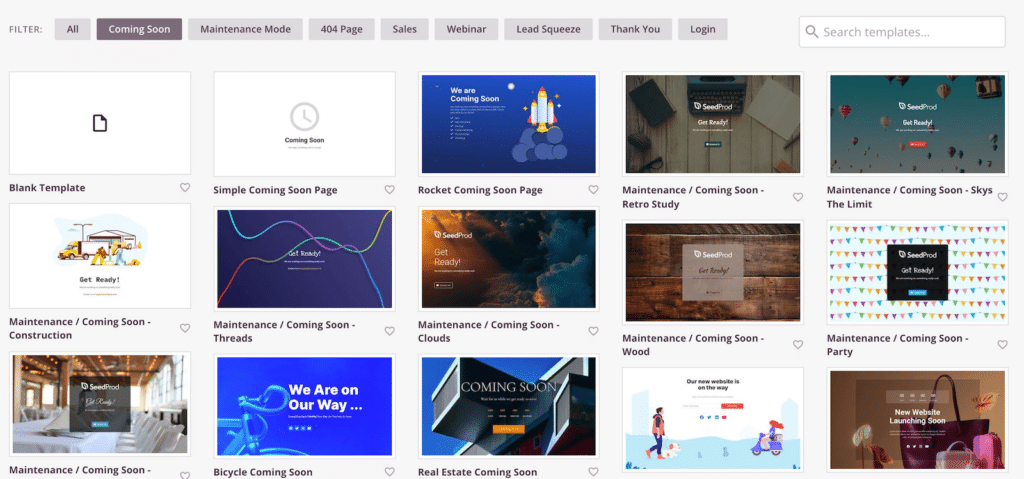
Step 2: Customize Your Coming Soon Page
Now we’re getting to the good stuff! Once you’ve selected your template, you’ll go to SeedProd’s page builder. Everything you see here can be customized to match your brand. Take some time to play with different blocks and sections. You never know when lightning will strike!
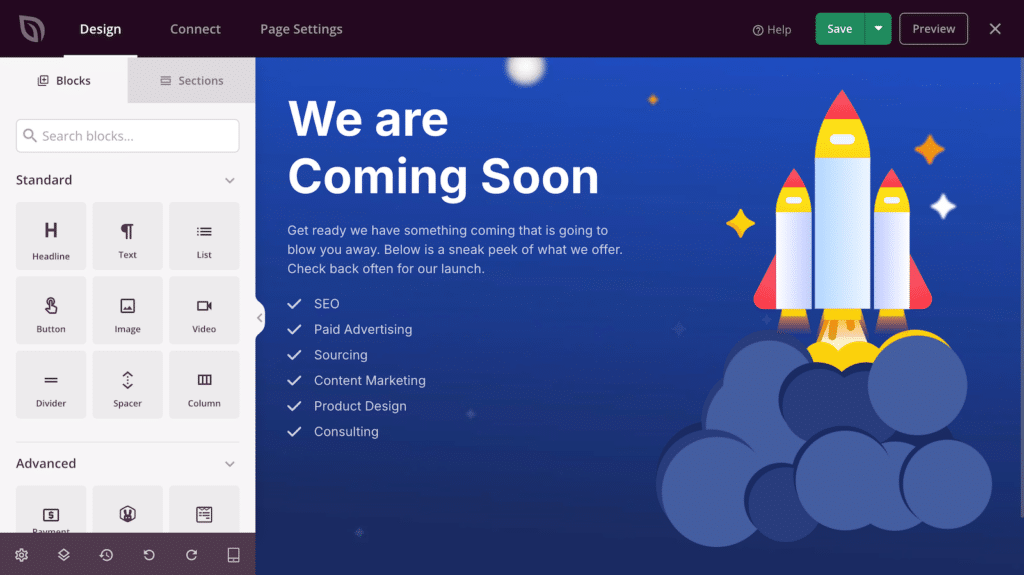
The interface is divided into two main sections, as you can see:
- Left sidebar: Your toolbox of blocks and sections
- Right side: Live preview of your page
Here are some small ways you can customize your page for big impact.
1. Update Your Text Content
First things first: let’s make this page truly yours. Click on any text element to edit it. Some key areas to update:
- Headline: Make it attention-grabbing and clear
- Description: Share exciting details about what’s coming
I made some minimal updates to the language in the template and it already makes a big difference.

2. Add a Contact Form
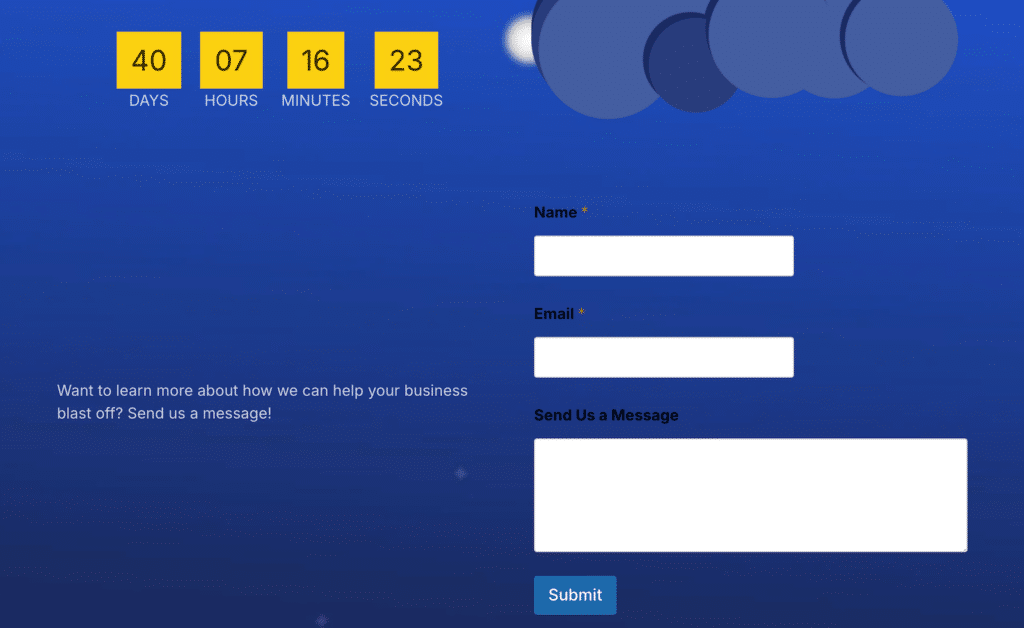
This step is optional, but I’m going to add a form to boost engagement. Adding a form lets you capture leads while your site is still under construction. If you have WPForms or Formidable Forms installed, you’re in luck! Simply:
- Drag the “Form” block from the left sidebar
- Select your preferred form from the dropdown
I’m adding a contact form from WPForms, but you can use whatever kind of form you’d like. Make your page however you want!
Don’t have a form builder? Get started with WPForms now!
3. Include a Countdown Timer
You may have noticed the countdown timer in the screenshot above with my form embedded. This is also not required, but nothing builds anticipation like a countdown! SeedProd makes it super easy to add one.
- Drag the “Countdown” block to your desired location
- Set your launch date and time
- Choose from different styles and animations
- Customize colors and typography to match your brand
4. Add Social Proof
If you’ve got it, flaunt it! Even before launch, you can start building credibility. Consider adding:
- Testimonials from beta users
- Social media feeds
- Partner logos
- Press mentions
And when you’re done, don’t forget to hit the Save button!

In fact, use it often. There’s nothing worse than losing your work!
Step 3: Customize Your Coming Soon Page Settings
Now that your page is stunning, let’s dive into the settings that control how it works.
From inside the page builder, click on Page Settings at the top of your screen to access these important options.

When that opens, you’ll see a handful of options on the left side. You can configure settings in each one of these. In my experience, especially when you’re doing this as a beginner, some settings are a little more important than others.
Let me break down some of your Page Settings options here.
1. General

- Set a public-facing page title to appear in the browser tab
- Toggle the page status (I recommend leaving this as Draft until all your customizations are complete)
2. Access Control
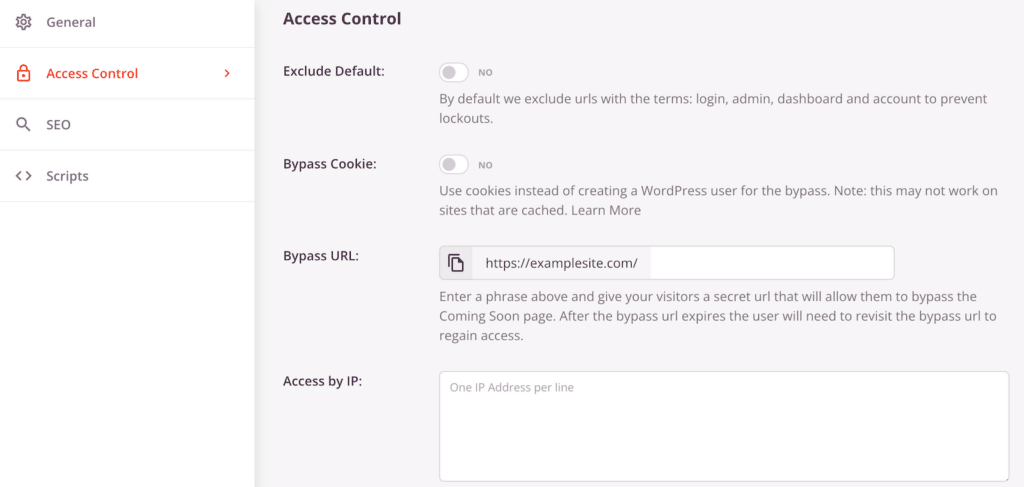
This is where SeedProd really shines! You can:
- Create a secret bypass URL for clients or team members
- Whitelist specific IP addresses
- Grant access based on WordPress user roles
- Choose which pages show the coming soon notice
3. SEO

- Set an optimized SEO title
- Write an engaging meta description
- Add a favicon
- Select a social media thumbnail
Step 4: Publish Your Coming Soon Page
The moment of truth has arrived! You have two ways to make your coming soon page live:
Method 1: Direct from the Page Builder
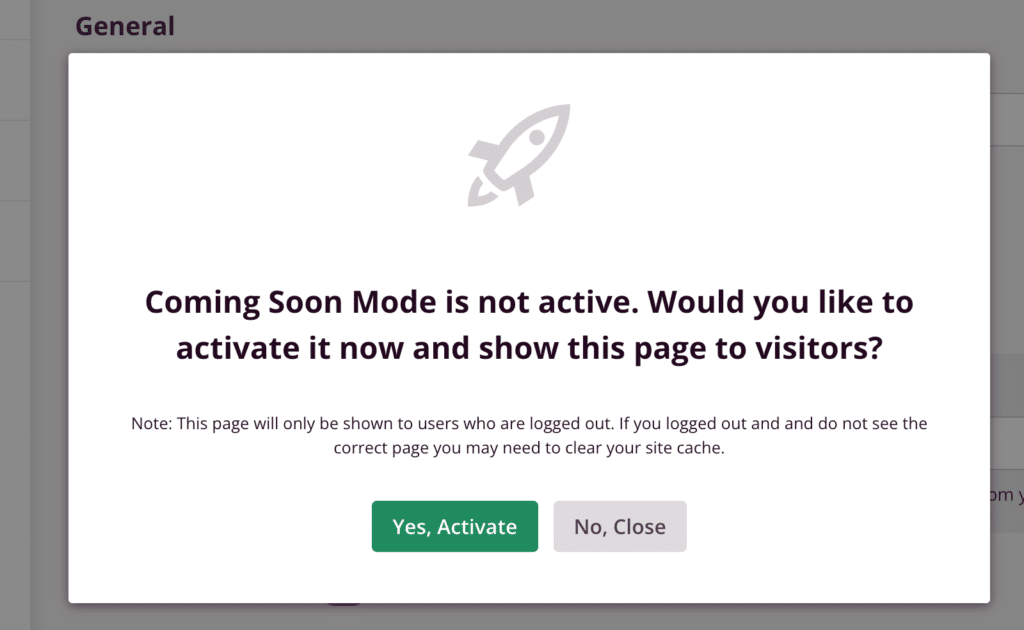
- Navigate to Page Settings » General
- Switch the Page Status toggle to Publish
- Save your changes
- Exit the page builder
- Confirm activation in the modal window
Method 2: Via the SeedProd Dashboard
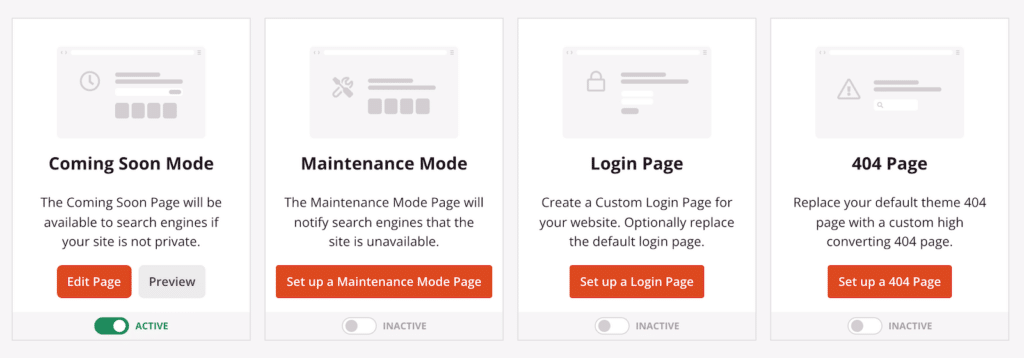
- Go to SeedProd » Landing Pages in WordPress
- Locate the active/inactive toggle below your coming soon Edit Page button.
- Toggle the activation switch to Active
- Verify the page status in the builder by going to Page Settings » General and checking that the Page Status is set to Publish.

Note that when your coming soon page is active, WordPress will display a notification banner to remind you. This helps prevent accidentally leaving it on after launch!
When Launch Day Arrives
Ready to reveal your site to the world? Here’s your launch day checklist:
- Return to SeedProd » Landing Pages
- Use the toggle switch to deactivate the coming soon page
- Set page status to Draft in the builder
- Test your live site thoroughly
- Celebrate your successful launch!
Remember, a coming soon page can be a customer’s first impression of your business. Make it count! With SeedProd and these detailed instructions, you’re well-equipped to create a coming soon page that not only looks professional but also helps build your audience before you even launch.
Next, Grow Your Landing Page Skills
Now that you know how to create a coming soon page, the world is your oyster! Well, at least as far as landing pages are concerned. 🙂
If you want to know how to make the best landing pages with the best results, check out our guide to landing page best practices. You’ll be creating everything from clever 404s to lead gen landing sites before you know it, and reaping all the benefits of your mad skills!
Ready to build your form? Get started today with the easiest WordPress form builder plugin. WPForms Pro includes lots of free templates and offers a 14-day money-back guarantee.
If this article helped you out, please follow us on Facebook and Twitter for more free WordPress tutorials and guides.


