AI Summary
Do you want to make your email notifications stand out and align with your brand? With WPForms, it’s easy to create and style custom email notifications that look professional and captivate your recipient.
Whether you’re using WPForms Lite or Pro, you can take advantage of email templates to create unique, on-brand email designs. Let’s dive into how you can custom-style your WPForms email notifications!
How to Custom Style Your WPForms Email Notifications
Get WPForms
WPForms is a popular and intuitive WordPress plugin that takes the hassle out of form creation. Whether you need a contact form, a survey, or a registration form, WPForms makes it easy for anyone to build forms without needing any coding knowledge.
When it comes to email notifications, WPForms offers a slew of customization tools that let you tailor your emails to fit your style and brand. With these versatile features, you can create professional, responsive forms and notifications with ease.
To get started, first install the plugin on your WordPress website. Then, after you activate it, follow the easy steps in this blog post to start customizing your form notification emails.
Set Up Notifications
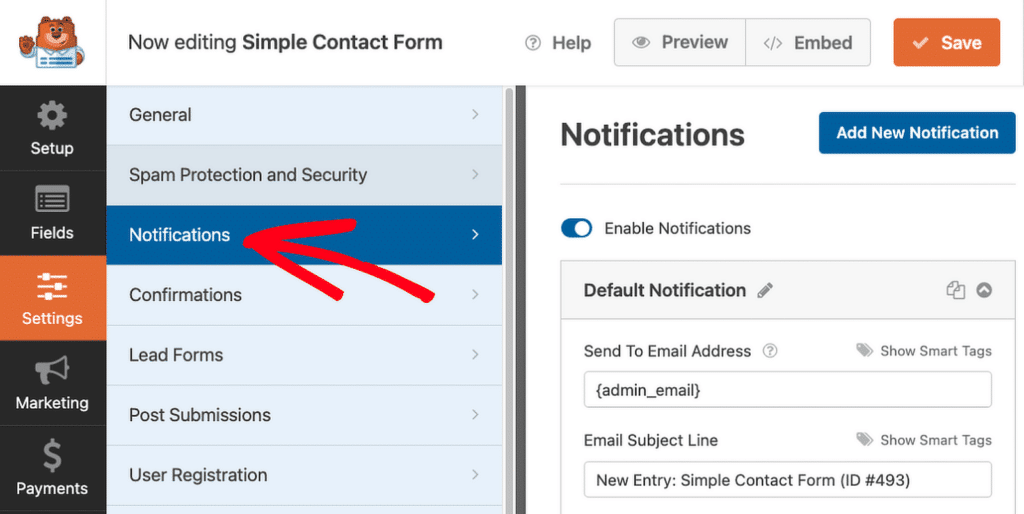
Before styling your email notifications for your users, make sure you’ve set up a form and enabled notifications. To do this, open the WPForms form builder and go to Settings » Notifications.
Form notifications are a great way to keep track of submissions and interact with site viewers right away.
And while WPForms gets you started with a basic notification, you can easily add a new one. Just click Add New Notification. When setting up a new notification email, you will simply:
- Configure the email addresses and message content as needed.
- Save your changes to ensure your notification email is ready to style.
But don’t worry about custom styling and branding for your notification email. This notification is automatically set to send to your admin email address. Your form users won’t receive this notification unless you want them to.
Also Read: How to Automate Form Submission Follow-Up Emails
Choose a Template Style
As for what your form users do receive, WPForms offers a variety of email templates to help you achieve the look you want.
To select a template, navigate to WPForms » Settings » Email in your WordPress dashboard.
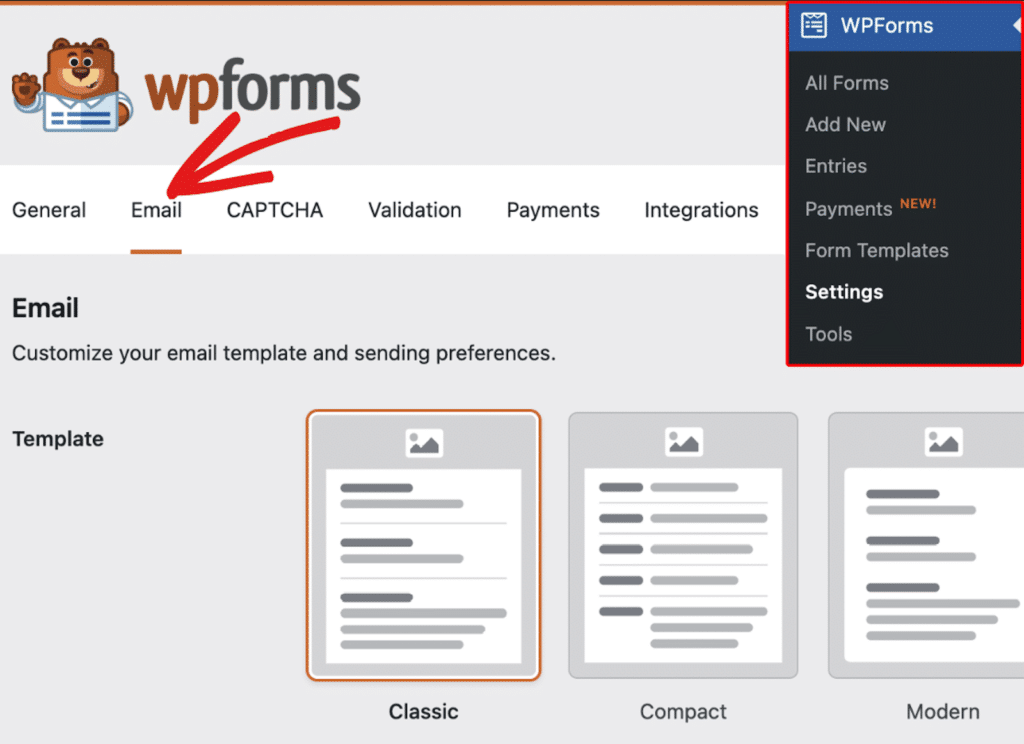
You can choose from a selection of styles including:
- Classic (Available in Lite and Pro)
- Compact (Available in Lite and Pro)
- Modern (Pro only)
- Elegant (Pro only)
- Tech (Pro only)
- Plain Text (Available in Lite and Pro)
Simply hover over the desired template and click Choose.
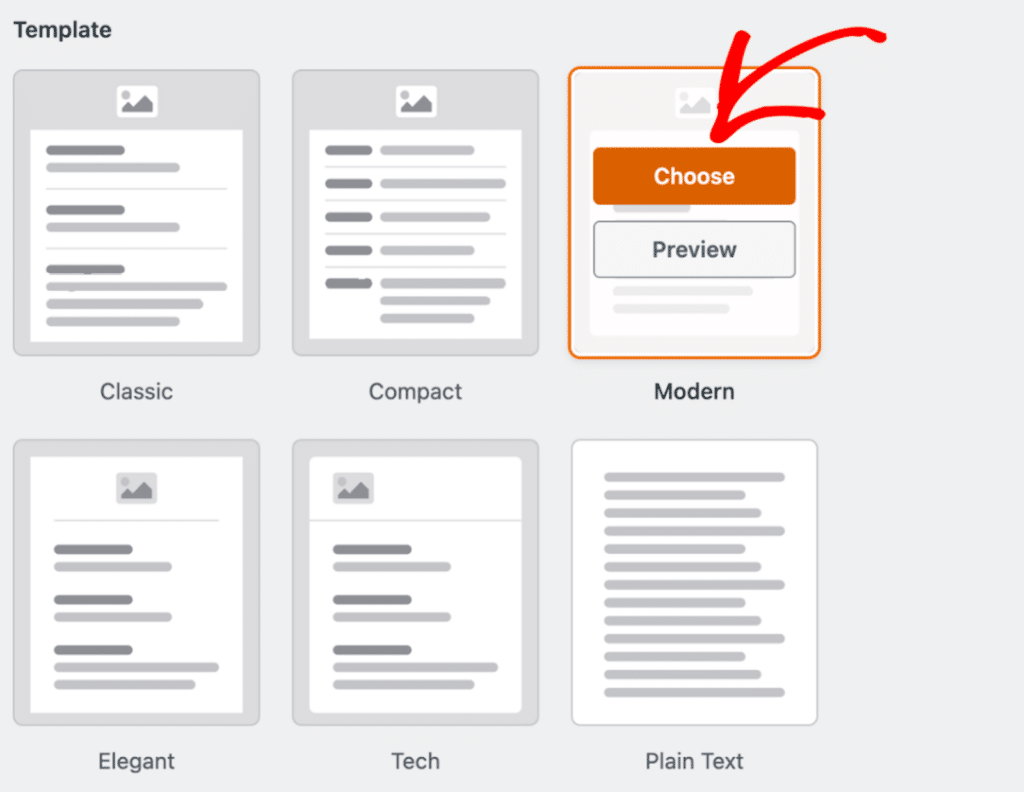
The Classic template is the default choice. But you can select from the other templates, provided you have a valid WPForms Pro license for certain options.
Expert Tip: You can also access the form notification email template from the form builder Settings tab.
Adjust Email Appearance: Light or Dark
You can match your emails to your brand’s style by selecting either the Light or Dark theme. This setting adjusts the overall appearance of the email template.
To switch themes, scroll down to the Appearance section in the email settings.

Select either Light or Dark depending on which theme suits your email and branding.
Add a Header Image or Logo
Including an image or logo in your email notifications is a great way to enhance your branding. WPForms makes this simple with the ability to upload directly to your email template.
Scroll to the Header Image section in your email settings. Then just click Upload Image to add an image or logo.

You can either select an image you already have in your media library, or you can upload a new image.
Once you’ve settled on the image you want to use, simply click on the Use Image button. Then, you’re able to select the desired image size from a dropdown menu.
- Small (best for compact designs)
- Medium (ideal for most branding needs)
- Large (great for standout designs)
The image will automatically adjust to fit various screen sizes, so your logo looks sharp on any device. Even mobile phones!
Customize Colors
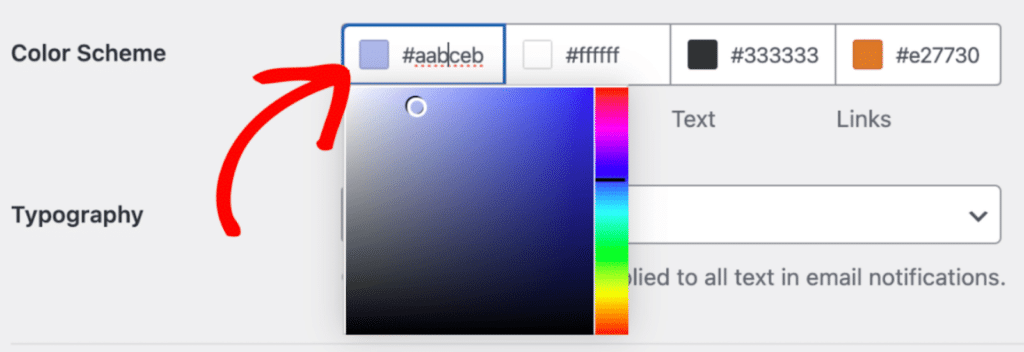
If you’re a WPForms Pro user, you can also customize the full Color Scheme of your notification emails.

This color scheme includes shades for the:
- Background: Sets the outermost color of the email. (Also available for WPForms Lite users.)
- Body: Changes the color of the email container.
- Text: Adjusts the color of all text.
- Links: Styles the links in your emails.
To update any of these colors, you can either enter the HEX value into the color field or you can click on it to open the color picker.
Choose Typography
You can also change up the typography used in your email notifications. WPForms currently supports both Sans Serif and Serif fonts.

To update the font family of your email template, just click on the Typography dropdown and choose the desired font from the available options.
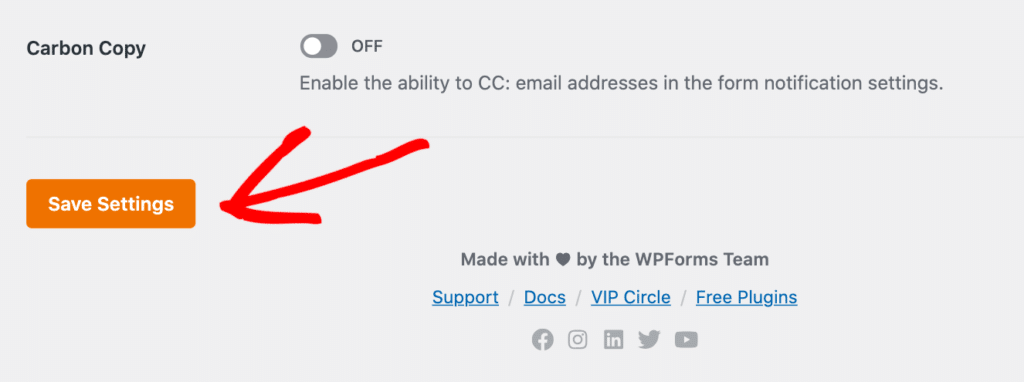
Be sure to click the Save Settings button when you’re finished styling the header image, colors, typography, and other elements.
And you’re almost done!
Also Read: How to Make a Custom Email Template in WordPress
Preview Your Styled Email Notifications
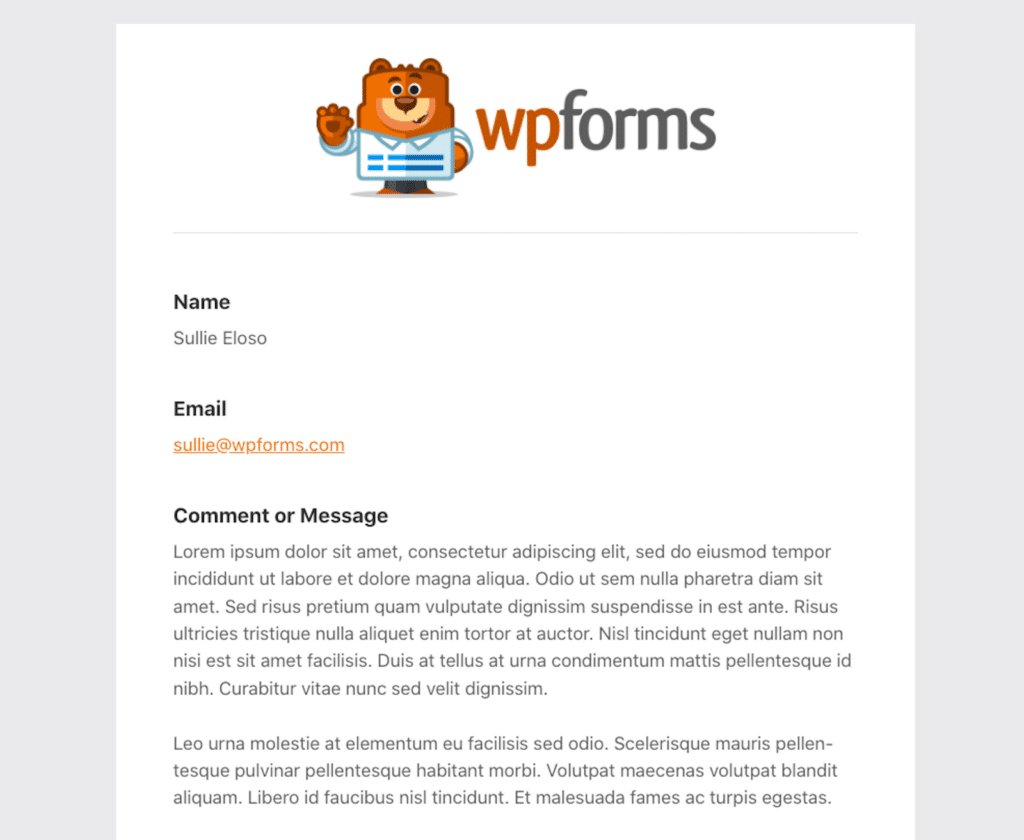
Now that you have your image, colors, and fonts customized, preview your email to see how it will appear in your users’ inboxes.
Just click on the Preview Email Template link beneath the Typography dropdown menu.

A new tab will open where you’ll see the preview of your notification email template. Everything you changed in the settings will be reflected here, so review the email to make sure it aligns with your branding.
Customizing your WPForms email notifications is an excellent way to create a professional, branded experience for your users. With features available to both Lite and Pro users, you can achieve stylish notifications that reflect your unique identity.
Ready to enhance your email notifications? Try out these features today and take your email communication to the next level!
FAQ
Can I customize email templates in WPForms if I’m using the Lite version?
Yes, Lite users can customize email notifications by choosing the Classic or Compact templates. You can also adjust the background color, add a header image, and personalize basic design elements to fit your branding.
How do I add a logo to my email notifications?
To include a logo, navigate to the Email tab in WPForms settings and upload an image in the Header Image section. You can then resize it to fit your preferred dimensions (Small, Medium, or Large), ensuring it looks great on any screen.
Can I use different email templates for individual forms?
Yes, WPForms allows you to assign unique email templates to specific forms. Open the form builder, go to Settings » Notifications, and choose your desired template under the Advanced options section.
Next, Follow These Best Practices
In this post, we’ve covered all the ways that you can custom-style the email notification your users receive when they submit a form. Email templates are the way to go!
But what about the content itself? Take a look at our email notifications best practices blog post to learn all of our tricks of the trade.
Ready to build your form? Get started today with the easiest WordPress form builder plugin. WPForms Pro includes lots of free templates and offers a 14-day money-back guarantee.
If this article helped you out, please follow us on Facebook and Twitter for more free WordPress tutorials and guides.

