AI Summary
Do you want to add custom HTML code snippets on your WordPress contact forms? Adding custom HTML to your form is a great way to get creative and enhance your forms.
The quickest way to do it is with the HTML field in WPForms. You add the field to your form, paste in your code, and hit save. You won’t need to touch your theme files or install a separate plugin.
So in this tutorial, I’ll walk you through installing WPForms, creating a form, adding an HTML block, and pasting your own code. I’ll also share a few copy-and-paste HTML snippets you can use right away.
Add Custom HTML to Your WordPress Form! 🙂
Why Add Custom HTML to Your Contact Form
You might be wondering why you should add HTML to your WordPress forms. In a lot of cases, an advanced user or web developer might want to expand the functionality of a form.
One of the main benefits of adding custom HTML to your form is that it helps you to make your form stand out from the rest of the content.
In the example below, you can see how easy it is to add a link to a Privacy Policy in some text on your contact form.

Therefore, when your visitors arrive on the page where your contact form is, they’ll be able to see something like this below:

Also, you can add an image to your form using custom HTML code to make the form more visually appealing or to showcase products and custom product options.

And adding these extra features to your forms, you can make the form stand out on the page, which helps to grab the attention of your visitors.
How to Add Custom HTML Code to Your WordPress Contact Form
I’ve also shared a video below describing all the instructions you need to follow to add HTML code to your form in WordPress.
If you’d prefer to read the tutorial, follow these instructions to create a place on your forms to put your custom HTML code.
Step 1: Install the WPForms Plugin
The first thing you need to do to get started is to install and activate the WPForms plugin. It’s an easy-to-use form builder that lets you make anything from simple forms to advanced forms.
What sets WPForms apart is how it handles custom HTML. Unlike other form builders that restrict what you can add, WPForms gives you full control over your HTML content while keeping everything secure and functional.
The HTML field is part of WPForms’ Fancy Fields collection, which means you’ll need at least the Basic plan to access it. If you’re new to downloading plugins, here’s a step-by-step guide on how to install a WordPress plugin.

Step 2: Create a Form and Add Basic Fields
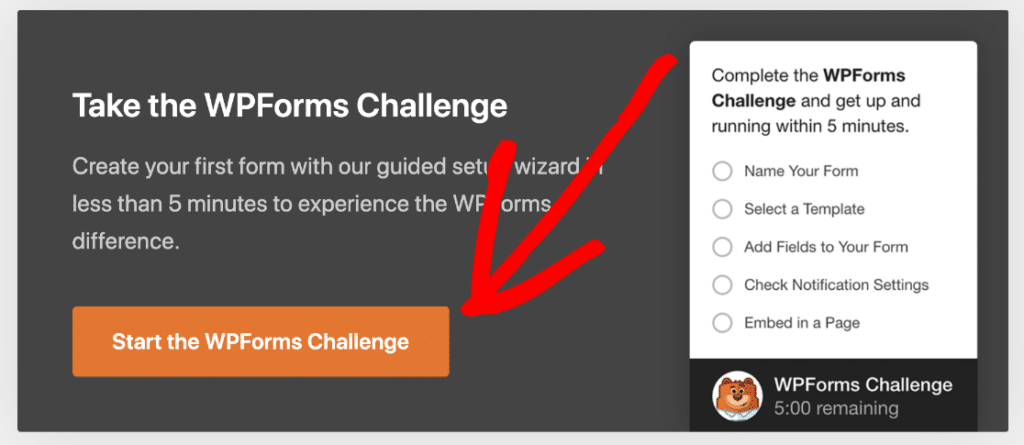
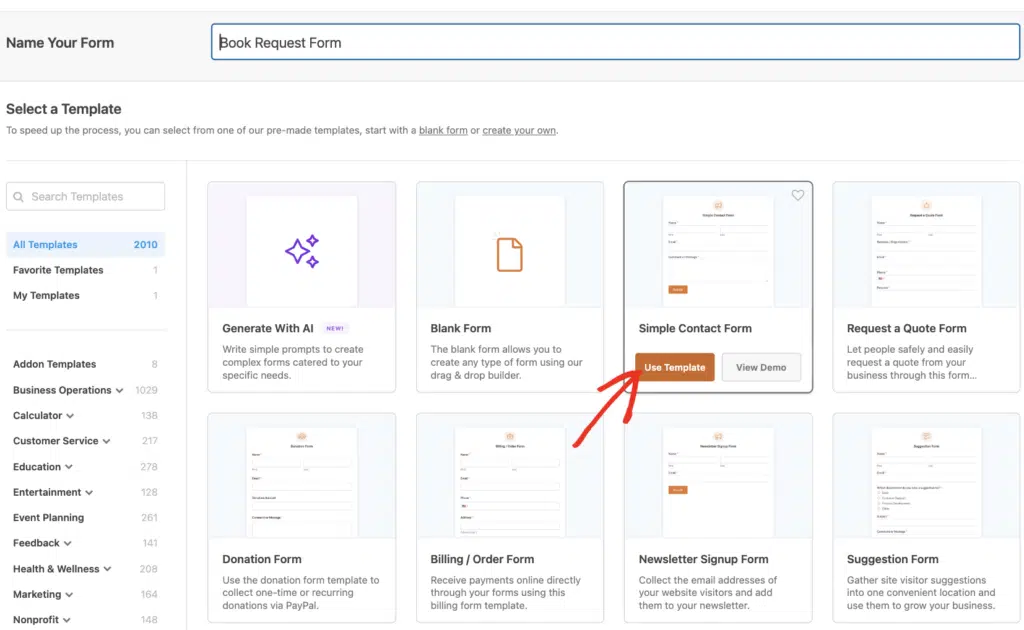
The next step is to make your first form. You can choose any form you’d like to add a custom HTML to, but for this example, we’ll build a simple contact form using the WPForms challenge.
Give your form a descriptive name like “Contact Form with Custom HTML” so you can easily find it later. You can start with a template like Simple Contact Form to save time.
Once you’re in the form builder, you’ll see the familiar setup with field options on the left and your form preview on the right with crucial fields like Name, Email, and Message already added.
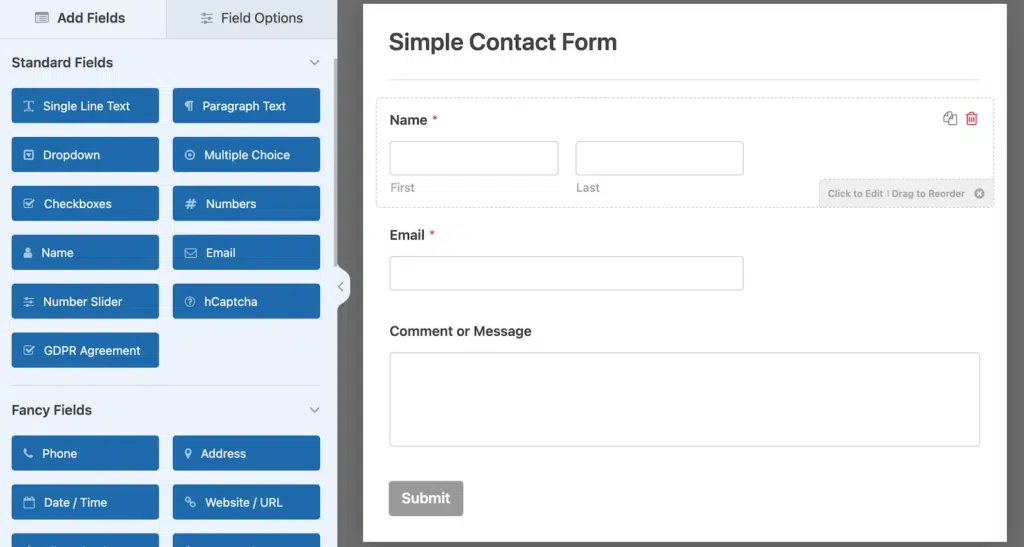
This gives you a solid base to work with before adding your custom HTML elements. Great. Now, let’s add the field that will accept custom HTML up next.
Step 3: Add an HTML Block to Your Form
Now comes the fun part of adding custom HTML to your form. Look for the HTML field in the Fancy Fields section on the left side of the form builder and drag it into your form preview area.

You can position the HTML field anywhere within your form structure. I usually place it where I want custom content to appear.
Maybe at the top for a welcome message, between field sections as a divider, or at the bottom for additional information.
Step 4: Insert Your Custom HTML Code
Now that your custom HTML box in on your contact form, you can add your custom HTML code snippet. Go ahead and go to your form on the right and click on the HTML / Code block field that you just added.

Then, head over to the left-hand panel where you’ll see the HTML Code box under Field Options. This is where you can add your custom HTML code snippet.

So go ahead and paste your custom HTML in that field. You can add any type of custom HTML code snippet to your form. When you’re done, hit the Save button in the top right corner.

Step 5: Take Your Custom HTML Form Live
Before making your form live, you need to test everything to make sure your custom HTML displays correctly and doesn’t interfere with form submissions.
Click the Preview button in the form builder to see exactly how your form will appear to visitors. If everything works as expect, you can then proceed to add it to your website. Click on the Embed button.

Now when the Embed in a Page notification pops up, go ahead and click on the Create New Page button. Next, WPForms will ask you to name your page.

For our example, we’re adding this custom HTML contact form to a contact page, so we’ll call it Contact Us. Type the title for the page you want into the box and click Let’s Go!

So now that you’ll see the brand new page with your custom HTML contact form on it. You can go ahead and hit the Publish button at the top right corner of your page.

And then give your new form a glance. You’ve done it. You’ve finished setting up a WordPress contact form with a custom HTML field.

Add Custom HTML to Your WordPress Form! 🙂
HTML Code Examples You Can Copy and Paste
Here are a few of my go-to ideas, along with the actual code you can paste straight into the HTML field. Each one uses plain HTML and inline CSS, so there’s nothing extra to install.
The snippet I reach for most often is a simple privacy policy line. It adds a short note with a link, which keeps your contact form GDPR-friendly.
<p style="font-size: 14px; color: #666666;">
  By submitting this form, you agree to our
  <a href="https://example.com/privacy-policy/">Privacy Policy</a>.
</p>
If you’d rather collect formal consent, you can add a GDPR agreement field instead of a plain link.
To make your form more engaging, you can embed a YouTube video right inside it. Swap VIDEO_ID for the ID in your video’s URL and it will display in the form.
<iframe width="100%" height="315"
  src="https://www.youtube.com/embed/VIDEO_ID"
  title="YouTube video" frameborder="0" allowfullscreen>
</iframe>
On a contact page, an embedded Google Map helps people find your business in person. Grab the embed link from Google Maps using the Share and then Embed a map option, and paste it in place of YOUR_EMBED_CODE.
<iframe
  src="https://www.google.com/maps/embed?pb=YOUR_EMBED_CODE"
  width="100%" height="300" style="border: 0;"
  loading="lazy" allowfullscreen>
</iframe>
Running an order form? A styled box is a nice way to highlight a discount or a limited-time offer. You can even pair it with conditional logic so it only shows when someone selects a certain option.
<div style="background: #f0f7ff; border: 1px solid #cce0ff; padding: 16px; border-radius: 6px;">
  <strong>Limited-time offer:</strong> Use code SAVE10 at checkout for 10% off your order.
</div>
For longer forms, a heading and a divider make it easy to group related fields into clear sections.
<h3 style="margin-top: 24px;">Shipping Details</h3>
<hr style="border: 0; border-top: 1px solid #e0e0e0;">
And if you want a call-to-action button that matches your branding, you can style a link to look like a button without touching your theme.
<a href="https://example.com/"
   style="display: inline-block; background: #e27730; color: #ffffff; padding: 10px 18px; border-radius: 4px; text-decoration: none;">
  Learn More
</a>
FAQs on How to Add Custom HTML to Your WordPress Forms
Adding custom HTML code to a WordPress contact form raises a few common questions. Here are the answers I get asked most often.
What types of HTML code can I add to WPForms?
You can add almost any standard HTML elements to the HTML field. This includes headings, paragraphs, dividers, images, embedded videos, styled text boxes, links, and even simple HTML tables.
You can also use inline CSS to style these elements exactly how you want them to look. The HTML field supports most common HTML tags.
Will custom HTML affect form submission functionality?
No, adding HTML to your form won’t interfere with form submissions at all. The HTML field is purely for display purposes and doesn’t collect any data that gets submitted with the form.
Your regular form fields (like Name, Email, Message) will continue to work exactly as they always have. The custom HTML simply enhances the visual presentation and user experience without touching the actual form processing functionality.
Can I use JavaScript in the HTML field?
No, JavaScript code is automatically filtered out of the HTML field for security reasons. WPForms removes <script> tags and JavaScript event handlers to protect your site from potential security vulnerabilities.
If you need interactive functionality beyond what HTML and CSS can provide, you might want to explore WPForms’ built-in features like conditional logic, which can create dynamic form behavior without requiring custom JavaScript.
What’s the difference between the HTML field and Content field?
The HTML field allows you to add any custom HTML code with full styling control, while the Content field is designed for simple text content with basic formatting options. The HTML field gives you much more flexibility for custom design elements.
If you just need to add plain text or simple formatted content, the Content field might be easier to use. But when you want custom styling, embedded media, or complex layouts, the HTML field is definitely the way to go.
Is there a limit to how much HTML code I can add?
There’s no strict character limit on the HTML field, but it’s good practice to keep your code concise and focused. Very large amounts of HTML can slow down your form’s loading time and make it harder to manage.
I recommend breaking complex HTML into smaller, logical sections using multiple HTML fields if needed. This makes your form easier to edit later and helps with overall performance and form loading speed.
Can I build a WordPress contact form with just HTML code?
You can hand-code a contact form in pure HTML, but it won’t actually send or store submissions on its own. HTML only handles the layout, so you’d still need PHP or a form-handling service to process what people submit. That’s why most people use a form builder to handle the submissions, then add custom HTML for the design touches.
How do I add HTML code to a contact form without a plugin?
Without a plugin, you’d add your form’s HTML directly to a page using the WordPress Custom HTML block, then write PHP to handle the submission and email it to you. It works, but it’s more technical and you’re responsible for spam protection and validation yourself. The HTML field in a form plugin gives you the same creative control over your markup while handling the secure submission side for you.
Do I need to know how to code to use the HTML field?
The HTML field doesn’t require any real coding knowledge. If you can copy and paste, you can use it, and the examples earlier in this guide are ready to drop in once you swap the placeholder text for your own. Basic HTML and a little inline CSS cover most of what you’ll want to do.
Does the HTML field work in the free version of WPForms?
The HTML field is part of the Fancy Fields collection, so you’ll need at least the Basic plan to use it. The free WPForms Lite version covers standard fields like name, email, and message, which is plenty for a basic contact form. Once you want custom HTML, image dropdowns, or file uploads, that’s when a paid plan comes in.
Can I add the same HTML to multiple WordPress forms?
Yes, but the HTML field is added per form, so there’s no global setting that applies it everywhere. The simplest approach is to save your snippet somewhere handy and paste it into the HTML field on each form that needs it. If you reuse the same block often, keeping a small text file of your go-to snippets saves time.
Next, Learn How to Style Your WordPress Forms
So now that you’ve added custom HTML to your form, you should take a look at our guide on styling contact forms in WordPress to make sure your custom code looks the way you want it to.
Ready to build your form? Get started today with the easiest WordPress form builder plugin. WPForms Pro includes lots of free templates and offers a 14-day money-back guarantee.
If this article helped you out, please follow us on Facebook and Twitter for more free WordPress tutorials and guides.