AI Summary
Have you ever tried to upload a photo to a form and found yourself scrolling through tons of screenshots, memes, and vacation pics just to find the right one?
Because I do every time.
That’s why the Camera field in WPForms feels like a small miracle. It lets people take a photo or video instantly, right from their device’s camera, without ever leaving the form.
This field is the perfect touch for collecting job applications, ID verifications, or submissions for a photo contest. And hey, nobody’s stopping you from screening your own prospects with instant photo submissions on our dating application templates… Just saying.
Let’s walk through how to set it up, step by step.
How to Add a Camera Field to Your WordPress Form (Step-by-Step)
- Step 1: Add the Camera Field to Your Form
- Step 2: Choose the Capture Format (Photo or Video)
- Step 3: Set File Size and Time Limits
- Step 4: Customize the Camera Button Style and Text
- Step 5: Choose Where to Store Captured Files
- Step 6: Restrict Access to Uploaded Files
- FAQs About the Camera Field in WPForms
What Is the Camera Field in WPForms?
The Camera field lets users take a photo or record a short video directly within your form. It works on both desktop and mobile devices and saves everything securely with the rest of your form entries.
The Camera field is perfect for:
- Photo ID verification forms
- Contest or event entries
- Client onboarding forms with selfies or short intros
- Feedback forms with video testimonials
Step 1: Add the Camera Field to Your Form
First, open your form or create a new one.
You’ll find the Camera field under Fancy Fields in the form builder, right next to the File Upload field.
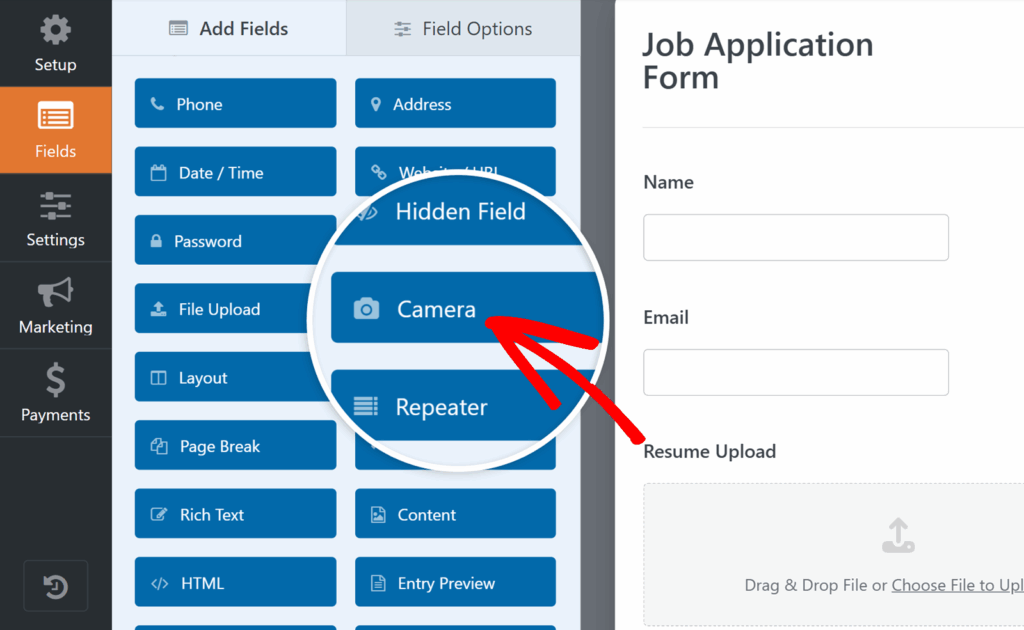
Click on it or drag and drop the Camera field into the form preview area to add it to your form. You’ll then see a little camera icon where users will eventually click to capture their photo or video.
And that’s it! Camera field is added. Pack up, everybody. We can go home…
Just kidding. We have a few customization options to cover, but that’s pretty much the gist of it!
Step 2: Choose the Capture Format (Photo or Video)
Click on your new Camera field to open the Field Options panel. Under Format, you’ll see two choices:
- Photo – great for profile pictures, snapshots, or ID cards.
- Video – perfect for quick intros, testimonials, or short clips.
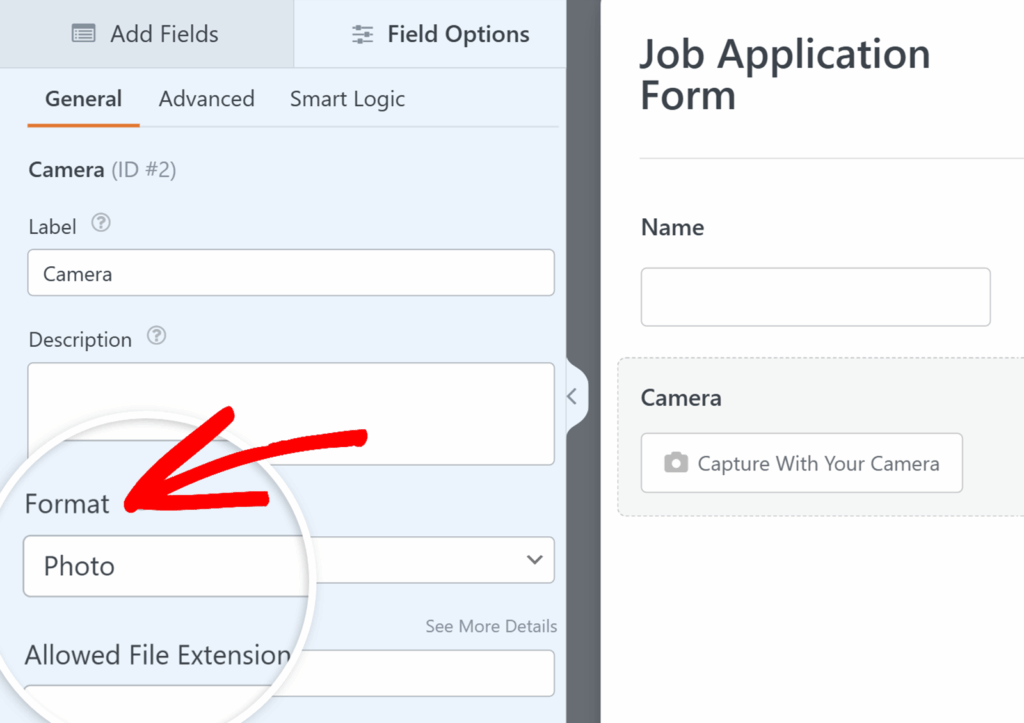
By default, it’s set to Photo, but you can switch it anytime.
When users click the camera button, they’ll see a short 3-second countdown before capture… Just enough time to fix their hair or adjust the lighting. 😉
Step 3: Set File Size and Time Limits
Ok don’t leave the Field Options yet – now scroll down to Max File Size.
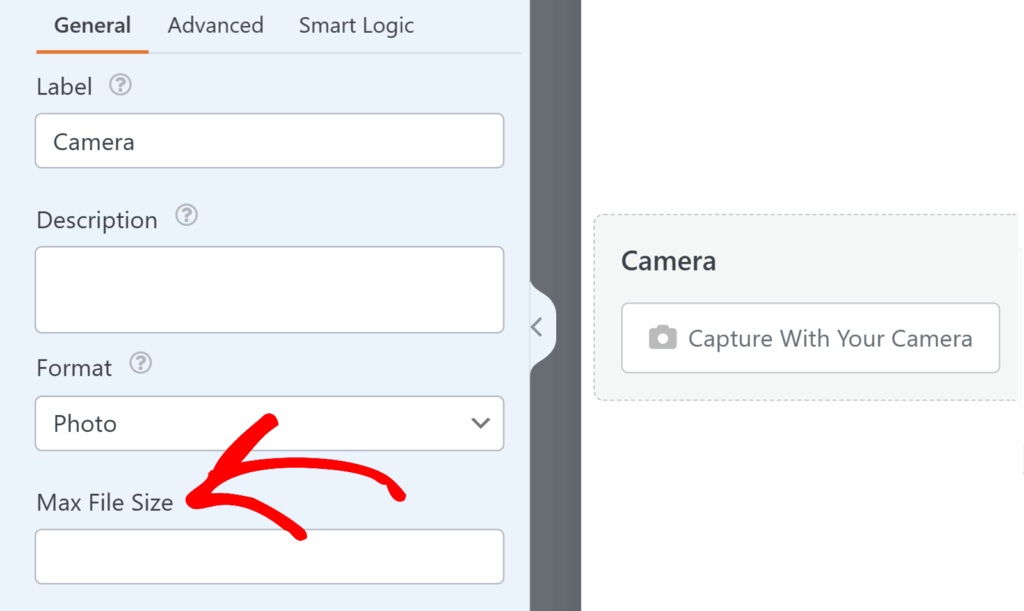
Enter the maximum size (in MB) for each upload. If you leave it blank, WPForms uses your server’s default limit, which is usually 64 MB.
For video, you can also adjust the Time Limit (the default here is 1 minute 30 seconds).

Shorter clips help your forms load faster and save space on your site. Hopefully, no one’s trying to upload their next feature film here anyway.
Step 4: Customize the Camera Button Style and Text
Next, in the Advanced tab, find the Button Style dropdown.
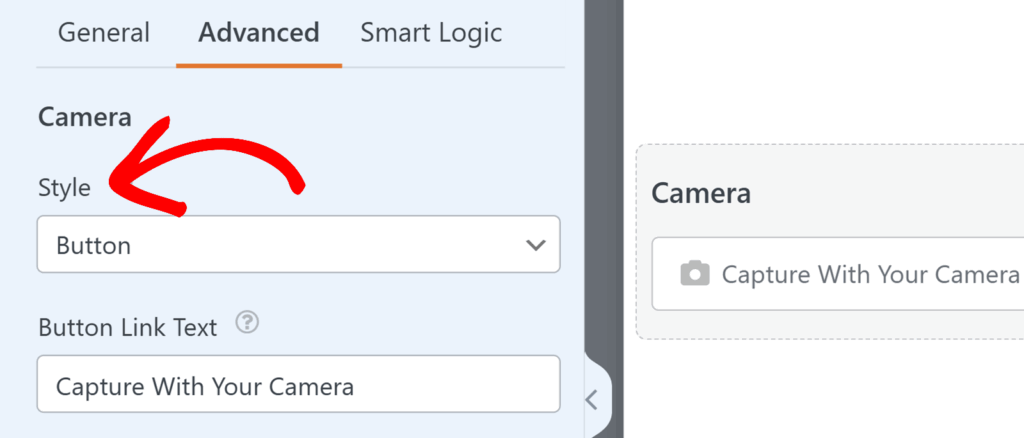
This dropdown will let you choose between a button icon or a link.
While you’re here, do you want the button to say something more on-brand?
Update the Button Link Text to match your tone with something like “📸 Capture With Your Camera” or “🎥 Record My Intro” or whatever’s actually on-brand for you.
Personally, I’d probably change it to something fun like “Say Cheese!”
Small touches like this keep your forms feeling polished and intentional.
Step 5: Choose Where to Store Captured Files
By default, WPForms saves captured photos and videos in your site’s Uploads folder inside the WPForms directory.
Do you prefer to keep everything in your Media Library? Just toggle the option to Store file in WordPress Media Library under the Advanced tab.
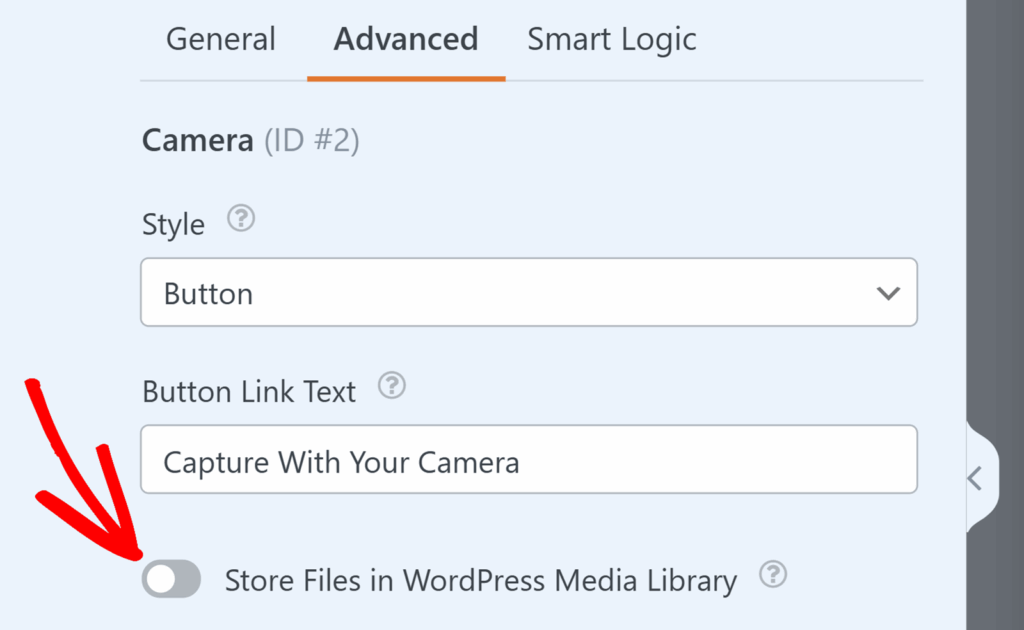
And if you’d rather store files externally — maybe to save server space — WPForms integrates seamlessly with Dropbox and Google Drive for easy offloading.
You can also view every captured file inside your Entries dashboard, attached to each submission.
Step 6: Restrict Access to Uploaded Files
If your form collects sensitive media (like IDs or customer uploads), you can restrict who can view them.
Under the Advanced tab, turn on Enable File Access Restrictions.
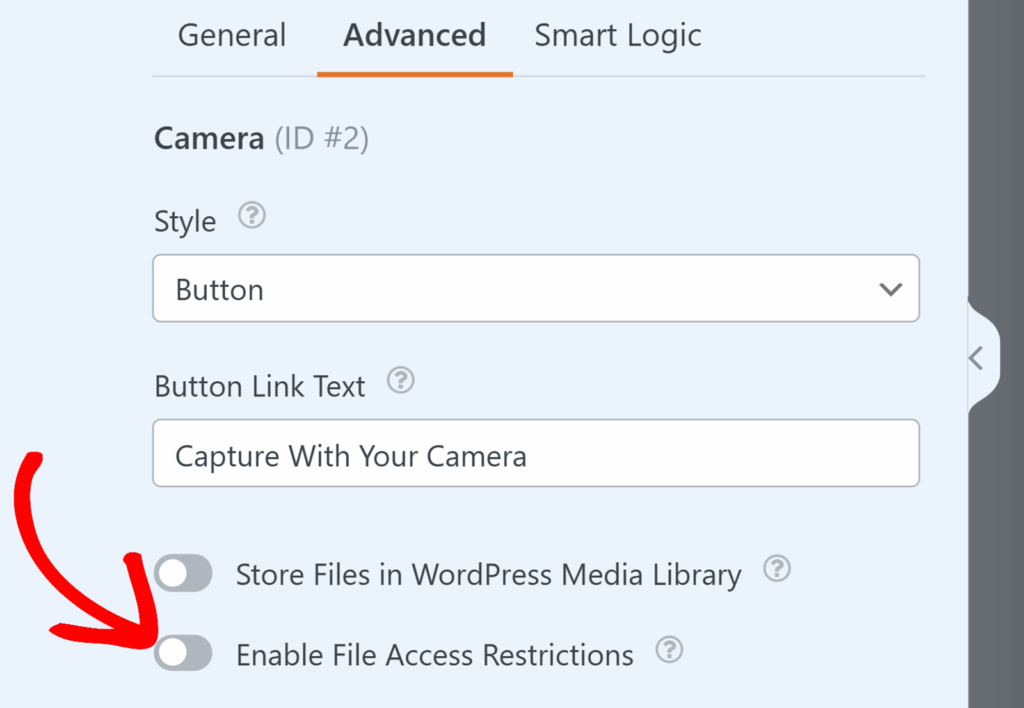
Here, you’ll be able to:
- Limit access to logged-in WordPress users, or
- Add password protection for extra security.
It’s a simple but important way to keep personal files private.
Adding a camera option to your WordPress forms takes just a few clicks, but it completely changes how people interact with your site.
Basically, you’re not just collecting text anymore. You’re collecting proof, faces, moments, and creativity directly through your form.
So go ahead! Open WPForms, drop in the Camera field, and let your users strike a pose.
FAQs About the Camera Field in WPForms
Can users retake their photo or video before submitting?
Yep! After capturing, they’ll see a preview with options to keep, retake, or delete it. No accidental bad selfies making it through! This makes the experience feel more natural and gives users confidence that their submission looks exactly how they want.
Can I change the countdown timer?
Yes — developers can adjust it with a short PHP snippet if you want a longer or shorter delay before the camera starts. For example, you might extend it for video intros so users have time to get ready, or shorten it for quick snapshots like ID checks.
Does it work on mobile?
Absolutely. The Camera field automatically uses a phone’s built-in camera, so users can take photos or videos right on the spot. It’s especially handy for on-the-go submissions — think delivery confirmations, field reports, or quick visual feedback.
Do I need a higher plan to access it?
Nope! The Camera field is available starting with WPForms Basic, so you don’t need to upgrade to use it. If you’re already on a paid plan, it’s ready to go right inside your builder. Just drag, drop, and you’re capturing photos and videos in minutes.
Next, Simplify Client Onboarding
I mentioned in this blog post that the Camera field would be a great addition to a client onboarding form. I’m thinking employee directory photos, short intro videos, and more. Want additional tips for simplifying client onboarding? Read the full blog post, next.
Ready to build your form? Get started today with the easiest WordPress form builder plugin. WPForms Pro includes lots of free templates and offers a 14-day money-back guarantee.
If this article helped you out, please follow us on Facebook and Twitter for more free WordPress tutorials and guides.

