AI Summary
Customizing a form template in WPForms is a simple yet powerful way to tailor your forms to meet your specific needs.
Whether you’re creating a basic contact form or a complex application, WPForms gives you full control over the design and functionality of your forms.
In this guide, I’ll walk you through the key customization options you should consider. By the end, you’ll have the tools to create forms that perfectly suit your audience and goals.
Let’s get to it!
How to Customize a Form Template in WPForms
Titles, Labels, and Text
When starting with a form template, you’ll want to check that every element reflects your purpose.
Customizing titles, field labels, and placeholder text makes your form more intuitive and user-friendly. Fortunately, you can modify these elements directly in the WPForms builder.
Naming Your Form
The very first step you’ll complete when building a new form is giving your form a name. You’ll name your form before you even pick out a template to build it from.

But don’t worry about coming up with clever branding and customization for your form users. This form name is for you.
You’ll see all of the forms you’ve created within your WPForms dashboard listed by name so that you can determine which pages, widgets, or other areas of your website where you’ll embed your form.
So if you have multiple forms and risk using the same name twice, WPForms will notify you that you already have a form with that name, as shown in the image above.
Once your form is created, you can always update the name of your form later in the form builder Settings tab.
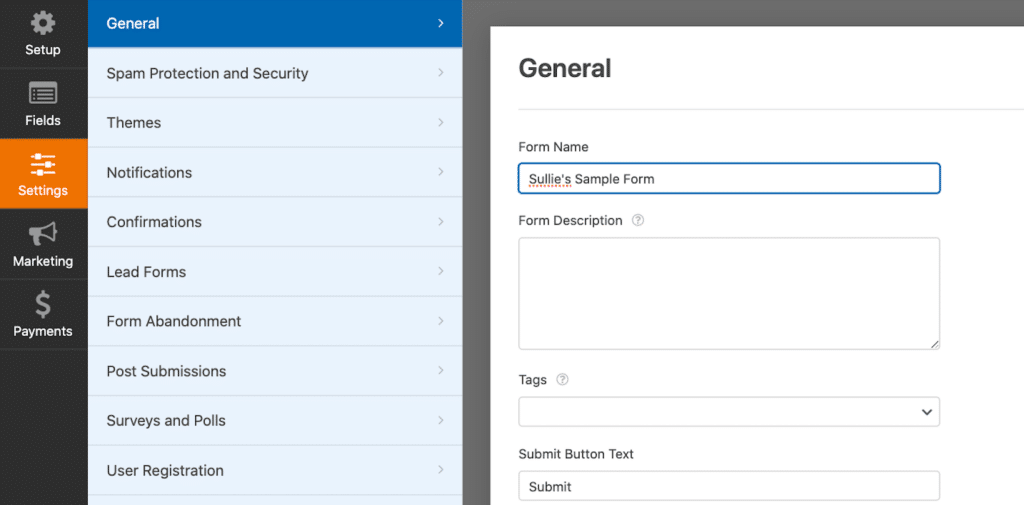
Remember that you can customize multiple elements in this part of the Settings tab, including the text your form’s submit button displays and what users will see when submitting.
Field Labels
Next, let’s consider the customization options you have for the fields on your form template.
By clicking on any given field, its settings are opened on the left side of the form builder. The details you’re able to customize may vary from field to field, but the common element you can modify for any field on your form is its label.
The field Label is what your form users will see for each field they’re filling out.
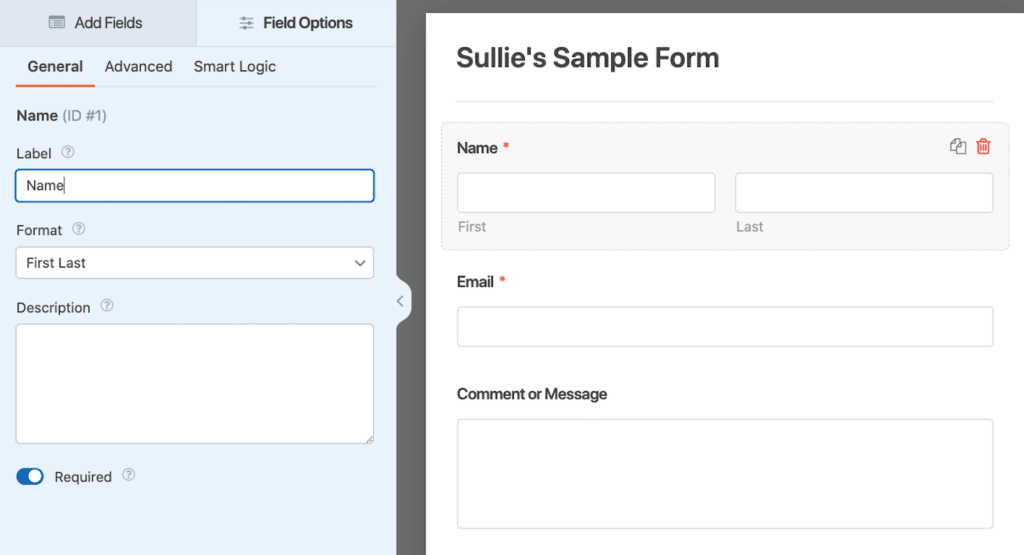
While these field labels are pretty self-explanatory, you might consider changing them up a bit.
For example, you may use the field label to pose a question or provide some direction. Rather than leaving the Name field Label as it is, you could edit it to ask, “What is your full name?” Or, anytime you’re adding the Paragraph Text field to a form, you’ll likely edit its Label to something relevant like, “Comment or Message.”
Luckily, when you utilize one of our ready-made form templates, we’ve already customized these types of fields to display appropriate labels for you!
Since each field label is easily changed, be sure to keep its Field ID # in mind.
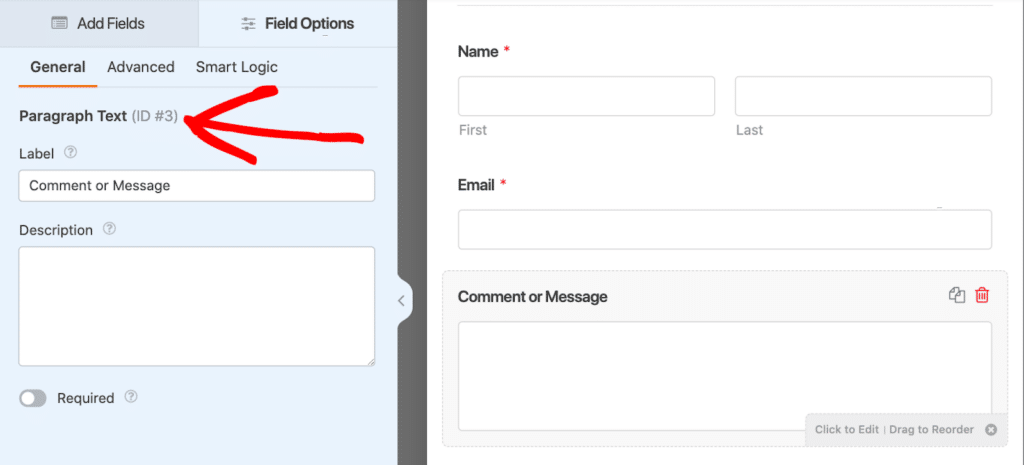
This way, when you see or use this ID number elsewhere, you’ll know which field it’s referring to.
Organizing Form Fields
While our form templates are pre-built with all of the basic fields you’ll need, you’ll likely need to delete, add, and move some fields.
Removing a field from the form template is a no-brainer — simply click on the trash can icon in the right corner of the field to delete it.
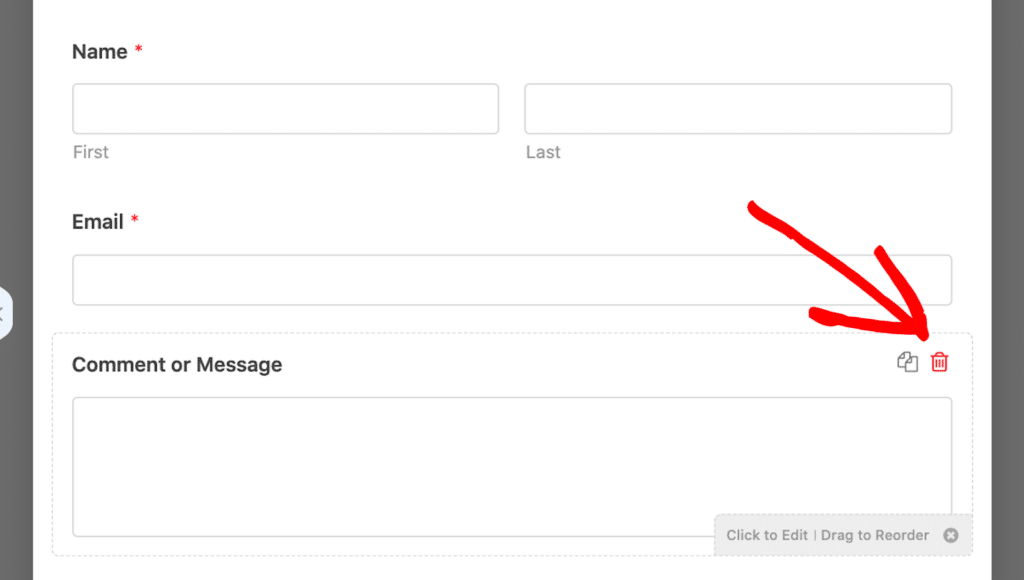
And what does that other symbol to the left of it do? Clicking the double page icon will duplicate the field.
As for adding more fields to your form template, that’s where our form builder shines. All you have to do is click a field on the left side of the screen, drag it where you want it on your form, and drop it!
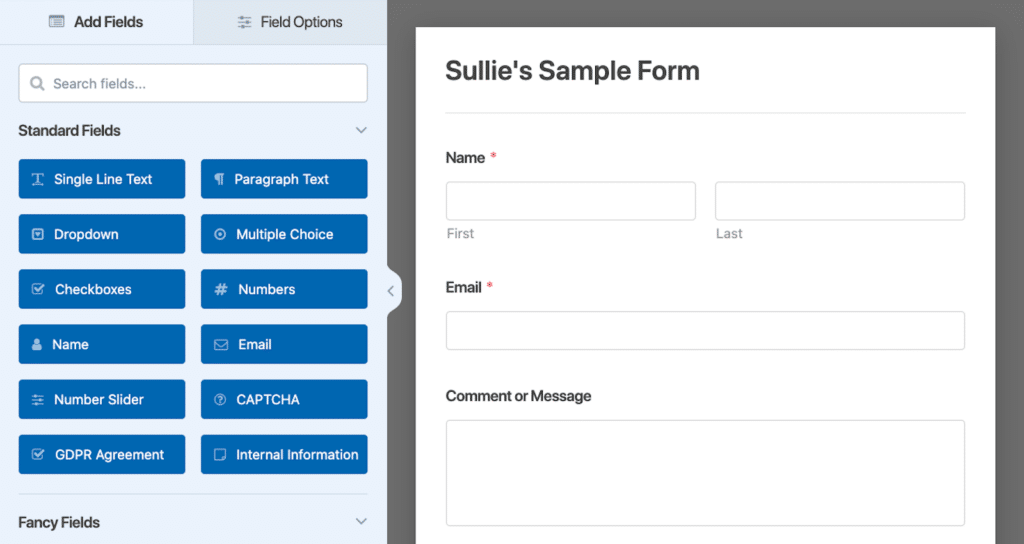
You can move fields up and down the form template this way, too. Just drag and drop the field to another area of the form.
Also Read: How to Randomize Form Fields in WordPress
Layout Field
When adding and moving fields on your form, you should consider how they’re laid out.
To keep things organized and concise, I like to utilize the Layout field option to drag other fields into its columns.
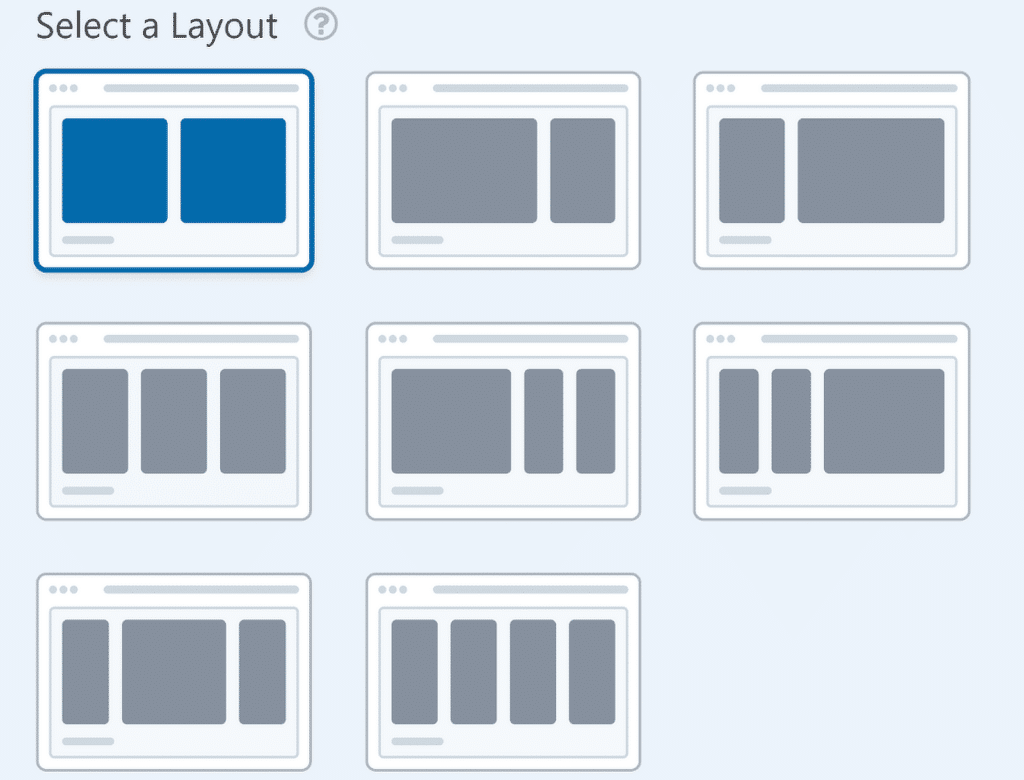
You can lay these fields out in a single column or multiple columns, with multiple column options including a whole selection of shapes and sizes.
Want even more Layout field inspiration? Take a look at our creative article on form layout best practices for user-friendly design.
Repeater Field
You also have the Repeater field to keep your form template clean and concise.
If you expect that your form user will need to enter the same type of information multiple times, such as job experiences on an application form template, you can use the Repeater field to allow your form user to simply repeat this field with the click of a button.
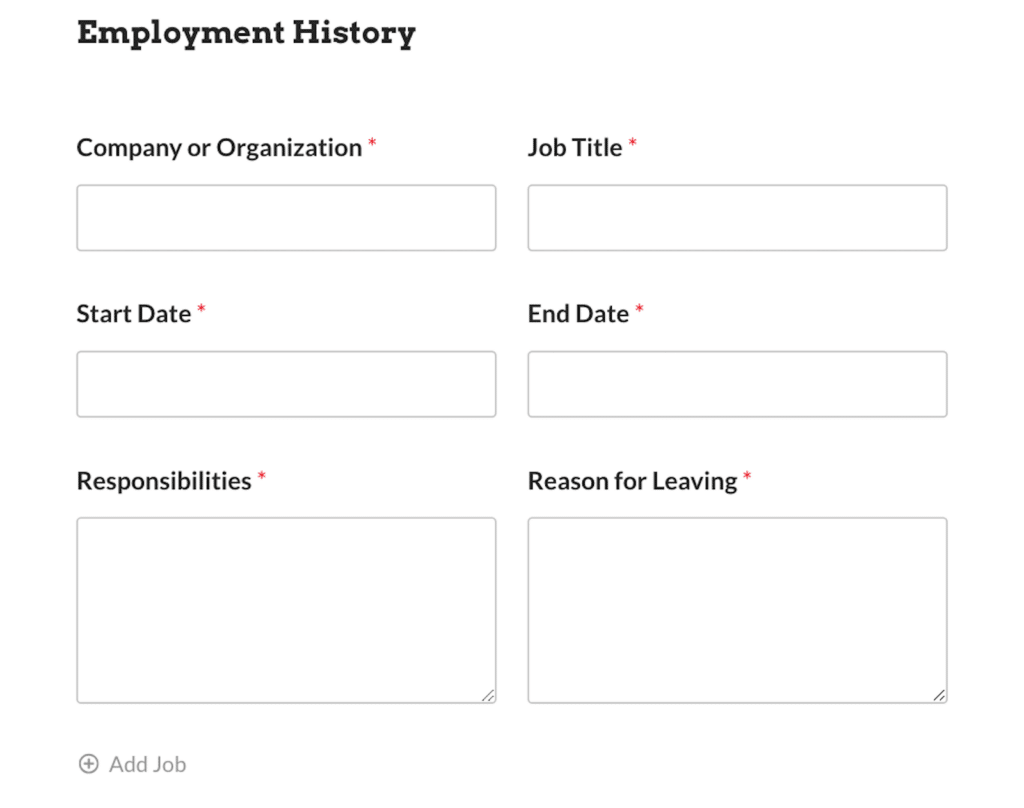
Rather than clogging up your form with empty fields and creating a trail of conditional logic settings to hide them, you can just drag the needed fields into the Repeater field zone. Then, you can choose which type of layout you want these repeatable fields to follow.
Using AI Choices
For the fields that provide various choices for your form user to select from, you’ll need to also customize these choices.
These types of fields are the Dropdown, Multiple Choice, and Checkboxes fields.
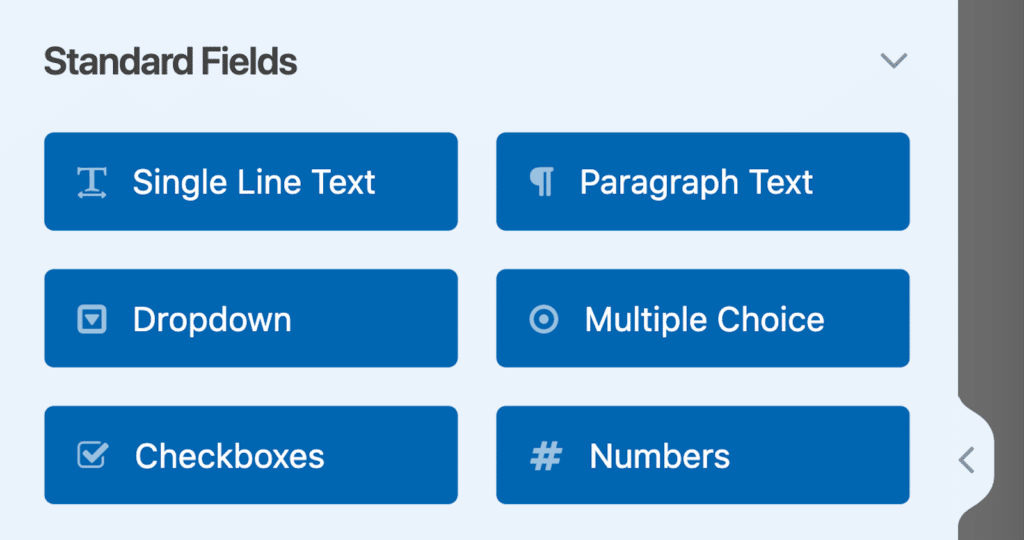
But don’t worry if you don’t know which choices you should offer to your form users — you can utilize AI to instantly whip them up for you.
Our field templates are meticulously researched, so the choice options we’ve included for these fields will likely be similar to those you would generate. But, as always, we encourage you to customize each element of your form as you see fit.
If you click or add one of the field types I mentioned, you’ll see the button to have AI generate your choices.
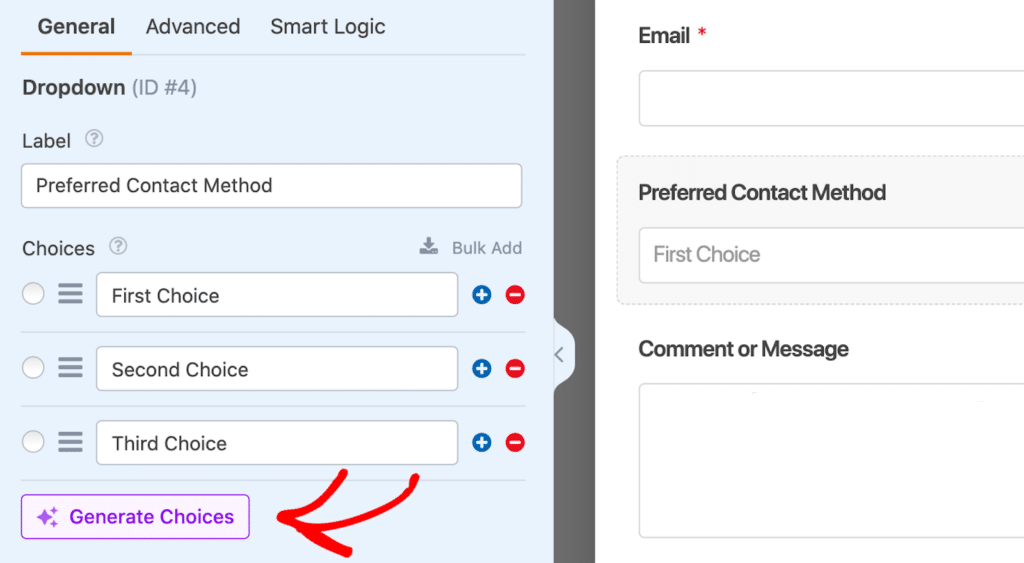
In my example form above, I’m going to use the built-in AI feature to generate choices for my form user’s preferred contact method.
When using AI, I like to create a prompt that asks exactly what I need for my specific form. So, I’ll ask AI to generate preferred contact method choices for a contact form.
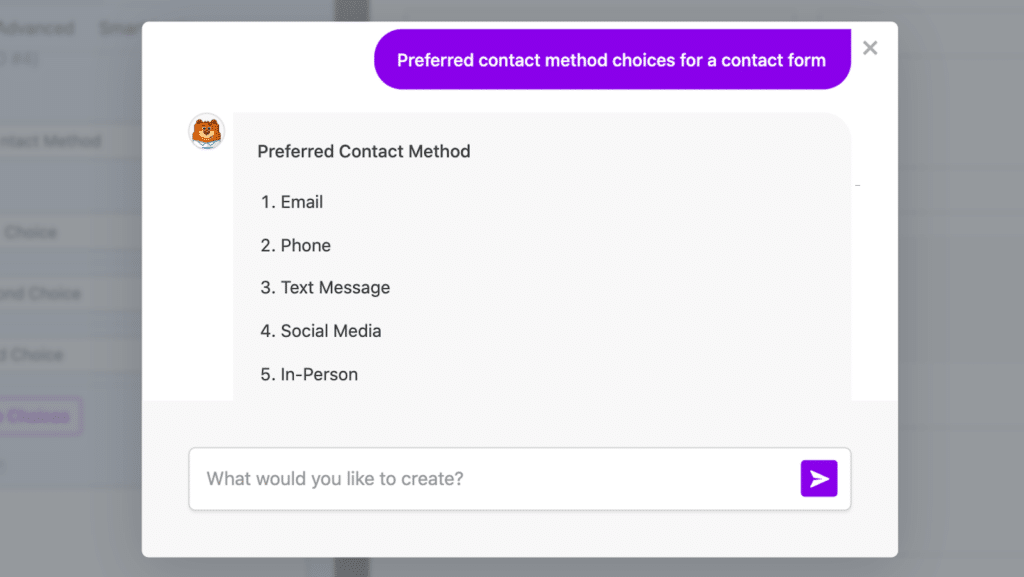
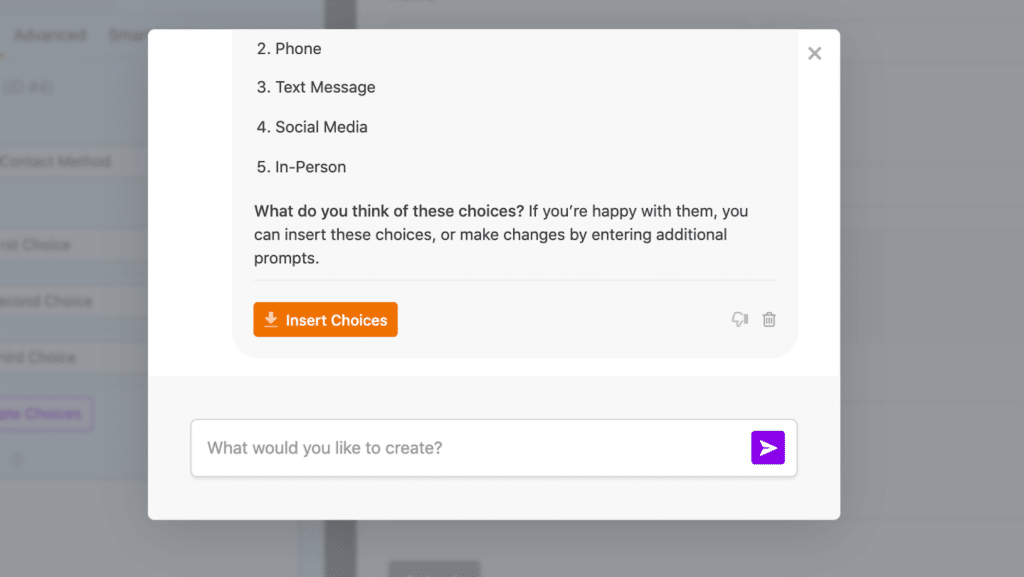
Then, these choices can be directly added to the form!
This saves you all kinds of time deciding which options to use and manually adding them to your form.
Looking for even more AI guidance? Take a look at our article that covers easy methods for using AI with your website.
Notifications and Confirmations
Remember the Settings tab we navigated to at the beginning of this post? I mentioned that there are additional customization options here, and your form’s notification options and confirmation message can be edited here, too.
The Notifications tab settings allow you to enter who and where the form submission details are to be sent.
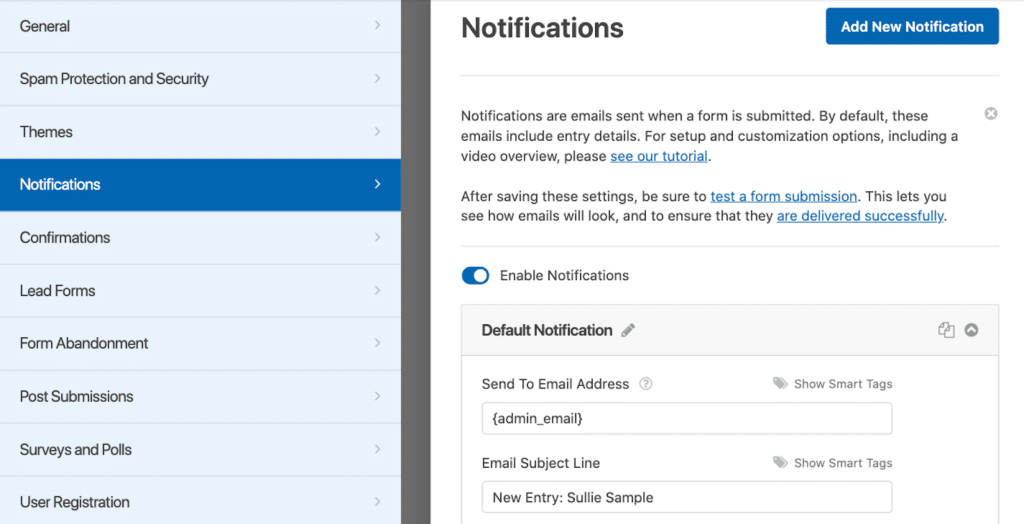
Usually, these settings are applied to your website administrator details, like the admin email set for your WPForms sign-in credentials.
With the notification settings, you can also designate the email address entered by your form user to which you will send any replies. Most forms you build will include just one email address for your form user to provide, so replies from you are automatically sent to that given email address.
But, like I said, you can change which user email you’ll reply to here, in the Notification settings.
As for what your form user will see after submitting their form — you can customize this message in the Confirmations tab just below Notifications.
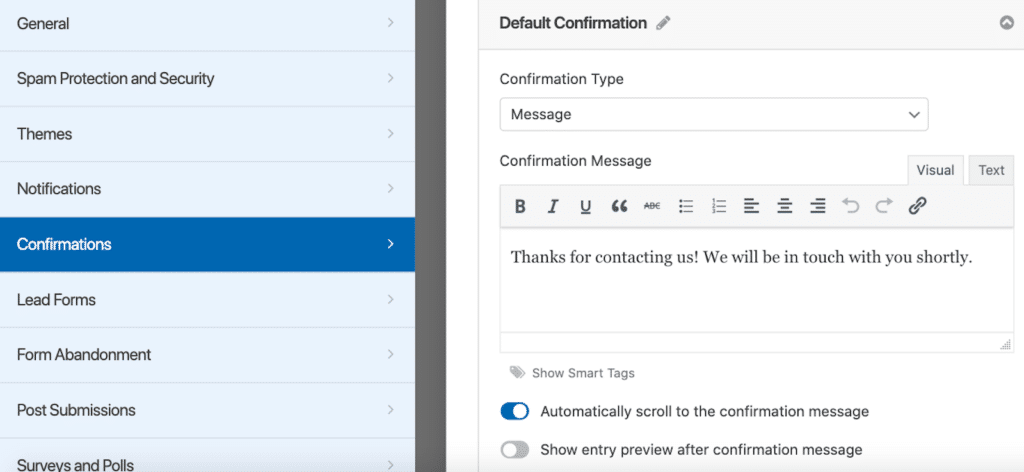
All of the WPForms templates you can use to build your form already have a relevant confirmation message written and included in its settings.
But I suggest personalizing this confirmation message with your own site’s branding and messaging. The confirmation message is also a great place to include coupon codes or information for sales and discounts you’re offering!
Adding Integrations
Many of the form templates we offer are designed to work with integrations you have set up on your site.
For example, you might utilize Constant Contact for your email marketing platform and want form users who sign up for your newsletter to be added to your Constant Contact mailing list.
It’s possible by integrating Constant Contact with WPForms!
To add any of our integrations to your form template, just head over to the Marketing tab in the form builder. Then, click the Add New Connection button.
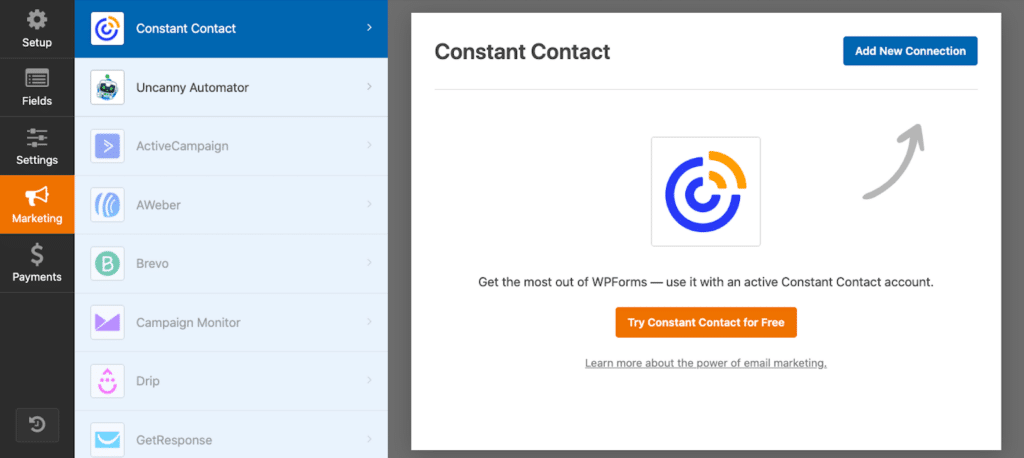
Now, all you have to do is enter your Constant Contact credentials and you’re all set to go!
Branding Your Form
There are many areas and ways to brand your form template throughout the customization process. Not only can you add elements of your brand directly within the form builder, but you’ll also find opportunities for branding once you have your form embedded on your site.
Content Field
One way to customize a form template with your own branding is with the Content field.
The Content field allows you to style the font, colors, and other elements of the field beyond the usual field settings. Most importantly, though, the Content field allows you to upload an image directly to your form.
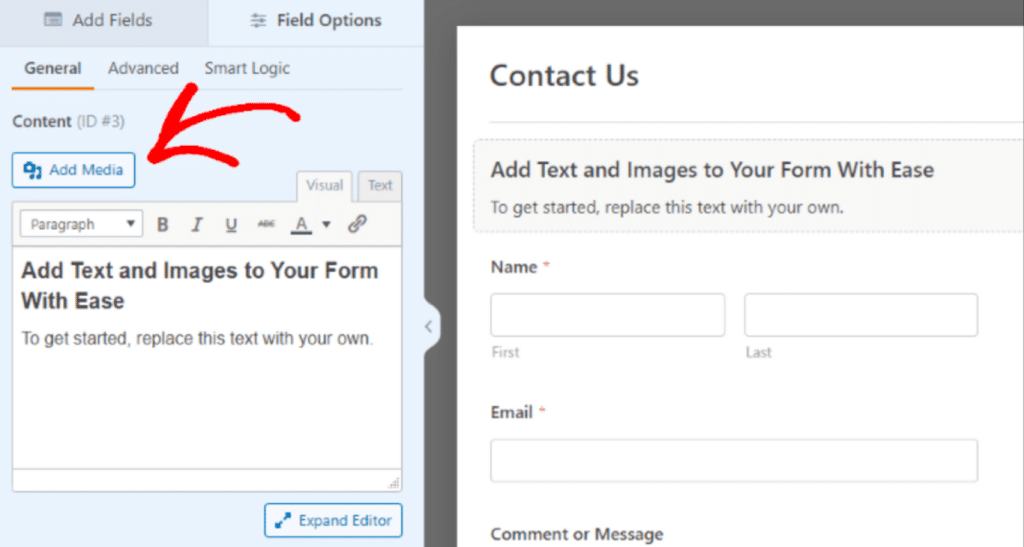
So, placing the Content field at the top of your form template is a great way to add your own header image or logo.
Email Notification Header
Another area where you can add your own header image is on the user notification emails I covered earlier.
Simply navigate to the Email tab in your WPForms dashboard to add and customize an email header image.
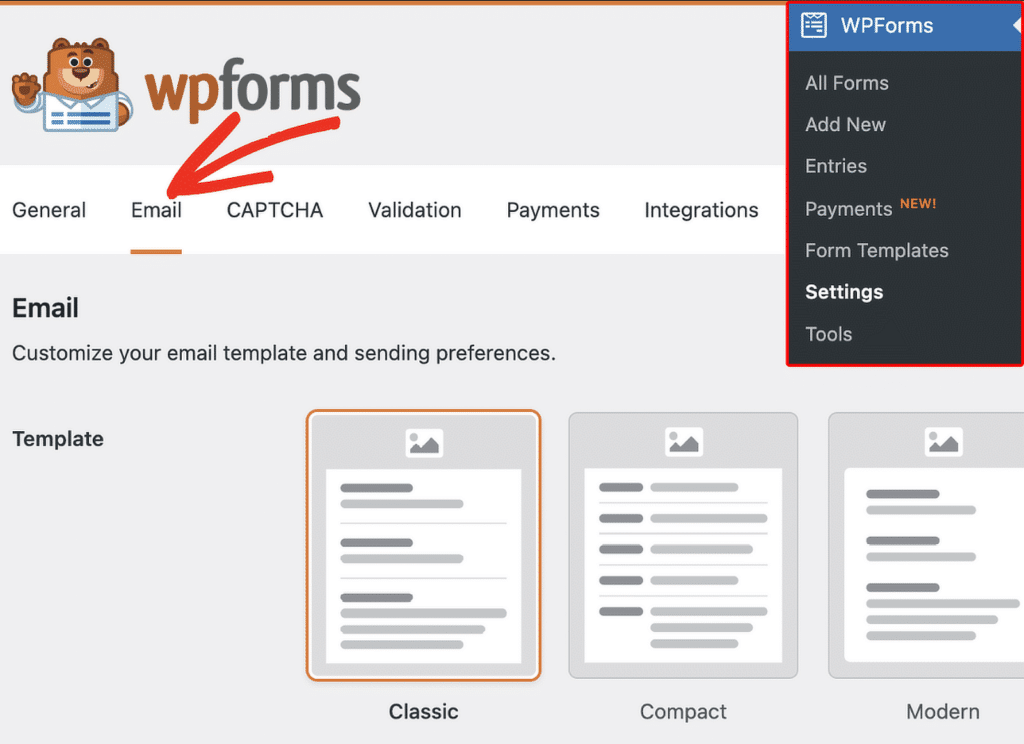
Here, you can add a header image to the top of any of the available email templates. This is an effective place to display your own logo and branding.
Or, I prefer to include a seasonal message or greeting here to promote user interaction.
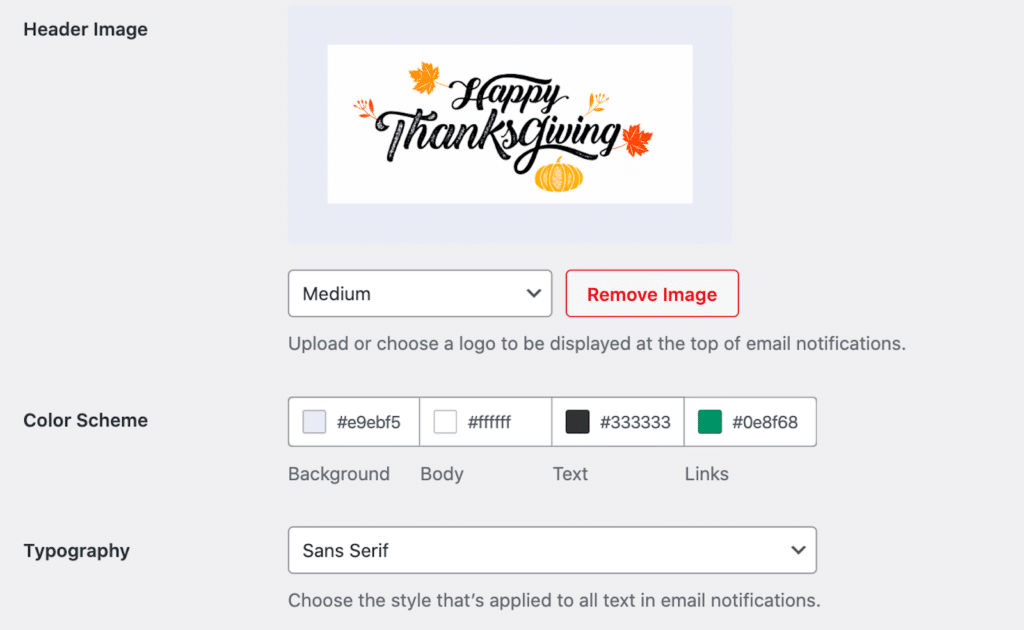
Just don’t forget to update the header image later!
Form Themes
Finally, after you’ve finished all the customization of your form template, you can further style your form within the WordPress block editor.
So, once you’ve embedded your form on your chosen website page, you’ll see options to style the WPForms block. Here, the Themes section includes all the available theme styles WPForms offers.
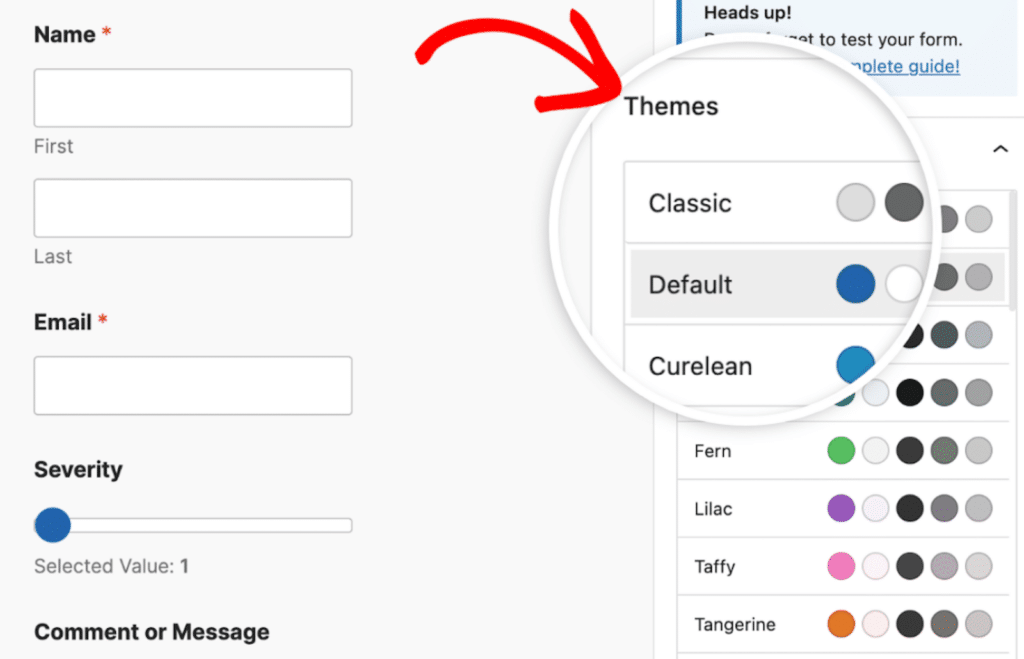
Be sure to take a look at our full documentation on using form themes to make sure you’re getting the most out of these branding tools.
That’s all there is to it! You now have all kinds of different options for customizing your form templates, right at your fingertips.
WPForms is more than just a simple form builder — it’s a powerful tool that can help your business grow in creative and unexpected ways.
By exploring these innovative uses, you can generate new opportunities for growth. Start experimenting with these ideas today and discover how WPForms can take your website to the next level!
FAQ
Looking for something specific? Browse our most frequently asked questions to discover more:
Can I use a pre-made template and still customize it?
Absolutely! WPForms offers a wide range of templates tailored to various purposes. You can customize any template by editing field labels, adding or removing fields, adjusting settings, and even incorporating advanced features like AI-generated choices.
Is it possible to preview my form before publishing?
Yes. WPForms allows you to preview your form at any time in the builder. This way, you can make adjustments before embedding it on your website for users to interact with.
Can I integrate WPForms with my email marketing service?
Definitely! WPForms integrates seamlessly with many popular email marketing services. To set this up, simply install the relevant email marketing addon for WPForms, connect your account, and map your form fields to your email list.
This integration makes it easy to automatically add subscribers, send confirmation emails, and manage your lists directly from your WordPress site.
Next, Follow These Best Practices
Now that you know how to customize your form by using a template, make sure that the changes you make are cohesive and beneficial to your site.
To follow our best practices that we suggest for building your form, take a look at our full article on the topic.
Ready to build your form? Get started today with the easiest WordPress form builder plugin. WPForms Pro includes lots of free templates and offers a 14-day money-back guarantee.
If this article helped you out, please follow us on Facebook and Twitter for more free WordPress tutorials and guides.

