Would you like to let your users create a WordPress post by submitting a form on the frontend of your site? With the Post Submissions addon for WPForms, you can easily accept guest post submissions, user-submitted events, and more without granting access to your WordPress dashboard.
This tutorial will show you how to install and use the Post Submissions addon for WPForms.
Requirements:
- You will need a Pro license level or higher to access the Post Submissions addon
- Ensure that you’ve installed the latest version of WPForms to meet the minimum required version for the Post Submissions addon
Before you jump into this tutorial, be sure to install the WPForms plugin on your WordPress site. Then verify your license key and install the Post Submissions addon.
1. Creating a Post Submissions Form
Although you can customize the form you use to accept post submissions more or less however you like, there are some important features to include.
Create a new form or open an existing one for editing. If you’re starting fresh, you might want to consider using our Blog Post Submission Form template.
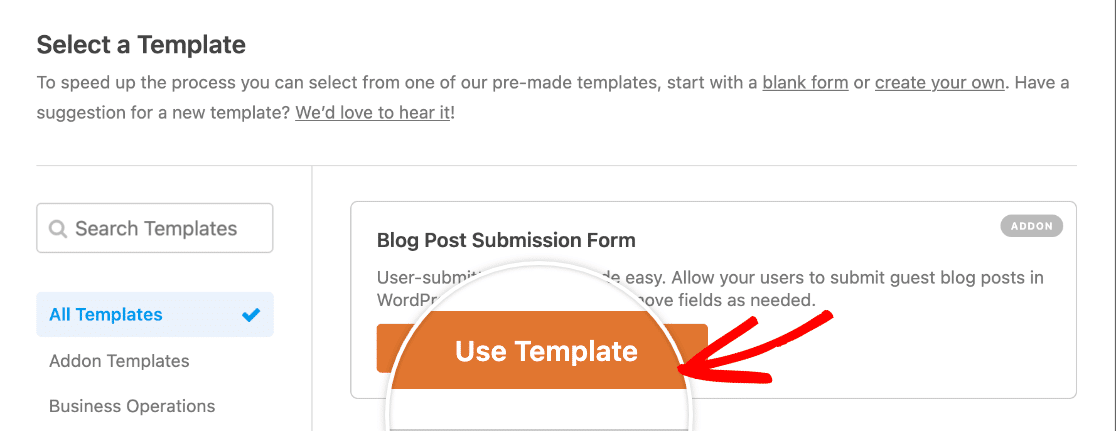
Whether you use a template or build your form from scratch, we recommend including fields for the following:
- Author Details
- Name: Use the Name field.
- Email: Use the Email field.
- Short Author Bio: Use the Paragraph Text field.
- Create a Blog Post
- Post Title: Use the Single Line Text field.
- Post Content: Use the Paragraph Text or Rich Text field.
- Featured Image: Use the File Upload field.
- Post Excerpt: Use the Paragraph Text field.
- Category: Use the Dropdown or Multiple Choice field with dynamic choices.
These are the fields you can connect to a standard WordPress post. You can customize these fields however you’d like, delete fields, or add new fields depending on what information you wish to include in your blog posts.
Letting Users Write and Format Their Posts in Your Form
There are several ways to enable users to submit their post content in your form. However, most of them will require you to do some formatting (such as adding headings and links) on the backend.
To cut down on the amount of work you have to do after a user submits a post via your form, we recommend using the Rich Text field to collect post content.
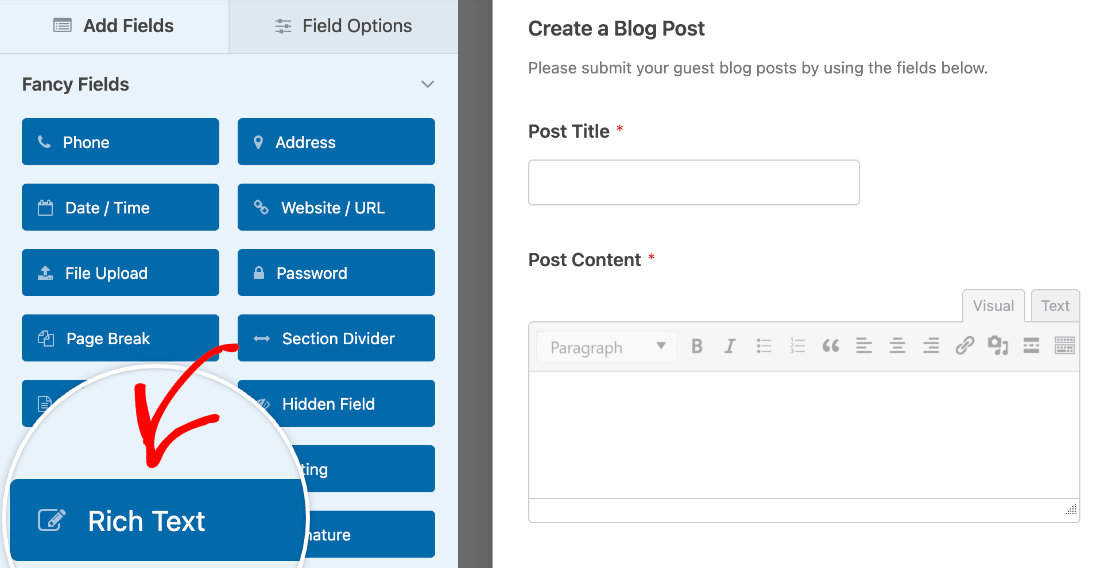
This field will insert a text editor into your form so that users can apply basic text styles. You may also choose to enable file uploads in the Rich Text field so users can include images in their posts.
Allowing Users to Select a Post Category
WordPress uses categories to organize posts on your site. You can enable users to select categories for their posts using a Dropdown or Multiple Choice field.
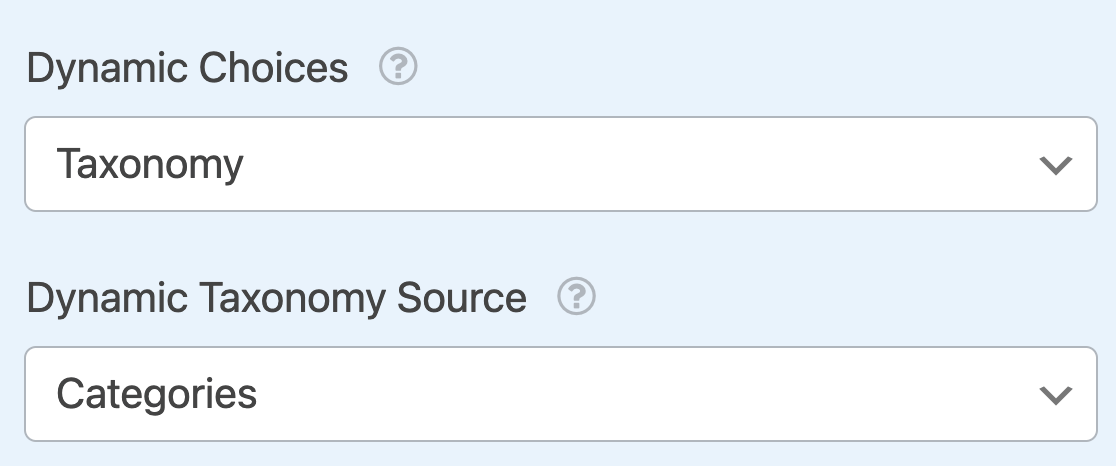
To let users select a post category, add the field type (Dropdown or Multiple Choice) you’d like to use to your form. Then, click on the field to open its Field Options panel and select the Advanced tab.

Towards the bottom of this section, you should see a dropdown labeled Dynamic Choices. You’ll need to set it to Taxonomy. Then, under Dynamic Taxonomy Source, select Categories.
2. Configuring Post Submissions Settings
When you feel your form is ready, click on Settings in the form builder menu on the left and then select the Post Submissions tab.
To enable the creation of posts, make sure that the Enable Post Submissions toggle is set to the ON position.
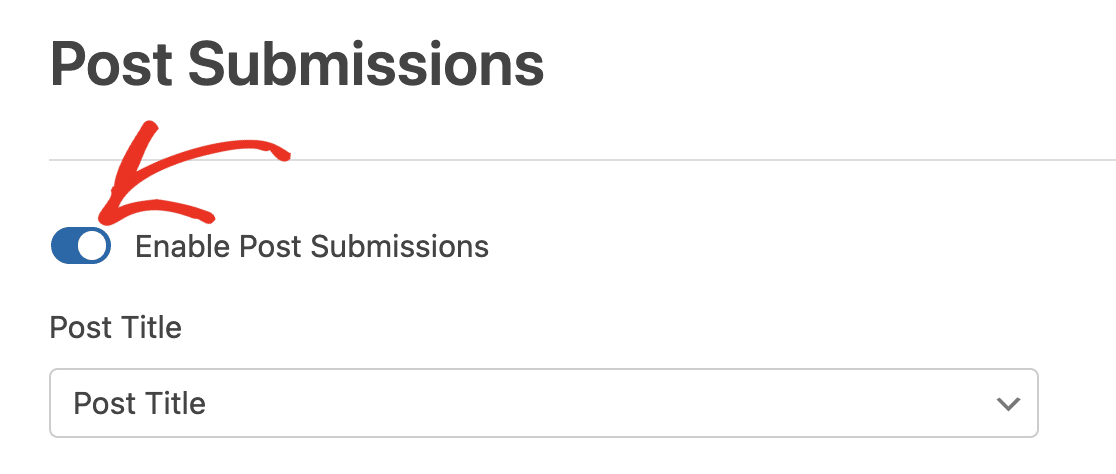
If you’re using the default Blog Post Submissions Form template, the settings on this page will already be configured for you. Whether you’re using the template or a custom form, though, it’s a good idea to check through these settings.
Mapping Form Fields to WordPress Posts
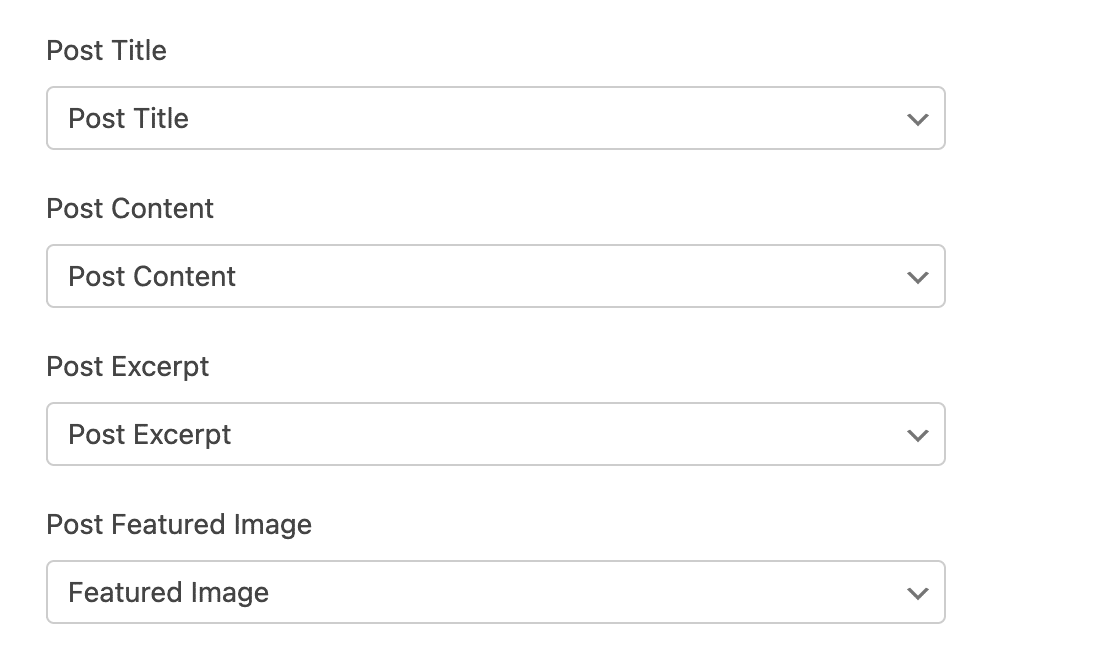
Next, you’ll need to map certain fields in your form to a new WordPress post. Using the dropdowns provided, select the corresponding field for each of the following items:
- Post Title
- Post Content
- Post Excerpt
- Post Featured Image
Choosing a Post Type
Then use the Post Type dropdown to select whether the content submitted in this form should be saved as a Post, a Page, or another post type.

Setting the Default Post Status
You’ll also need to choose the status you want to assign to all new posts submitted via this form. Although you can enable users to publish their posts right away, we recommend setting the Post Status option to Draft or Pending Review so that you can check over content before it’s made public on your site.

Selecting the Post Author
Finally, you’ll need to select a registered user from your site to be the author of all new posts submitted using this form. If you choose the Current User option, logged-in users who submit a post using this form will be listed as the authors of their posts.

Adding Custom Post Meta (Optional)
If you’ve added custom meta fields to your WordPress posts, you can collect the relevant details from users in your form and map them to your posts.
First, you’ll need to set up your custom meta fields. We recommend using the Advanced Custom Fields plugin for this.
Then locate the meta key for the field you want to map. You can find it by going to the Custom Fields » Fields Groups screen and looking under the Name column for the field you want to map data to.
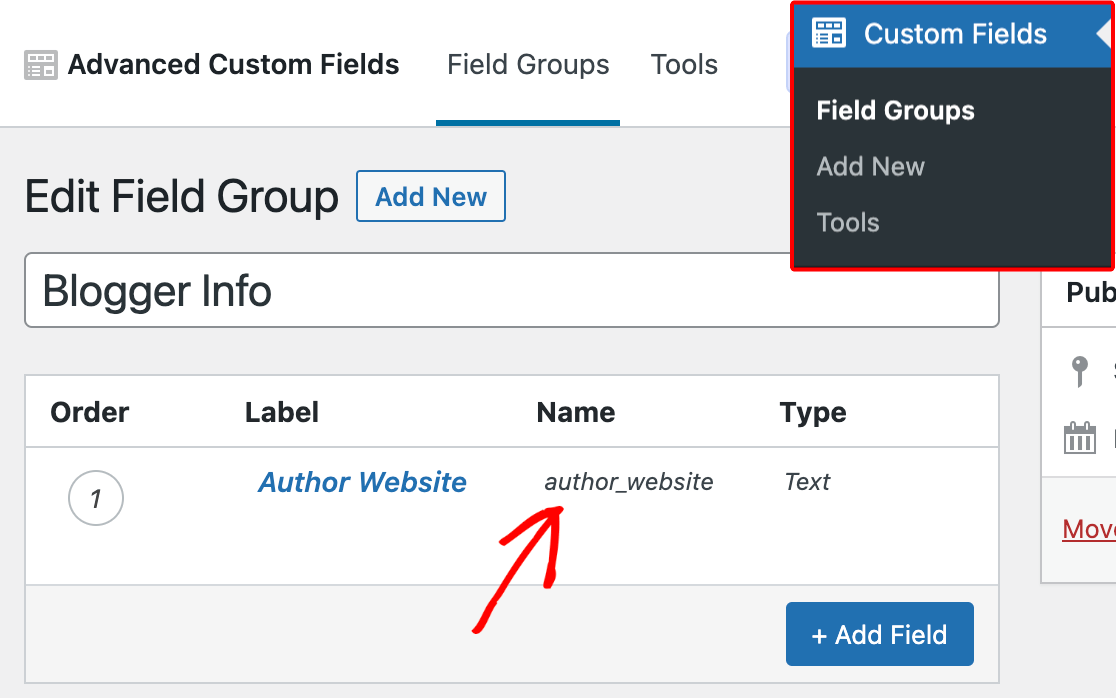
In the form builder, go to Settings » Post Submissions and scroll to the Custom Post Meta section. Here, enter the meta key for the custom field you want to map, then select the corresponding field from your form using the dropdown provided.

Remember to always save your changes before leaving the form builder.
3. Frequently Asked Questions
These are answers to some top questions about using the Post Submissions addon.
Can the user edit/update the post after submitting it through the form?
No. Once the user submits a blog post through your form, only users with access to your site’s admin dashboard can update the post. However, you could give the user an Author role so they can access your dashboard and edit their post.
Note: See WPBeginner’s tutorial to learn more about WordPress user roles.
That’s it! You can now easily allow users to add posts to your WordPress site on the frontend using a form.
Next, would you like to let users register for accounts on your site before they submit posts in your form? Check out our tutorial on the User Registration addon for more details.
