Would you like to allow users to register for accounts on your WordPress site? With the WPForms User Registration addon, you can easily create custom registration forms for your site.
This tutorial will show you how to install and use the User Registration addon for WPForms.
Requirements:
- You will need a Pro license level or higher to access the User Registration addon
- Ensure that you’ve installed the latest version of WPForms to meet the minimum required version for the User Registration addon
Before you dive into the tutorial below, be sure to install and activate the WPForms plugin on your WordPress site.
Once you’ve installed WPForms and verified your license, you’ll be able to quickly install and activate the User Registration addon.
Creating a User Registration Form
After you’ve installed and activated the User Registration addon, you can create a new form for user registration or edit an existing one to add registration functionality to it.
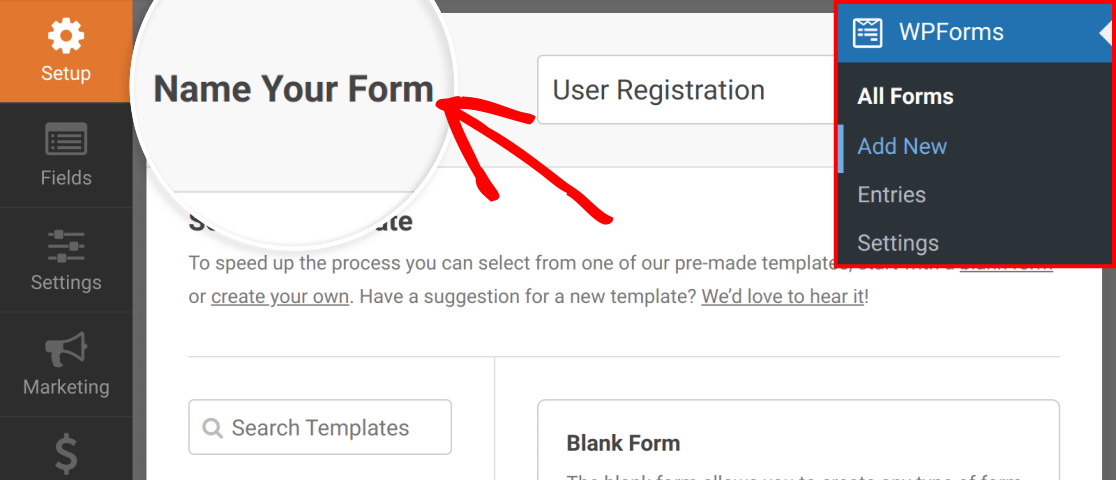
To create a new form, go to WPForms » Add New. This will open the form Setup page. Here, you can give your form a title in the Name Your Form field.
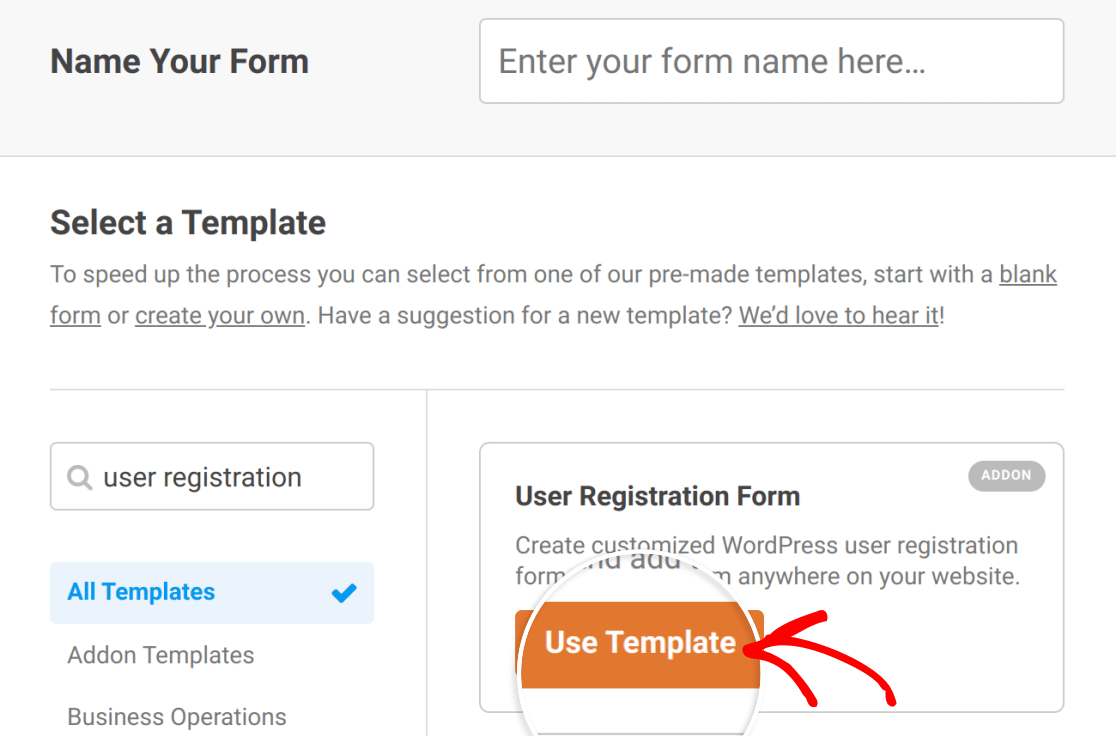
You can build your form from scratch or use our template to speed up the process. After you add your form’s name, scroll down to the Select a Template section and search for “User Registration.” Hover over the User Registration Form and click the Use Template button.
The template will load in the form builder with the following fields already in place (required fields in the template are marked with an asterisk):
- Name*
- Username*
- Email*
- Password*
- Short Bio
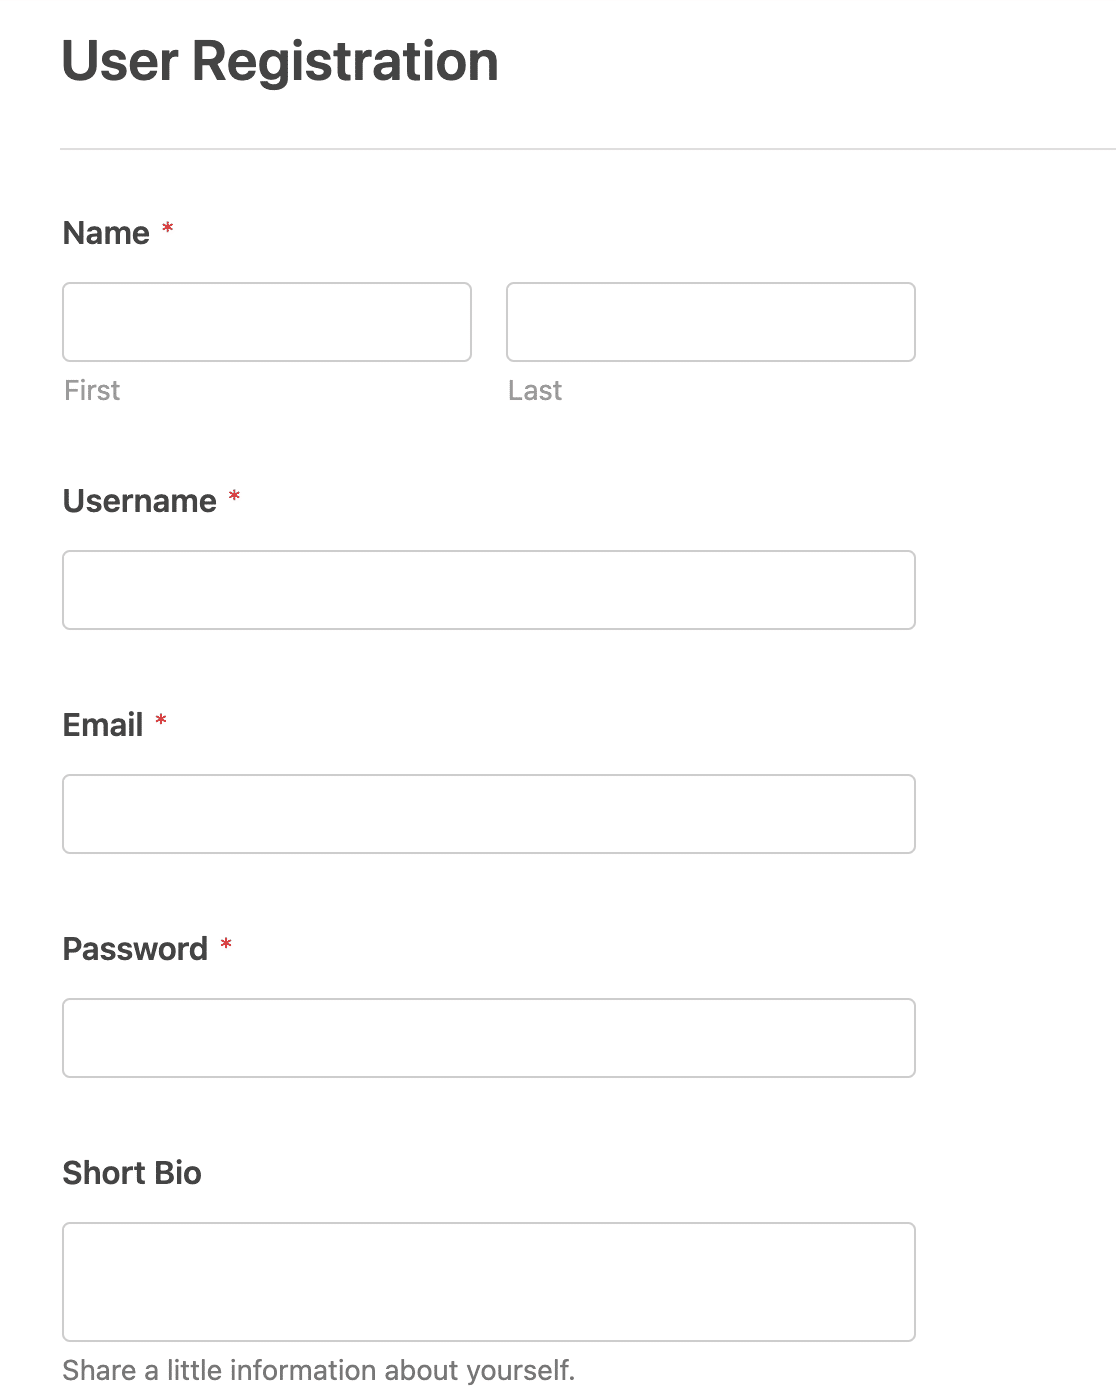
Your User Registration form must include an Email field, as WordPress requires an email address to create a new user account.
Otherwise, you can add, edit, or delete these fields as you see fit. However, we strongly recommend that you keep at least the Name, Username, and Password fields, as these are also key details for WordPress user accounts.
Note: Need help configuring your form’s fields? Our tutorials on creating new forms and WPForms field options have more details.
It’s also important to note that if you want the information submitted in your registration form to be visible in users’ profiles, the fields you include will need to correspond to data in your site’s WordPress user profiles.
For instance, if you add a phone number field to your registration form, users’ phone numbers will not be visible in their profiles because there is not an existing profile field for this data.
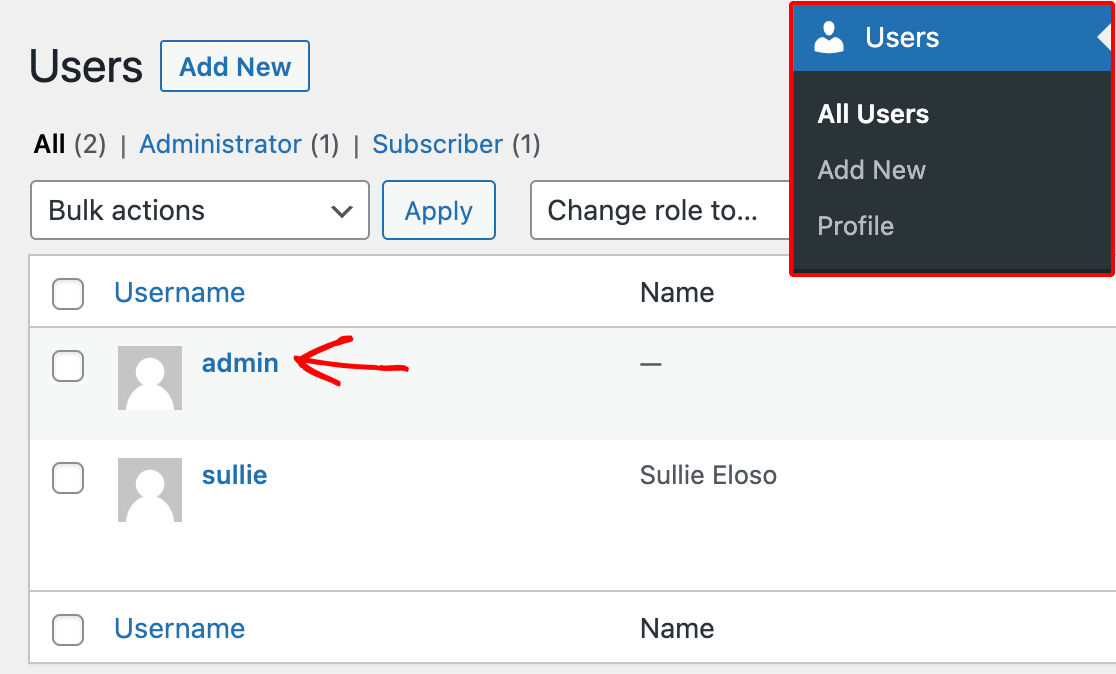
You can view your own user profile to see the default information it includes by going to Users » All Users and clicking on your username.
Note: If you’d like to add other information to user profiles such as birthdays, mailing addresses, phone numbers, and more, check out our tutorial on setting up custom user meta fields.
Customizing User Registration Settings
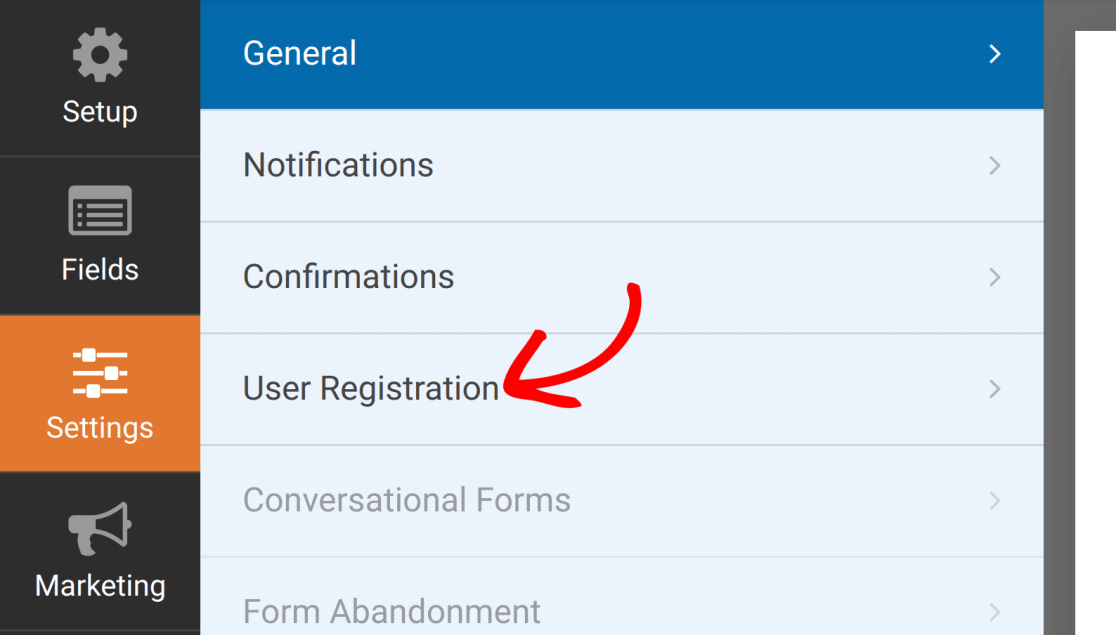
Once you feel your form is ready, you can configure its User Registration settings in the form builder. To do so, go to Settings » User Registration.
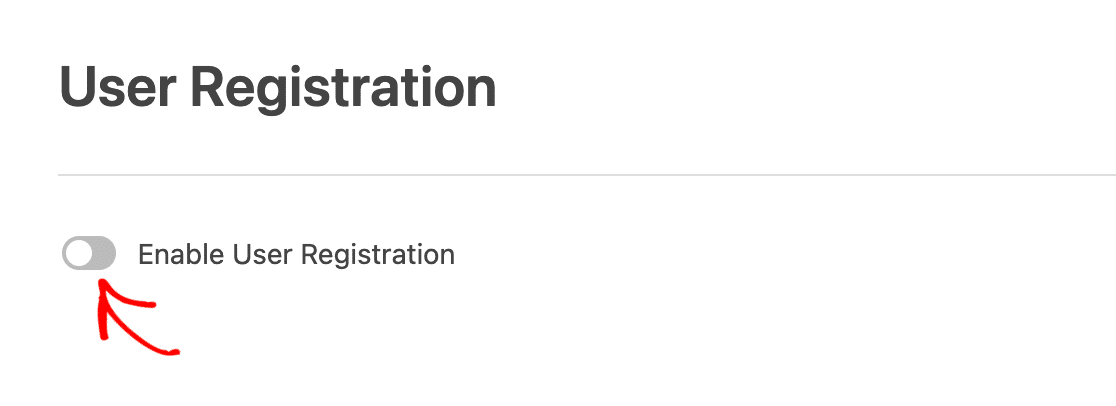
If you’re using our User Registration template, these settings will be pre-configured for you. Otherwise, switch the Enable User Registration toggle to the “on” position to view the available options.
Mapping User Profile Fields
On the settings page, you can map each form field to a field in the WordPress user profile. Just select the form field that corresponds to the user profile field from each dropdown.
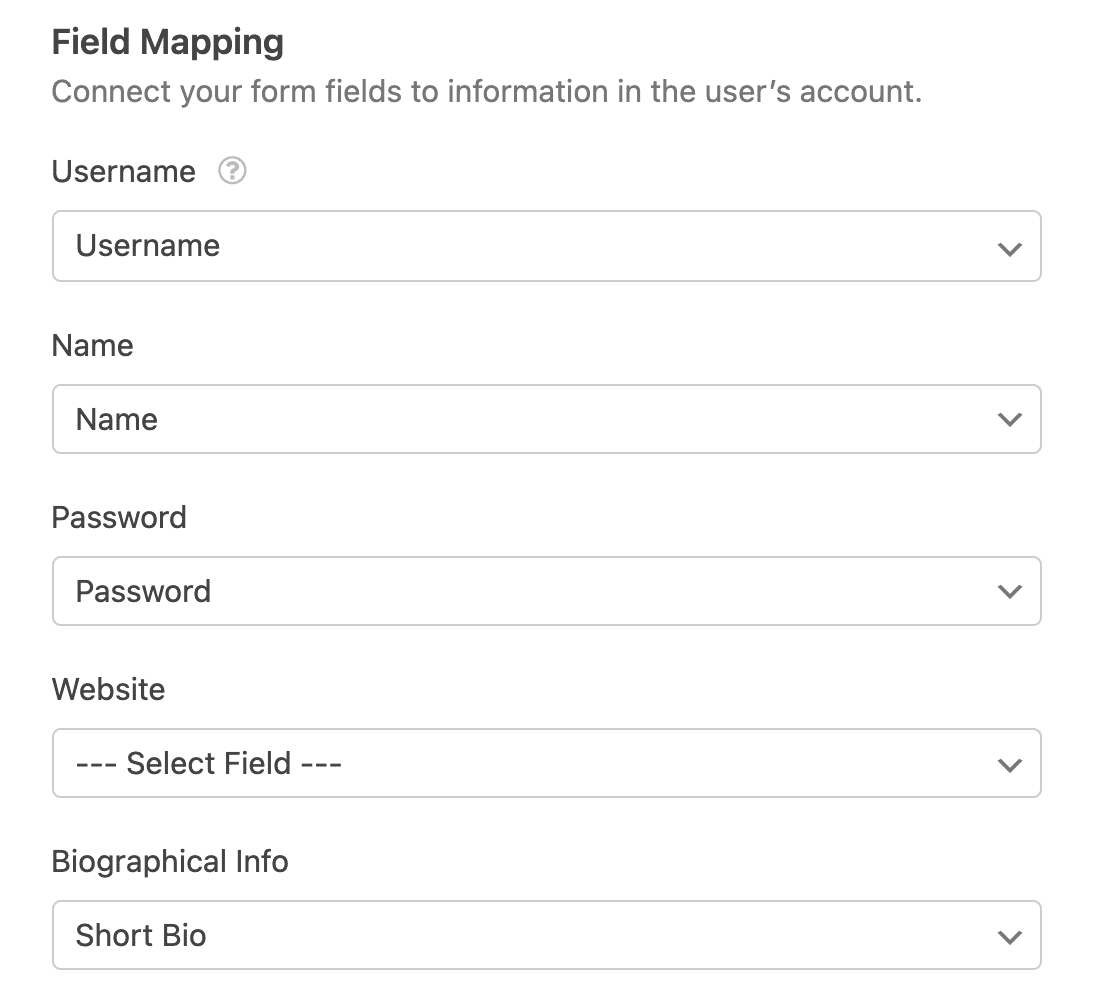
Here are the profile fields available in these settings:
- Username: All WordPress profiles require a username. If a user filling out your form leaves the Username field empty, WordPress will use their email address as their username instead.
- Name: Adding users’ names to their accounts is optional, but recommended.
- Password: WordPress user profiles also require passwords. To provide random, strong passwords to new users, select the Auto generate option from the dropdown.
- Website: This will add the URLs for users’ websites to their profiles. It’s optional.
- Biographical Info: This gives users a chance to write a short paragraph about themselves to include in their profiles. It’s optional as well.
Note: See the section below on mapping custom user meta fields to include other information in your site’s user profiles.
Assigning User Roles
The User Roles dropdown lets you determine which role to assign to new users when they register through this form.

Note: If you’d like more details about roles in WordPress, check out WPBeginner’s guide to WordPress user roles and permissions.
Enabling User Activation and Login Options
Our User Registration addon provides options for activating new accounts, logging users in automatically, and hiding your registration form from those who are already signed in to their accounts.
Choosing a User Activation Method
It’s common for new users to have to “activate” their accounts in some way before they can log in to your site. This helps prevent spam registrations.
To turn on user account activation, toggle on the Enable user activation setting.
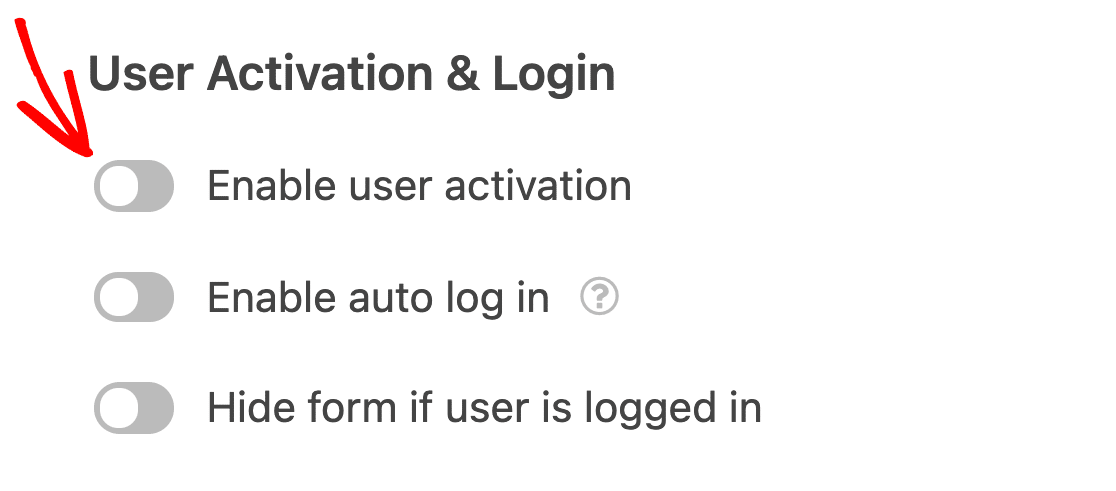
This will reveal several additional options. First, using the User Activation Method dropdown, choose whether you want to send users an email upon registration so they can activate their own accounts, or if you want to manually approve each registration yourself.

Note: The user role will be assigned to the user after they’ve completed the email activation, or after you’ve manually approve their registration.
User Email Activation
If you choose the User Email method, you can customize the Email Subject and Message.
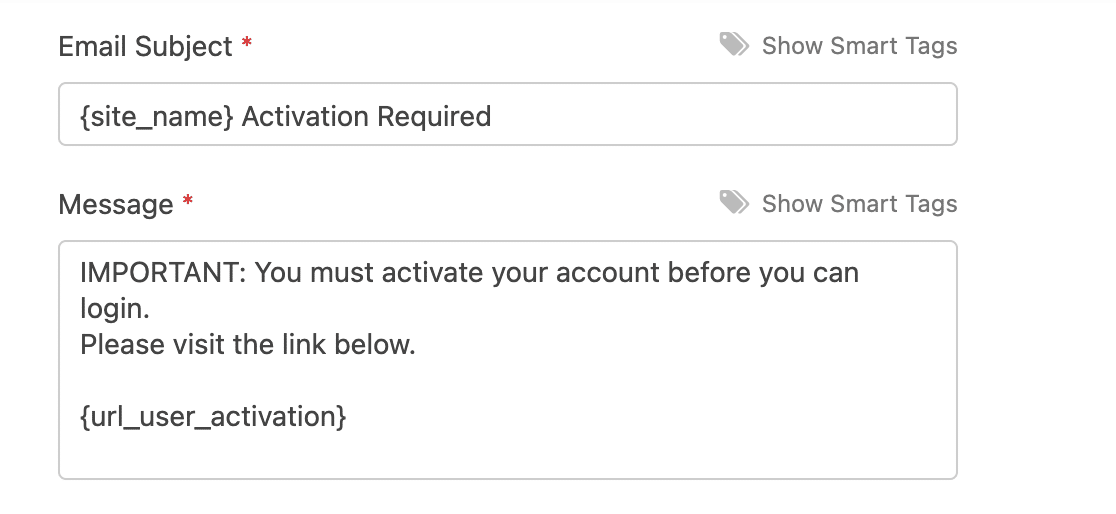
It’s important to include the {url_user_activation} Smart Tag in the Message field. This will automatically insert the link users will need to click to activate their accounts.
Note: Want to learn more about how to pull site data into your forms and notifications? See our tutorial on Smart Tags for all the details.
The default Message includes {url_user_activation}. If you delete it, you can add it back in by typing it into the field or by clicking on Show Smart Tags and selecting it from the list.
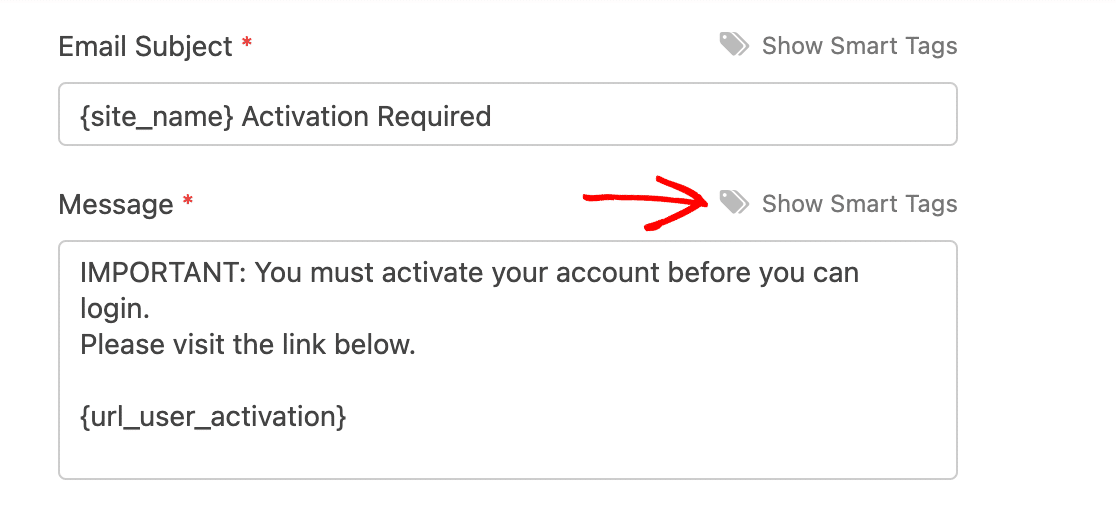
Otherwise, you’re free to customize the Email Subject and Message as you please.
Then, select the page you want to use as your User Activation Confirmation Page from the dropdown. Users will be sent to this page when they click the activation link in the email they receive after registering.

When a user signs up for an account using your registration form, they will receive an email at the address they entered. They can click on the link in the message to activate their account.
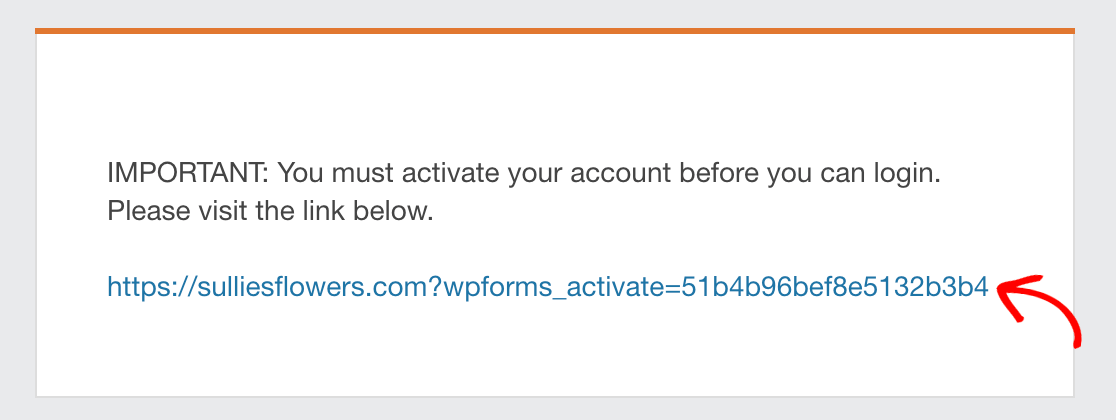
This will take them to the confirmation page you chose in the User Registration settings for your form.

After the user has activated their account, they will be able to log in normally.
If a user does not receive their activation email for some reason, you can resend it to them by going to Users » All Users in your WordPress admin area. Find the user’s username in the list, hover over it, and click Resend activation email.
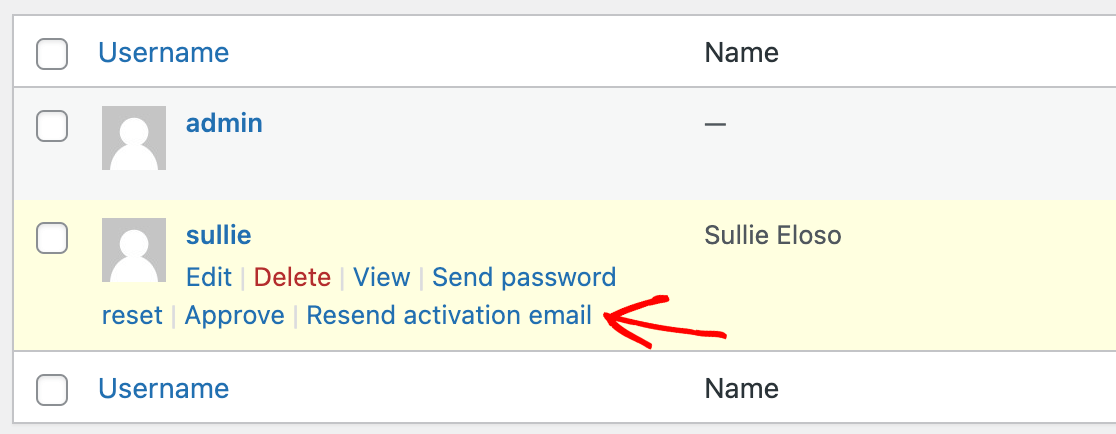
They should then receive a new email with their activation link.
Note: Having trouble sending emails from your WordPress site? Check out our tutorial on improving email delivery with SMTP for solutions.
Manual User Activation
The Manual Approval method does not show any additional settings in the form builder.
When a user signs up for an account using your registration form, they’ll be added to the All Users list in your WordPress admin area. Visit this screen, hover over a new user’s username, and select Approve to activate their account.
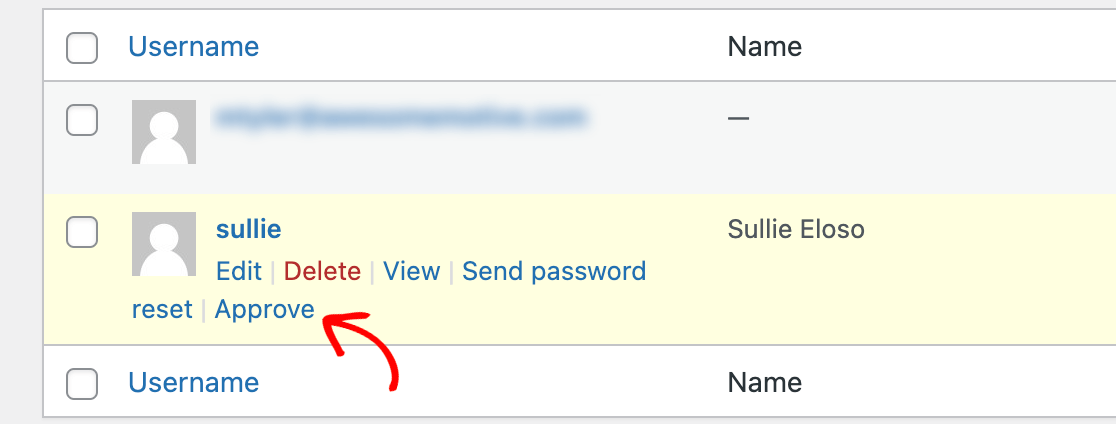
Or, if you do not want to activate the account, you can click Delete.
You can also manually Unapprove any user on your site, regardless of which activation method you chose in the User Registration addon settings.
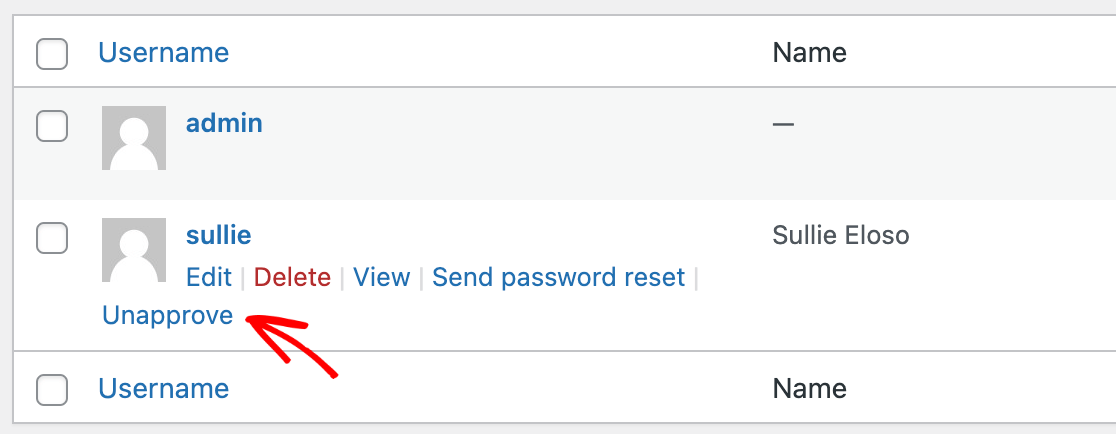
When you do this, the user will no longer be able to log in to their account unless you manually approve them again.
Note: For membership sites requiring payment confirmation before user approval, see our developer documentation on integrating PayPal with user registration.
Logging Users In Automatically
If you do not enable user activation, you can log new users in automatically after they register.
Just toggle on the Enable auto log in option.
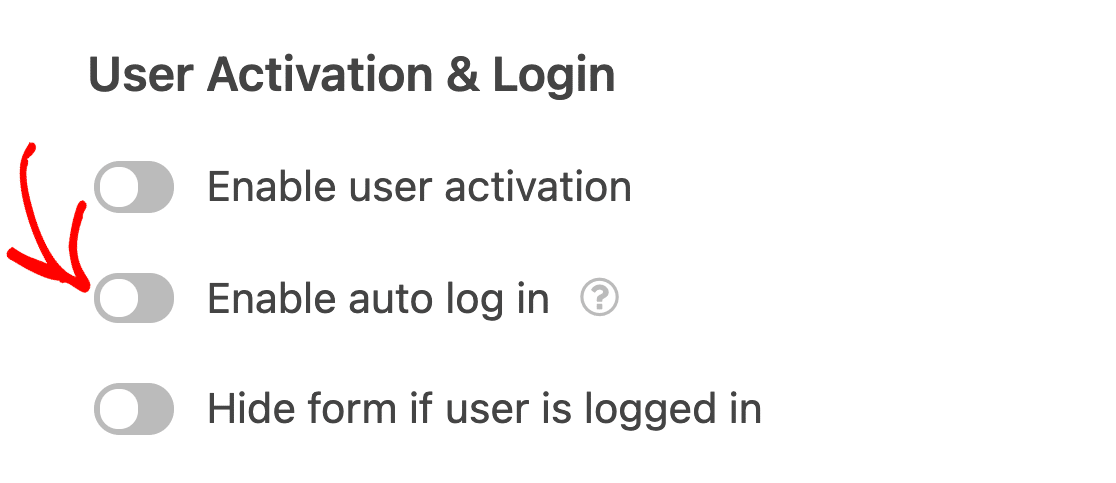
Note: You cannot enable auto log in and user activation together.
Hiding Your Registration Form from Logged-In Users
Hiding your registration form from users who are already logged in can prevent confusion and improve the user experience of your site.
First, toggle on the Hide form if user is logged in option.
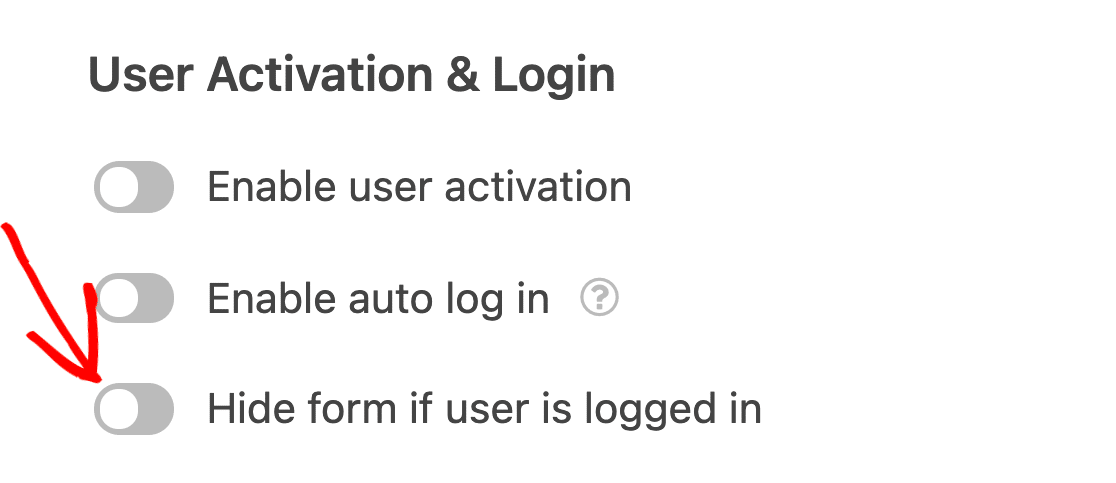
Then you can customize the message logged-in users will see if they try to access your registration form.
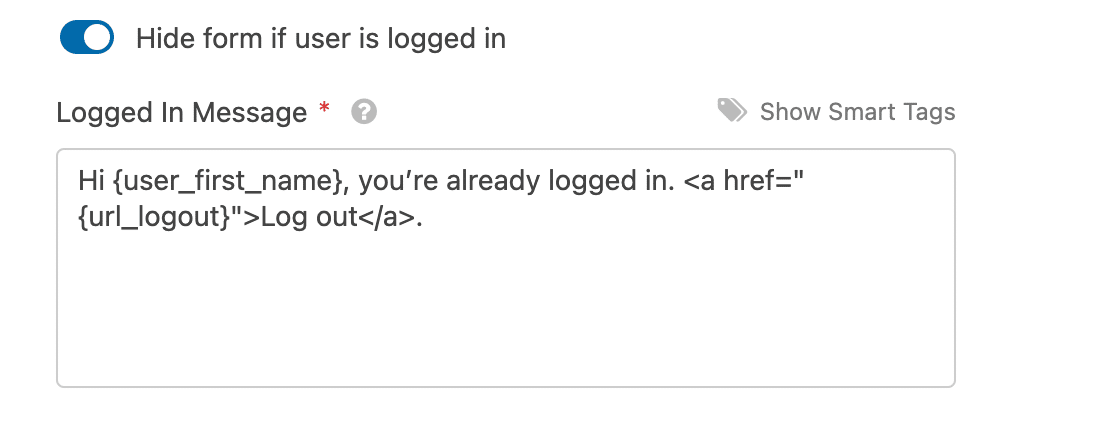
Here’s an example of what this message looks like on the frontend.

Setting Up Registration Emails
The User Registration addon enables you to create automated emails to send when a new user signs up for an account on your site.
Note: Any emails you configure in your form’s User Registration settings will be sent in addition to its notification emails.
Emailing the Site Admin When a New User Registers
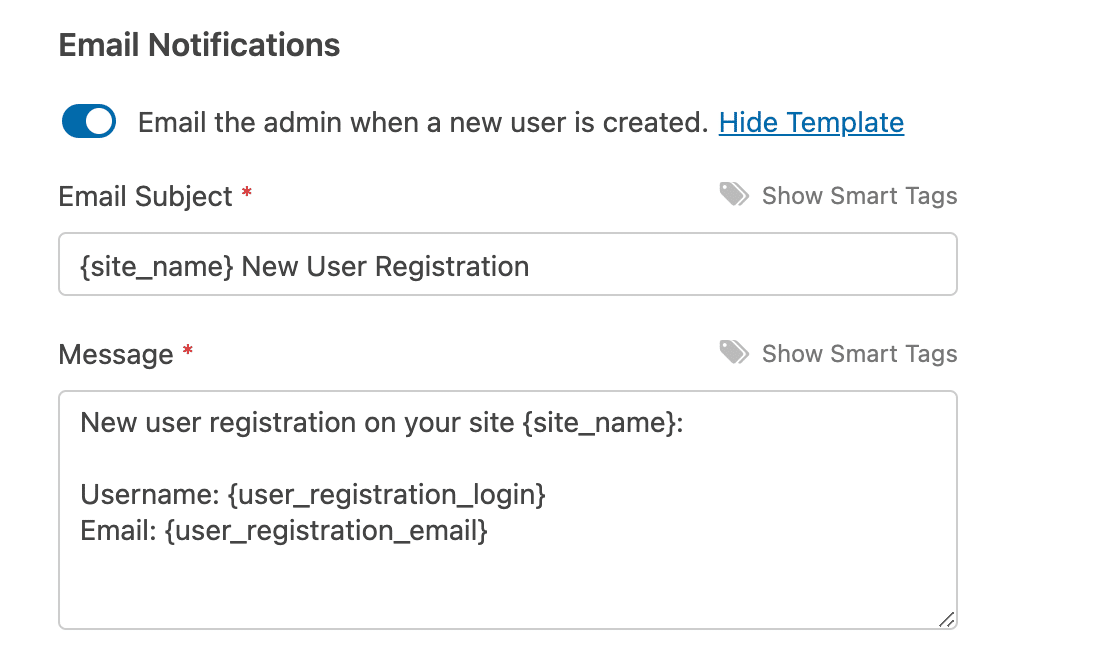
If you would like to receive an email notification when a new user registers, toggle on the Email the admin when a new user is created option.

Note: The Email the admin when a new user is created option sends an email to the address listed as the site administrator’s email in your WordPress settings. To learn how to view or change the admin email address, please see WPBeginner’s guide to this setting.
To edit the Email Subject and Message, click Edit Template.

You can then make any changes you want to the Email Subject and Message fields using text and Smart Tags.
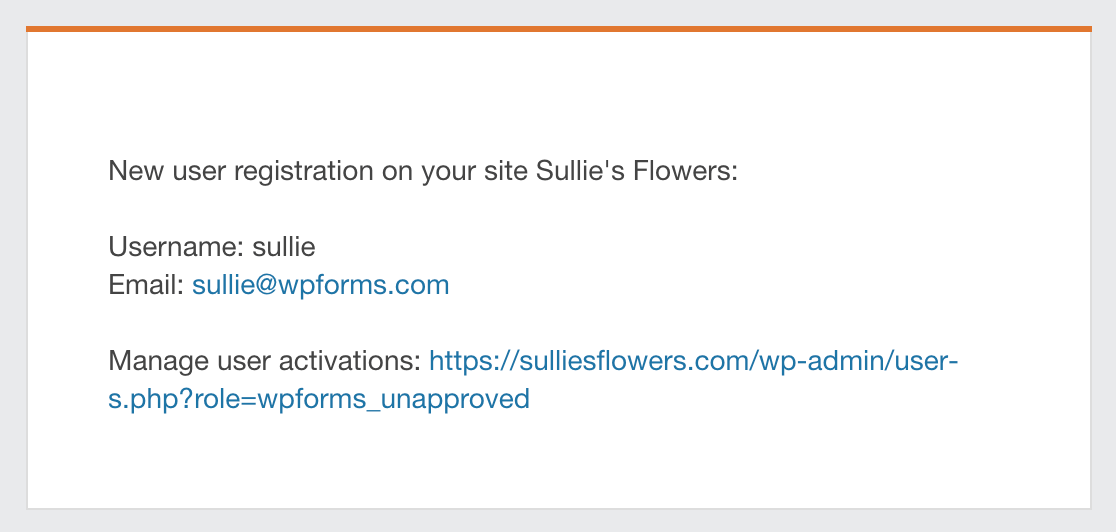
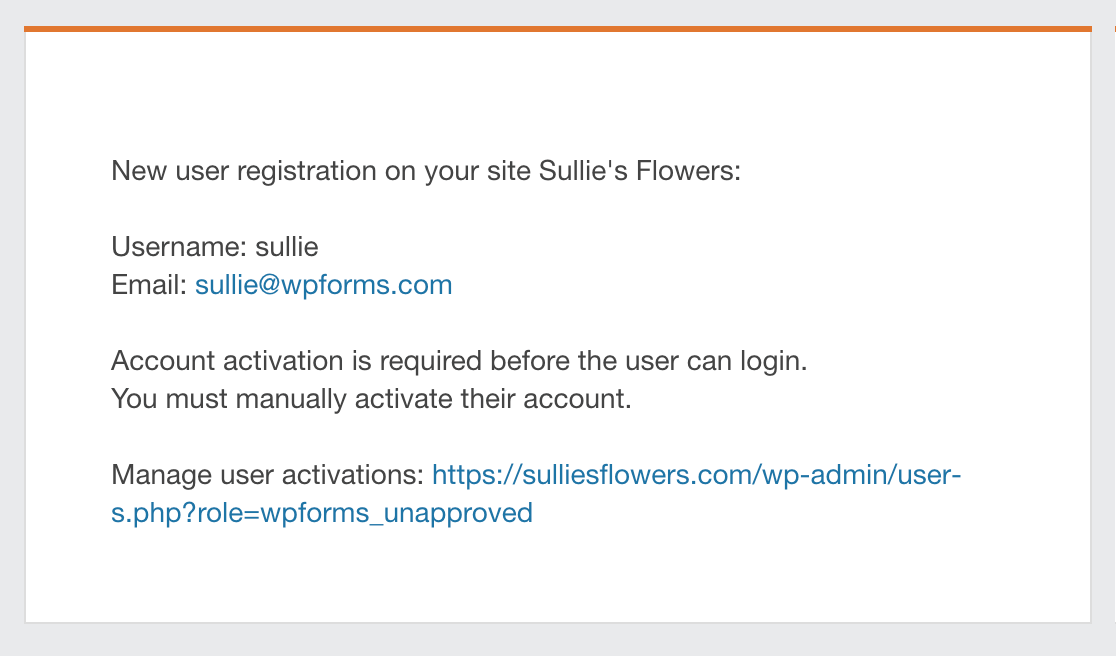
When a new user registers through your form, you’ll receive an email like this one.
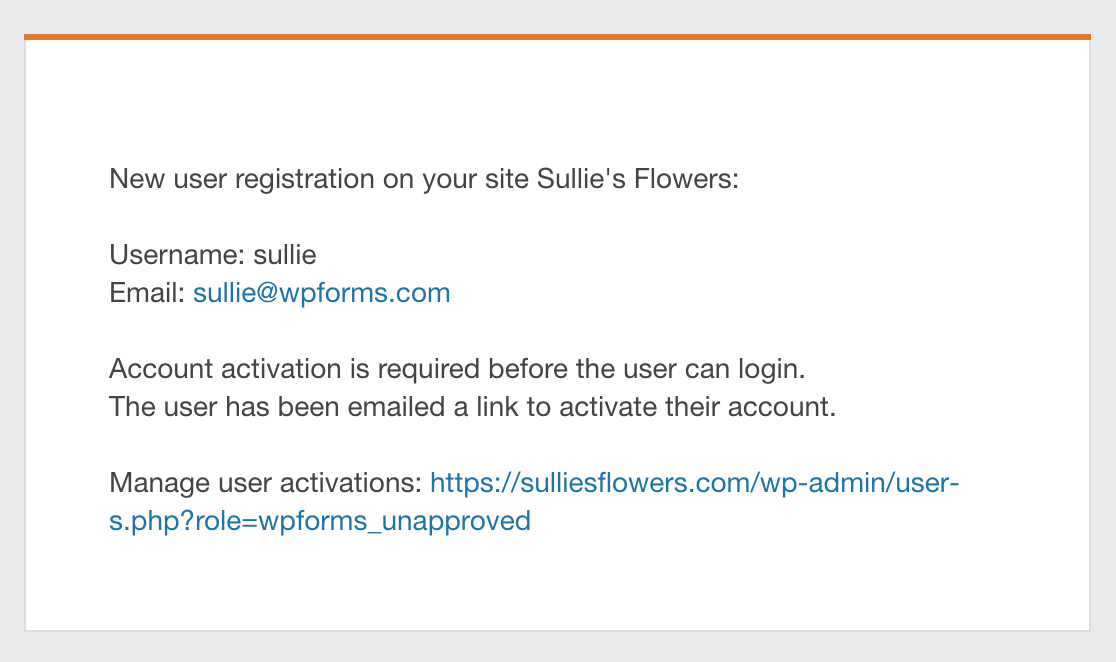
If you’ve turned on email account activation, your admin email will tell you that the user has received a link to activate their account.
If manual activation is on, this email will let you know that you must activate the user’s account before they can log in, and provide a link to the user management area of your WordPress dashboard.
Emailing New Users Their Account Information
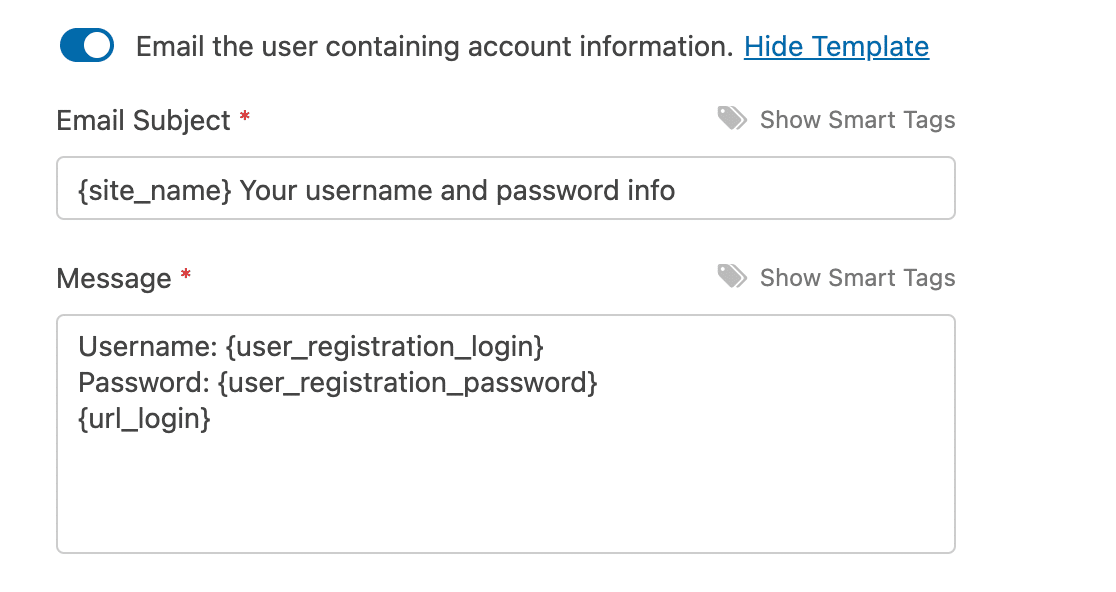
To send an email to new users with their account information, toggle on the Email the user containing account information option.

By default, this option will send new users emails with their usernames and passwords, as well as a link to log in to your site. You can edit the Email Subject and Message by clicking on Edit Template.

Then customize the Email Subject and Message as you see fit using text and Smart Tags.
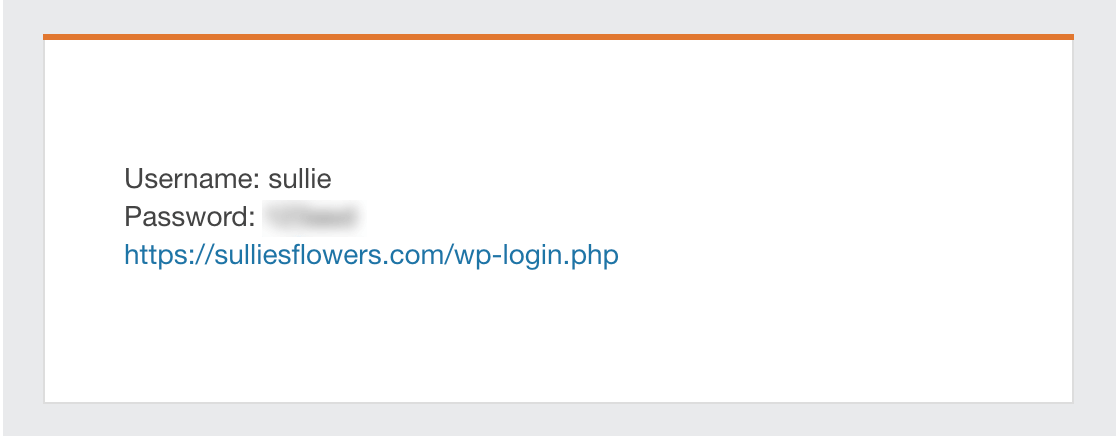
When a new user registers, they’ll receive an email that looks something like this one.
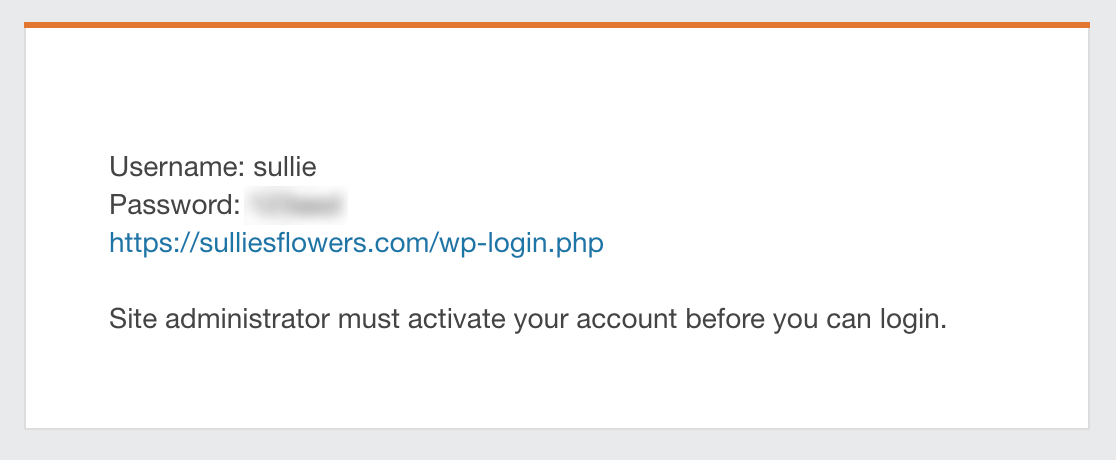
If you have manual account activation enabled, this email will also include a note informing the new user that the site administrator must activate their account before they can log in.
Note: Account information emails and user activation emails are sent separately. If you have both of these options turned on, users will receive two emails from your site when they sign up for accounts.
Emailing Users Once Their Accounts Have Been Activated
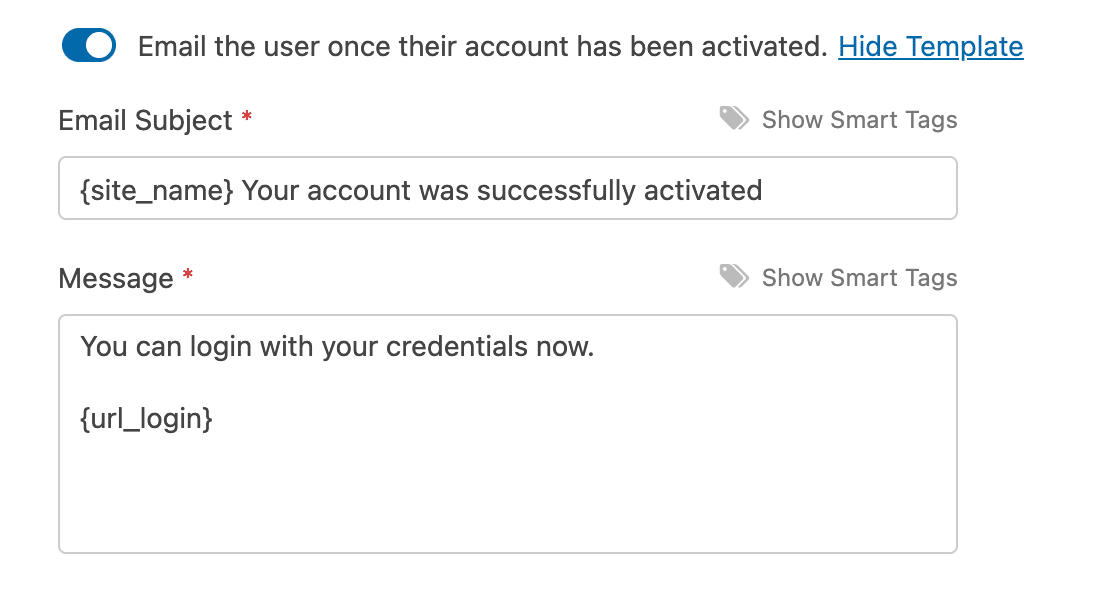
If you have account activation enabled, you can also send users emails to notify them when their accounts have been successfully activated. To do so, toggle on the Email the user once their account has been activated option.

If you want to make changes to the default Email Subject and Message, click on Edit Template.

Then change the Email Subject and Message as you see fit using text and Smart Tags.
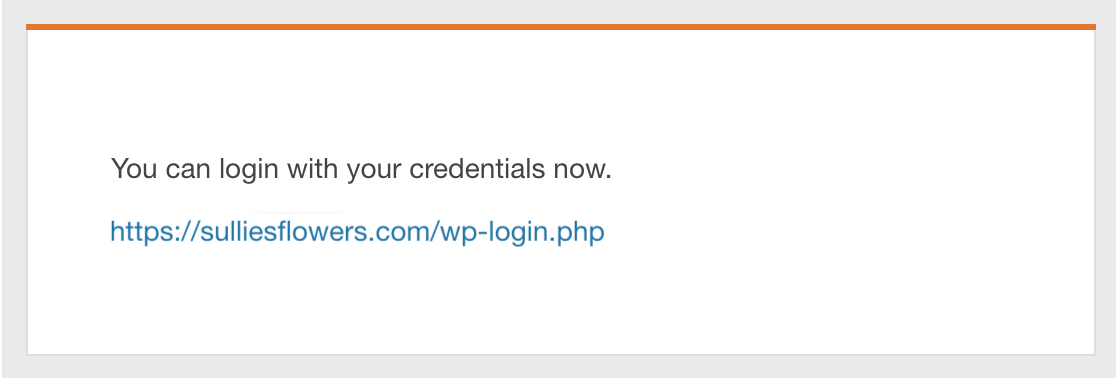
Once a new user’s account is activated, either by you or via their email activation link, they’ll receive an email similar to this one.
Mapping Custom User Meta Fields
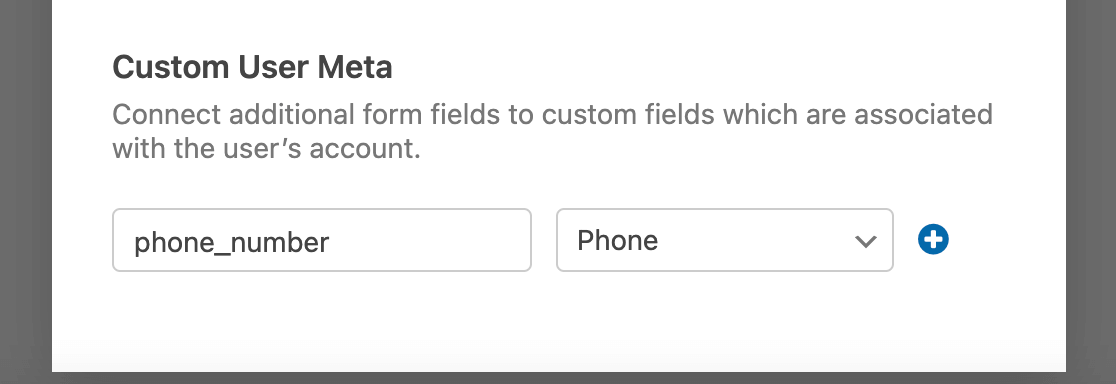
Finally, if you’ve set up any custom user meta data for your WordPress site, you can map your registration form fields to your custom meta fields.
Just enter your custom field’s meta key, then select the corresponding form field from the dropdown.
Note: Need more help mapping your custom fields to fields in your registration form? Check out our complete tutorial on setting up custom user meta fields.
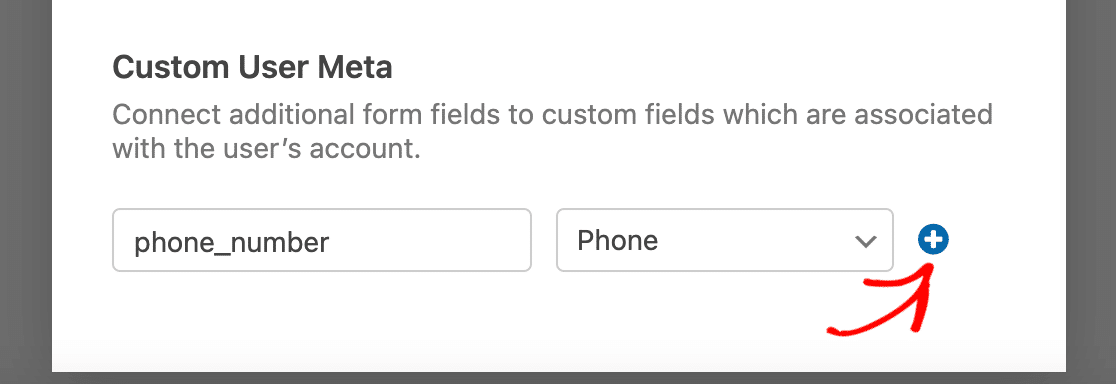
To add multiple custom user meta fields, click on the blue plus (+) button and repeat the process.
When you’re done customizing your User Registration form and configuring its settings, make sure to click on the Save button before you exit the form builder.

Enabling Conditional Logic (Optional)
Note: Conditional logic is not available in our User Registration template. If you would like to create a smart form with user registration functionality, please use a different form template or build a new form from scratch.
Conditional logic enables your forms to change automatically based on users’ input or selections. With the User Registration addon, you can use this feature to let users choose whether or not to create an account.
As an example, we’ll enable user registration in a payment form and let customers choose if they would like to create an account.
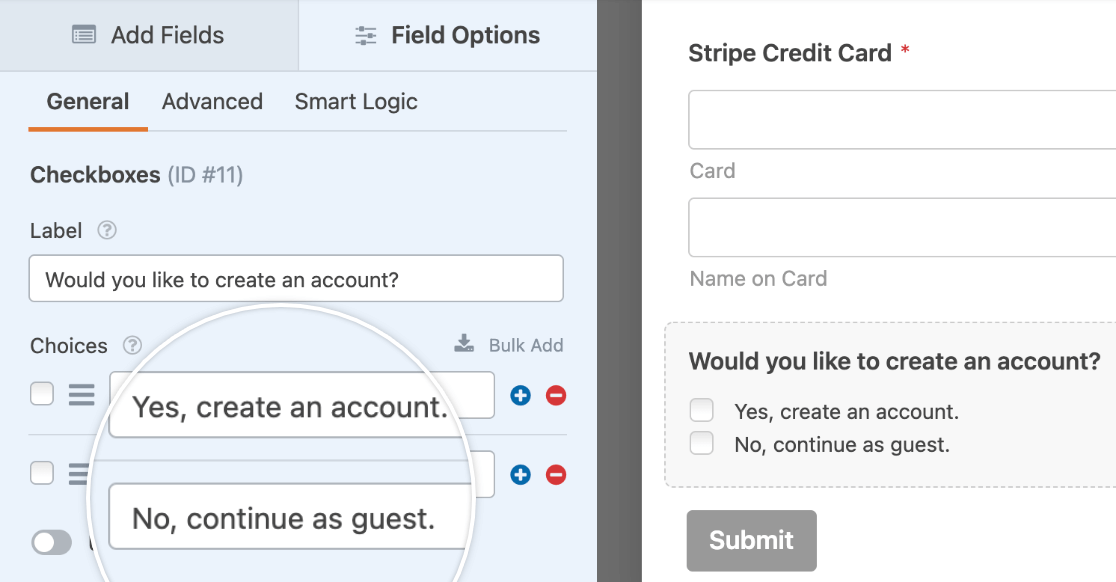
First, we’ll add a Checkboxes field to our billing form and change the label to, “Would you like to create an account?”
We’ll include two choices for this field: “Yes, create an account” and “No, continue as guest.”
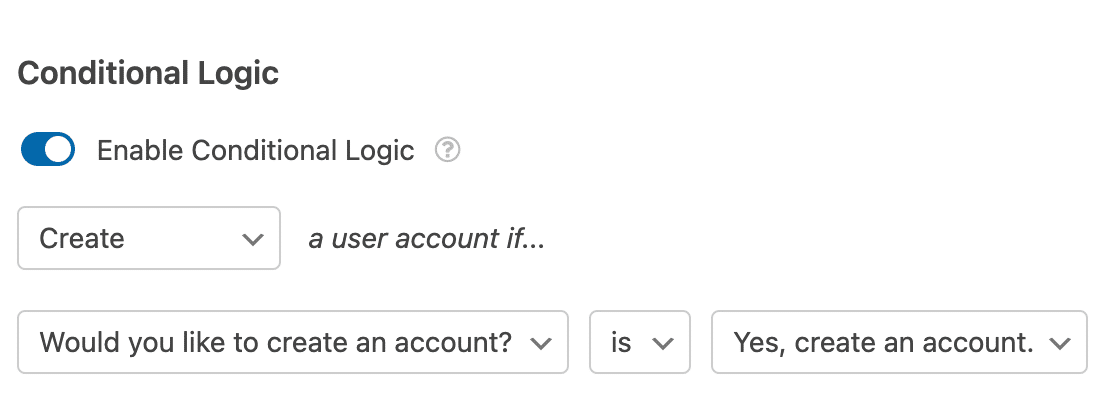
Then we’ll go to Settings » User Registration and configure our user registration settings as described earlier in this tutorial. At the bottom of the settings screen, we’ll toggle on the option labeled Enable Conditional Logic.

Then we’ll use the dropdowns to create a conditional logic rule that reads, Create a user account if Would you like to create an account? is Yes, create an account.
Note: Need help setting up your conditional logic rule? Our beginner’s tutorial on using conditional logic in WPForms has all the details.
Frequently Asked Questions
Below, we’ve covered some of the top questions we receive about the User Registration addon.
Why don’t I see the Enable Conditional Logic option in my form’s User Registration settings?
If you don’t see the Enable Conditional Logic option in your form’s User Registration settings, the form you’re editing probably uses our User Registration template.
This template does not include conditional logic functionality. Since it’s meant to be used as a dedicated registration form and always create a new account with each submission, this option isn’t necessary.
If you want to create a form that registers users only under specific circumstances, please use a different template or create a blank form and customize it from scratch.
How can I customize the validation messages for the User Registration addon in WPForms?
To personalize the validation messages for the User Registration addon in WPForms, you can modify the default error messages that appear during user registration. For more information, be sure to check out our developer documentation.
Note: Please be aware that this requires advanced functionality, such as adding code to your site, and is therefore recommended for developers.
Can I disable the User Registration addon on a specific form?
If you’re using our User Registration form template, you won’t see the option to disable user registration in the form’s settings page. We suggest using a different template or building your form from scratch if you’d like to control when to enable/disable user registration.
How can I enable password visibility during registration?
To enhance user experience, you might want to allow users to toggle the visibility of their password when they are registering. This feature can help prevent errors during the registration process by allowing users to confirm their password input. For detailed instructions on enabling this feature, please refer to our developer documentation on adding a password visibility toggle button.
That’s it! Now you know how to use the User Registration addon with WPForms to create custom registration forms.
Next, would you like to learn more ways to use our User Registration addon? Be sure to check out our tutorials on creating a login form and a custom password reset form for more details.

