AI Summary
Would you like to create a WordPress contact form in under 5 minutes? WPForms is so beginner-friendly and easy to use that most users can create and publish a brand new form in just minutes. The WPForms Challenge gives you a chance to try this for yourself and helps to guide you through the form creation process.
This guide will go over how to take the WPForms Challenge.
In This Article
Before beginning the WPForms Challenge, make sure you’ve installed and activated WPForms. Once the plugin is installed and activated, you’ll be ready to get going!
Note: If you’d like, you can also verify your license key and install addons before starting the challenge.
1. Starting the WPForms Challenge
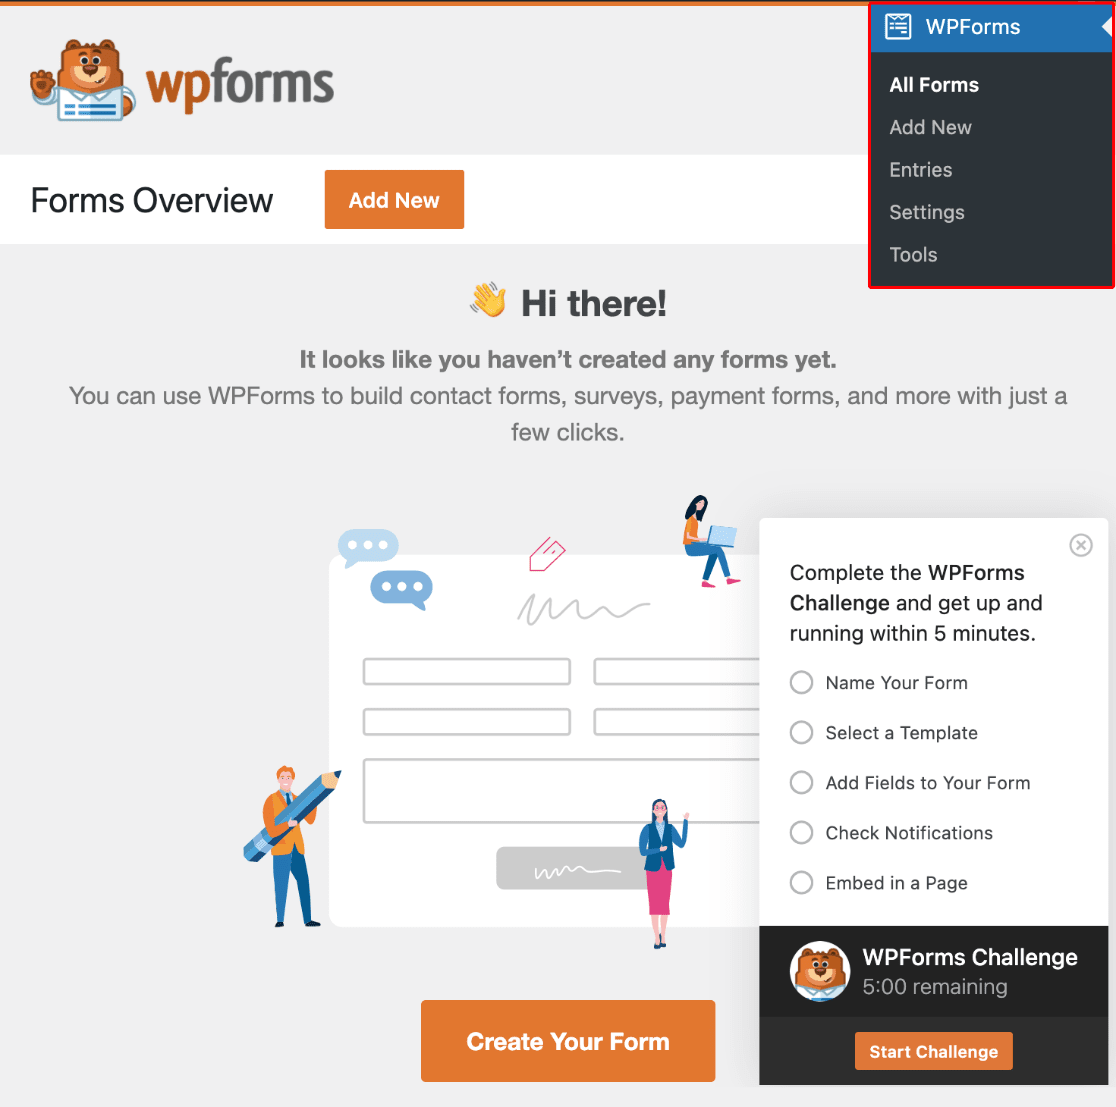
To access the challenge, click on WPForms in the left WordPress menu. As long as this is a new install, you’ll see the challenge in the lower right corner of the page.
During the challenge, you’ll go through the following steps:
- Naming Your Form
- Selecting a Template
- Adding Fields to Your Form
- Checking Notification Settings
- Embedding in a Page
When you’re ready to get started with the challenge, you can click the Start Challenge button. Don’t worry, this won’t start the 5-minute timer quite yet.

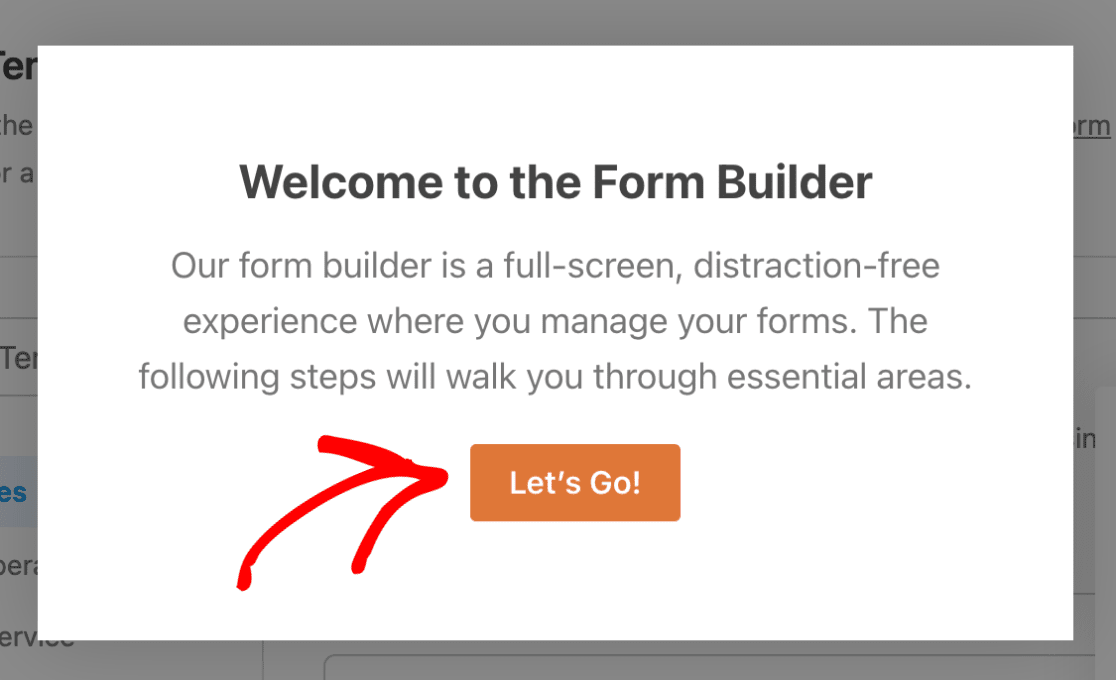
Clicking the button will take you to the form builder, where you’ll see a welcome message. When you’re ready to properly start the 5-minute timer, click the Let’s Go! button.
2. Naming Your Form
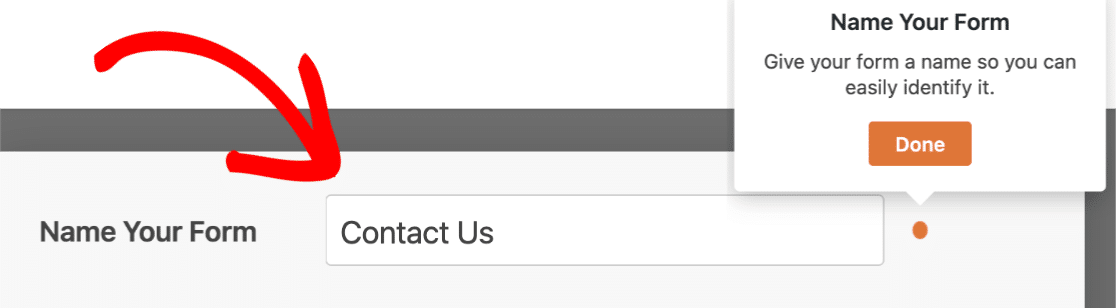
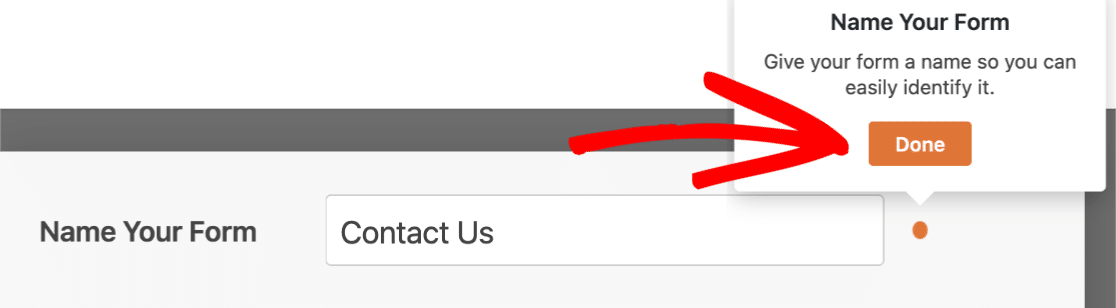
As soon as you start the challenge, the form builder will open for you. Your first step in the challenge is to add a name to your form. To do this, enter a name of your choice in the Name Your Form field, located at the top of the page.
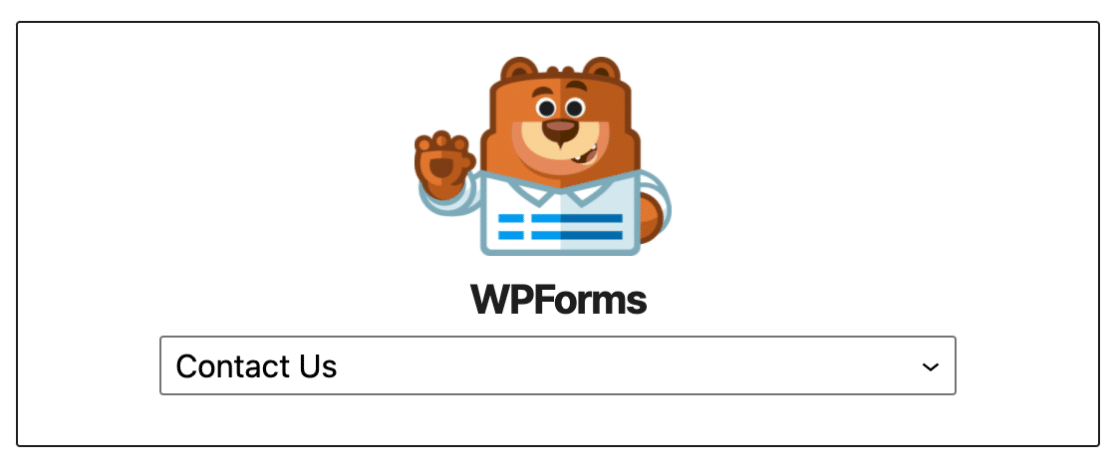
For our example, we’ll name our form Contact Us.
You can decide later whether or not to display this form name when the form is embedded on your site. The name will also help you easily distinguish your forms in the admin area.
Once you’ve entered a form name, go ahead and click the Done button in the guide box.
3. Selecting a Template
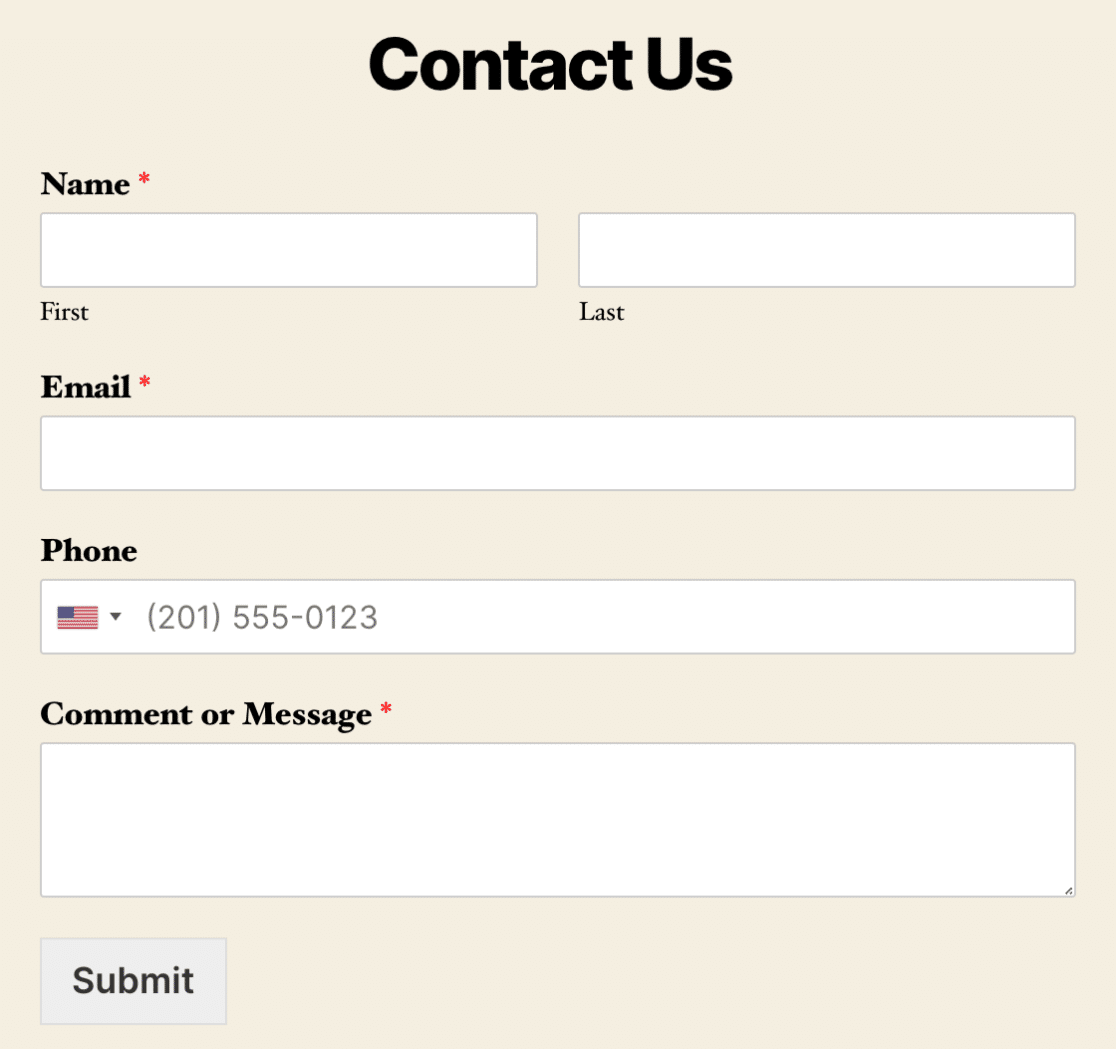
After naming your form, the next step of the challenge is to select a form template.
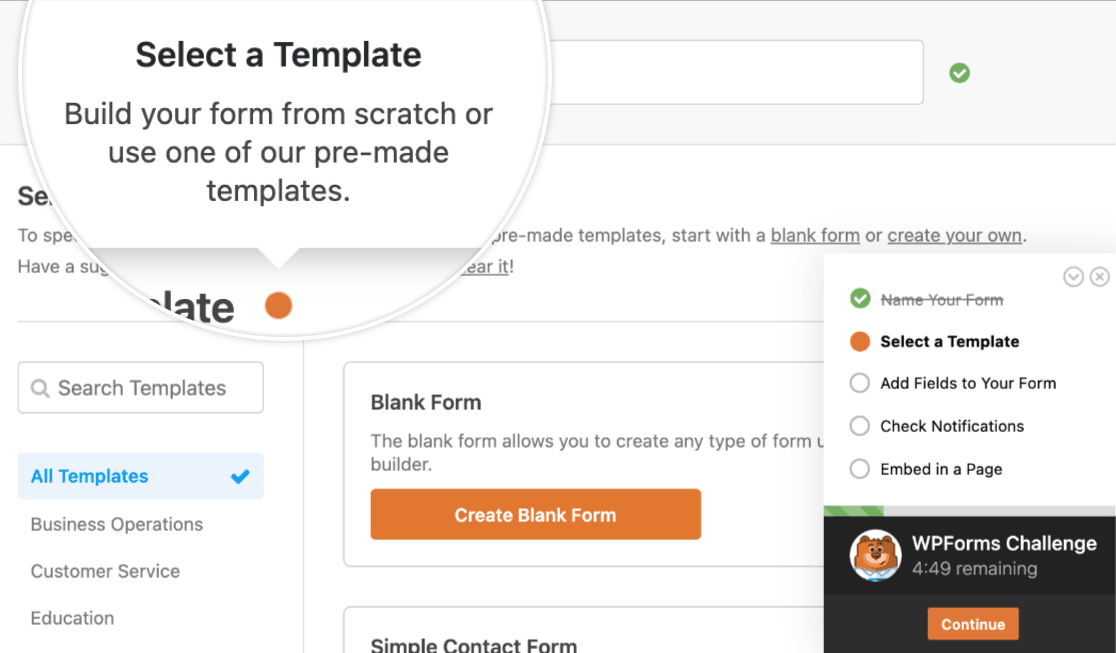
Once you’ve identified the template you’d like to start with, click on the Use Template button to open the form builder. For our example, we’ll select the Simple Contact Form template.

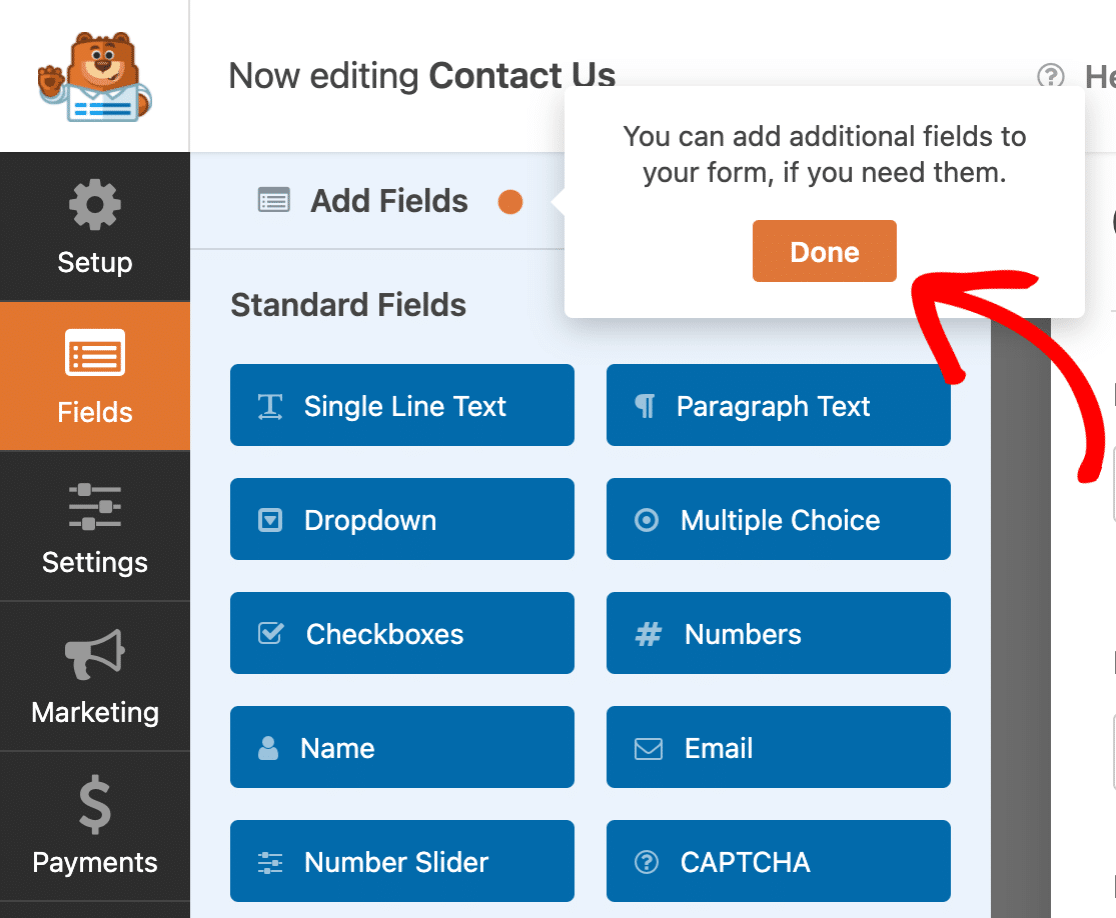
4. Adding Fields to Your Form
The template’s form fields will provide a useful starting point, and in many cases already include all of the fields you need. However, if you’d like to make changes, you can add, delete, move, or rename any fields.
Note: Want to learn more about the form fields available in WPForms? See our complete guide to field types for all the details.
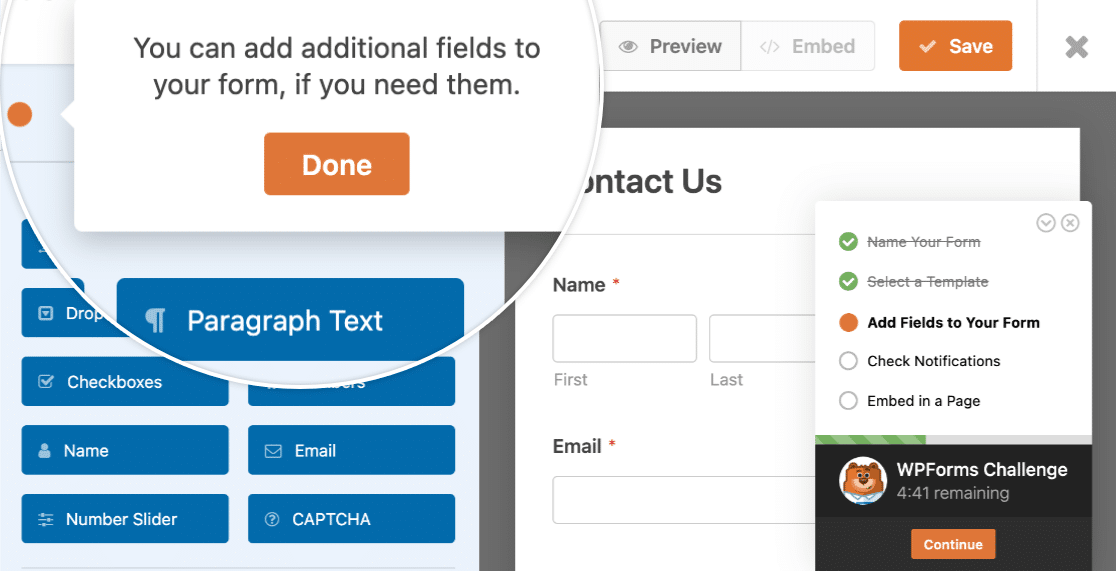
To add a new field, simply click and drag it into the form.
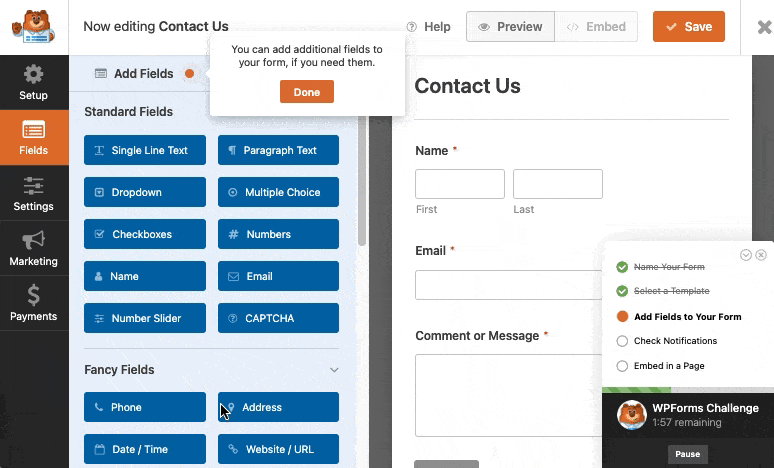
When you’re ready, click the Done button to move to the next step of the challenge.
5. Checking Notification Settings
Now that your form fields are all set, the next step is to set up notification emails. These are the emails that get sent out immediately after the form is submitted, and are most often used to let the site admin know that they have a new entry.
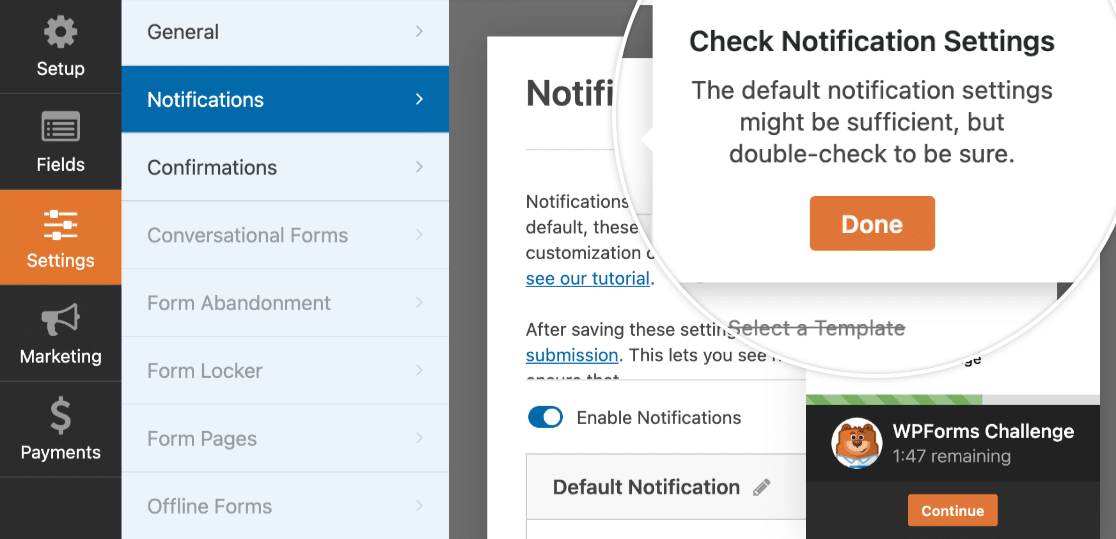
The default settings will send an email to the site administrator and include all form entry details, which works well for most cases. If you’re unsure whether or not you should make changes, you can check out our tutorial on setting up form notification emails.
When you’re done checking out these settings, click the Done button.

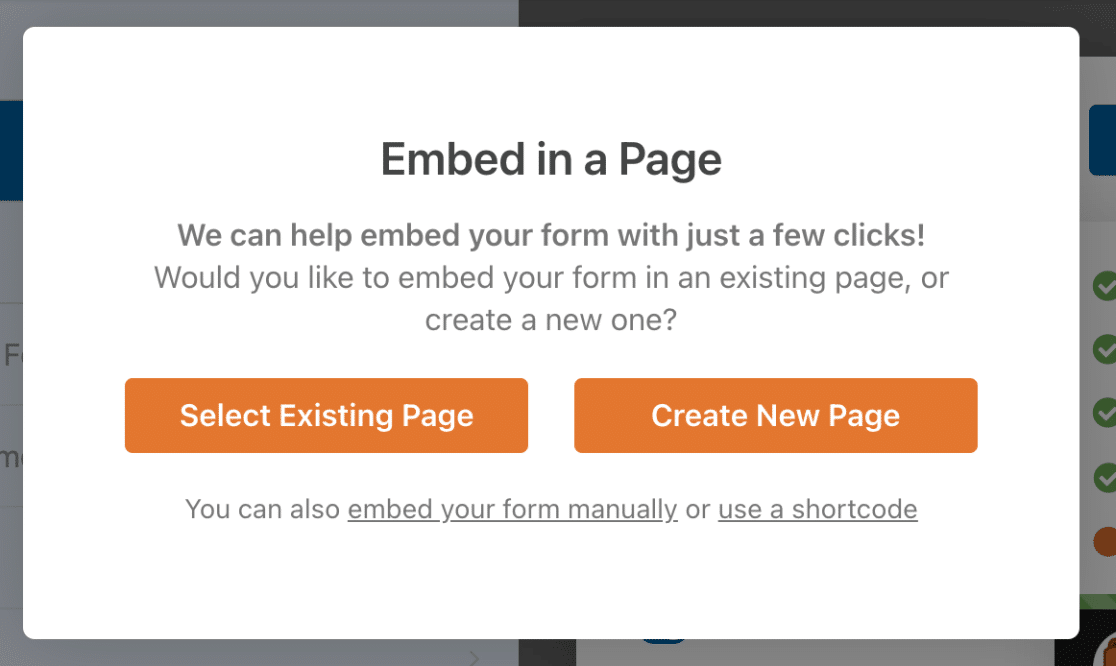
6. Embedding in a Page
Once you’ve clicked the Done button in the notification settings step, you’ll automatically be prompted to embed the form in a page. This is the last step of the WPForms Challenge.
There are two main options for how to embed your form: Create New Page or Select Existing Page.
Additionally, if you’d like to manually embed your form or use a shortcode, you can do that from here as well.
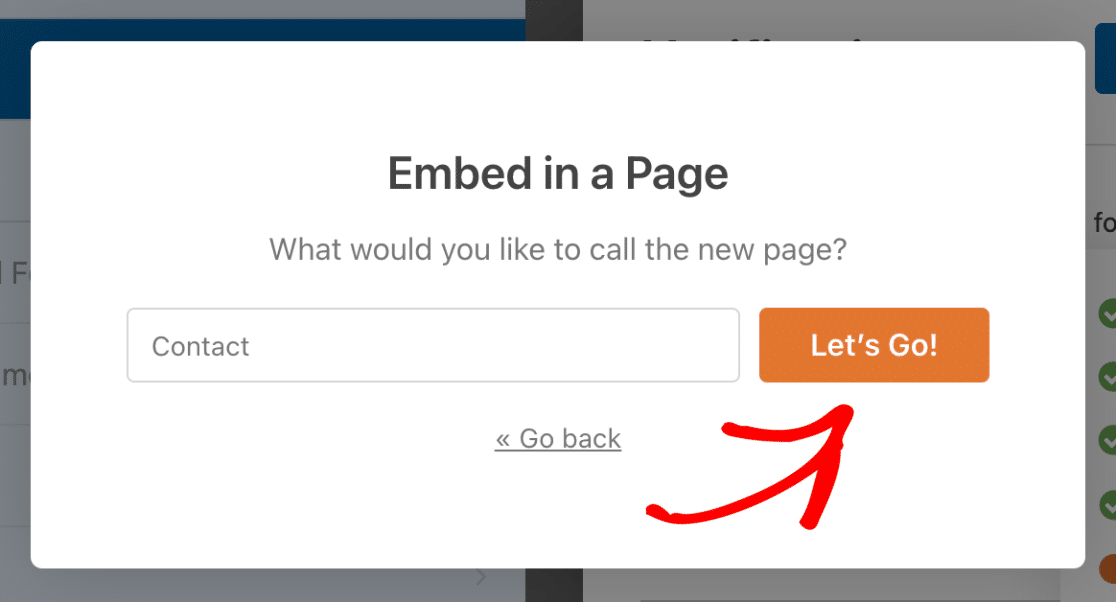
Creating a New Page
The Create New Page option will allow you to create a brand-new page on your site. Once the page is created, your form will automatically be embedded, and the page will be published.
When you select this option, you’ll be prompted to name the page.
Go ahead and add a name, then click the Let’s Go! button to embed your form and publish your page.
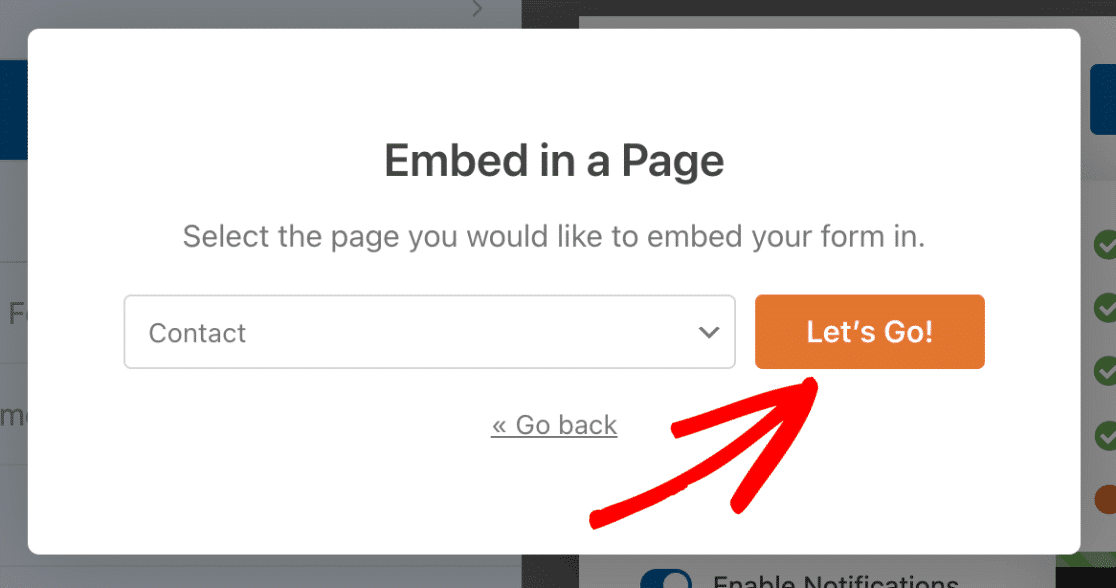
Selecting an Existing Page
The Select Existing Page option will allow you to embed your form directly into a page that you’ve already built.
After selecting this option, a dropdown menu will appear with a list of all pages on your site. Go ahead and choose the page you’d like to add your form to. For this example, we’ll choose our existing Contact page.
When you’re ready, click the Let’s Go! button to open up the WordPress block editor.
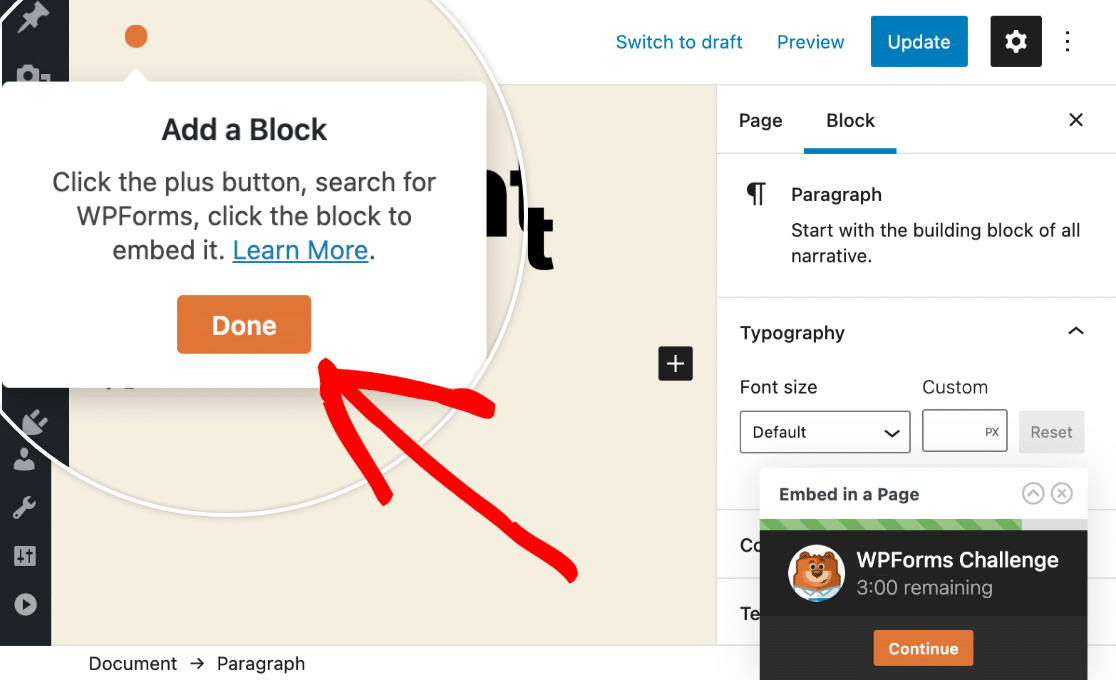
Within the WordPress block editor, you’ll need to click the Add a Block button, which appears as a plus (+) symbol at the top of the editor.

After clicking this button, an overlay box will appear with different blocks. From here, scroll to the Widgets section and select WPForms.

Then, from the dropdown that appears, select the form you’d like to embed on your page.
After you’ve selected your form, it will automatically get added to the page.
Once the form is in place, go ahead and click the Done button.
You’ve now completed the WPForms challenge!

7. Enabling Form Entry Backups (Optional)
If you’ve completed the challenge using WPForms Lite, you’ll see an option to enable secure backups using Lite Connect for WPForms. Toggle Enable Form Entry Backups for Free into the on position to get started.
 Next, you will see a dialog describing this feature in more detail. Click Enable Entry Backups to complete the process.
 WPForms will now securely back up your form entries in the cloud. You can restore your entries once you have upgraded to a Pro license. For more information, check out our guide on upgrading your WPForms License.
We hope that you enjoyed the challenge and were able to create your first form in under 5 minutes!
Next, we recommend testing out your form to make sure it looks and works exactly how you’d like. To help guide you through this process, please be sure to check out our form testing checklist.