AI Summary
Would you like to accept payments from your customers through your WordPress forms? WPForms integrates seamlessly with Stripe, allowing users to receive live payments from their forms.
In this guide, you’ll learn how to connect and use Stripe with WPForms Lite to accept online payments.
Requirements:
- Stripe requires your site to have SSL (HTTPS) enabled on the page you intend to add a live payment form, as this allows you to securely send credit card data to Stripe. For setup details, please see WPBeginner’s guide to adding SSL and HTTPS in WordPress
- You’ll need WPForms version 1.8.2 or higher to access Stripe payments for Lite users
Installing WPForms Lite
Before getting started, you’ll need to install and activate the WPForms Lite plugin on your WordPress site. You can install WPForms Lite from the WordPress plugins directory.
If you are unfamiliar with installing WordPress plugins, check out WPBeginner’s guide to learn how.
Connecting Your Stripe Account
Note: There’s a 3% fee for every transaction along with Stripe charges if you’re using Stripe with WPForms Lite. To remove the additional 3% charge, you’ll need to upgrade to WPForms Pro license or higher.
After activating WPForms Lite, you’ll need to connect it with your Stripe account to begin accepting payments. Fortunately, this process is pretty straightforward and doesn’t require any complex configuration.
To connect your account, go to WPForms » Settings and select the Payments tab.
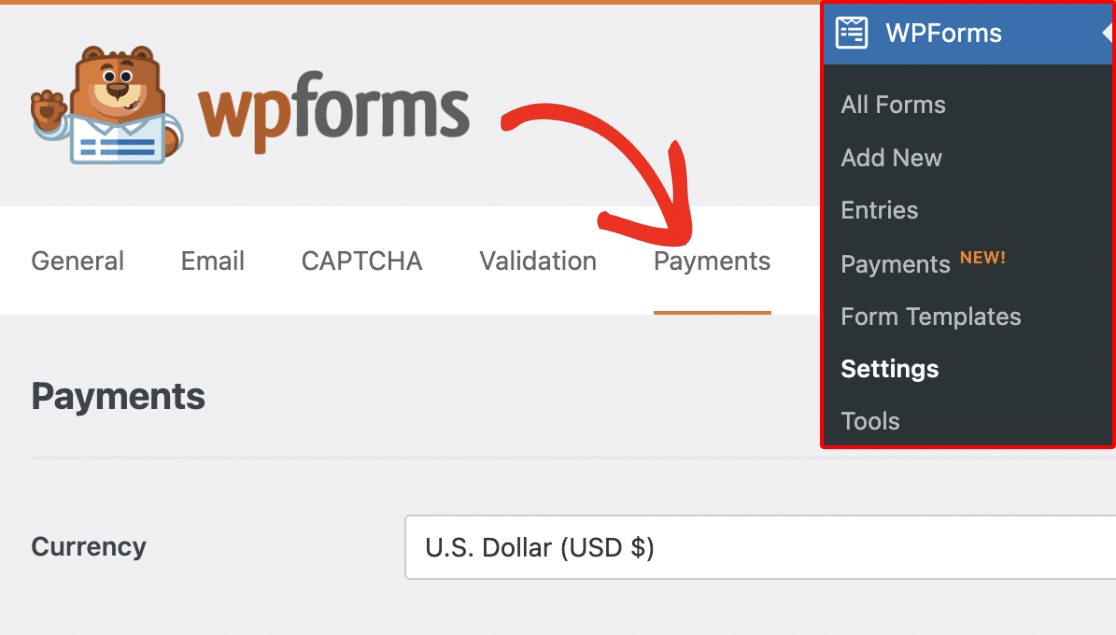
If you’d like, you can adjust the default currency to match the one your site uses.

Next, scroll to the Stripe section and click Connect with Stripe to link your account.
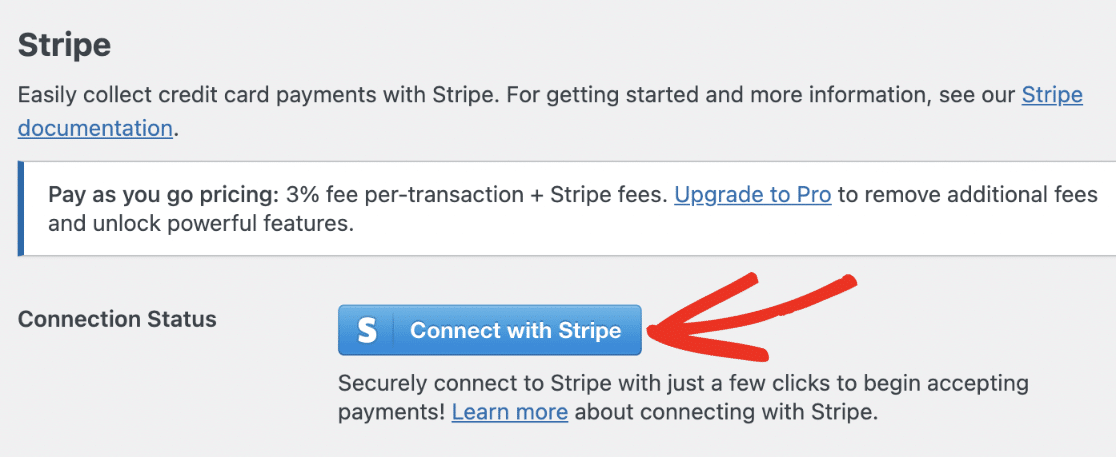
Note: If you’re currently using Test Mode, please be sure to repeat this connection process with Test Mode unchecked when you’re ready to launch your forms.
You’ll be redirected to the Stripe Connect wizard. Here, you’ll need to authorize your Stripe account. The exact content you’ll see here will vary depending on whether your account has been connected.
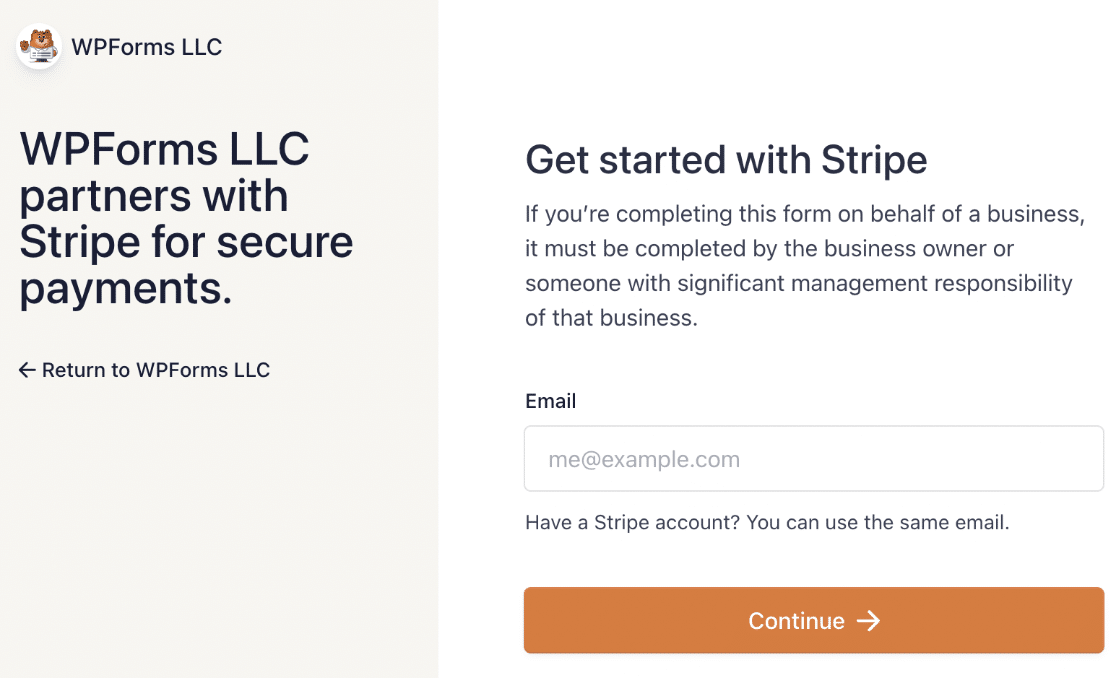
To proceed, you’ll need to enter your email address and log in to your Stripe account. Then fill out the form to connect your account.
Once you’ve followed the steps in the Stripe Connect wizard, you’ll be redirected back to your site’s admin area. You should see a green checkmark next to Connection Status.

Setting Up Stripe Webhooks
Stripe uses webhooks to synchronize events that occur in your Stripe account from an external source.
Configuring Stripe webhooks in WPForms lets you view real-time updates from your payment forms in the WordPress admin area.
You can manage your subscriptions and process refunds from the Payments Overview page in WPForms.
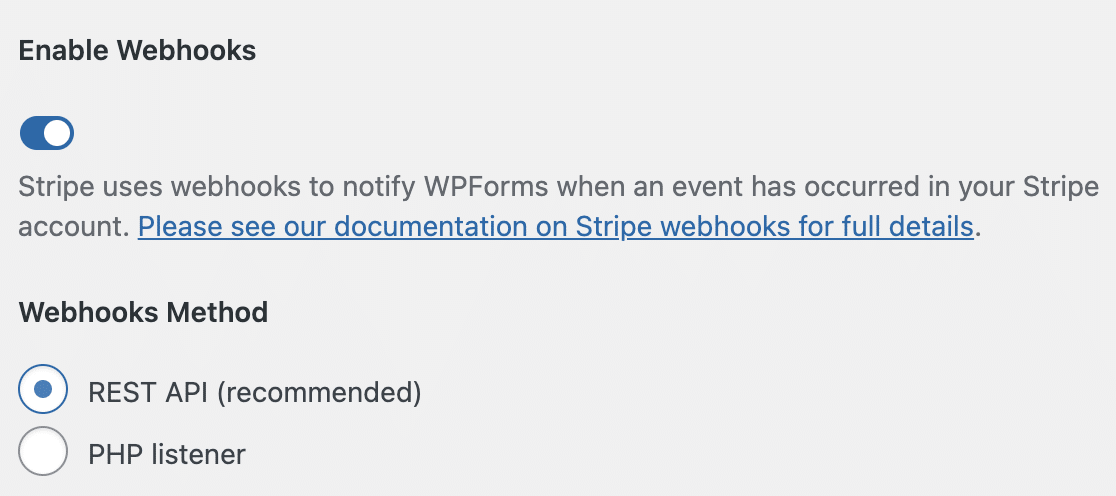
Webhooks are automatically configured for WPForms version 1.8.4 or higher when you connect your Stripe account. However, in some cases, the autoconfiguration may not work for your account.
If that is the case, you can manually set it up for your account. For more details, see our guide on setting up Stripe webhooks.
Enabling Stripe Payments in the Form Builder
To begin, you’ll need to create a new form or edit an existing one to access the form builder.
In the form builder, you can customize the form how you like. Just be sure to include the following fields:
- Email field
- Payment items field (Single Item, Multiple Items, Checkbox Items, or Dropdown Items)
- Stripe Credit Card field
For our example, we’ll create a billing form that includes the Name, Email, Multiple Items, and Stripe Credit Card fields.
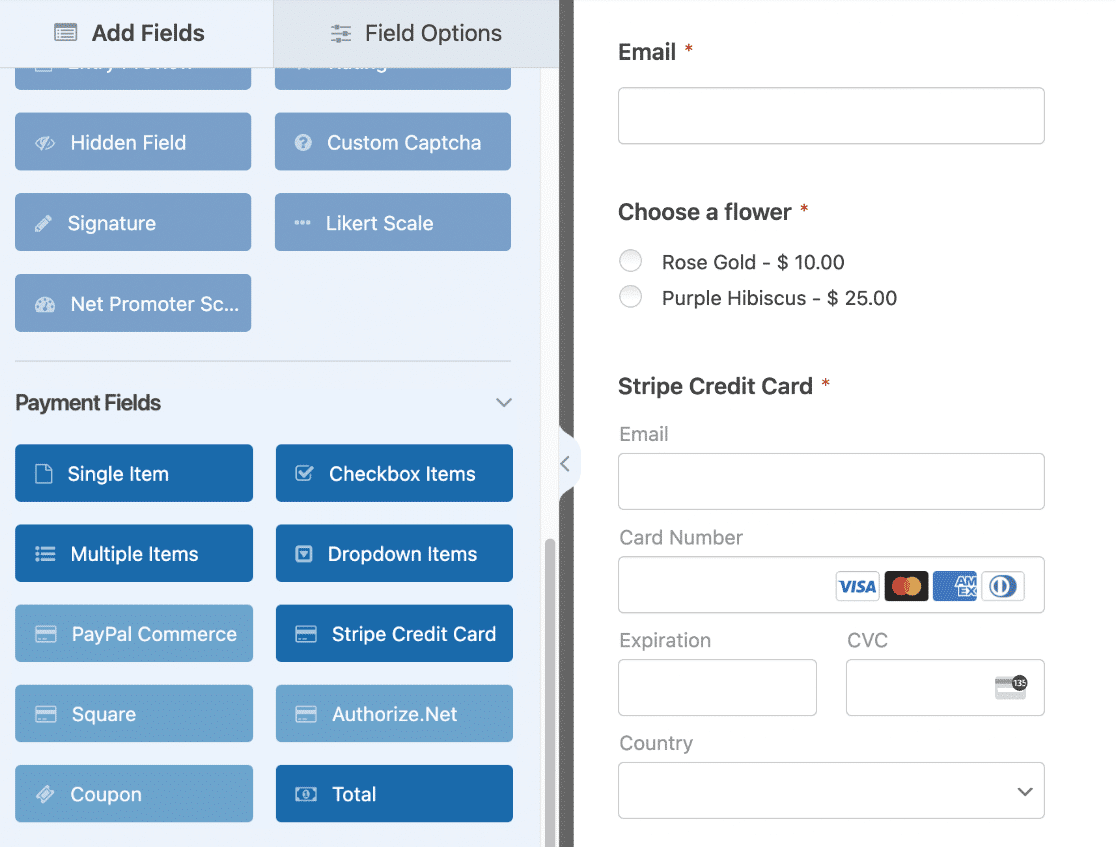
Note: The Stripe Credit Card field uses Stripe’s Payment Element option to simplify checkout. This option also supports Apple Pay and Google Pay. However, it’s only available if you meet Stripe’s requirements. See Stripe’s documentation to learn about the requirements.
After adding the fields you want to use on your form, go to Payments » Stripe to access the Stripe settings page. Then toggle the Enable one-time payments option to the on position.
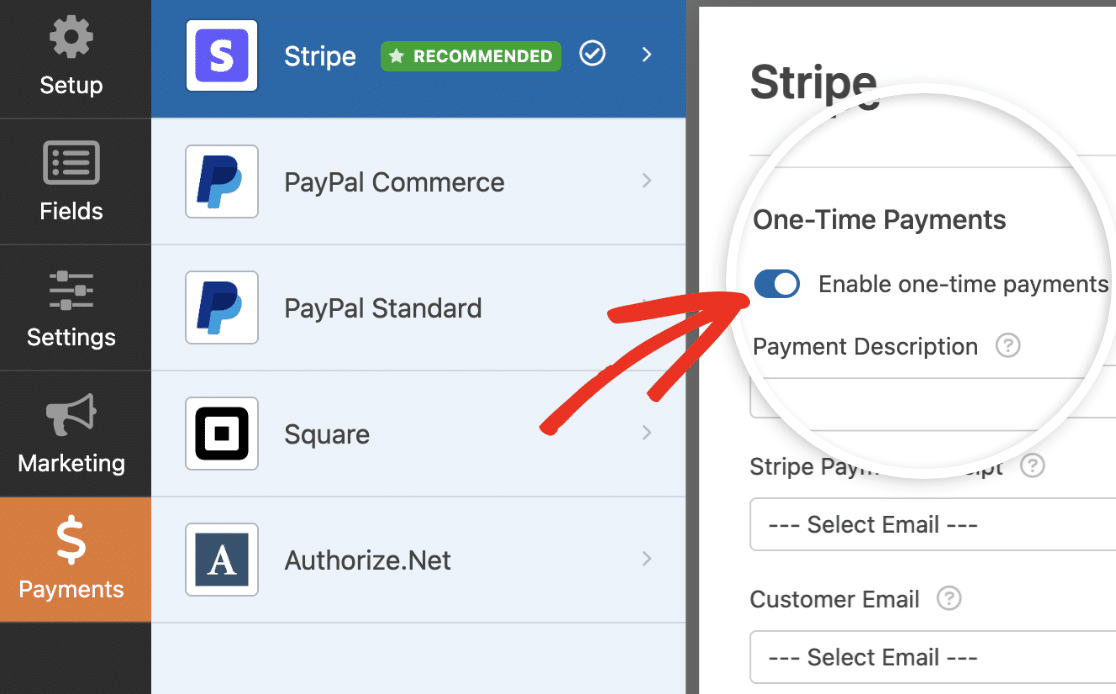
Note: For Stripe to function correctly, be sure to enable AJAX form submissions before continuing.
Once you’ve enabled Stripe payments for this form, additional options will appear. These fields are optional, but we recommend filling them out as they help you to easily manage your transactions.
First, enter a short text under Payment Description describing what this payment is about. This text will appear on users’ card statements to help identify your payments.

Next, choose the Email field from your form under Stripe Payment Receipt. This is the email address Stripe will send the payment receipt to.

Finally, select the Email field from your form that contains the customer’s email address under the Customer Email dropdown.

Sending Custom Metadata to Stripe
The Custom Meta section lets you pass additional data from your form to Stripe as metadata.
Each row includes:
- Object Type: Choose whether to send the data to the Payment or Customer object in Stripe
- Meta Key: Enter a custom label which will appear as the metadata key in Stripe
- Meta Value: Select a supported form field whose value should be sent
You can include multiple custom metadata rows. All values will appear in the Metadata section of your Stripe dashboard.

If your form is for accepting one-time payments, you can save your changes and proceed to test your payment form. However, if you need to accept recurring payments, you’ll need to complete additional settings.
Enabling Recurring Payments
If you run a subscription-based service, you can charge users regularly by enabling subscription payments.
Under the Recurring Payments option, toggle the Enable recurring subscription payments option to the on position.

After enabling it, you’ll need to complete the additional fields that appear.
First, enter a title for the subscription under the Plan Name field. This name will appear on the transactions page for this form in your Stripe account.
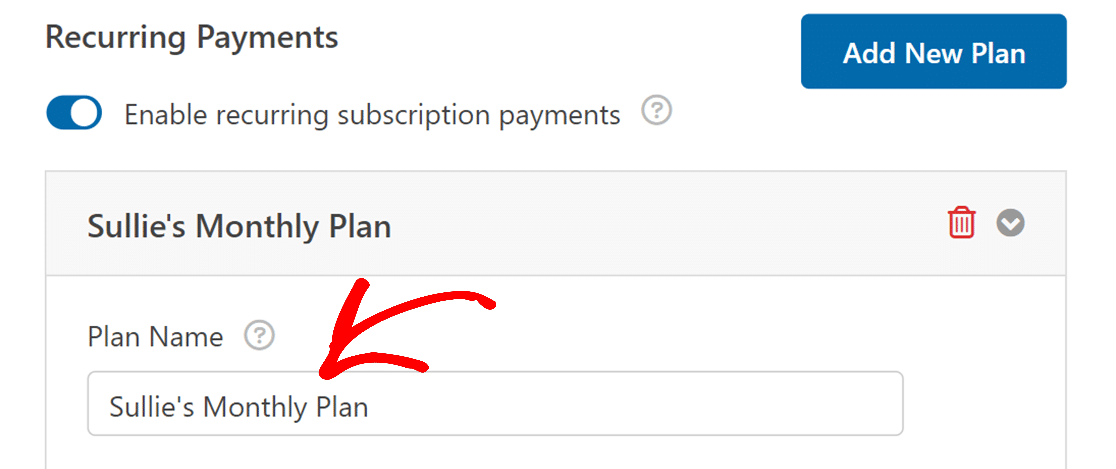
After that, choose how often you’d like the recurring payment to occur from the Recurring Period dropdown. Available options include Daily, Weekly, Monthly, Quarterly, Semi-Yearly, or Yearly.

Finally, you’ll need to select the Email field from your form to match the Customer Email field. Stripe requires this field to enable recurring payments for the user with the specified email address.

Note: WPForms Lite doesn’t support conditional logic with Stripe payments. You’ll need to upgrade to the Pro license or higher and install the Stripe Pro addon to enable conditional logic for your payment form.
If you’d like to create an additional subscription plan, click the Add New Plan button.
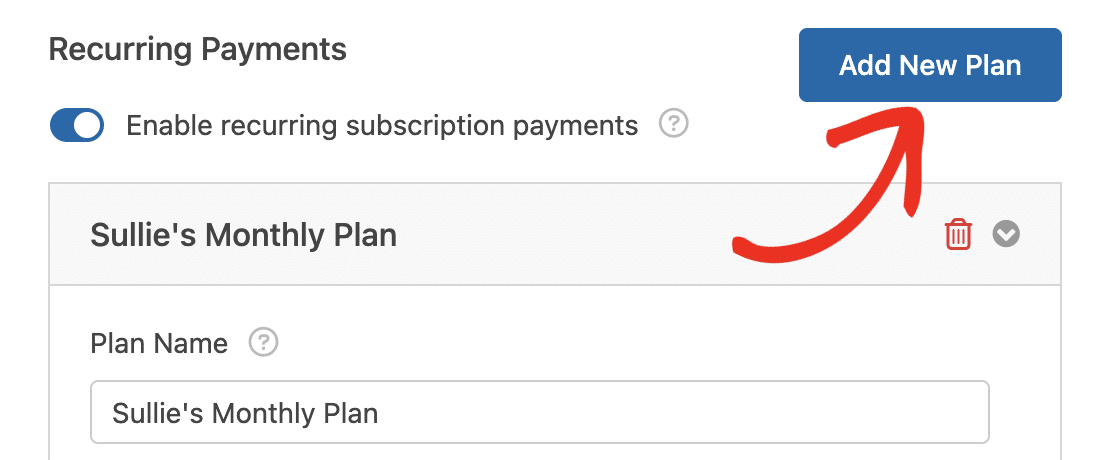
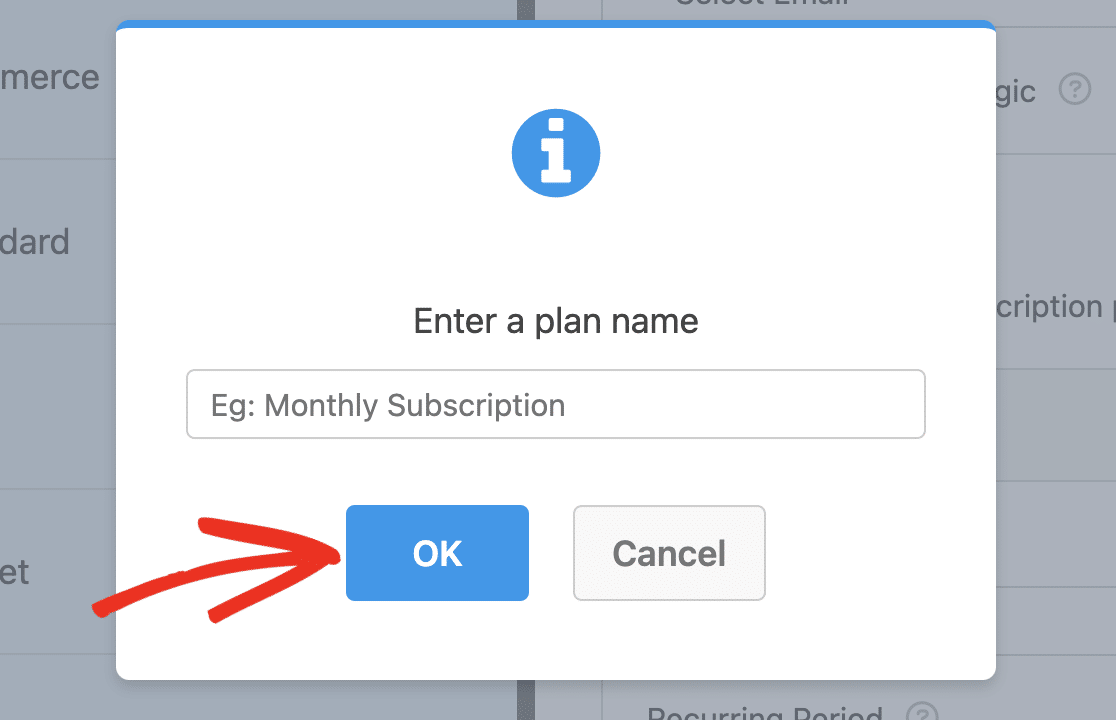
In the overlay that appears, enter a name for your plan and click OK to continue.
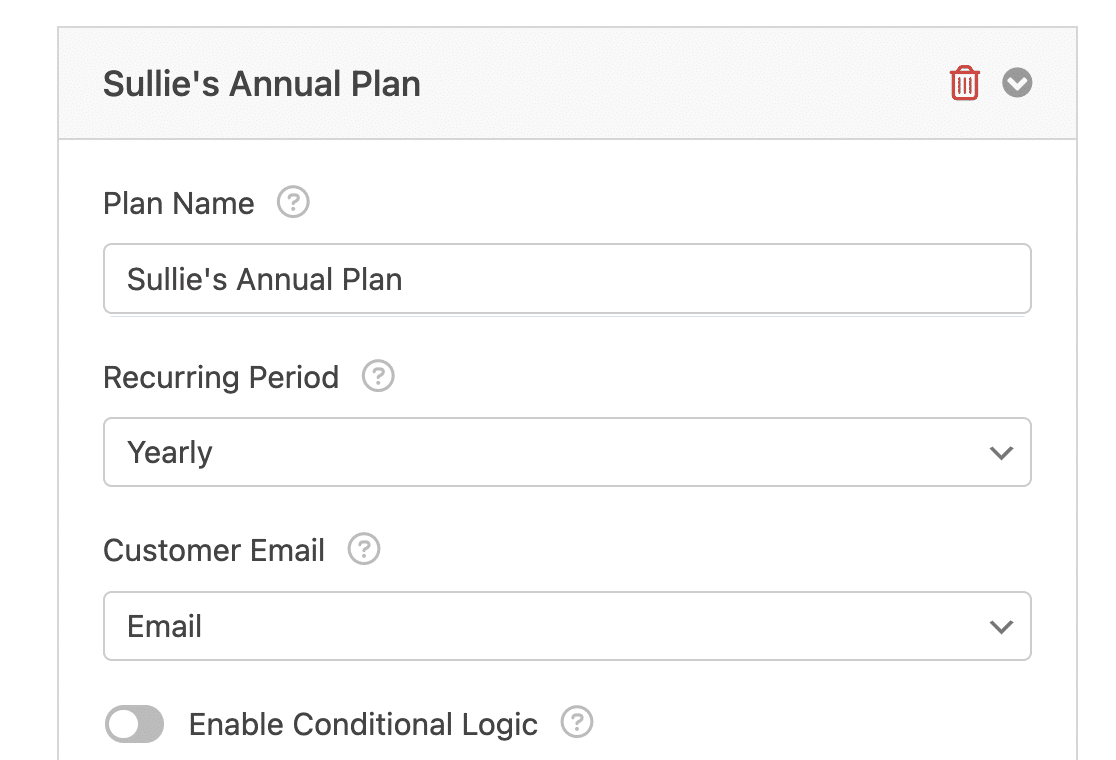
After that, scroll to the new plan you created and configure the options similar to how you did the first plan.
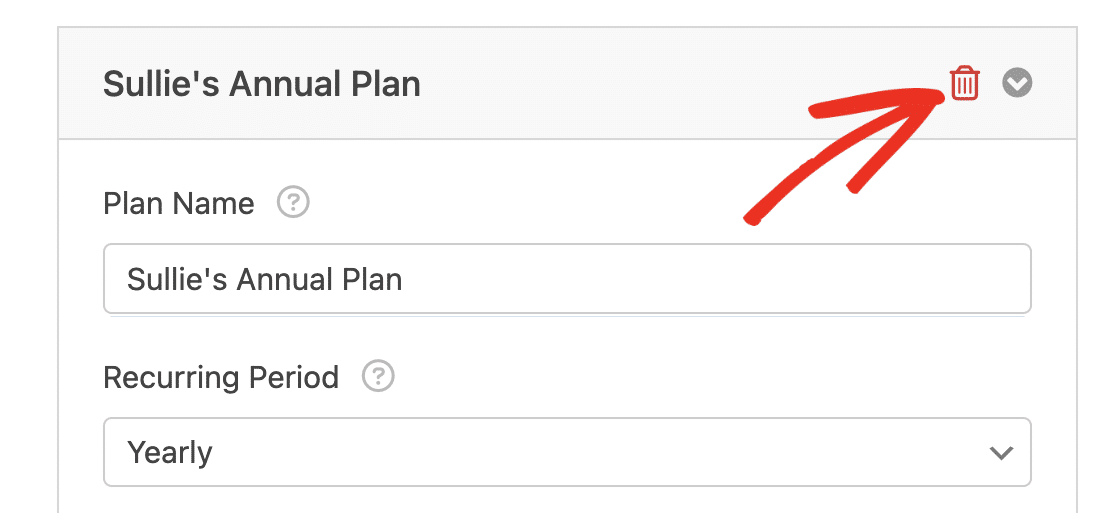
If you’d like to delete an additional plan you created, click the trash icon next to the plan’s name.
Once you’re done configuring your payment settings, be sure to save your form to update your settings.
Testing Stripe Payments
After setting up Stripe on your WordPress form, you’ll need to send a test payment before launching your form to ensure everything works as expected.
We recommend reviewing our guide to testing Stripe payments for a complete walkthrough.
Viewing Payment Entries
Once you’ve launched your form and received payments through your form, you’ll be able to track your payments from your site’s admin area.
To do so, go to WPForms » Payments to access the Payments overview page. Here, you’ll see details about all the payments you’ve received through your form.
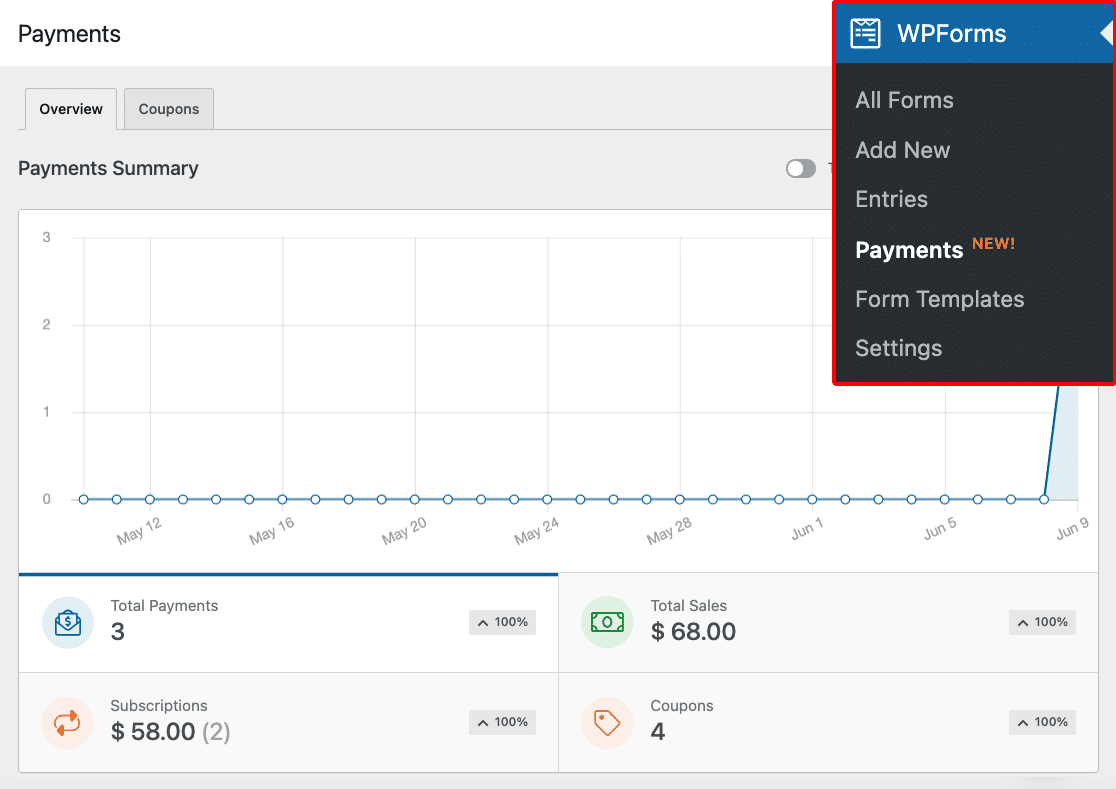
You can filter the entries by Customer Email or the last 4 digits of the payment card. For more information, please see our guide on viewing and managing form payments.
Frequently Asked Questions
Below are some of the most common questions asked about using Stripe with WPForms Lite.
What is Stripe Link and how can I remove it from the payment process in WPForms?
Stripe Link is a feature from Stripe that automatically saves and fills in payment and shipping information for your customers, simplifying the checkout process. However, if you wish to disable this feature and require customers to manually enter their details for each transaction, you can do so through your Stripe dashboard settings.
For detailed guidance on how to turn off Stripe Link for your specific setup, please refer to the Stripe documentation on disabling Link.
That’s it! You now know how to integrate Stripe with WPForms Lite to begin accepting online payments from users.
Next, would you like to use icons to make your payment items field visually appealing? Be sure to check out our tutorial to learn how to use icon choices in WPForms.

