AI Summary
Would you like to integrate Stripe webhooks with your website’s forms? With the integration of Stripe webhooks into WPForms, your WordPress site will instantly know about any refunds or subscription changes made in Stripe.
This guide will show you how to easily connect Stripe webhooks with WPForms, ensuring your website stays in sync with your Stripe activities.
Before you get started, be sure to install WPForms on your WordPress site. After that, connect your site to your Stripe account.
Understanding Webhooks
Webhooks act as automated messages sent between applications when certain events take place. By integrating Stripe’s webhooks with WPForms, your WordPress site becomes seamlessly synchronized with Stripe, allowing payment statuses to update in real time.
Once webhooks are integrated, your WordPress site not only stays informed of Stripe activities but also lets you manage refunds and subscription renewals directly, without needing to visit the Stripe dashboard.
Enabling Webhooks in WPForms
After you’ve connected your site to Stripe, the webhooks should configure automatically. If they don’t, you’ll need to create an endpoint in the Stripe dashboard and transfer the configuration keys to your WPForms settings manually.
To do so, go to WPForms » Settings in the left menu of your WordPress site. From there, click on the Payments tab.

Next, scroll down to the Stripe section. Here, toggle on the Enable Webhooks option.

Next, click the Save Settings button at the bottom of the page.
After saving your settings, the page will refresh. You should now see additional fields for further webhooks configuration.

To generate the information you need for these fields, you’ll need to use your Stripe account to create a new endpoint. This process doesn’t require any coding, and we’ll show you exactly what to do in the next step.
You’ll be coming back to WPForms’ settings page later, so for the next step, open a new tab or window in your browser.
Creating a Webhook Endpoint in Stripe
In the new tab or window you’ve opened, log in to your Stripe account and open your Stripe dashboard.
When you log in to your Stripe account, you’ll find a Test mode toggle button in the top-right corner of the page. Ensure this toggle aligns with your site’s mode: if your site is in Test Mode, set the toggle to ON, and if your site is in Live Mode, make sure it’s switched OFF.

Next, click on the Developers option located at the top-right corner and select Workbench.
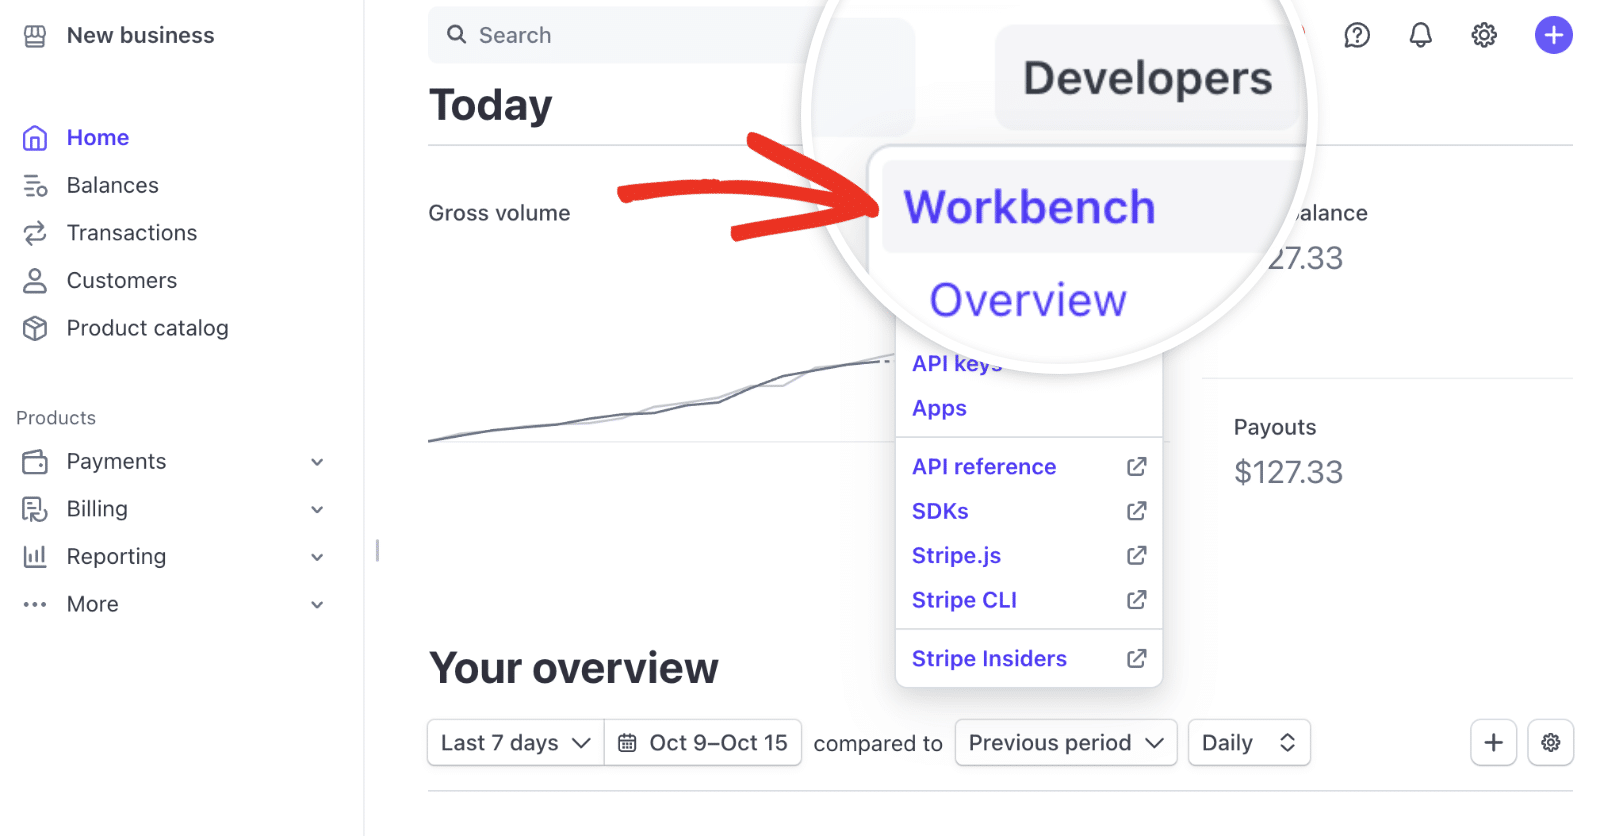
Once the Workbench screen has opened, click on the Webhooks tab.
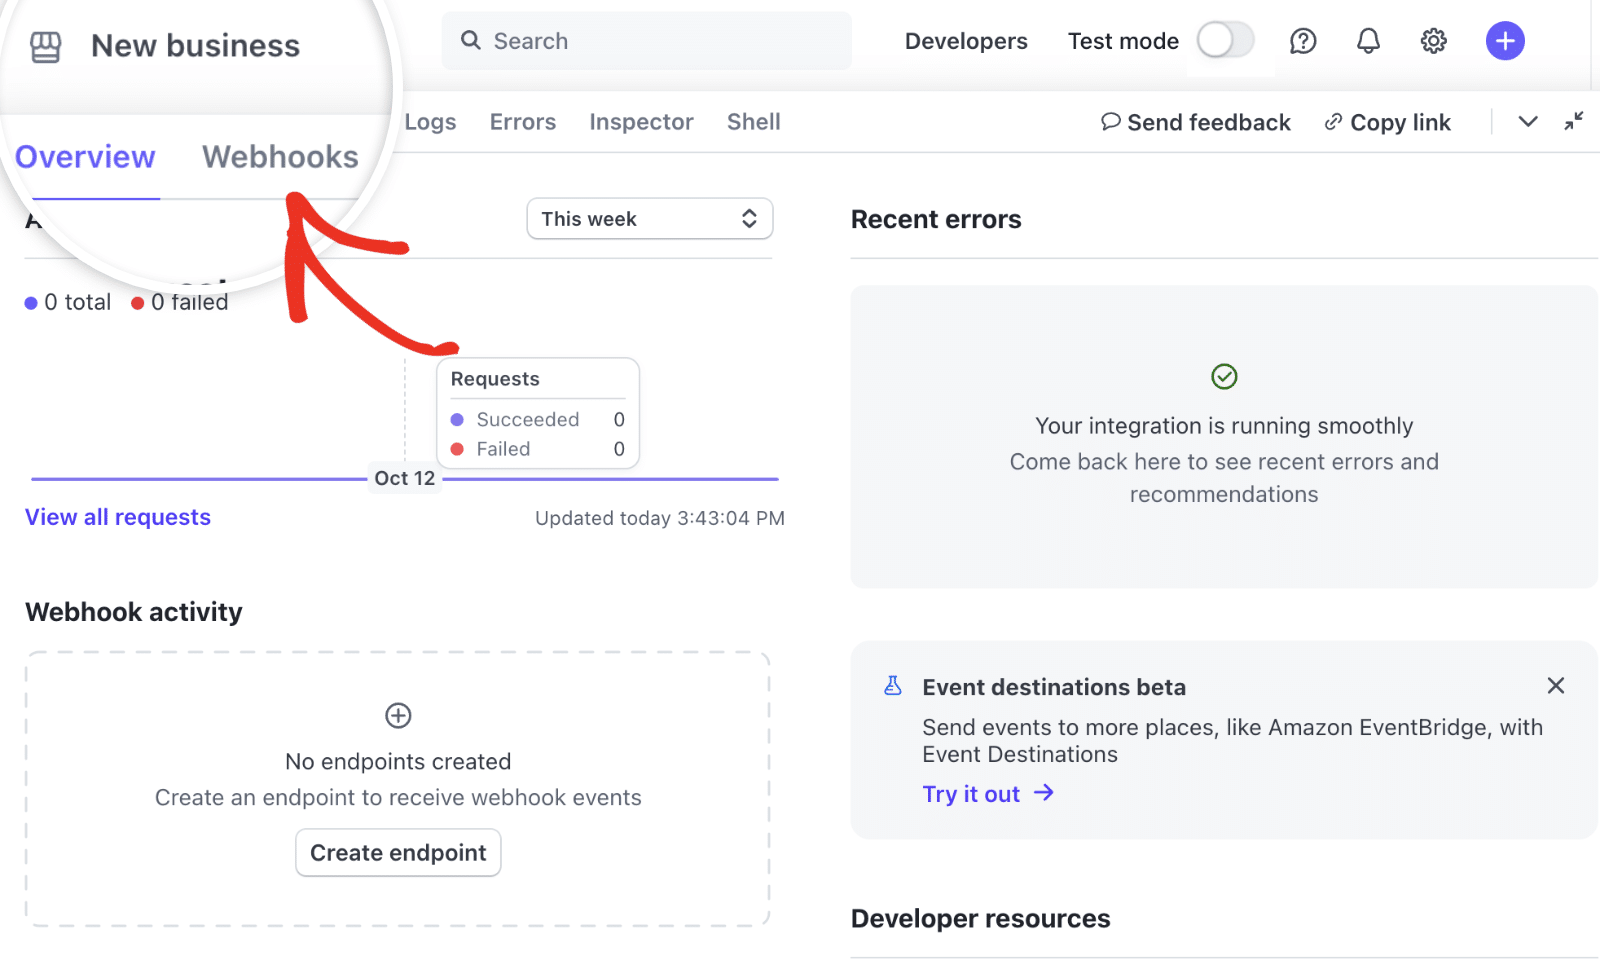
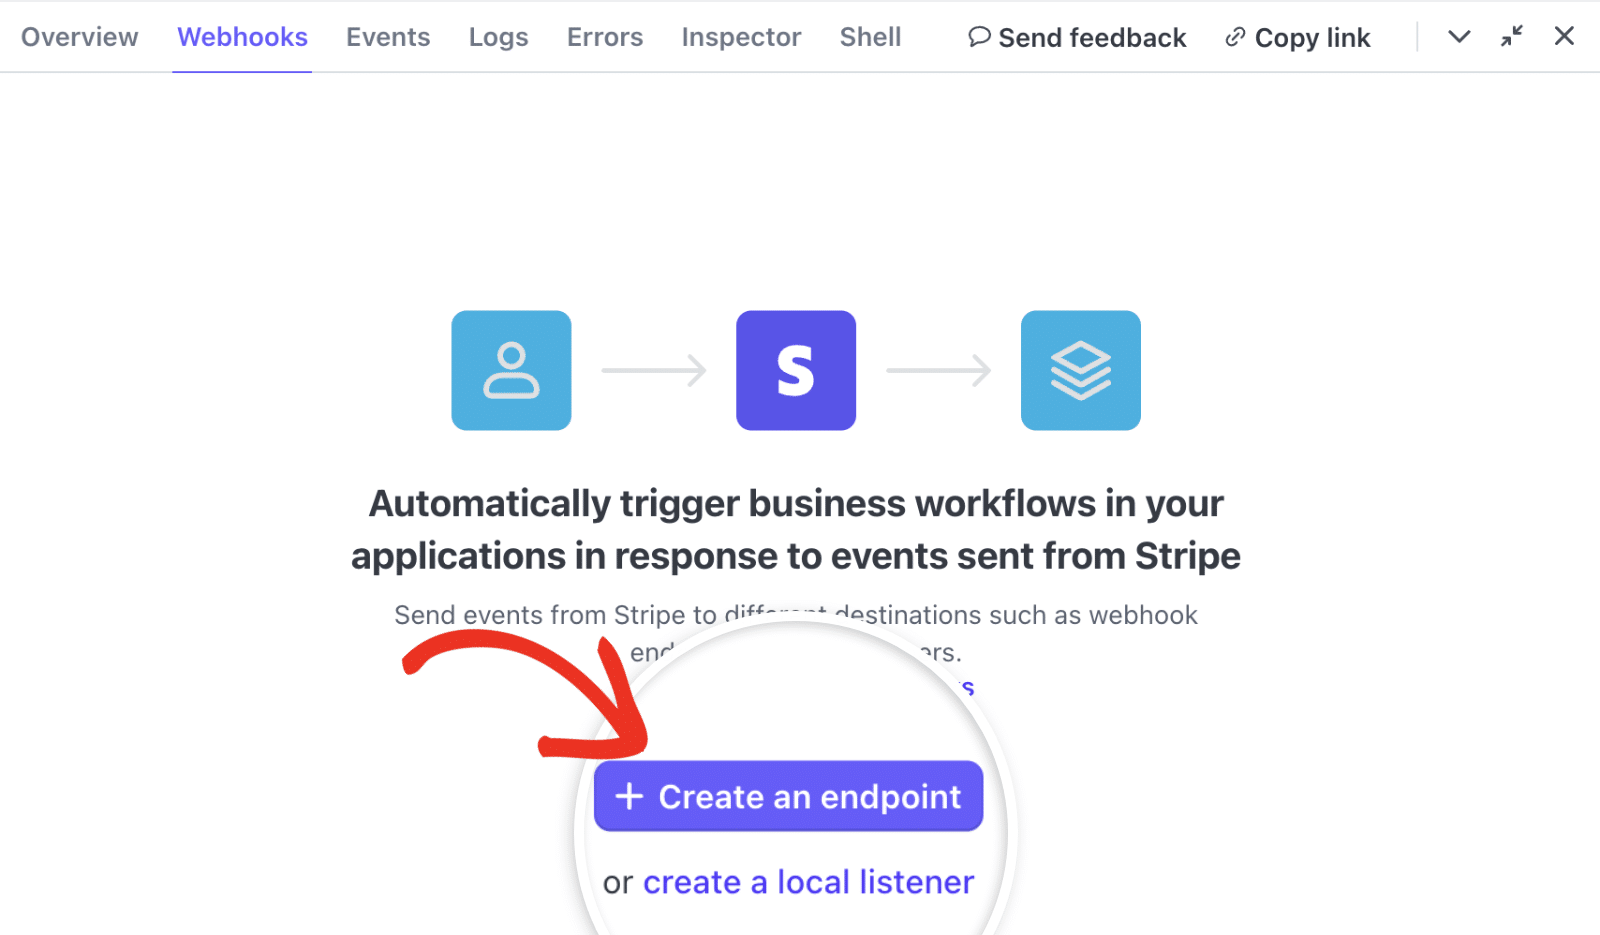
In the Webhooks tab, click on the + Create an endpoint button to create a new webhook endpoint.
This opens the Select Events page where you’ll need to enter details to configure your webhook. Make sure the Events from option is set to Your account.
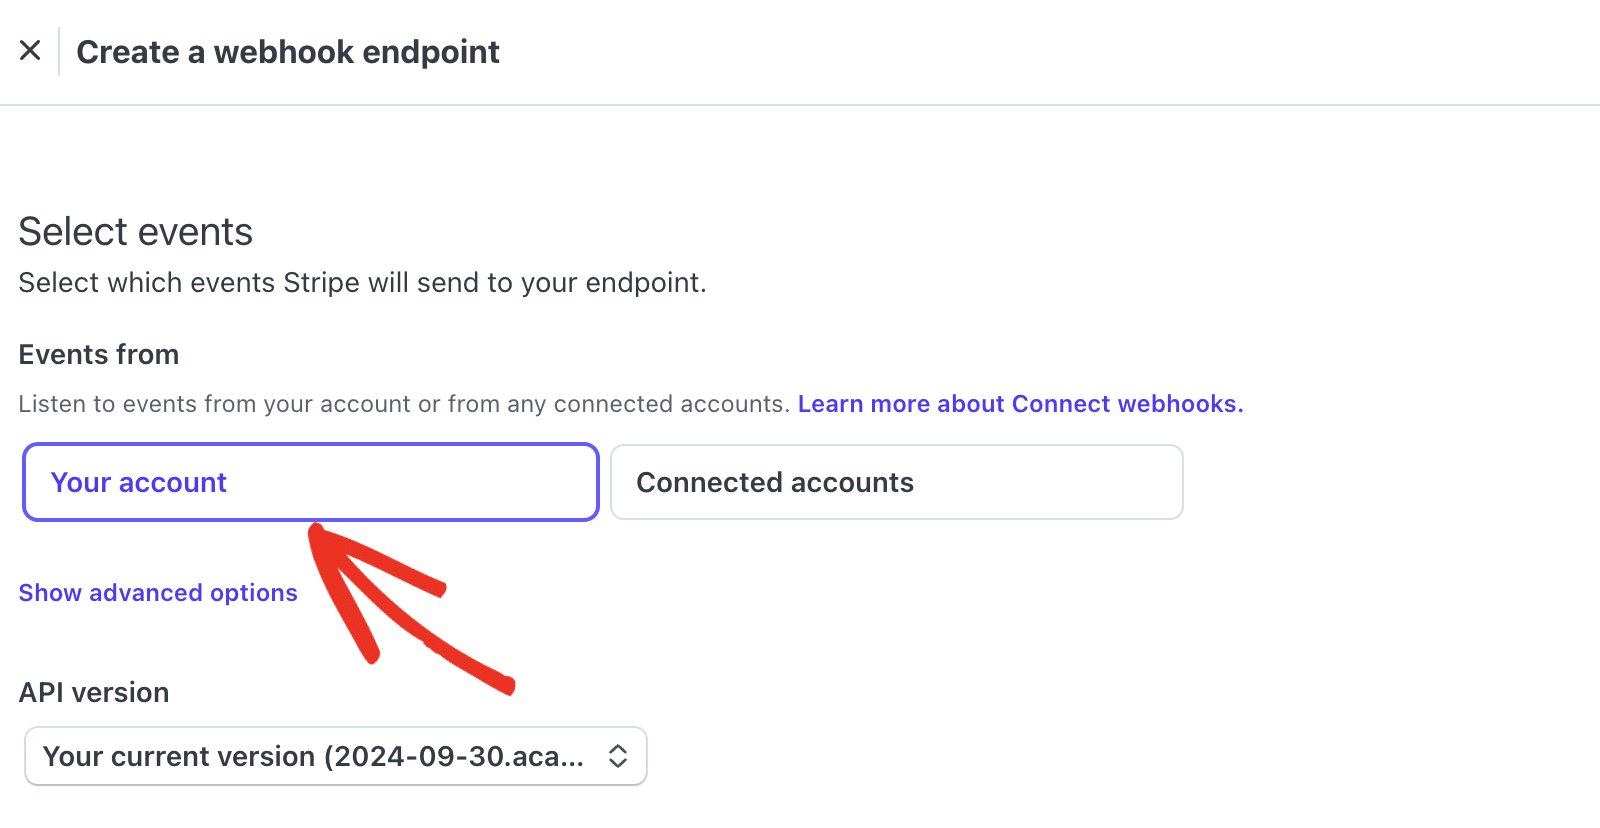
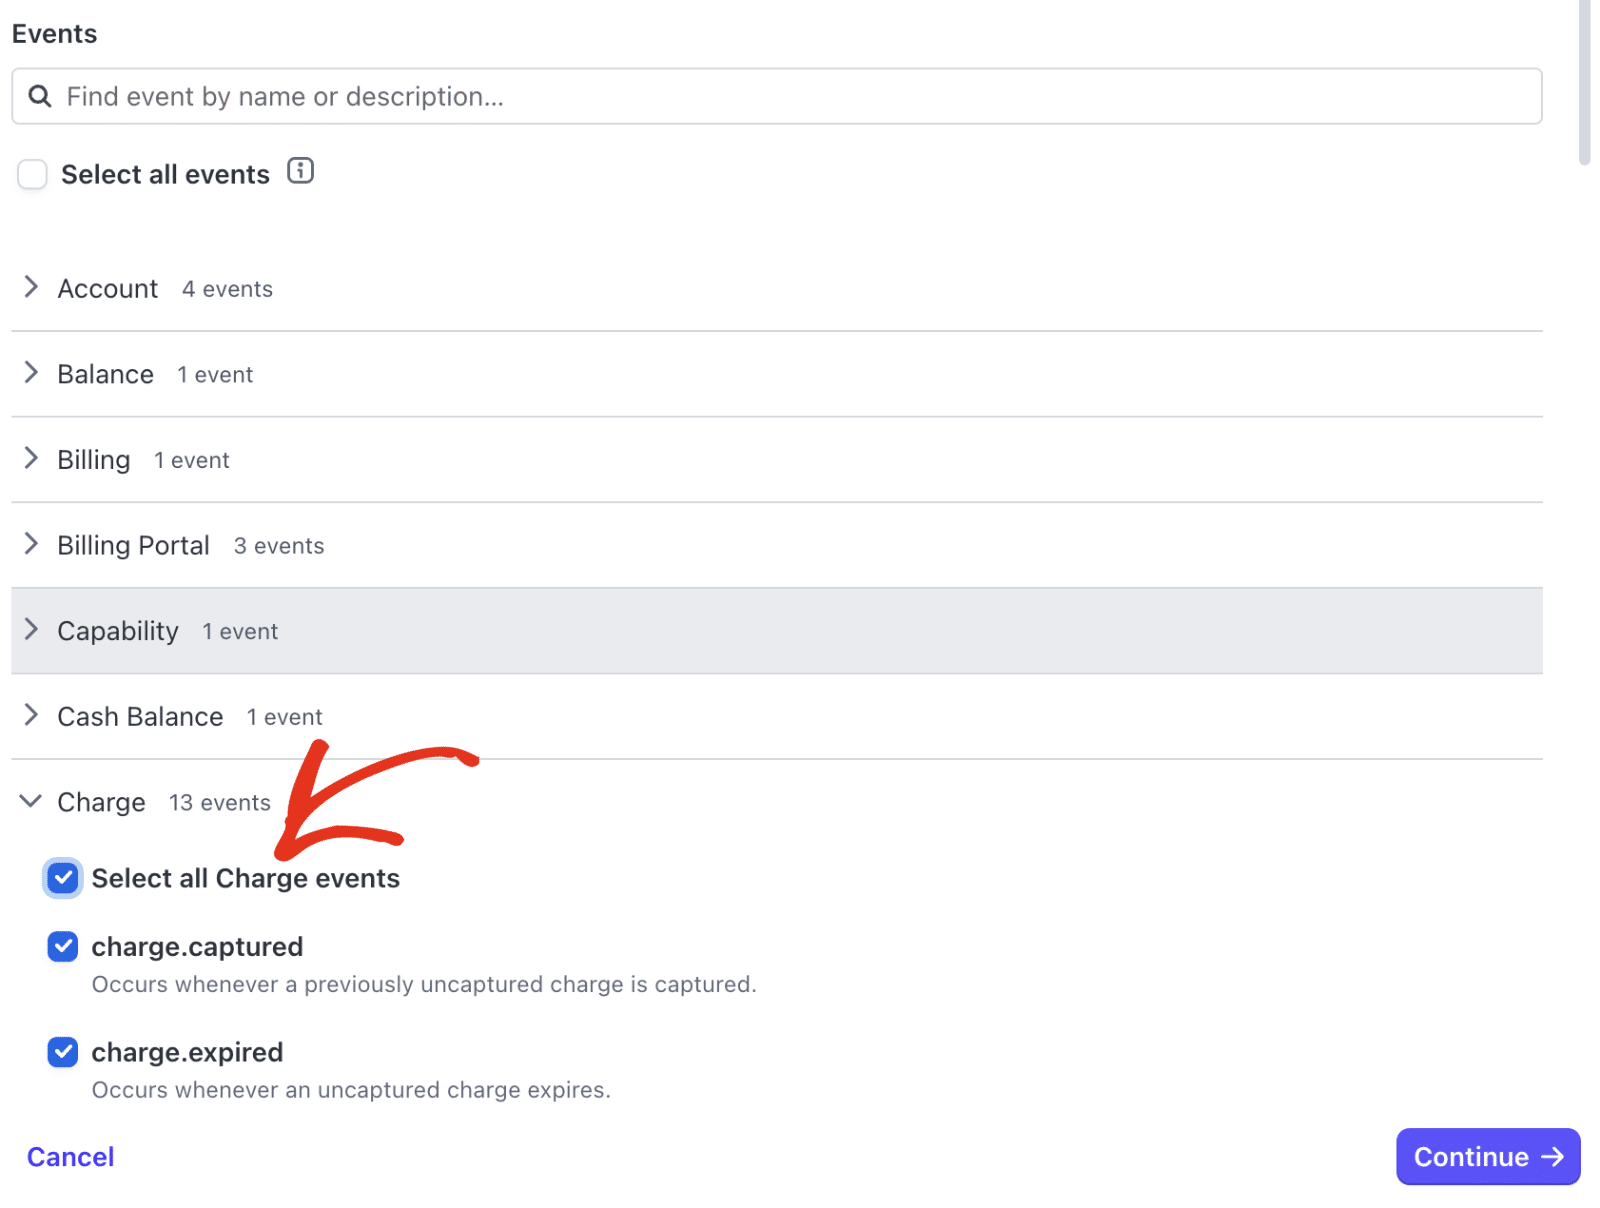
After that, scroll down to the Events section. Here, click the Charge dropdown and tick the Select all Charge events option.
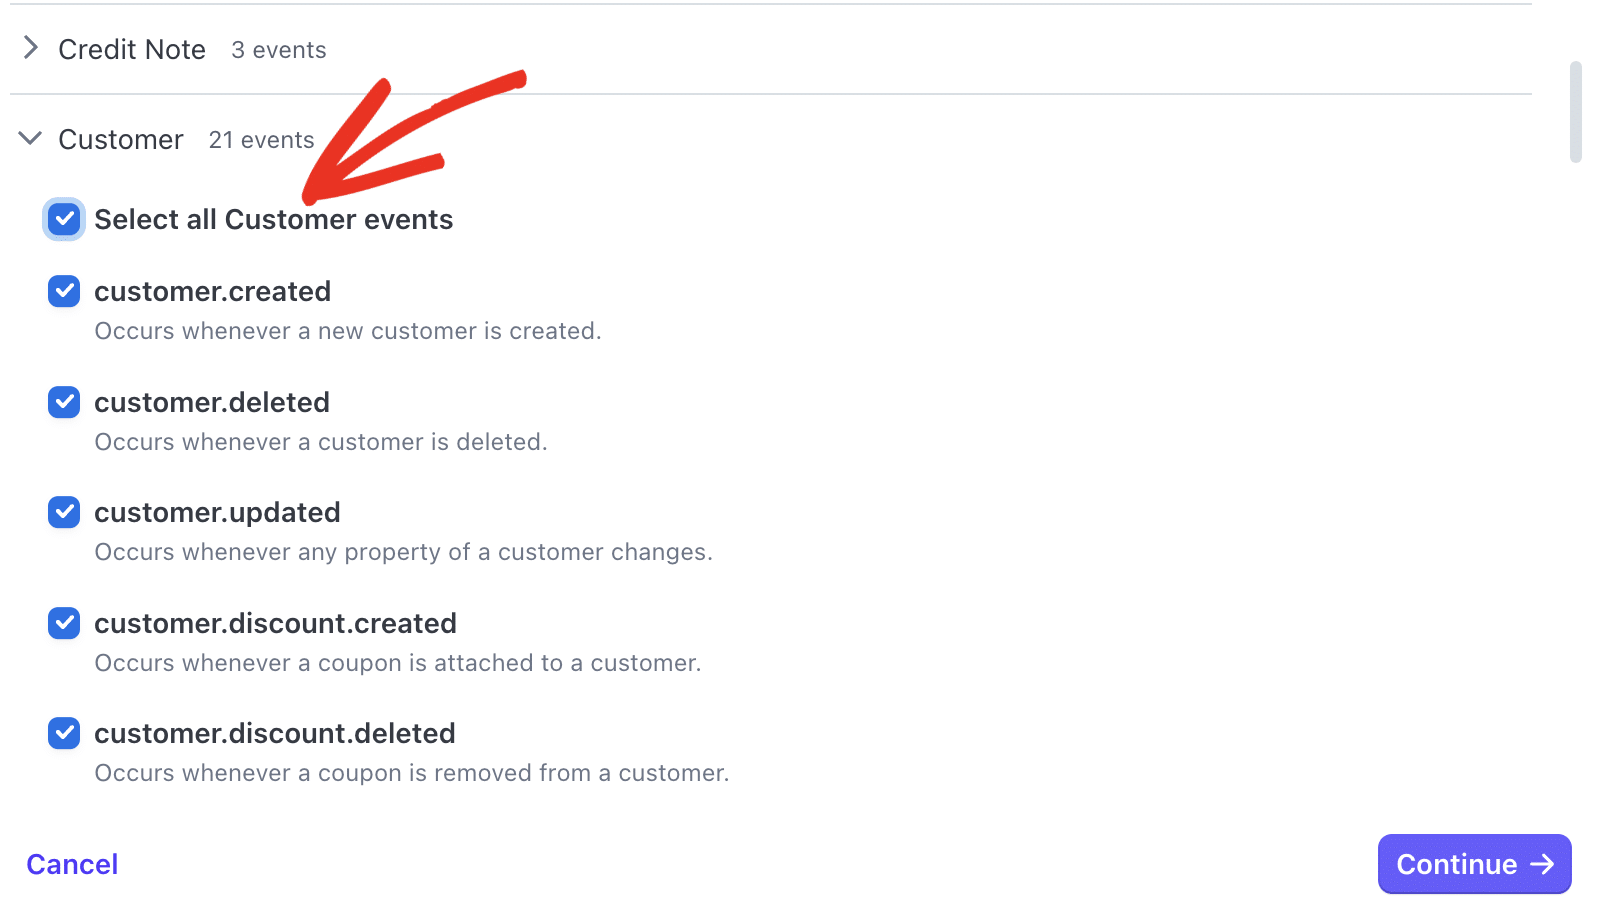
Next, select the Customer dropdown and tick the Select all Customer events option.
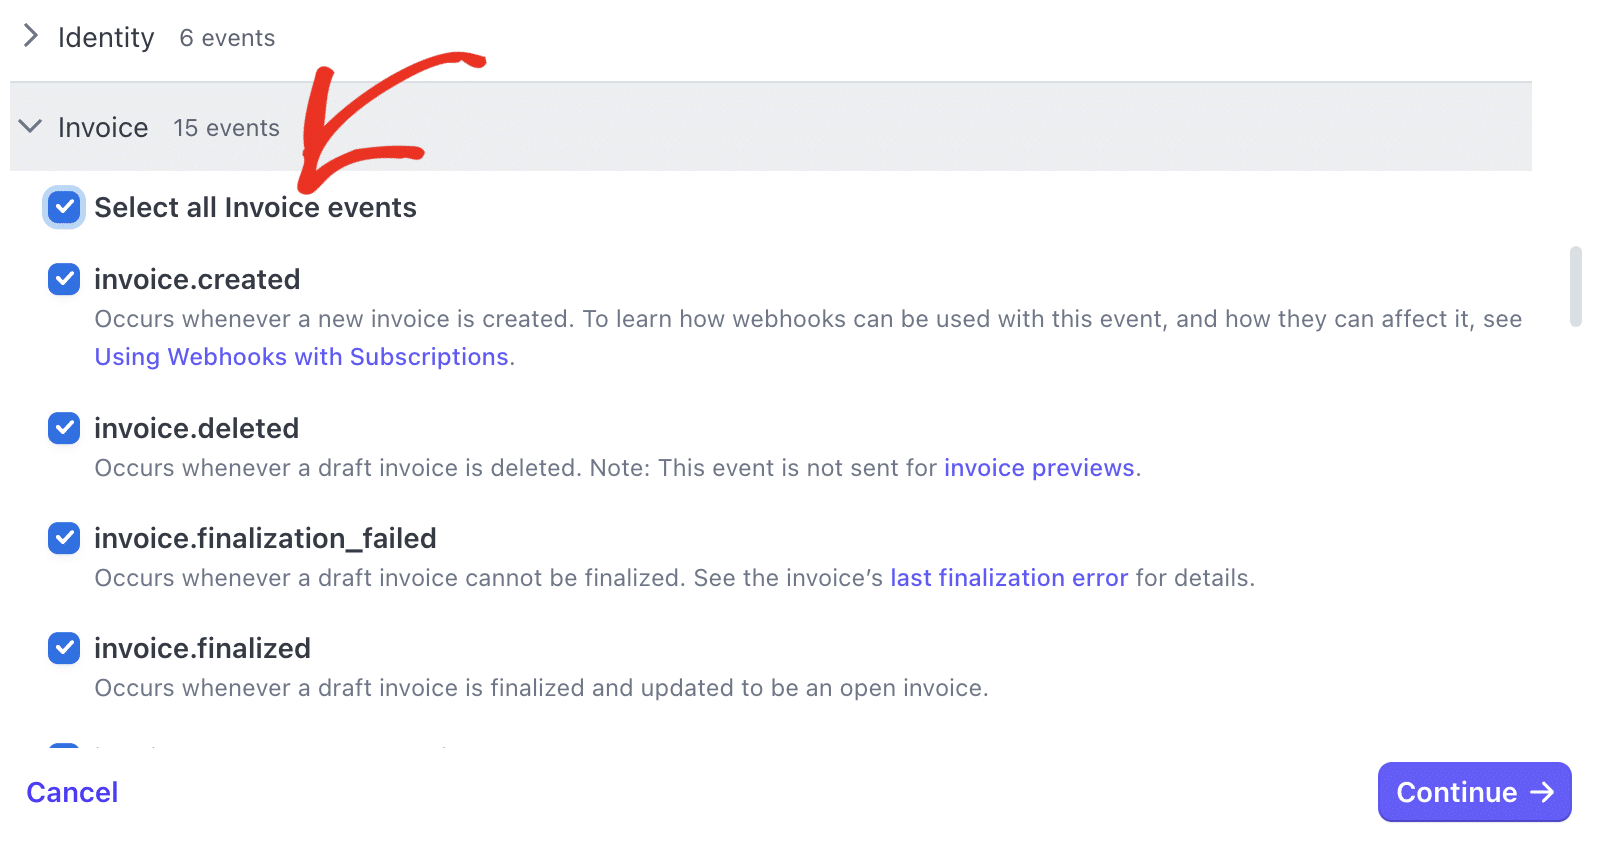
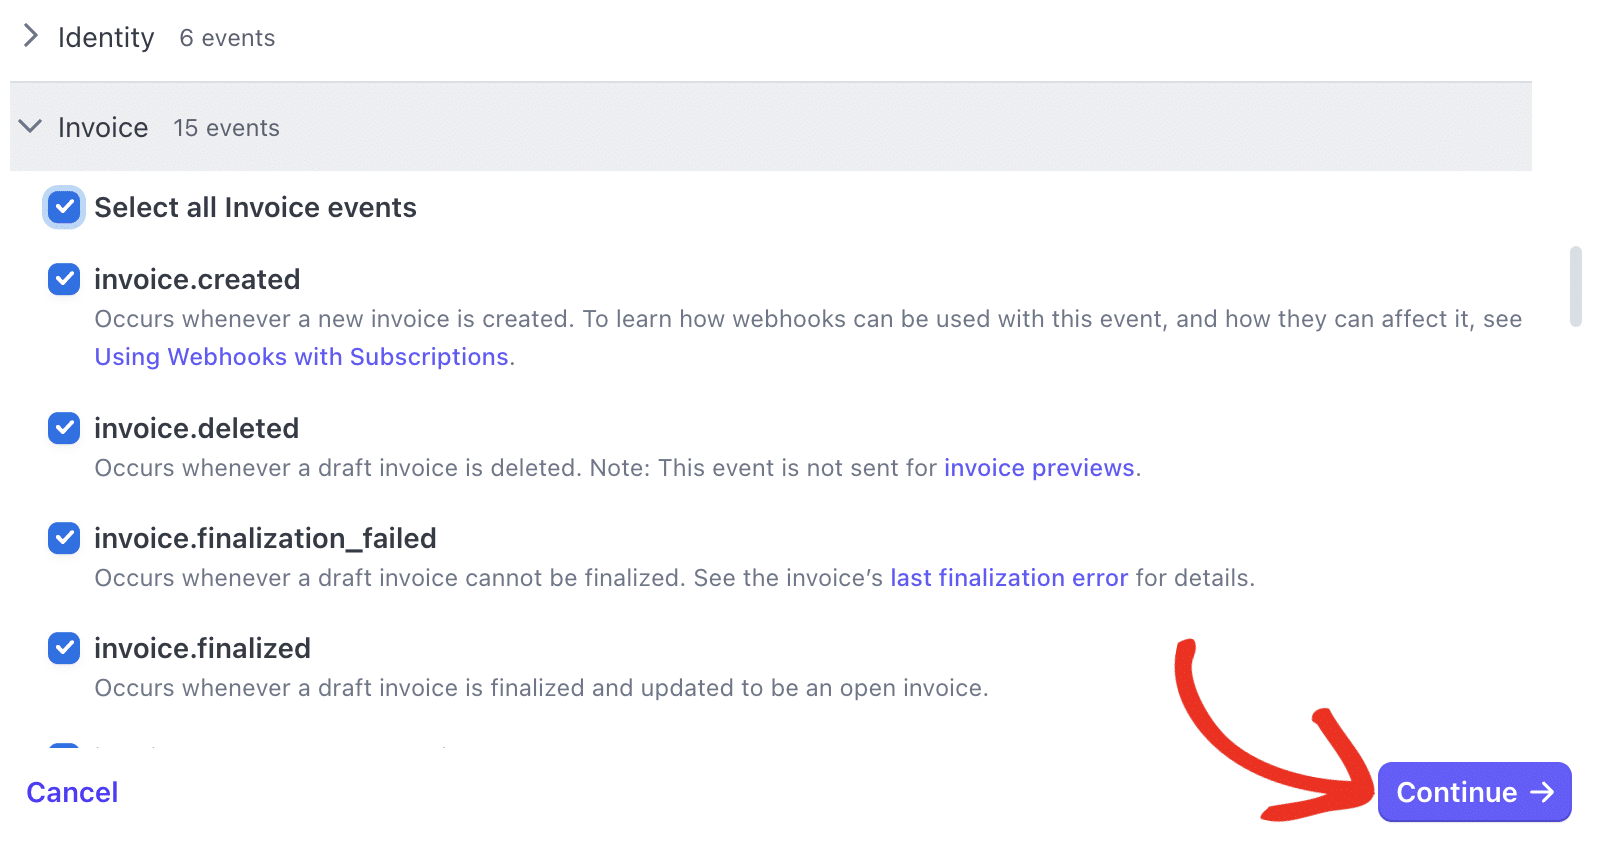
Finally, locate the Invoice dropdown and tick the Select all Invoice events option.
After choosing the events you’d like to configure, click Continue to proceed.
Now, you’ll need to add the Webhooks Endpoint from WPForms into the Endpoint URL field.
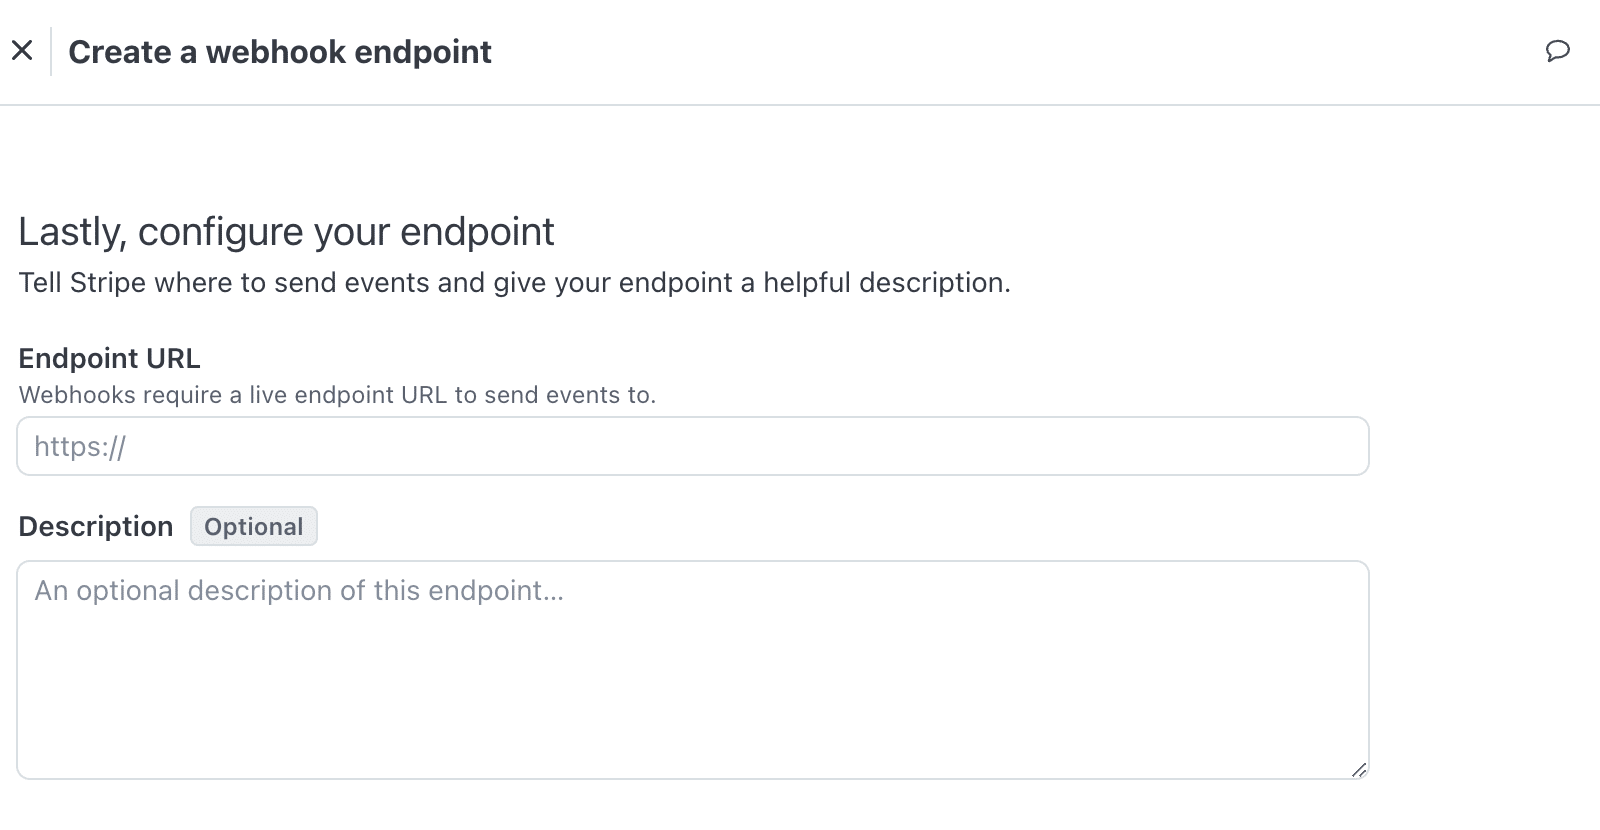
For this, return to the browser tab with your WPForms settings page open. Once there, you’ll need to copy the Webhooks Endpoint by clicking the copy icon.

After that, switch over to your Stripe account and paste the Webhooks Endpoint into the Endpoint URL field.
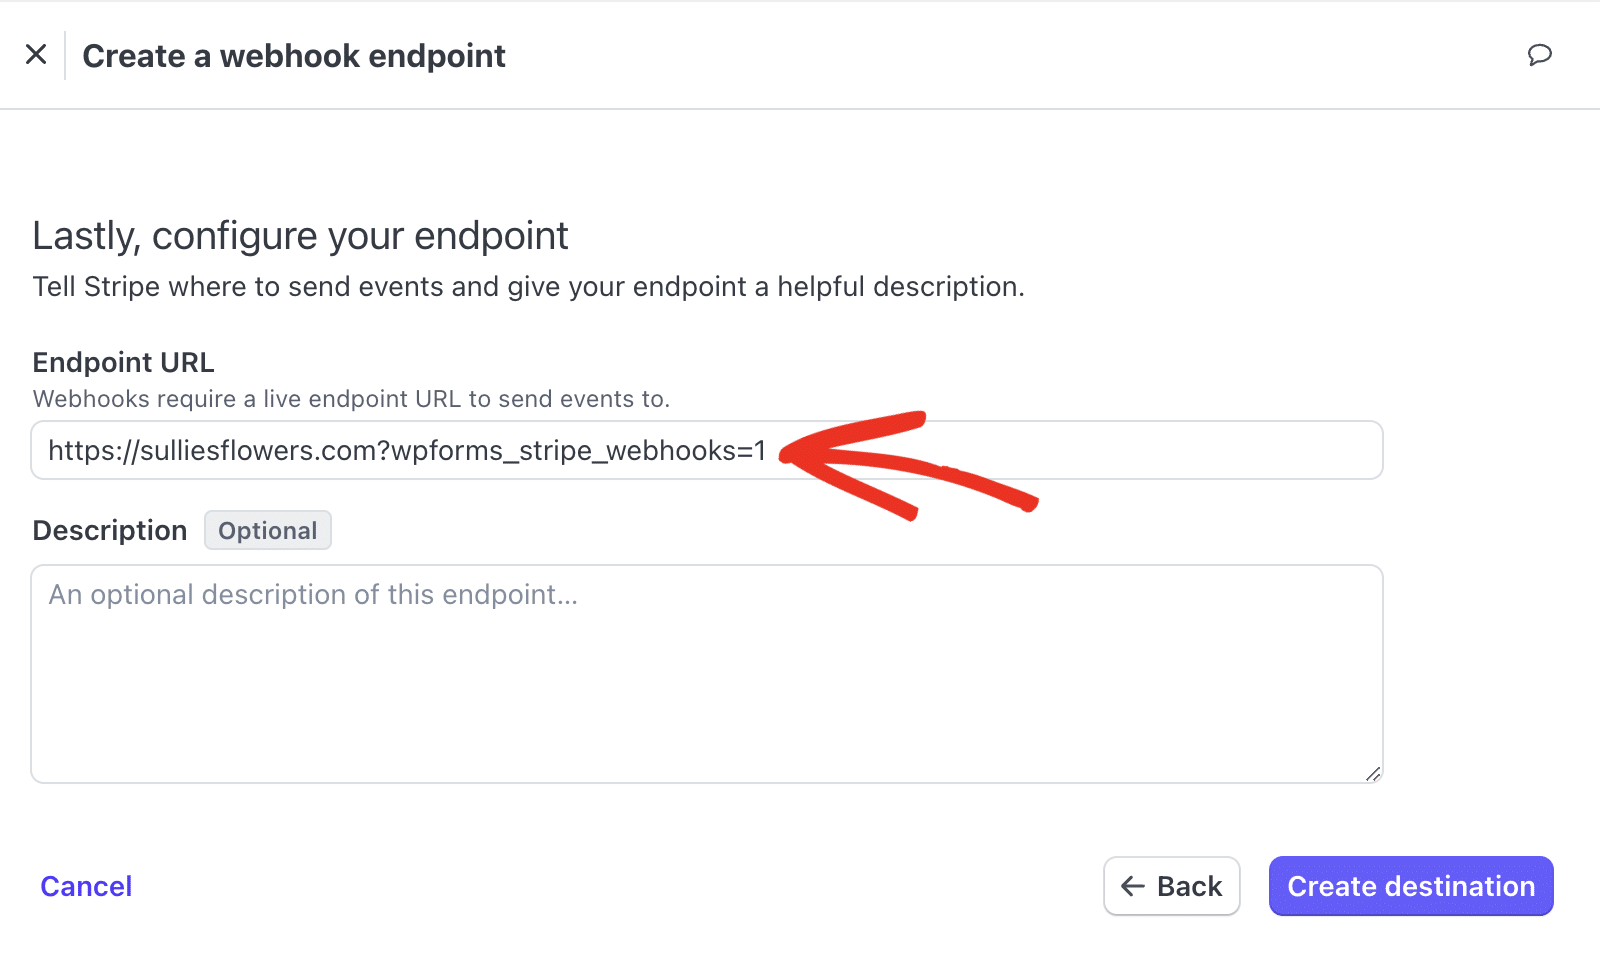
While the Description field is optional, we recommend entering WPForms to easily identify the webhook’s purpose.
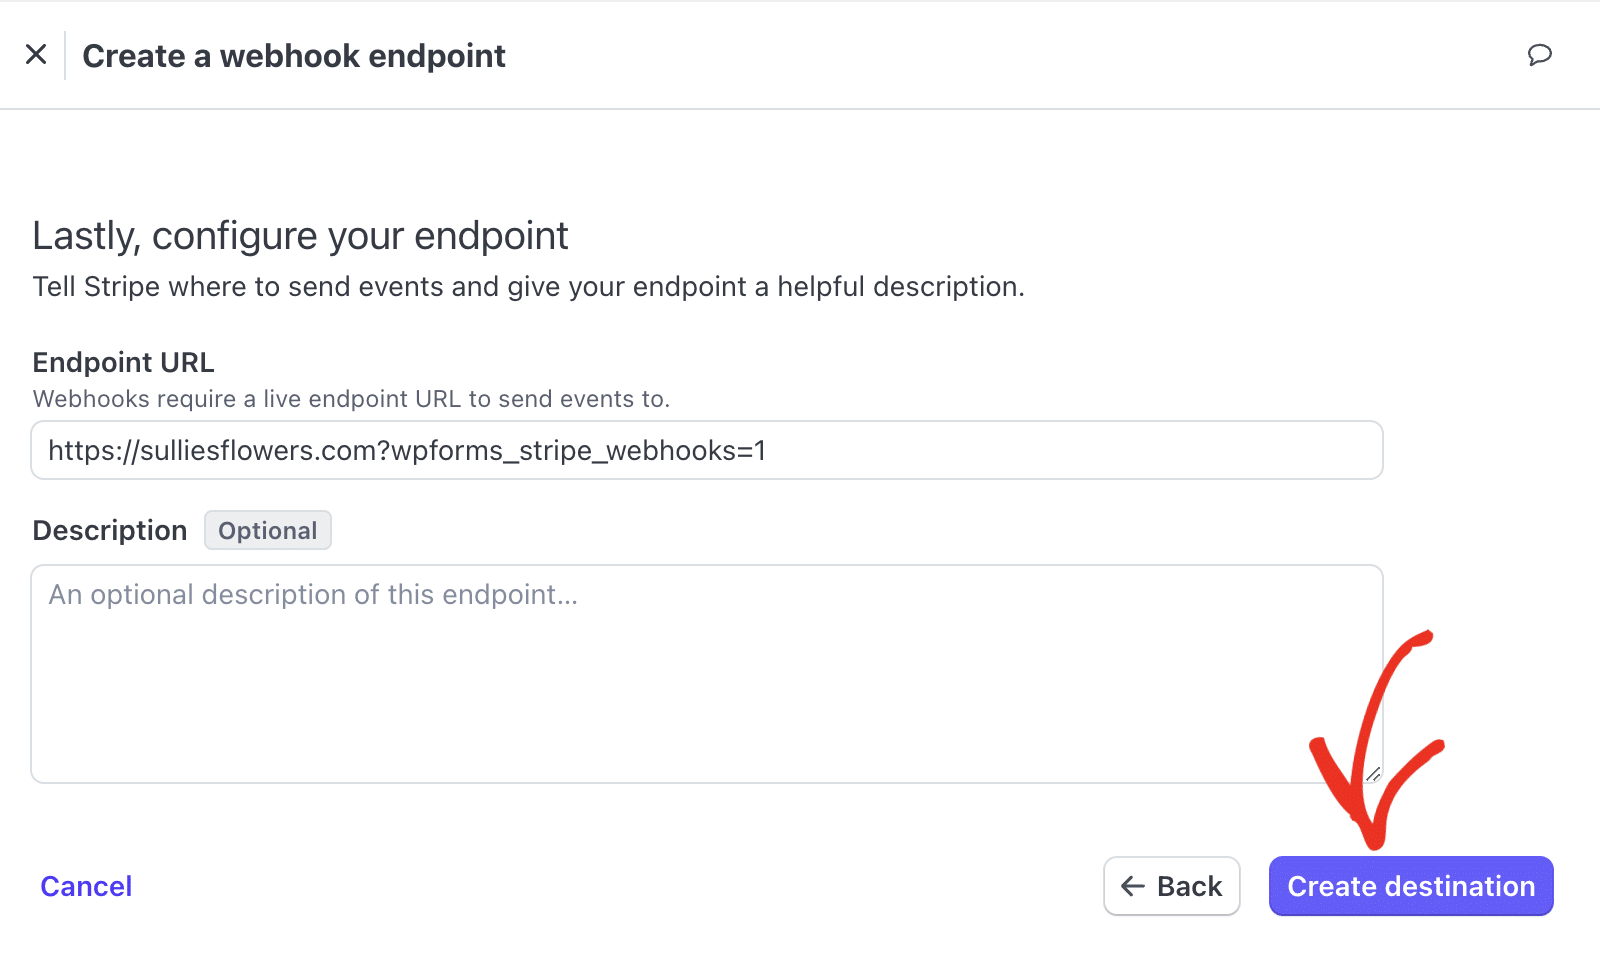
Once done, click the Create destination button to save your endpoint.
Once you’ve set up the webhook, Stripe will navigate you to its dedicated page. Here, you’ll be able to copy both the webhook’s ID and the Signing secret. Simply click on the value next to Endpoint ID and then select Copy ID to copy it.

After copying the Endpoint ID, return to your WPForms settings and paste it into the Webhooks Live ID field.

Next, head back to your Stripe account and, next to the Signing secret, click on Reveal.
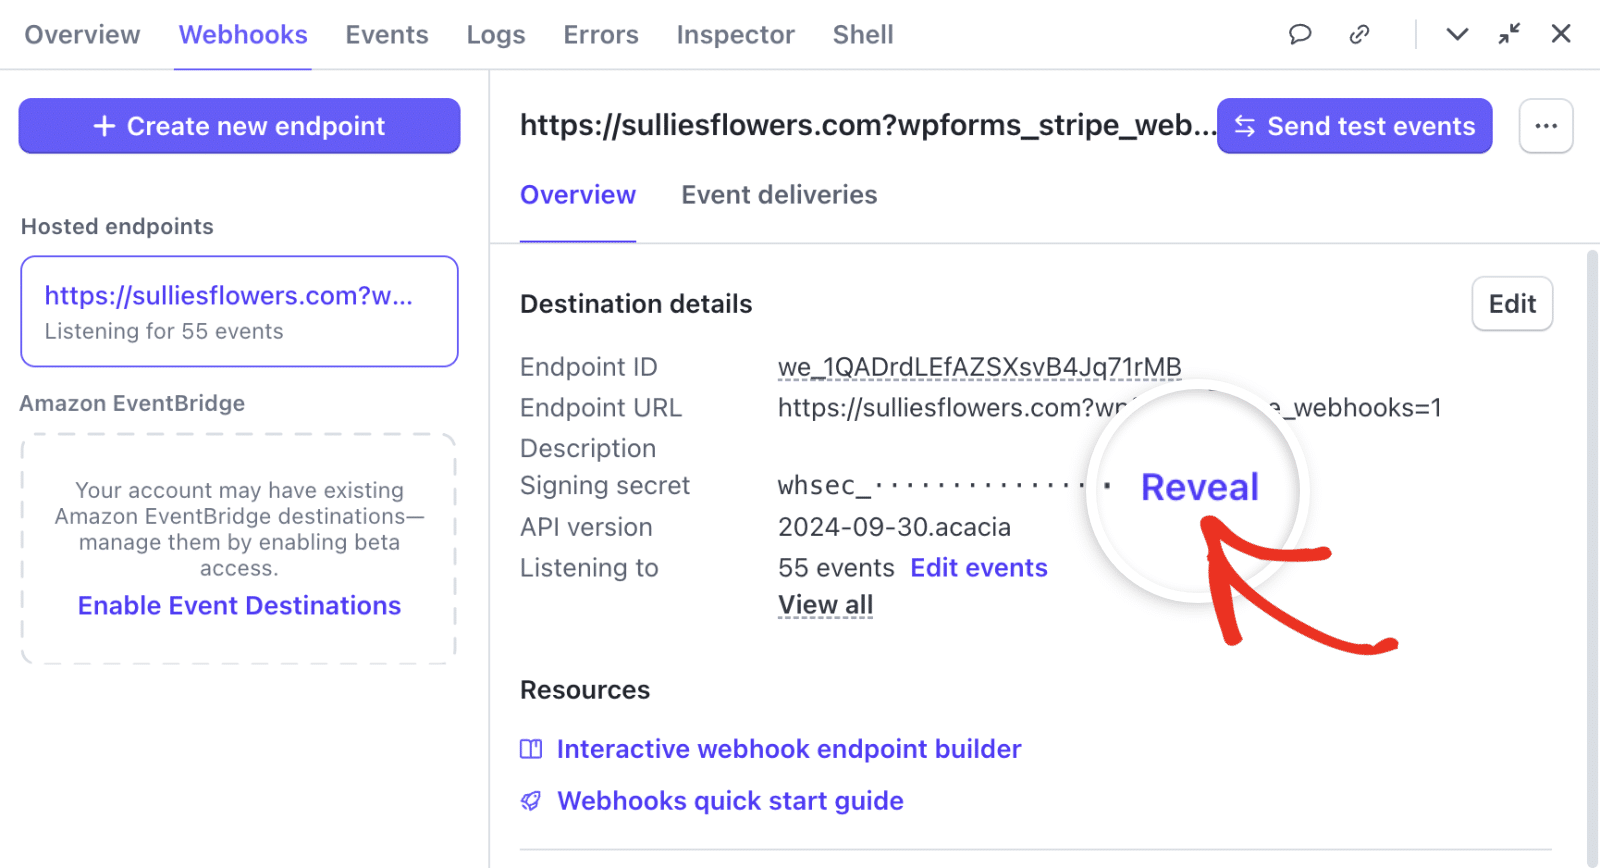
After revealing the Signing secret, copy its value and paste it into the Webhooks Live Secret field within your WPForms settings.

Once your keys are in place, click on the Save Settings button.
After setting up Stripe webhooks with WPForms, your payment statuses will sync in real time between WPForms and Stripe. This also allows you to manage refunds and renew subscriptions directly from WPForms, without frequently accessing the Stripe dashboard.
For more details on refunds, renewals, and understanding payment statuses, refer to our guide on viewing and managing form payments.
Frequently Asked Questions
These are answers to some of the top questions we see about setting up Stripe webhooks in WPForms.
I’m not seeing the option to manually configure Stripe webhooks. How do I enable it?
If you set up your Stripe integration on WPForms version 1.8.4 or higher, Stripe webhooks are automatically configured on your site. So you don’t need to manually configure it.
However, if you’d like to show the webhooks settings, you’ll need to update the URL parameter of the WPForms settings page.
To do this, go to WPForms » Settings and then select the Payments tab. After that, add &webhooks_settings to the URL. The URL should look similar to the one below.
https://example.com/wp-admin/admin.php?page=wpforms-settings&view=payments&webhooks_settings
Just be sure to replace example.com with your actual domain.
That’s it! Now you know how to set up Stripe webhooks with WPForms.
Next, would you like to learn more about managing payments in WPForms? Check out our tutorial on creating payment forms in WPForms for further information.