AI Summary
Would you like to translate WPForms into a different language? There are many translation tools available for WordPress, and it can be challenging to find the best approach.
WPForms has several built-in translations available, including Spanish, Italian, Japanese, French, German, Russian, Portuguese (Brazilian), Hindi, Polish, Turkish, and Dutch. This tutorial will discuss our recommended strategies for translating your forms into a language that’s not on this list.
In This Article

Note: This tutorial will discuss translating WPForms into a single language. If you’d like to translate your forms into multiple languages, please check out our guide to multilingual translation tools.
Before you dive into translating WPForms, make sure the plugin is installed and activated on your WordPress site and that you’ve verified your license. Then take a minute to create your first form.
Using Built-In Customization Options to Translate WPForms
WPForms lets you customize the text your users see in every part of your forms. In some cases, changing default text using the plugin’s built-in options is the easiest way to translate your forms.
Here are a couple of ways you can translate your forms using the built-in features WPForms provides.
Translating Form Field Labels, Placeholders, and Default Values
To translate the default name of any field in one of your forms, you can simply edit its label.
Open the form builder, then click on the field whose label you want to translate. In the Field Options panel, enter your text in your desired language in the Label field.

Similarly, you can translate the placeholder or the default value for a field in the Field Options panel. Click on the Advanced tab, then enter your translated text in the Placeholder or Default Value field(s).
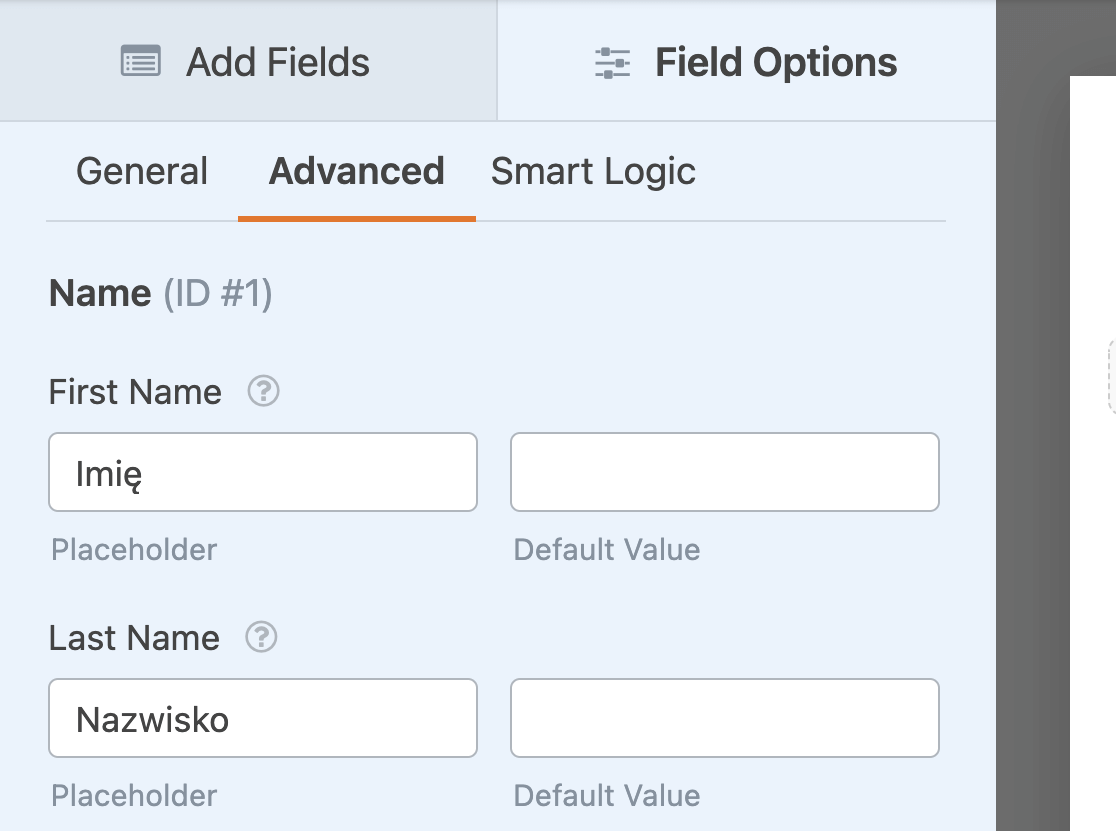
Remember to save your form before you exit the builder.
Translating Confirmation Messages and Submit Button
Confirmation messages are alert notifications users see after filling out and submitting your form.

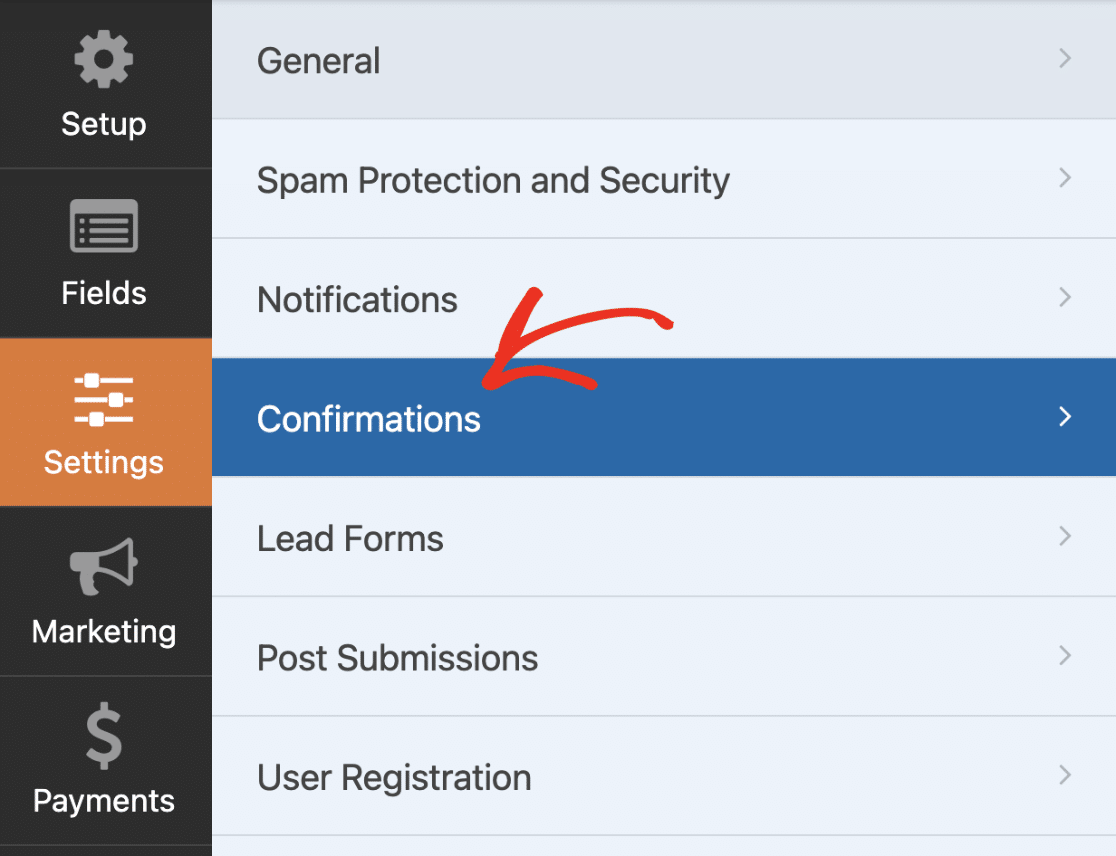
To translate your form’s confirmation message, go to Settings » Confirmations in the form builder.
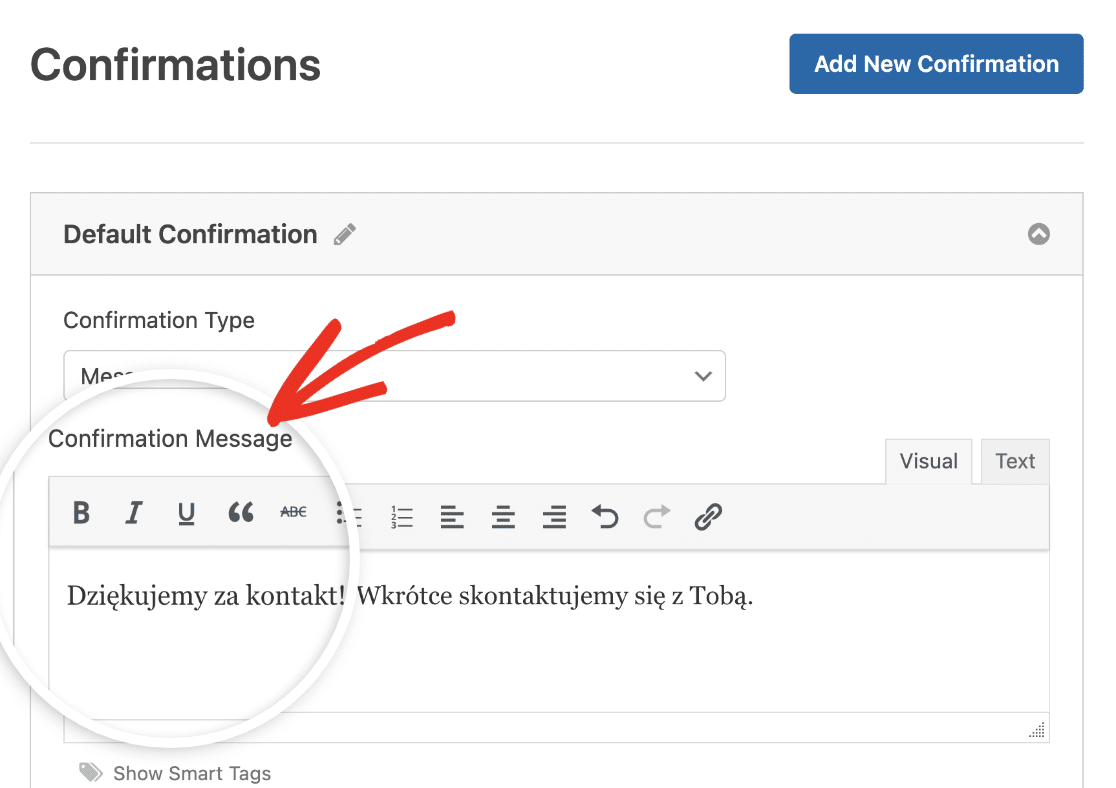
In the Confirmation Message text editor, replace the current text with the translated text you’d like to display.
If you want to translate the submit button text, go to Settings » General to access your form’s settings.
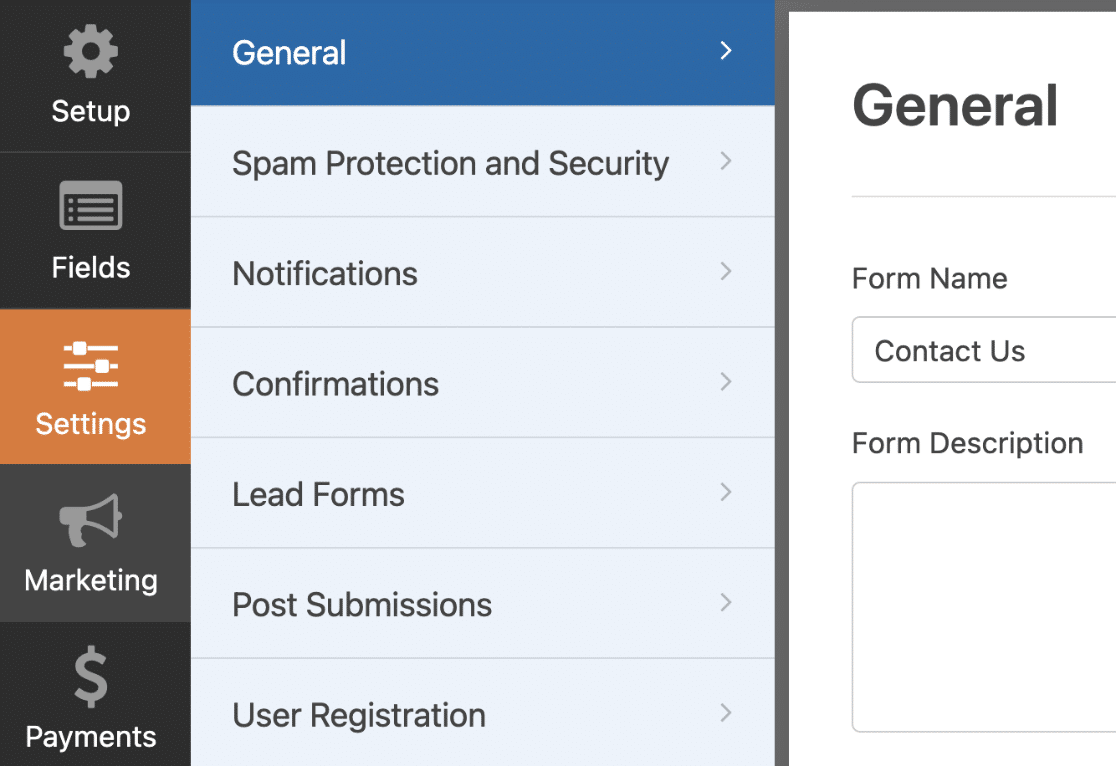
Then scroll down and update the Submit Button Text and Submit Button Processing Text fields with the relevant translation text.
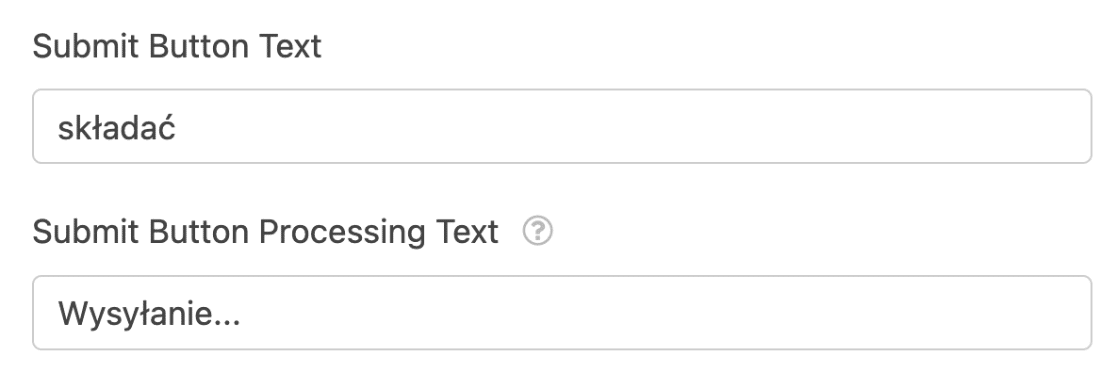
Be sure to save your changes after adding your translation texts.
Translating Validation Messages
Your forms display validation messages when a user leaves a required field empty or when certain fields contain the wrong formatting.
For example, when a user skips a required field and tries to submit the form, they’ll see a validation message that reads, “This field is required.”

You can easily translate or customize this and other validation messages by going to WPForms » Settings and opening the Validation tab.
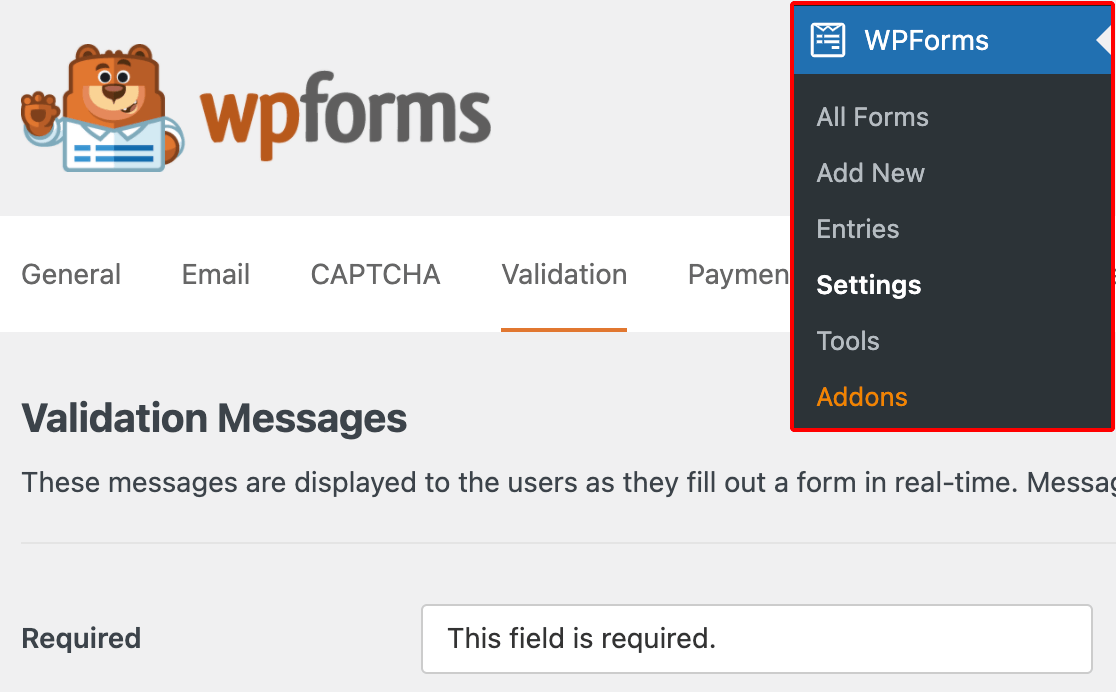
Here you’ll see all of the validation messages currently available for customization and their default values, which include:
- Required: This field is required.
- Website URL: Please enter a valid URL.
- Email: Please enter a valid email address.
- Email Suggestion: Did you mean {suggestion}?
- Email Restricted: This email address is not allowed.
- Number: Please enter a valid number.
- Number Positive: Please enter a valid positive number.
- Confirm Value: Field values do not match.
- Input Mask Incomplete: Please fill out the field in required format.
- Checkbox Selection Limit: You have exceeded the number of allowed selections: {#}.
- Character Limit: Limit is {limit} characters. Characters remaining: {remaining}.
- Word Limit: Limit is {limit} words. Words remaining: {remaining}.
- Phone: Please enter a valid phone number.
- File Extension: File type is not allowed.
- File Size: File exceeds max size allowed. File was not uploaded.
- Time (12 hour): Please enter time in 12-hour AM/PM format (eg 8:45 AM).
- Time (24 hour): Please enter time in 24-hour format (eg 22:45).
- Payment Required: Payment is required.
- Credit Card: Please enter a valid credit card number.
- Field Upload Total Size: The total size of the selected files {totalSize} Mb exceeds the allowed limit {maxSize} Mb.
- Password Strength: A stronger password is required. Consider using upper and lower case letters, numbers, and symbols.
- Unique Answer: The value must be unique.
- Coupon Error: This is not a valid coupon.
Simply enter your translations in the fields provided and save your changes. For more details, please check out our tutorial on customizing validation messages.
Note: When translating validation messages, do not translate the text for placeholders such as {limit} or {suggestion}. See our validation messages tutorial for more examples.
Using Loco Translate to Translate WPForms Admin Areas
In addition to translating text your users will see in your forms, you can translate text WPForms provides in your WordPress admin area, such as the form builder and settings pages.
You can approach translations for the admin areas of WPForms in many ways, but Loco Translate and Poedit are two popular options. For this tutorial, we’ll focus on Loco Translate.
Note: WPForms includes built-in translations for Spanish, Italian, Japanese, French, German, Russian, Dutch, Hindi, Polish, Turkish, and Portuguese (Brazilian). If you go to Settings » General and choose one of these languages from the Site Language dropdown, WPForms admin pages will automatically be translated for you.
Installing Loco Translate
First, log in to your WordPress admin area and go to Plugins » Add New to install and activate the Loco Translate plugin.
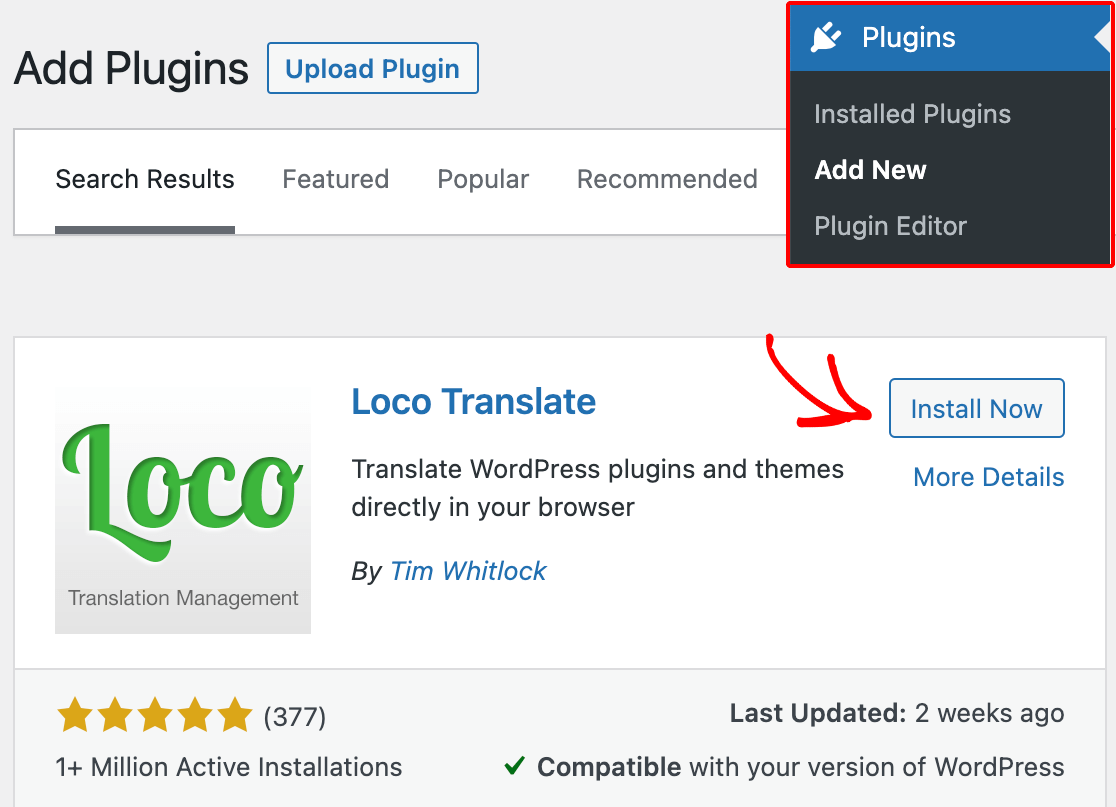
Note: For help installing Loco Translate, see WPBeginner’s guide to installing WordPress plugins.
Once you’ve done so, go to Loco Translate » Plugins and find WPForms in the list. You can either look through the alphabetical list or use the search bar to narrow your options.
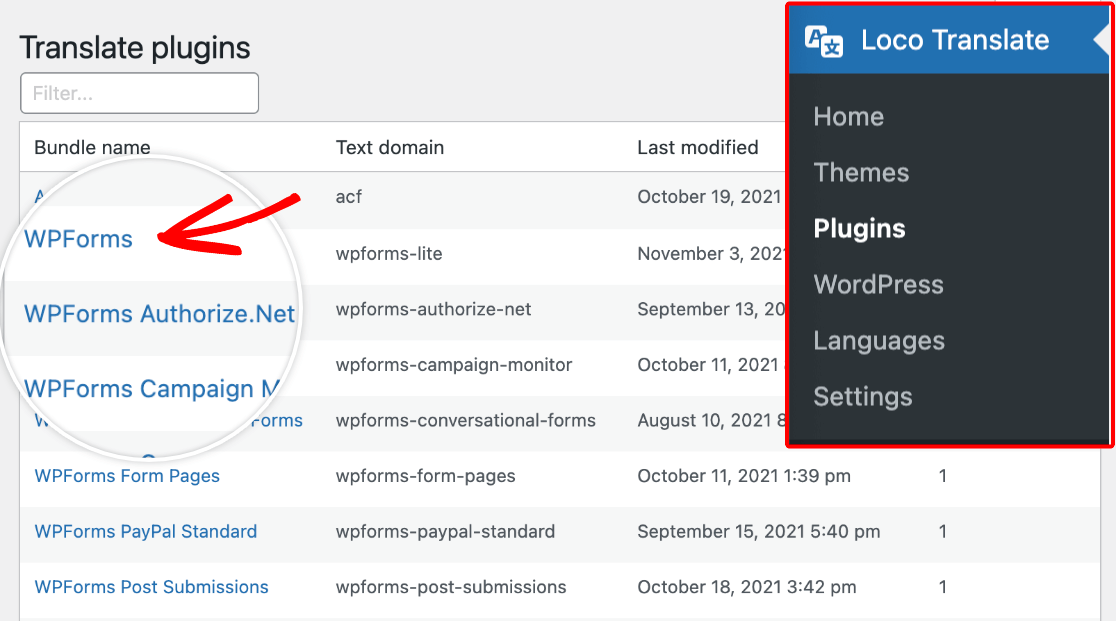
Note: In Loco Translate, you’ll see two different translation tables: a WPForms-Lite table, and a WPForms table.
If you’re using the paid version of WPForms, make sure to select the WPForms table. This will include all translation strings for both the paid and Lite versions of the plugin.
Adding a New Translation in Loco Translate
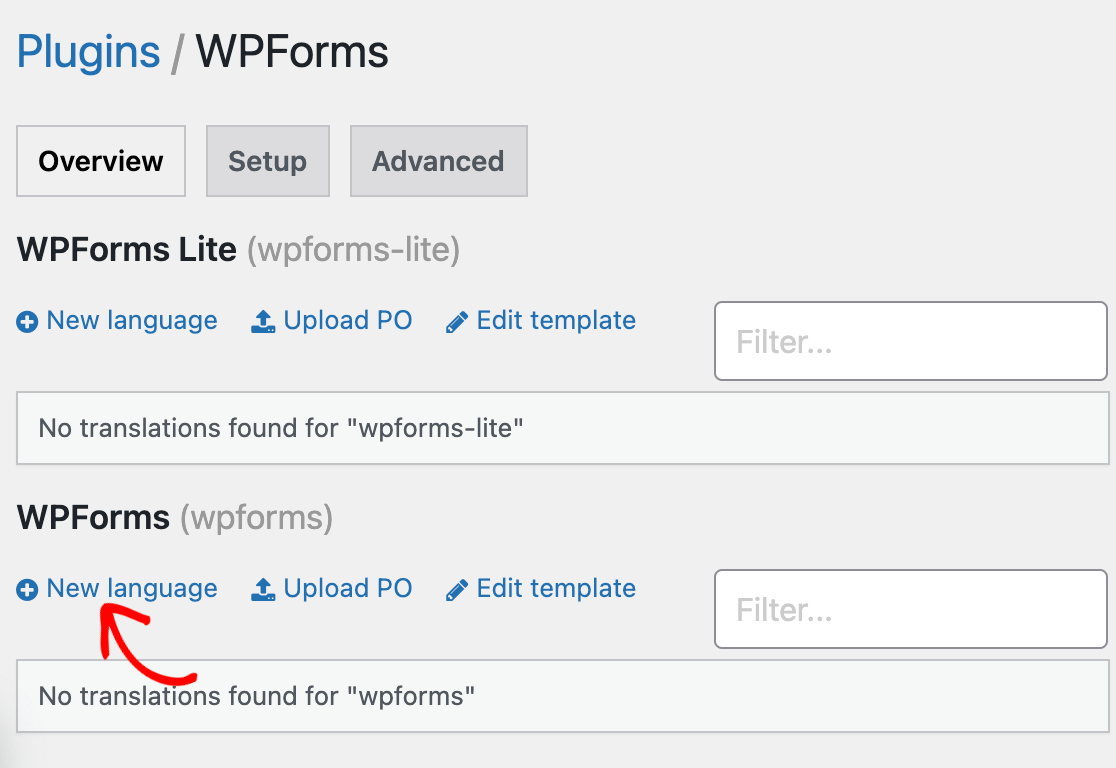
Next, you should be taken to the WPForms translations page for Loco Translate. To build out a new translation, click on New Language under WPForms.
Then choose a supported WordPress language from the dropdown.
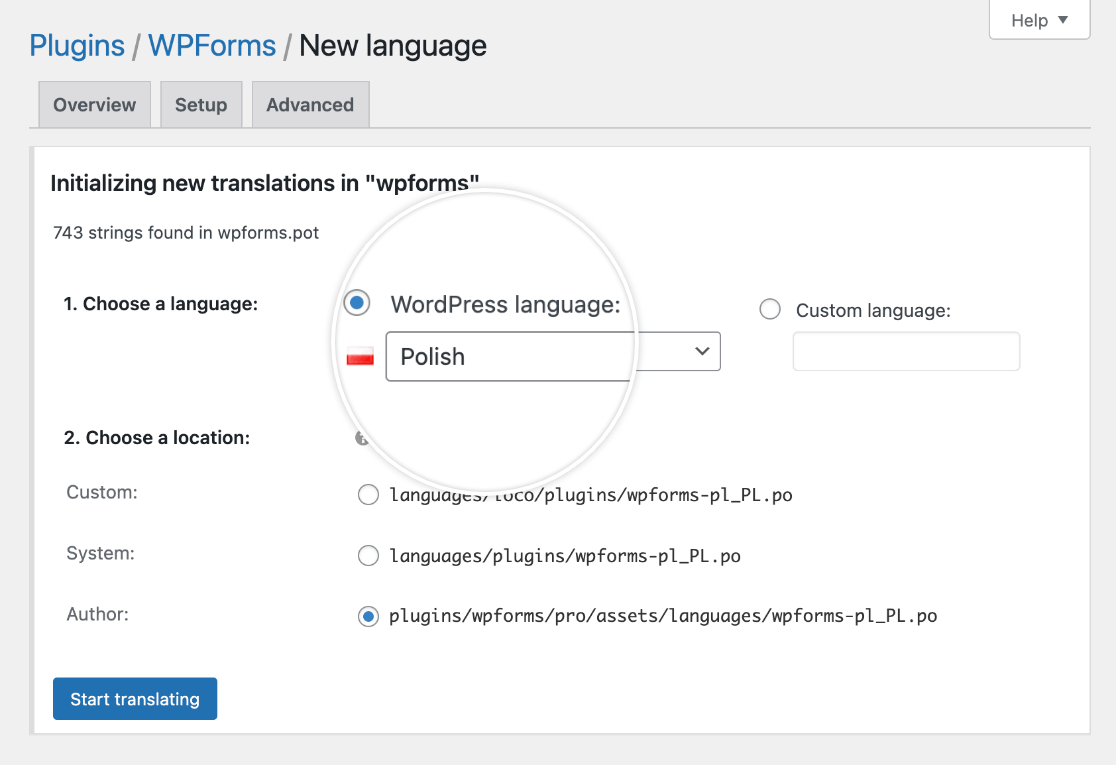
Note: If you choose the Custom language option, you won’t be able to switch your site to your target language once you’ve completed your translation, as Loco Translate does not modify the WordPress language switcher in your site’s settings.
For more details, please see Loco Translate’s documentation on adding new languages and switching languages.
Next, you’ll need to choose where you want to save the translation file. Be sure to select the System location option, as this will protect your translations from being overwritten by updates to WPForms.
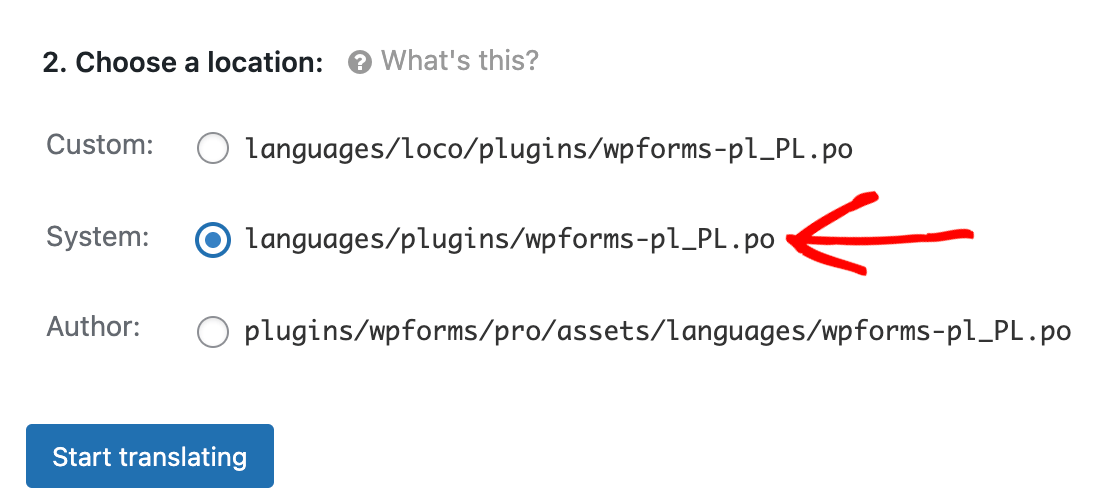
Note: To protect customizations from updates, it’s important to never add files to the WPForms plugins folder (shown in the Author option). Instead, add translation files to the WordPress languages folder so those files won’t be altered by updates.
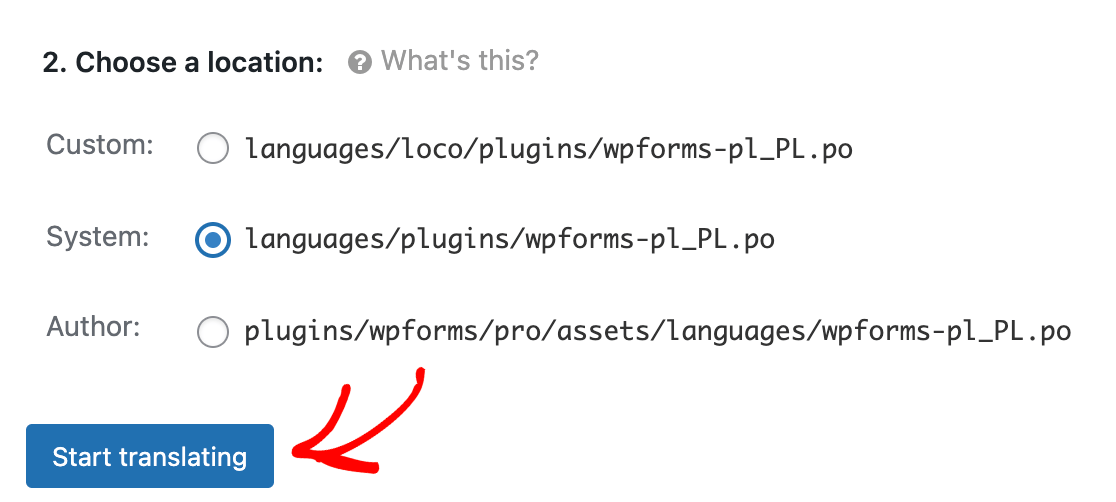
When you’ve set up these options, click the Start translating button to continue.
Translating WPForms
On the next screen, you’ll see a list of all the text strings in WPForms that are ready to be translated. Select a Source Text option from the list, then enter its translation in the space provided.
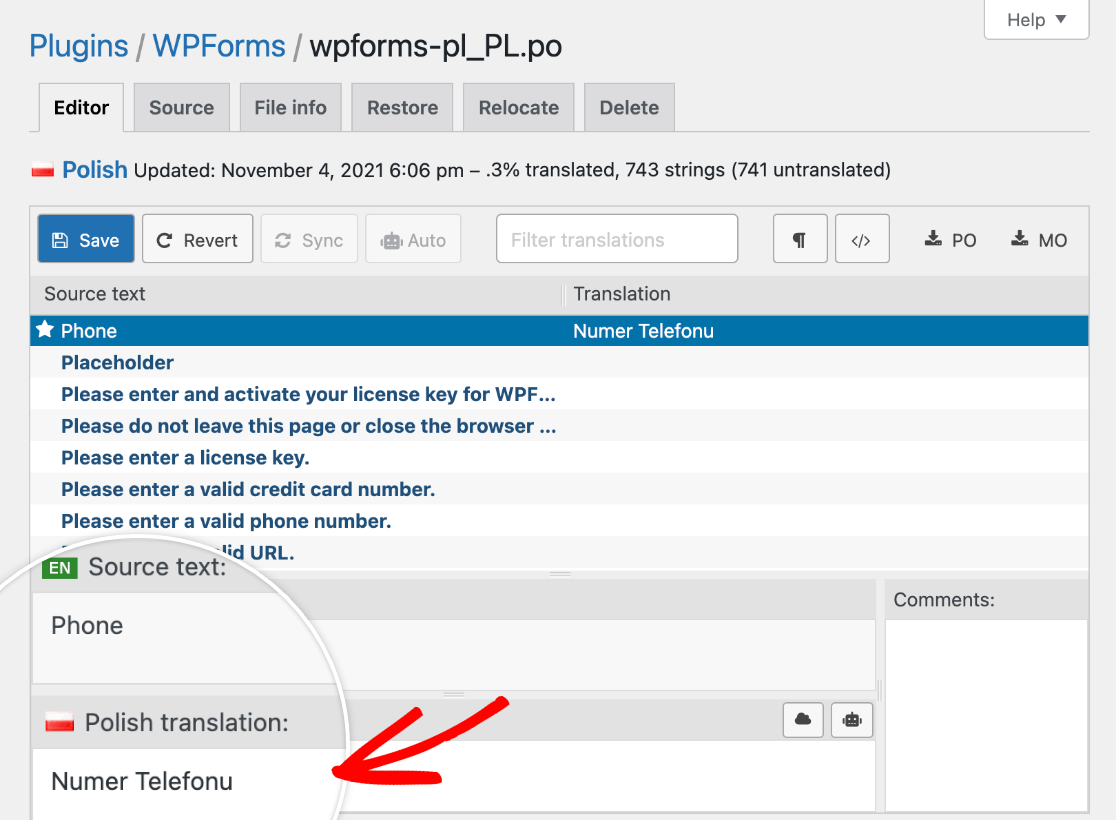
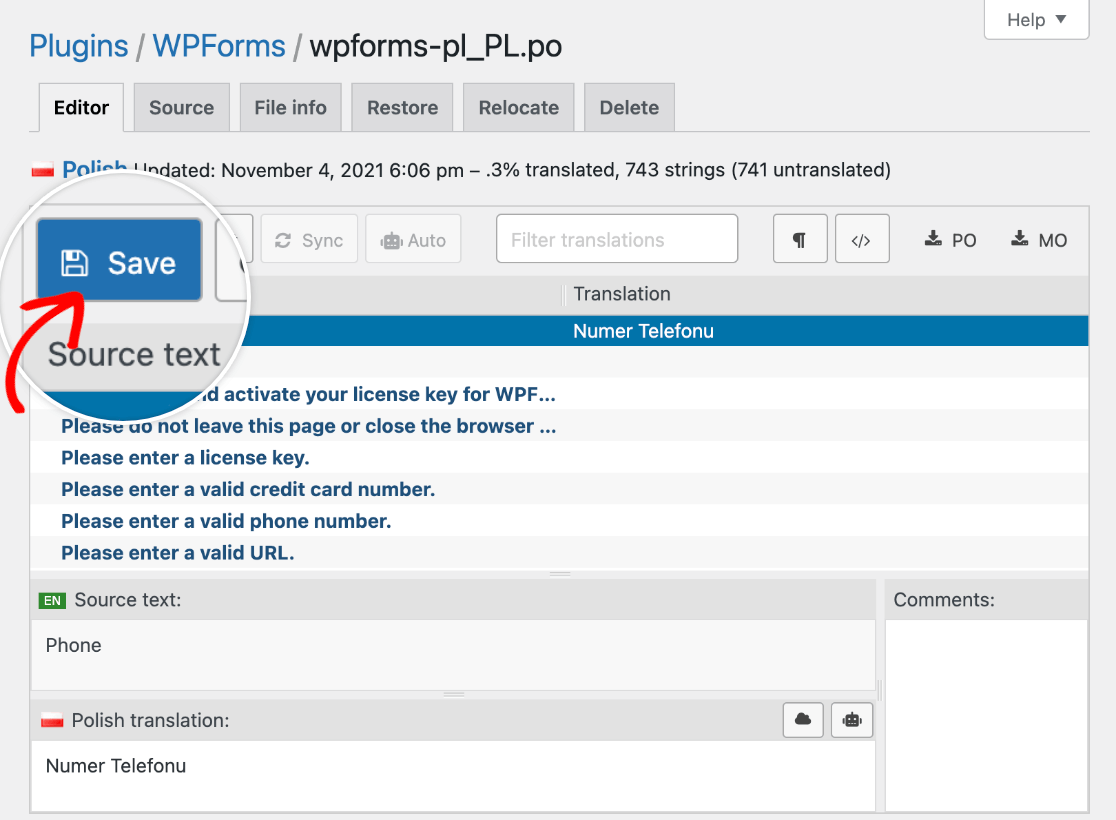
You’ll need to repeat this process for each string you want to translate. Click the Save button when you’re done.
Switching Your Site’s Language
To see your Loco Translate translations in your WordPress admin area and the form builder, you need to set your site’s language to match the one you chose when adding a new language for WPForms in Loco Translate.
Go to Settings » General and select the same Site Language you added in Loco Translate.
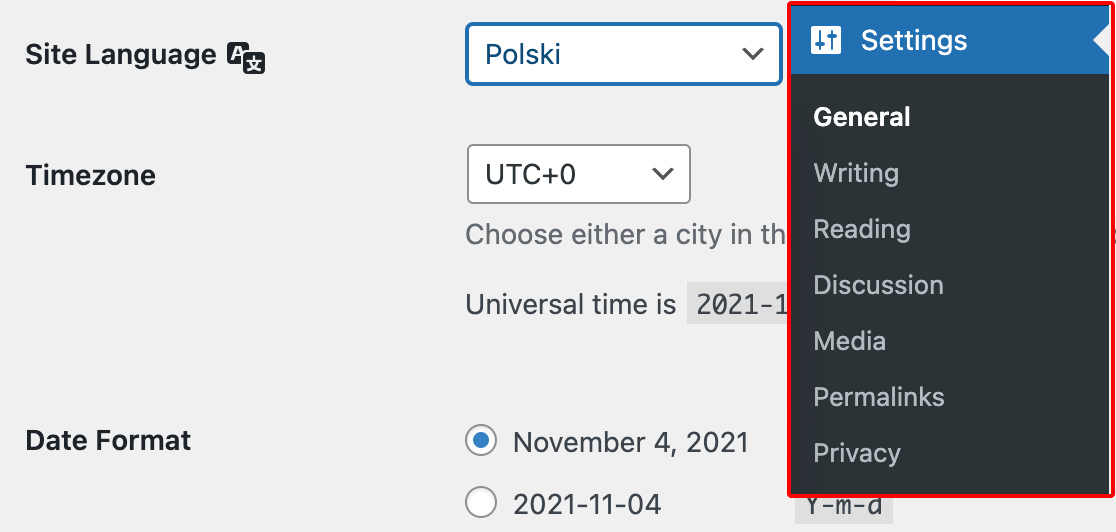
Note: Languages are labeled in English in Loco Translate, but are listed in their own language in your WordPress settings. So, if you selected French in Loco Translate, you would select Français as your Site Language, German would Deutsch in your WordPress settings, Polish corresponds with Polski, and so on.
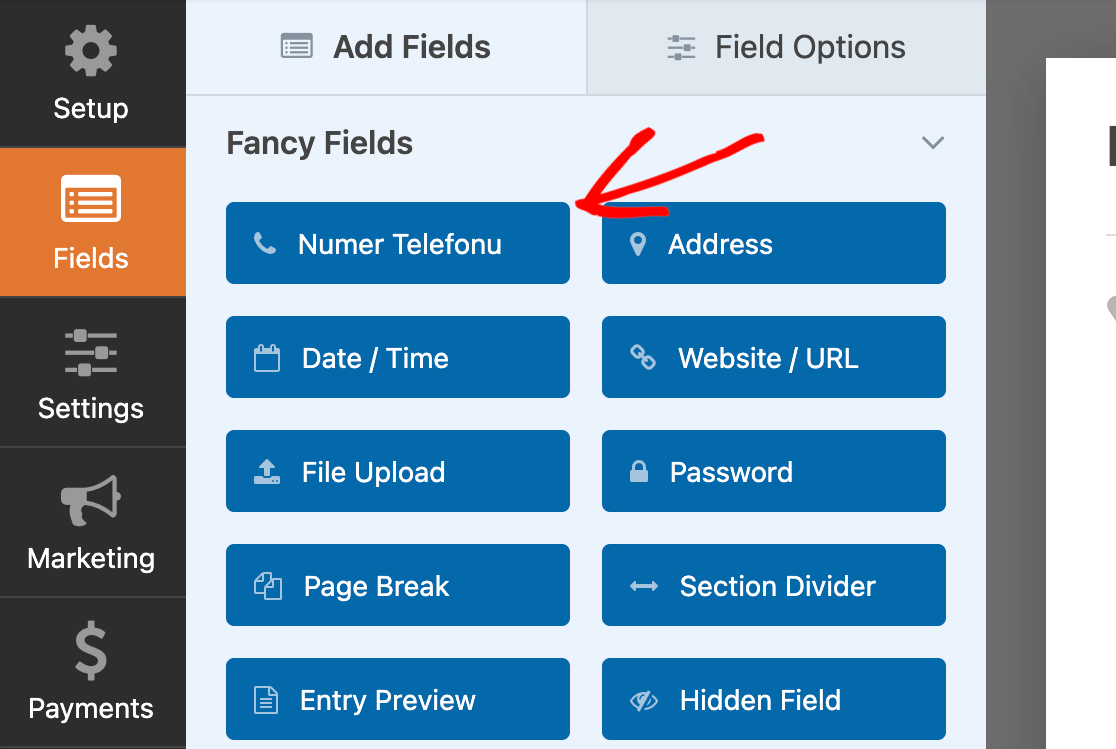
When you save your changes, WordPress will install the language pack for this translation. You should then see your corresponding Loco Translate translations in the form builder and other WPForms admin areas on the backend of your site.
Advanced Translation Options
As you begin translating your forms, you may notice a couple of parts that aren’t translatable using the techniques described above.
For guidance on translating these elements, see our developer documentation:
- Date field: Datepicker calendar (day and month names)
- User Registration Addon:
- Credit Card fields: How to Change Sublabels for the Credit Card Field
Frequently Asked Questions
These are the top questions we see regarding translating WPForms into a different language.
How do I translate WPForms addons with Loco Translate?
Each addon has its own separate bundle that you’ll need to open in Loco Translate to access its translation strings.
For example, if you want to translate the Authorize.Net strings on your site, you need to open that bundle under Loco Translate » Plugins.
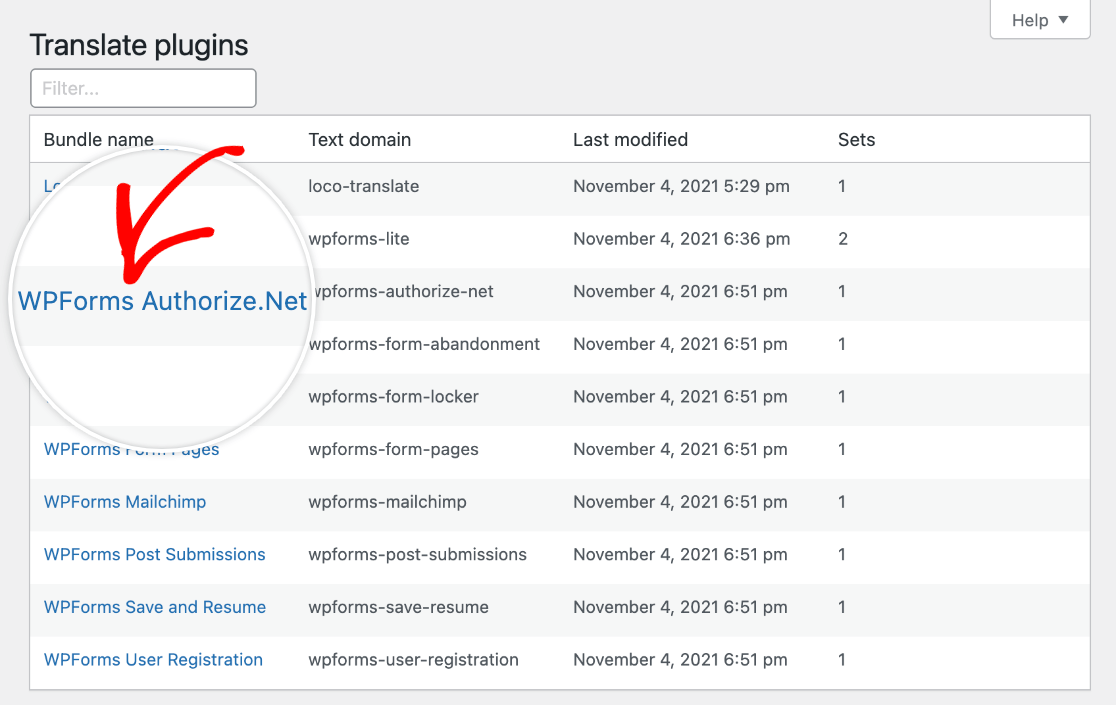
Then you would follow the same steps above to translate the available Source Text strings for the addon in Loco Translate.
How do I translate the File Upload field in my forms?
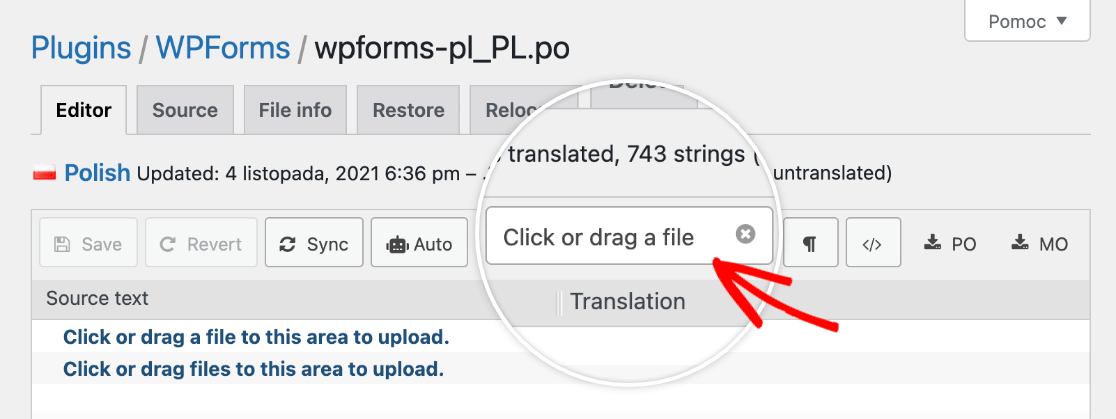
The File Upload phrases can be found in the WPForms bundle in Loco Translate.
You can find the specific phrase you’d like to translate (including “Click or drag a file to this area to upload”) using Loco Translate’s built-in search functionality.
That’s it! You can now translate WPForms into a different language on both the frontend of your site and in the WordPress admin area.
Next, would you like to set up automated notification emails? Check out our full tutorial on WPForms notifications settings for all the details.
