Would you like to capture leads even when users don’t finish your forms? With the Form Abandonment addon for WPForms, you can easily collect partial entries for your forms, gathering data even if the user abandons the form partway through.
This tutorial will show you how to set up and use the Form Abandonment addon for WPForms.
In This Article
Requirements:
- You will need a Pro license level or higher to access the Form Abandonment addon
- Ensure that you’ve installed the latest version of WPForms to meet the minimum required version for the Form Abandonment addon
What Is Form Abandonment?
A form is considered “abandoned” when a user stops filling it out partway through. In some cases, the user may only complete a single field, while in others they may complete most or even all of the form without clicking the submit button.
The Form Abandonment addon can capture entries no matter how far the user gets in the form. In WPForms, there are 2 specific events that will trigger form abandonment:
- When the user moves their mouse outside of the browser’s viewport
- When the user clicks on a link on the page
If these conditions are met, the form is considered abandoned even if the browser window is still open. Once the form is considered abandoned, an automatic notification email will be sent to the email address specified in your notification settings, alerting you about the form abandonment.
Note: To learn about common reasons users abandon forms and how to address them, please check out our article on fixing low-converting forms.
Enabling Form Abandonment Features in WPForms
Before you get started, be sure to install and activate the WPForms plugin on your WordPress site.
Once the core WPForms plugin is in place and you’ve verified your license, you’ll be able to quickly install and activate the Form Abandonment addon.
The Form Abandonment addon settings are in the form builder. To access them, you’ll need to create a new form or edit an existing one.
While your form can include any fields you’d like, we recommend that you ask for the user’s name, as well as their email address and/or phone number, at the beginning of your form. This way, you can follow up with the user even if they only complete the first few fields.
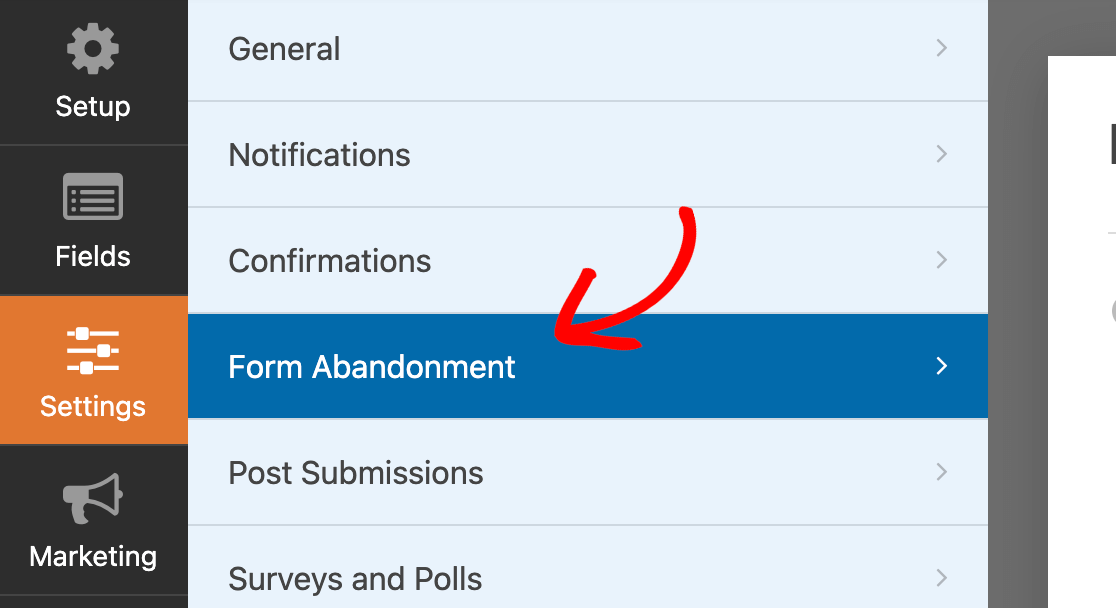
Next, you’ll need to turn on form abandonment lead capture in your form’s settings. To do so, go to Settings » Form Abandonment.
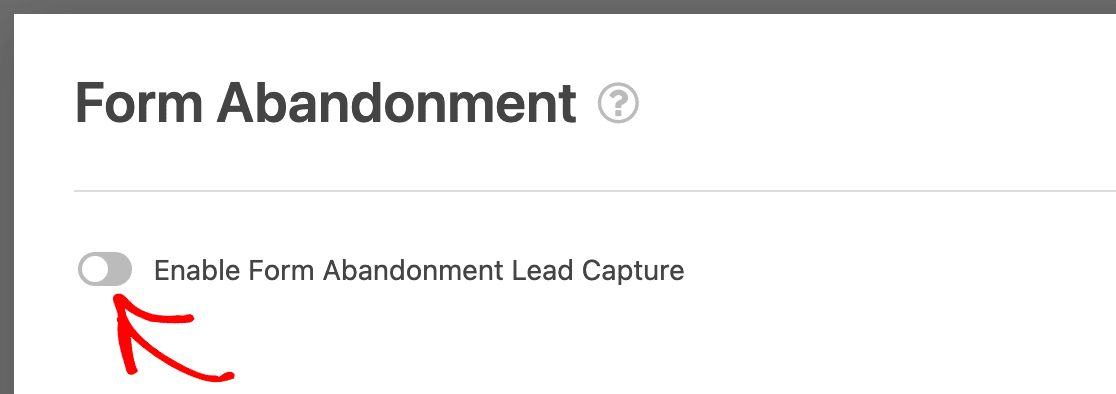
From here, you can toggle on the option labeled Enable Form Abandonment Lead Capture.
Note: This addon will not work if you have Disable User Cookies enabled in your WPForms settings, even if the GDPR Enhancements setting is disabled. You can read more about these settings in our doc on creating GDPR compliant forms.
Configuring Form Abandonment Options
Once form abandonment lead capture is enabled, some additional options will appear. First, you’ll need to decide between two lead capture options:
- Save only if email address or phone number is provided: Recommended in most cases since this will provide you with the minimum information needed to follow up with the lead.
- Always save abandoned entries: Use this option only if you want every single partial entry to be saved. Best for anonymous submissions, such as an anonymous survey or poll.
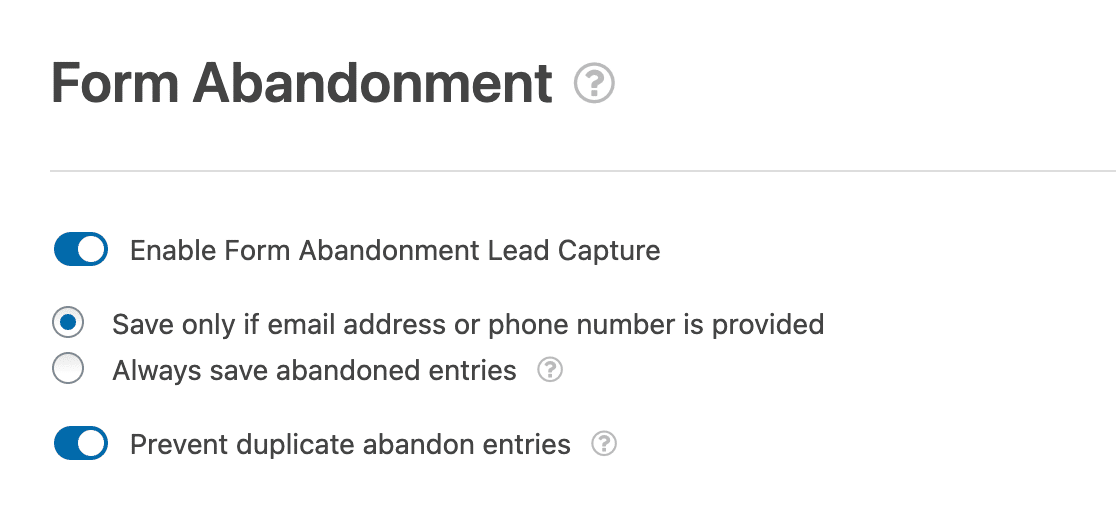
Next, you can choose whether to enable the Prevent duplicate abandon entries option. By default, WPForms will save all partial entries even if the same user fills out your form multiple times.
When this setting is toggled on, you’ll be able to avoid collecting multiple entries for a single user. For example, a user might start filling out your form, abandon it after filling out the first few fields, and then return later and start filling it out again. By default, both of those entries will be saved.
For most sites, we recommend enabling this option to avoid collecting the same information multiple times.
Viewing Abandoned Entries
Once you’ve set up form abandonment, you’ll start seeing abandoned entries recorded on your form’s Entries page. To test this out, you can try starting and then purposefully abandoning your form.
Note: Need more help testing your forms? Be sure to see our pre-launch checklist for details on how to make sure your forms are ready to be published.
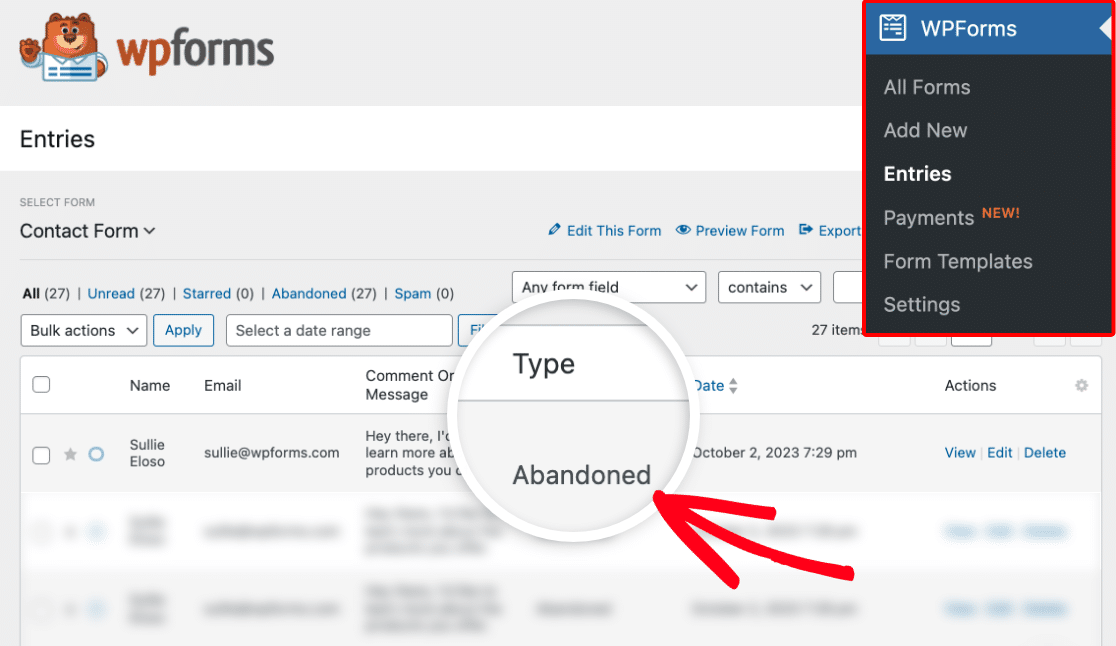
Then you’ll need to go to WPForms » Entries. From here, be sure to select the name of the form you’d like to see entries for.
If form abandonment lead capture has been enabled for the form you select, you’ll see a Type column. In this column, entries will be labeled Abandoned when applicable.
Sending Abandoned Form Emails
In addition to saving abandoned entries to your site, you can send out automatic notification emails when a form has been abandoned. This enables you to quickly follow up with potential leads.
You can send out as many emails as you’d like when a form is abandoned. For example, you could automatically send an email to the user who abandoned the form as well as to your sales manager, who can coordinate a follow-up call or email.
To set up an abandoned form email, go to Settings » Notifications in the form builder. Then scroll to the bottom of the settings for the notification email you want to send when a user abandons a form.
From here, toggle on the option labeled Enable for abandoned forms entries.

Then repeat this process for any additional abandoned form email notifications you want to send.
Note: When setting up abandoned form emails, don’t forget to also set up separate emails for completed forms. For details, please see our tutorial on setting up multiple notification emails.
Frequently Asked Questions
Below, we’ll cover some of the top questions about the Form Abandonment addon.
Why is the Resend Notifications option missing from my form entries?
Normally, individual entries include an option to resend notifications under the Actions section of the page.
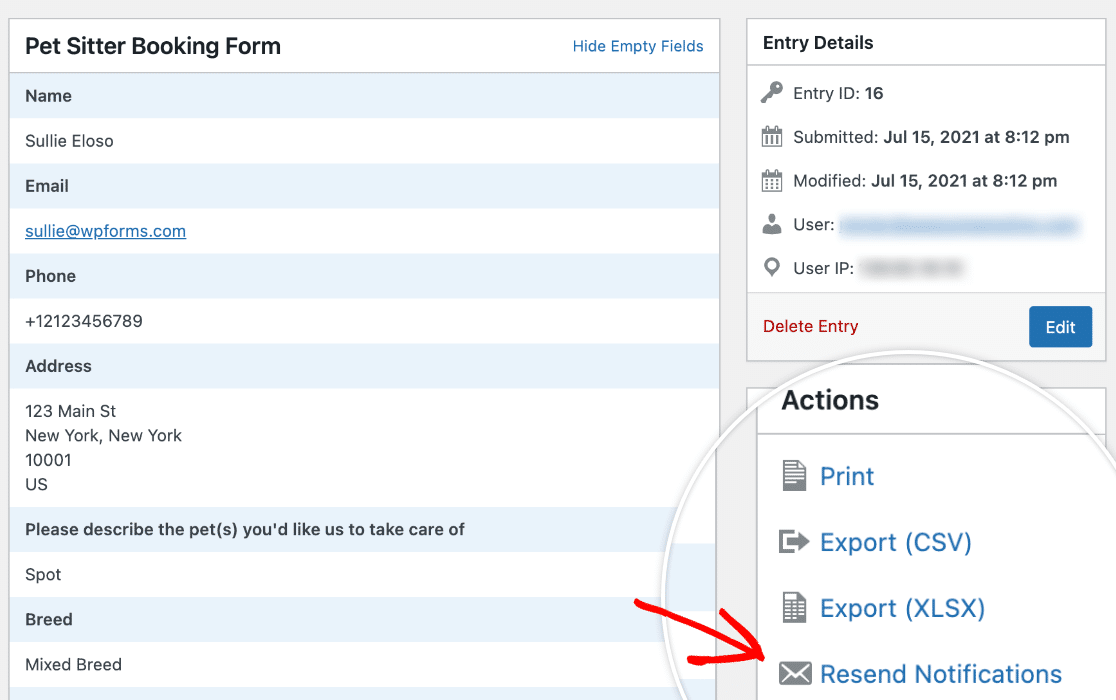
When you enable form abandonment lead capture for a form, the Resend Notifications option will be removed from all entries for the form. This is because this action resends all of the notifications for an entry, not just the one(s) marked for form abandonment, which may be annoying or confusing for recipients.
That’s it! You can now collect entry data even when a user abandons your form.
Next, would you like to add custom branding to your emails? Be sure to check out our form notification tutorial for details on how to customize the background color of emails, and add a header logo.
