AI Summary
Want to manage your Stripe transactions directly from the WordPress dashboard? Learn how to view and handle Stripe payments with the WPForms Stripe Pro addon, including issuing refunds, managing subscriptions, and more.
This tutorial will show you how to view and manage Stripe payments with WPForms.
Requirements:
- You will need a Pro license level or higher to access the Stripe Pro addon
- Ensure that you’ve installed the latest version of WPForms to meet the minimum required version for the Stripe Pro addon
- Set up a form with Stripe integration
- Stripe requires your site to have SSL (HTTPS) enabled on the page where you’re adding a live payment form, as this allows you to securely send credit card data to Stripe. For setup details, please see WPBeginner’s guide to adding SSL and HTTPS in WordPress
Before you get started, be sure to install WPForms on your WordPress site and verify your license. Then install and activate the Stripe Pro addon.
Note: Stripe applies a 3% transaction fee to each payment processed through their platform if your WPForms license is inactive.
Viewing and Managing Payments
Once you’ve set up a form with Stripe integration and you’ve received some payments, you’ll be able to view and manage them right from your site’s admin area.
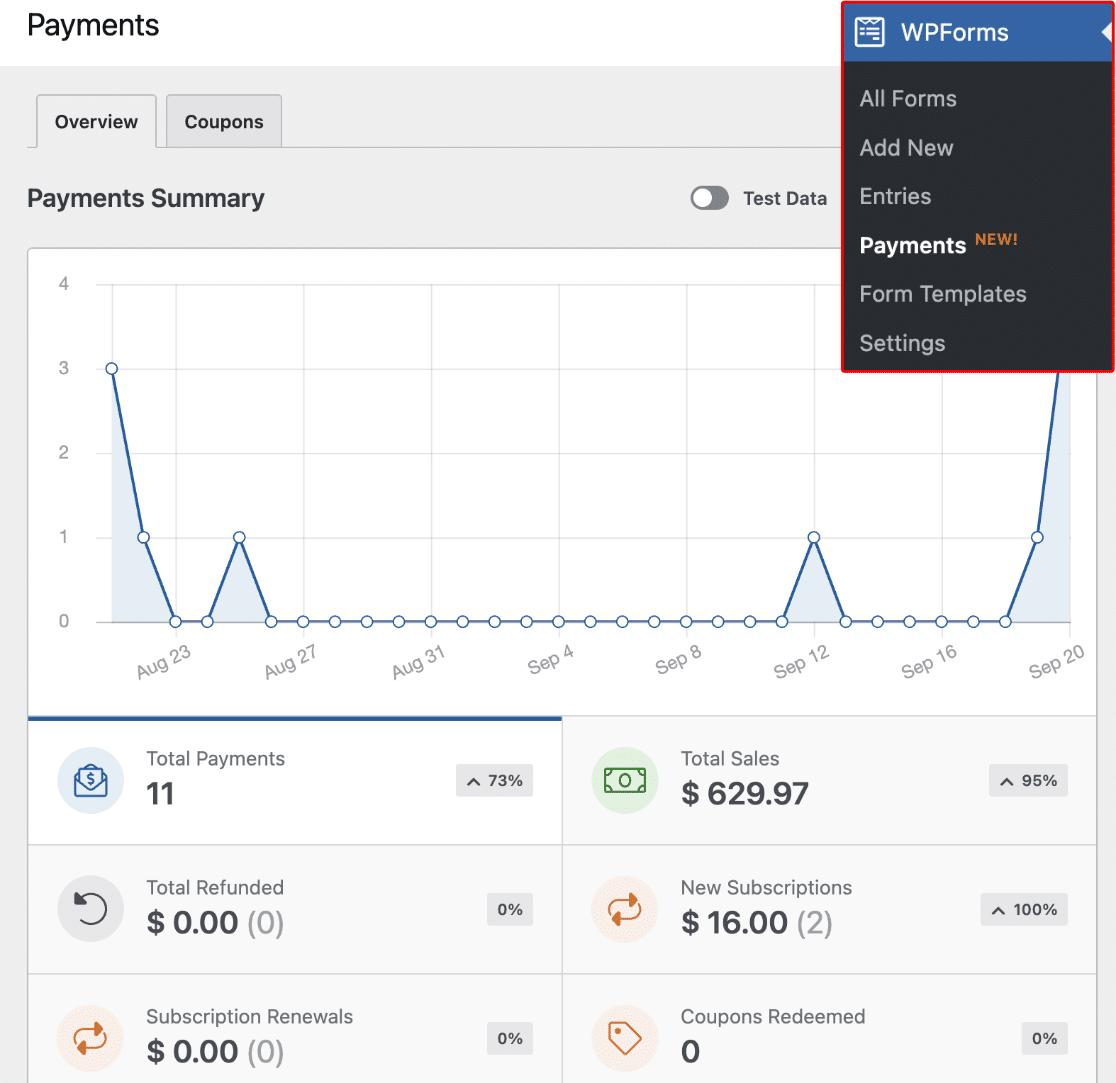
To do this, go to WPForms » Payments to access the Payments overview page.
Note: If you’d like, you can create coupon codes and give users a discount when filling out your payment form. To learn more, check out our Coupons addon tutorial.
On the Payments overview page, you can view transaction details, track your sales, view revenue trends, measure the success of your payment forms, and much more.
You can also manage your subscriptions and issue refunds to users from the Payments page without visiting your Stripe account.
Viewing Purchase Details in Stripe
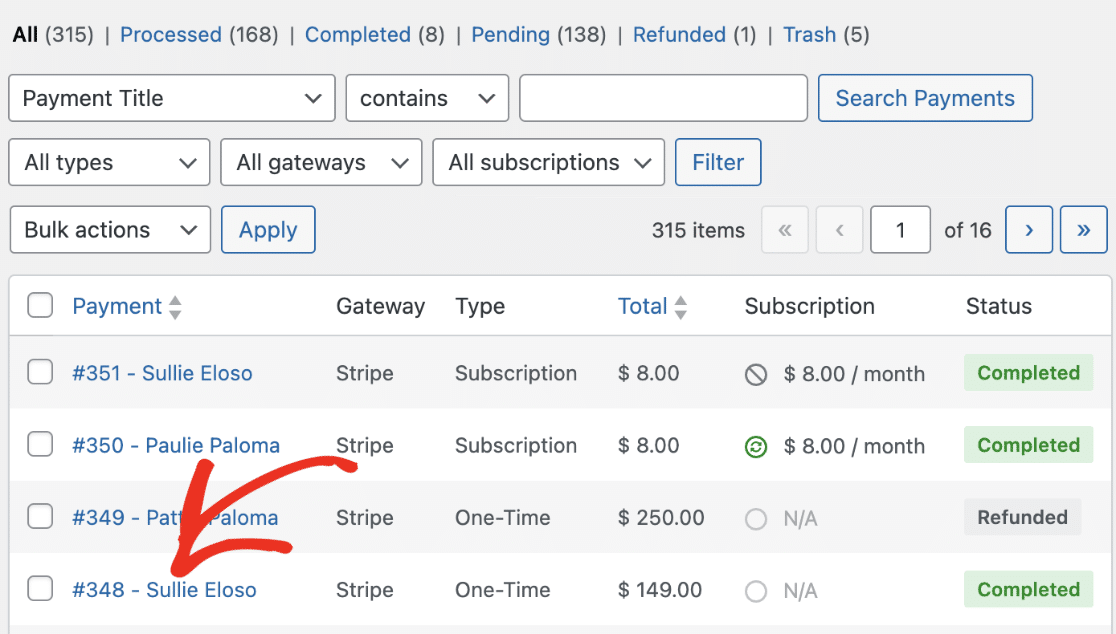
To easily access payment details in Stripe, scroll to the payment entries table and click on the entry you wish to view its details.
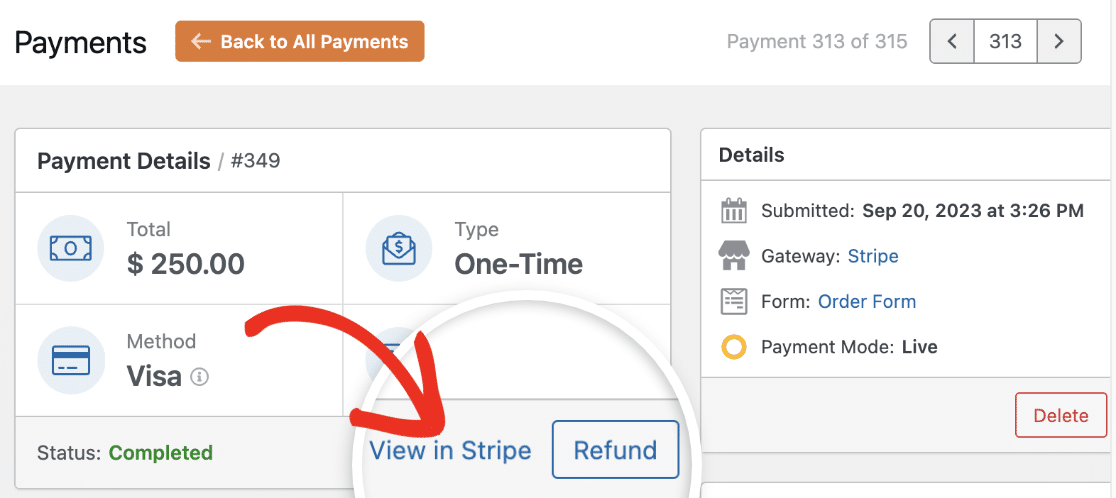
Under Payment Details, click the View in Stripe link to see additional details about the transaction in Stripe.
Identifying Recurring Payments
To see if a payment is recurring, scroll down to the payment entries table. If the payment is recurring, you’ll see Subscription next to it under the Type column.
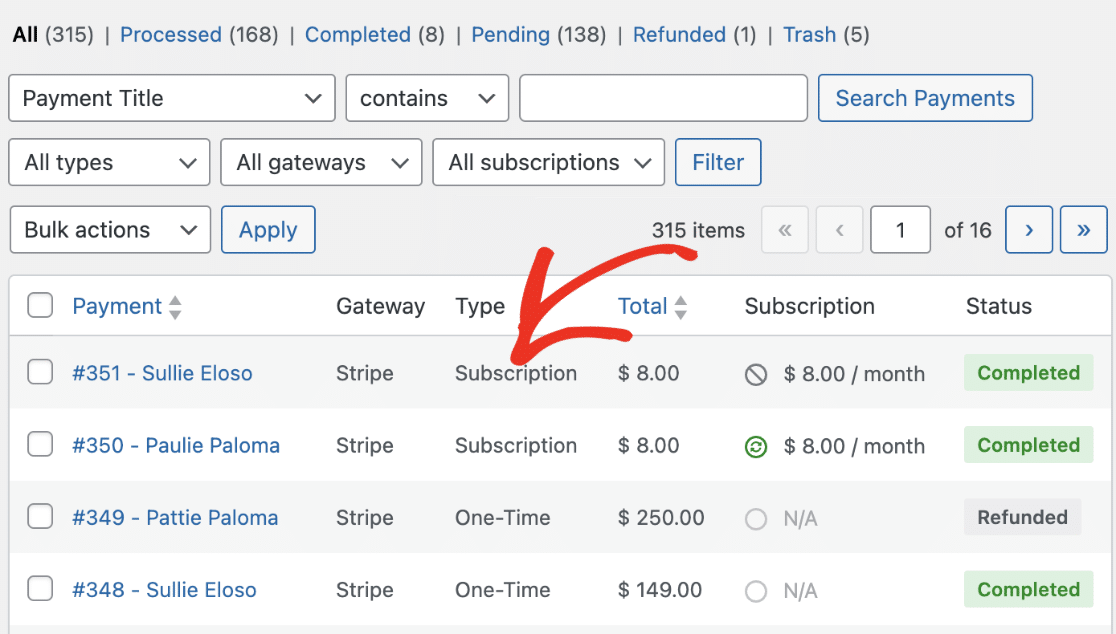
You’ll also see the subscription amount and recurring period under Subscription.
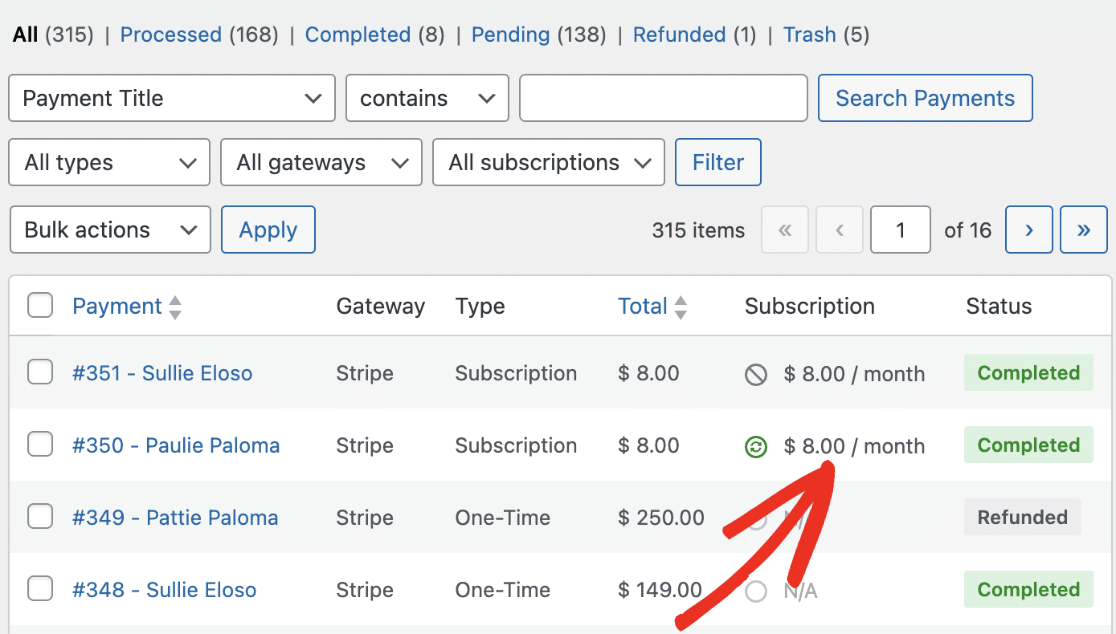
Note: Active subscriptions have a green active icon next to them. If a subscription plan has been canceled, you’ll see a canceled icon next to the subscription amount.
Issuing a Refund
Start by going to WPForms » Payments and selecting the specific payment you’d like to refund.
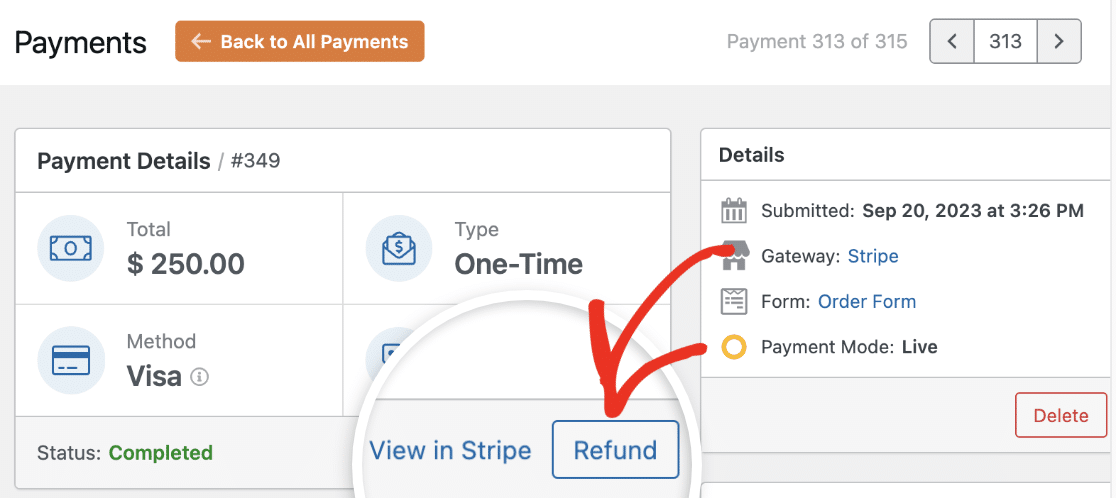
From the Payment Details page, you can refund the payment to the user. To do so, simply click the Refund button.
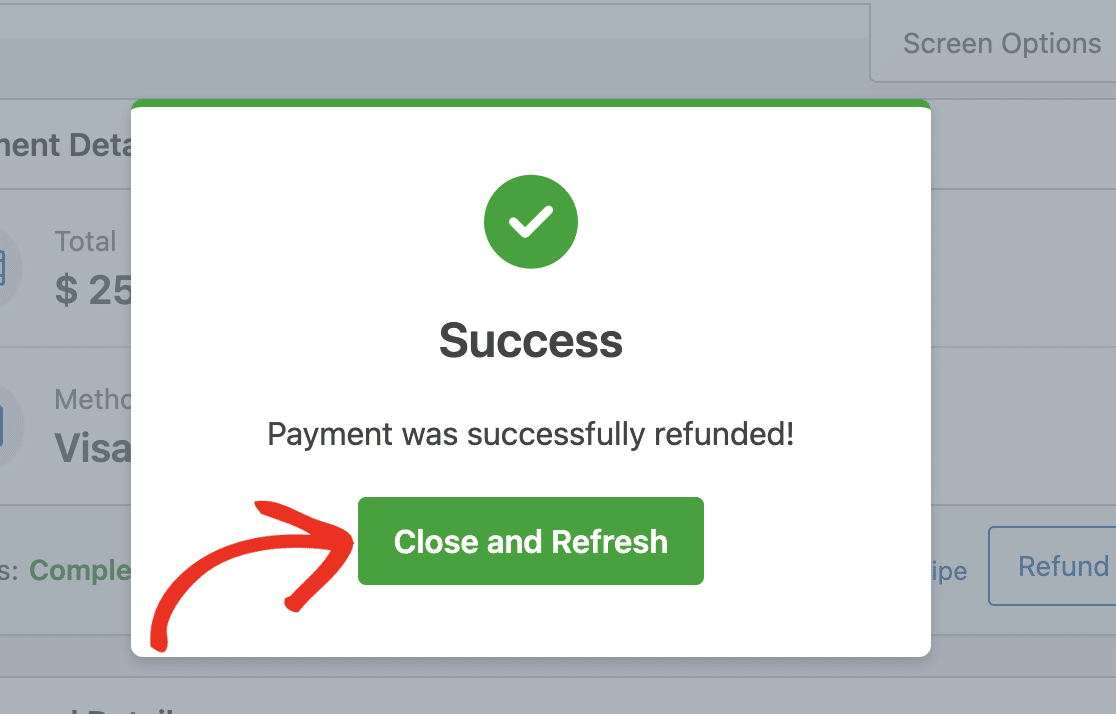
Once the process is completed, you’ll see a success notification. Click the Close and Refresh button to continue.
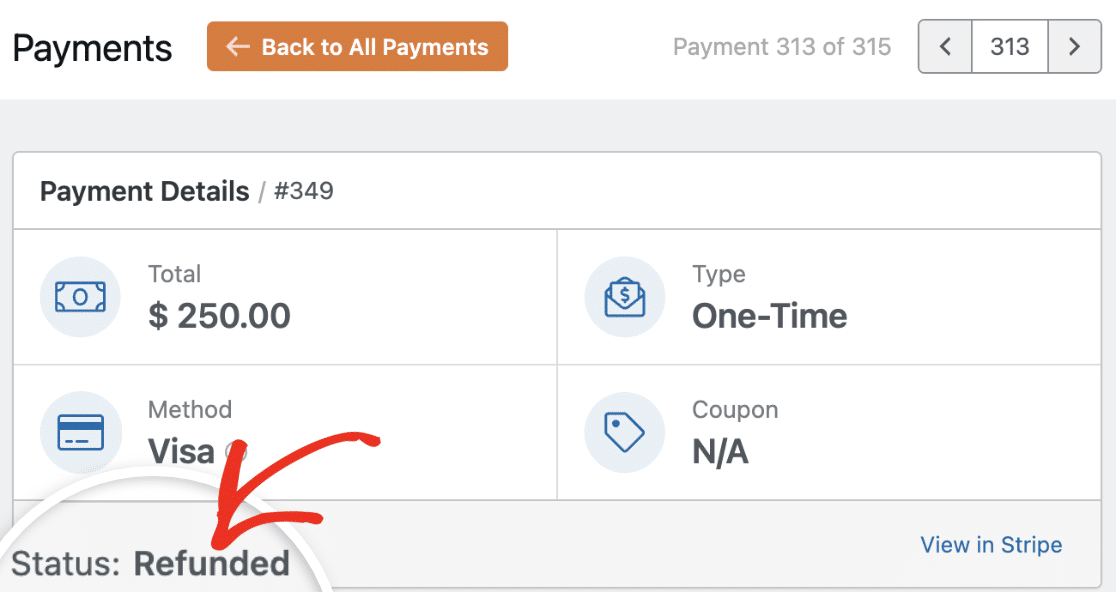
The status will read Refunded, indicating the payment has been refunded to the user.
Canceling Subscription Plan
You can cancel subscriptions created through your forms directly from the Payments page. To cancel a subscription, scroll to the payment entries table and select the entry you want to cancel its subscription.
You’ll see additional details about the recurring payment in the Subscription Details section. To cancel the subscription plan, click the Cancel button.
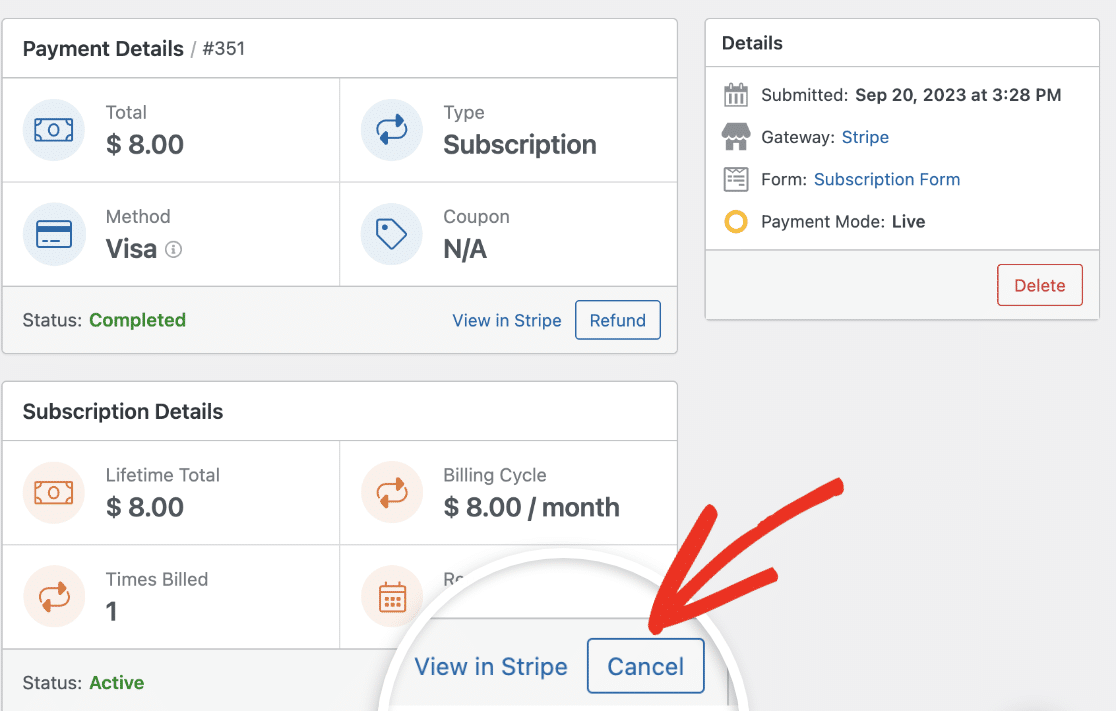
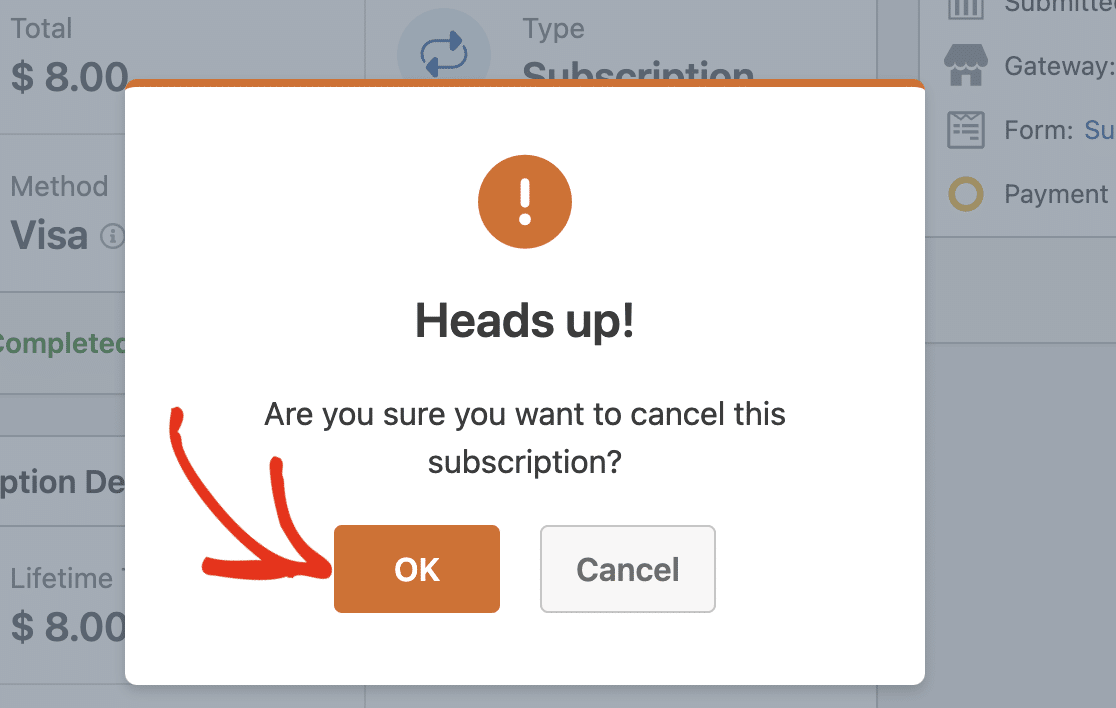
In the confirmation overlay that appears, click OK to proceed.
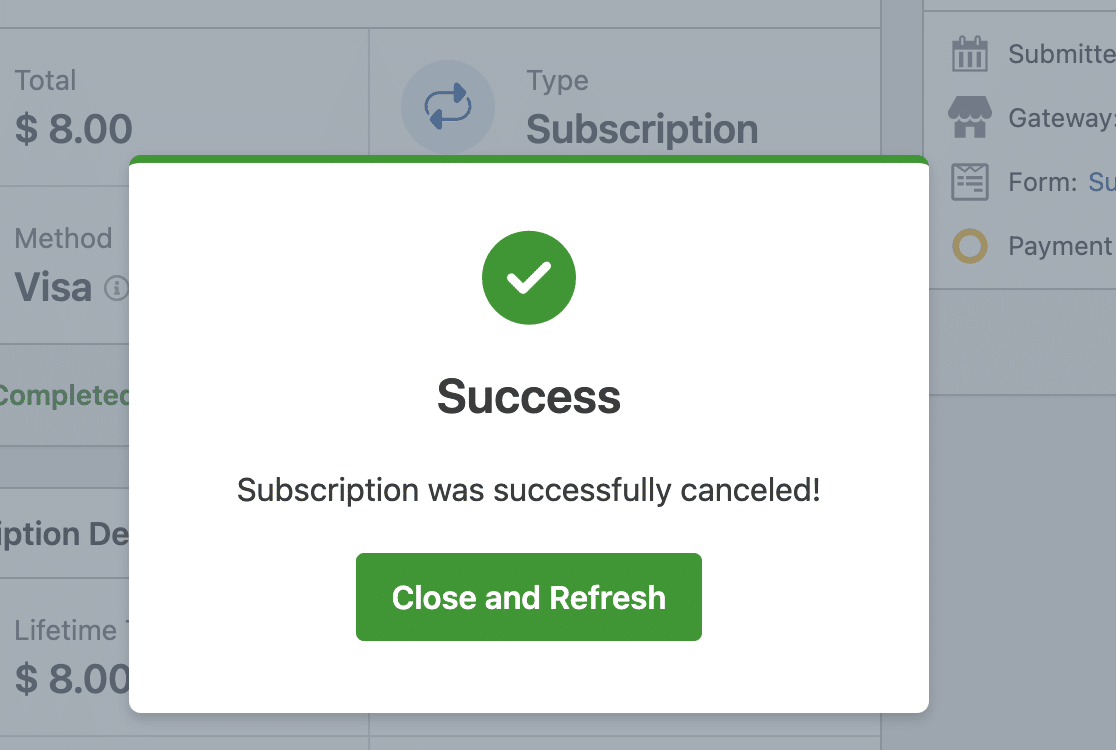
You should see a success notification afterward. Click the Close and Refresh button to continue.
Note: If you’d like, you can still cancel subscriptions from your Stripe account dashboard. For more details, be sure to check out Stripe’s guide on how to pause or cancel subscriptions.
To learn more about managing payments in WPForms, be sure to check out our guide to viewing and managing form payments.
Frequently Asked Questions
These are some of the most common questions we receive about viewing and managing Stripe transactions.
How do I test Stripe payments in my forms?
The best way to test out your forms is to submit an entry and follow the same steps as your users. We recommend setting up Stripe’s Test Mode before adding your form to a live page, which allows you to test transactions before accepting actual payments. Once you’ve enabled test payments, you can view your test transactions from the WordPress dashboard.
That’s it! Now you know how to view and manage Stripe payments with WPForms.
Next, would you like to further customize your payment forms and provide even more flexibility to your users? Be sure to explore how to use conditional logic with Stripe payments for more details.
