AI Summary
Would you like to be able to view entries flagged as spam by our anti-spam tools? Reviewing spam entries allows you to check and retrieve entries identified as spam that may be legitimate entries.
This tutorial will show you how to view and manage spam entries in WPForms.
Before you get started, be sure to install and activate WPForms on your WordPress site.
Enabling Spam Entry Storage Option
Note: With WPForms version 1.9.0 and later, this option is enabled by default for new forms. You can proceed directly to accessing the spam entries page in the next section.
To view spam entries in your admin dashboard, you’ll first need to enable the spam entry storage option in the form builder.
To get started, create a new form or edit an existing one to access the form builder.
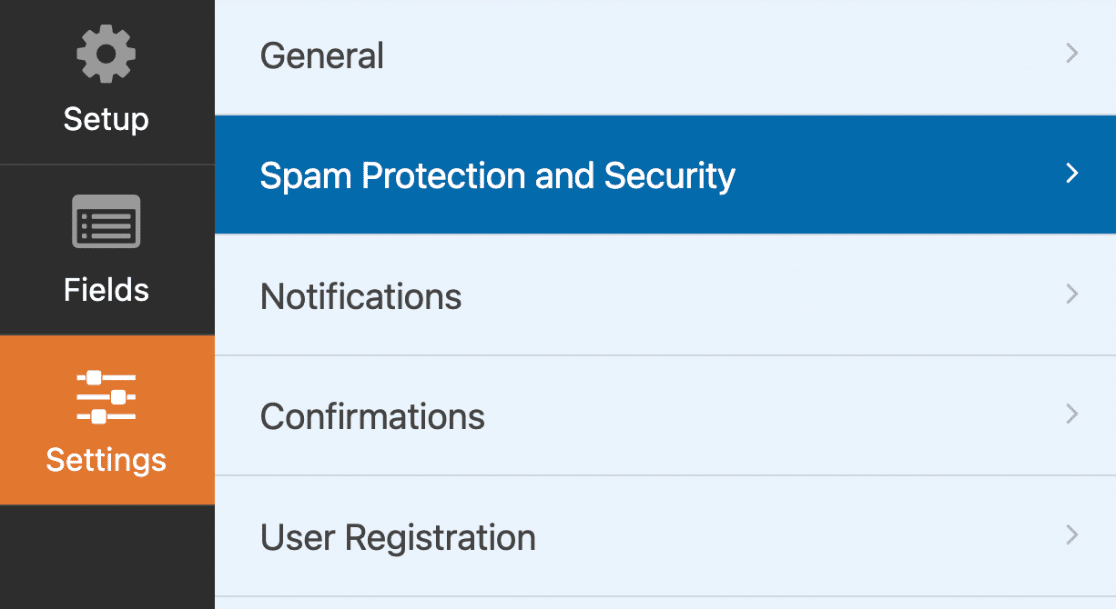
In the form builder, go to Settings » Spam Protection and Security.
Under the Protection section, toggle the Store spam entries in the database option to the on position.
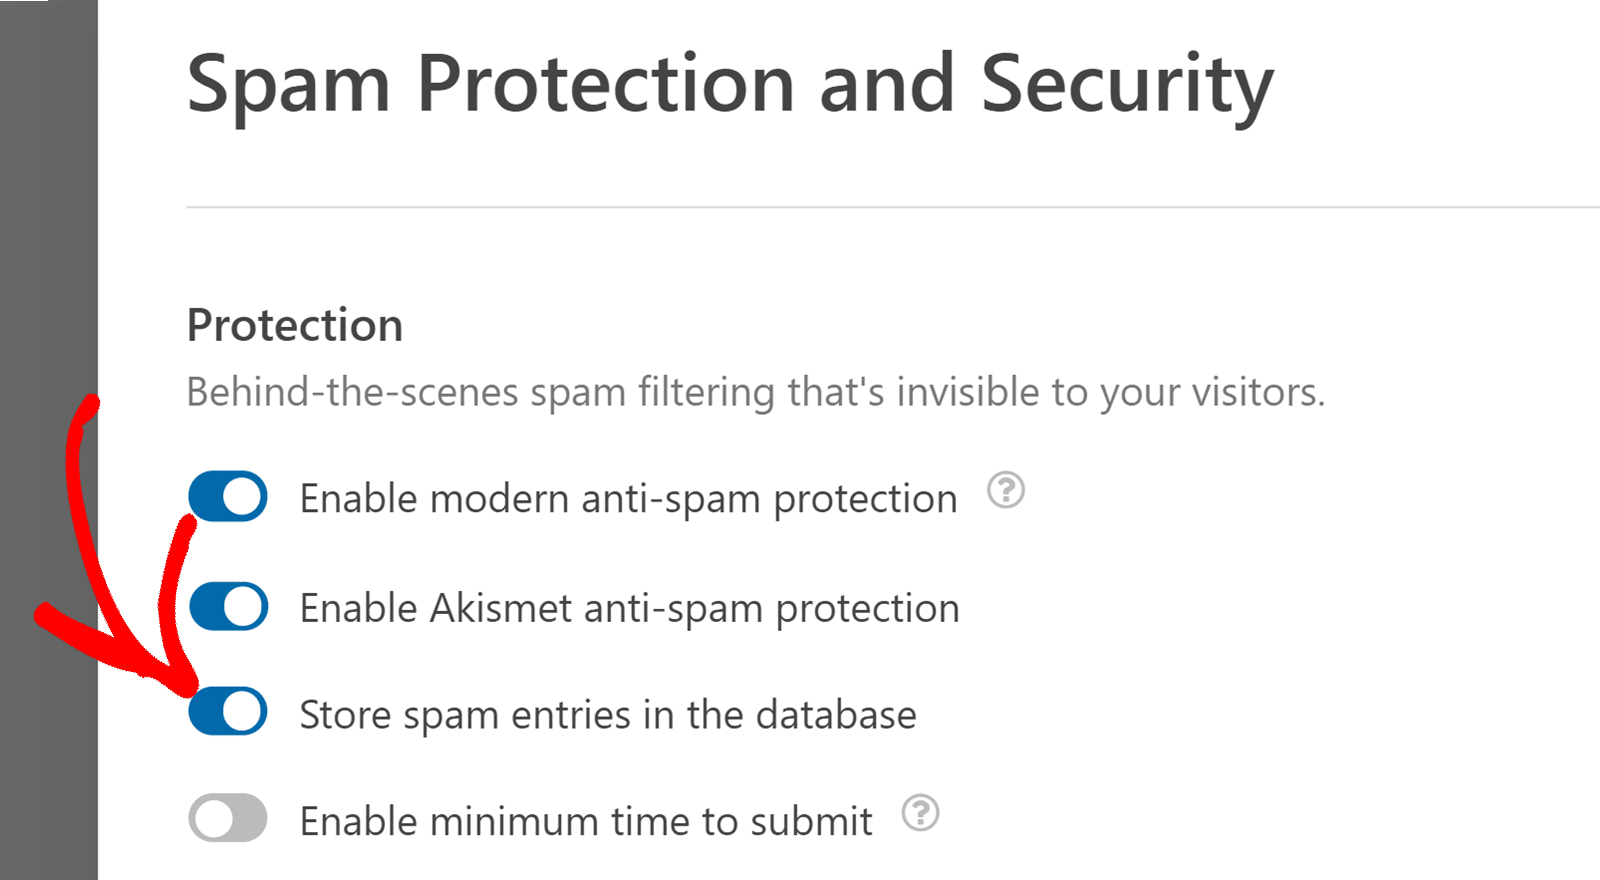
After enabling this option, the form will allow all submissions (including spam entries) instead of blocking them. However, form notification emails won’t be delivered if an entry is identified as spam. See our FAQ section for more details.
Once done, be sure to save your changes.
Note: If you have multiple forms on your website, you’ll need to enable this option on all the forms you’d like to store spam entries.
Accessing the Spam Entries Page
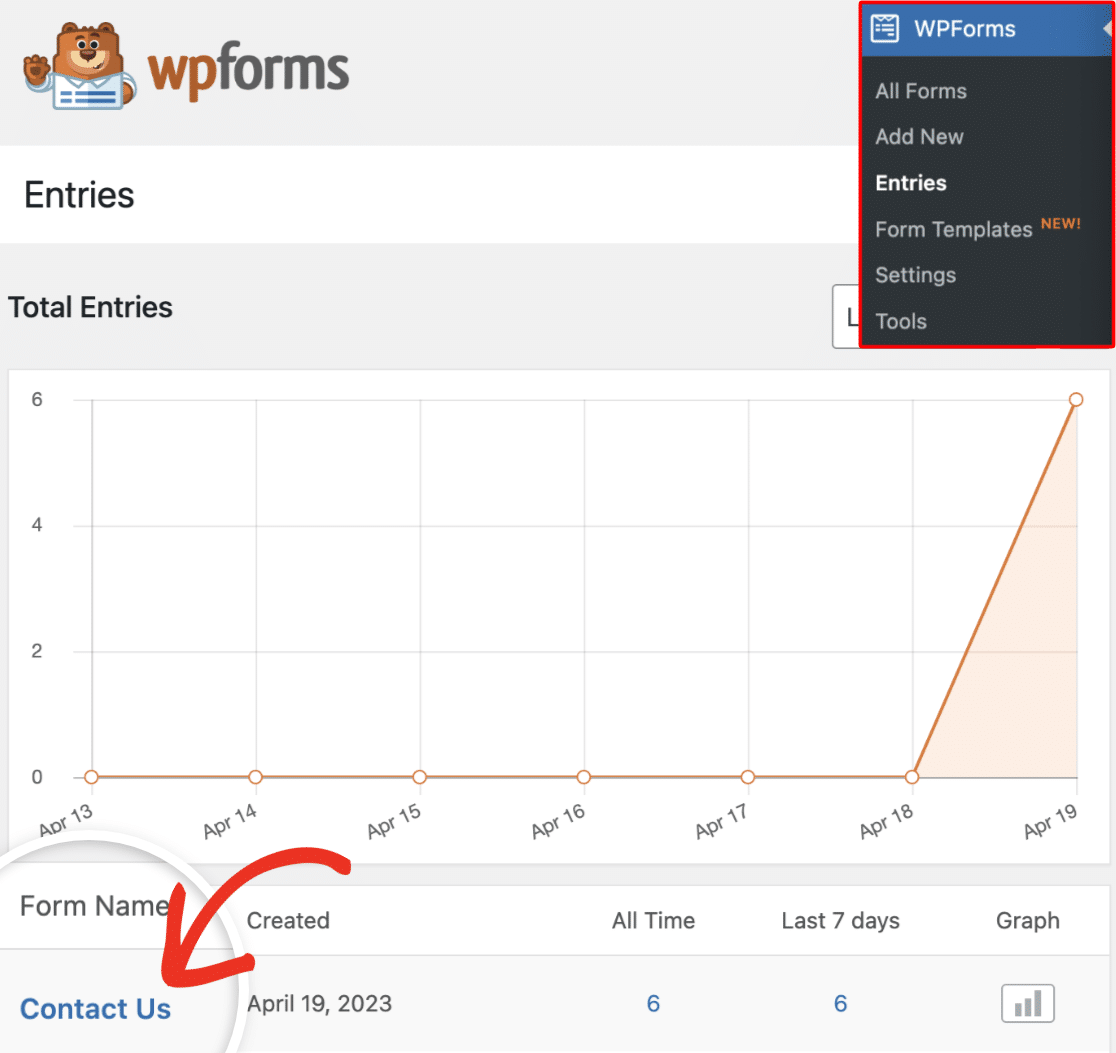
To access your entries page, go to WPForms » Entries. Here you’ll see a list containing all the forms you’ve created. Go ahead and select the form you’d like to view its entries.
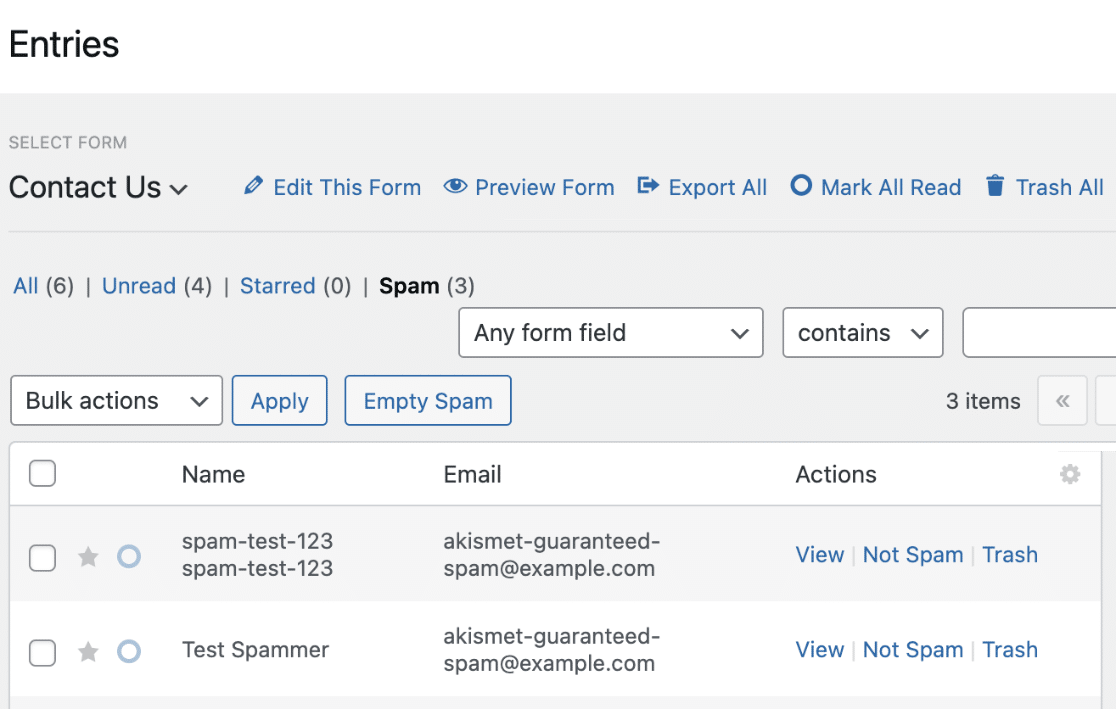
On the Entries page, click the Spam link below the form name to access spam entries for the selected form.
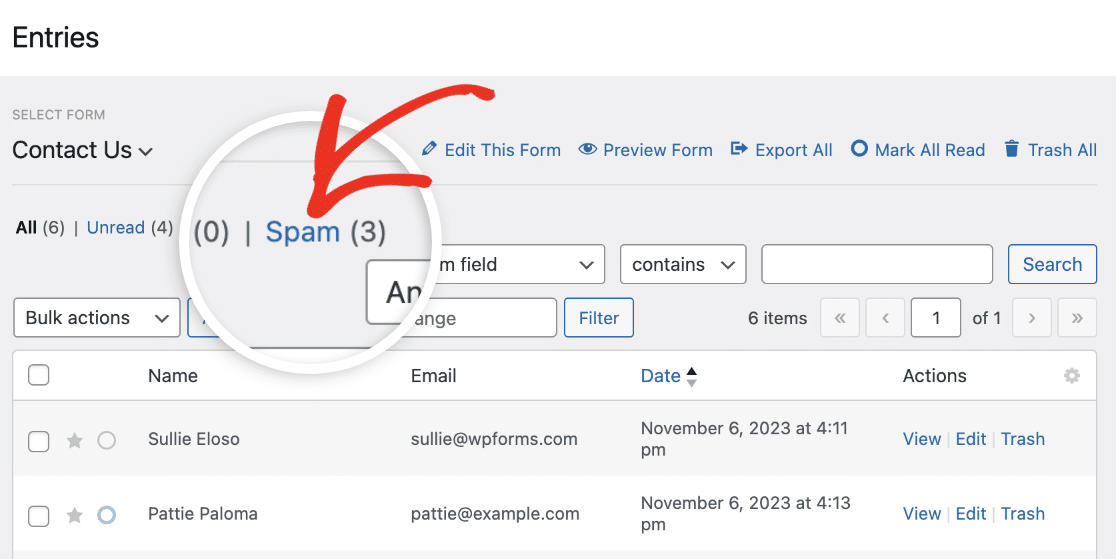
Clicking on this link will filter the entries page to only show submissions identified as spam.
Note: Want to learn how to manage your form entries? Check our form entries tutorial for more details.
Managing Spam Entries
On the Spam Entries page, you’ll see a list of entries marked as spam by WPForms’ anti-spam tools. Here, you’ll be able to perform actions such as viewing, deleting, or marking an entry as not spam.
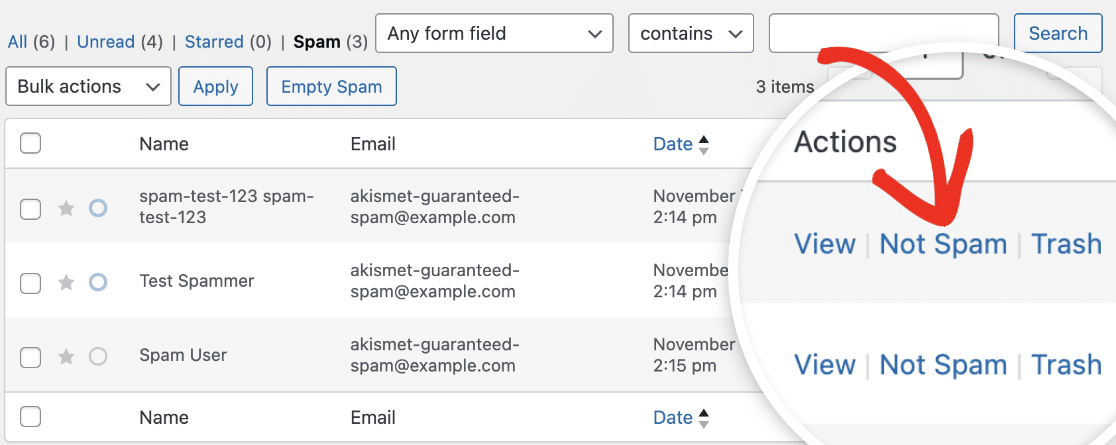
Under the Actions column, you’ll see 3 options to help you manage each spam entry.
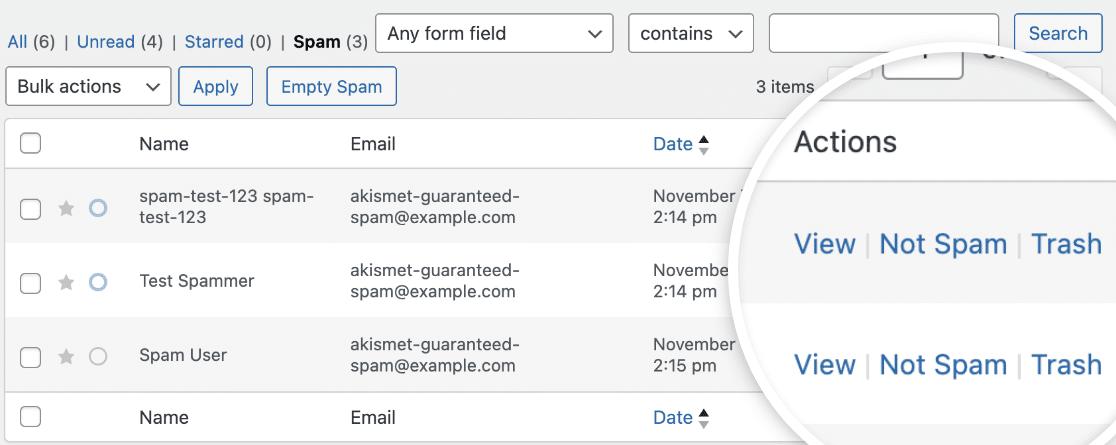
Below, we’ve explained each of the available options:
- View: Clicking on this link will direct you to the view entry page with additional details about the specific entry.
- Not Spam: This link lets you move false-positive spam entries back to your entries page.
- Trash: This option lets you move the specific spam entry to the Trash folder.
Note: The search filter in WPForms allows you to find specific entries that match the keyword you specify. This is handy to quickly find entries that may have been wrongly flagged as spam. For more details, please see our guide on searching and filtering form entries.
Viewing Individual Spam Entry
To see more details about a specific spam entry, click the View link under the Actions column.
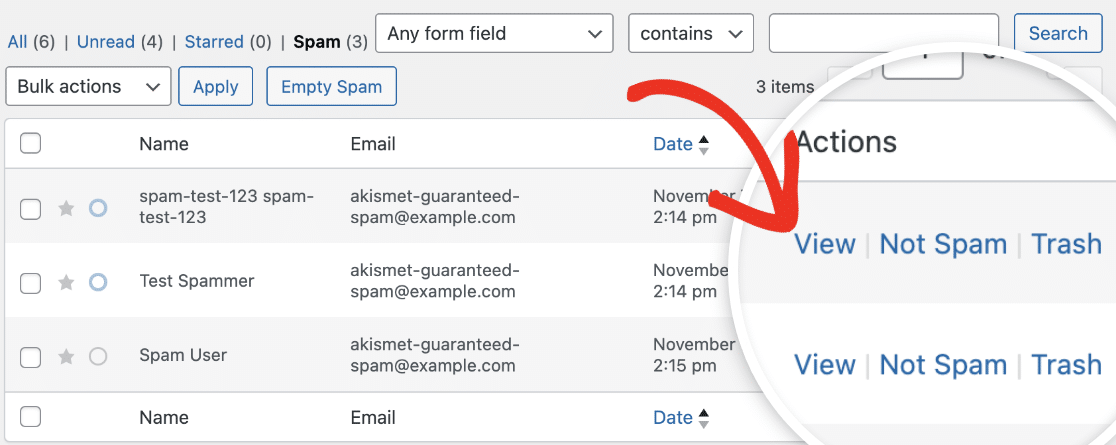
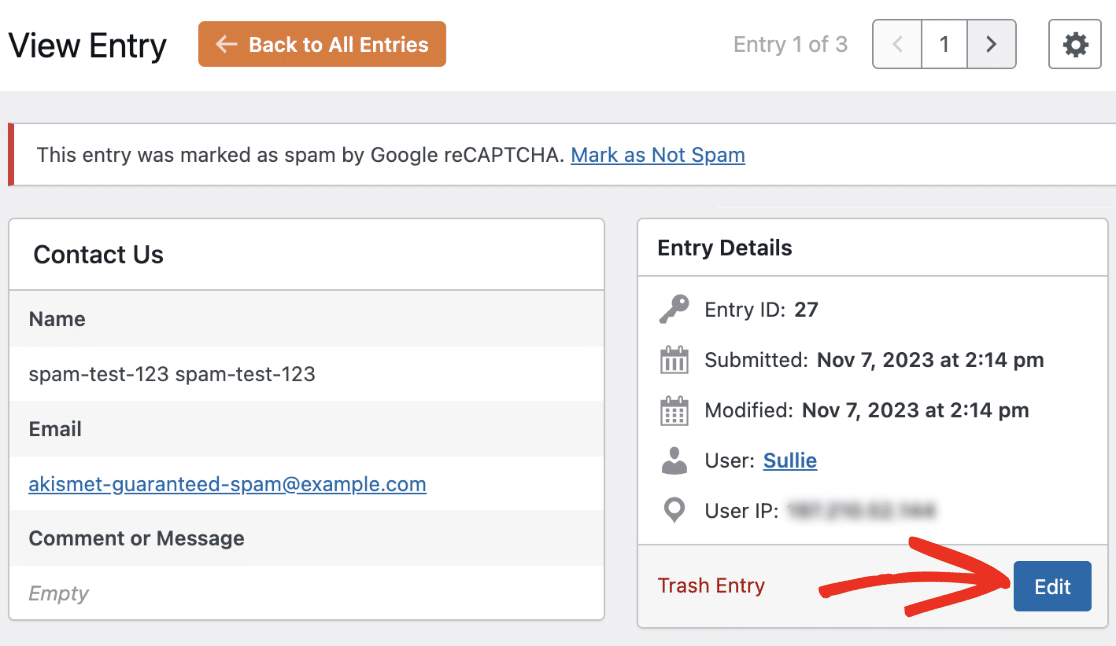
On the View Entry page, you’ll see additional details about the entry.
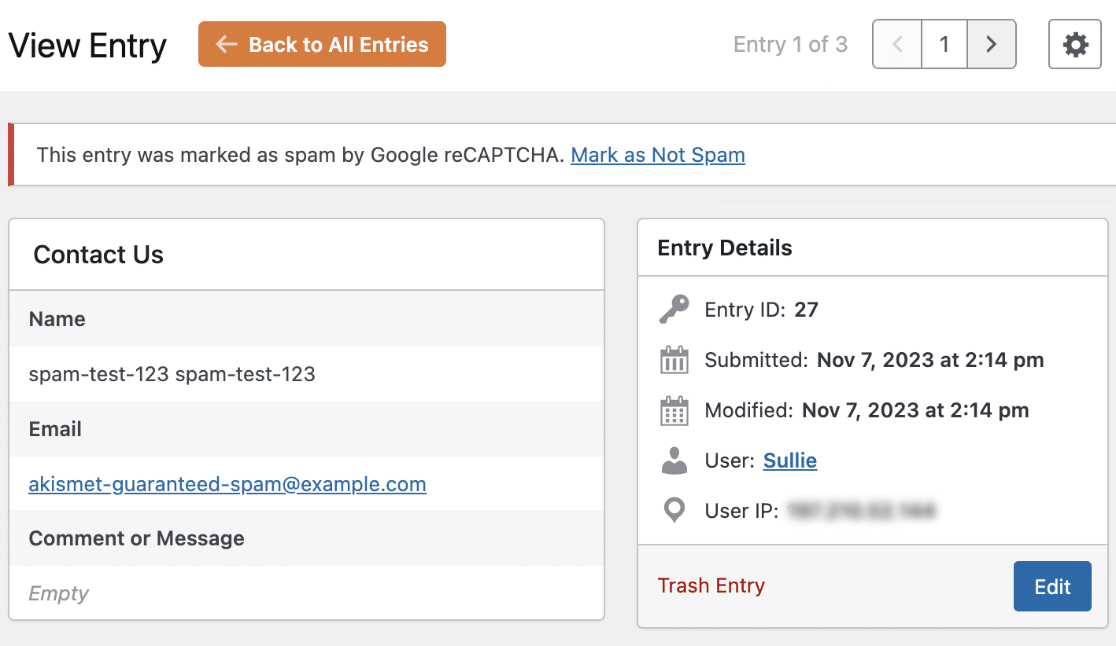
Clicking on the Back to All Entries button directs you to the spam entries page.

You can use the navigation at the top right corner to switch between individual entries.

Below the View Entry header, you’ll see an alert with details of the anti-spam tool that flagged the entry as spam. In our example, the entry was identified by Google reCAPTCHA.

Note: The exact alert you’ll see may vary for each entry, depending on the anti-spam tool that identified it as spam.
If you’d like, you can edit the entry just like you would a regular entry. To do so, click the Edit button and update the values of each form field.
Note: For a detailed guide, please see our tutorial on editing form entries.
Retrieving Spam Entries
The View Entry page shows additional details about a specific entry. You’ll be able to review each spam entry from here.
If an entry was mistakenly flagged by one of WPForms’ anti-spam tools, you’ll be able to retrieve the entry. To restore an entry, click the Mark as Not Spam link in the alert box.

After clicking on this link, you’ll see an alert notifying you that the entry has successfully been unmarked.
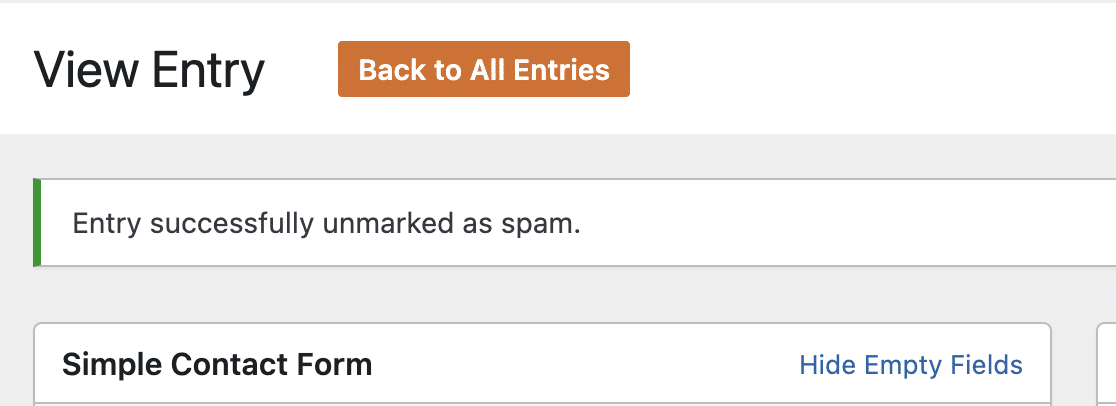
This would move the unmarked submission to your form entries page. It will also send all form notification emails to the email address(es) you configured.
Note: After marking an entry as not spam, you won’t be able to mark it as a spam entry. See our FAQ section for more details.
You can also unmark an entry as spam from the Entries page by clicking the Not Spam link next to the specific entry.
Trashing Spam Entries
After reviewing your spam entries and retrieving the legitimate ones, we recommend deleting spam entries to optimize your database storage.
If you’d like to delete spam entries from your site, WPForms provides multiple options. Below, we’ll cover the steps for deleting spam entries individually and in bulk.
Individual Spam Entry
If you’re on the spam entries overview page, select the Trash option under the Actions column.
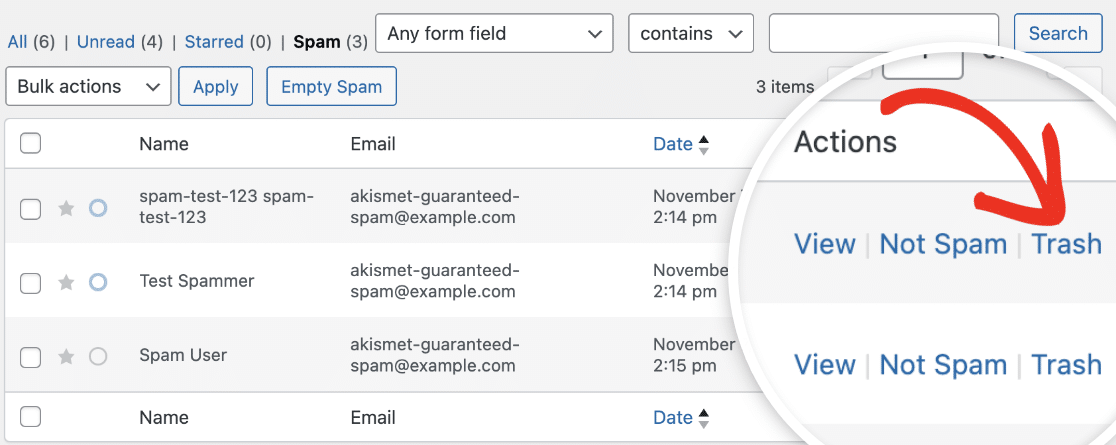
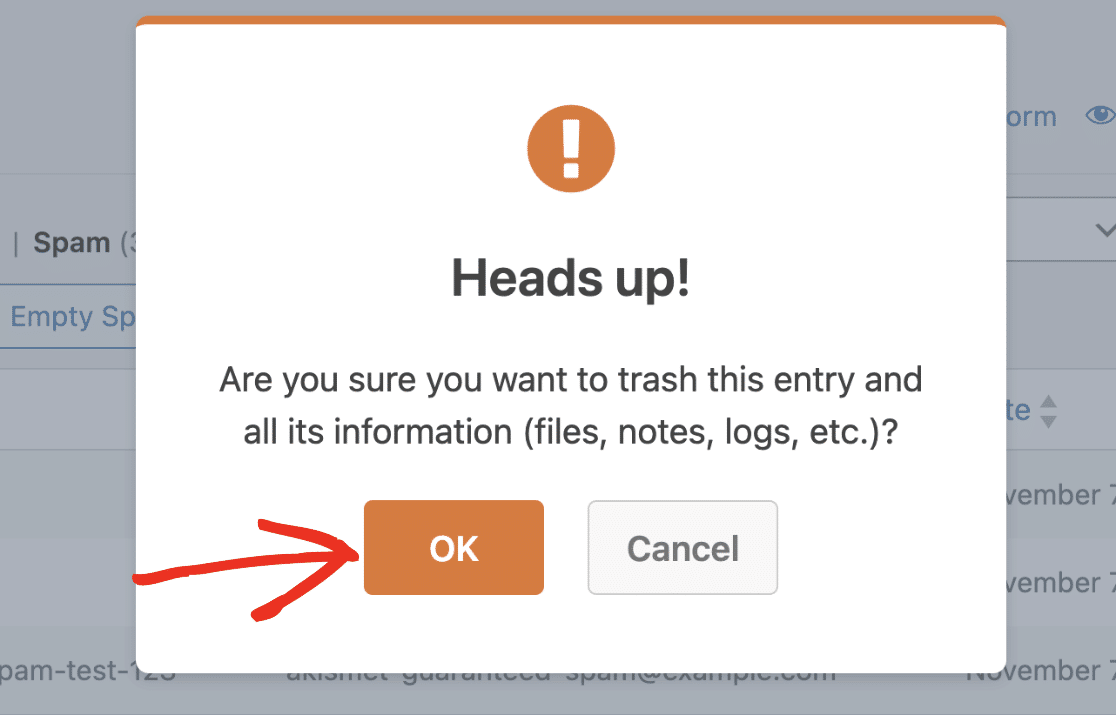
In the confirmation overlay that appears, click OK to trash the spam entry.
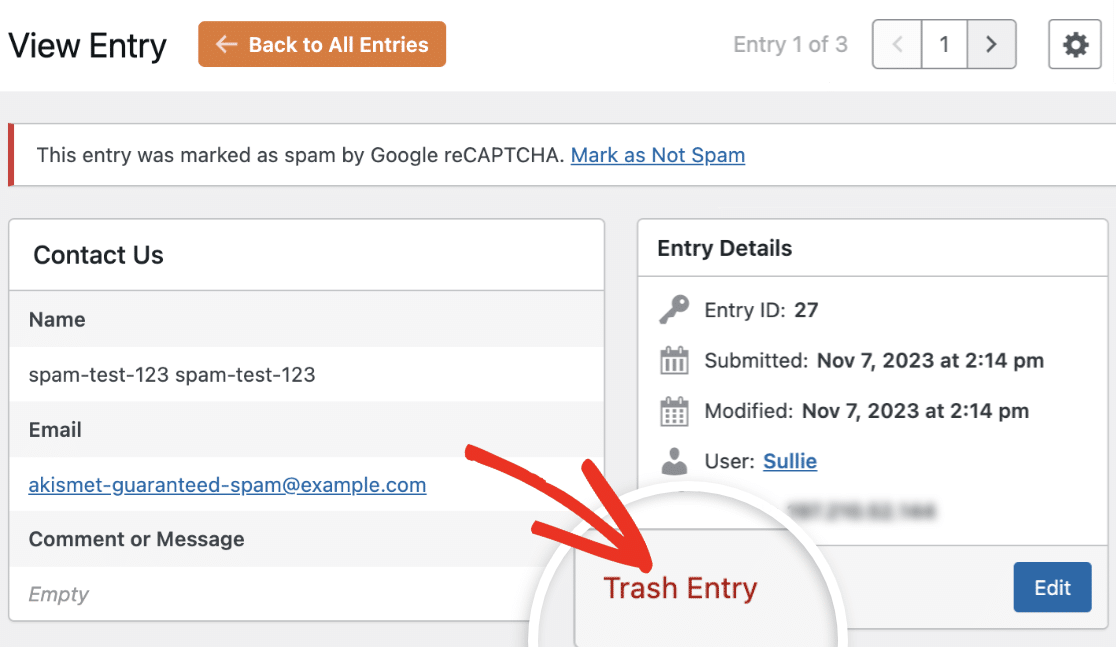
Alternatively, you can trash a spam submission from the View Entry page. Simply click the Trash Entry link and follow the prompt.
Bulk Spam Entries
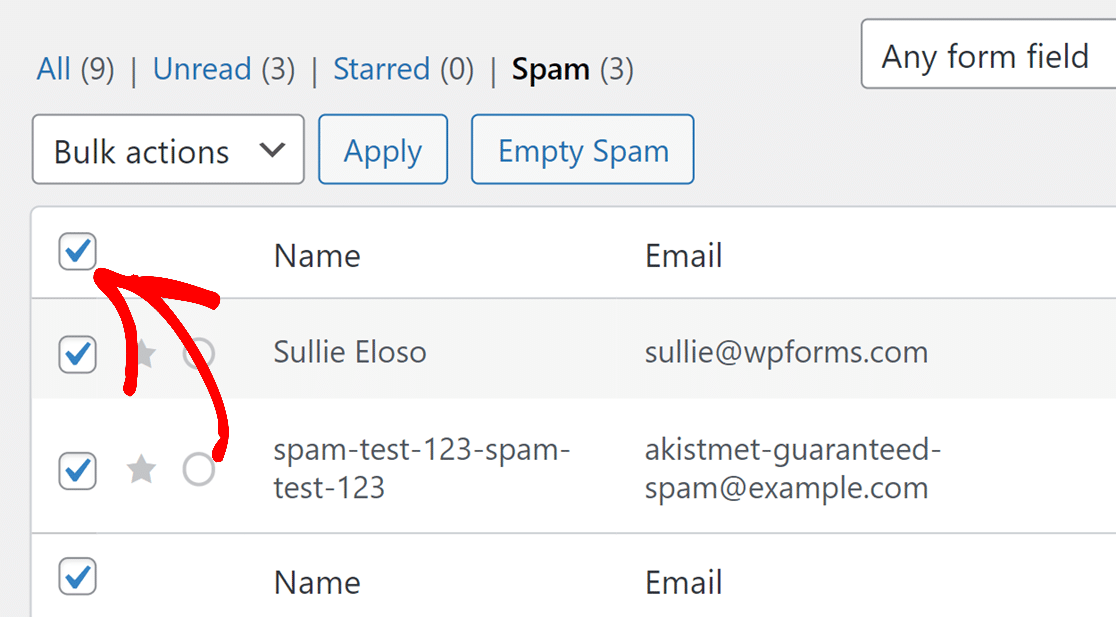
To delete spam entries in bulk, tick the checkbox next to the Name column to select all entries on the page.
Next, click the Bulk Actions dropdown and select Move to Trash from the available options.
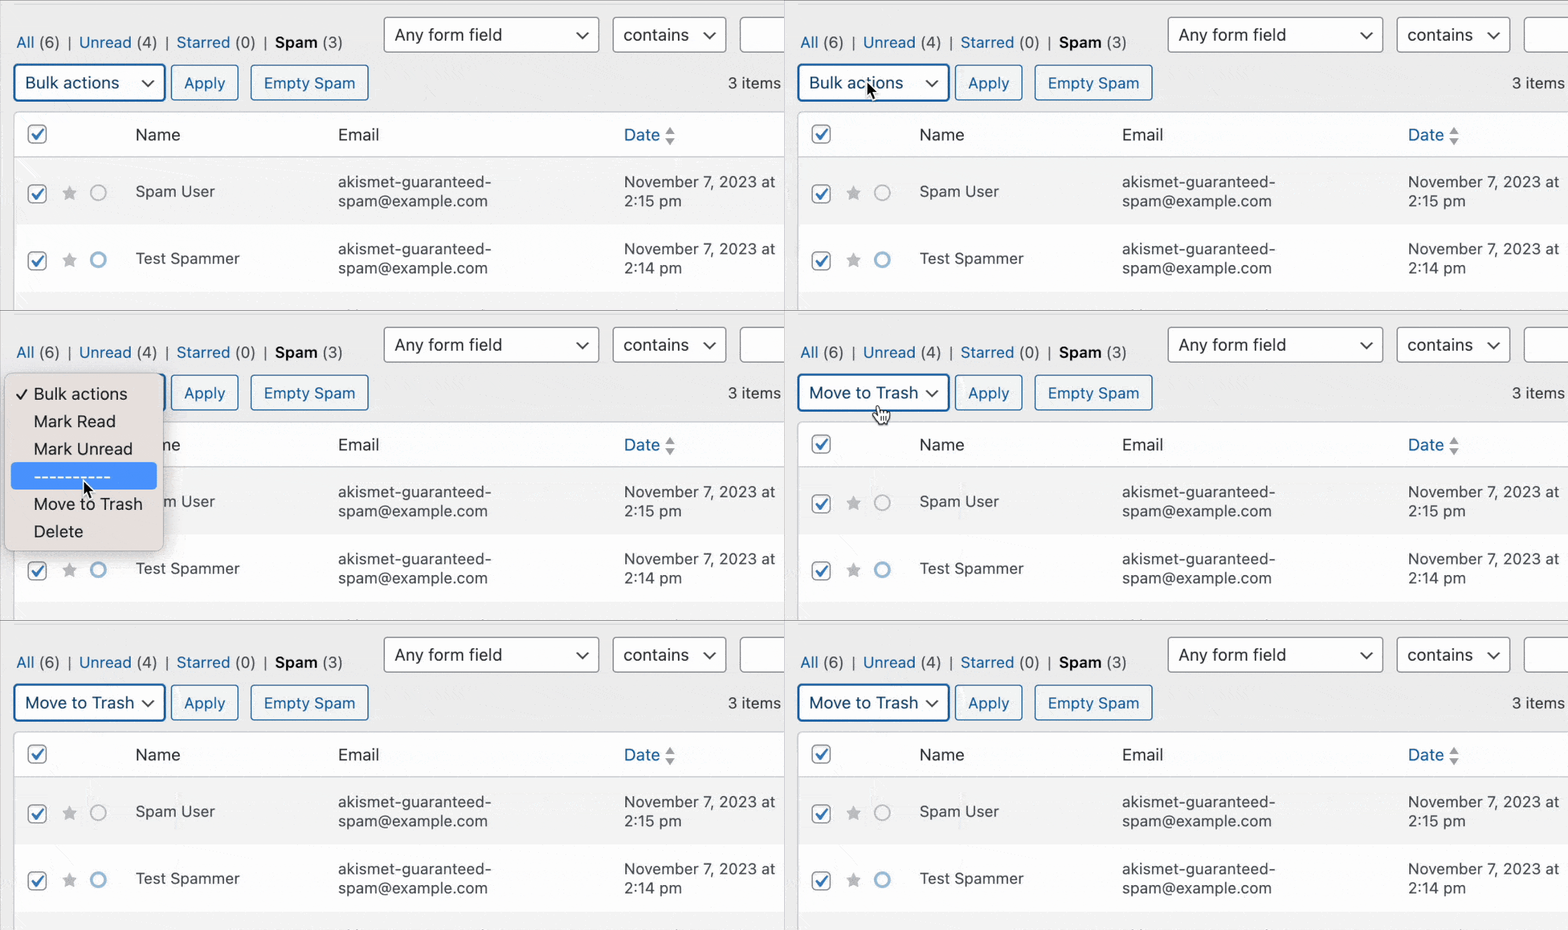
Note: Choose the Delete option if you’d like to skip the trash folder and delete your spam entries.
Once selected, click the Apply button to trash the selected spam entries.
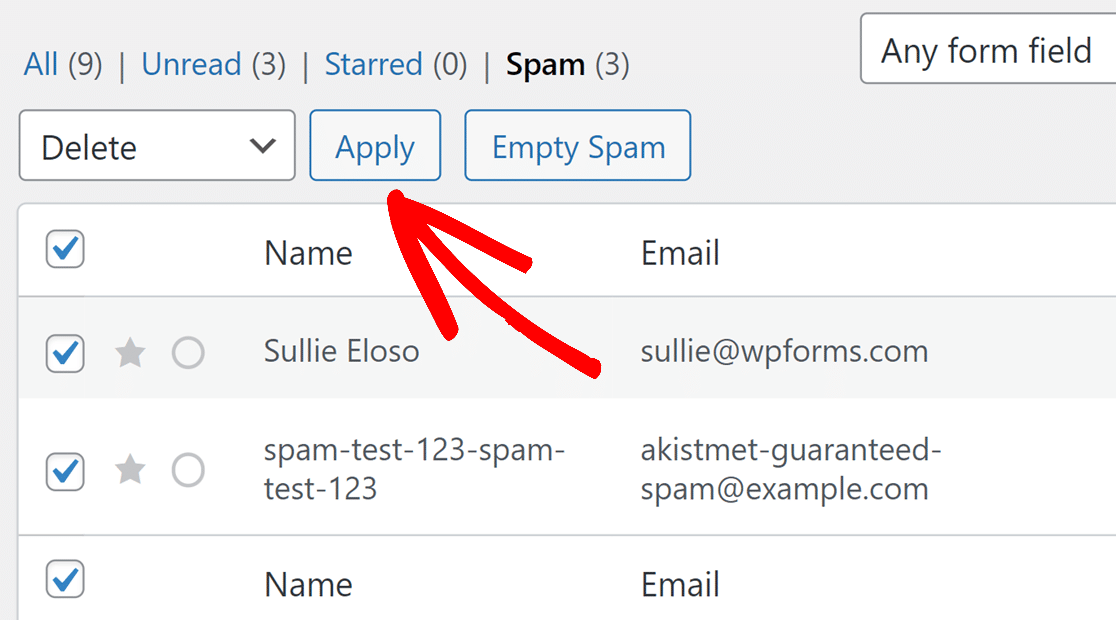
Note: Using the Bulk Actions option to trash spam entries will only remove entries displayed on the current page due to pagination.
If you want to delete all spam entries for a form, simply click the Empty Spam button.
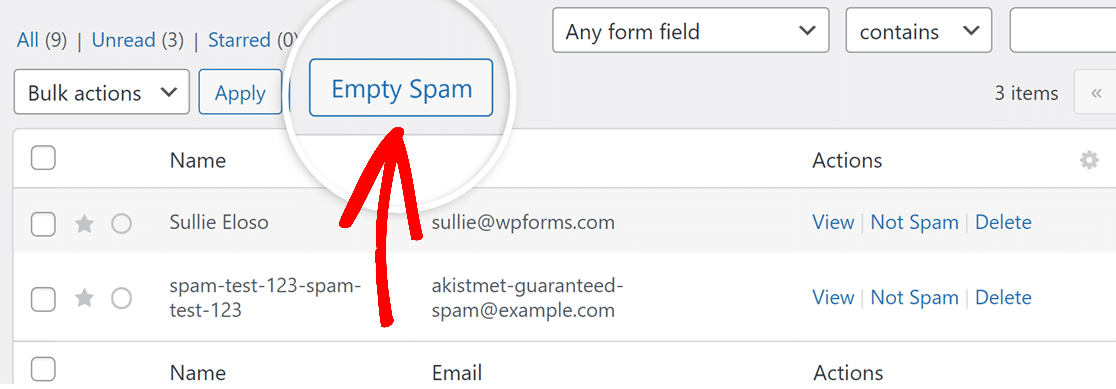
Once done, you’ll see a notification with the number of deleted entries.

Customizing Spam Entries View
You can customize the rows and columns in the spam entries page to show the fields you’d like. It works the same way as customizing the Entries page. To learn more, please see our customizing entries view tutorial.
Frequently Asked Questions
These are answers to some top questions about viewing and managing spam entries in WPForms.
Can I mark an entry as Spam from the Entries page?
No. WPForms automatically mark entries as spam once any of our anti-spam tools detect them. You won’t be able to mark existing entries as spam if our anti-spam tool doesn’t flag them.
If you spot a spam submission not identified by WPForms on your entries page, we recommend deleting it from your site.
Does WPForms mark entries as spam if the country and keyword filter is used?
No. If you enable keyword or country filtering on your form, submissions containing filtered keyword(s) or from blacklisted countries will be blocked and won’t be submitted.
What are the criteria for marking an entry as spam?
Entries blocked by the CAPTCHA method you integrate with your form will be marked as Spam on the Entries page. If you’ve set up Akismet anti-spam protection, entries blocked by Akismet will also be marked as spam.
What happens when an entry is identified as spam?
Entries flagged as spam will be submitted and stored in the Spam section on the Entries page.
Although the form will be submitted, notification emails won’t go through. Also, if you’re using one of our email marketing addons, actions such as adding a new subscriber to your email list will be blocked.
When you unmark an entry as spam, it’ll move it back to the Entries page. It’ll also trigger actions like sending notification emails or adding a new subscriber to your mailing list.
I have a payment form. Will payment entries be flagged as spam if identified by WPForms anti-spam tools?
No. WPForms payment providers often handle spam and security checks before processing a payment. The form will be submitted if the users’ payment is successful from the provider’s gateway.
Will spam entries be deleted after a while?
Yes. By default, WPForms automatically deletes spam entries after 90 days. You can set how often the auto-delete should run on your site. To do so, go to WPForms » Settings and select the Misc tab.
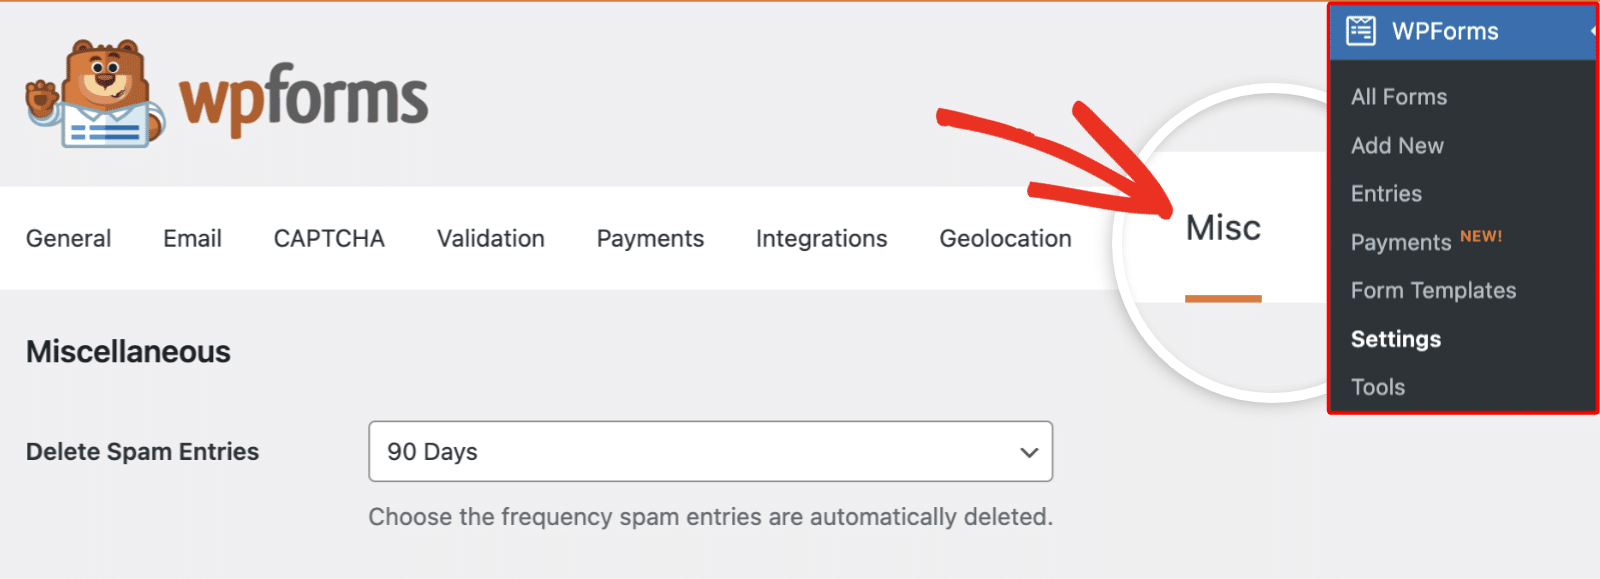
In the Delete Spam Entries section, you’ll be able to choose the frequency at which spam entries are deleted. Available options include:
- 7 Days
- 15 Days
- 30 Days
- 90 Days

Note: To help reduce spam submissions from the start, consider using our Anti-Spam GDPR Contact Form Template, which incorporates built-in spam prevention measures like custom CAPTCHA and GDPR compliance features.
That’s it! Now you know how to view and manage spam entries submitted through your WordPress forms.
Next, would you like to learn how to reduce the number of spam submissions you receive? Check our spam prevention tutorial to learn how.
