AI Summary
Would you like to record your user’s path throughout your site before submitting your WordPress forms? With the User Journey addon in WPForms, you can easily see where your users visit on your site before filling out your forms.
This tutorial will show you how to install and use the User Journey addon for WPForms.
Requirements:
- You will need a Pro license or higher to access the User Journey addon
- Ensure that you’ve installed the latest version of WPForms to meet the minimum required version for the User Journey addon
Installing the User Journey Addon
Before getting started, you’ll first need to make sure that WPForms is installed and activated on your WordPress site.
Once you’ve got WPForms installed and your license is verified, you’ll be able to quickly install and activate the User Journey addon.
Viewing User Journey Details
Once the User Journey addon is activated and installed, all future form submissions will include the User Journey information in the entry details.
To view this information, go to WPForms » Entries and select the name of your form.
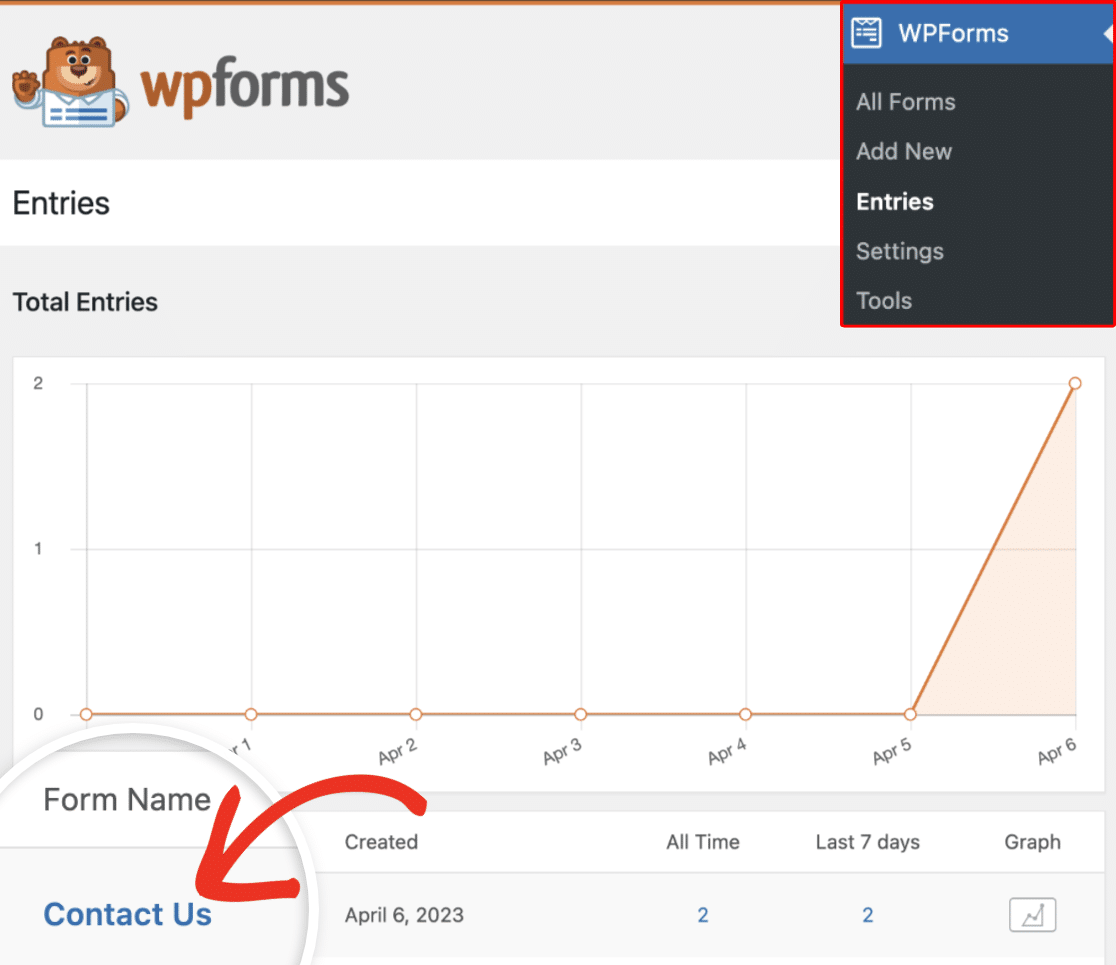
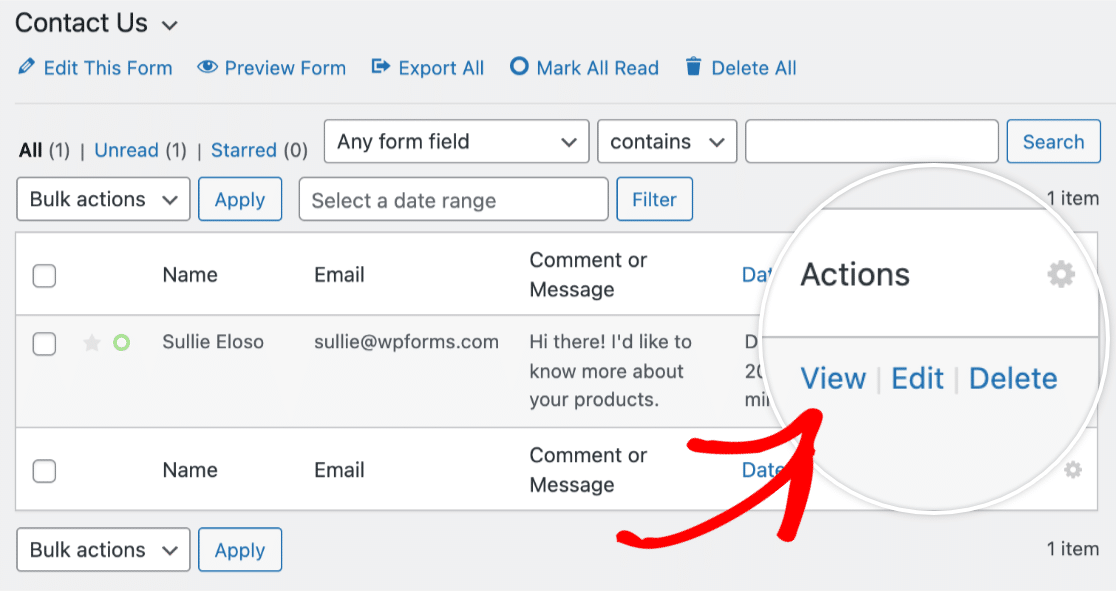
This will show a list of all available entries in the form. To see an entry’s User Journey details, click the View button to open the full entry details.
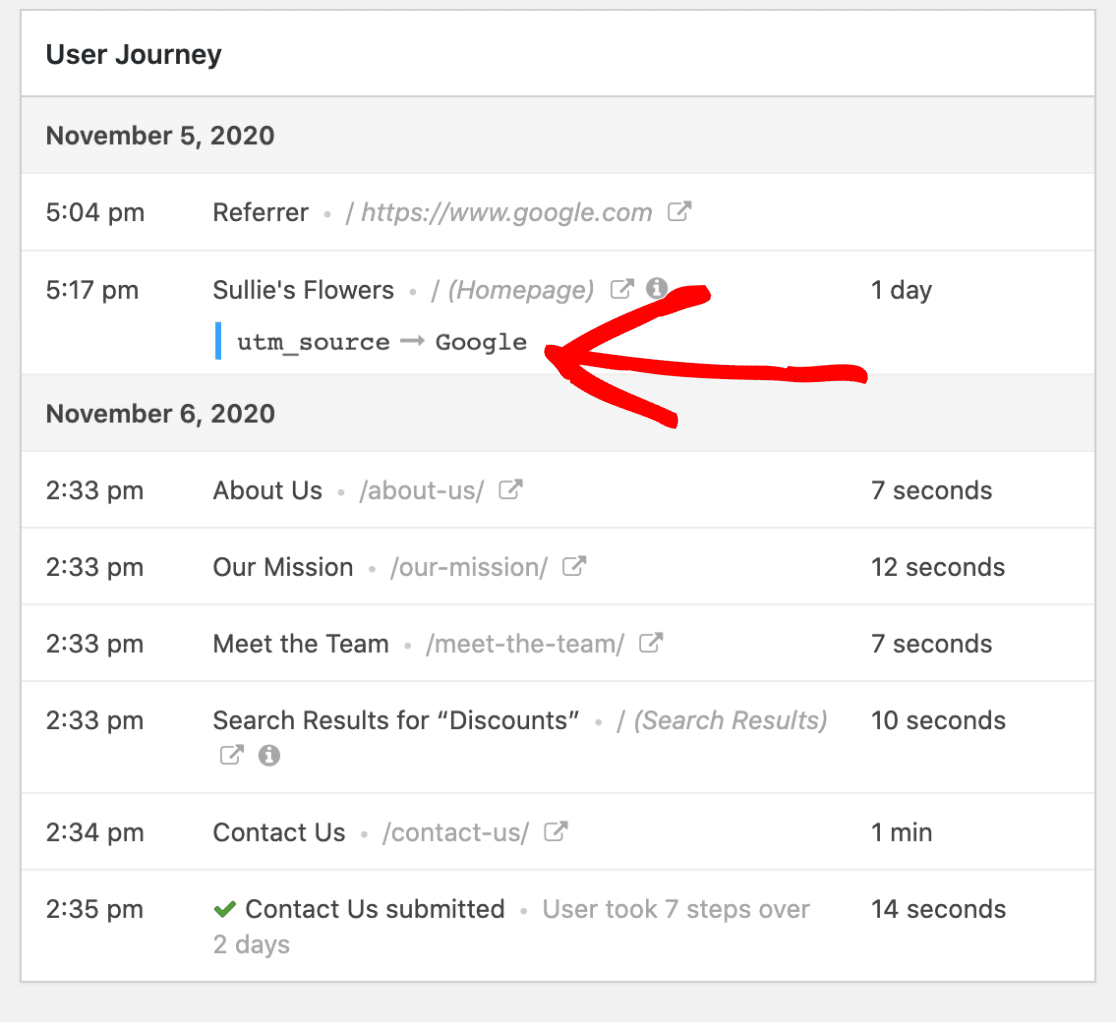
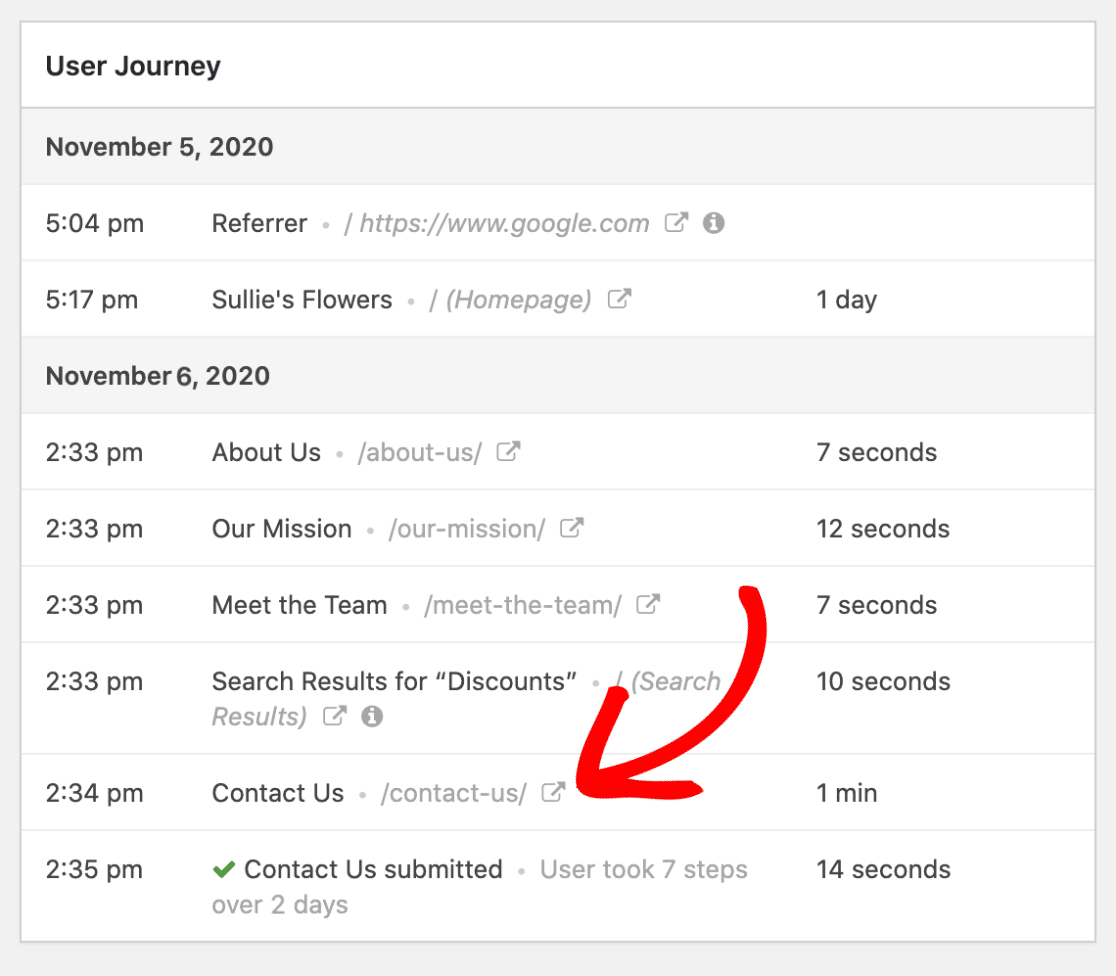
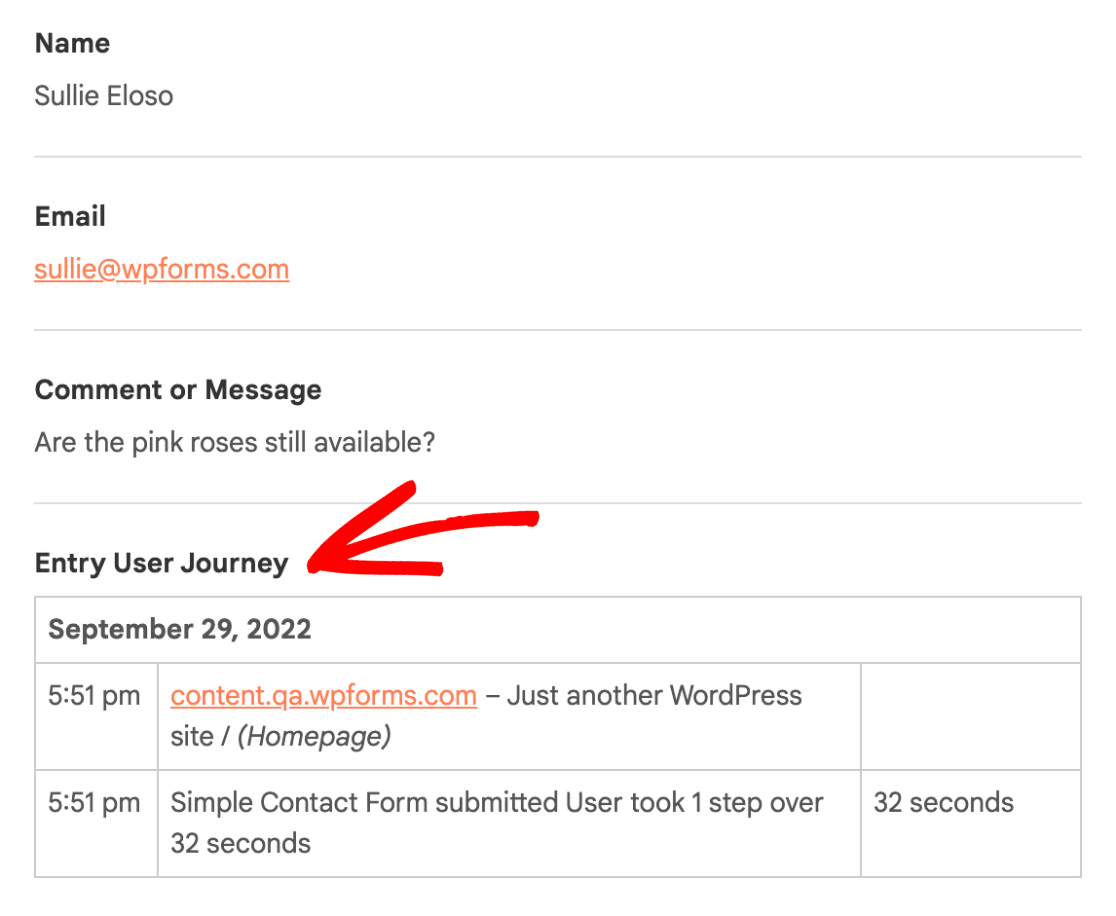
Once you’ve opened the complete details of your entry, scroll down until you see the section titled User Journey.
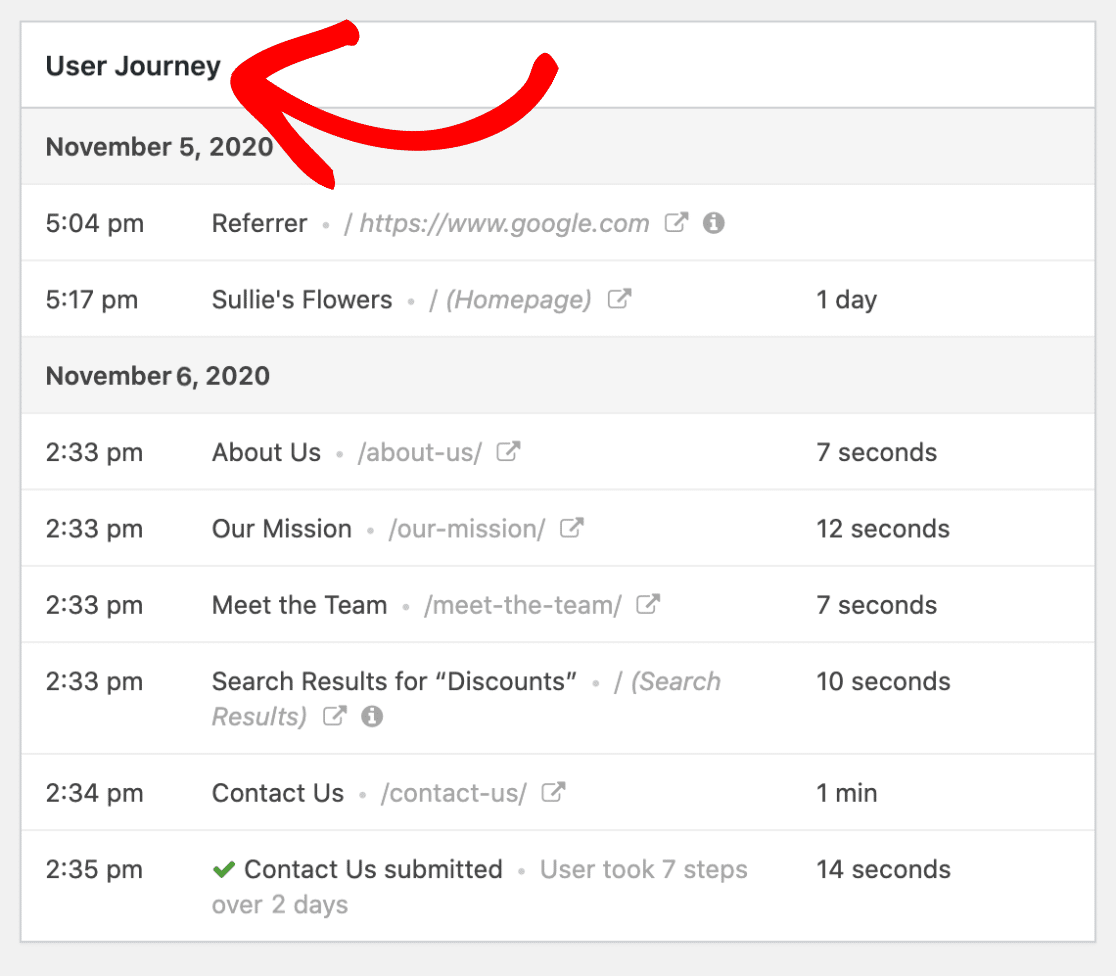
This section will allow you to see each step a user took on your site, including the page the user was referred from. You will also be able to view details such as the date, time, and duration of the visit to each page.
Note: In some cases, the referrer information may not be available in the User Journey results. For example, if a user has come from a non-SSL site and your site runs on SSL, the referrer information won’t be captured. Additionally, users may have special privacy settings or extensions running in their browser, preventing referrer information from being captured.
Additionally, you can view any available URL parameters by clicking the Info icon.
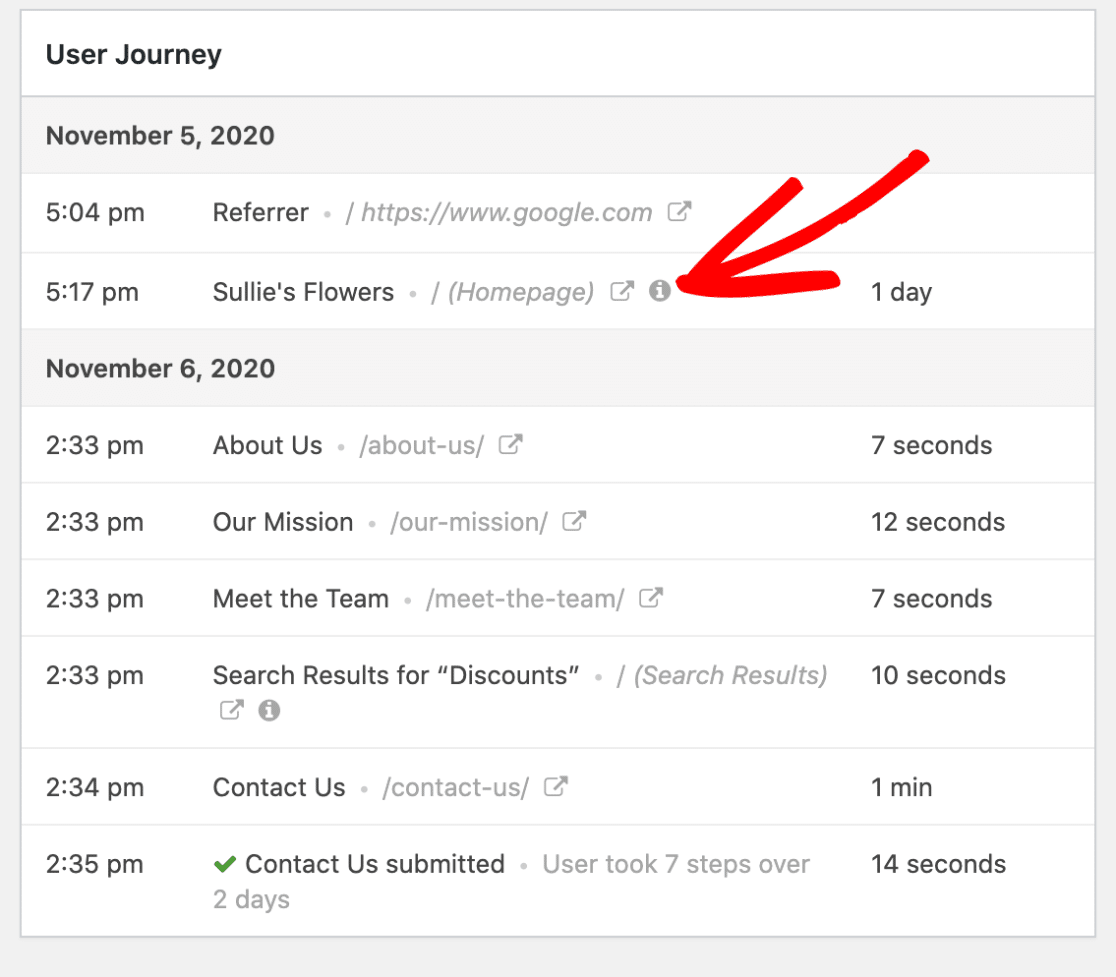
This will reveal the specific URL parameters for that page, including any search queries.
If you’d like, you can also view a visited page in a new tab by clicking the Open Window in a New Tab icon.
Using the Entry User Journey Smart Tag
Smart Tags provide a powerful solution to include helpful details in your form settings, notification emails, and more. The {entry_user_journey} Smart Tag allows you to include user journey data tables in your form notification emails.
Adding the Smart Tag to Notification Emails
In the form builder, locate your notification settings by navigating to Settings » Notifications. If you haven’t already, go ahead and enable email notifications by setting the Enable Notifications option to the on position.

Note: To learn more about notification emails, check out our complete guide to setting up notification emails in WPForms.
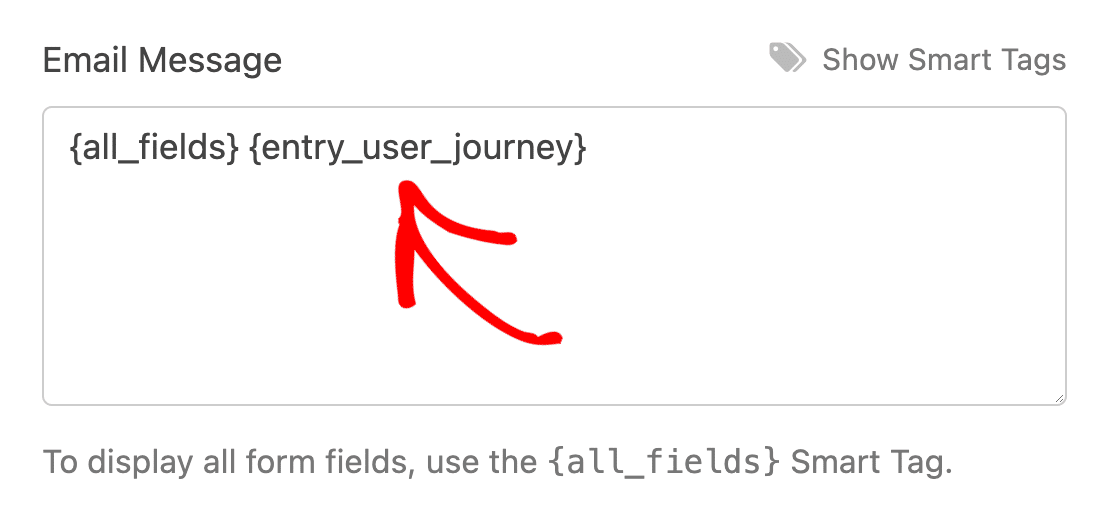
Next, scroll down to the Email Message section and click on Show Smart Tags.
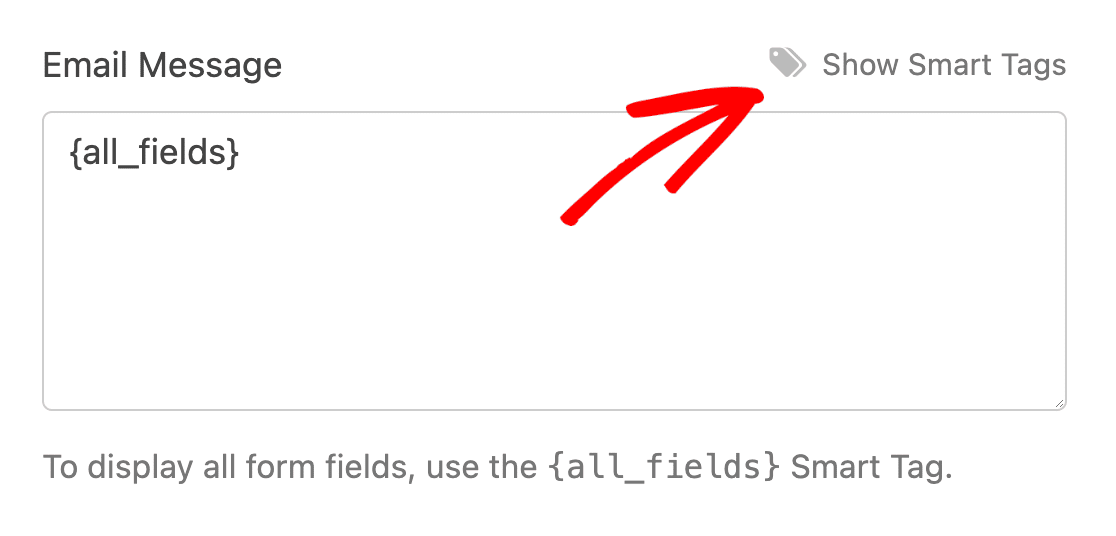
You’ll now see a list of the available Smart Tags you can add to your notification email. From this list, click on the Entry User Journey Smart Tag.
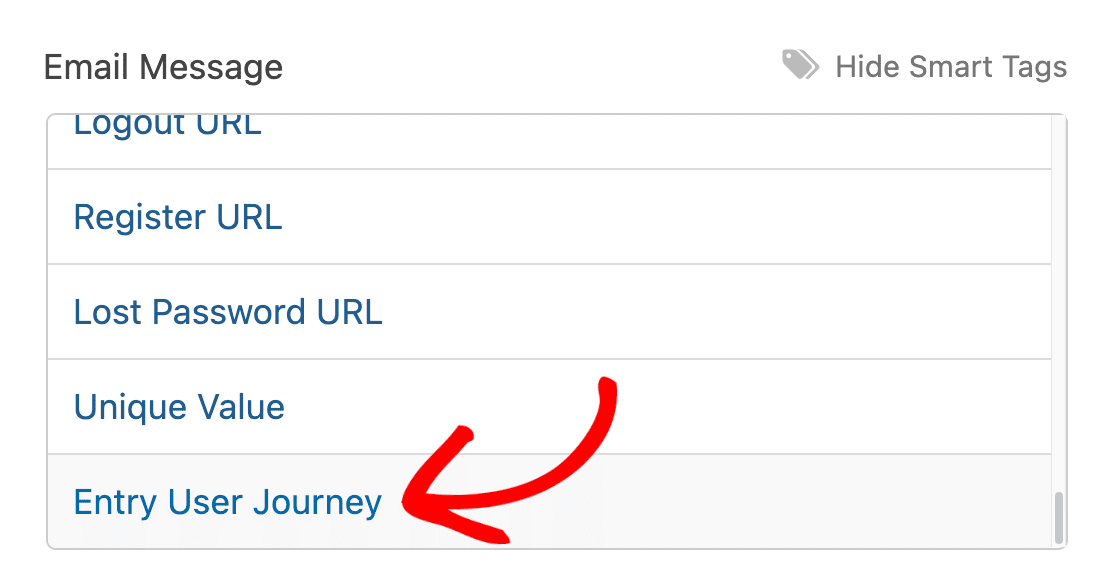
After that, the {entry_user_journey} Smart Tag will be added to the Email Message.
Now that you’ve added the Smart Tag, be sure to save your notification settings. The notification email will now include the user journey data when the form is submitted.
Frequently Asked Questions
These are some of the top questions we receive about User Journey addon.
Can I export User Journey data?
Yes. You can export User Journey data along with your entries. For CSV export, go to WPForms » Tools » Export and check the box to include User Journey data. For more details, see our guide on exporting entries to CSV in WPForms.
If you’d like to export to Google Sheets, use the Google Sheets addon and map a custom field with the {entry_user_journey} Smart Tag.
Can I export User Journey details to other tools with Zapier?
Yes. When the User Journey addon is v1.5.0 or higher and the Zapier addon is v1.8.0 or higher, the Entry User Journey data is sent to Zapier for any New Form Entry trigger, so you can map it to a field in Google Sheets, Google Docs, your CRM, or other apps. If you do not see the Entry User Journey field in Zapier, check that both addons are updated and active.
Does User Journey work with abandoned entries?
Yes. When both the User Journey addon and the Form Abandonment addon are active on a form, abandoned entries automatically include User Journey data. Navigate to WPForms » Entries, select your form, and click View on any entry with the Abandoned status. The User Journey section displays the pages the user visited before abandoning the form.
That’s it! We just showed you how to install and use the User Journey addon in WPForms.
Next, would you like to record the geographic location of your users? Be sure to check out our guide to using the Geolocation addon for more details.