AI Summary
Would you like to automate entry management for your WordPress forms? Our Entry Automation addon lets you create tasks like exporting or deleting form entries for a specific form. These tasks can then be automated to run based on the schedule you specify.
This tutorial will show you how to install and use the Entry Automation addon with WPForms.
Requirements:
- You will need an Elite license level or higher to access the Entry Automation addon
- Ensure that you’ve installed WPForms version 1.9.6.1 or higher to meet the minimum required version for the Entry Automation addon
Once the core WPForms plugin is in place and your license is verified, you’ll be able to quickly install and activate the Entry Automation addon.
Creating a New Automation Task
To start, create a new form or edit an existing one to access the form builder. Once you’re in the form builder, go ahead and add the fields you’d like to include in the form. You can use WPForms AI to quickly speed up the form creation process.
After adding the fields to your form, navigate to Settings » Entry Automation and click the Add New Task button to create a new automation task.

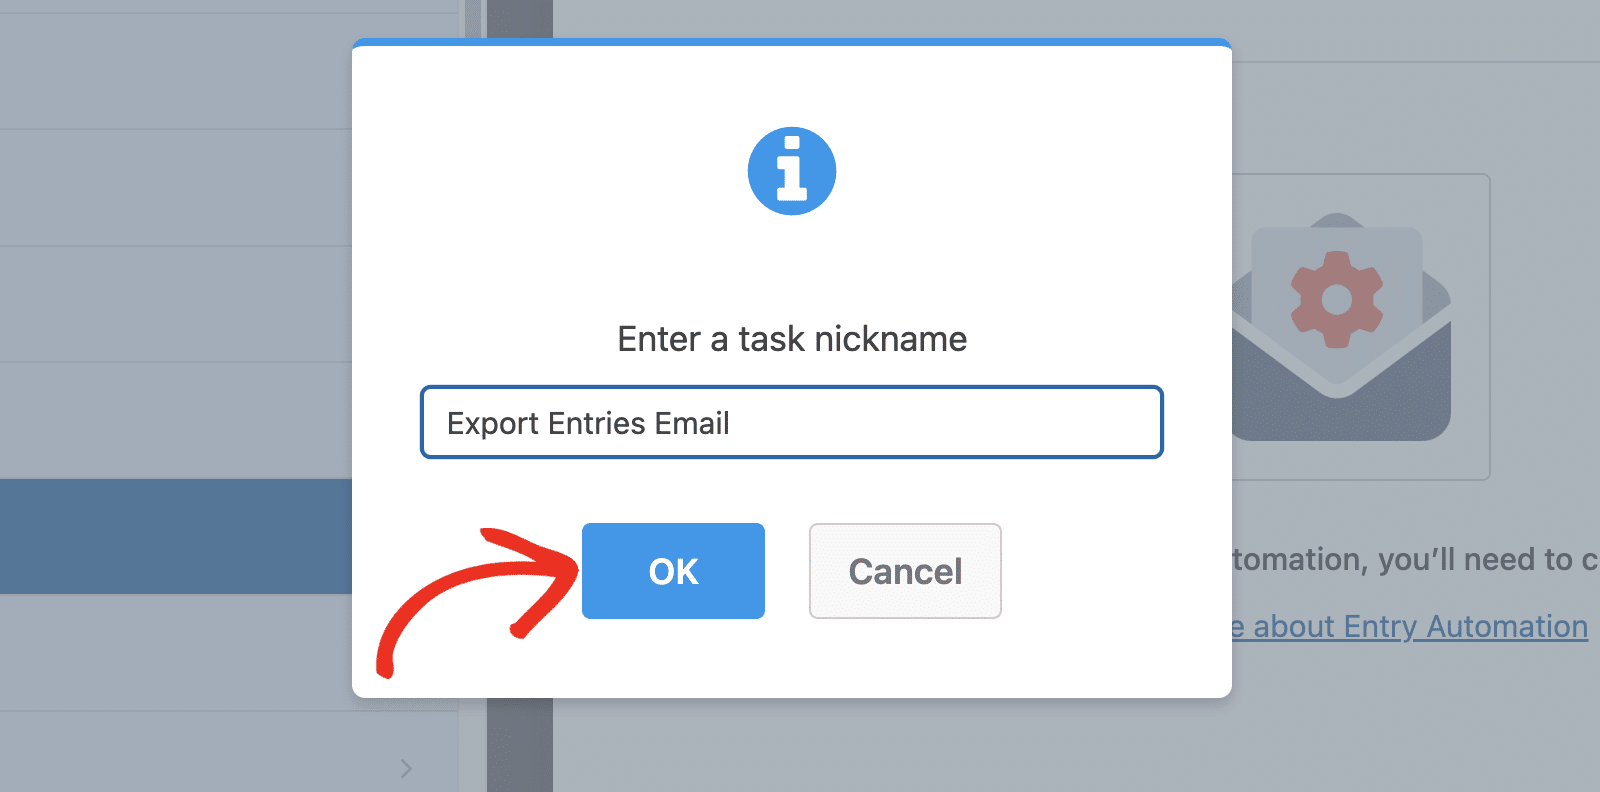
In the overlay that appears, go ahead and name your task and then click OK to proceed.
You’ll be presented with two options: Export Entries and Delete Entries.
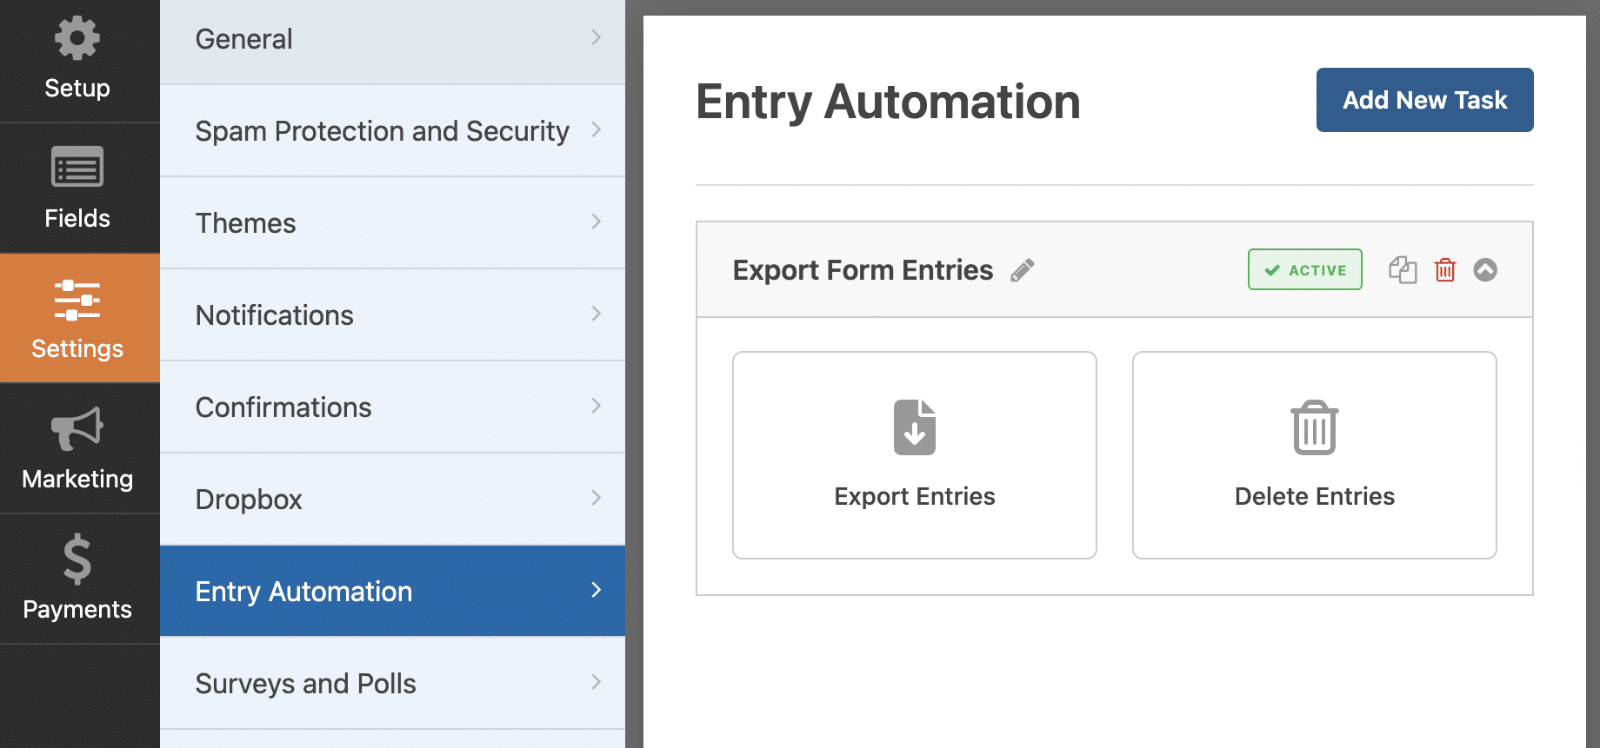
We’ll cover how each of these options works in detail.
Exporting Form Entries
To automate entry exporting, go ahead and select the Export Entries option.
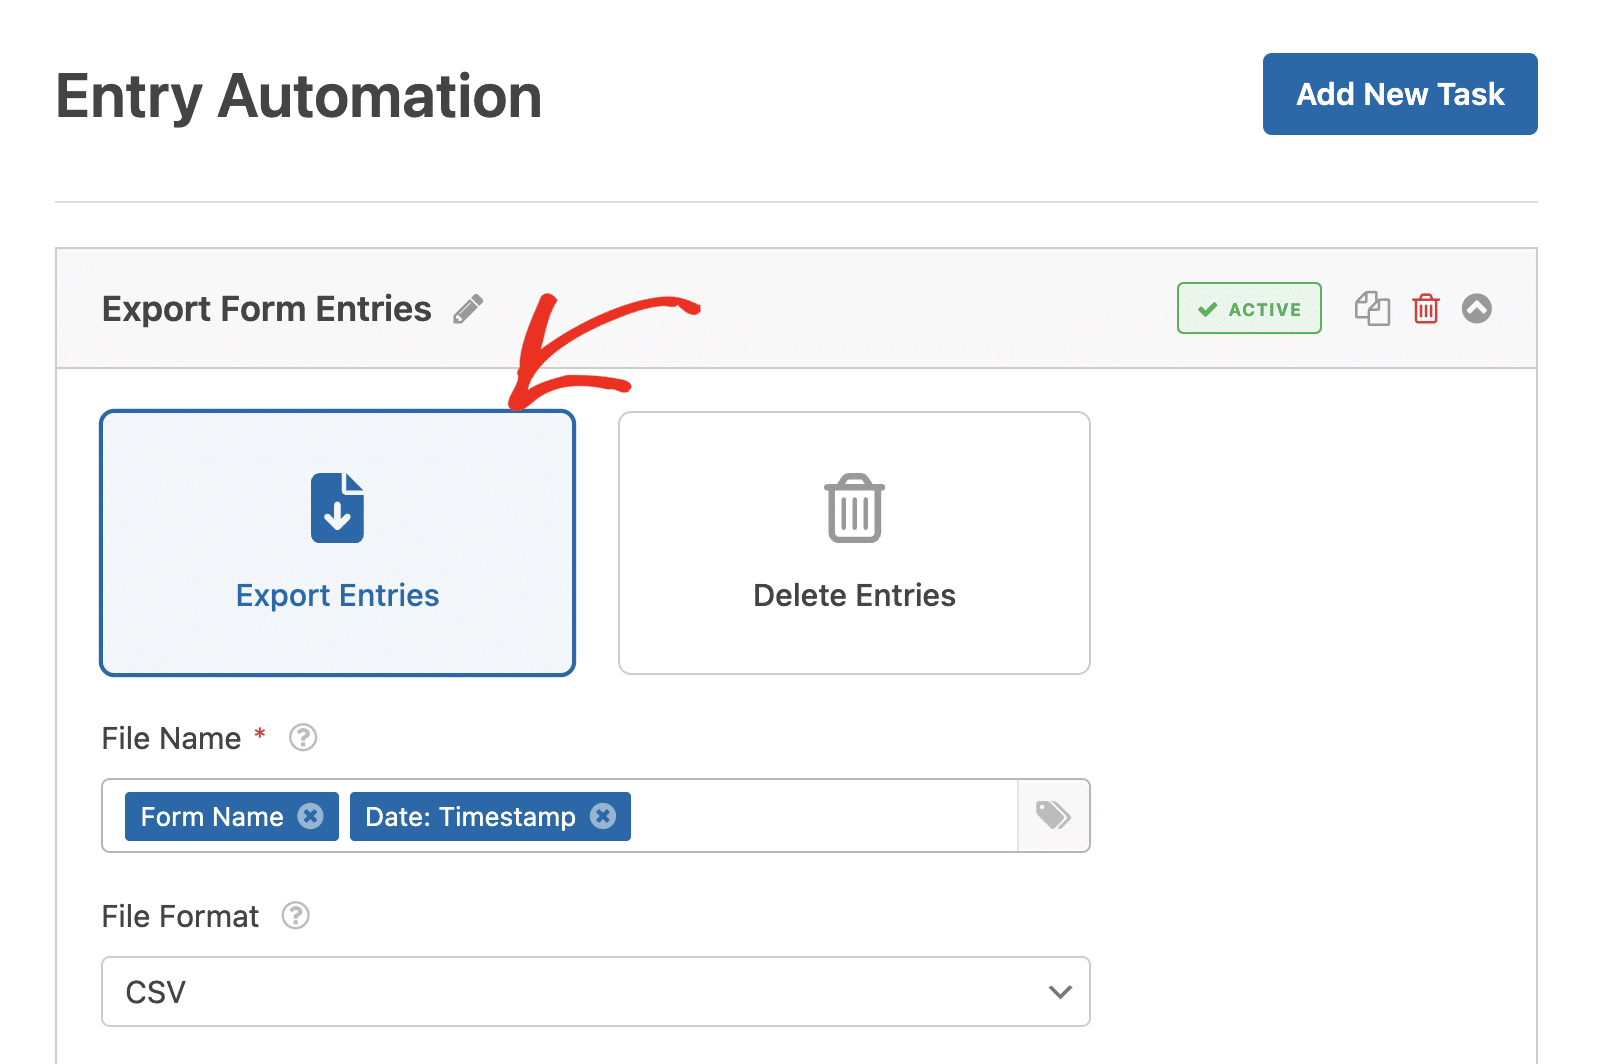
Once you’ve selected it, additional options will appear. First, specify the name of the exported file in the File Name field. By default, it is set to the Form Name and Date Timestamp.
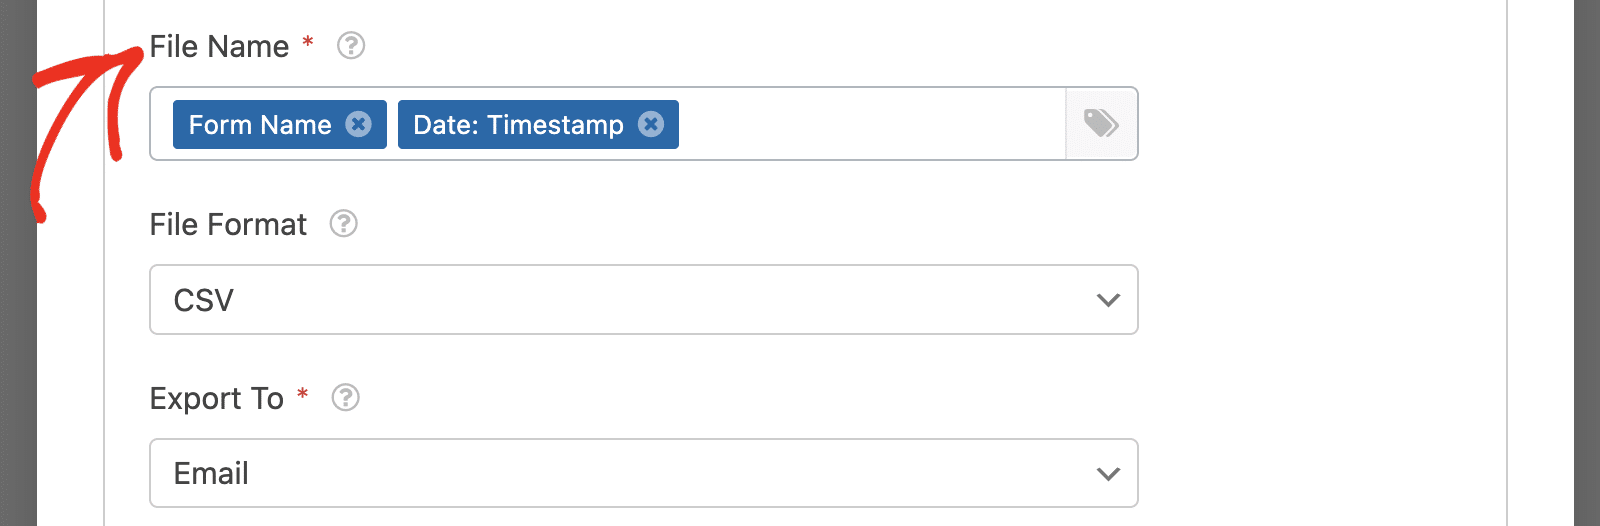
You can either enter a name manually or use smart tags to populate the name field. Clicking on the Smart Tag icon will display a dropdown containing supported Tags you can use for the file name.
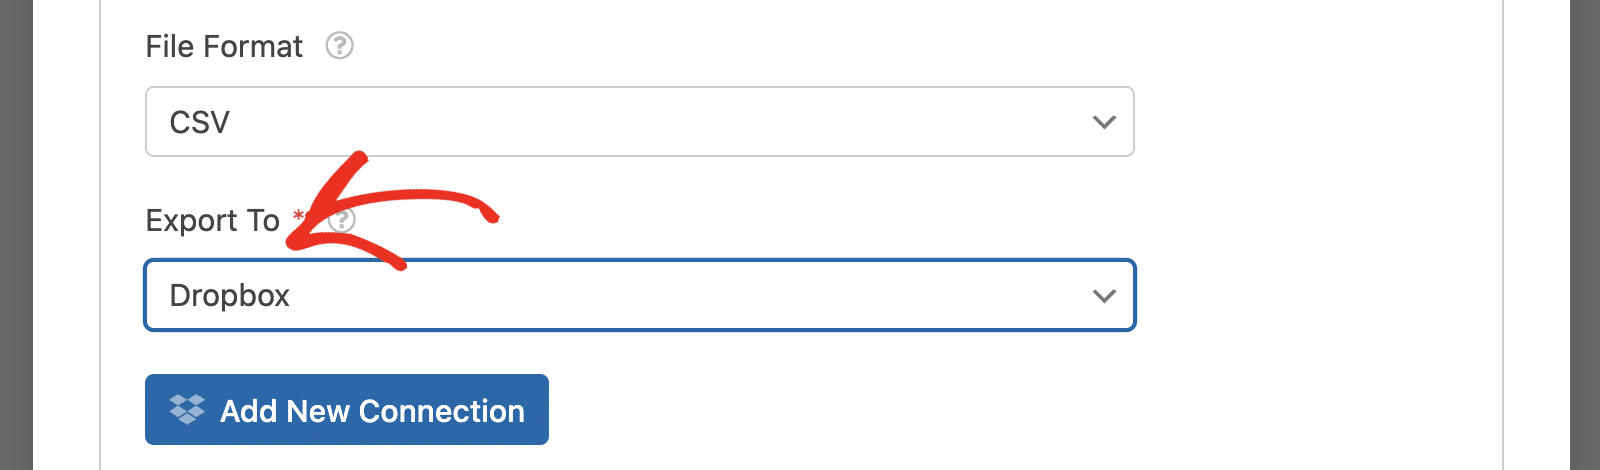
After that, choose the format you’d like to export the file as from the File Format dropdown.

Available options include: CSV, XLSL, JSON, and PDF formats.
Next, you’ll need to specify the channel you’d like to export the entries to. By default, it is set to Email, but you can change it by clicking the Export To dropdown.
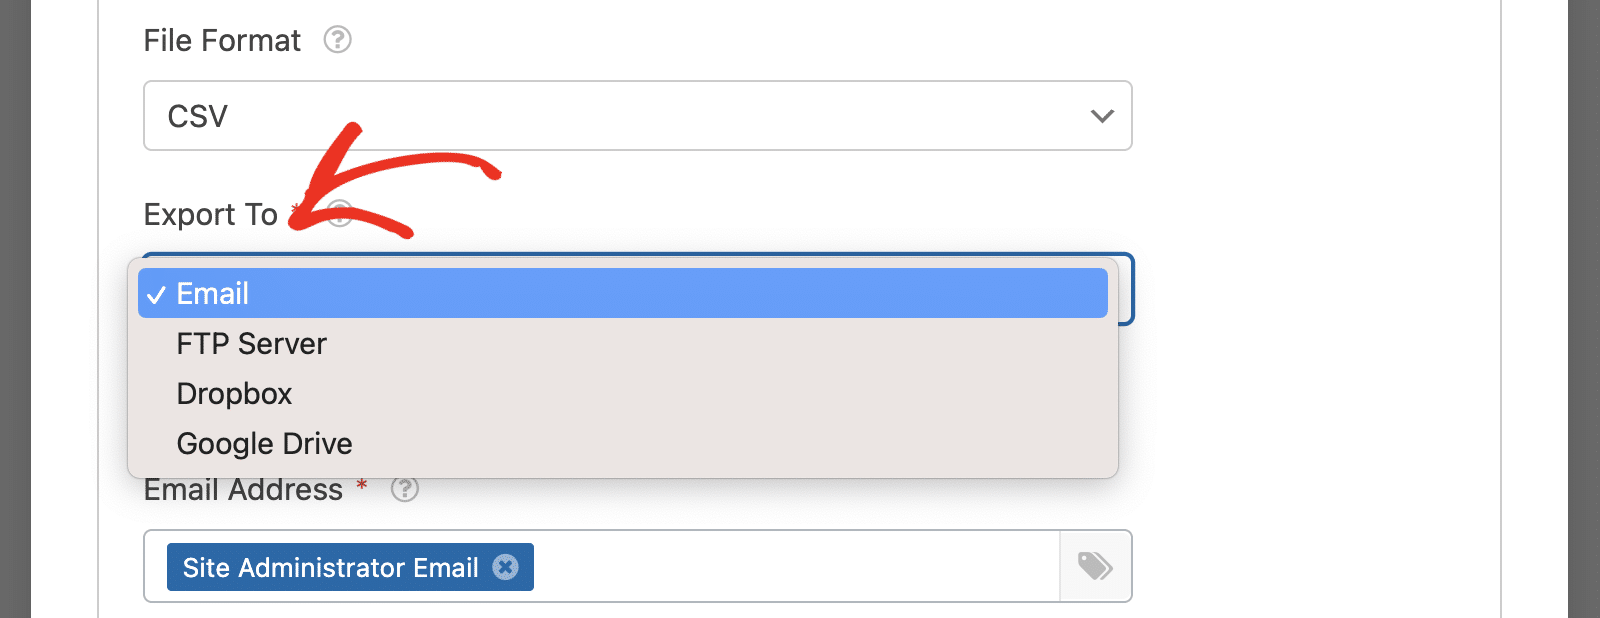
Below, we’ve covered the available options
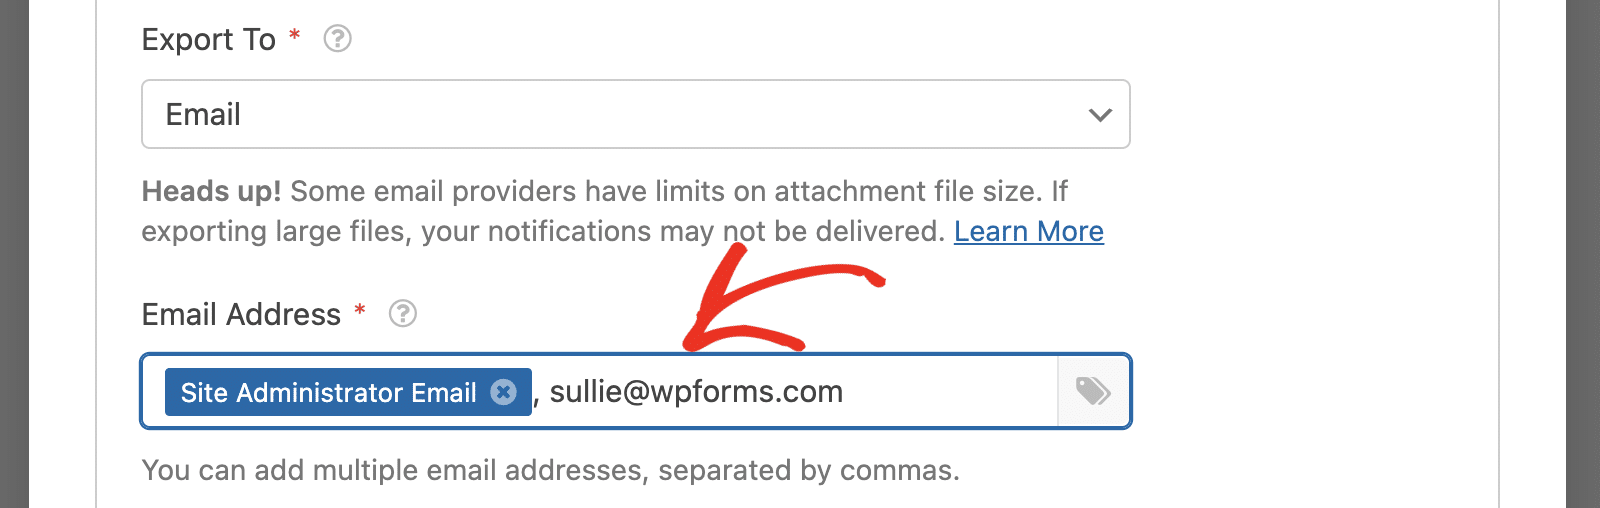
Selecting Email will display the Email Address field, where you’ll need to specify the email address(es) you’d like to send the exported entry.

By default, it is set to the Site Administrator Email smart tag. You can add multiple email addresses. Just be sure to separate each email with a comma.
FTP Server
If you’d like, you can export the form entries to an FTP server. To do so, select FTP Server from the Export To dropdown.
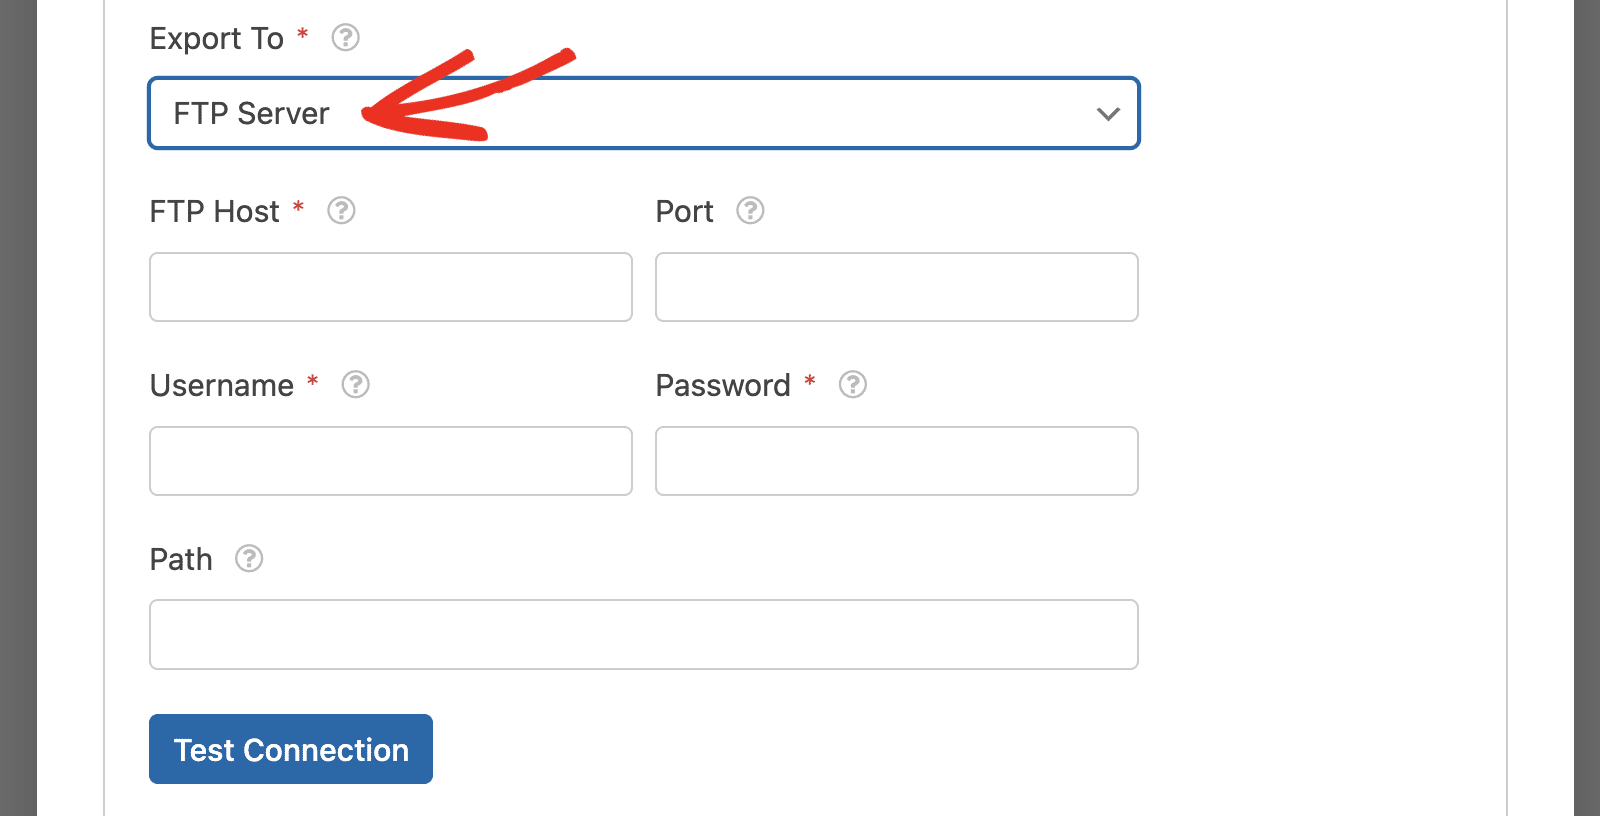
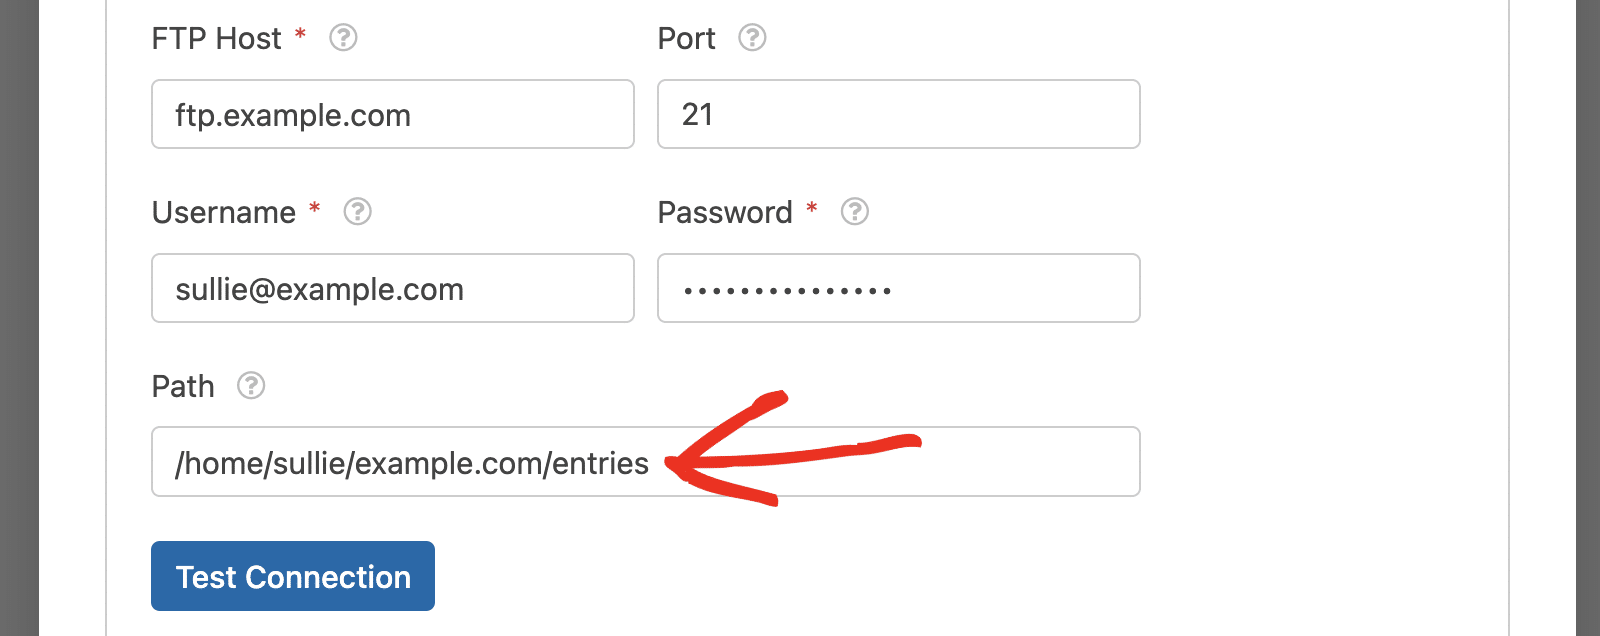
After that, you’ll need to fill out details about your FTP server like the Host name, Port number, FTP username and password.
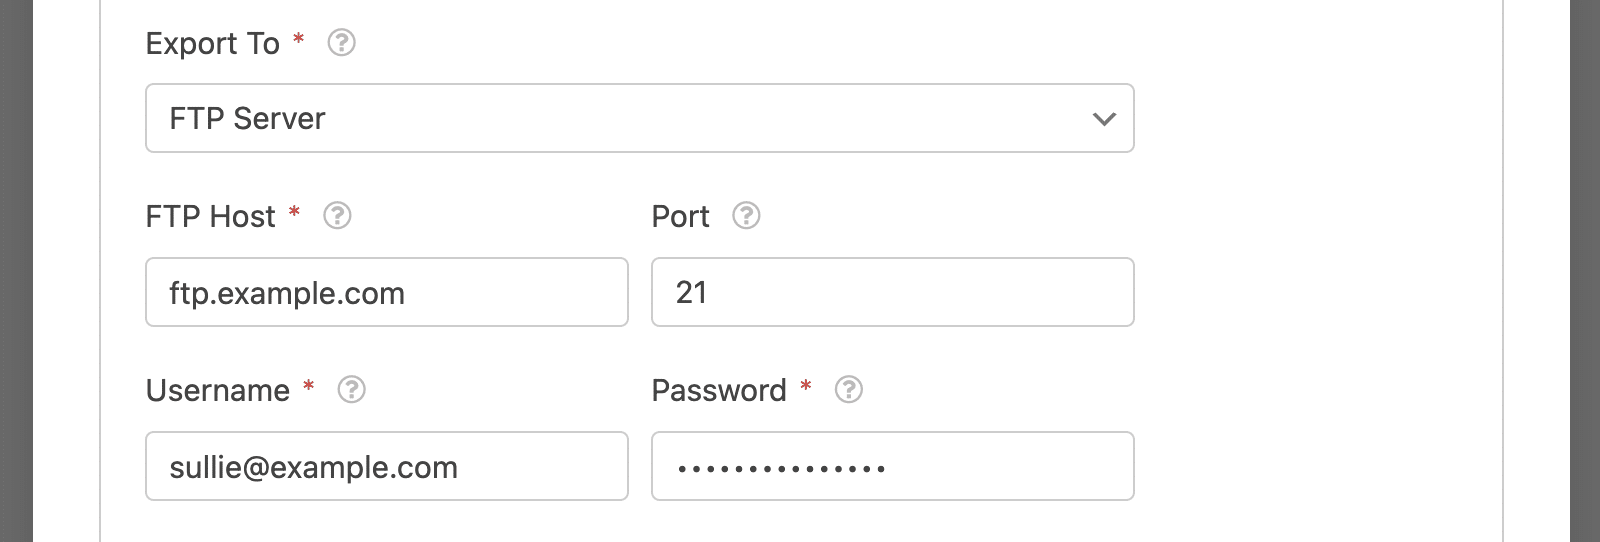
Next, specify the folder you’d like the exported files to be stored in the Path field. The path is usually included when accessing your FTP server credentials.
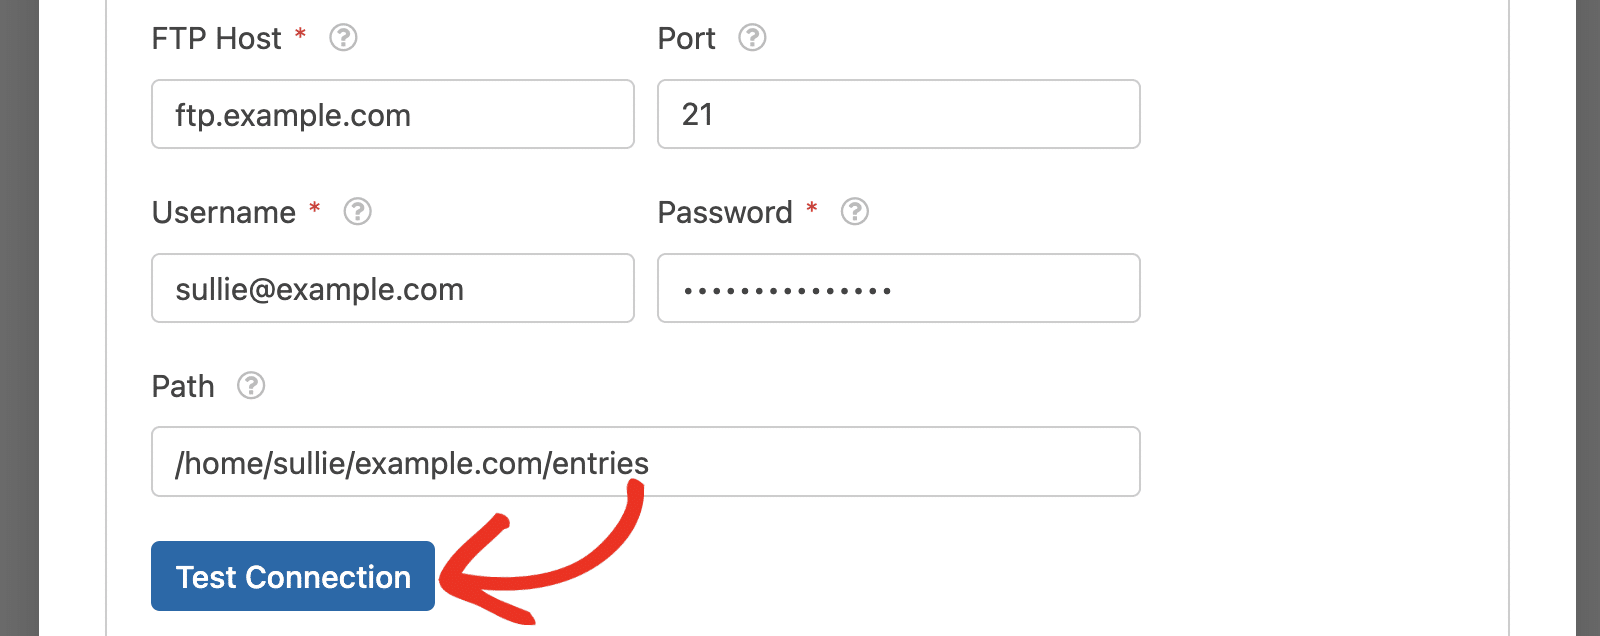
If you’d like to confirm your FTP connection, click the Test Connection button.
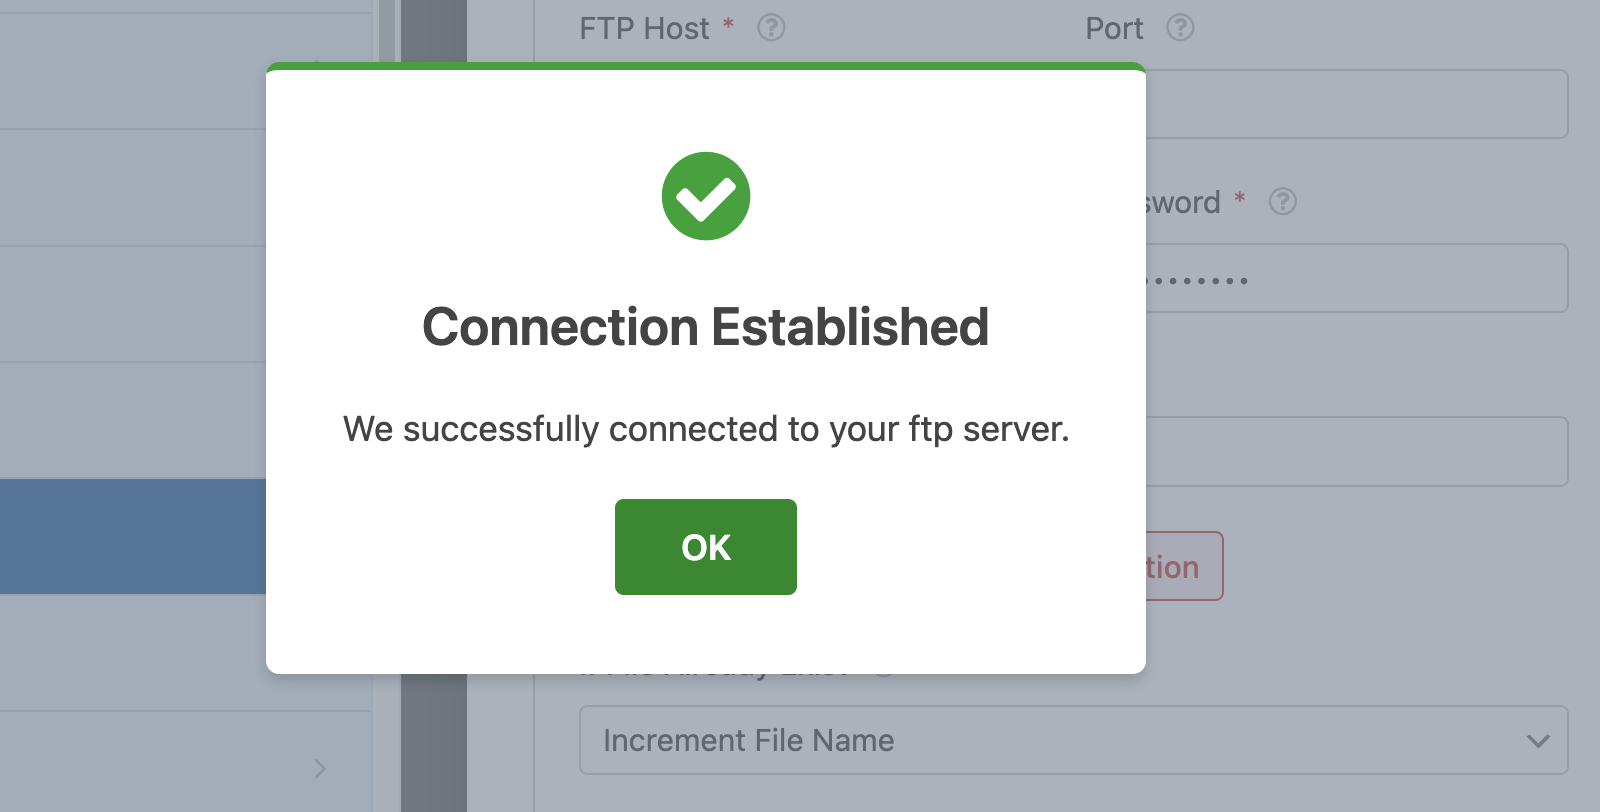
You’ll see a Connection Established pop up if everything is properly connected.
If there’s an issue with your connection, you’ll be alerted with a Connection Failed alert.
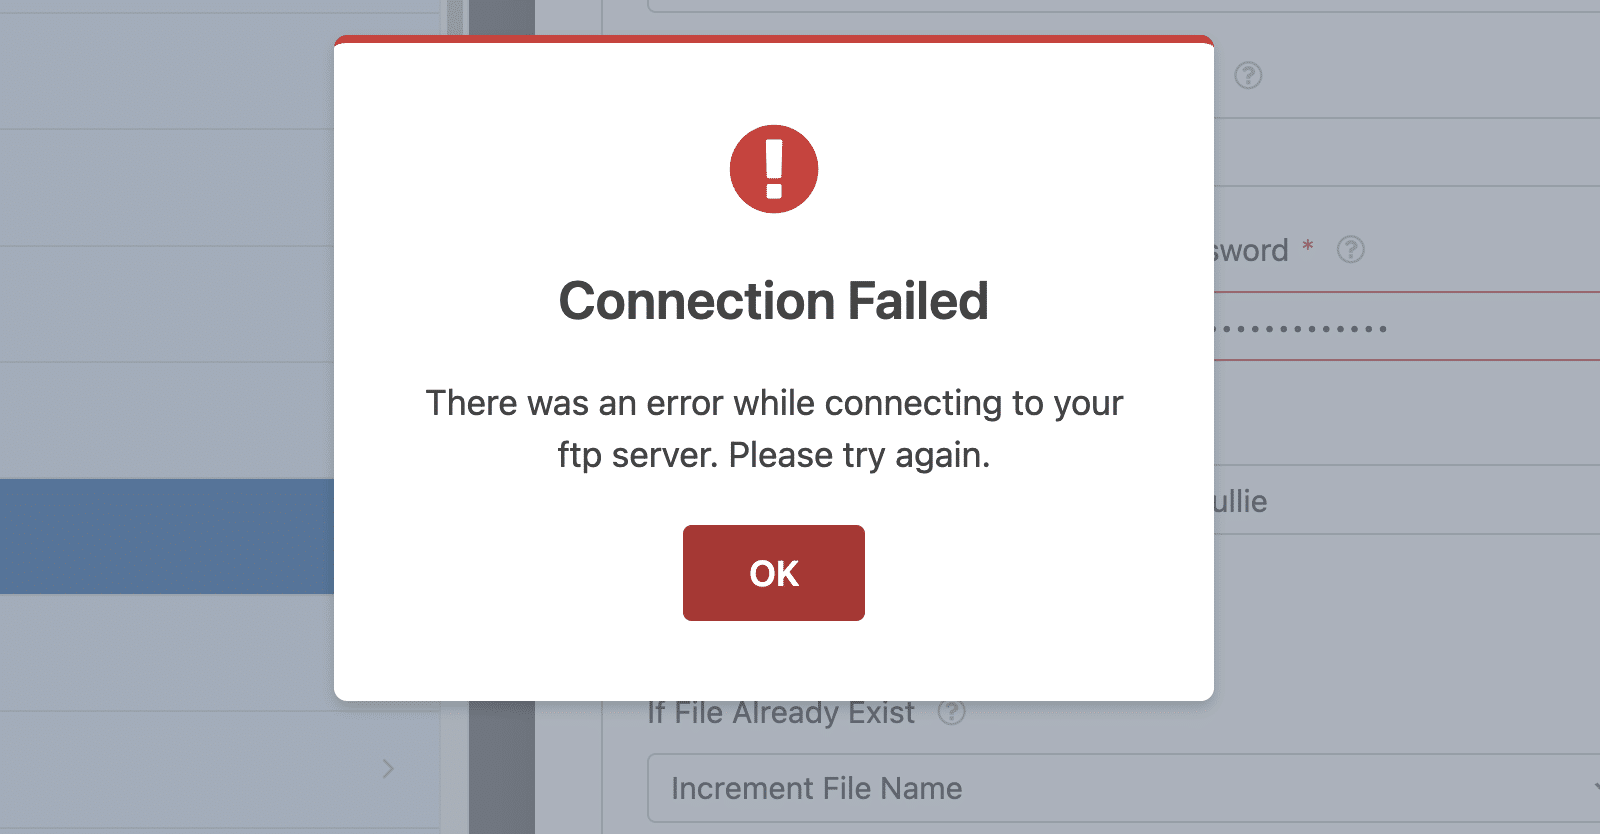
Note: We recommend contacting your hosting provider if your FTP connection isn’t working properly.
Dropbox
With our Dropbox integration, you can automate exporting form entries to your Dropbox account.
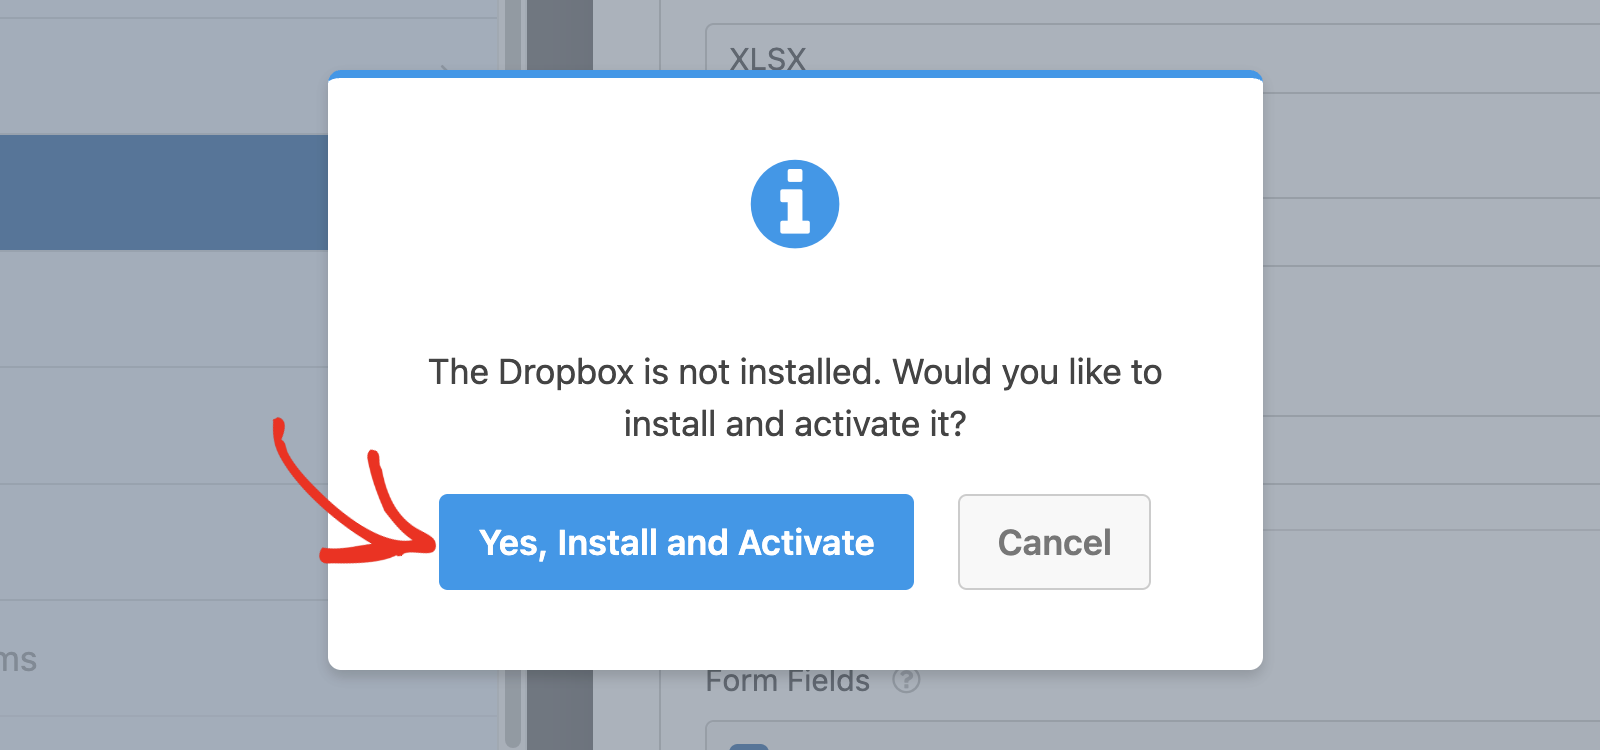
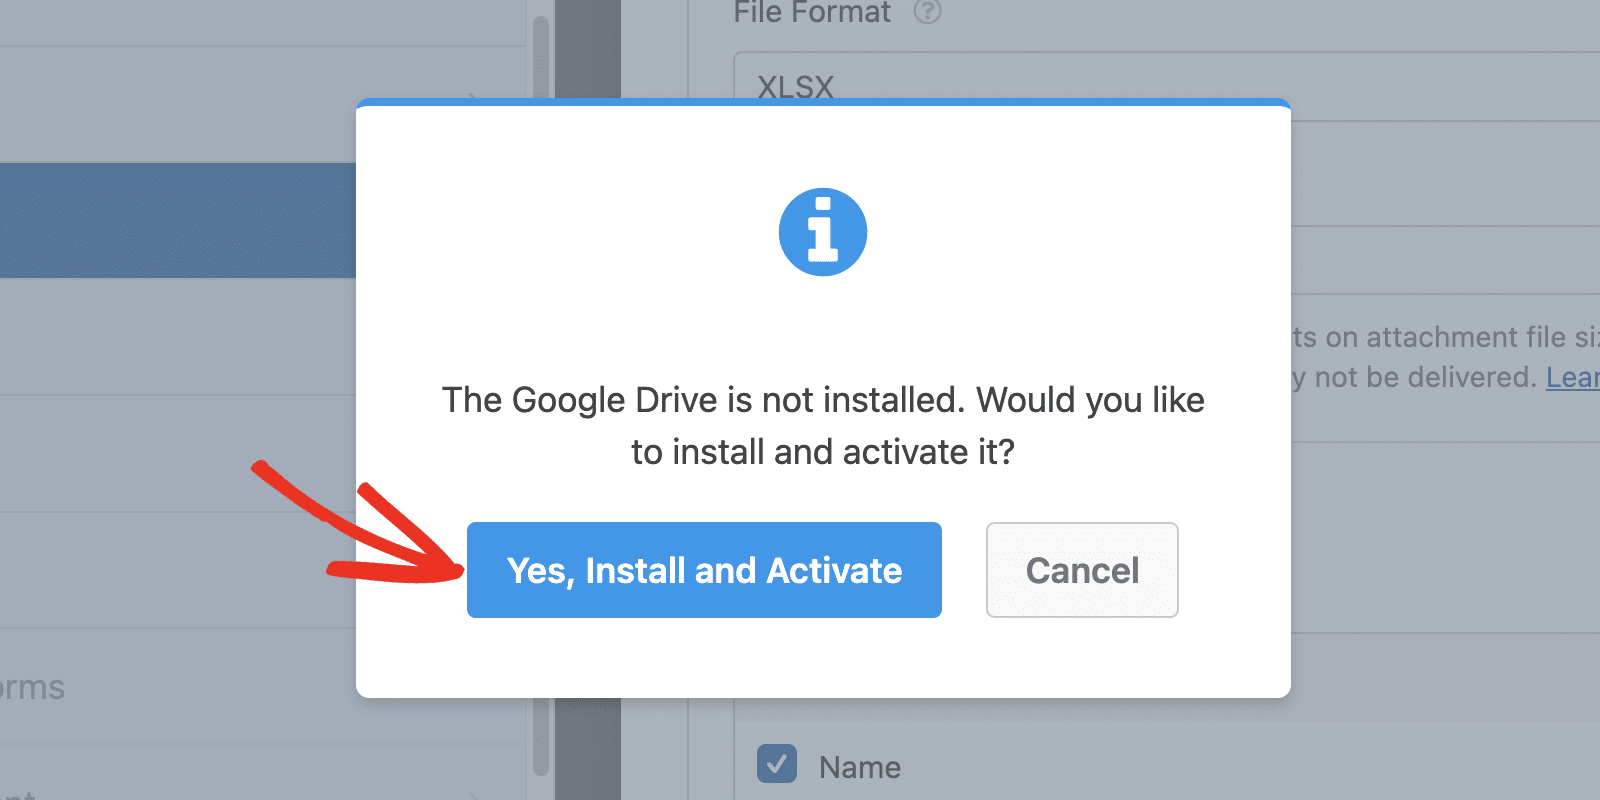
After choosing the Dropbox option, you’ll be prompted to install and activate the Dropbox addon if you don’t have it installed on your site already. Go ahead and click the Yes, Install and Activate button in the pop-up that appears.
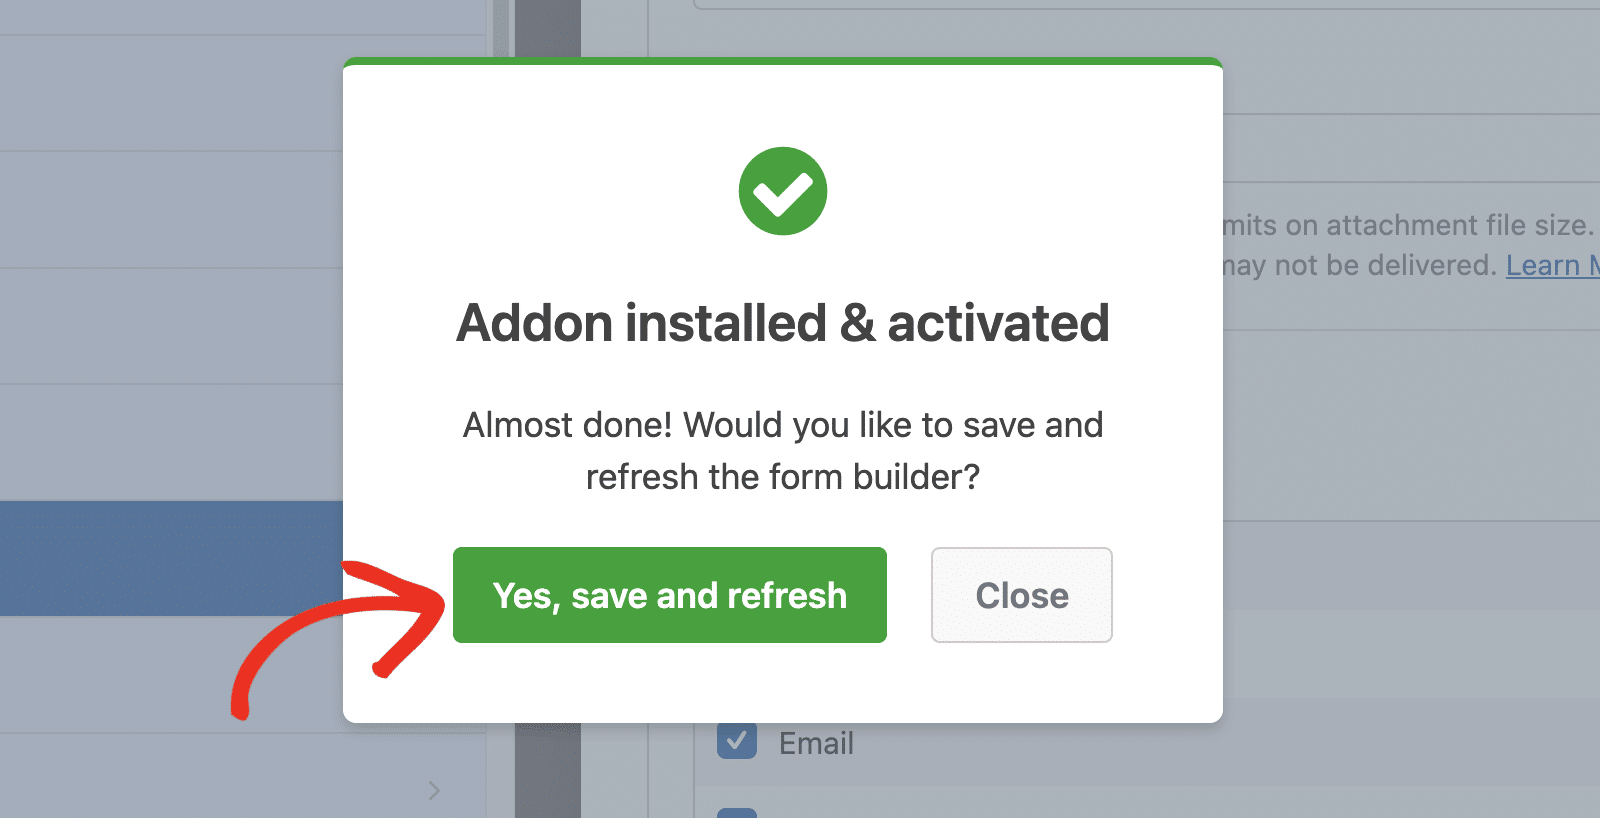
Once the installation completes, click Yes, save and refresh to continue.
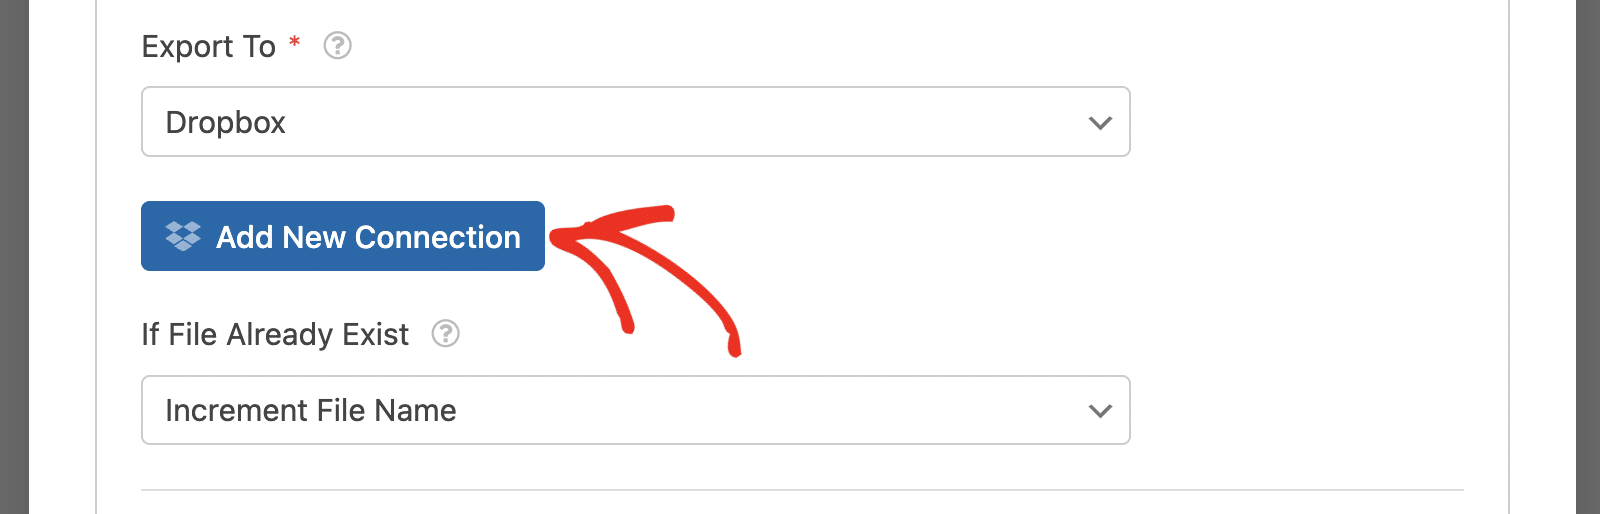
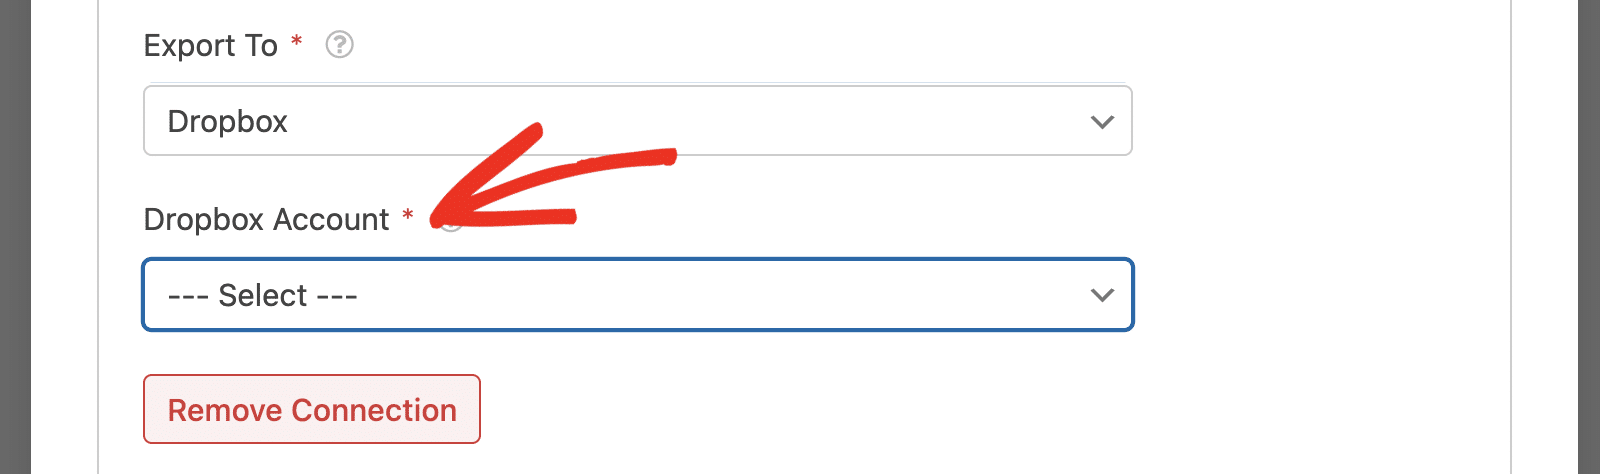
Next, click the Add New Connection button to connect your Dropbox account.
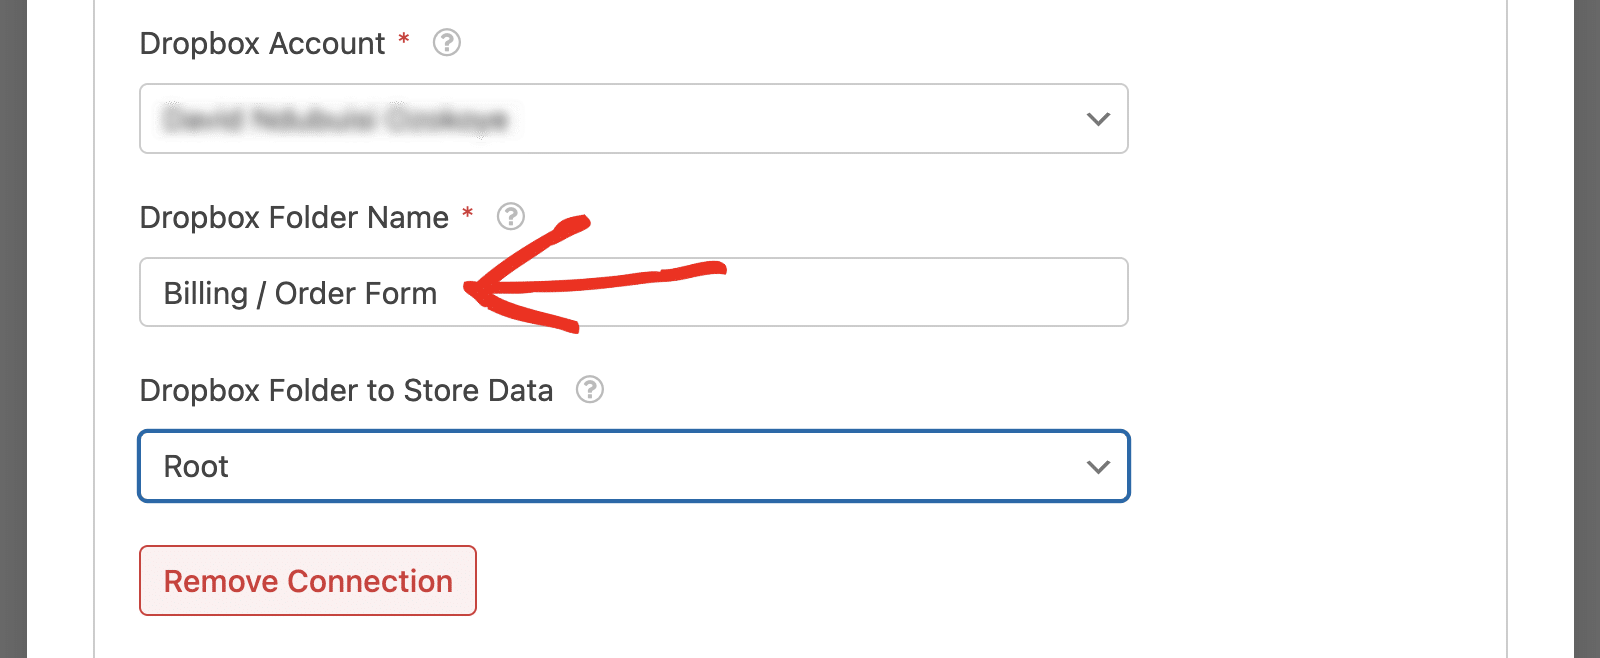
After that, choose your account from the Dropbox Account dropdown.
The Dropbox Folder Name field will default to your form’s name. But you can update it to match the folder name you intend to use.
Google Drive
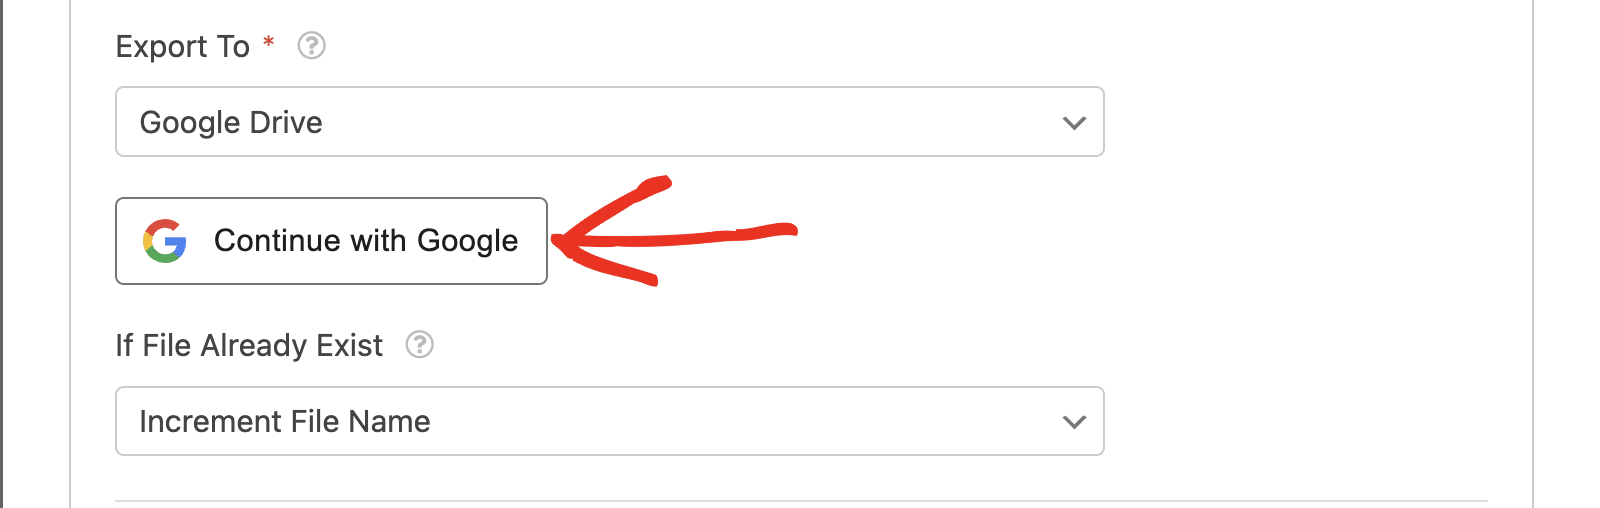
Similar to the Dropbox integration, you can export form entries to Google Drive by selecting the Google Drive option.

You’ll see a pop-up to install and activate the addon if it’s not already installed on your site.
After the installation completes, click the Continue with Google button to connect your account.
Then select the Google Account you’d like to connect with WPForms and follow the prompts to complete the setup. Please see our tutorial for details on how to connect and use the Google Drive addon.
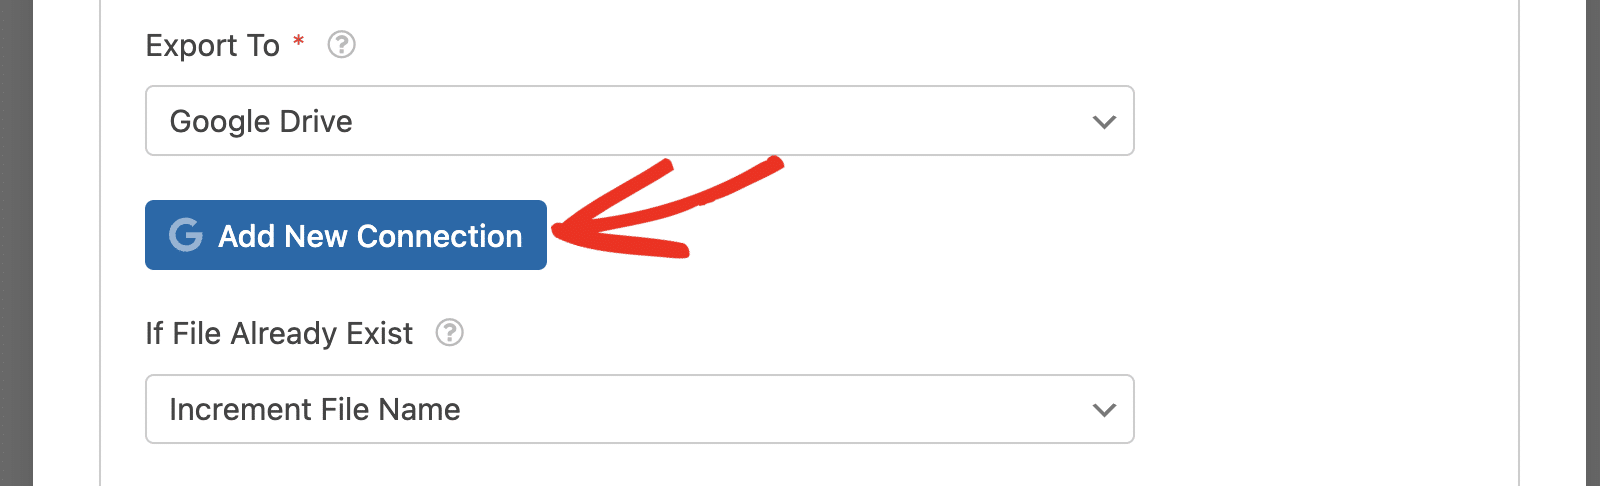
After connecting your Google account, click the Add New Connection button.
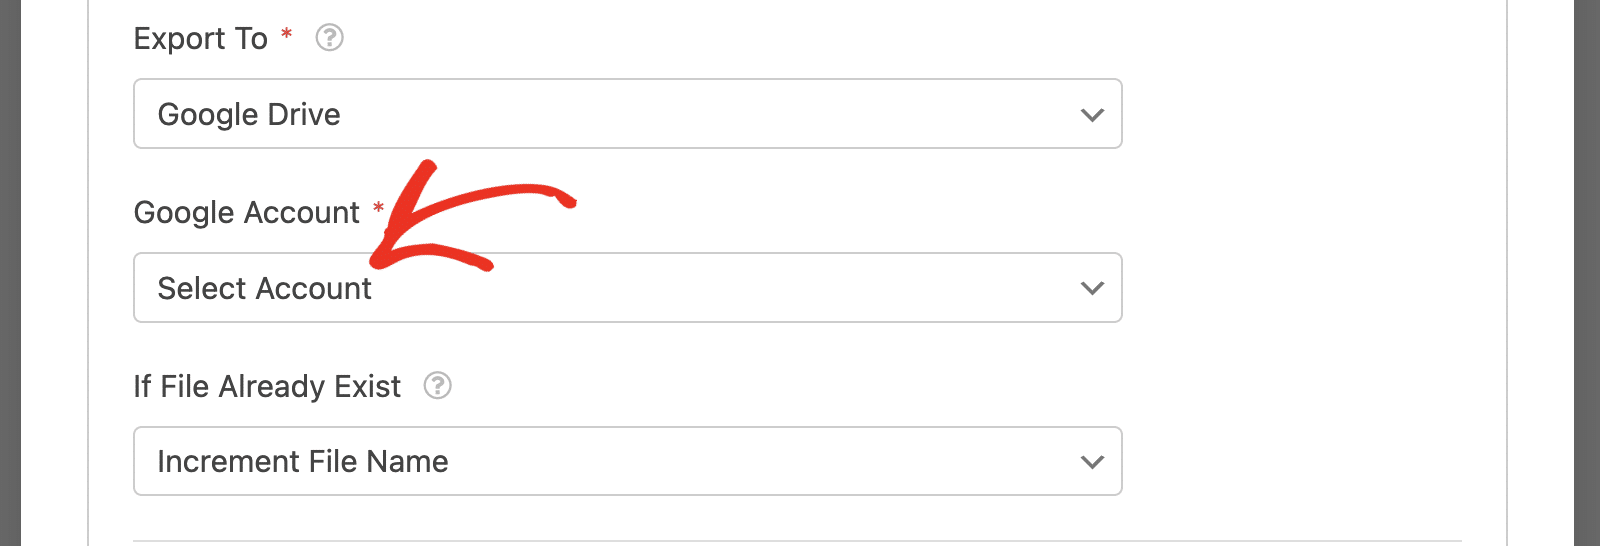
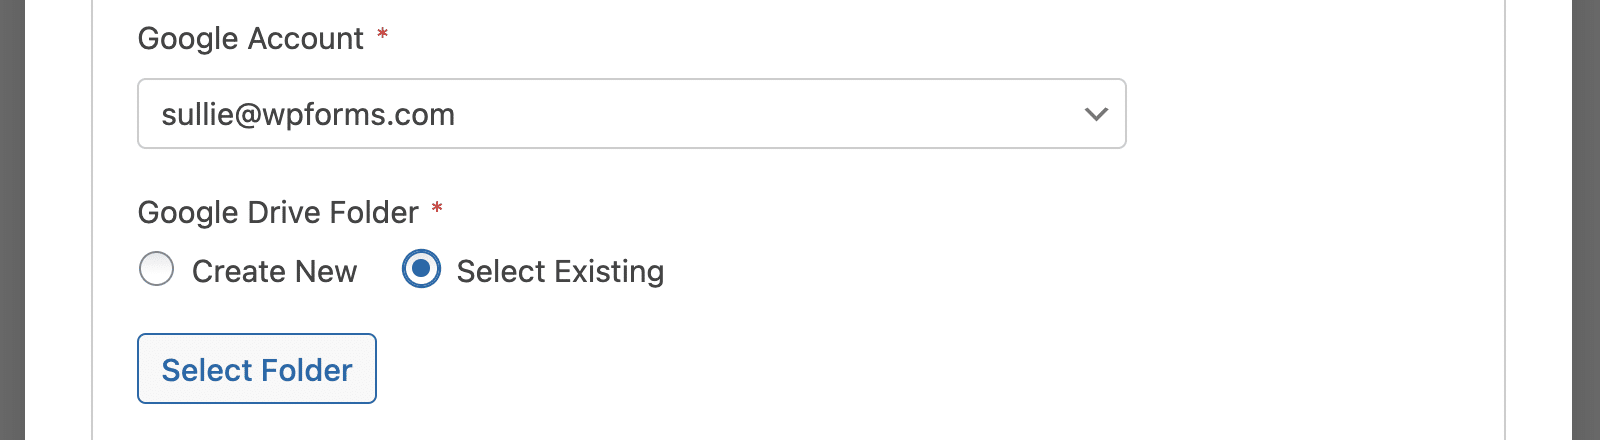
Then choose your Google account from the Google Account dropdown.
Once you’ve selected your account, you’ll be able to specify the folder where the entries should be saved from the Google Drive Folder section.
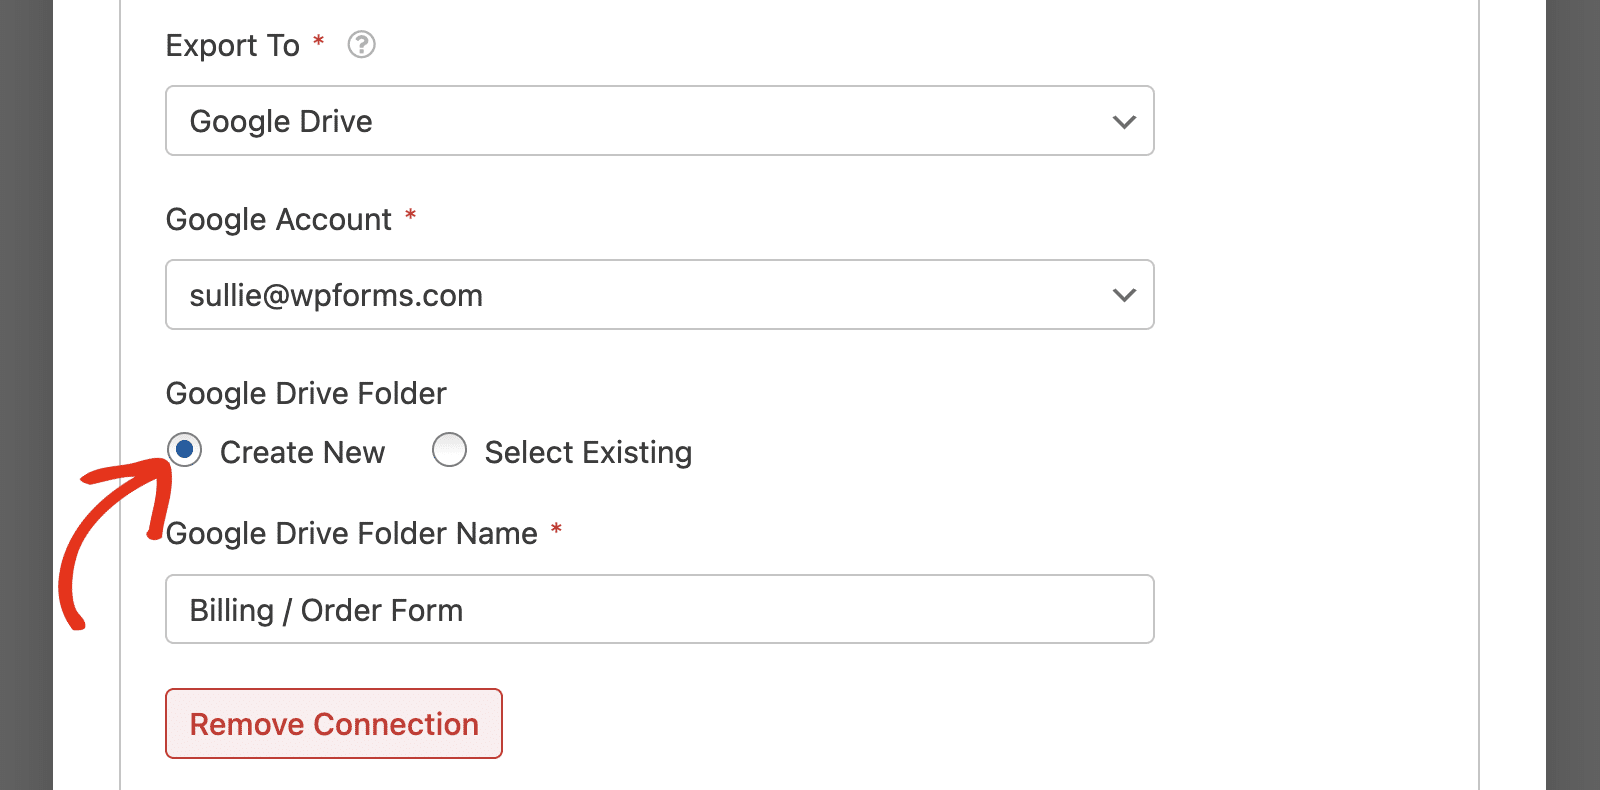
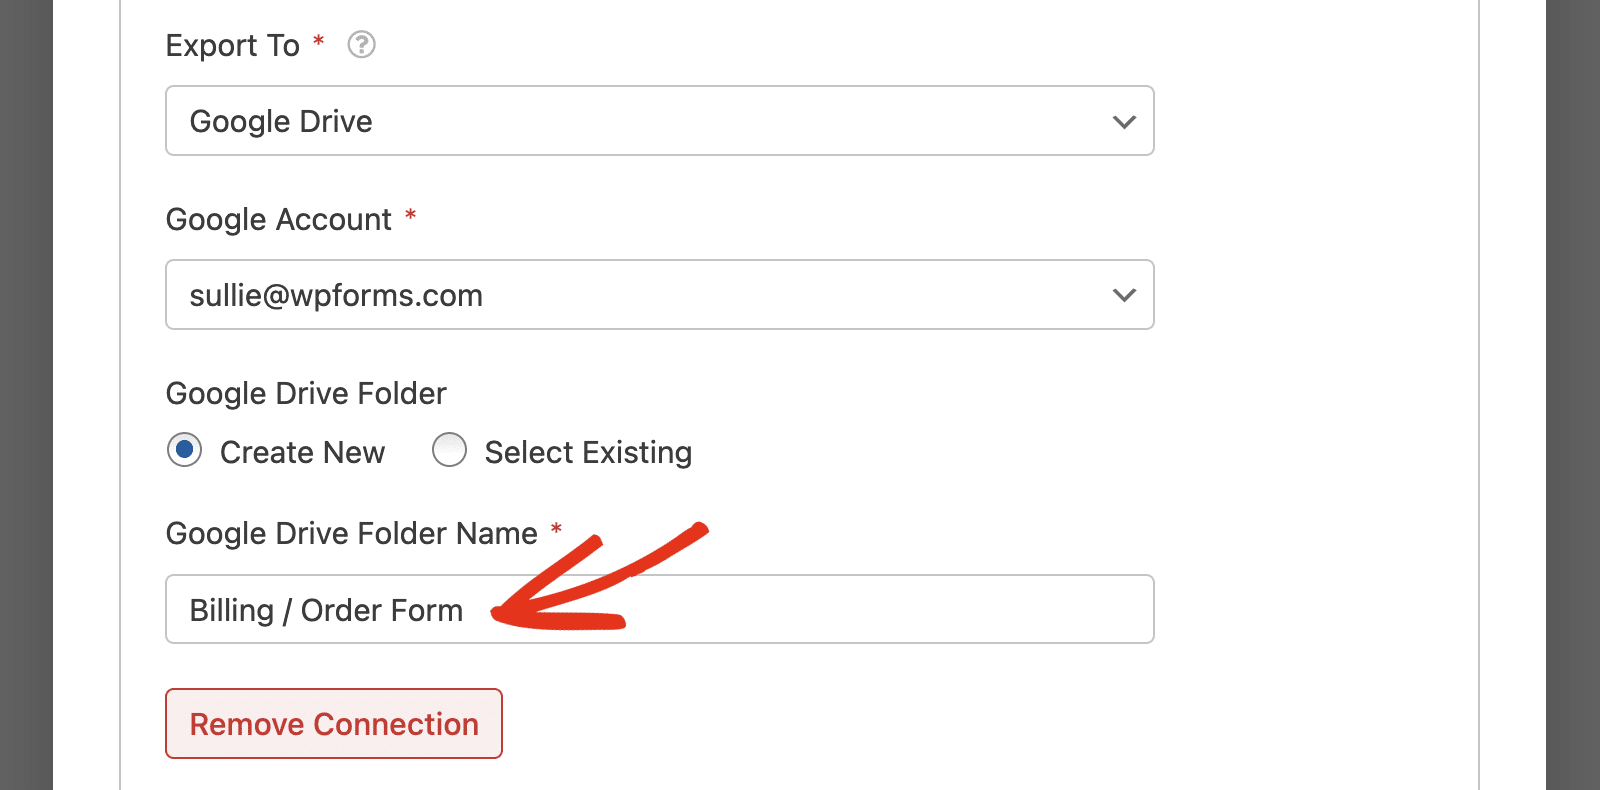
If you select the Create New option, enter your preferred folder name in the Google Drive Folder Name field. By default, it is set to the form name. But you can update it to match the folder name you intend to use.
However, choosing the Select Existing option will display a button to select an existing folder from your Google Drive account.
Handling Existing Files
If you choose either FTP Server, Dropbox, or Google Drive as your entry storage, you’ll need to specify how existing files are handled after each recurrence of the entry automation task. This option is available under the If File Already Exist dropdown.
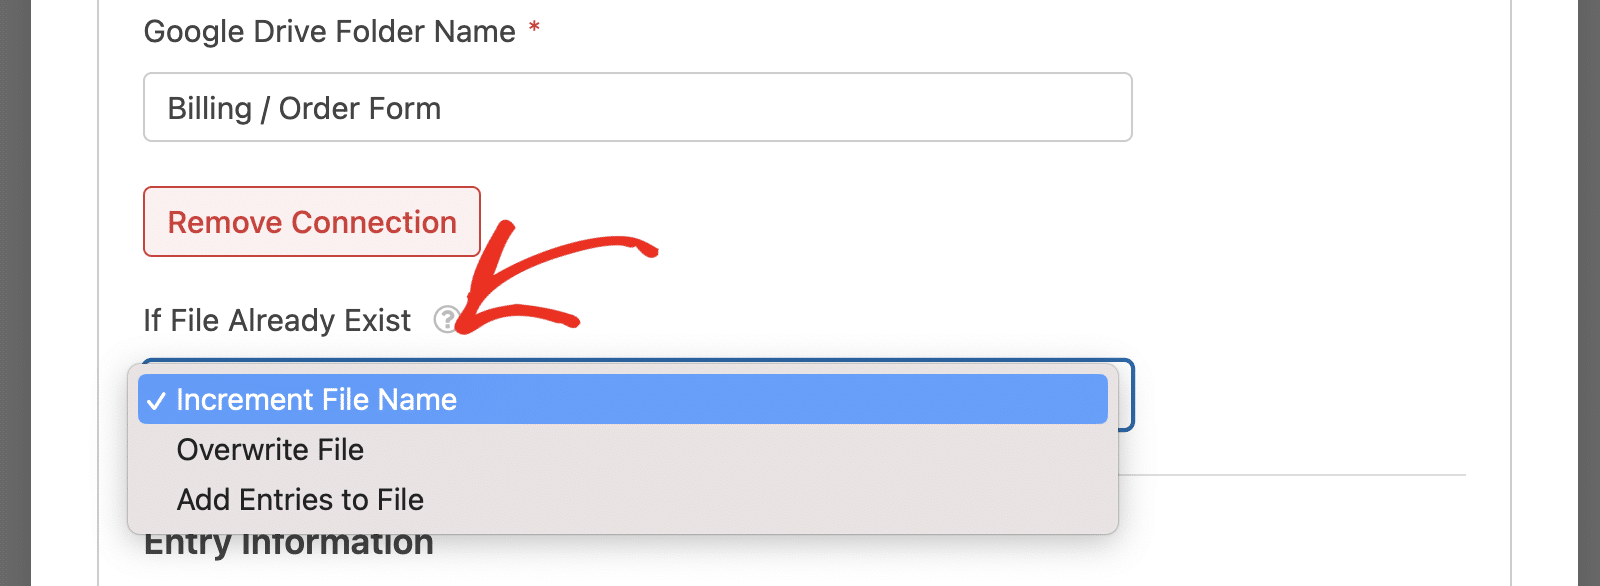
Below, we’ve highlighted the available options:
- Increment File Name: This option will create a new export file in the same directory and append a number to the filename.
- Overwrite File: This option will replace the existing export file with the most recent one each time the task runs.
- Add Entries to File: Selecting this option will append the new entries to the existing export file. It is only available for the CSV and XLSX file formats.
Note: If you choose the Add Entries to File option, we do not recommend updating the Entry Information section after the first export. This is because the columns have already been created in the CSV or XLSX file when the task ran initially. If you change your form fields later, the new fields won’t be added to the existing export file.
We recommend using the Increment File Name option as it allows you to retain your old export file and generates a new file with the updated fields.
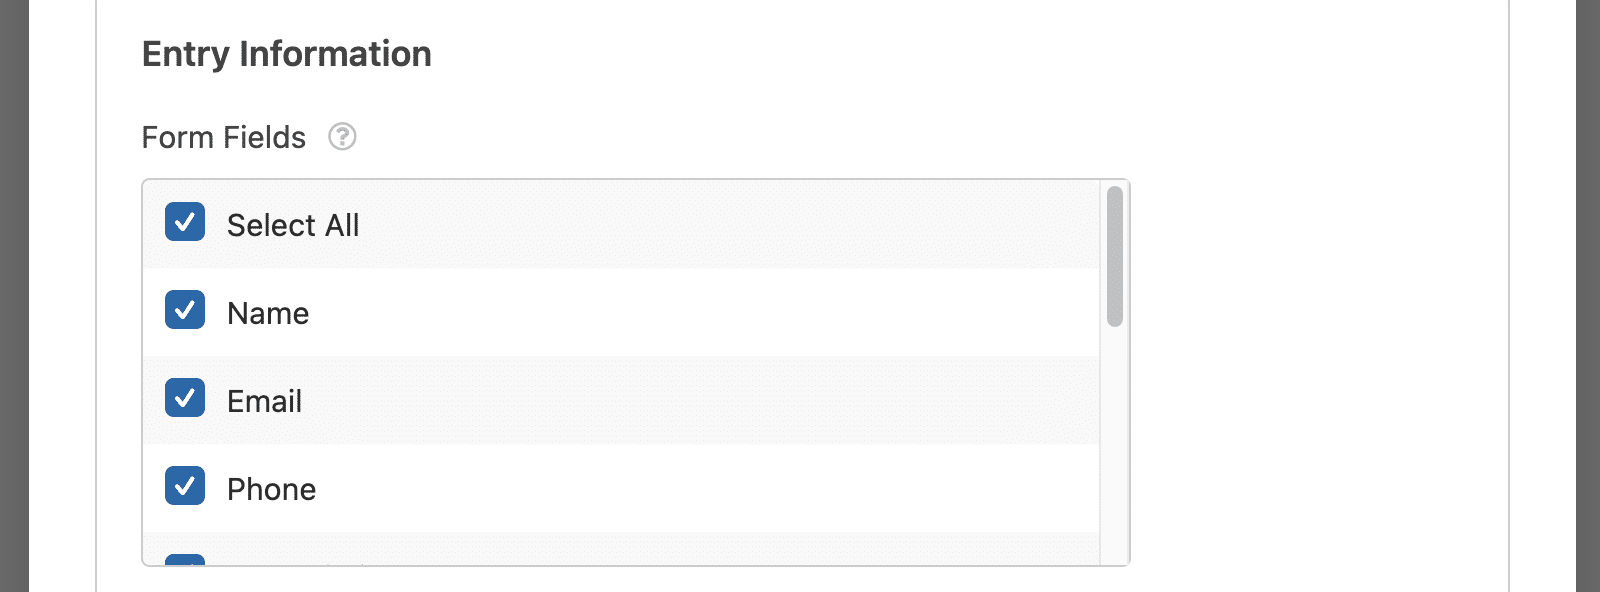
Entry Information
In the Entry Information section, you’ll be able to configure additional settings for the entries export. For instance, you can select the fields you’d like to include in the entry export file from the Form Fields checkbox list.
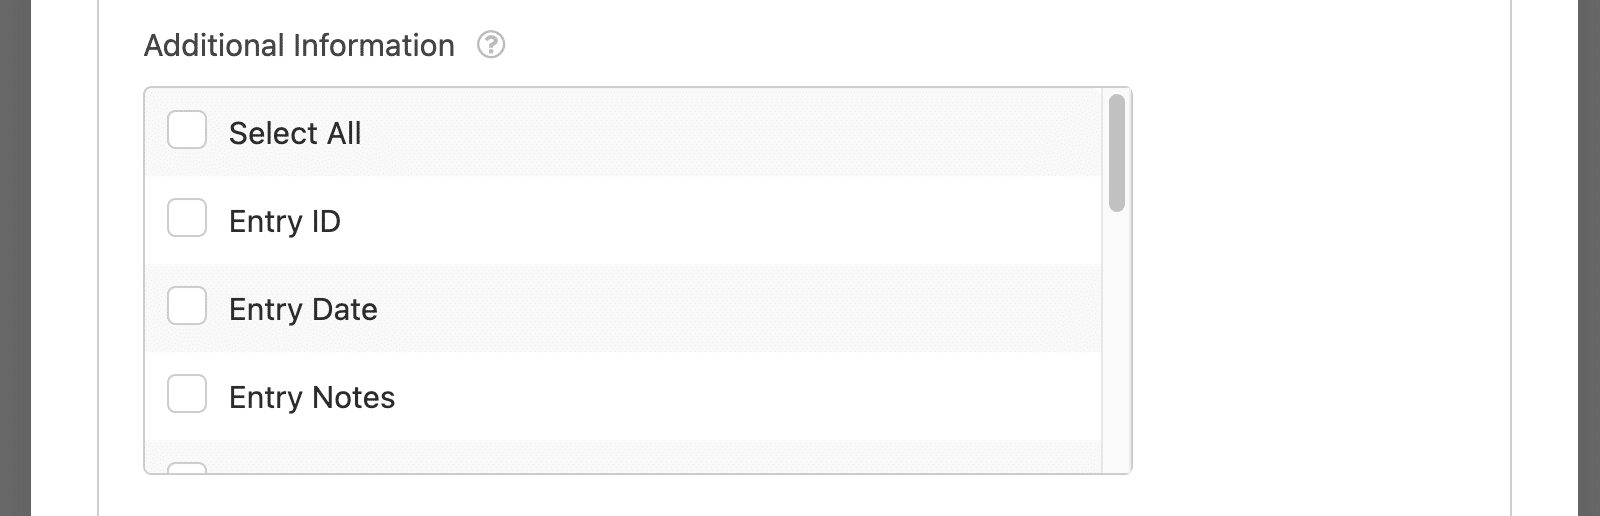
Under Additional Information, you can include more details like the Entry ID, Entry Date, Payment Status, etc.
In the Filter section, you’ll be able to include fields that match specific criteria.
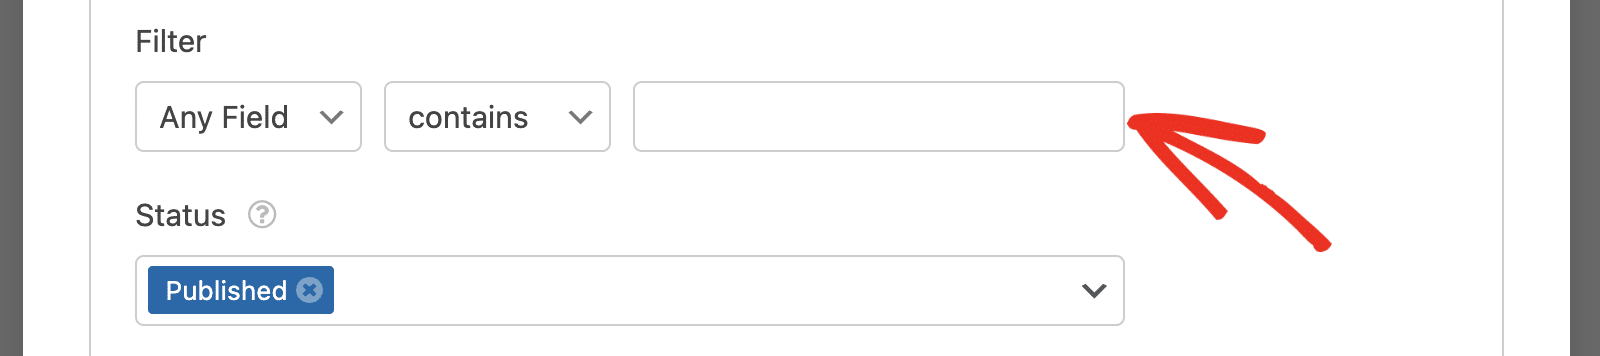
For example, setting it to include Any Field that contains the term giveaway will only export entries where there’s a mention of the term ‘giveaway’ in any of the fields.
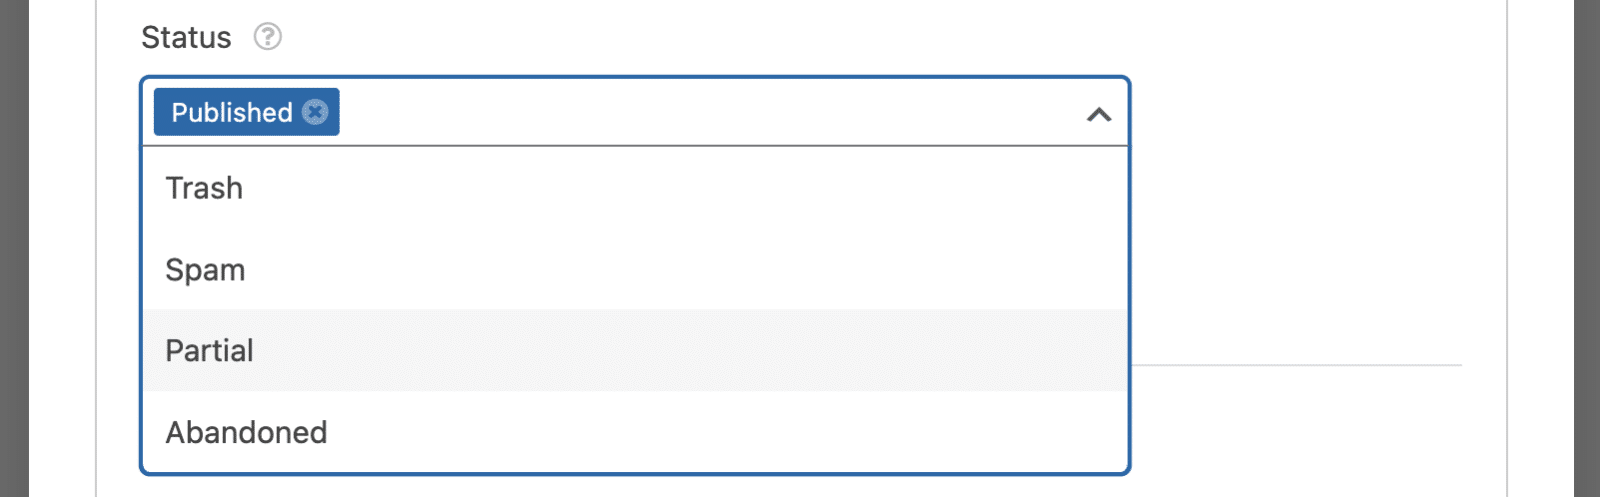
Under Status, choose the status for the entries you’d like to include in your export.
In the Export dropdown, you’ll need to choose how you’d like to handle the entries export.
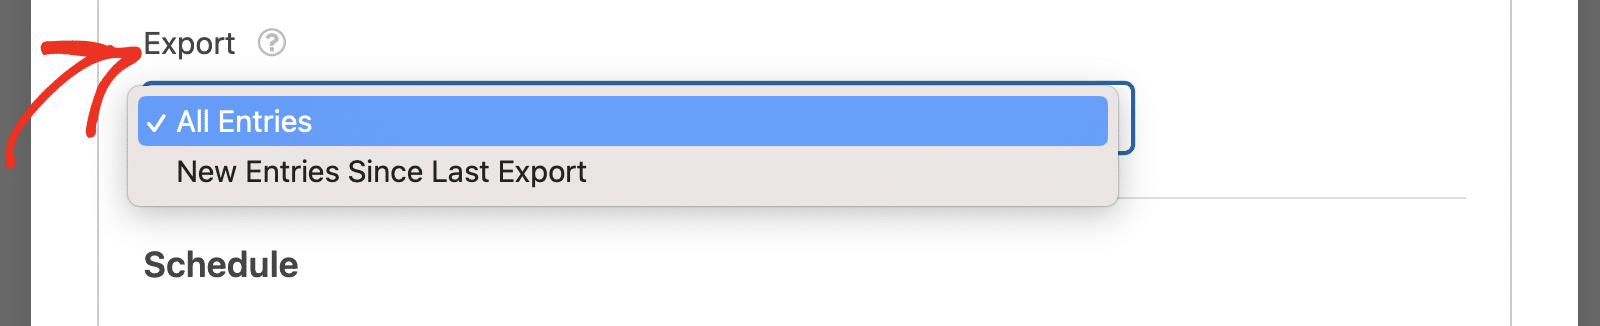
Choose the All Entries export if you’d like to export all entries each time the task runs. Selecting the New Entries Since Last Export option will filter out all entries that were previously exported the last time the task ran.
Schedule
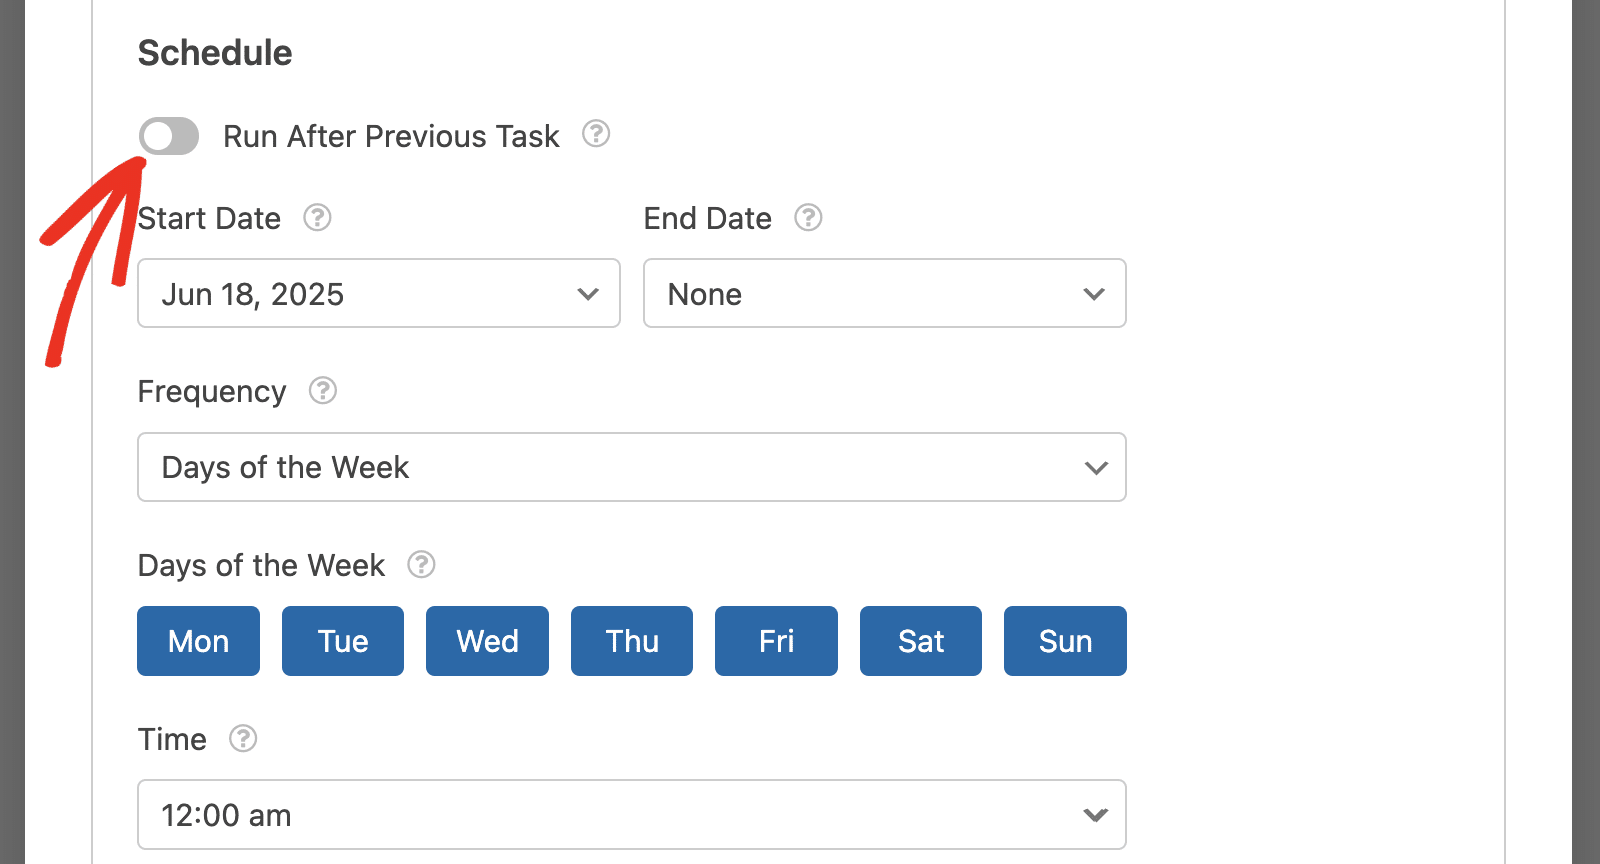
The schedule section is where you’ll define how often tasks should run on your site. First, click the Start Date dropdown and choose a date from the datepicker.
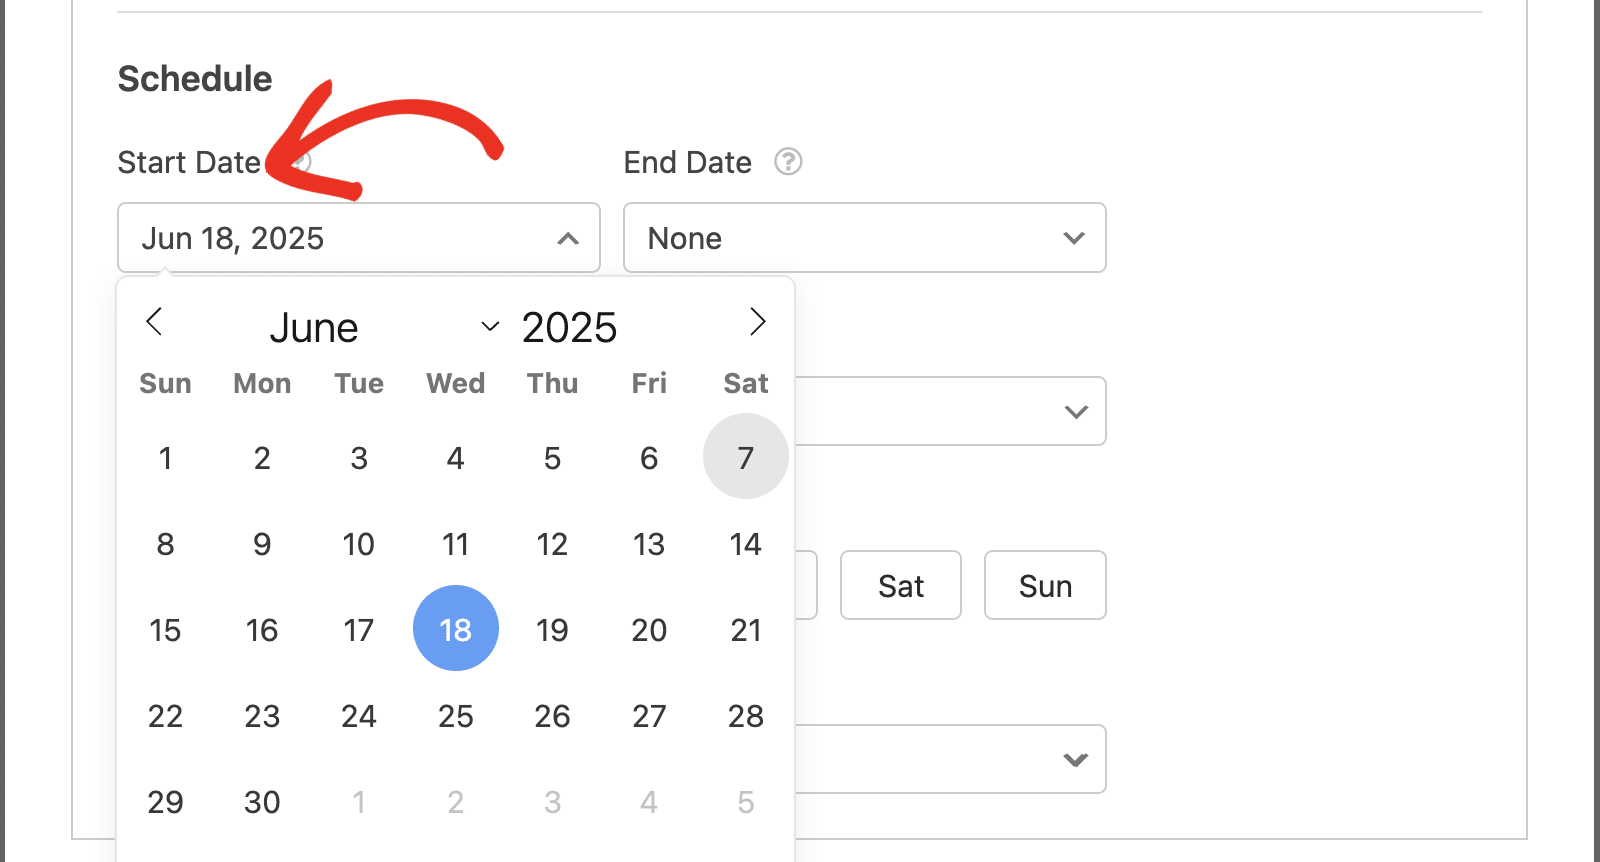
You can optionally choose when to stop running the task by selecting a date from the End Date field.
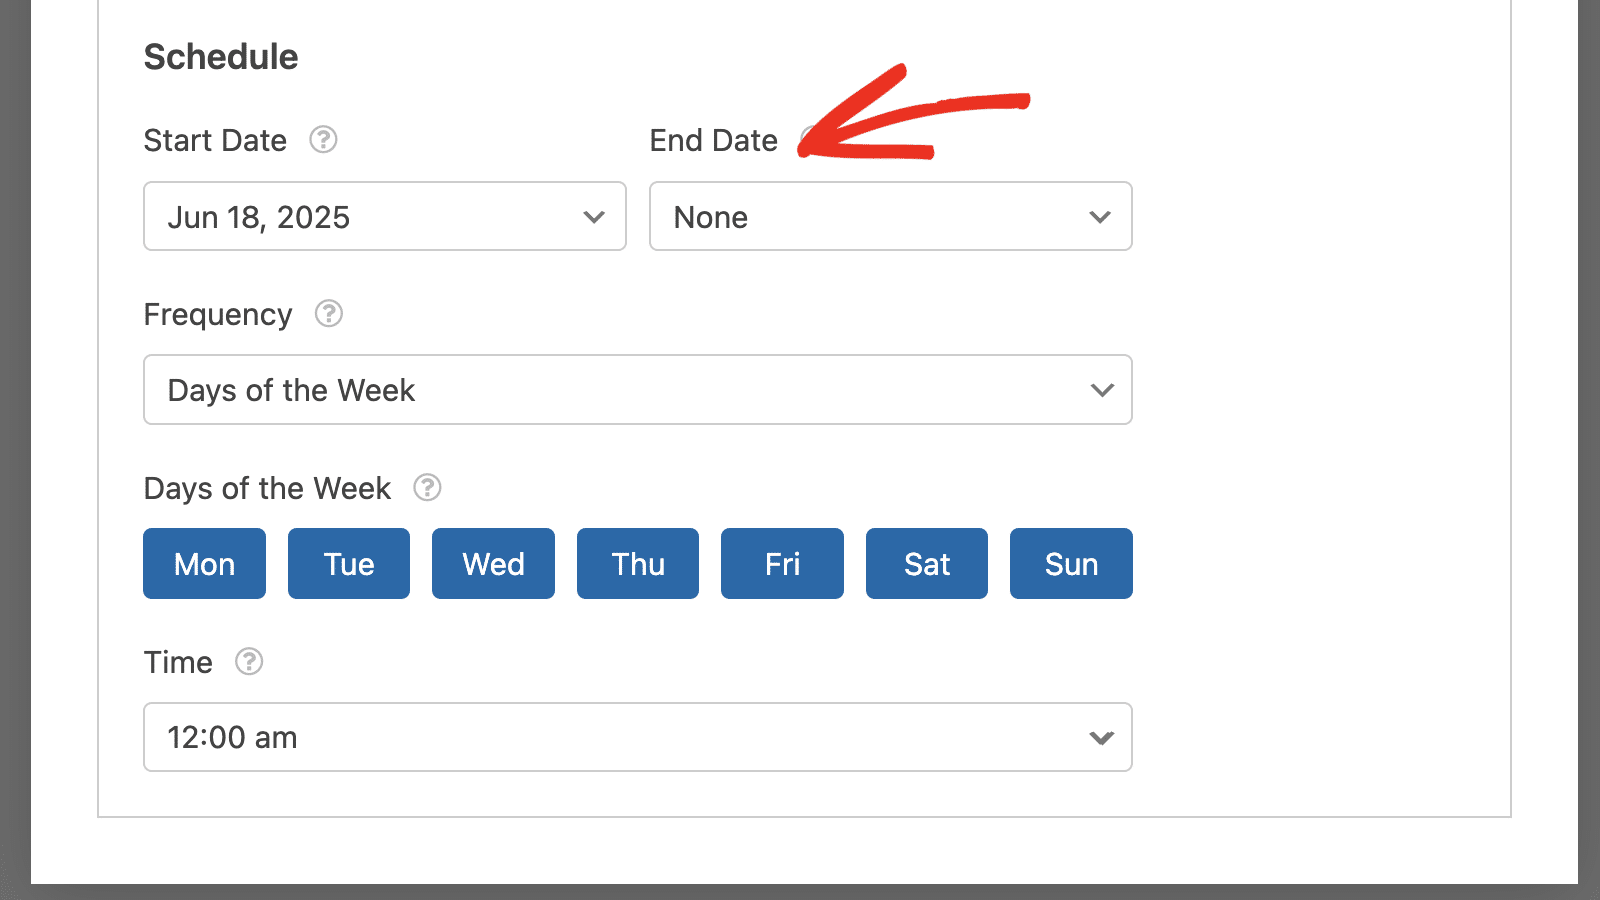
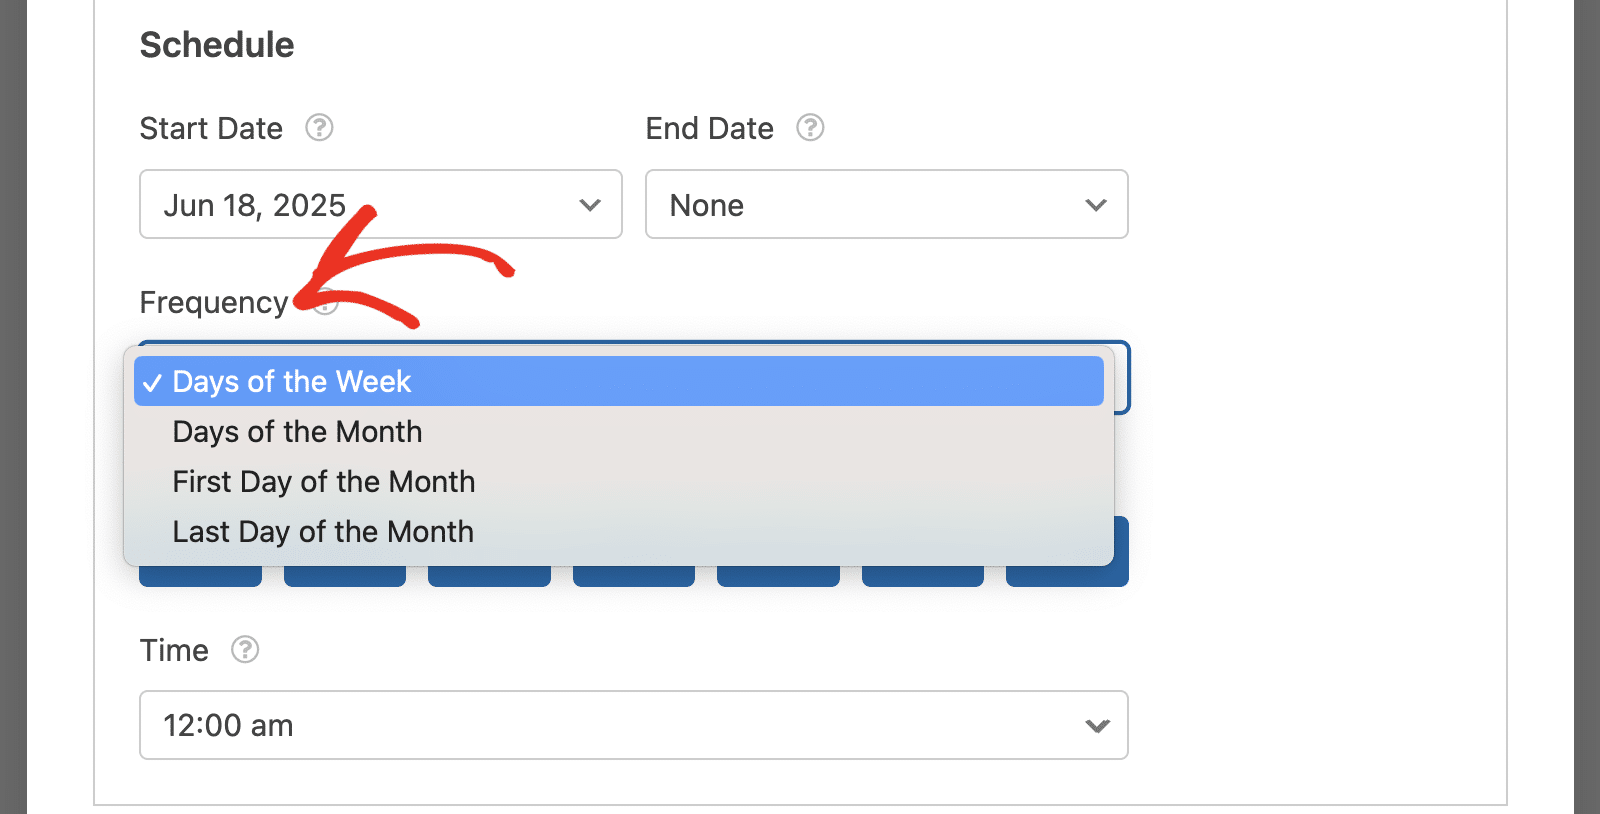
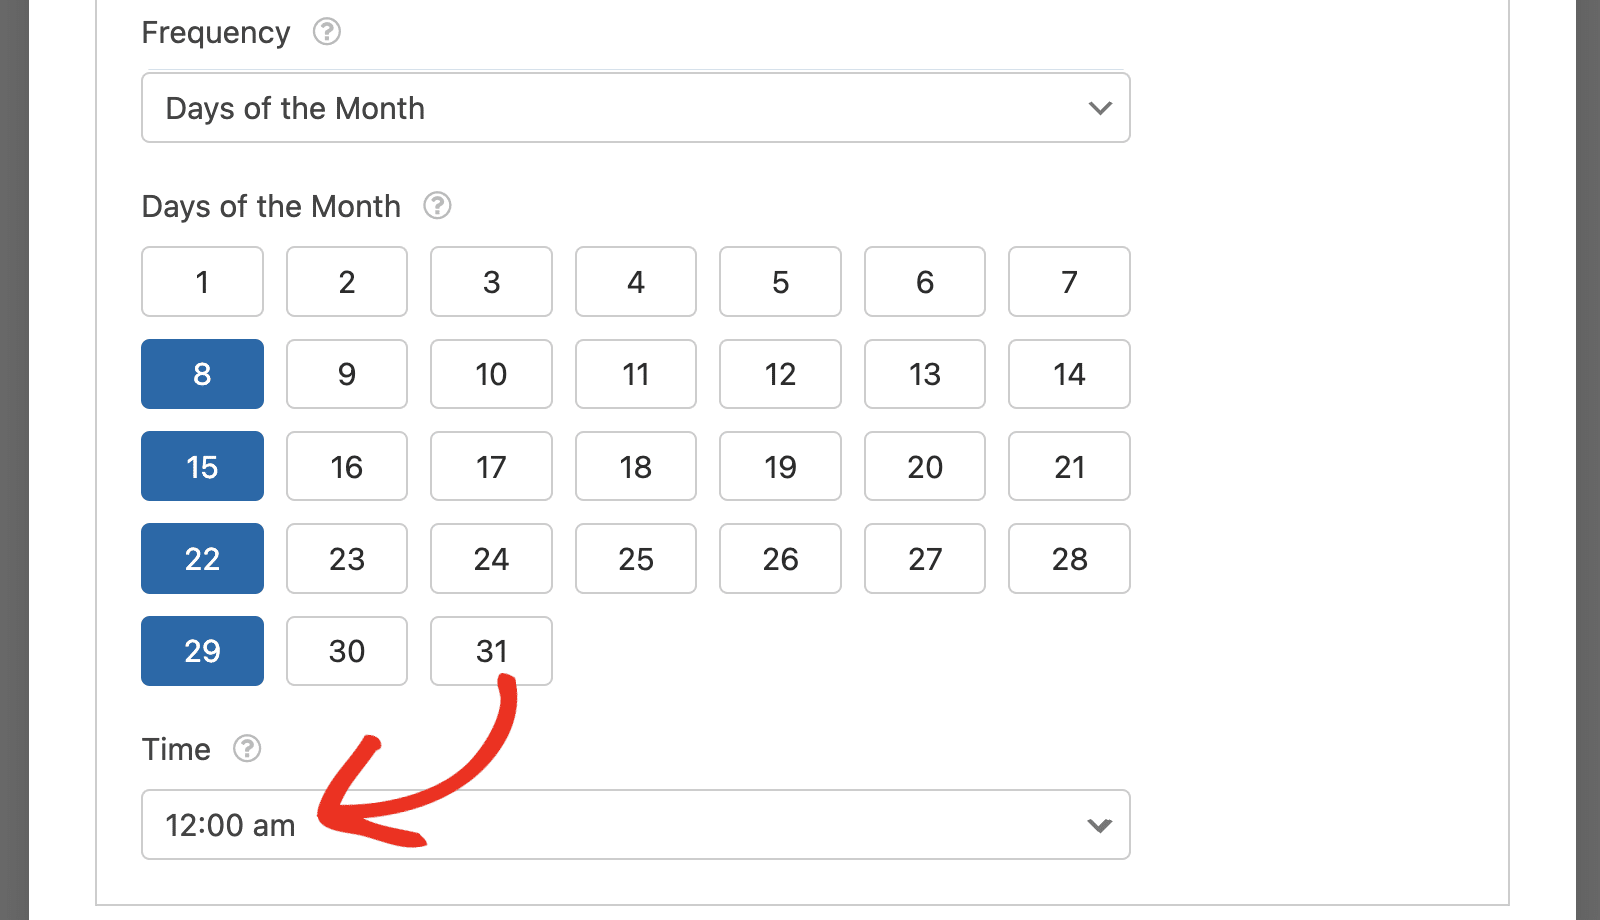
In the Frequency section, you’ll need to choose when and how often the task should run. Available options include:
- Days of the Week
- Days of the Month
- First Day of the Month
- Last Day of the Month
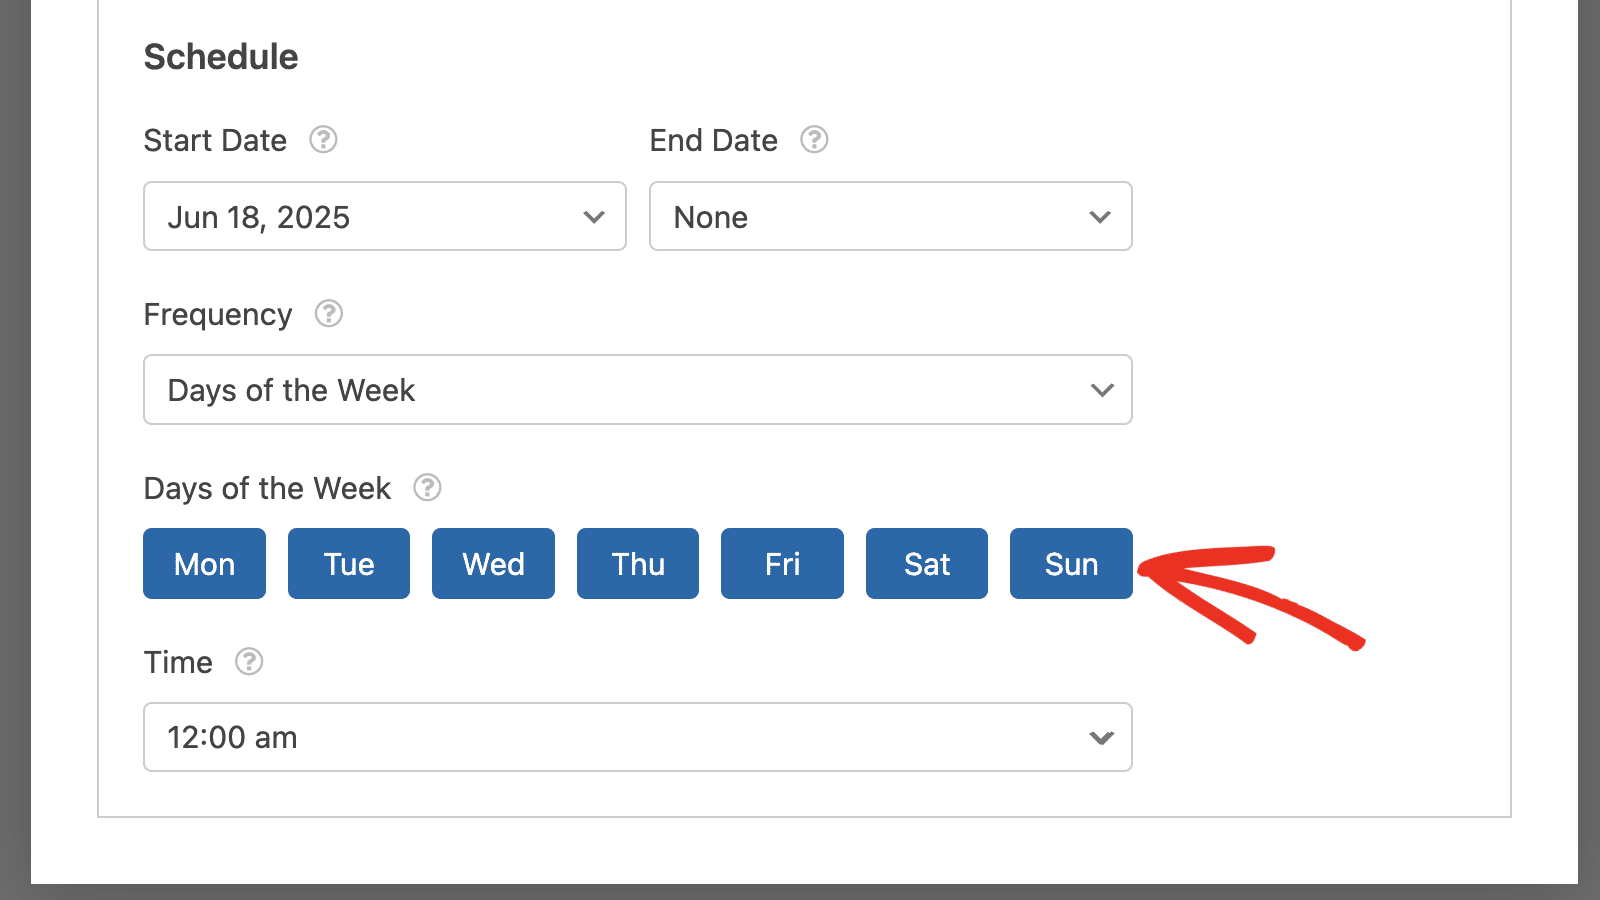
If you select Days of the Week, you’ll need to choose the specific day(s) you’d like the task to run.
Selecting the Days of the Month option will display a day picker where you’ll need to choose specific day(s) in the month to run your task.
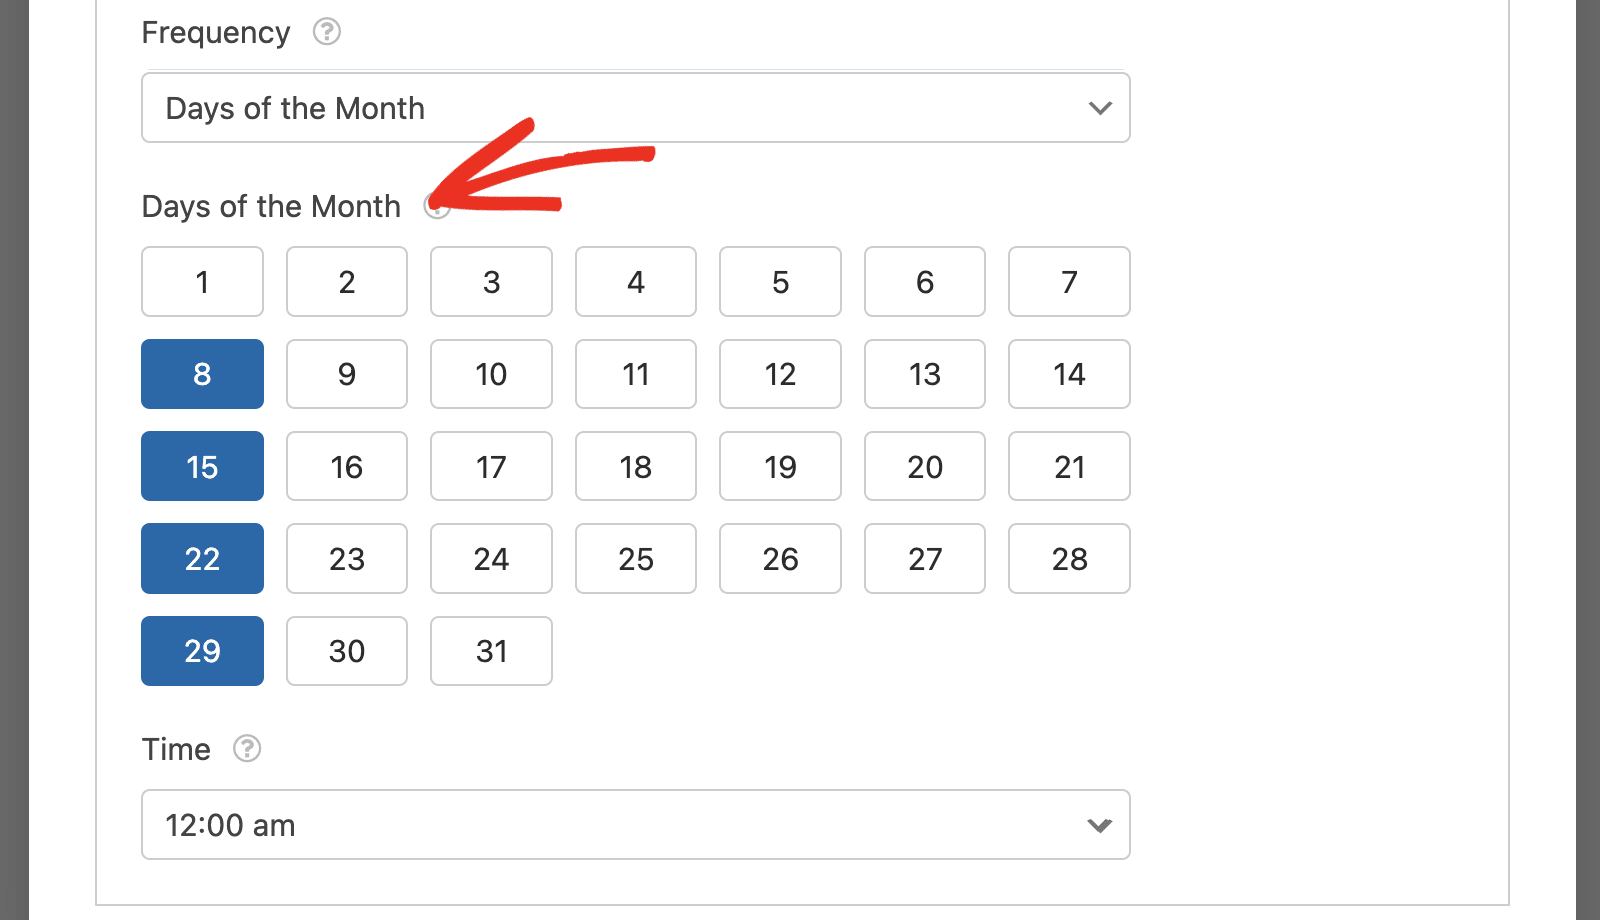
After choosing the frequency, select the time you’d like the task to run from the Time dropdown.
Note: The Entry Automation addon uses WP-Cron to schedule tasks, which is different from how the system scheduler works. This means tasks will only run when there’s a page load on your site. Please see WordPress’ official documentation if you’d like to modify how tasks run on your site.
Once you’re done configuring your automation task, be sure to save your form to complete the process. After that, you’ll see an ACTIVE status next to the task name.

You can clone an existing task by clicking the Copy icon. This will copy all the configurations from the task you cloned.
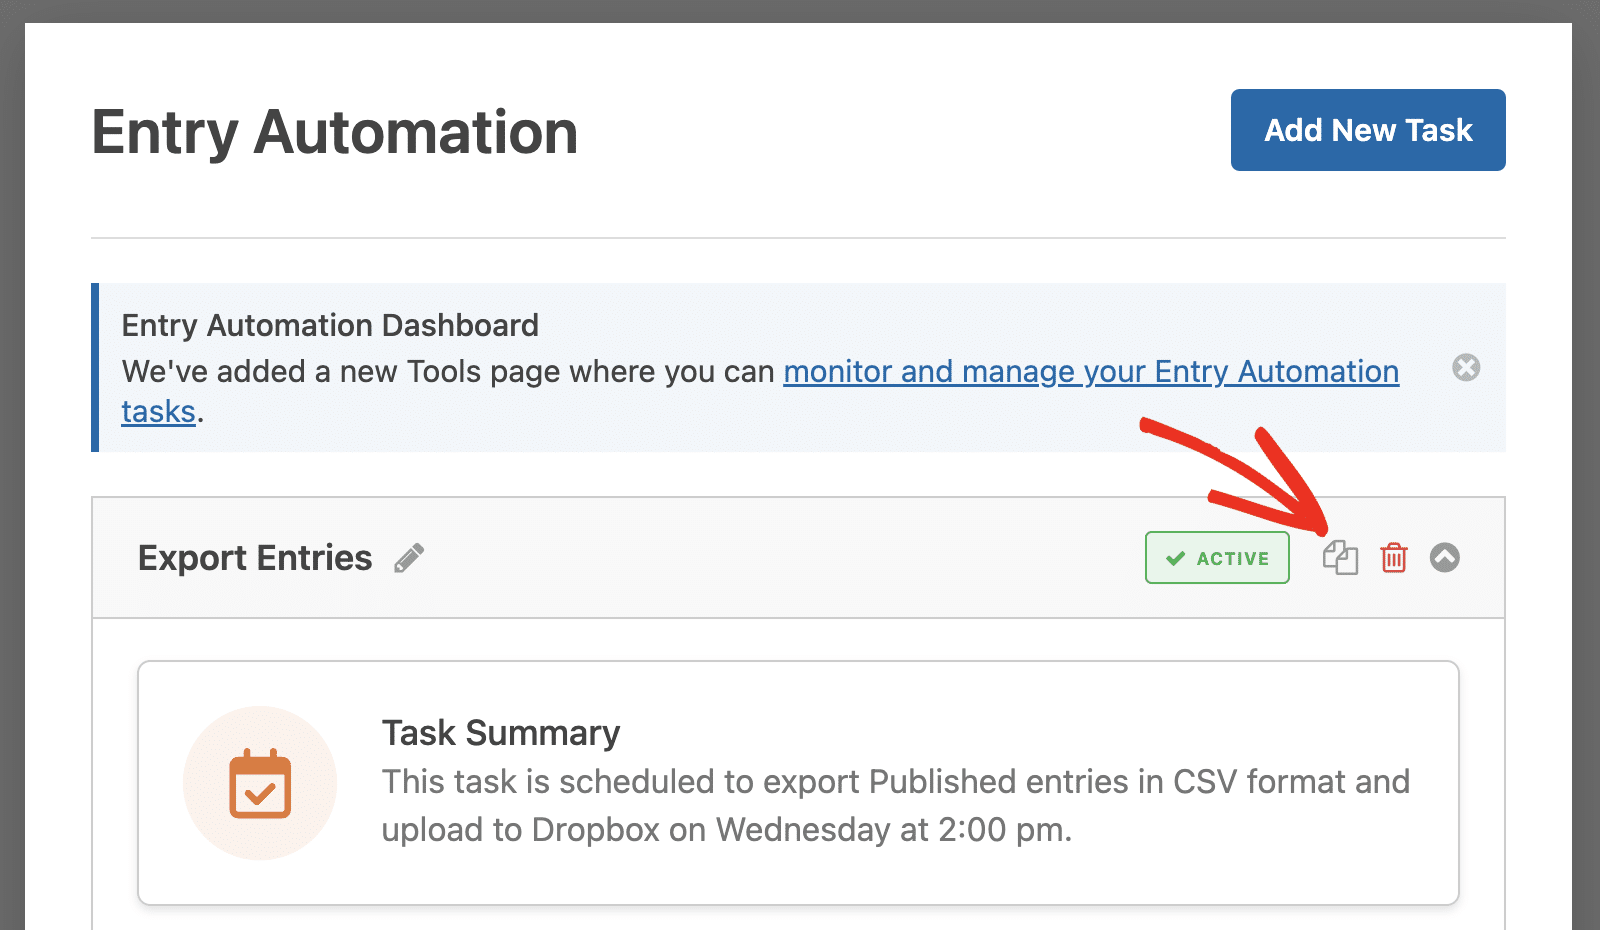
To delete a task, click the Trash icon.
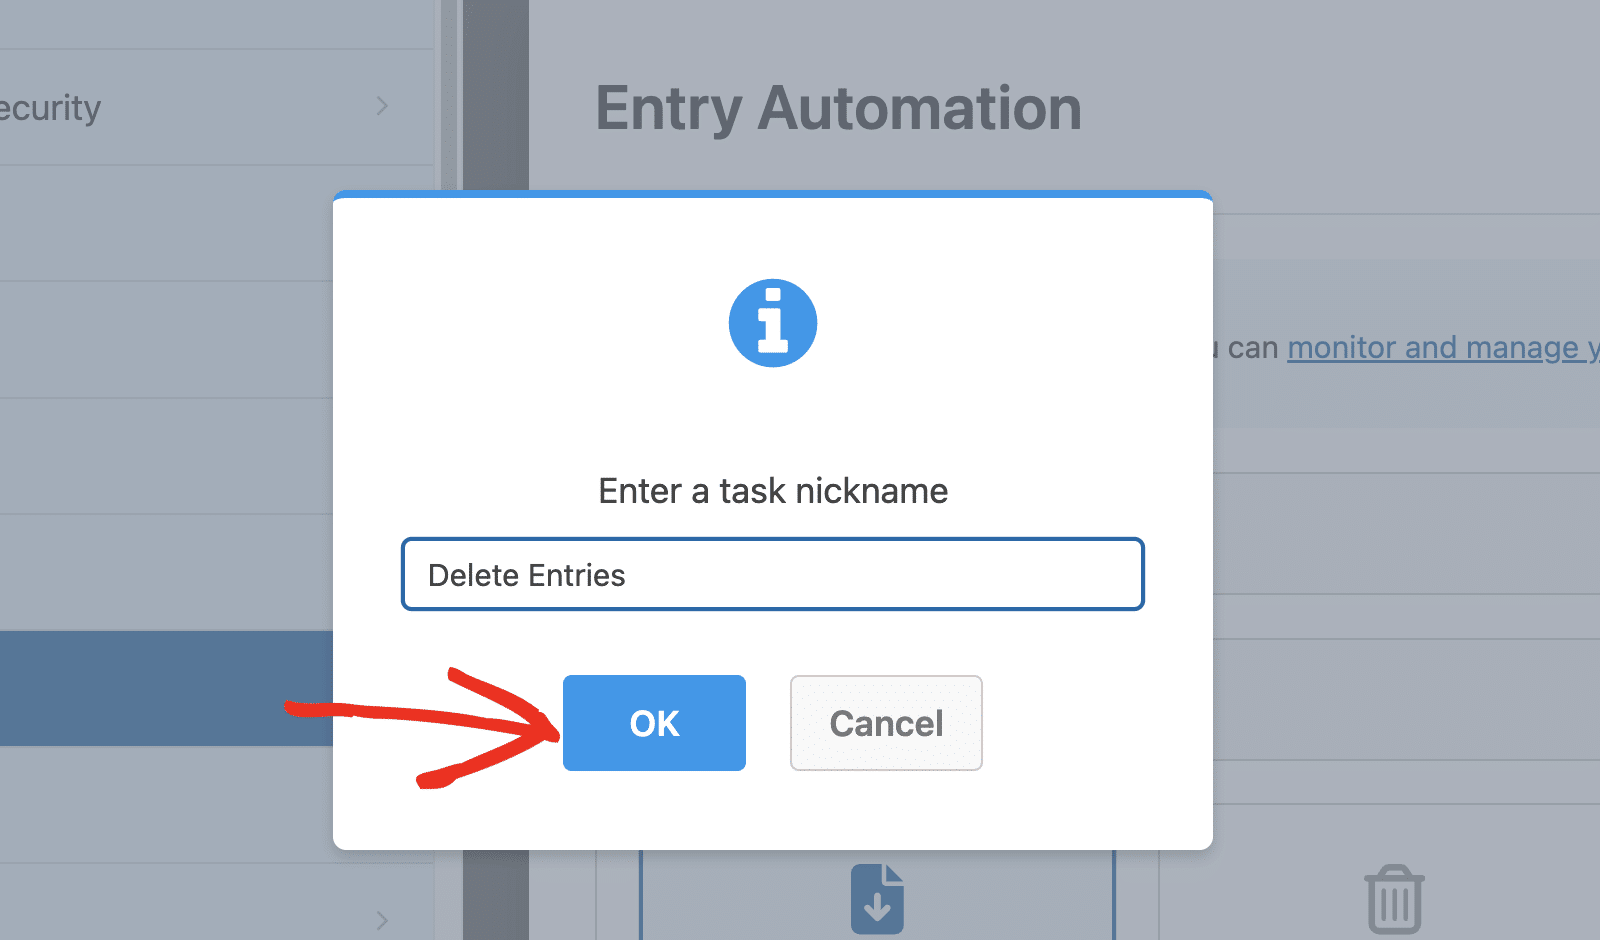
In the overlay that appears, click OK to confirm your action.

Adding Multiple Automations
You can create unlimited automations to perform multiple entry management tasks on the form. As an example, we’ll create an additional task to delete form entries from the WordPress dashboard after they’ve been exported.
Deleting Form Entries
To start, navigate to Settings » Entry Automation from the form builder. You’ll see all the tasks you’ve created for that specific form. Go ahead and click the Add New Task button.

In the overlay that appears, enter your task’s name, and click OK.
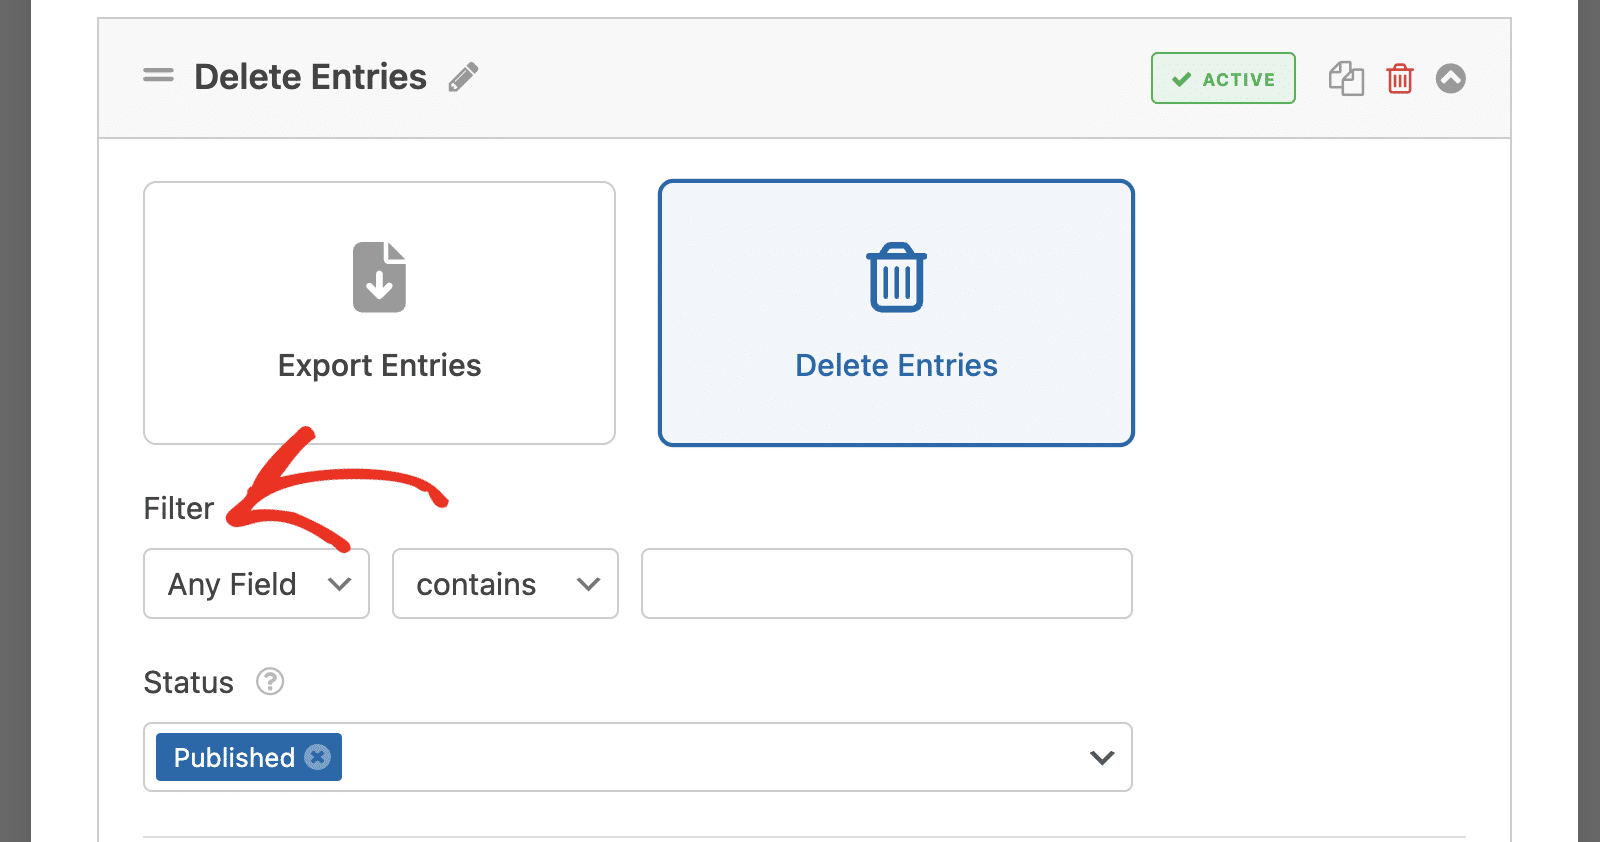
Next, select the Delete Entries option. Additional options will appear afterwards.
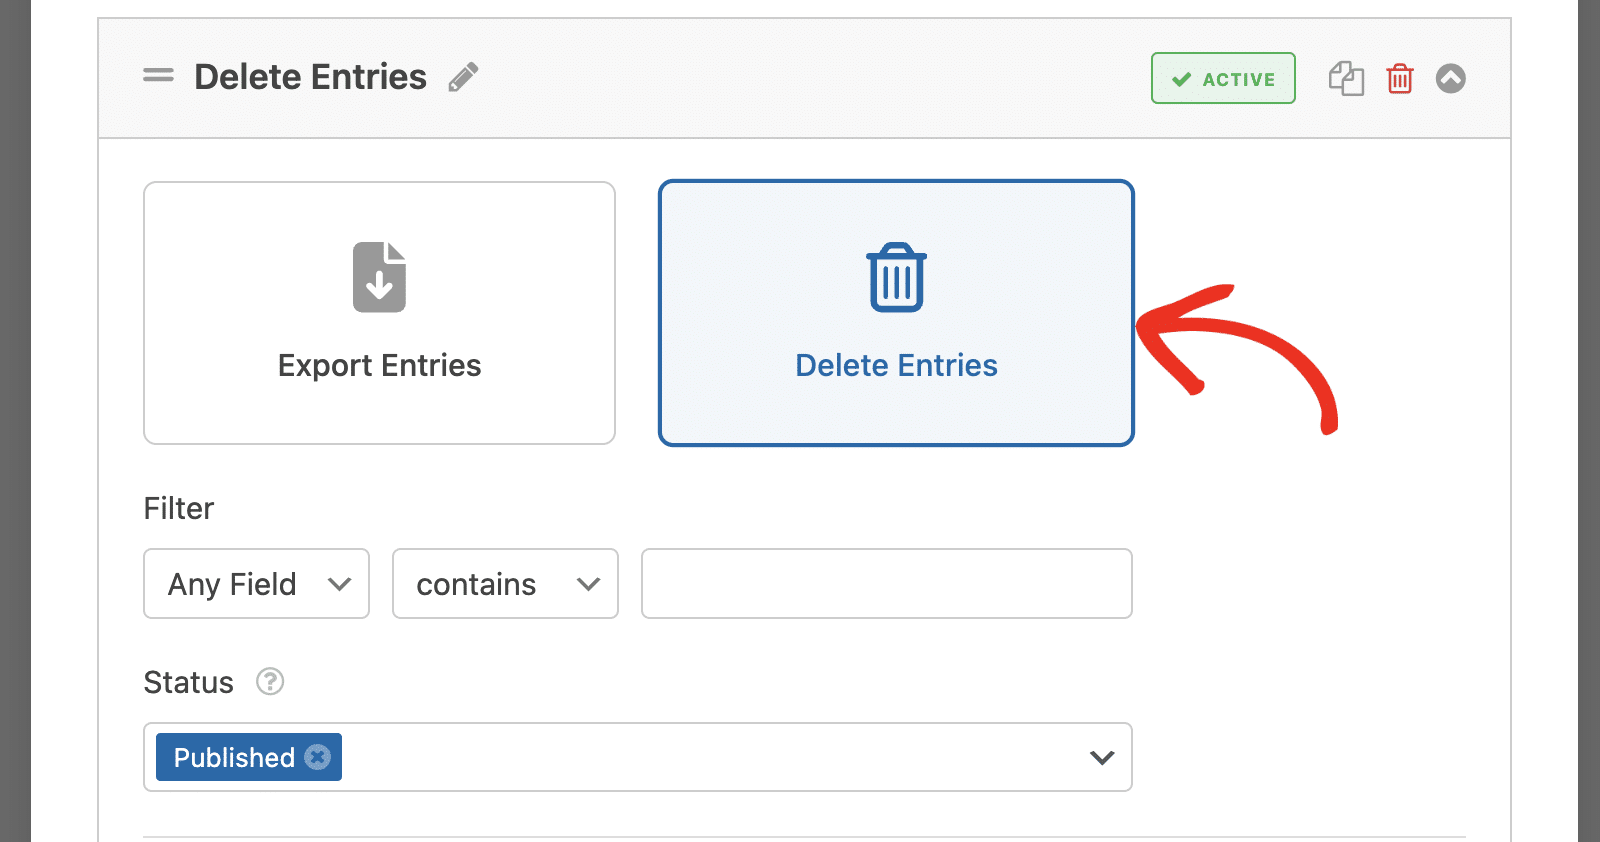
You can use the Filter section to specify the entries you’d like to delete based on the conditions you set.
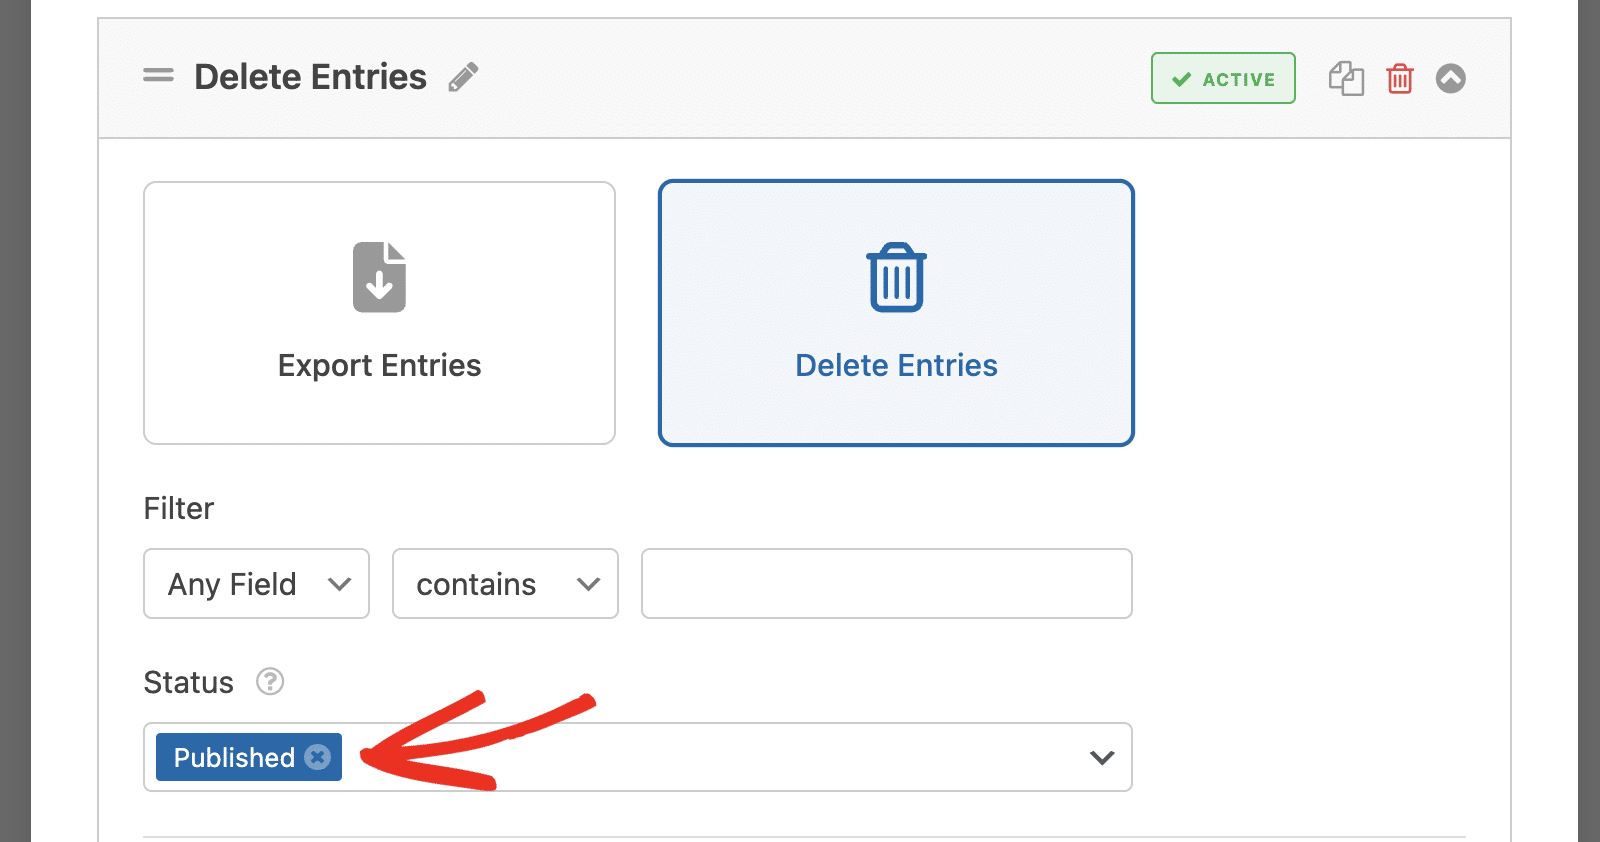
After that, use the Status dropdown options to select the entries you’d like to delete based on their status(es).
In the Schedule section, the Run After Previous Task option is enabled by default.
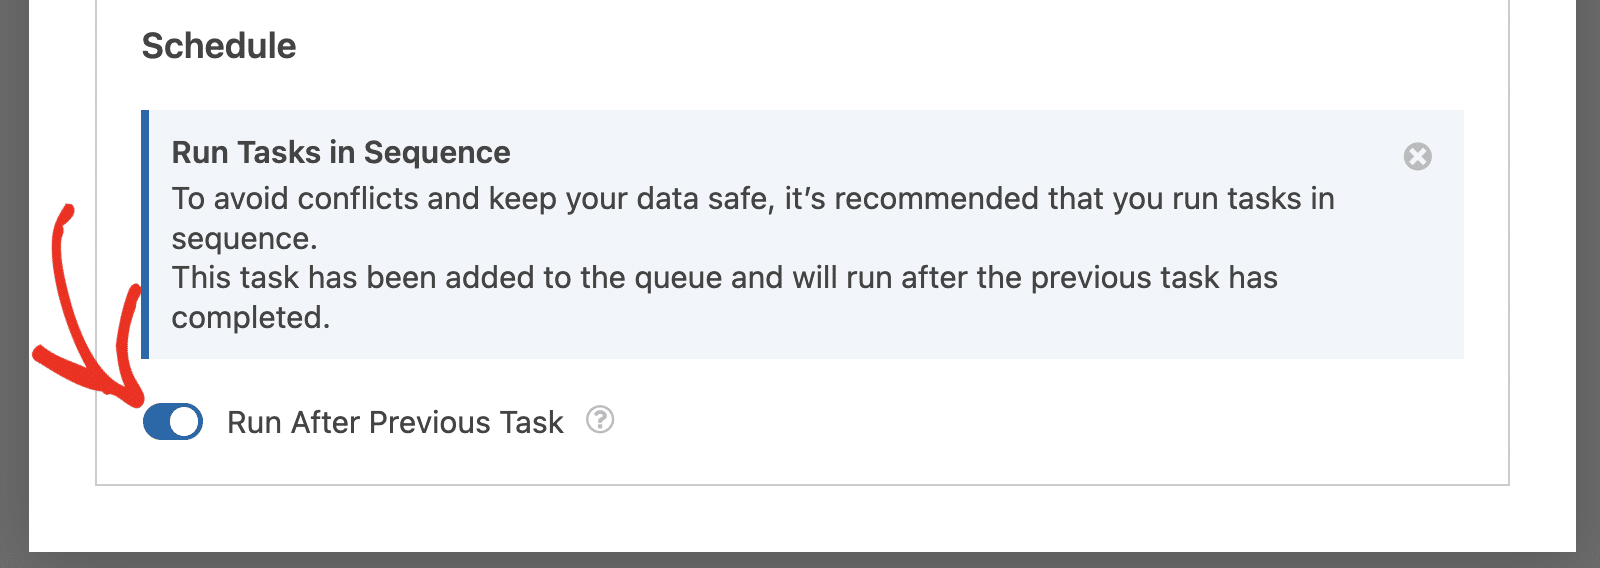
This is the default schedule for all additional tasks you create, and it ensures multiple tasks run sequentially.
You can manually specify a schedule by disabling the Run After Previous Task option. Disabling it will display the Schedule form, where you’ll need to specify how the tasks should run.
Note: Unless you specifically need to set custom schedules, we recommend setting additional tasks to run after the previous tasks to avoid conflicts.
If you have multiple tasks, you can reorder them by holding the 2-vertical line icon and dragging the task to your desired location.
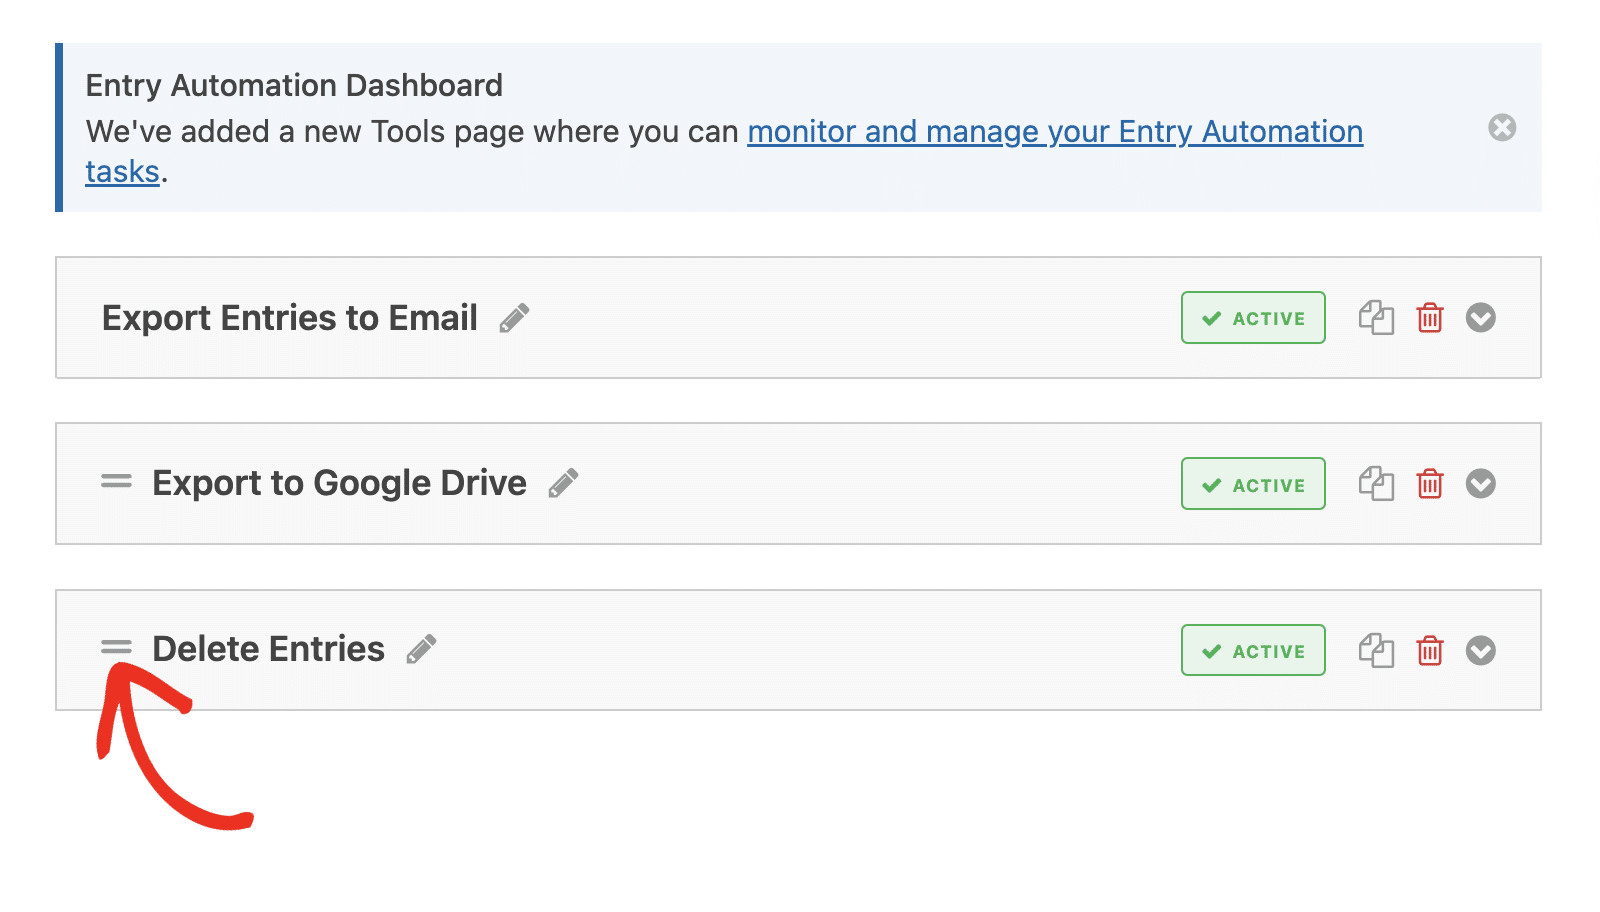
Keep in mind that any task you move above will run before the task that was previously above it.
Managing Entry Automation
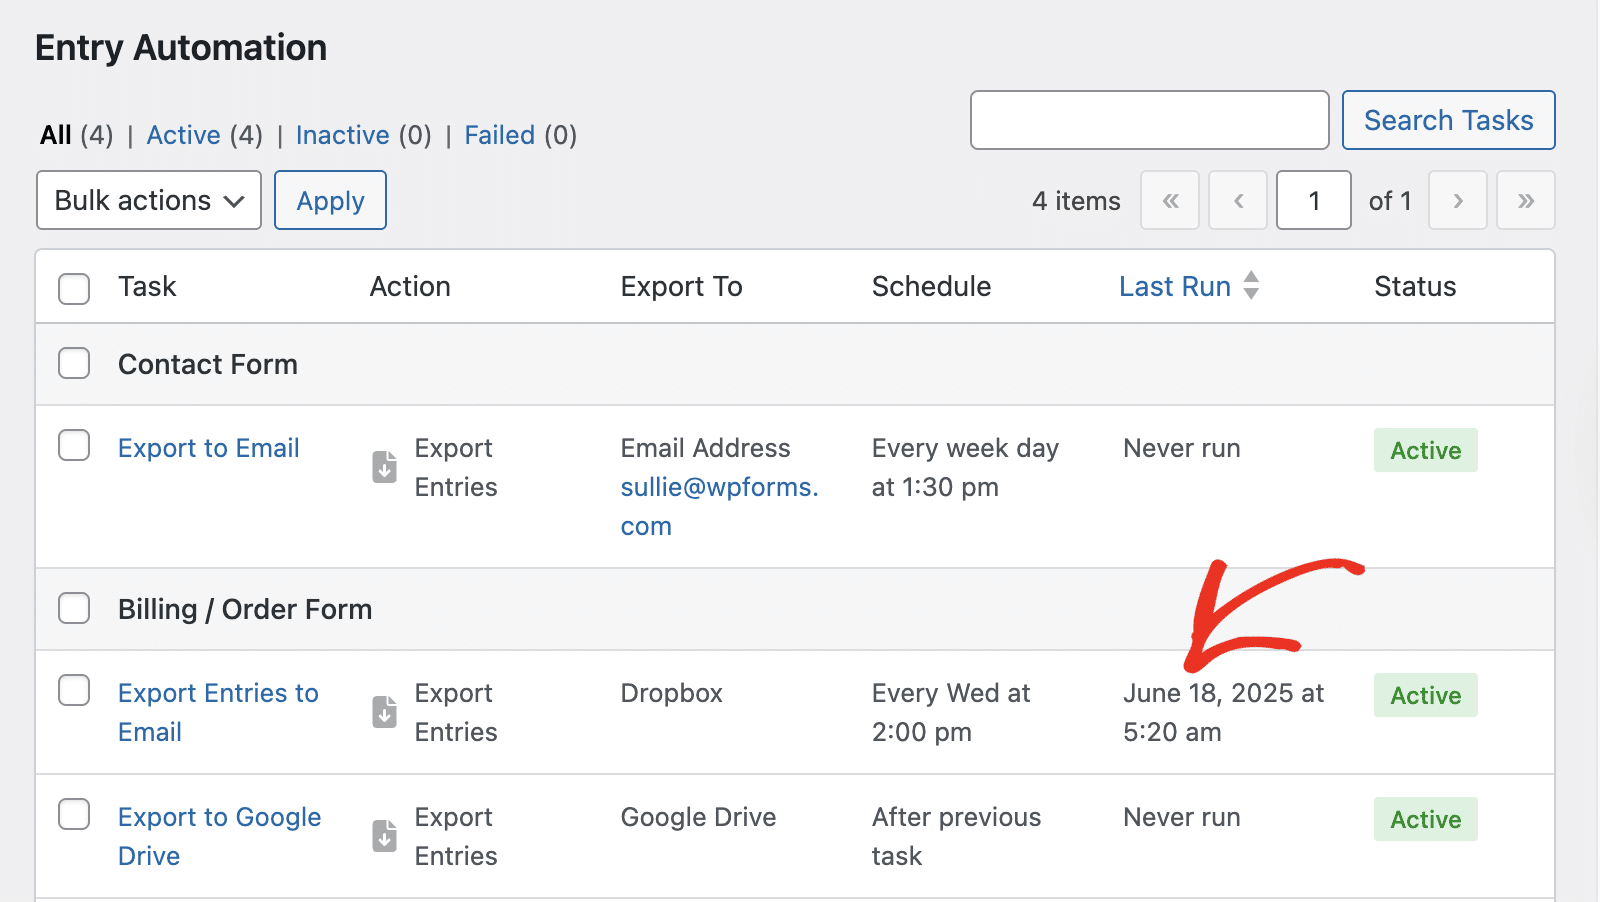
WPForms provides a dashboard to keep track of all automation tasks you’ve created on your site. To access this page, go to WPForms » Tools and select the Entry Automation tab.

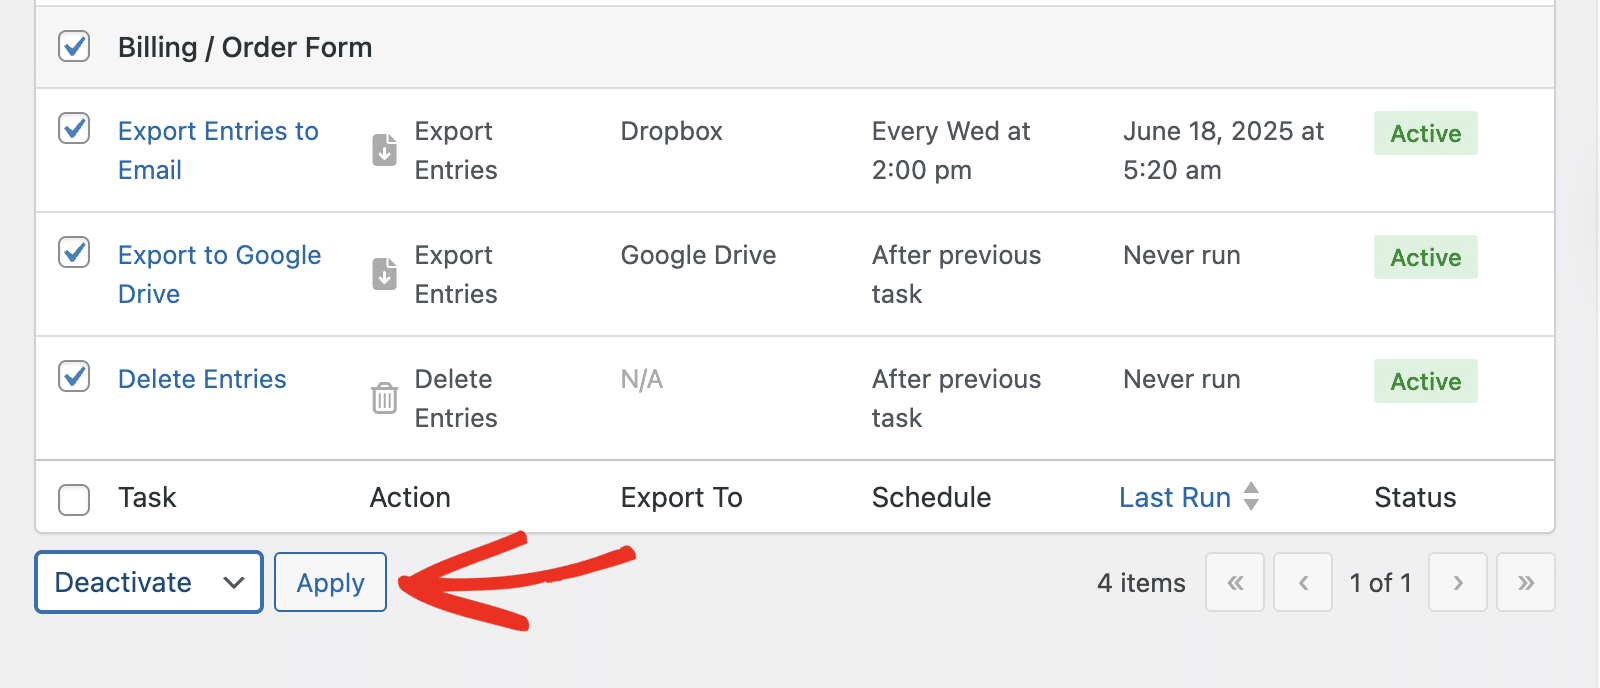
Here, you’ll see a table with details about the forms you’ve enabled Entry Automation on. You’ll also see all the automation tasks you’ve created below each form.

The Last Run column shows the last time each task was triggered.
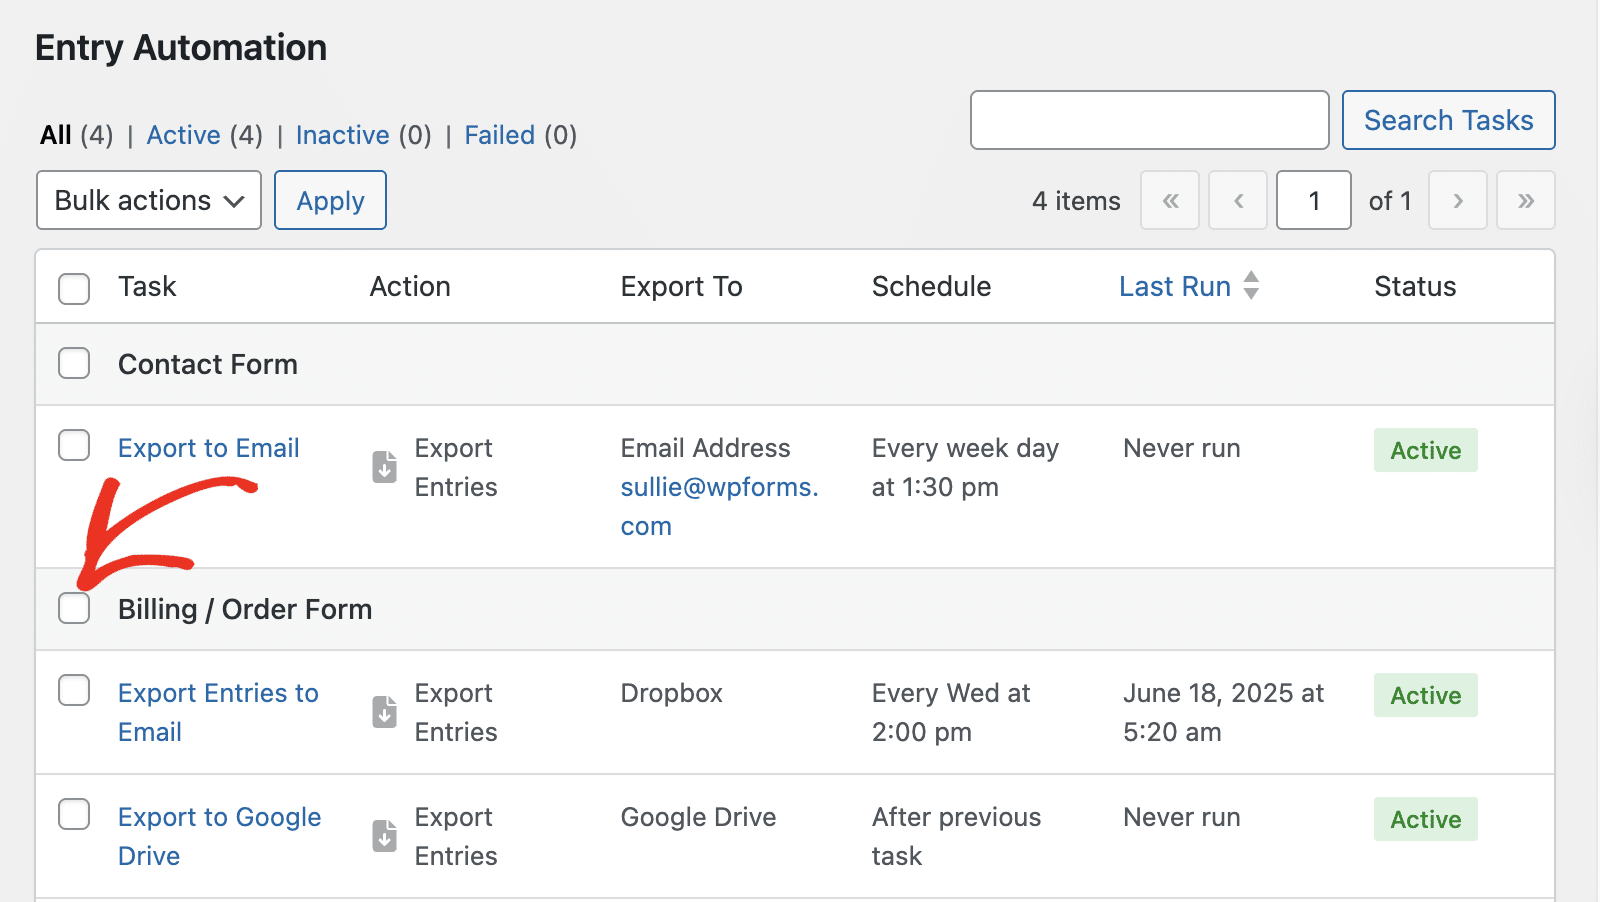
You can manage task status from this dashboard. If you’d like to deactivate tasks for a specific form, click the Checkbox next to the form.
Then click the Bulk Actions dropdown and select the action you’d like to perform.
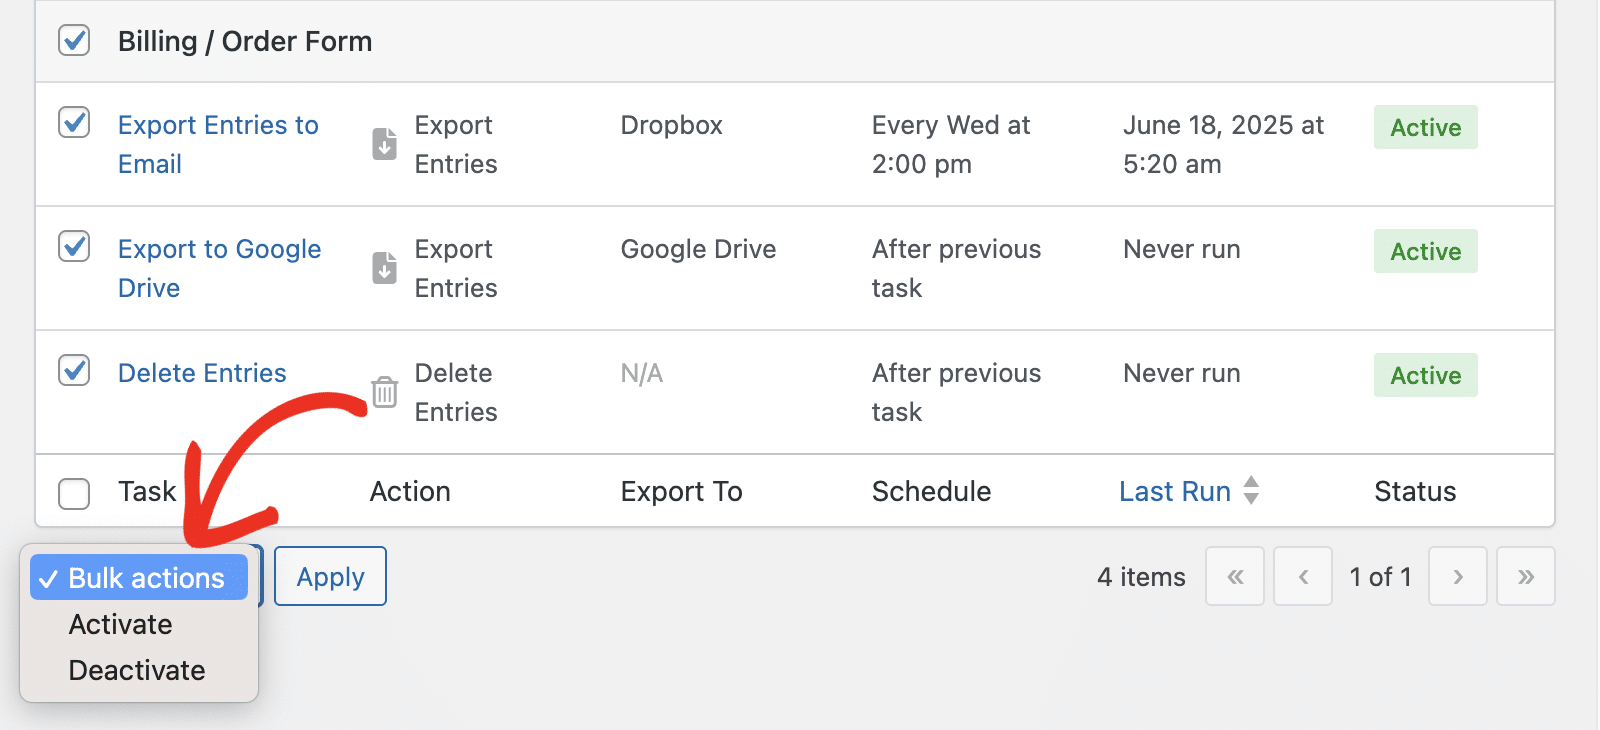
After that, click the Apply button to proceed.
That’s it! You’ve now learned how to install and use the Entry Automation addon in WPForms.
Next, would you like to learn how to build other automations in WPForms? Be sure to check our tutorial on using the Make addon for more details.