AI Summary
Would you like to send SMS and WhatsApp messages when forms are submitted on your WordPress site? With the WPForms Twilio addon, you can automatically send SMS and WhatsApp notifications when forms are completed.
This tutorial will show you how to install and use the Twilio addon with WPForms.
Requirements:
- You will need a Plus license level or higher to access the Twilio addon
- Ensure that you’ve installed the latest version of WPForms to meet the minimum required version for the Twilio addon
Setting Up Your Twilio Account
Before configuring the Twilio addon in WPForms, you’ll need to create and set up your Twilio account. The process involves creating your account, verifying your identity, and obtaining a phone number for sending messages. If you already have a Twilio account set up, you can skip ahead to the Connecting WPForms to Twilio section.
First, navigate to Twilio’s website and create an account. You’ll need to provide some basic information to get started.
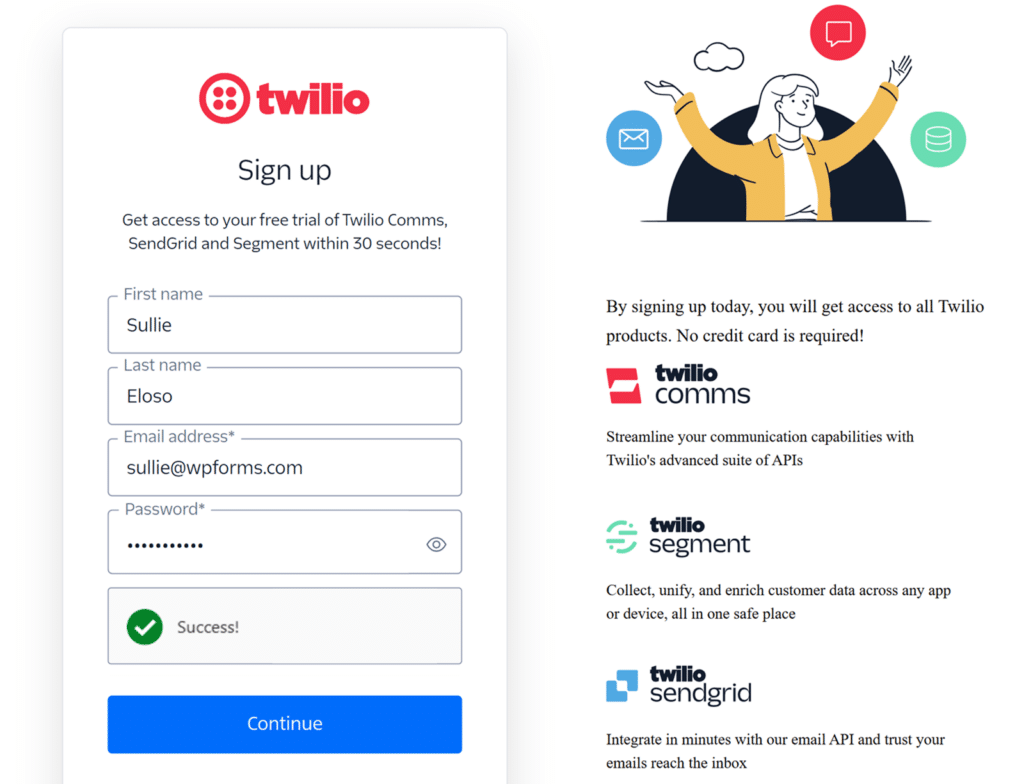
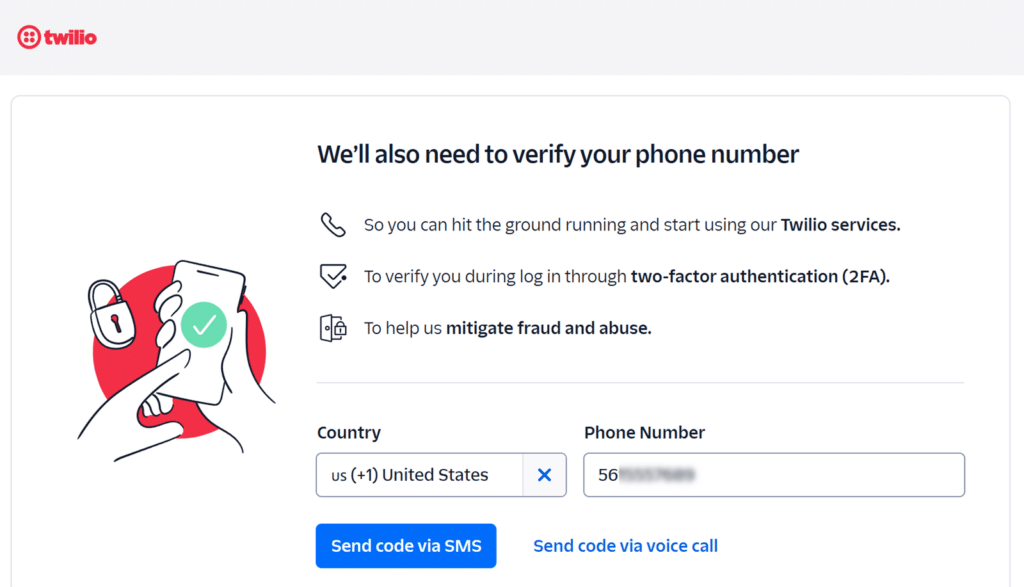
After signing up, Twilio will guide you through their account setup process. This includes verifying your identity with a phone number where you can receive a verification code. Enter your phone number, and Twilio will send you a code via SMS.
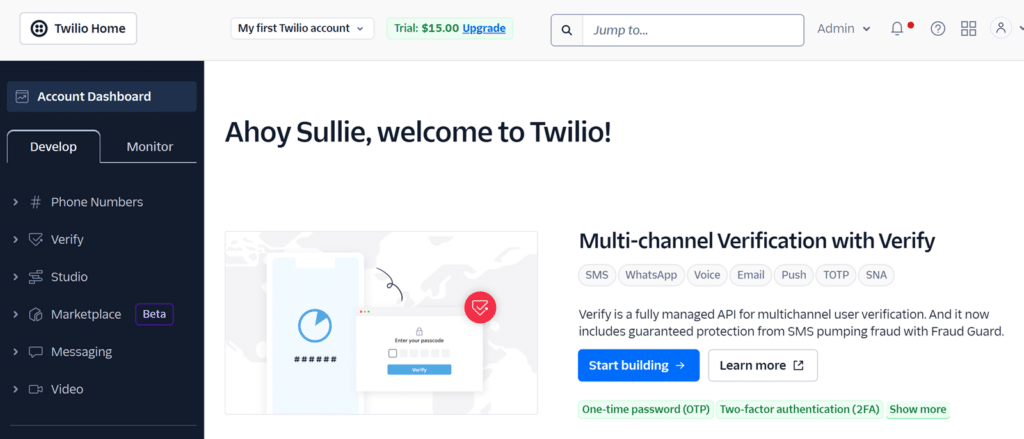
After entering the verification code, you’ll be taken to your Twilio Console dashboard. This is where you’ll find all the tools and settings needed to integrate Twilio with WPForms.
Purchasing a Twilio Phone Number
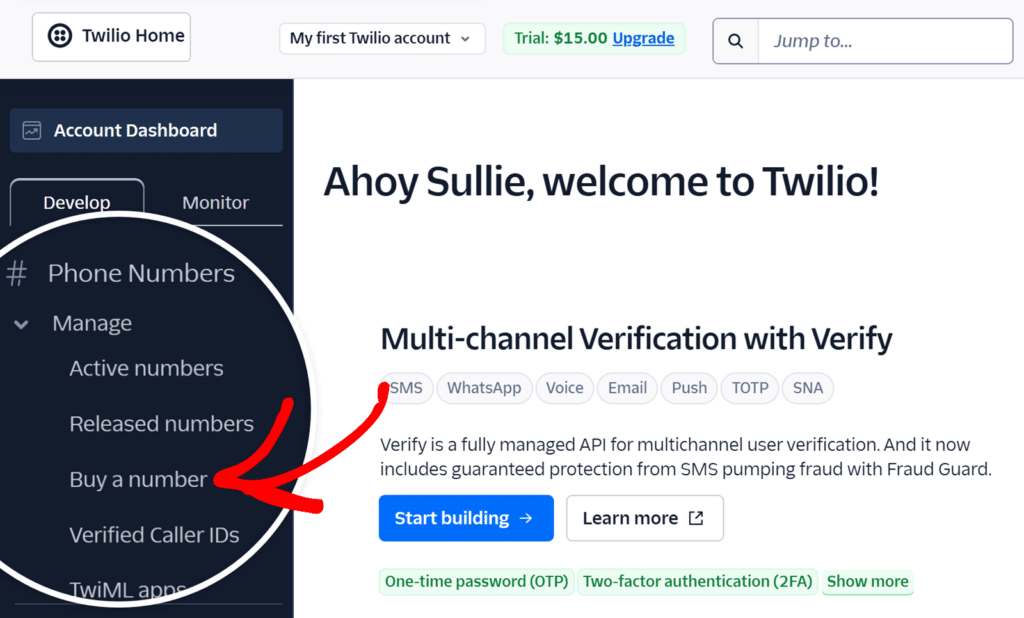
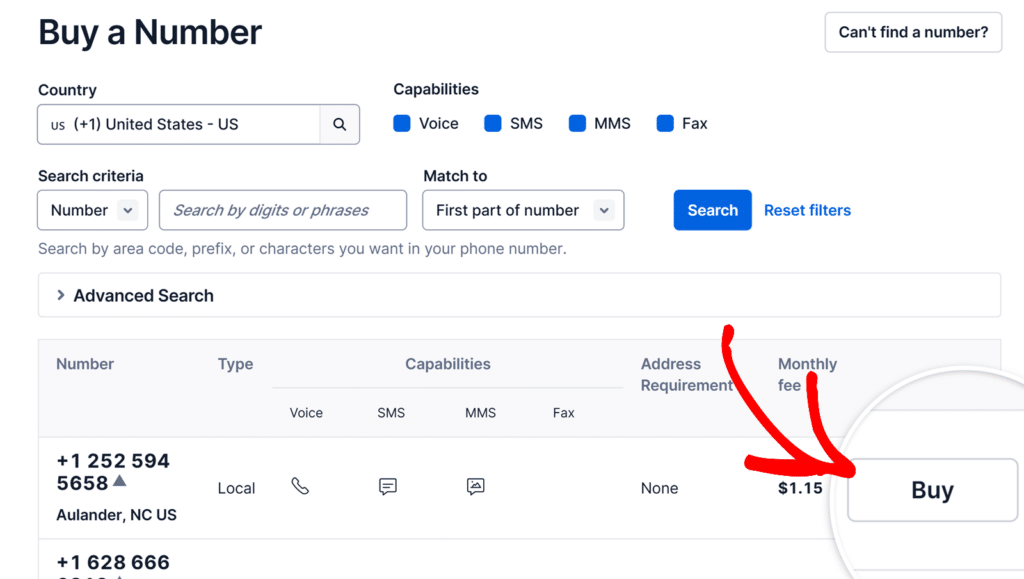
To send messages through your WPForms integration, you’ll need to purchase a dedicated Twilio phone number. In your Twilio Console, go to Phone Numbers » Manage » Buy a number from the left navigation menu.
Here, you’ll see options to search for available phone numbers. You can search for specific area codes or number patterns using the search options at the top of the page.
Once you find a suitable number, click the Buy button next to it.
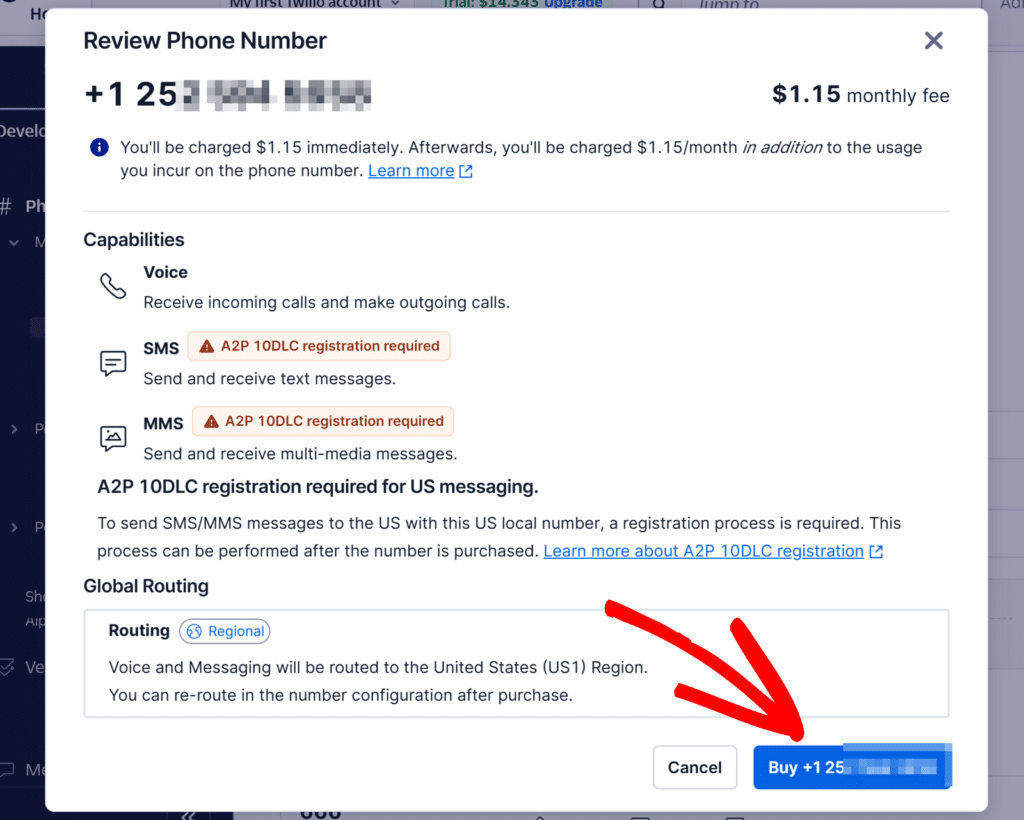
A confirmation window will appear showing the number’s capabilities and monthly fee. Click Buy to complete your purchase. While on the free trial, Twilio provides you with $15 in credit which you can use to purchase your phone number and send messages.
For comprehensive details about searching for and purchasing phone numbers in Twilio, please see Twilio’s official guide.
Creating Message Templates
Message templates help you standardize your WhatsApp notifications and make them more dynamic by including form submission data. You can create templates that automatically insert information from your form fields.
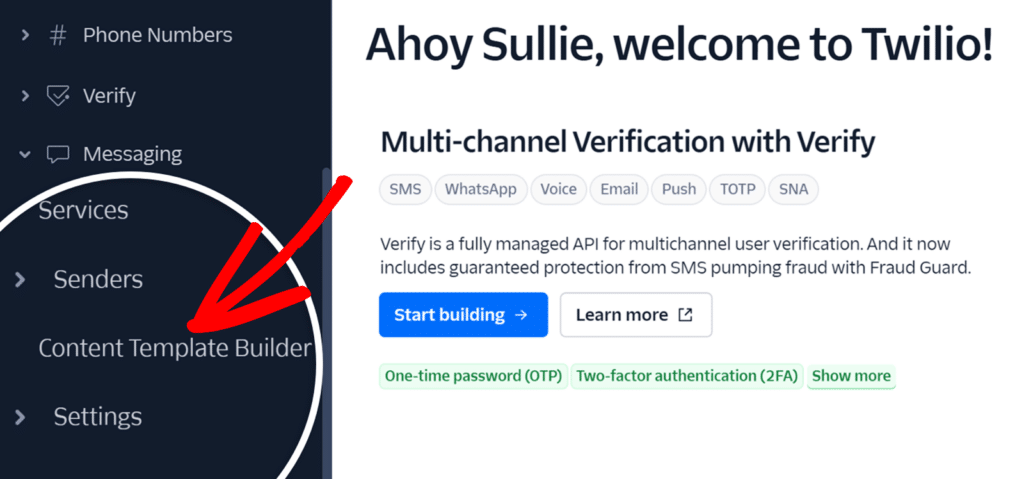
To set up message templates, go to Messaging » Content Template Builder from the left sidebar menu in your Twilio Console.
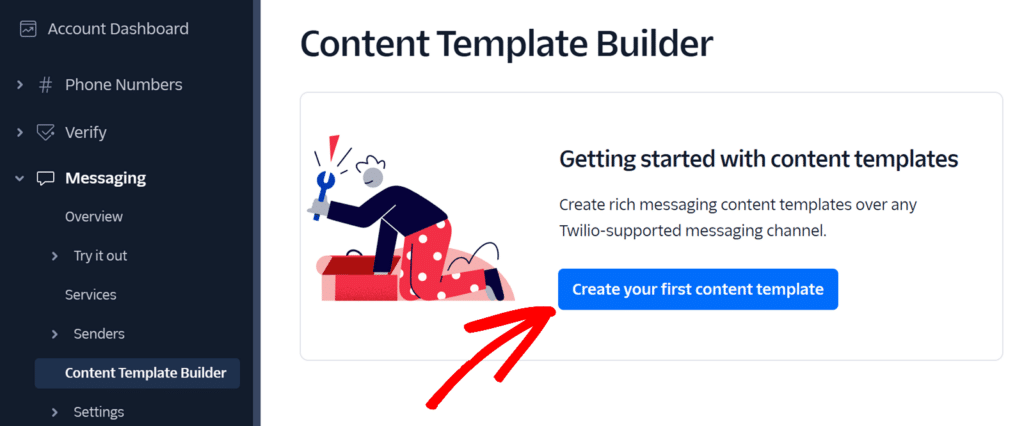
Next, click on the Create your first content template button.
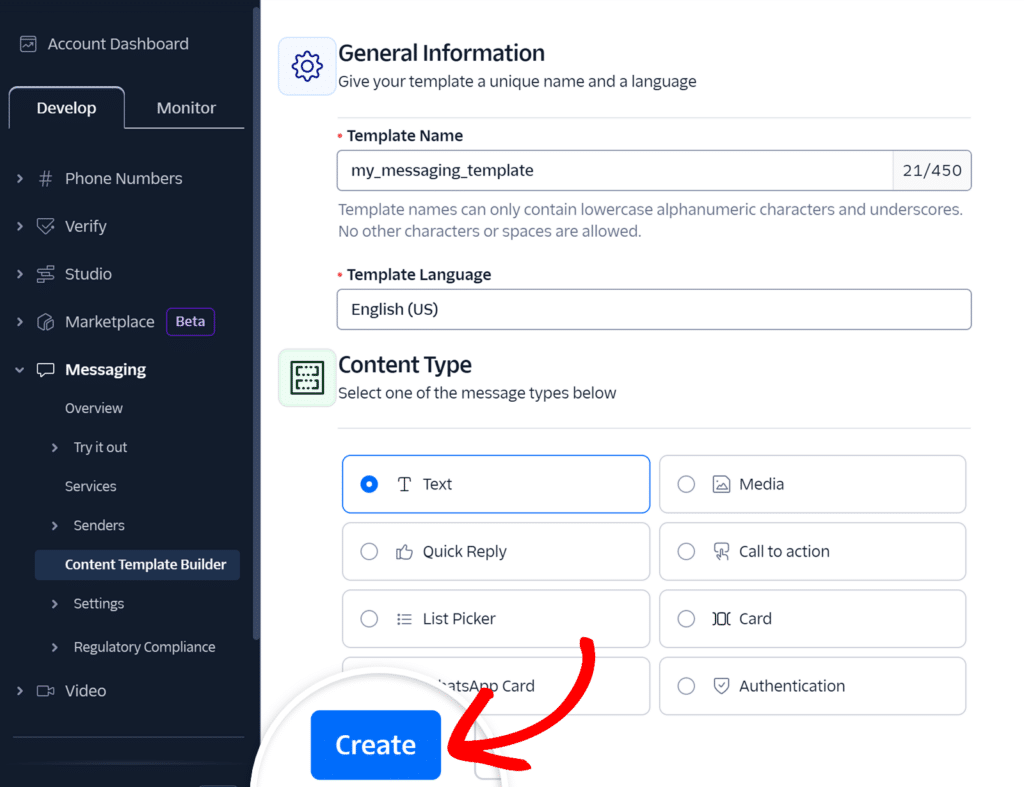
After clicking the button, you’ll see the template creation form where you’ll need to provide several important details:
- Template Name: Enter a descriptive name that clearly indicates the template’s purpose. This field can only contain lowercase alphanumeric characters and underscores.
- Template Language: Select the language you want to use for your messages from the available options.
- Content Type: In this field, you’ll see various options for formatting your message. Select the type that best suits your needs based on whether you want to send simple text messages, include media, add interactive elements, or create more structured layouts.
- For our example, we’ll select the Text Content Type.
Once you’ve added these details, click on the Create button to go to the next step.
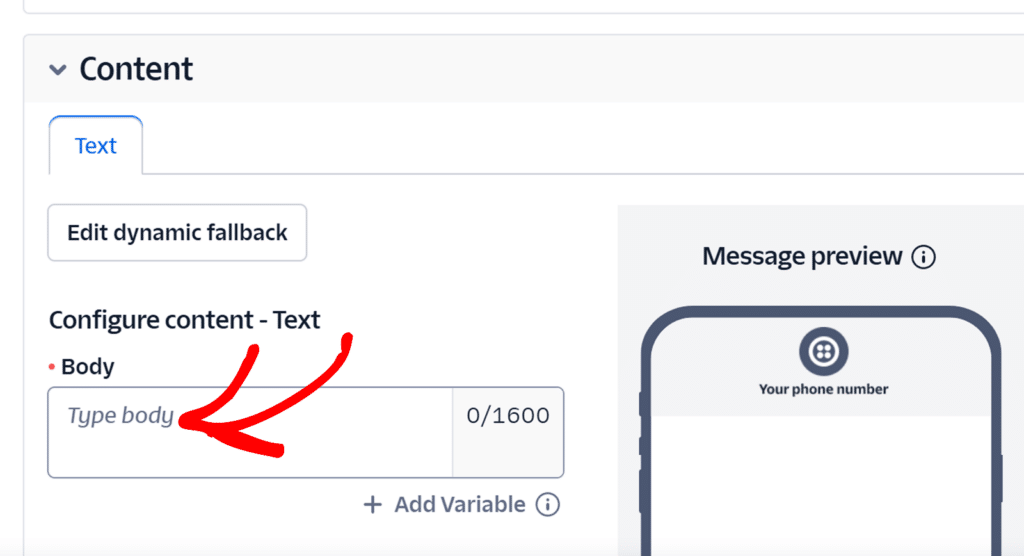
Next, you’ll be taken to the template configuration page. Here you’ll see options to customize your template’s content. Scroll down to the Content section and in the Body field, enter the text for your message.
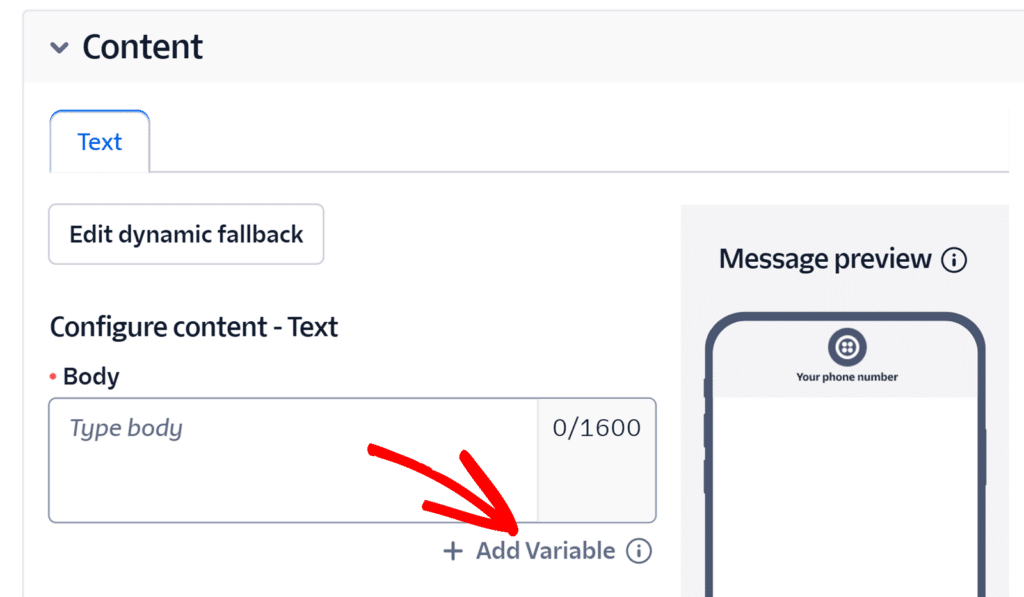
To make your messages dynamic, you can add variables that will be replaced with actual form data when the message is sent. To add a variable, click the Add Variable button below the Body field.
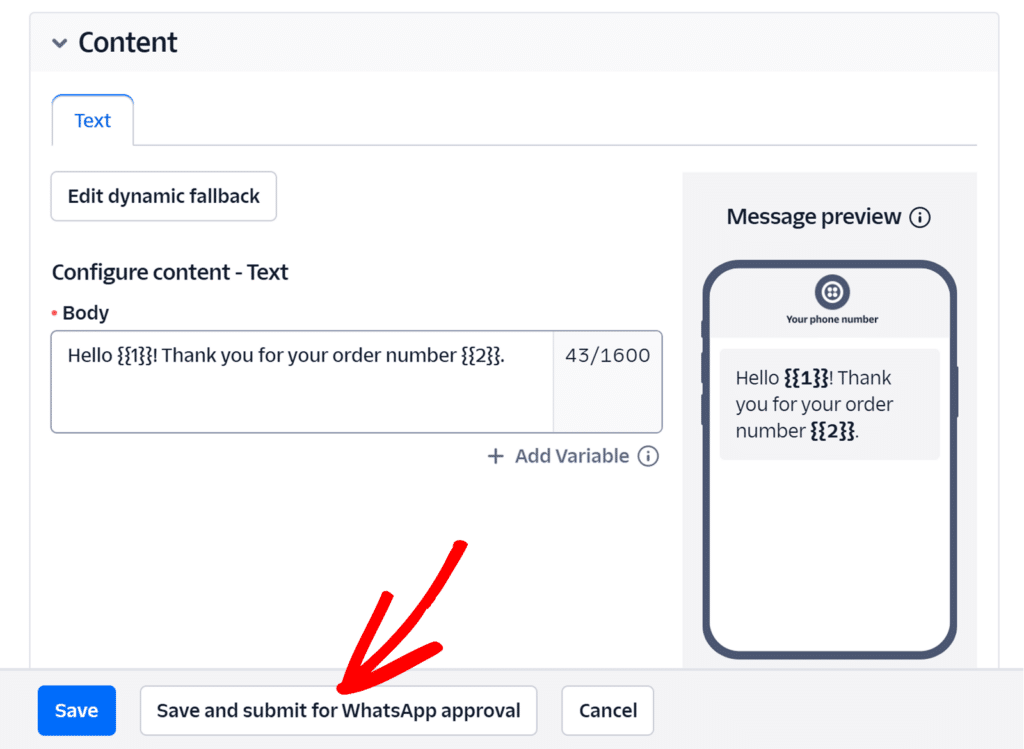
Variables use double curly braces with numbers, such as: “Hello {{1}}! Thank you for your order number {{2}}.”
After entering your message, click Save and submit for WhatsApp approval.
You’ll see a popup window asking you to provide sample values for each variable you’ve used. These sample values help WhatsApp understand how your template will be used.
Enter appropriate sample text for each variable and click Save with samples to complete the template creation process.
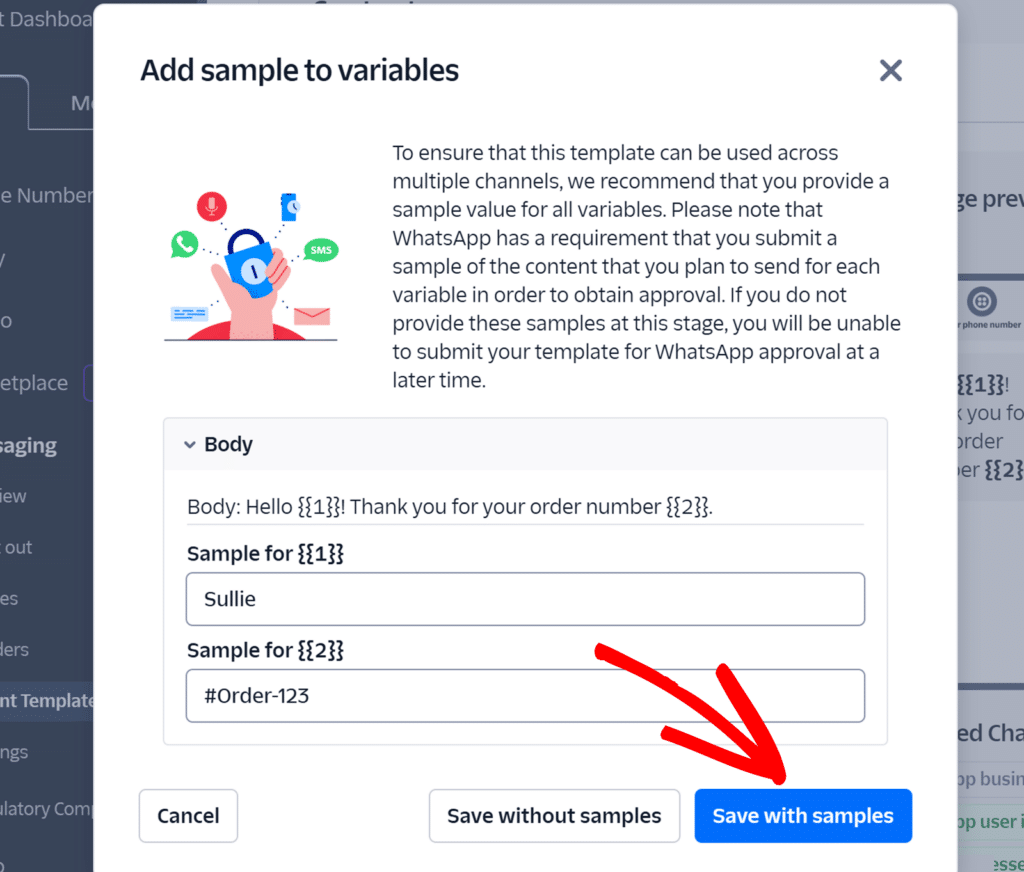
For comprehensive details about message template creation, formatting options, and best practices, please refer to Twilio’s official guide on setting up WhatsApp message templates.
Connecting WPForms to Twilio
Once the core WPForms plugin is in place and your license is verified, go ahead and install and activate the Twilio addon.
To connect your Twilio account with WPForms, go to WPForms » Settings and click on the Integrations tab.
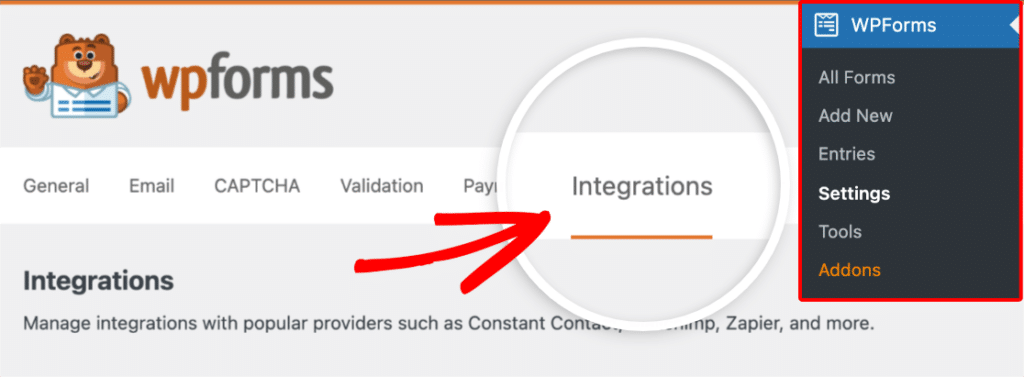
Then, click on the Twilio option to expand its settings. From here, click the Add New Account button.

This will reveal two fields where you’ll need to add your Twilio Account SID and Auth Token, as well as a nickname for the account.
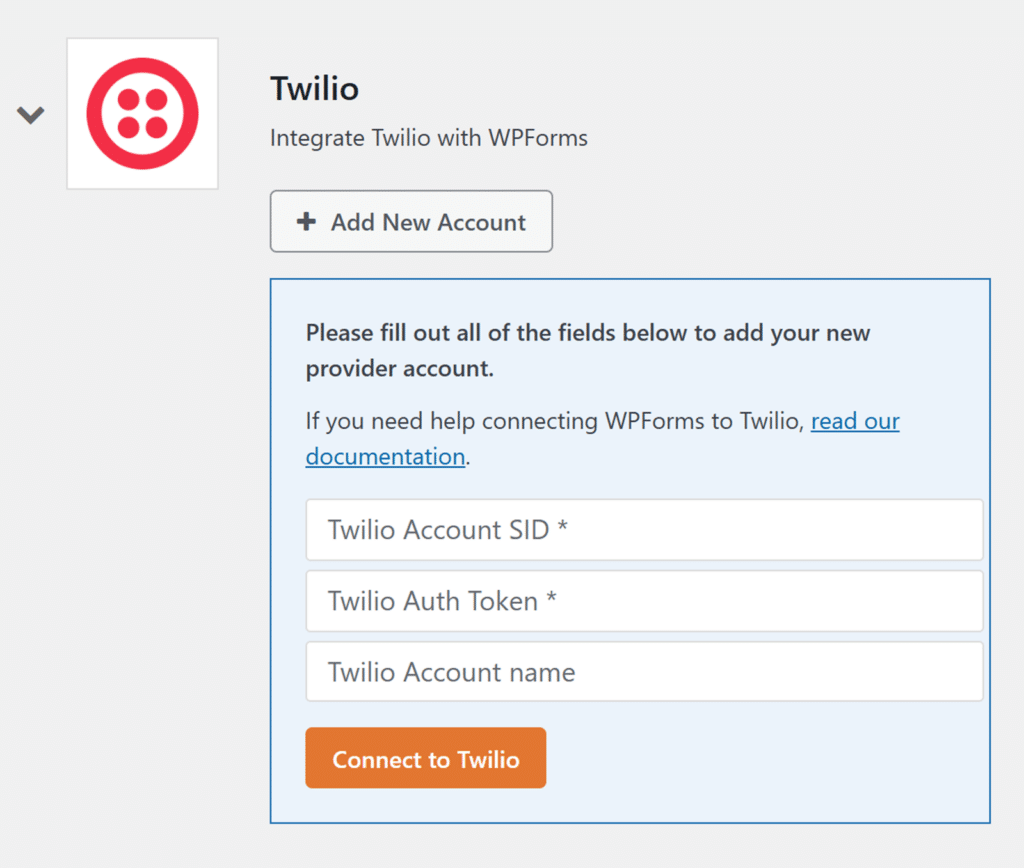
Keep this browser tab open, as we’ll return to it later.
Accessing Your Twilio Credentials
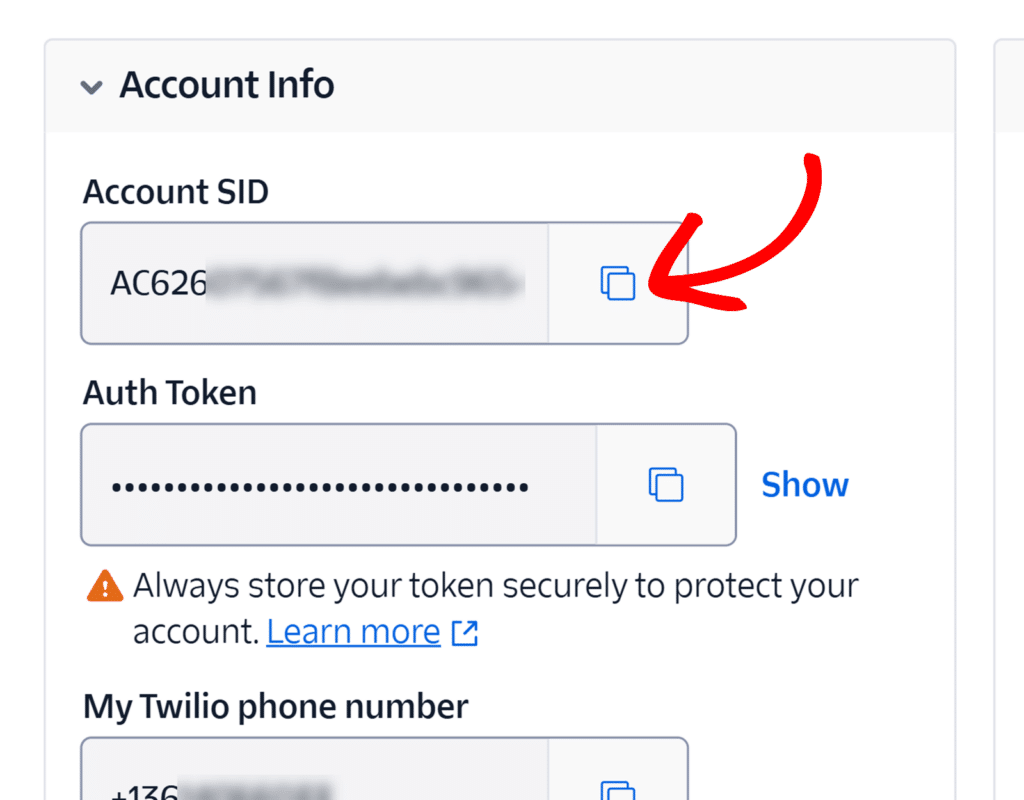
To find your credentials, first, log in to your Twilio Console. Once you’ve logged in, locate the Account Info section on your dashboard.
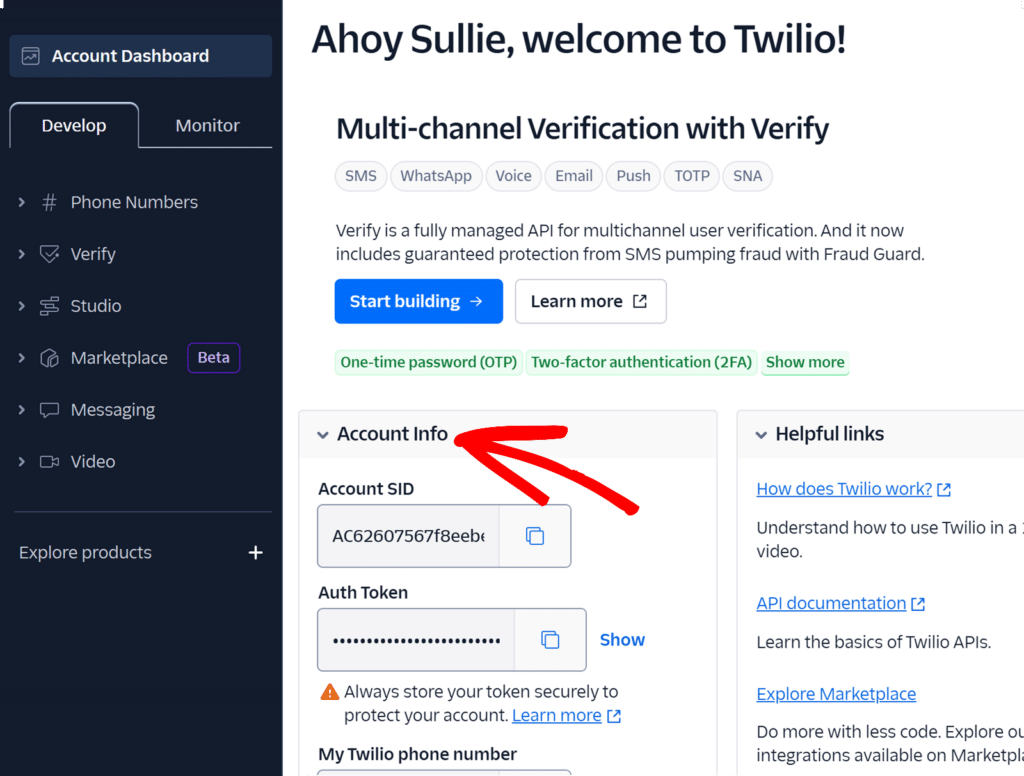
This section contains two important pieces of information you’ll need: your Account SID and Auth Token. Make sure to copy both credentials by clicking the copy icon.
Adding Twilio Credentials to WPForms
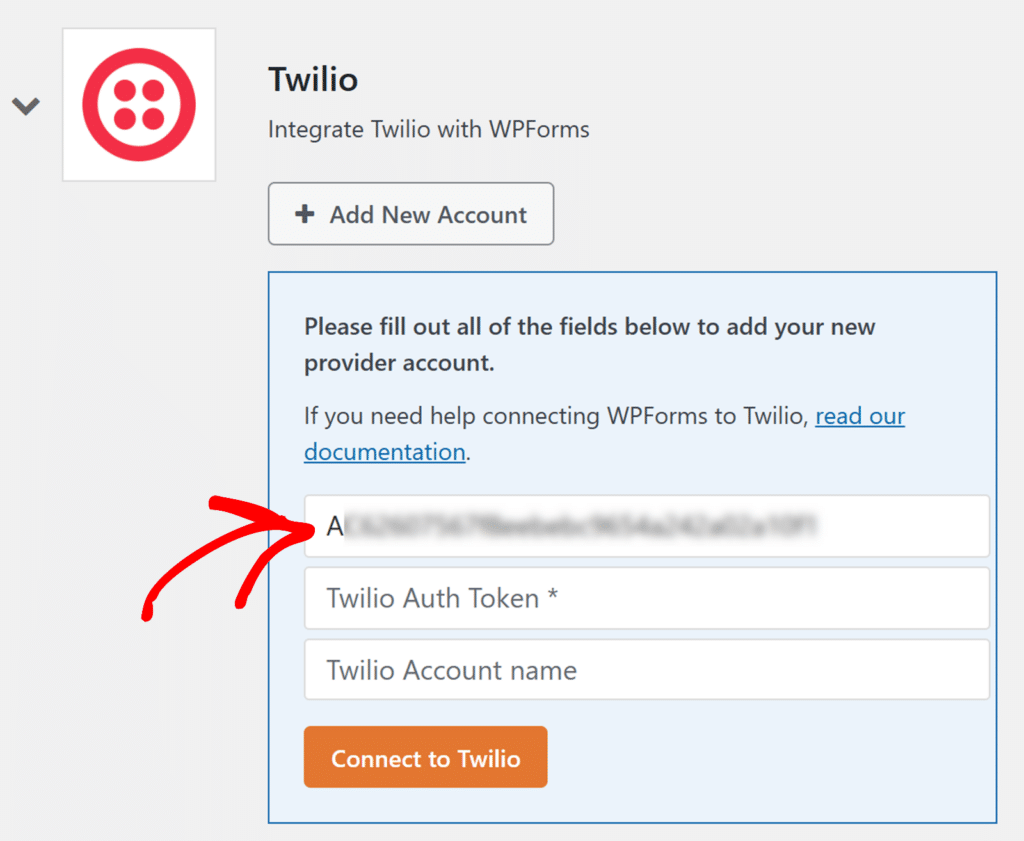
After copying your Account SID key, return to the browser tab with WPForms open and paste the key you just copied into the Twilio Account SID field.
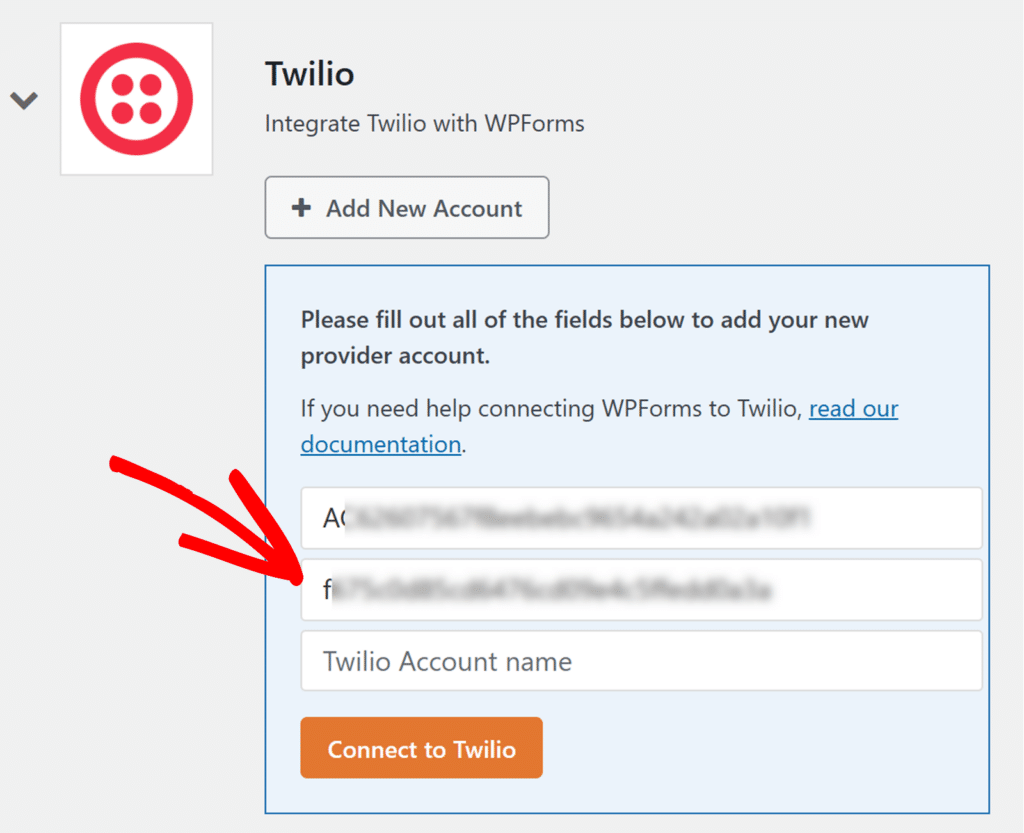
Similarly, you’ll need to copy your Auth Token from Twilio and paste it into the Twilio Auth Token field.
Then, add a nickname to the Twilio Account name field. This is for internal reference only and can be helpful if you later decide to connect additional Twilio accounts.
When you’re ready, click the Connect to Twilio button.
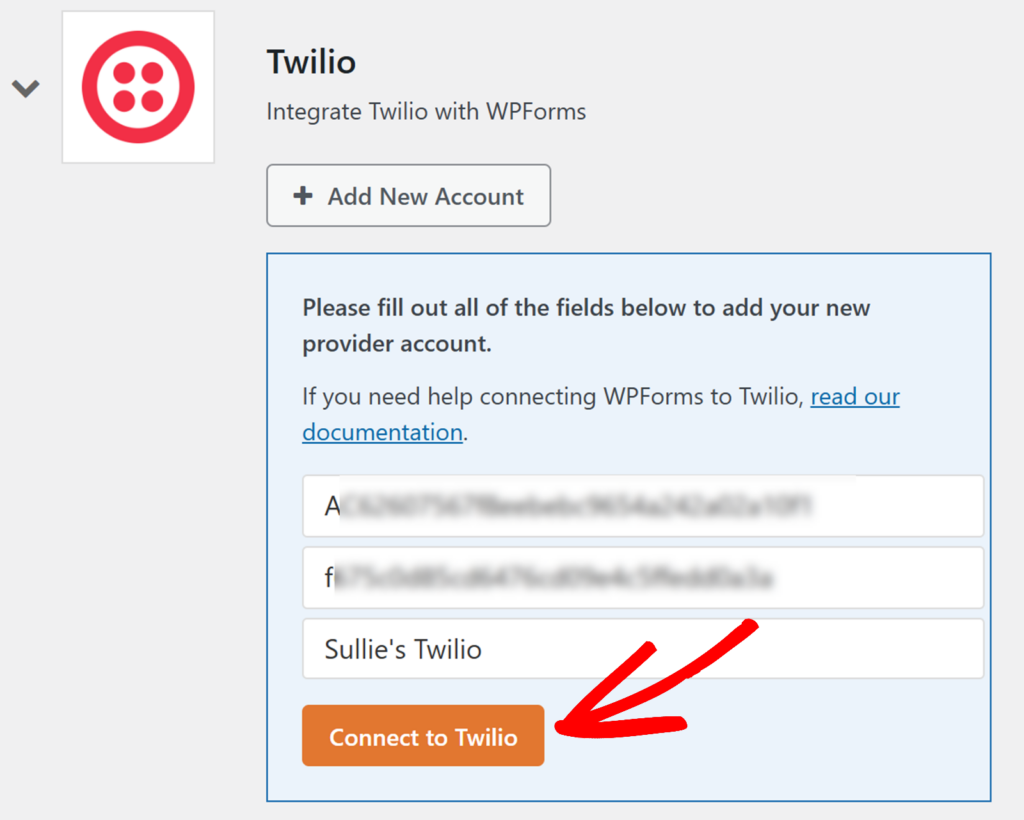
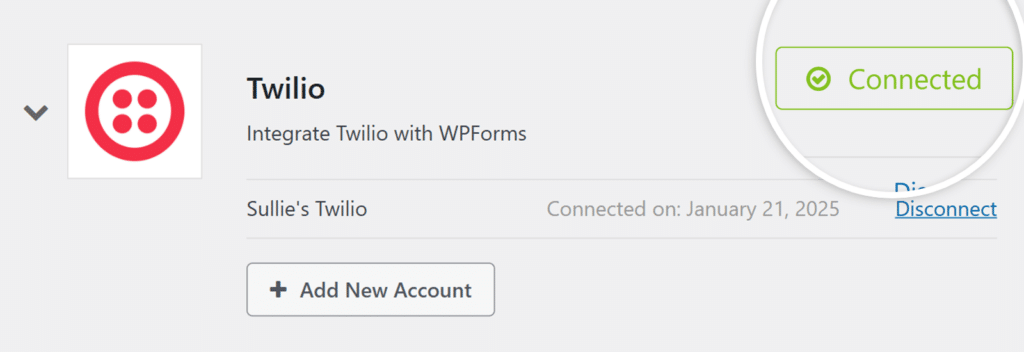
WPForms will now connect your site to your Twilio account. When it’s finished connecting, it will show a green Connected status next to your Twilio integration.
Using Twilio With Your Forms
Now that you’ve successfully connected WPForms to your Twilio account, you’ll be able to link Twilio with your forms. To do this, you’ll first need to create a new form or edit an existing one to access the form builder.
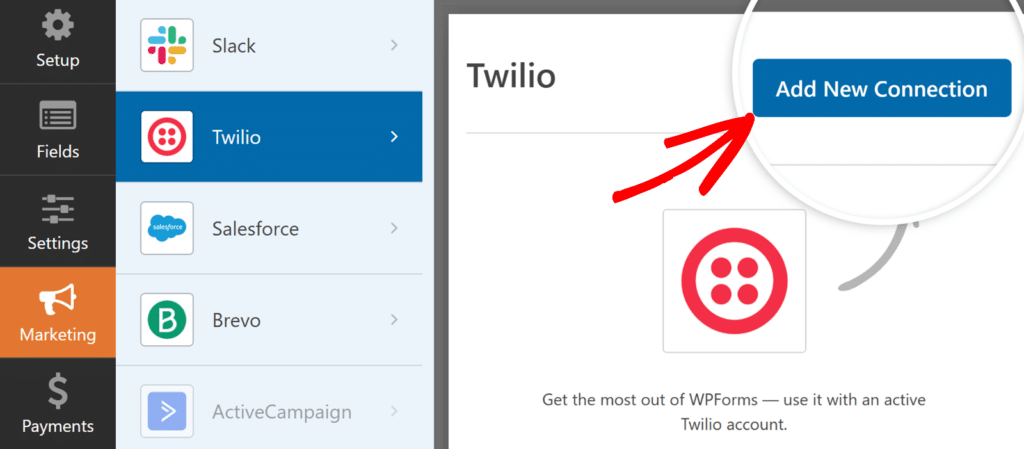
In the form builder, go to Marketing » Twilio. Then, click on the Add New Connection button.
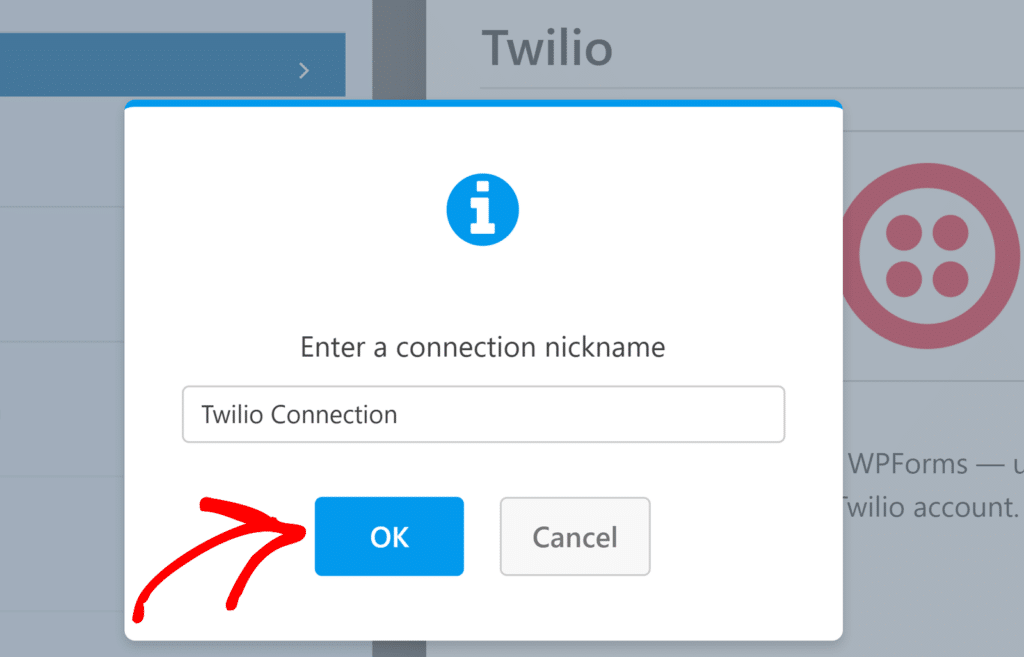
Next, an overlay will appear where you can enter a connection nickname. Feel free to use any nickname you’d like, as this won’t be visible to your users. Once you’ve added a nickname, click the OK button.
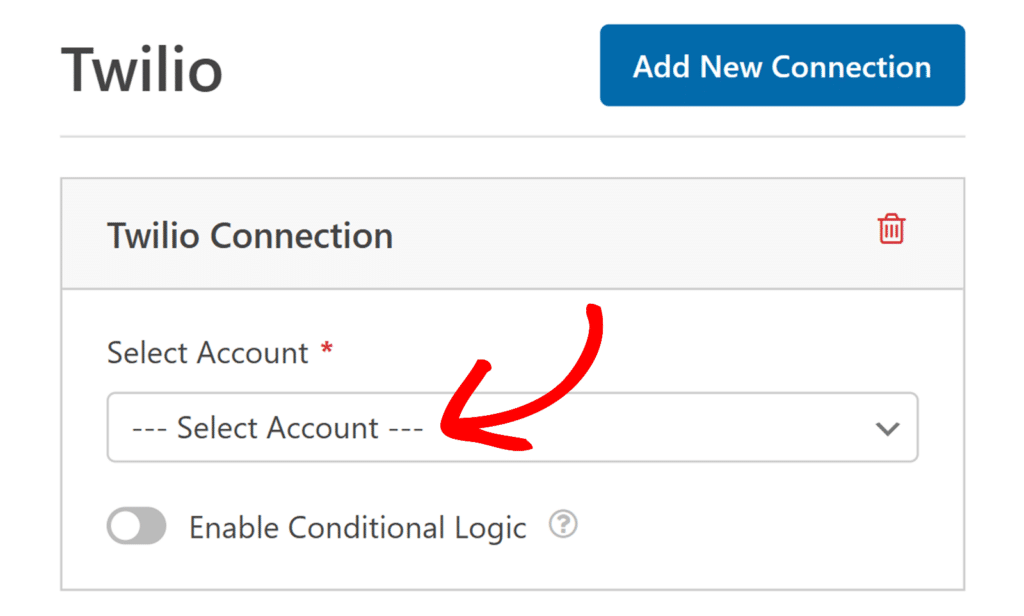
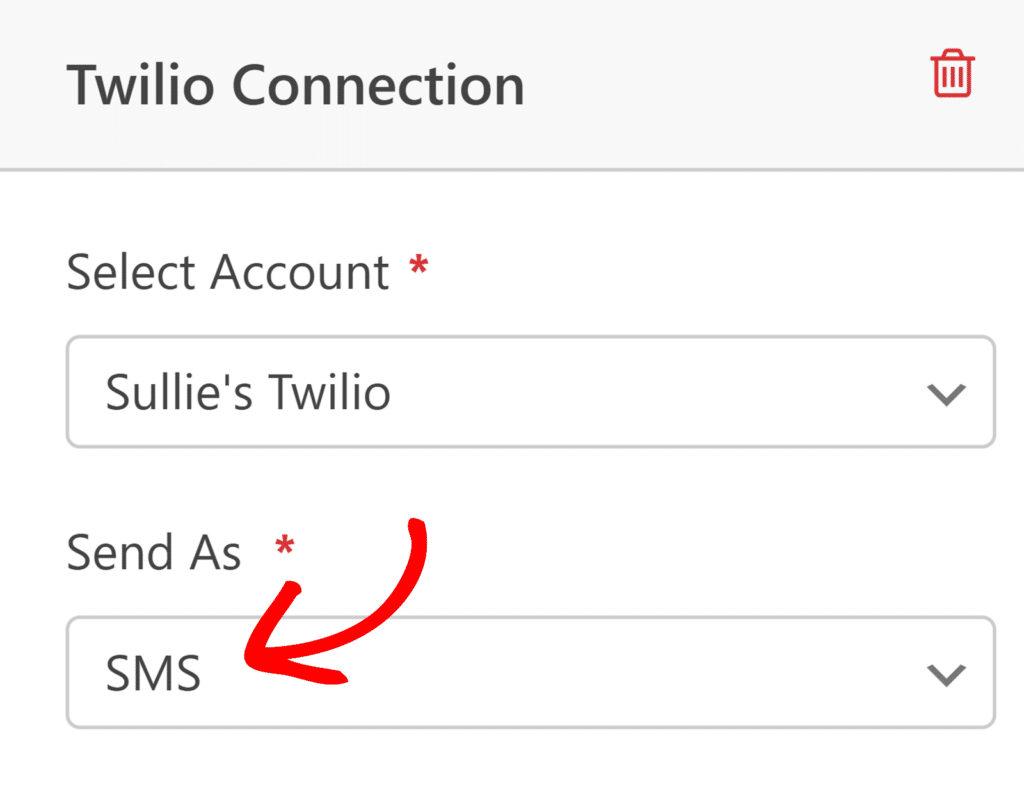
Once you’ve named your connection, you’ll need to choose the account you connected from the Select Account dropdown.
After selecting an account, you’ll see several configuration options.
Send As
Choose how you want to send your notifications. You can select either SMS or WhatsApp. Your selection here will determine some of the additional options that appear below.
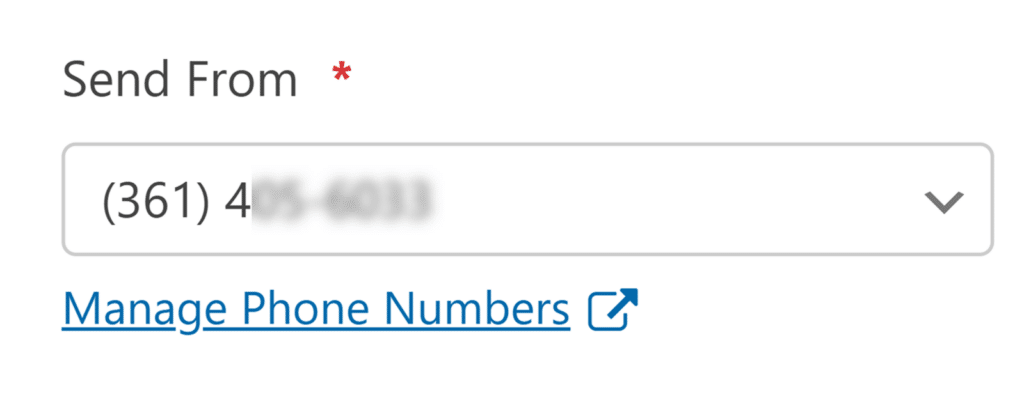
Send From
Choose which of your Twilio phone numbers should be used to send the message. This dropdown will display all the phone numbers you’ve purchased in your Twilio account.
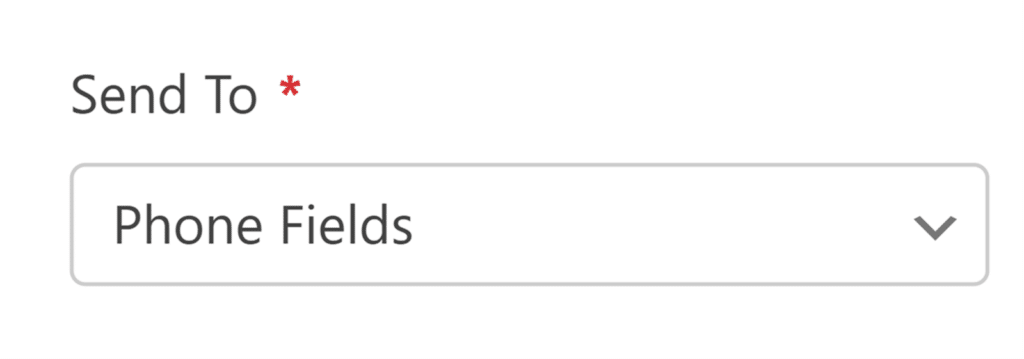
Send To
Specify who should receive the notifications. You can select from two options:
- Phone Fields: Select this to send messages to your form submitters.
- Verified Phone Number: Choose this to send notifications to a specific phone number that you’ve previously verified in your Twilio account.
Phone Field
Note: This field appears only when Phone Fields is selected from the Send To dropdown.
From this dropdown, select the form field that contains the recipient’s phone number.

Verified Phone Number
Note: This field appears only when Verified Phone Numbers is selected from the Send To dropdown.
From this dropdown, choose from your list of verified phone numbers in your Twilio account.

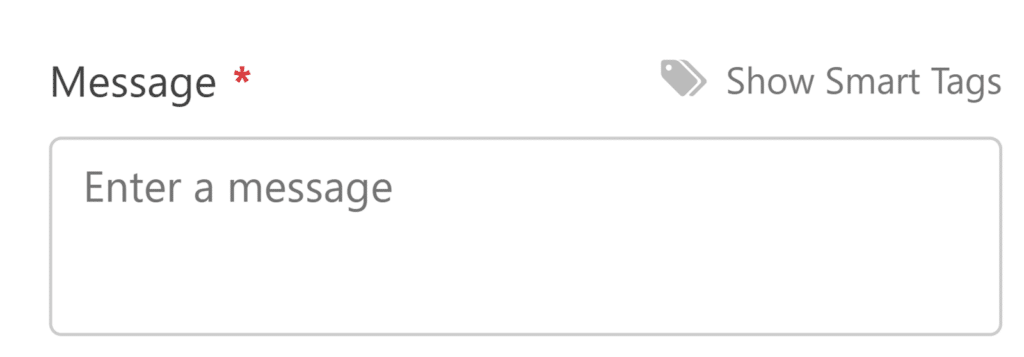
Message
This field appears when SMS is selected from the Send As field. Here, enter the text you’d like to send. You can click the Show Smart Tags button next to this field to include dynamic content like form field values in your message.
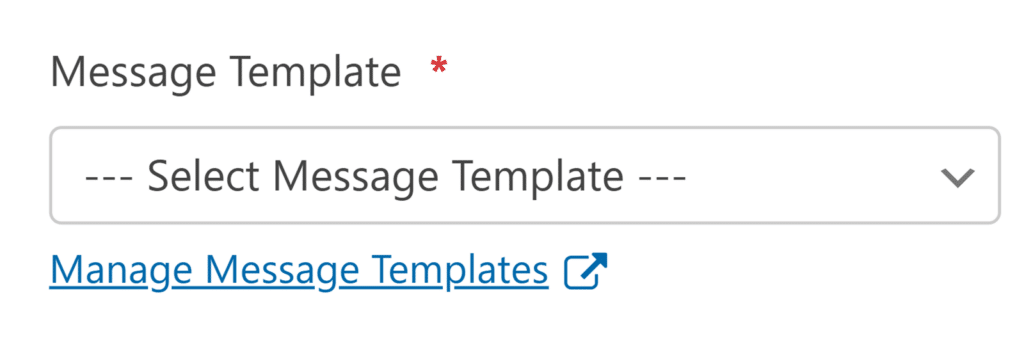
Message Template
This field appears when WhatsApp is selected from the Send As field. Here, select one of the templates you created earlier in the Message Templates section. This is required for WhatsApp Business messaging compliance.
Template Variables
After selecting a WhatsApp message template that contains variables, you’ll see a Template Variables section appear. Here, you can map your form fields to the variables in your template.
For each variable in your template, you’ll see a corresponding dropdown where you can select which form field value should replace that variable when the message is sent.
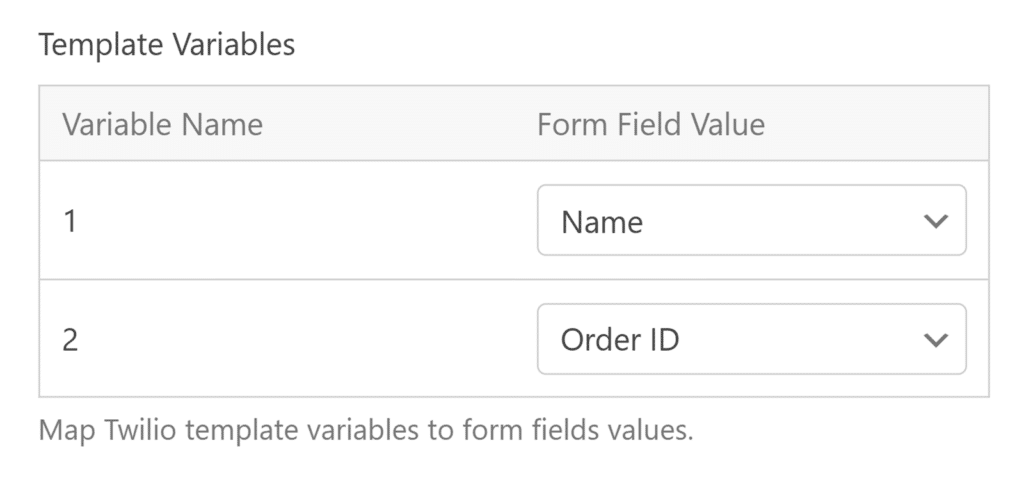
For example, if your template message is “Hello {{1}}! Thank you for your order number {{2}}“, you would:
- Map variable 1 to a form field containing the customer’s name.
- Map variable 2 to a form field containing the order number.
This mapping ensures your WhatsApp messages automatically include the correct information from your form submissions.
Once you’re done configuring your form’s Twilio connection, click Save at the top of the form builder.

Enabling Sandbox for WhatsApp Testing (Optional)
If you want to test WhatsApp messaging before setting up a full WhatsApp Business account, you can use Twilio’s Sandbox environment. This allows you to test your integration without requiring WhatsApp approval.
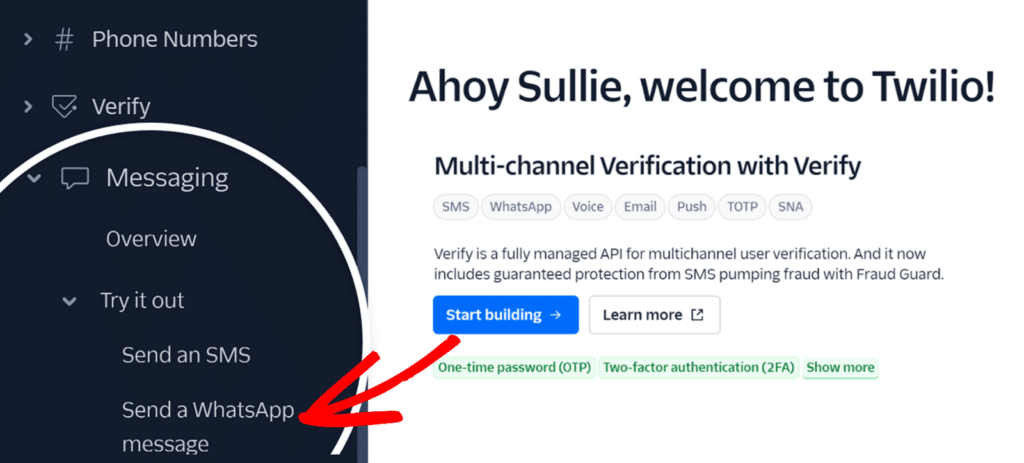
To do so, you’ll need to connect your phone number to the Twilio WhatsApp Sandbox. To do this, log in to your Twilio Console and navigate to Messaging » Try it out » Send a WhatsApp message from the left sidebar.
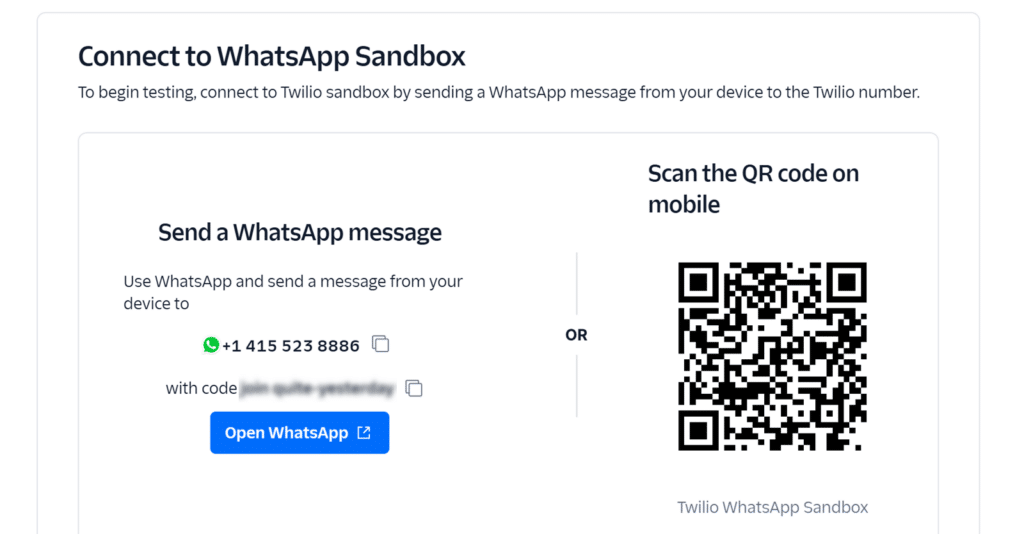
On the WhatsApp testing page, scroll down to the Connect to WhatsApp Sandbox section where you’ll see your unique Sandbox connection details, including a Twilio phone number (+14155238886) and a join code. You can connect to the Sandbox by either sending your join code to this number via WhatsApp or scanning the QR code shown on the page with your phone’s WhatsApp app.
After sending the join code, you’ll receive a confirmation message indicating that your phone number is now connected to the Sandbox and ready for testing.
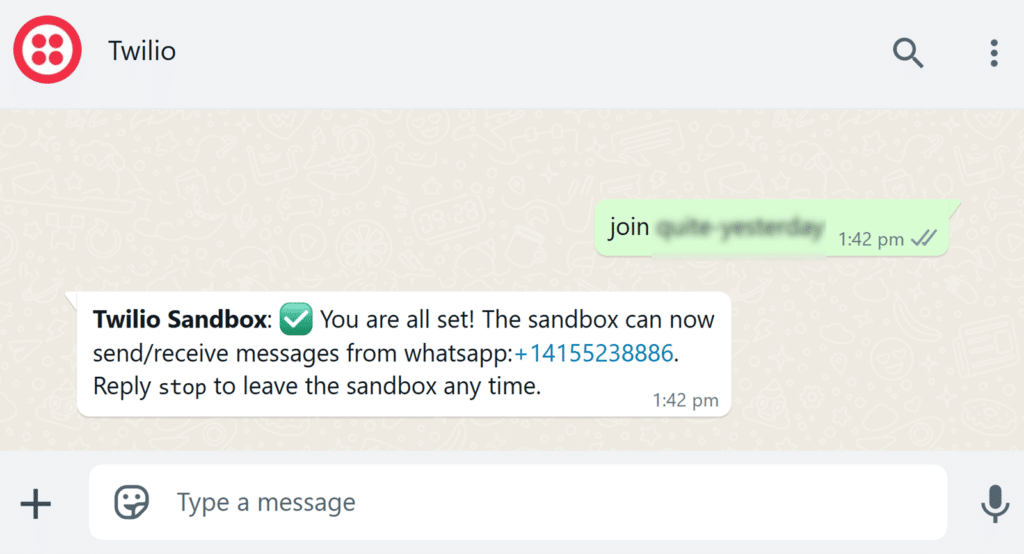
Once you’ve connected your phone number to the Twilio Sandbox, you can configure WPForms to use it. Open your form in the form builder and go to your Twilio connection settings, select WhatsApp in the Send As dropdown to reveal the Enable Sandbox Mode option.
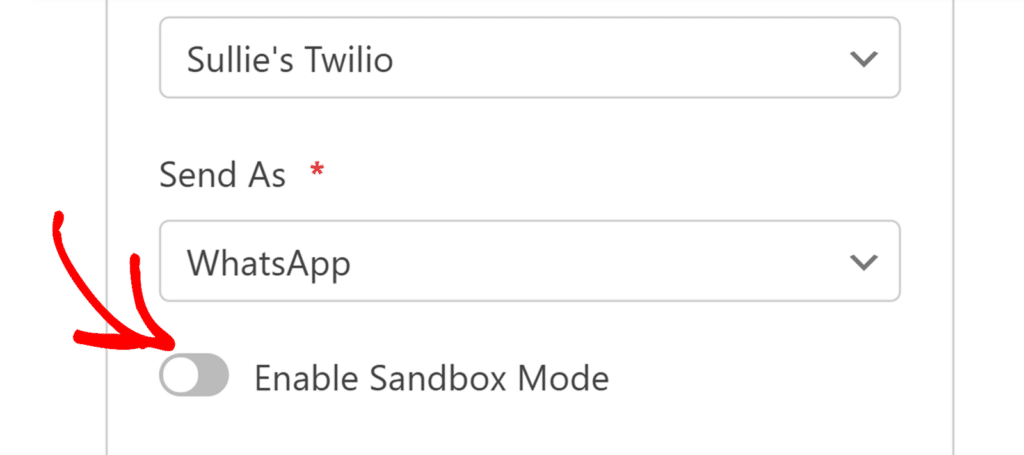
When you enable this option, it modifies how your WhatsApp messages are handled. Instead of requiring a pre-approved message template, you’ll see a Message field where you can enter any custom text you’d like to use.

The addon will then send your messages using Twilio’s test number (+14155238886), allowing you to test your WhatsApp integration without a WhatsApp Business account.
Remember to save your form after enabling sandbox mode and configuring your message text in the Message field.
Setting Up Conditional Logic (Optional)
Conditional logic allows you to choose whether or not an action is performed based on a user’s choices in your form. As an example, we’ll show how you can use conditional logic to send messages through a user’s preferred notification method by creating two separate Twilio connections – one for SMS and one for WhatsApp notifications.
To set this up, you’ll first need to create two Twilio connections following the steps described above. Configure one connection to send SMS messages and another to send WhatsApp messages.
Then, add a Multiple Choices field to your form. For our example, we’ll set the label to How would you like to be notified? and add two choices: SMS and WhatsApp.
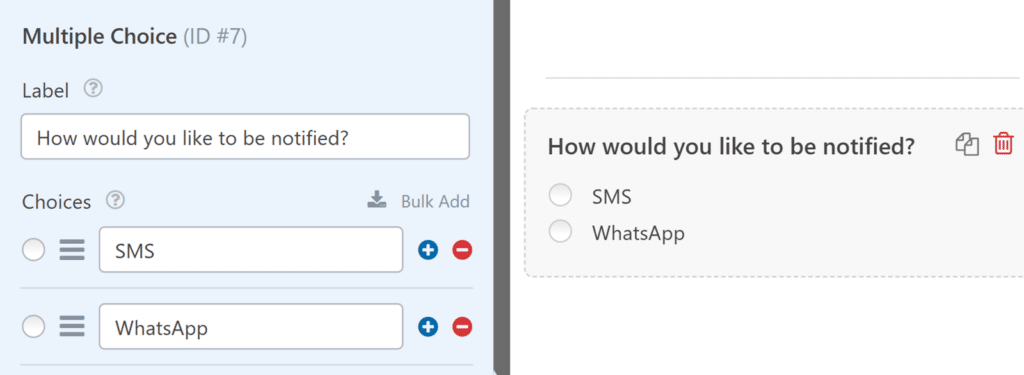
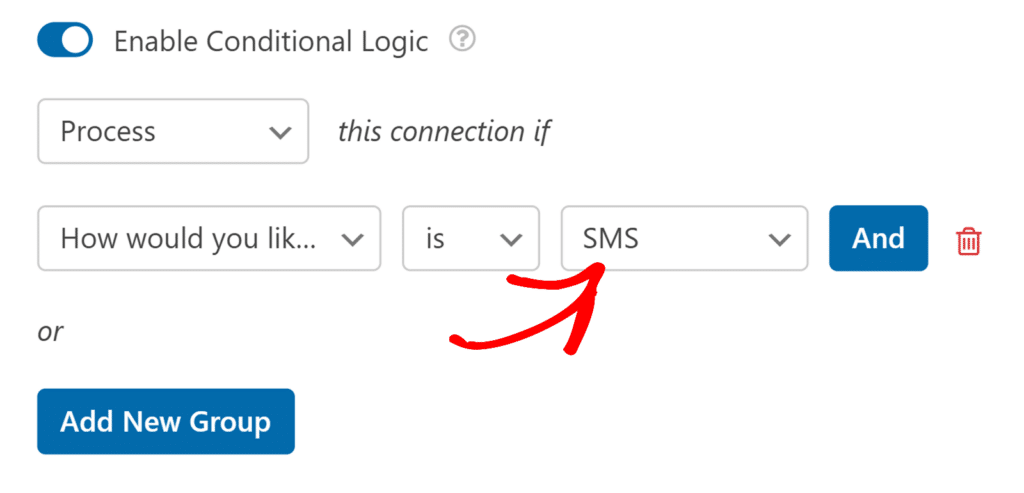
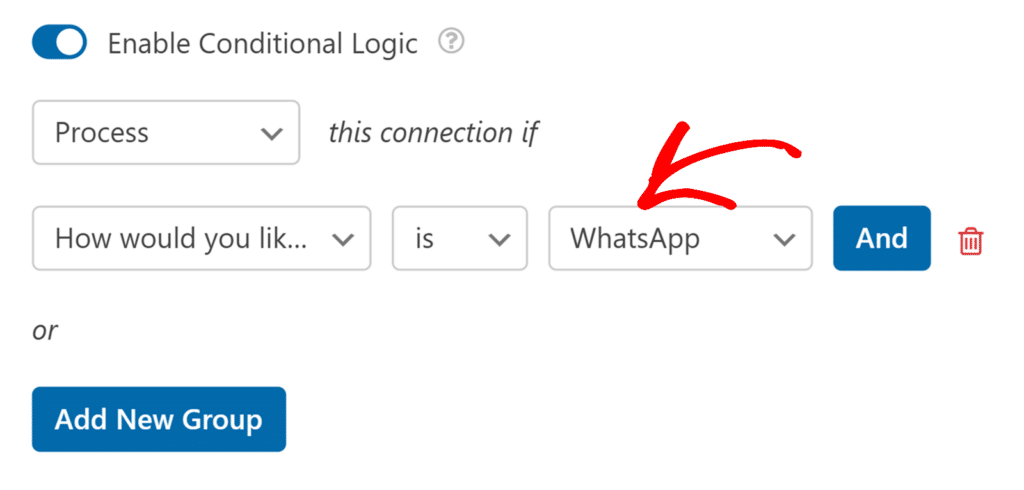
Next, go to Marketing » Twilio in the form builder and toggle the Enable Conditional Logic option. Then, you’ll need to set up your rules for your conditional logic.
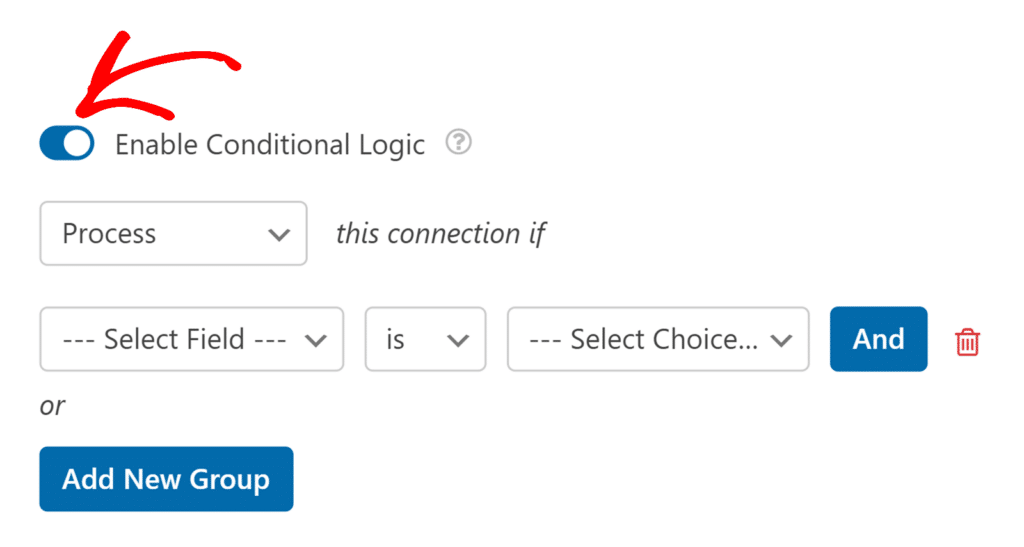
For the SMS connection, set the rule to: Process this connection if How would you like to be notified? is SMS.
For the WhatsApp connection, set it to: Process this connection if How would you like to be notified? is WhatsApp.
Finally, be sure to save your form to apply the conditional logic.
With this setup, when users fill out your form, they’ll automatically receive notifications through their preferred method – either SMS or WhatsApp – based on their selection in the form.
Frequently Asked Questions
Below, we’ve answered some of the top questions we see regarding the Twilio addon.
Why did my WhatsApp messages stop working in Sandbox mode?
When testing WhatsApp messages using Sandbox mode, you have a three (3) day testing period after initially connecting your phone number. After this period expires, your messages will stop sending. To continue testing, simply reconnect to the Sandbox by following the steps in the Enabling Sandbox for WhatsApp Testing section above.
Can I view delivery status and logs for my messages?
Yes, you can track message status and logs in both WPForms and the Twilio Console.
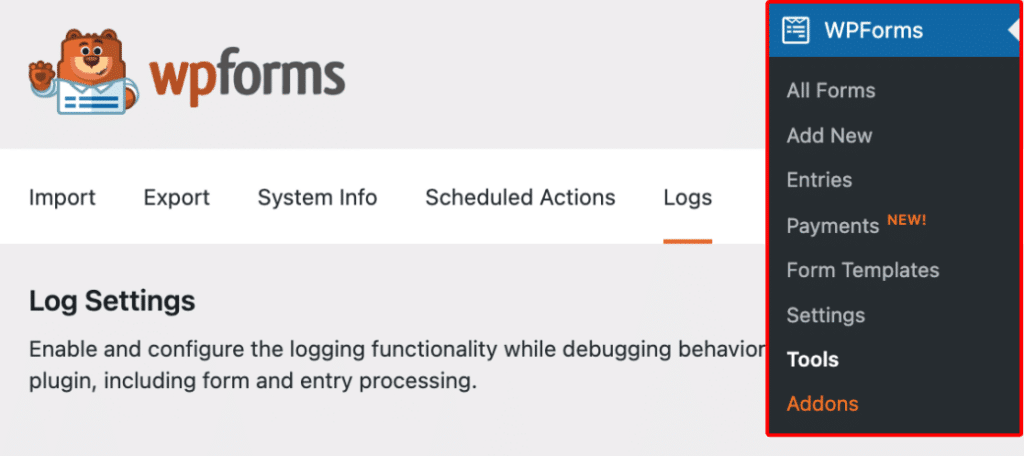
Within WPForms, you can view message delivery status and logs directly from WPForms » Tools and opening the Logs tab.
For more details about WPForms logging, see our guide on how to enable activity logging.
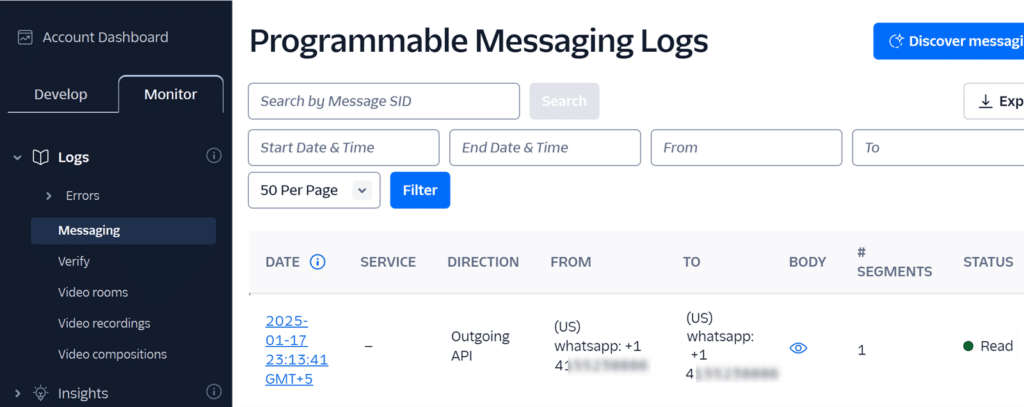
Additionally, in the Twilio Console, go to Monitor » Logs » Programmable Messaging to view detailed messaging logs including delivery status, timestamp, content, recipient information, and any errors.
For more detailed information about messaging logs, see Twilio’s official guide on messaging logs.
That’s it! We just showed you how to install and use the Twilio addon with WPForms.
Next, would you like to add a CAPTCHA to your forms to help prevent spam submissions? Be sure to check out our tutorial on how to choose a CAPTCHA for your forms for more details.
