AI Summary
Do you want to see some examples of how you can use WPForms Smart Tags? This handy feature can display input from your forms in your notifications, confirmations, default values, and more.
In this guide, we’ll share some examples of how you can use Smart Tags in WPForms.
- Sending Notifications to the WordPress Admin Email Address
- Showing Input From a Specific Field
- Displaying HTML-Processed Values
- Showing All Fields in a Form
- Viewing the Page the Form Was Submitted From
- Seeing the Date the Form Was Submitted
- Identifying Entries From the Same User
- Showing Author Details in Your Forms
- Showing Logged-In User Details in Your Forms
- Adding User Account Links to Your Forms
- Adding a Password Recovery Link to Your Form
- Displaying User Registration Information
- Prefilling Payment Fields in Forms
For more information on Smart Tags and how to use them, please see our guide to using Smart Tags.
Sending Notifications to the WordPress Admin Email Address
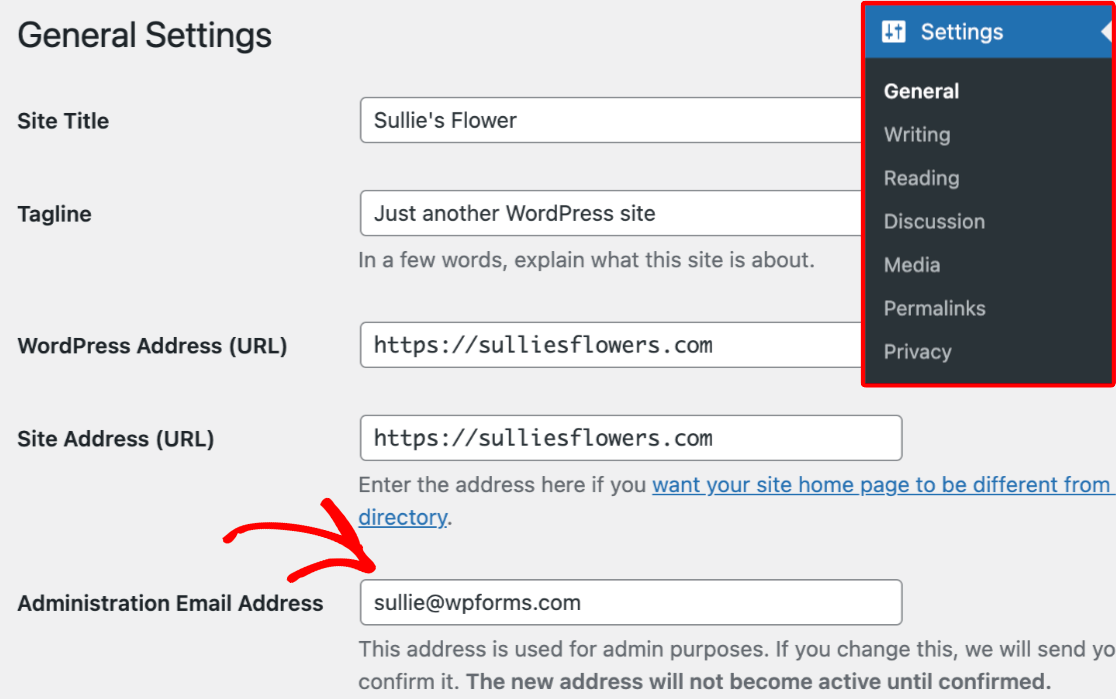
This Smart Tag will insert the email address of the site administrator from your WordPress settings.
To check your site’s admin email, log into your WordPress admin area and navigate to Settings » General. On this page, look for the Administration Email Address field.
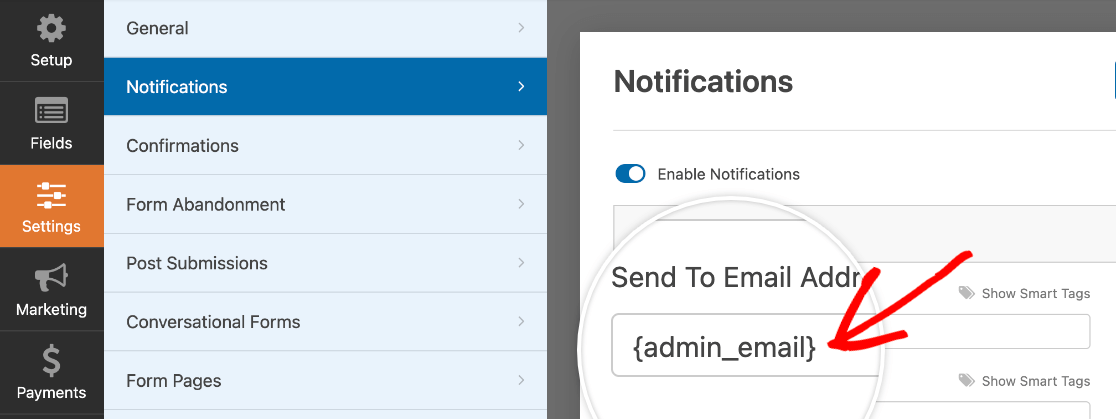
In your form notifications settings, you can add this Smart Tag to the Send To Email Address, From Email, or Reply-To Email Address fields, rather than typing out the site administrator’s email address.
Showing Input From a Specific Field
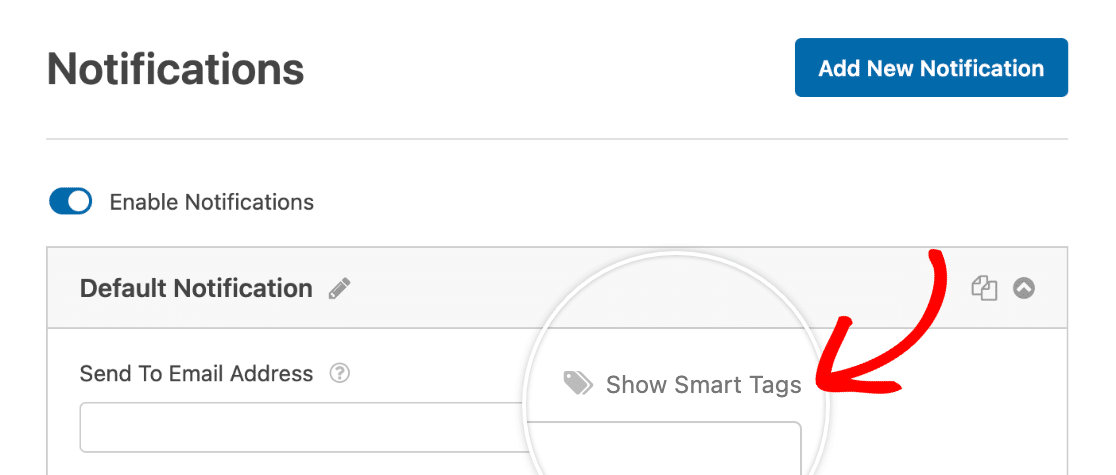
The {field_id} Smart Tag pulls the value that a user has added to or selected from a specific field in your form. It can be found in the notifications settings in the form builder when you click on Show Smart Tags.
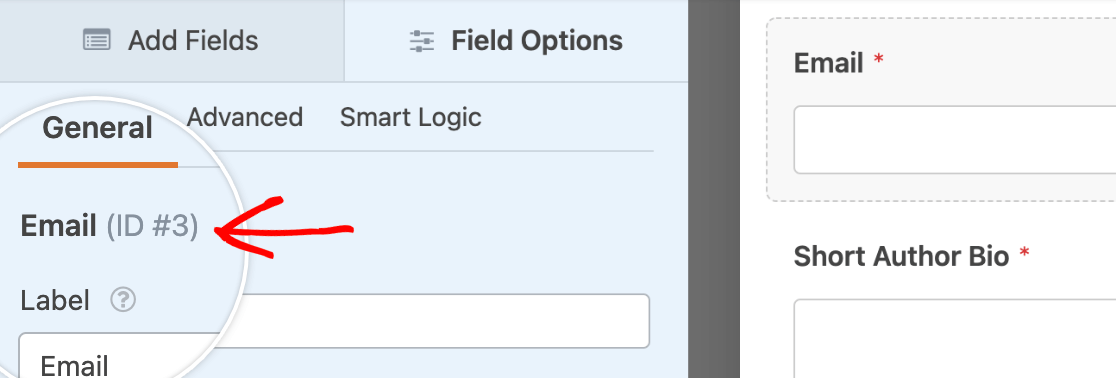
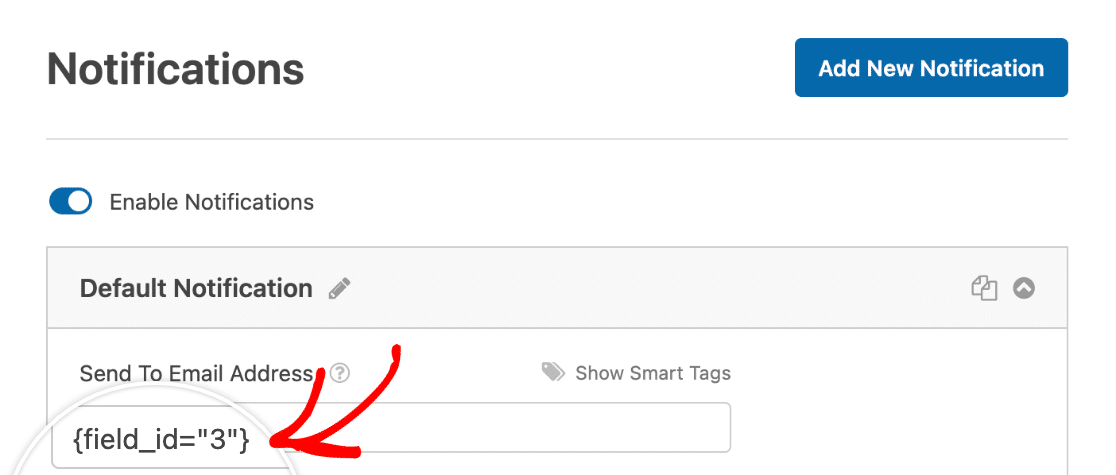
If you’d like to manually create a field-specific Smart Tag, you can replace # with the ID of a specific field. For example, a field with the ID #3 will use the Smart Tag {field_id="3"}.
In the form builder, you can click on a field in the form preview area to see its field ID in the Field Options panel.
You can use a field-specific Smart Tag if you’d like to include user-submitted information in your notifications. For example, you can add a Smart Tag for the Email field in your notification’s Send To Email Address field.
Displaying HTML-Processed Values
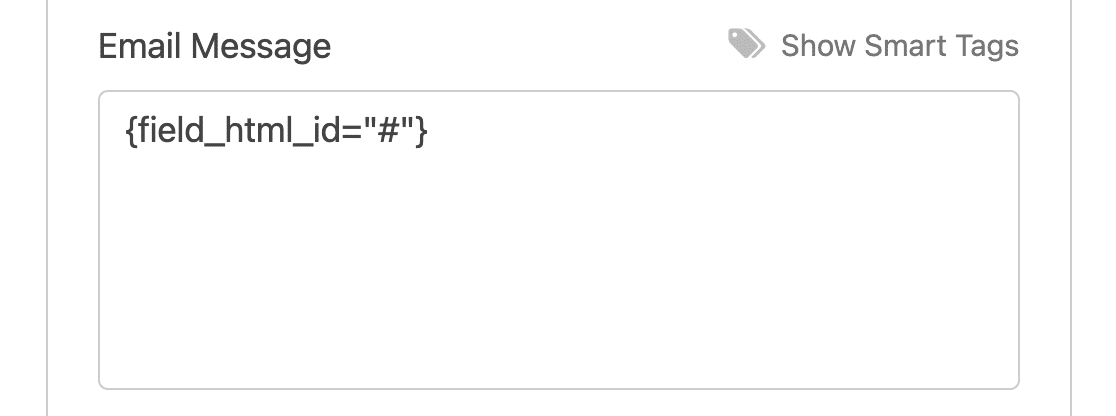
The {field_html_id} Smart Tag will pull the HTML-processed value from a specific field in your form. By doing this, the value will retain its HTML tags when sent through email, enabling you to embed field labels, signatures, image choices, and more directly in your notification emails.
You can add this Smart Tag directly to the Email Message field in your notifications settings.
As an example, let’s look at how this works with the Signature field.
Note: Make sure to replace # with the field ID number of the Signature field from your own form.
On the frontend of your site, users can draw their signatures in the Signature field:

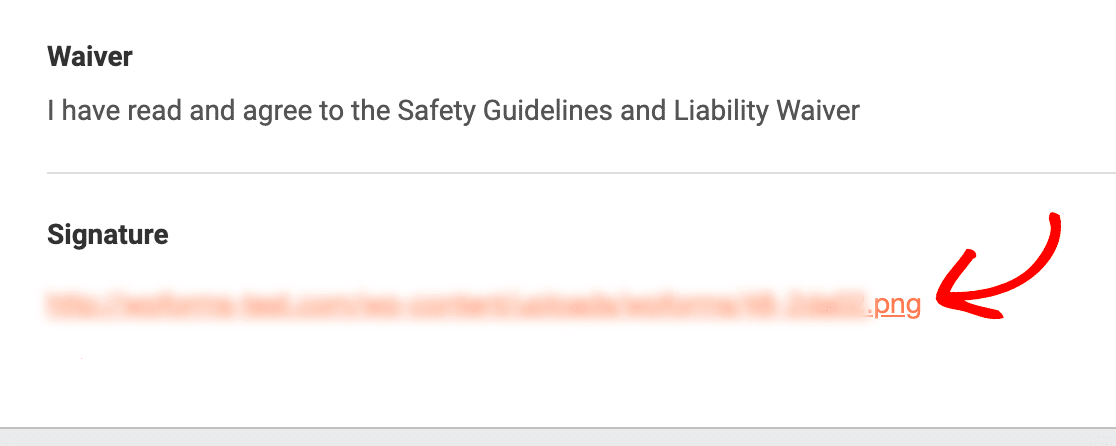
If you use the {field_id="#"} Smart Tag, this field will appear in your form notification emails as a link, which you would have to click on to view the signature.
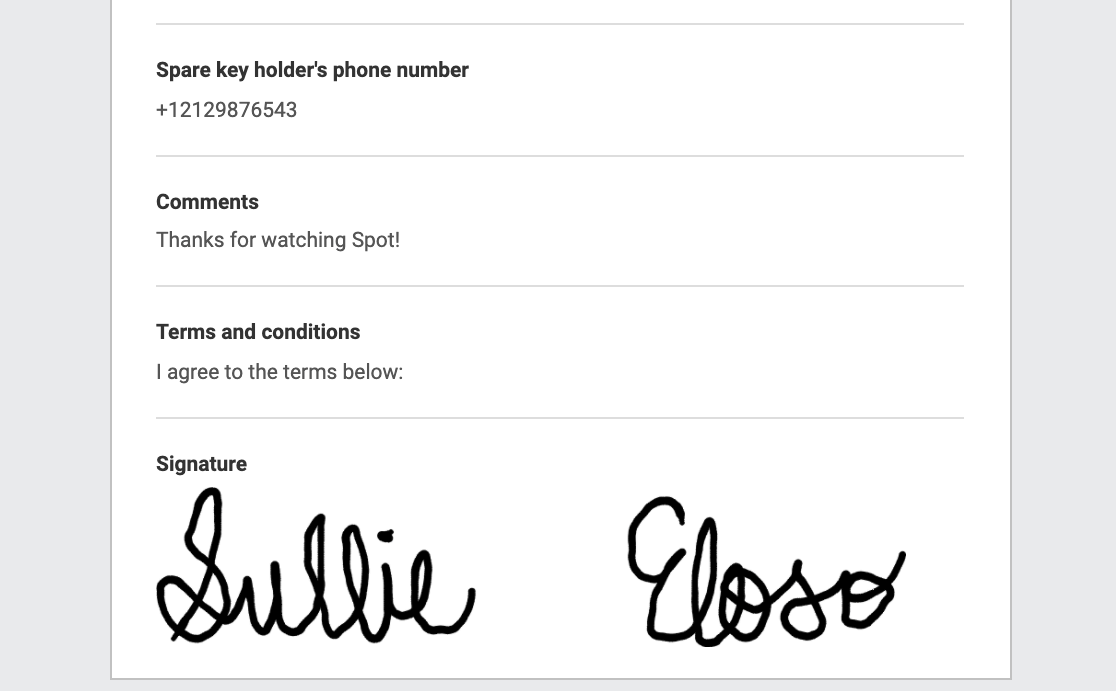
However, using the {field_html_id} Smart Tag, you can embed the signature right in your notification email.
Below is a list of all the fields you can change with the {field_html_id} Smart Tag:
- Signature: Directly embeds an image of the signature into notification emails.
- Number Slider: Formats the numerical input in your notification email as “Selected Value: [X] (0 min / 10 max).”
- File Upload: Displays uploaded file paths by file name, rather than displaying the full WordPress link.
- Rating: Displays the star rating and a numerical representation of the rating in the body of the email.
- Images Choices: Displays the selected image for fields that support image choices.
Showing All Fields in a Form
This Smart Tag displays all the submitted information from your form fields in your notification emails.
By default, form notifications settings include this Smart Tag in the Email Message field to display the entry contents when the notification email is sent.
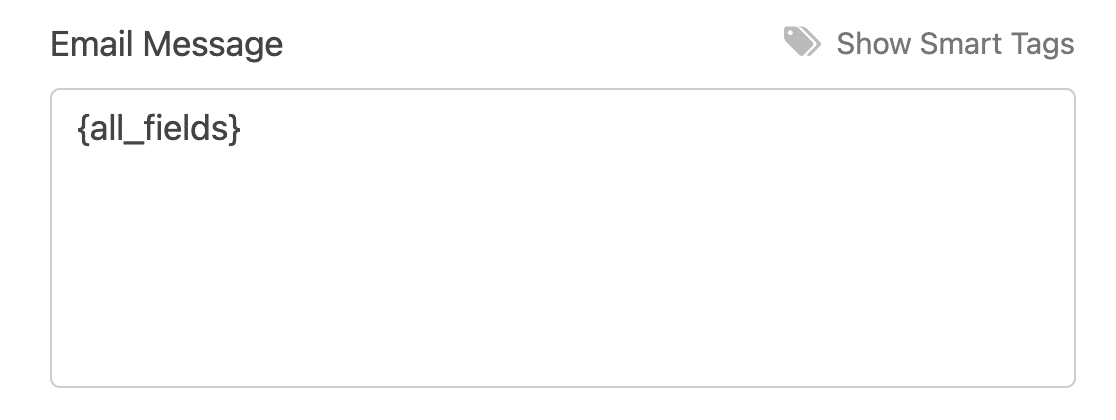
Note: The Page Break, Section Divider, and HTML fields are not included in the {all_fields} Smart Tag by default. To include them in the {all_fields} Smart Tag and display them in your notifications, you’ll need to add a custom code snippet.
If you’d like to provide more information to the user, you can add details above or below the Smart Tag. You can also remove the Smart Tag so the entry contents are not included in your email notification.
If you’d like to see how a notification email with the {all_fields} Smart Tag looks, check out our guide on setting up notification emails.
Viewing the Page the Form Was Submitted From
The {page_title}, {page_url}, and {page_id} Smart Tags display the title, URL, or ID of the page on which the form is embedded. It’s most useful when you have embedded the same form on more than one page.
By adding one of these Smart Tags to either the Email Subject Line or Email Message in your notifications settings, you can see exactly which page a user was on when they submitted your form.
Seeing the Date the Form Was Submitted
The {date format="m/d/Y"} Smart Tag will tell you the date when a form was submitted. You may find this useful for record-keeping, particularly if you might resend a notification sometime after submission, or if the submission date is particularly important.
You can add it to the Email Message field of your notifications settings.
Note: If your site uses caching, the date and time values that are pulled into this Smart Tag will be the date when the page was last cached (this is usually within the previous 12-24 hours). So, if you’re using this Smart Tag to track the date and time of form submissions, this value may not match the actual entry date.
To be sure the entry’s correct date information is pulled when using caching, use the {entry_date} Smart Tag.
If you’d like to also include a time stamp, you can change the {date format="m/d/Y"} Smart Tag to the following format: {date format="m/d/Y h:i:s A"}.
Note: If you’d like to use alternative PHP parameters, refer to our developer guide on using PHP date and time formats in WPForms.
For customizing the Date Smart Tag format in your forms, check out our developer documentation.
Identifying Entries From the Same User
With the {unique_value} Smart Tag, you can add unique identifiers to every form entry. It is useful for identifying individual form entries from the same user or email address. You can also display its output on the frontend and in form notifications.
To include the {unique_value} Smart Tag in your forms, we recommend using a Hidden Field or HTML field.
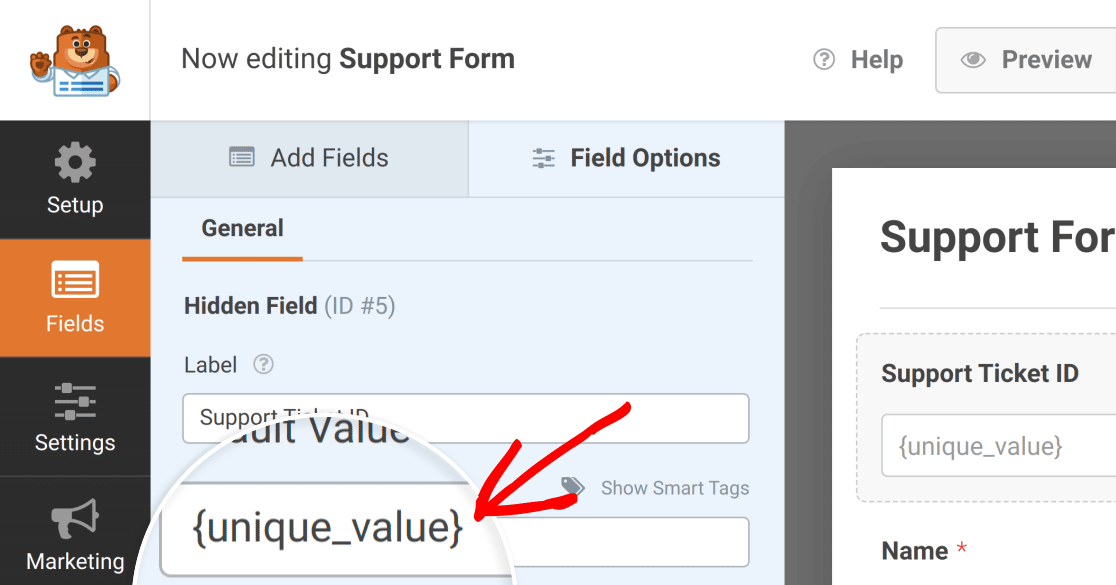
By using a Hidden Field, you can mark each entry with a unique ID that is only visible from within your WPForms entries. With an HTML field, you can display the output of the {unique_value} Smart Tag on the frontend of your forms.
Note: For more information on Hidden Fields, be sure to check out our tutorial on using Hidden Fields with WPForms.
If you’d like to use this Smart Tag on the frontend, check out our tutorial on using HTML fields.
Showing Author Details in Your Forms
The following Smart Tags enable you to pull details about authors on your WordPress site:
{author_id}: Reveals the ID number of the author of the page or post on which a form is embedded.{author_display}: Reveals the name of the author of the post or page on which the form is embedded.{author_email}: Inserts the email address of the author of the page where the form is embedded.
You can find an author’s ID by clicking on their name in the Posts or Pages sections of your WordPress admin area and looking at the browser address bar. In this example, the author has an ID of 1.
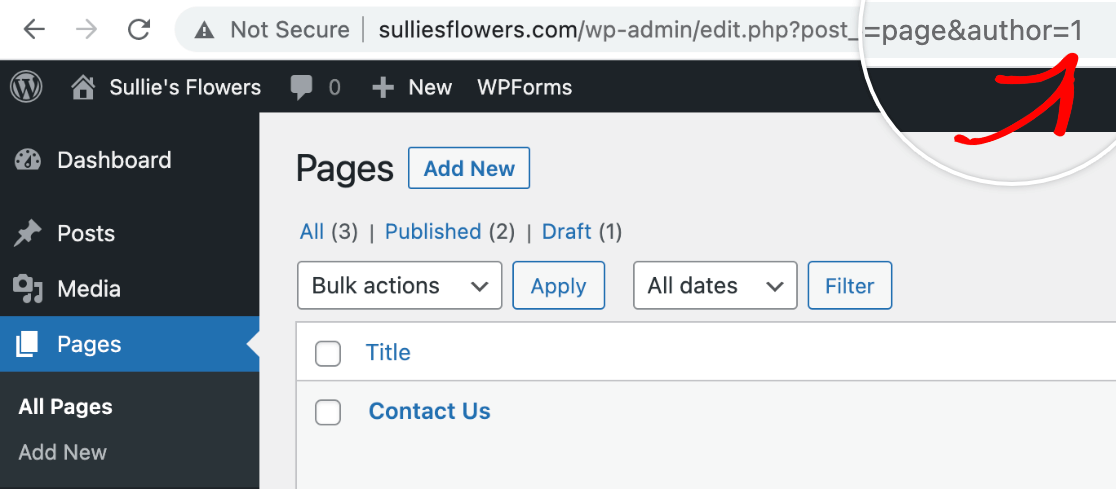
The {author_id} Smart Tag might be useful if you want a quick record of a post or page author included in the Email Message of a notification.
The {author_email} is useful if you want the author of the page to receive a notification when a user submits the form. You can add it as the Send To Email Address for the notification to accomplish this without having to set up a new conditional notification for each author.
Showing Logged-In User Details in Your Forms
User management Smart Tags are some of the most useful Smart Tags for community-powered sites, like forums or membership sites that require users to create accounts.
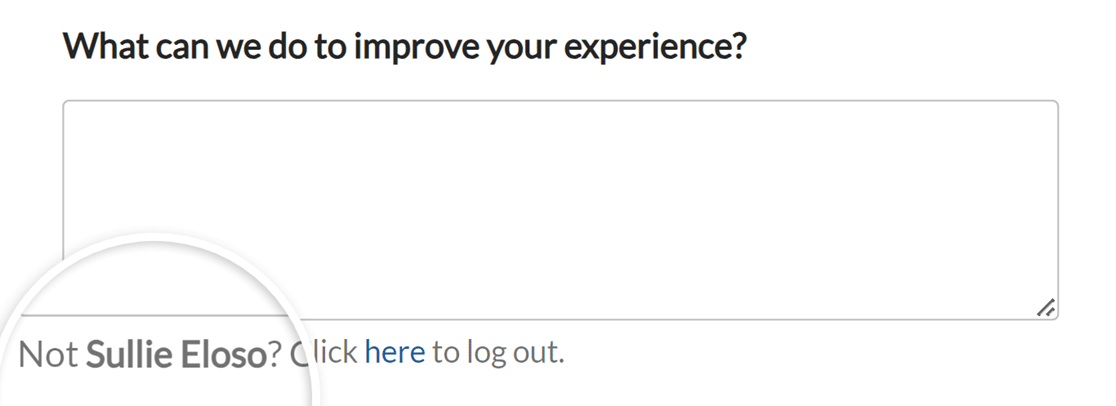
For instance, the {user_display} Smart Tag will insert the user’s display name.
You can add this Smart Tag to a field description to show the current user’s display name so they can check that they’re using the correct account.
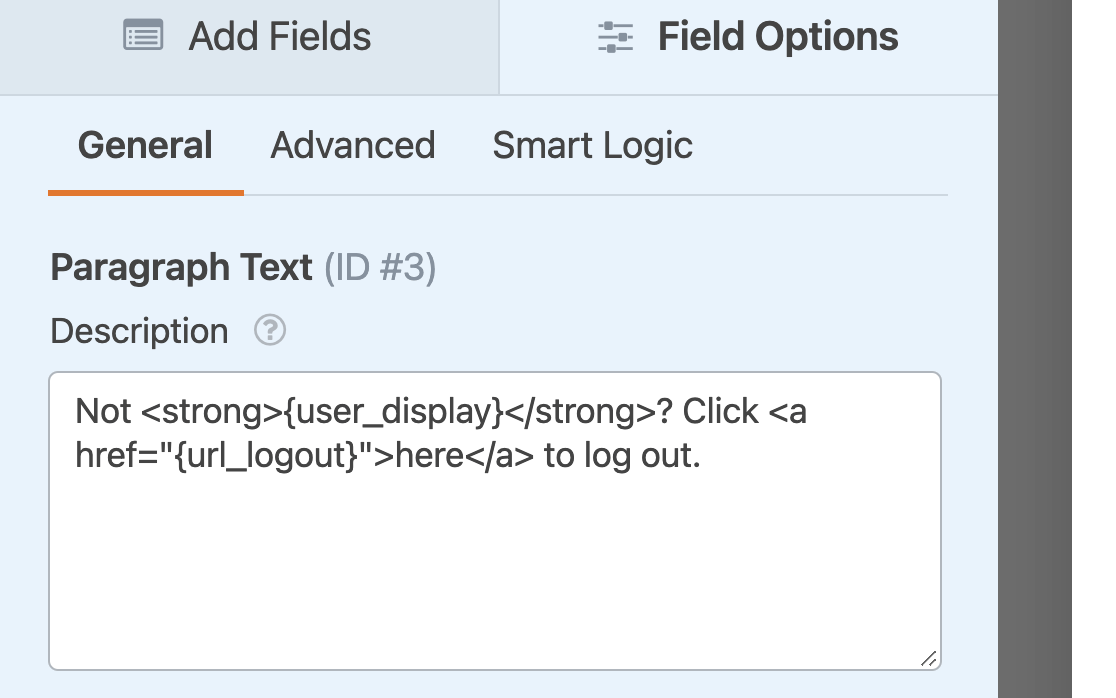
Here’s an example of how it might look on the frontend:
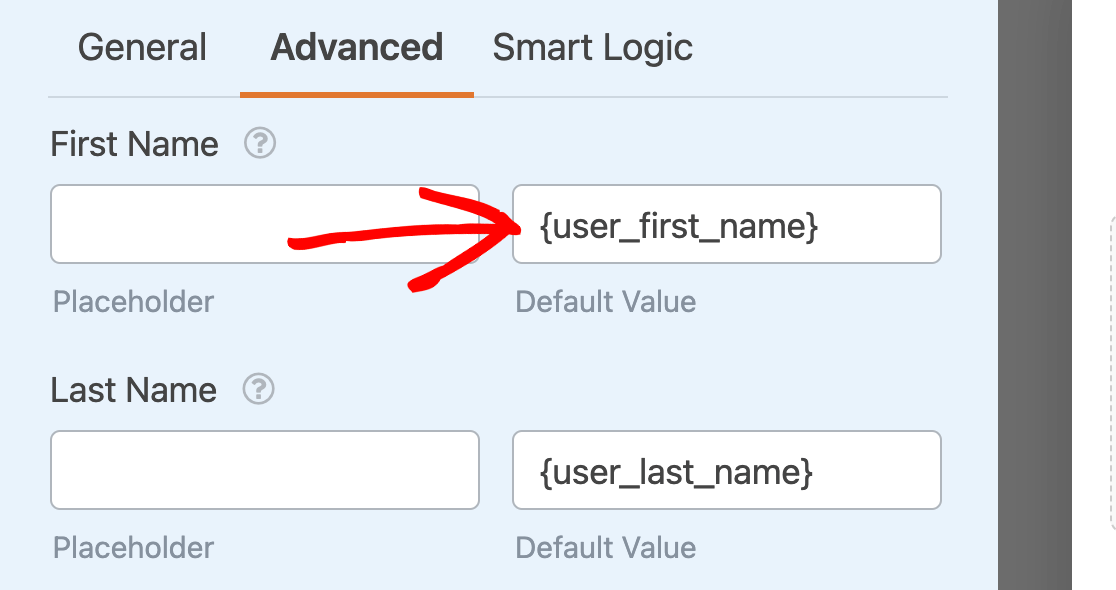
You can also added users’ names and email addresses as default values to auto-fill the Name and Email fields using the {user_full_name}, {user_first_name}, {user_last_name}, and {user_email} Smart Tags. Just enter the appropriate Smart Tag in the Default Value field in the Advanced Field Options.
The {user_meta} Smart Tag can be used to pull custom user meta data from your site. You can pull any data from a user profile as long as you know the meta key.
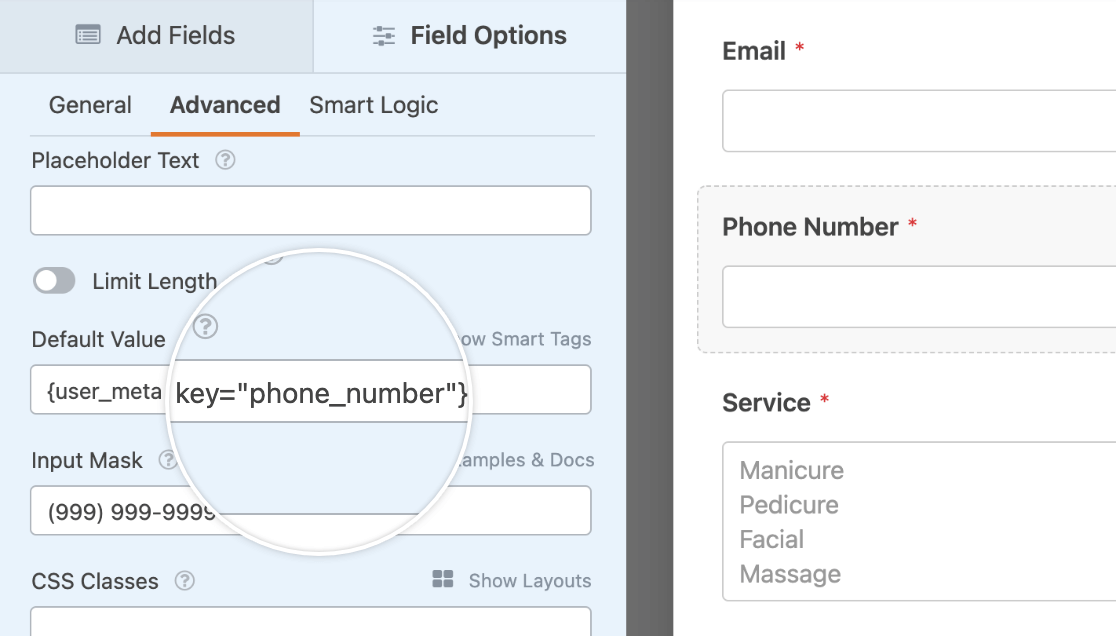
You can read our guide on setting up custom user meta fields for more details and step-by-step instructions.
Adding User Account Links to Your Forms
You can add links in your forms for users to log in, log out, or register for a new account using the following Smart Tags:
{url_login}{url_logout}{url_register}
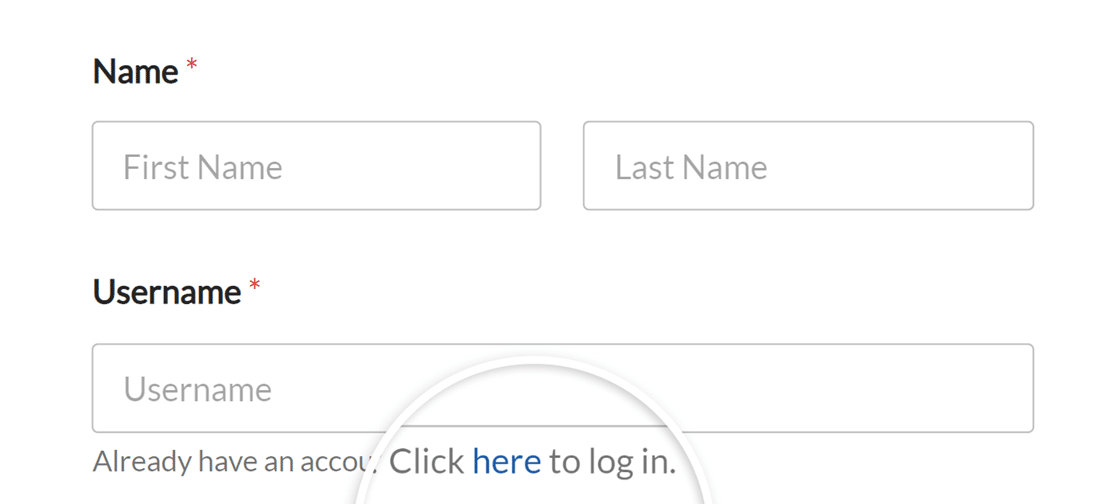
These Smart Tags can be useful for custom login and registration forms. For example, you might add them in the Username field description of your login form so that users with existing accounts can easily sign in.
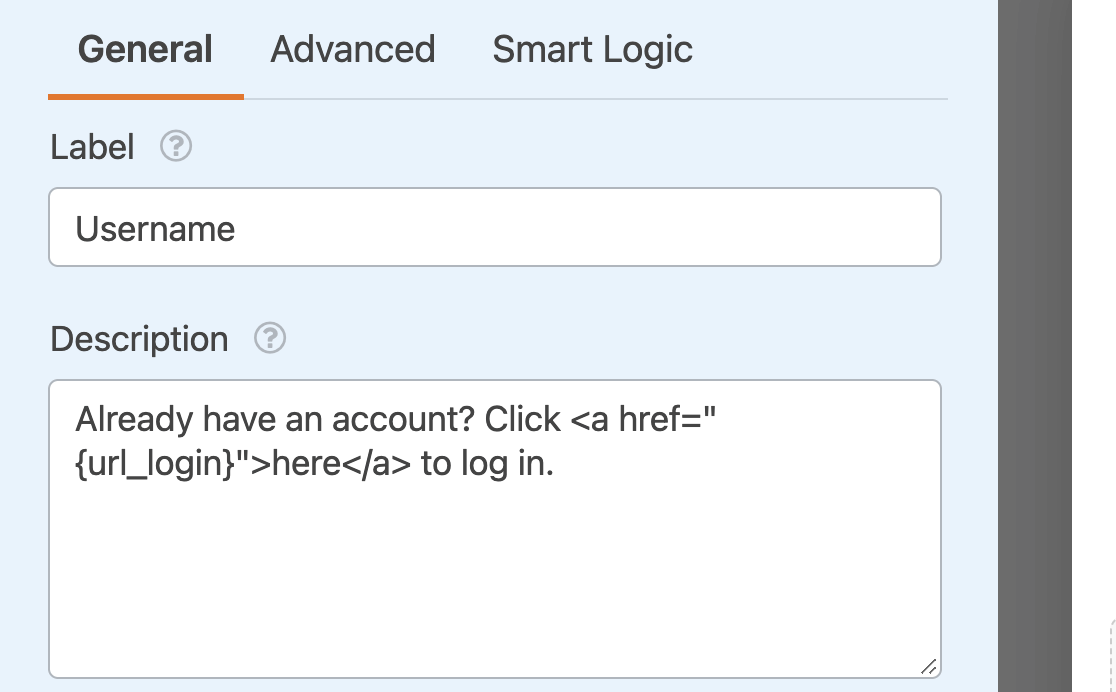
Here’s an example of how it might look on the frontend:
Adding a Password Recovery Link to Your Form
The {url_lost_password} Smart Tag inserts the lost password link for your site.
When a user forgets their password, this Smart Tag provides the address they need to go to in order to reset it. If you have a login form built with WPForms, you might consider including a reset link in the description area of the Password field.
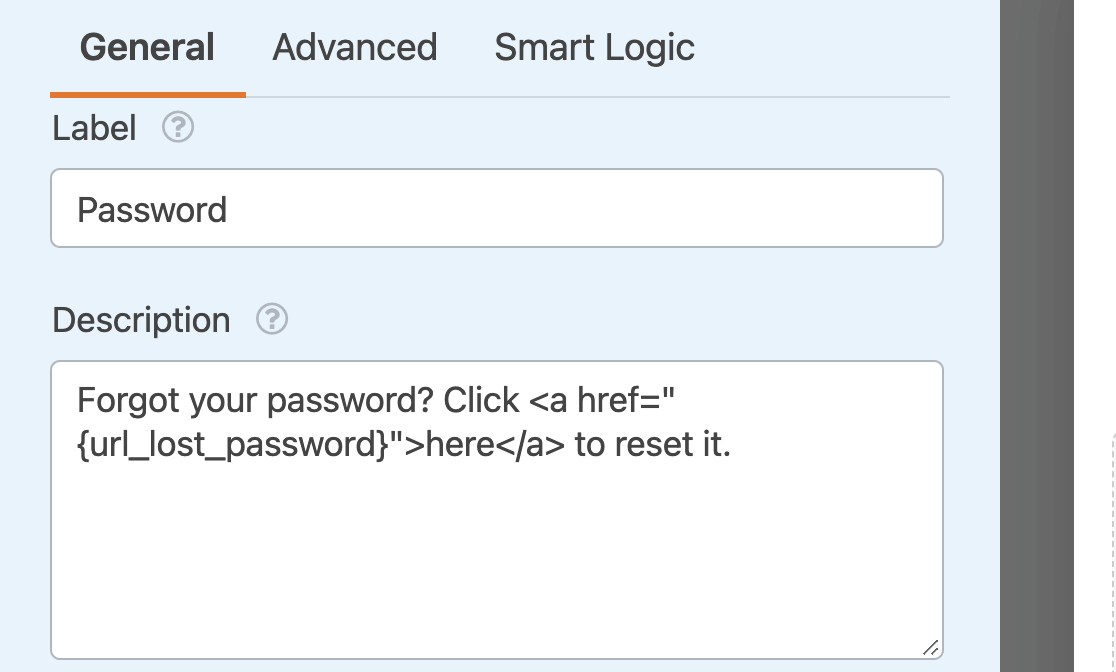
Here’s an example of how it might look on the frontend:

Note: Interested in creating custom user Smart Tags that can pull information directly from WordPress user profiles? For detailed instructions on setting this up, including adding unique user data like nicknames, user roles, and biographies, please refer to our developer documentation on how to create more user Smart Tags.
Displaying User Registration Information
The following Smart Tags work with our User Registration addon. They pull useful data for including in automated emails for user activation, password resets, and more:
{site_name}: Inserts your site’s name as it’s listed in your WordPress settings.{user_registration_login}: Inserts the username of the new user that has been created.{user_registration_email}: Adds the new user’s email address to notification emails sent out by the User Registration addon.{user_registration_password}: Inserts the password of the newly registered user.{url_manage_activations}: Inserts a link to the admin screen where you can manually approve and activate new user accounts on your site.{url_user_activation}: Adds a link users can click to activate their new accounts.{user_registration_password_reset}: Inserts a password reset link.
Note: These Smart Tags only work in the emails generated by the User Registration addon. They will not pull data into other parts of your forms, such as regular notification emails or default values.
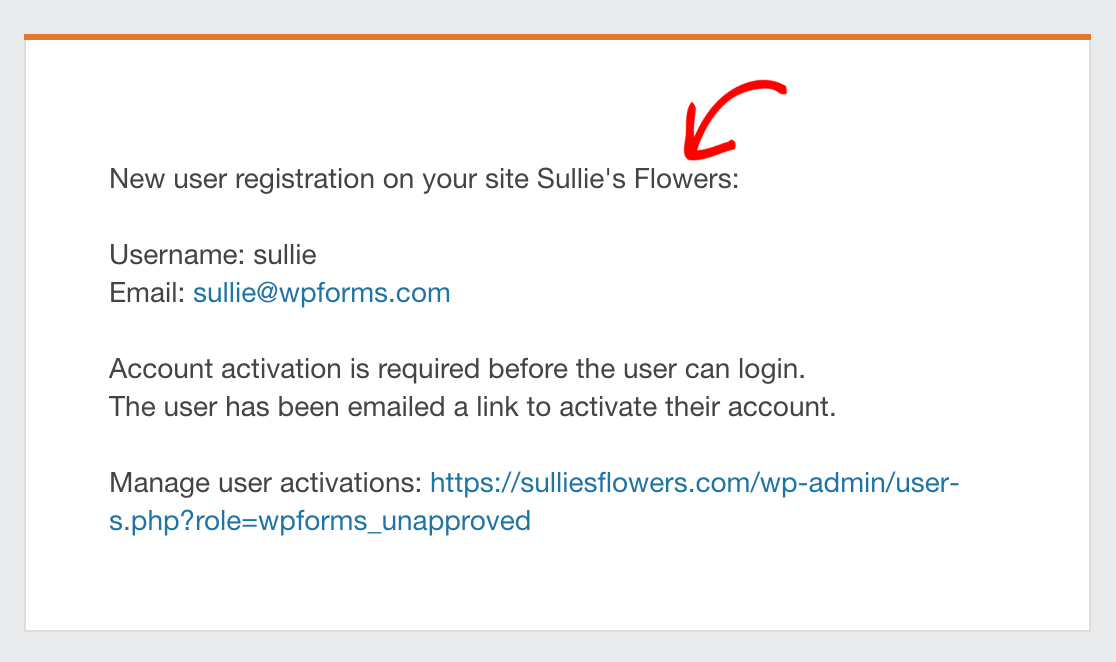
In this example, you can see the site name displayed at the top of the email. The message also includes the {user_registration_login}, {user_registration_email}, and {url_manage_activations} Smart Tags.
This email uses the {url_user_activation} Smart Tag to allow users to activate their new accounts via email.
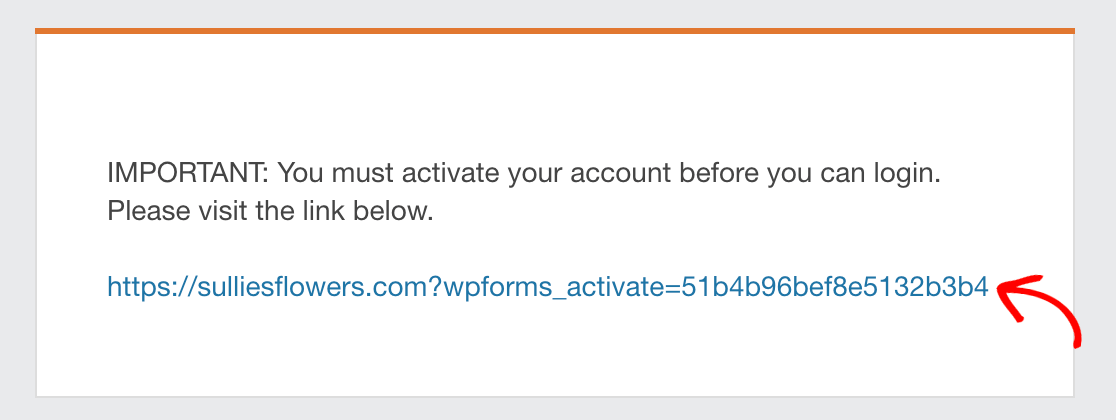
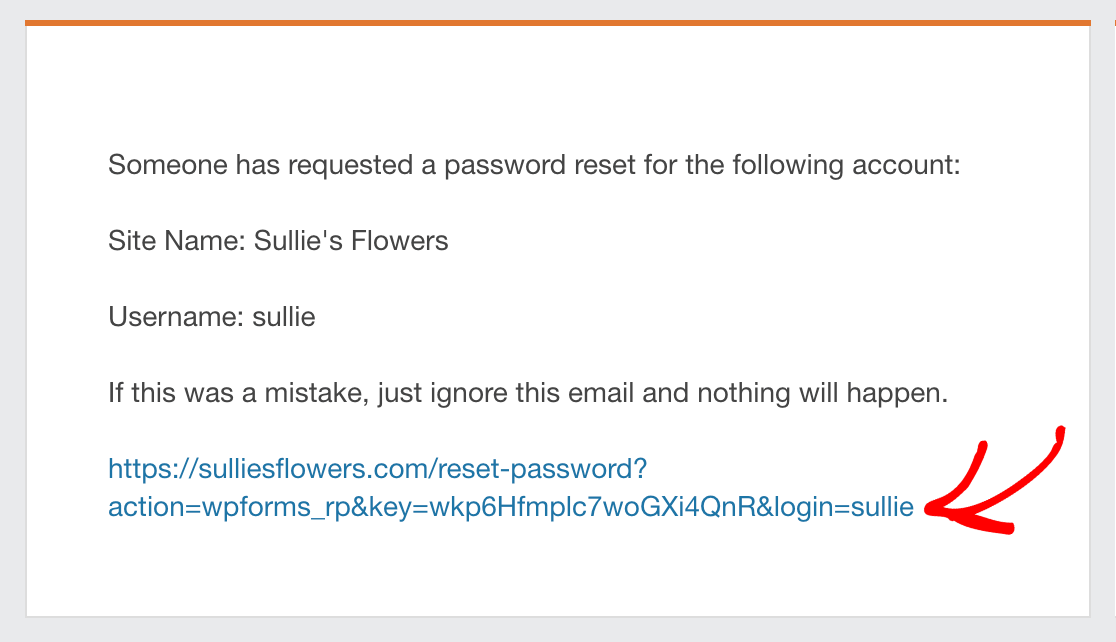
And this email shows the link that’s inserted when you use the {user_registration_password_reset} Smart Tag.
Prefilling Payment Fields in Forms
When working with payment fields (such as Checkbox Items, Multiple Items, or Dropdown Items), you can use a special Smart Tag format to prefill values from one form to another:
{field_id="#|value_choice"}
For example, if you have a payment field with ID 4, you would use: {field_id="4|value_choice"}
That’s it! Now you know some of the ways you can use Smart Tags in your forms.
Next, want to collect hidden user data from your forms? Learn how to gather IP addresses, location data, and more using Smart Tags in our guide to unlocking hidden user data.
