AI Summary
Looking to add flexibility to your payment forms? Using conditional logic with the WPForms Stripe Pro addon allows users to choose payment methods, toggle between one-time or recurring payments, opt for payment flexibility, and more.
This tutorial will show you how to use conditional logic with the Stripe Pro addon for WPForms.
Requirements:
- You will need a Pro license level or higher to access the Stripe Pro addon
- Ensure that you’ve installed the latest version of WPForms to meet the minimum required version for the Stripe Pro addon
- Set up a form with Stripe integration
- Stripe requires your site to have SSL (HTTPS) enabled on the page where you’re adding a live payment form, as this allows you to securely send credit card data to Stripe. For setup details, please see WPBeginner’s guide to adding SSL and HTTPS in WordPress
Before you get started, be sure to install WPForms on your WordPress site and verify your license. Then install and activate the Stripe Pro addon.
Note: Stripe applies a 3% transaction fee to each payment processed through their platform if your WPForms license is inactive.
Setting Up Conditional Logic for Payments
The Stripe Pro addon supports conditional logic, which lets you create “smart forms” that automatically change based on a user’s selections or input.
There are many ways you can use conditional logic with Stripe payments, such as:
- Letting your users choose whether to pay with Stripe or PayPal
- Making payment optional
- Letting your users choose whether to submit a one-time payment or start recurring payments
- Sending email notifications only for completed payments
Below, we’ve walked through how to set up conditional recurring payments, and how to create conditional payment notification emails.
Conditional Logic for Payments
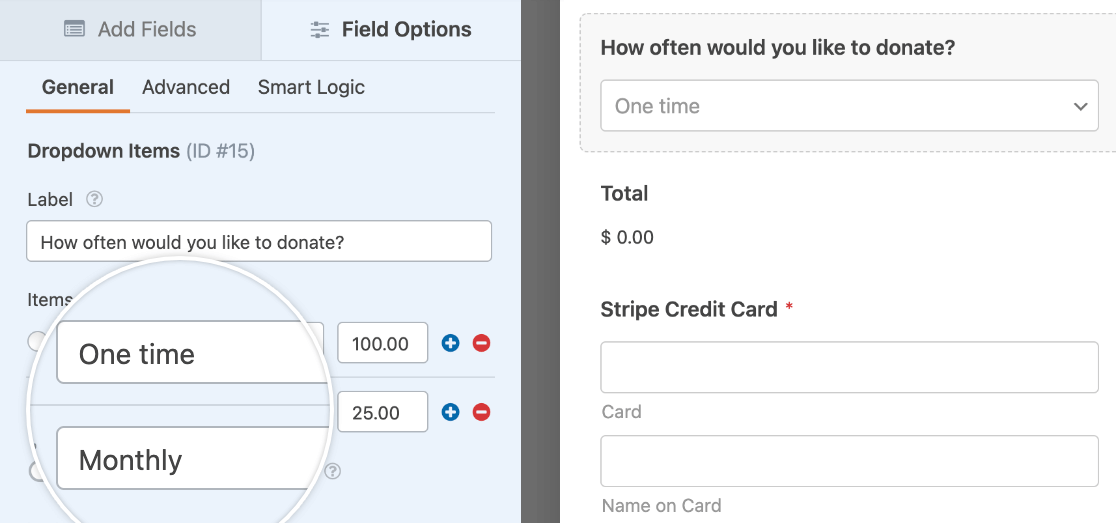
As an example, we’ll create a form to let users choose to submit either a one-time or recurring donation.
To get started, we’ll create a simple donation form. This will need to include either a Dropdown or Multiple Choice field to let users choose whether they’d like to submit a one-time donation or set up a recurring donation.

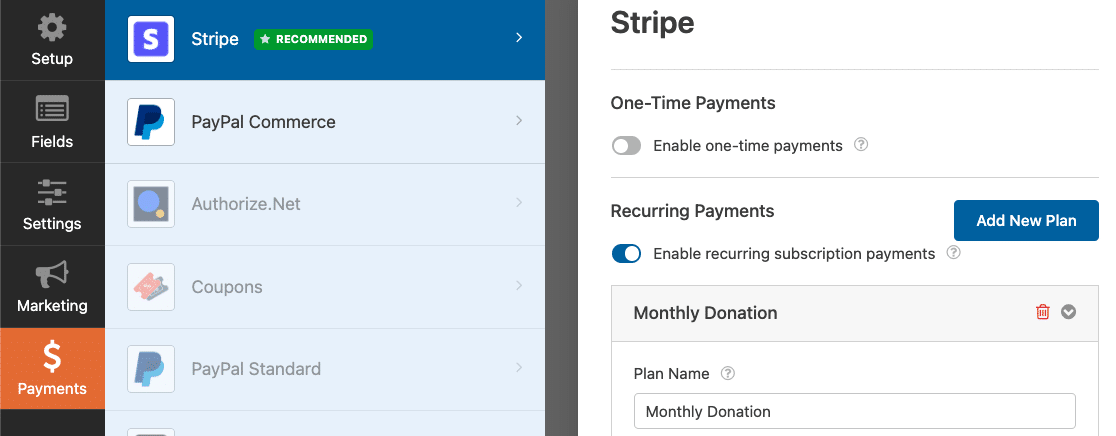
Next, access the Stripe settings in the form builder under Payments » Stripe. This is where we’ll set up the conditional logic for our payment options.

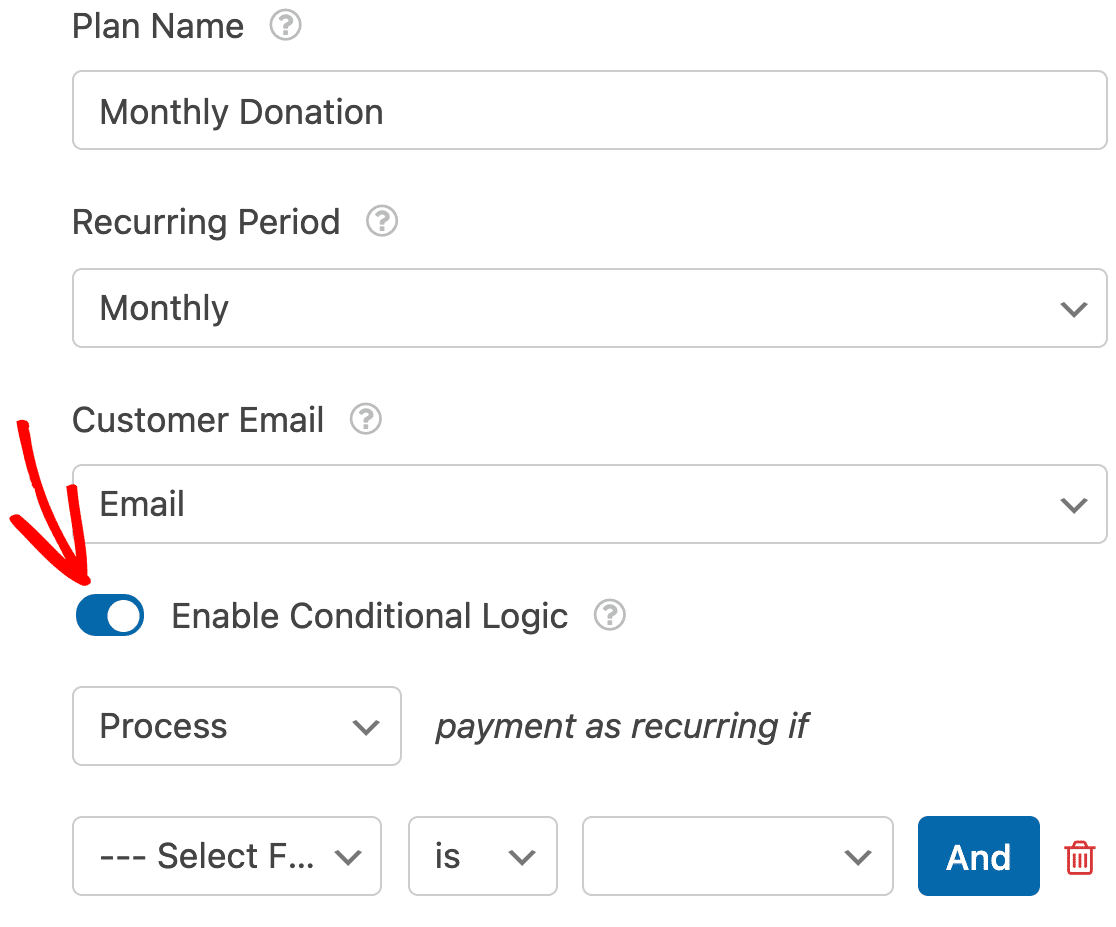
Scroll to the bottom of the settings (under the Recurring Payments section) and toggle on the option labeled Enable Conditional Logic.

This will display additional fields for you to create your conditional rule. For our example, we’ll set the dropdowns to make a rule that states, Process payment as recurring if How often would you like to donate? is Monthly.

Don’t forget to save your form after setting up your conditional logic rule.
Conditional Notification Emails for Completed Payments
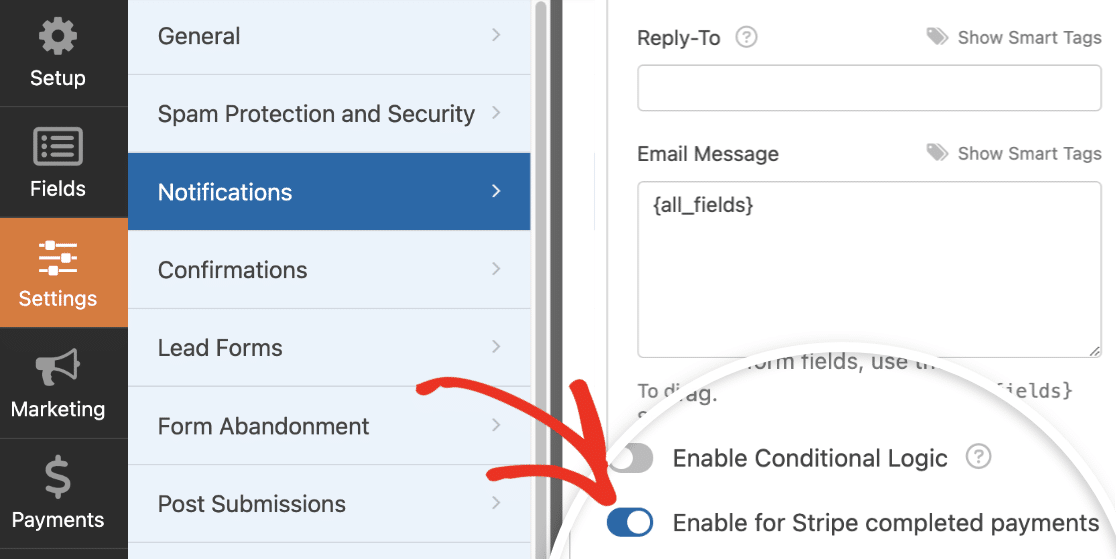
By default, WPForms sends out all notification emails as soon as a user submits your form. However, in some cases, you may want to wait to send a notification email until the user’s payment has been successfully processed in Stripe.
To delay notification emails until payment has been successfully completed, go to Settings » Notifications in the form builder. For the notification email that you want to delay, check the box at the bottom of the settings labeled Enable for Stripe completed payments.

That’s it! Now you know how to set up conditional payments with WPForms Stripe Pro addon.
Next, would you like to allow users to choose how they complete a payment in your form? Be sure to check out our tutorial on allowing visitors to choose a payment method for more details.
