AI Summary
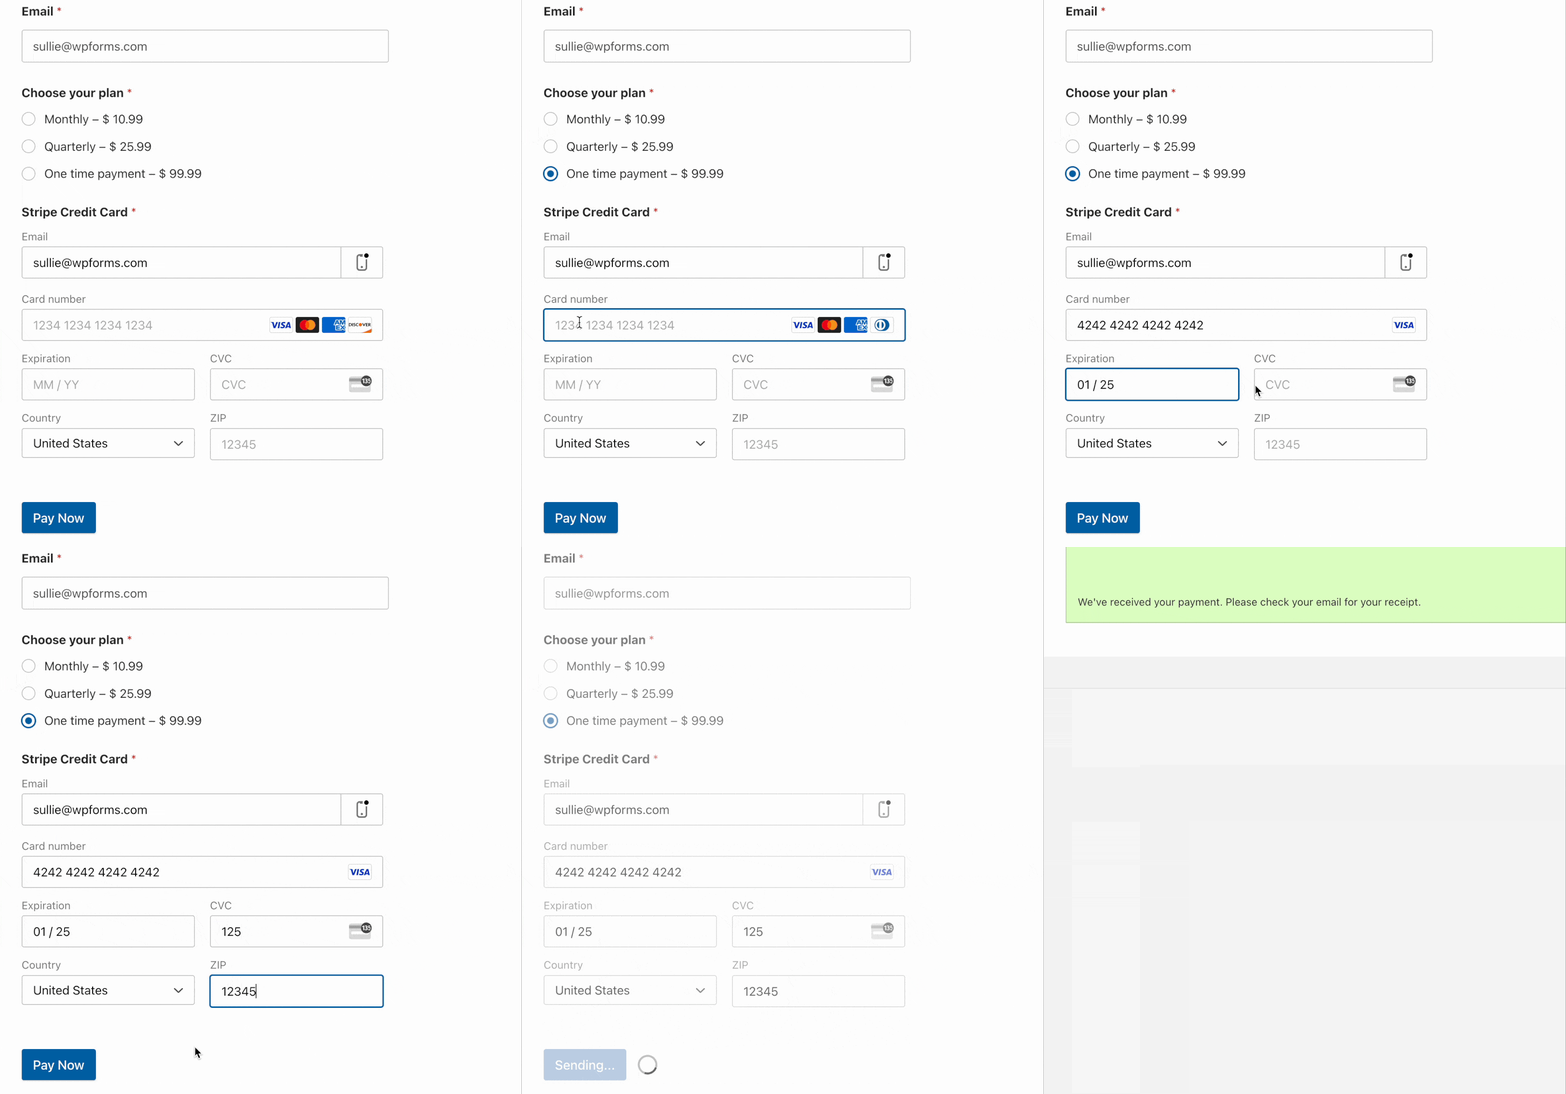
Do you want to test Stripe transactions before accepting real payments in WPForms? You can make trial purchases using test credit card numbers on your site and analyze the transactions by logging in to your Stripe account.
This tutorial will show you how to perform test Stripe transactions on your site.
Note: Testing Stripe payments is available to all WPForms users. However, you’ll need a Pro license level or higher to access the Stripe Pro addon.
Before you get started, be sure to install WPForms on your WordPress site and verify your license.
Note: Stripe applies a 3% transaction fee to each payment processed through their platform if your WPForms license is inactive. However, this fee doesn’t apply to test transactions.
Enabling Stripe Test Mode
Note: If you’re using WPForms Lite, you’ll also be able to test your Stripe payments.
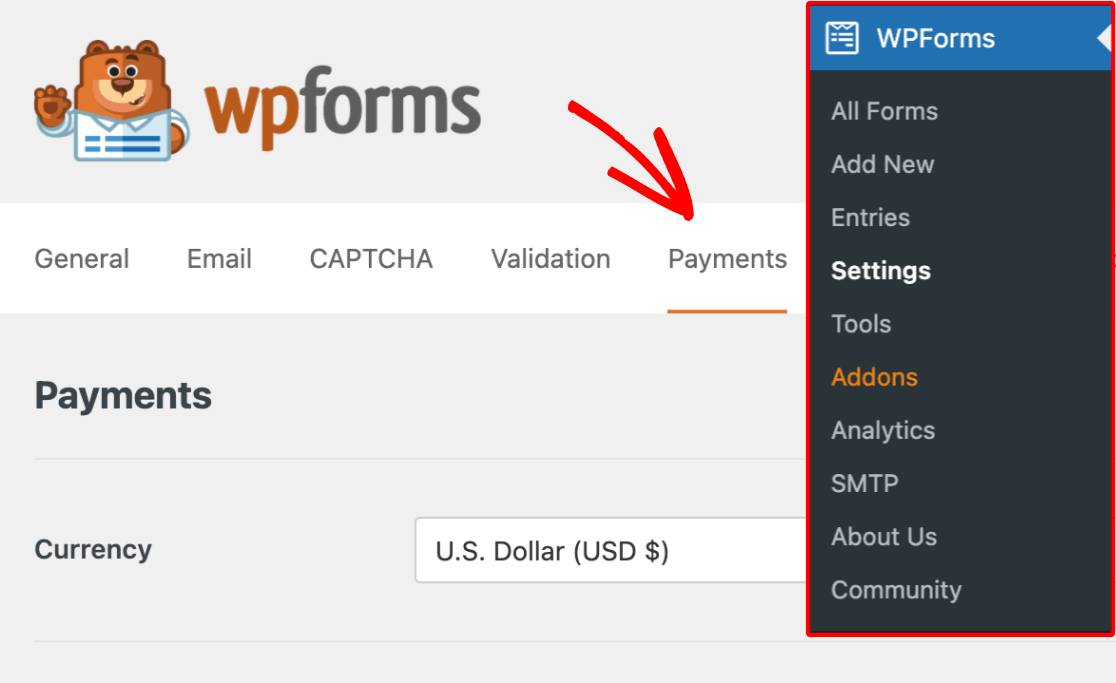
When testing your payment form, you’ll need to ensure that no real transactions are made in the process. To do so, navigate to WPForms » Settings and go to the Payments tab.
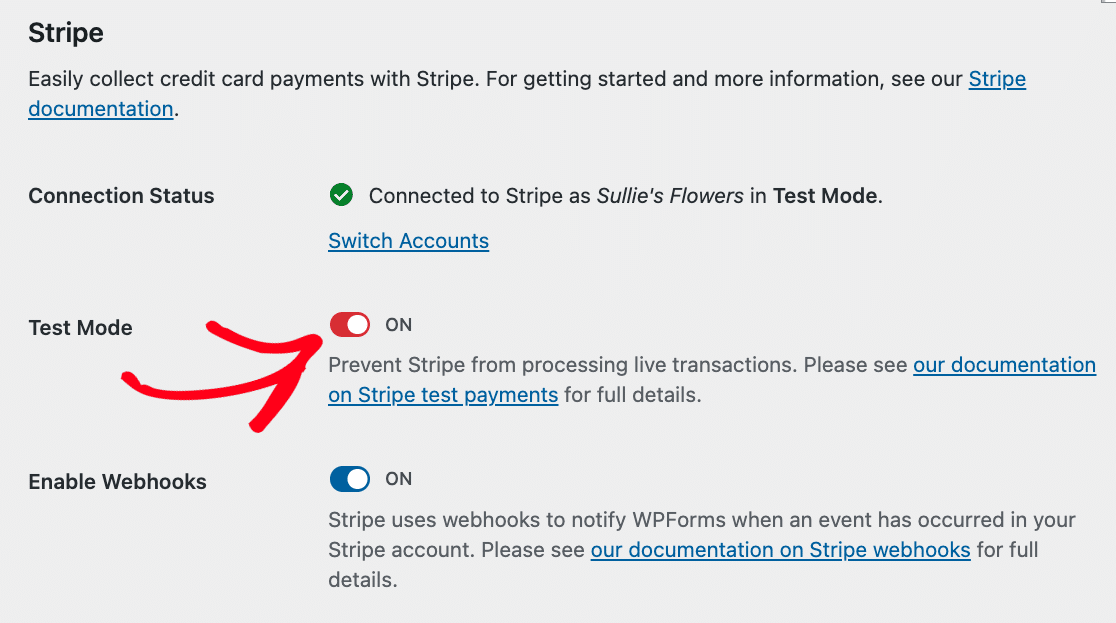
Here, scroll to the Stripe section and, toggle on the Test Mode option.
Note: When switching Stripe payments to test mode within WPForms settings, please note that this change only applies to the WPForms plugin. If you have other plugins on your site that also use Stripe, this test mode setting won’t affect them. Ensure you check and configure each plugin’s settings individually to avoid any unexpected payment behaviors.
You should also check that there’s a green checkbox for the Connection Status. This lets you know that your site has been successfully connected to your Stripe account.

Note: If you haven’t already connected your site to your Stripe account, you’ll be reminded to set up Stripe Connect. This will let your site send payment data to your Stripe account, and must be configured separately for live and test payments.
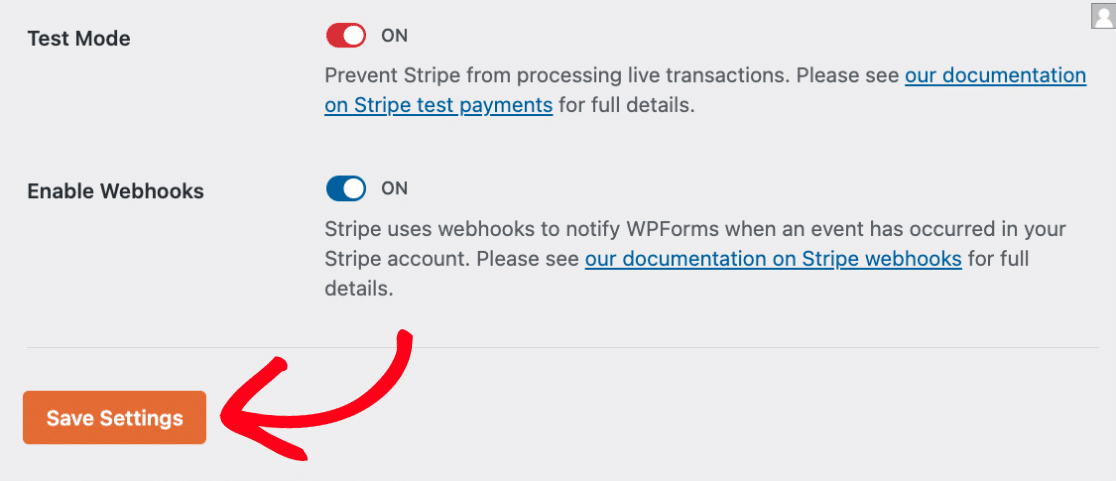
After you’ve checked that Stripe is connected and test payments are enabled, click the Save Settings button.
Enabling Stripe Payments
Next, you’ll either need to create a new payment form or edit an existing one with WPForms.
Note: You’ll need to add a payment field and the Stripe Credit Card field to your form before testing. For more details, see our guide on creating a payment form.
Once you’ve added the fields you’d like to use to your form, you’ll need to allow Stripe payments in the form by going to Payments » Stripe and toggling on the option labeled Enable one-time payments.
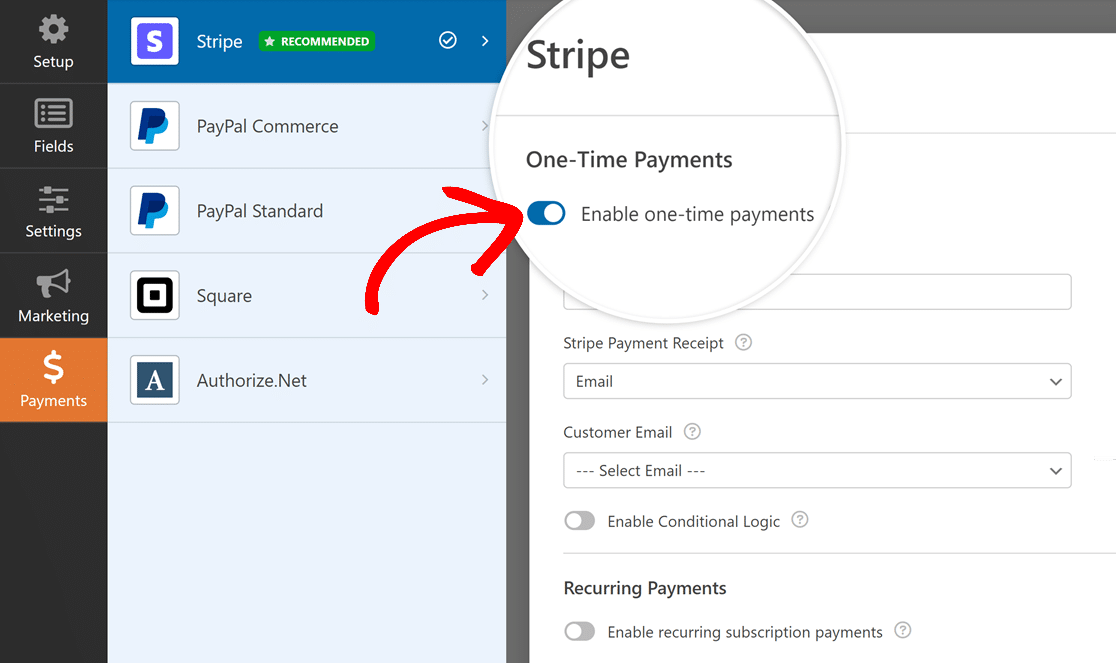
The other settings here are optional for testing purposes. You can fill them out or leave them blank for now.
Note: For more details on configuring Stripe payment settings in your forms, check out our Stripe for Lite users and Stripe Pro addon tutorials.
The Stripe Credit Card field also requires your form to use AJAX submissions. This is when your form submits without requiring the page to refresh.
AJAX submissions are enabled by default in WPForms. You can double-check that this option is turned on by going to Settings » General in the form builder. Then click on the Advanced section to expand it.
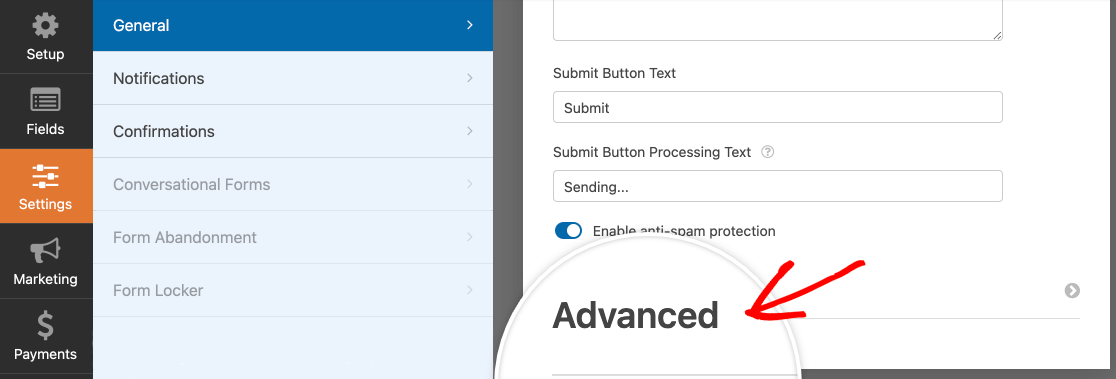
Here, make sure the setting labeled Enable AJAX form submission is toggled to the “on” position.
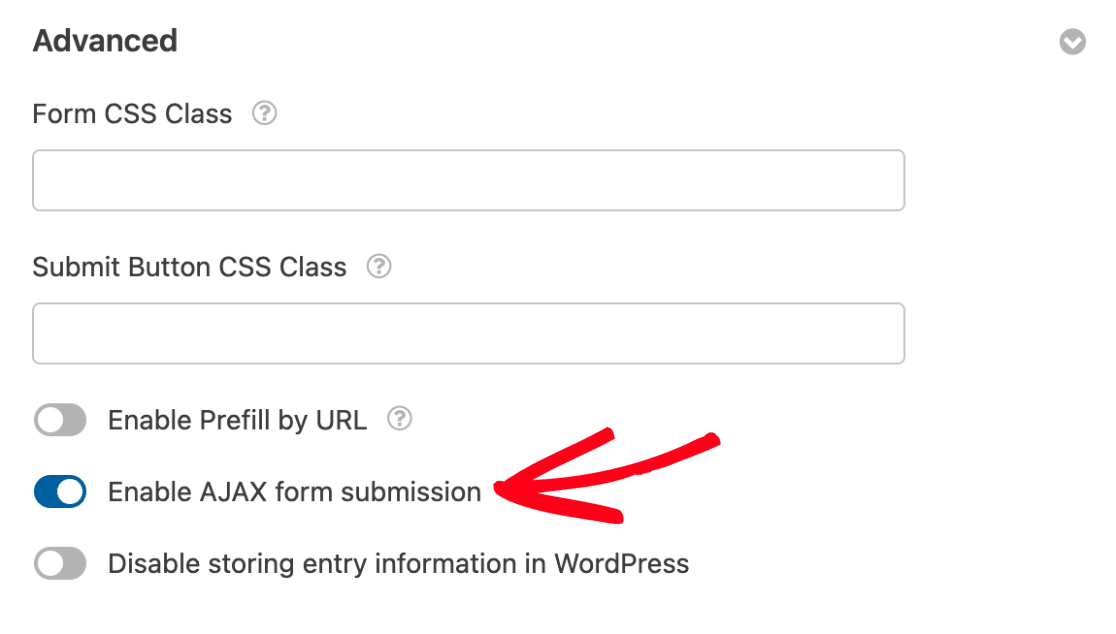
Once this is all set, don’t forget to save your form.
Publishing Your Form and Performing the Test
Once you’ve set up your form, you can test payments with it on the frontend of your site. To do this without publishing the form to a live page, you can use the form preview option in WPForms, or create a private page or post.
Since you can’t use genuine card information in the Stripe Credit Card field when the addon is in test mode, enter any test card numbers listed in Stripe’s testing doc when filling out your form for testing.
Viewing Test Transactions in WPForms
To view and manage all test transactions and their details, simply go to WPForms » Payments and turn on the Test Data option.
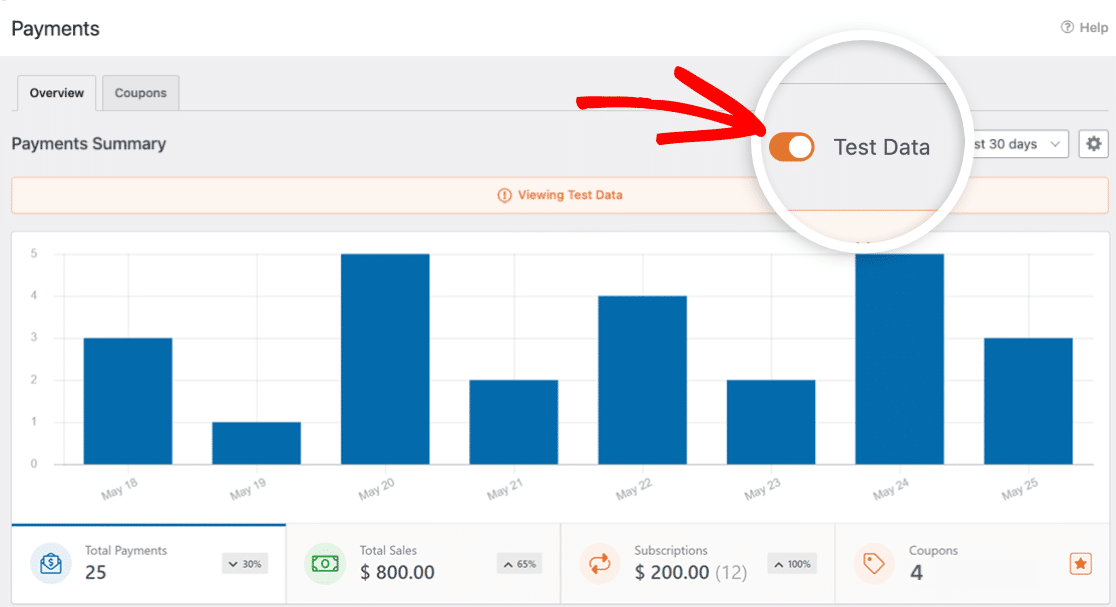
For full details on viewing test and live payment information, understanding transaction trends, adjusting for different currencies, and more, check out our guide to viewing and managing payments.
Note: Looking to offer discounts to your customers through coupon codes? Check out our Coupons addon tutorial for all the details.
Viewing Test Transactions in Your Stripe Account
Stripe does not send payment receipts in test mode so you won’t receive any Stripe payment notifications automatically. To view or send receipts manually, you can check your Stripe Dashboard.
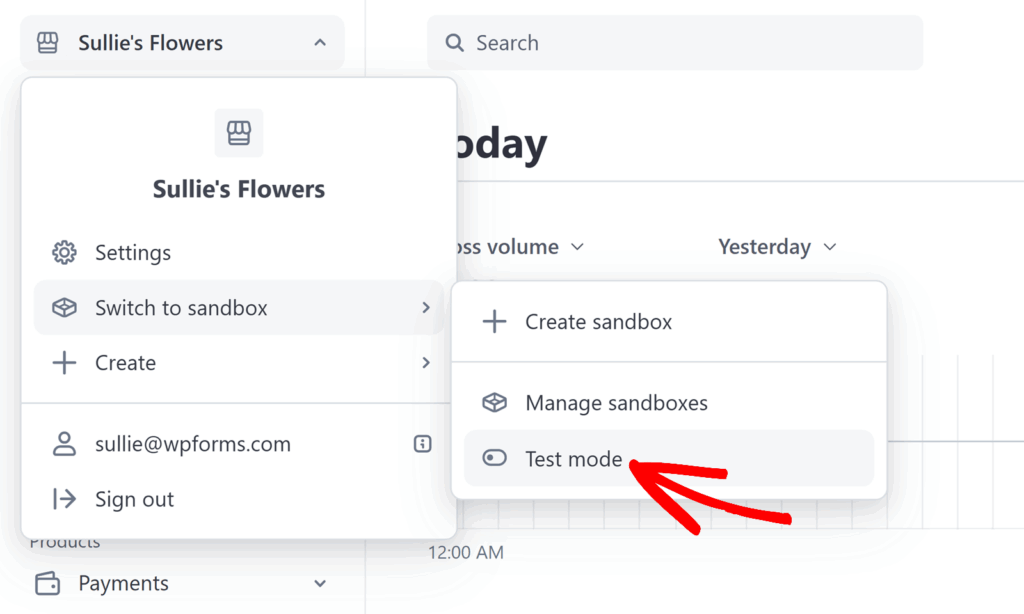
To begin, you’ll need to log in to your Stripe account. Then, from the top-left menu, select your workplace and click Switch to sandbox. Then, click on the Test mode option.
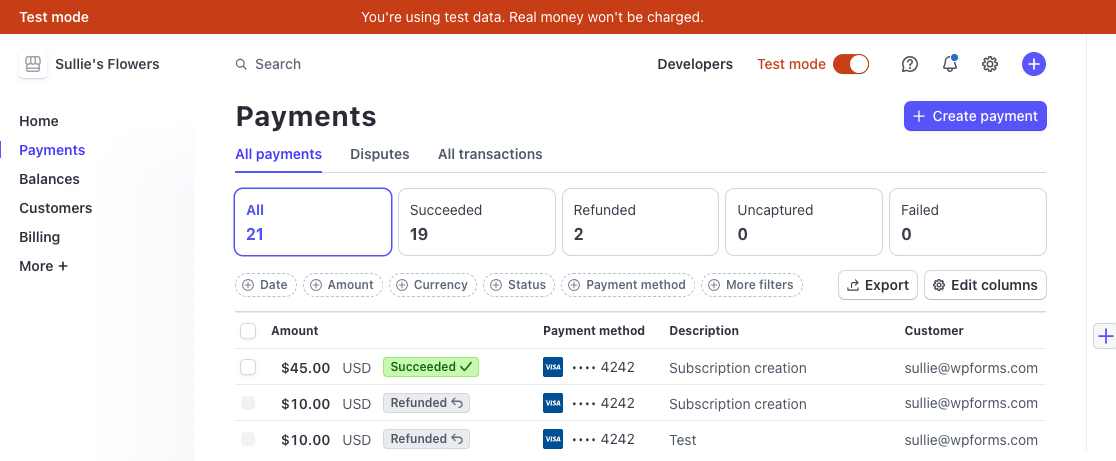
This will show you an overview of the test payments you’ve received in your Stripe account.
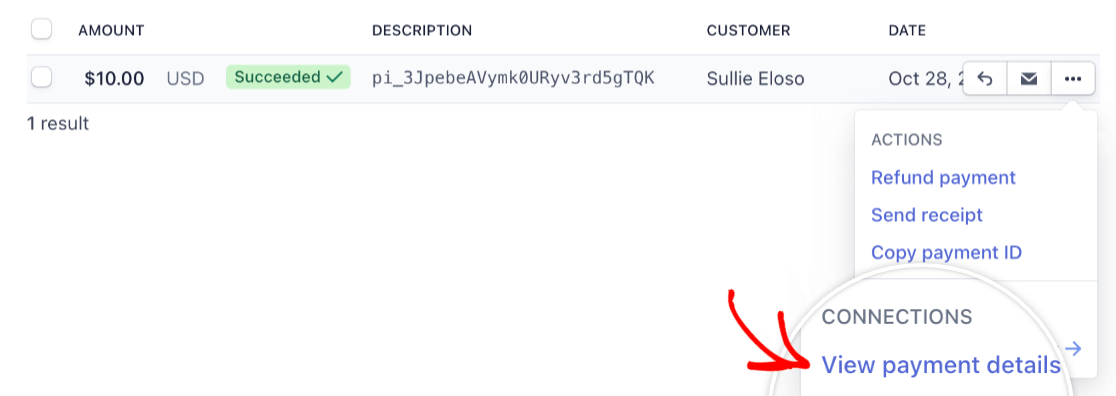
If you’d like, you can view more details for an individual payment. To do so, go to the row for that entry and click on the three dots to see more options. Then, select View payment details.
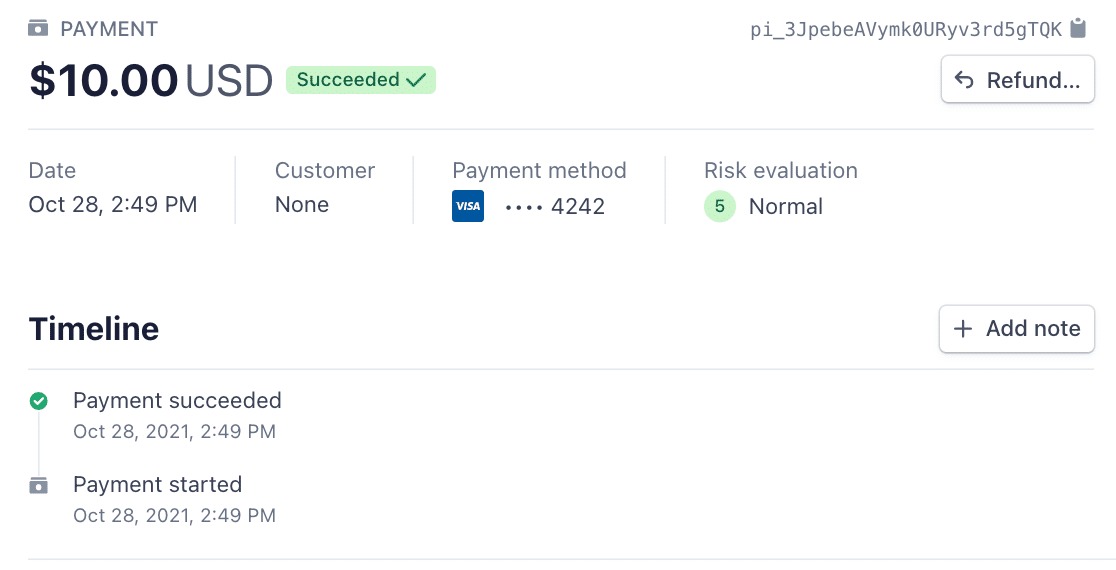
On the individual payment details page, you can see more information and options for your specific test payment.
Switching to Live Mode
When you’re done testing, remember to deactivate Test Mode in Stripe before allowing users to submit payments in your form. You can do this by going to WPForms » Settings » Payments, as in the previous step.
To enable Live Mode, scroll to the Stripe section and toggle the Test Mode option to the OFF position.

You’ll then need to reconnect WPForms to Stripe by clicking on the Connect with Stripe button. Don’t forget to save your settings as well.
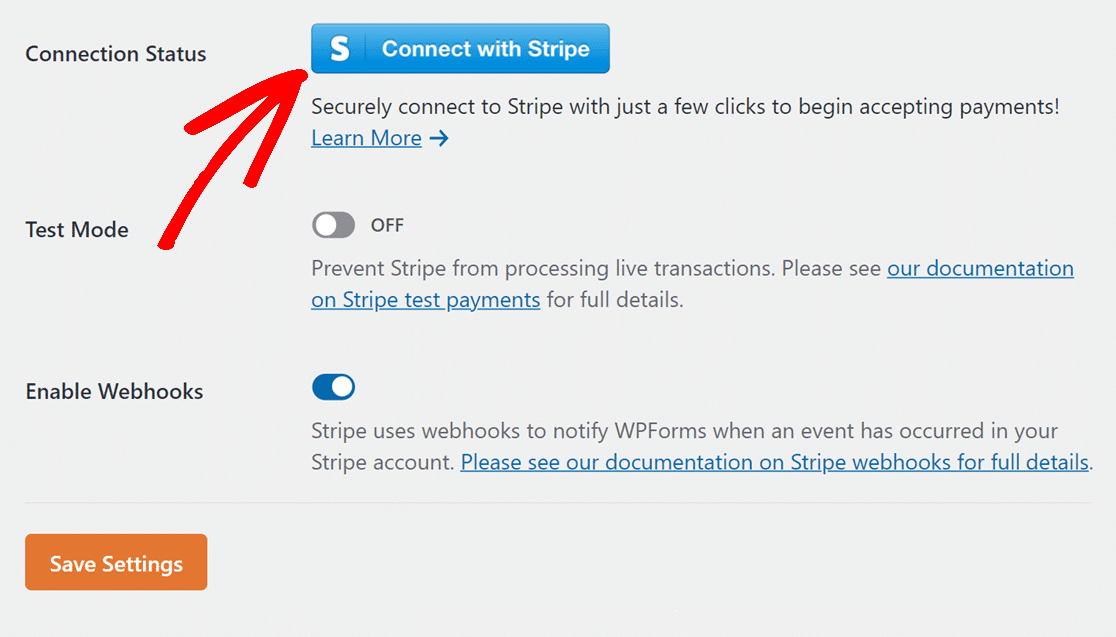
Note: For more details on how to connect your site to Stripe in Live Mode, see our guide to using the Stripe Pro addon.
That’s it! You can now test Stripe payments in your forms.
Next, do you want to set up automatic form notifications so you can receive submitted entries via email? Be sure to check out our guide on how to set up form notifications emails for all the details.
