AI Summary
Would you like to connect your WordPress forms to your HubSpot account? With the WPForms HubSpot addon, you can easily send lead information from your form submissions to your HubSpot account.
This tutorial will show you how to install and set up the HubSpot addon with WPForms.
Requirements:
- You will need the Elite license level to access the HubSpot addon
- Ensure that you’ve installed the latest version of WPForms to meet the minimum required version for the HubSpot addon
Before you get started, be sure to install and activate WPForms on your WordPress site. You will also need to sign up for a HubSpot account if you don’t already have one.
Installing and Configuring the HubSpot Addon
Once the core WPForms plugin is in place and your license is verified, you’ll be able to quickly install and activate the HubSpot addon.
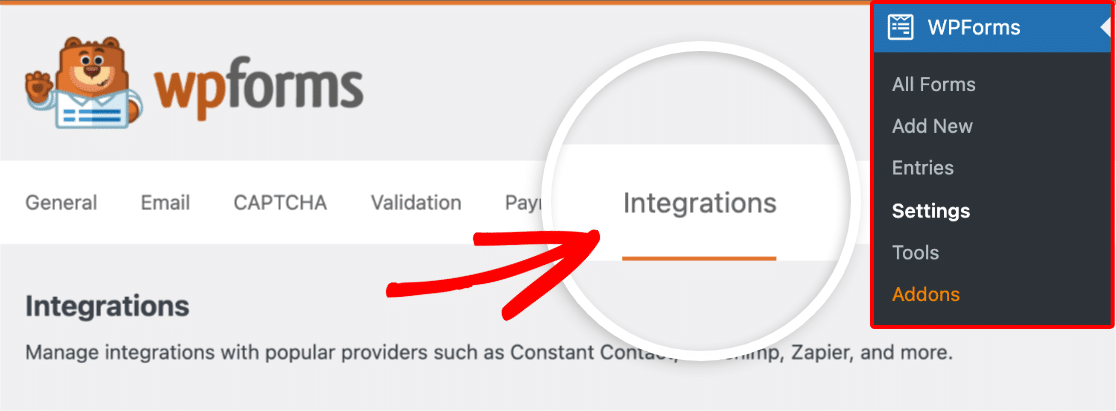
The next step is to integrate WPForms with your HubSpot account. To do this from the WordPress dashboard, you’ll need to go to WPForms » Settings and click on the Integrations tab.
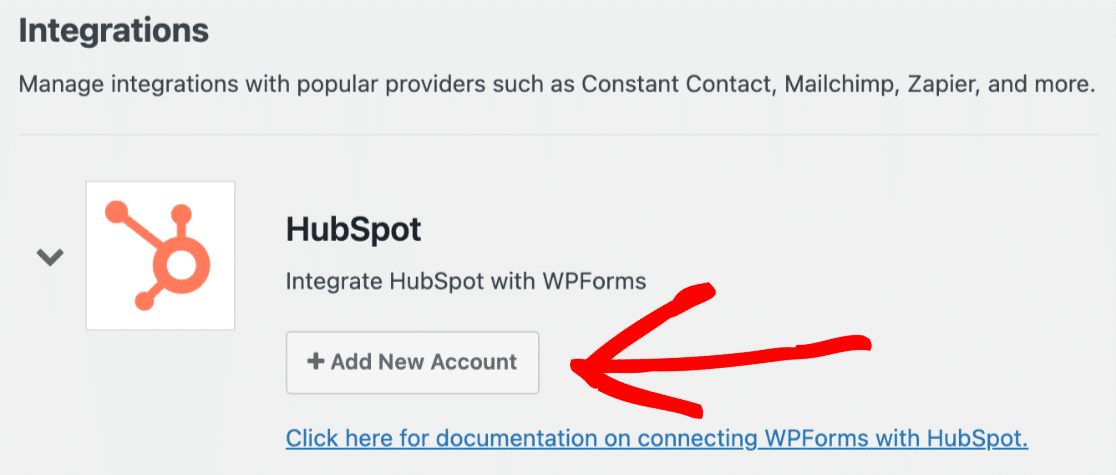
Then, click on the HubSpot option to expand its settings. From here, click the Add New Account button.
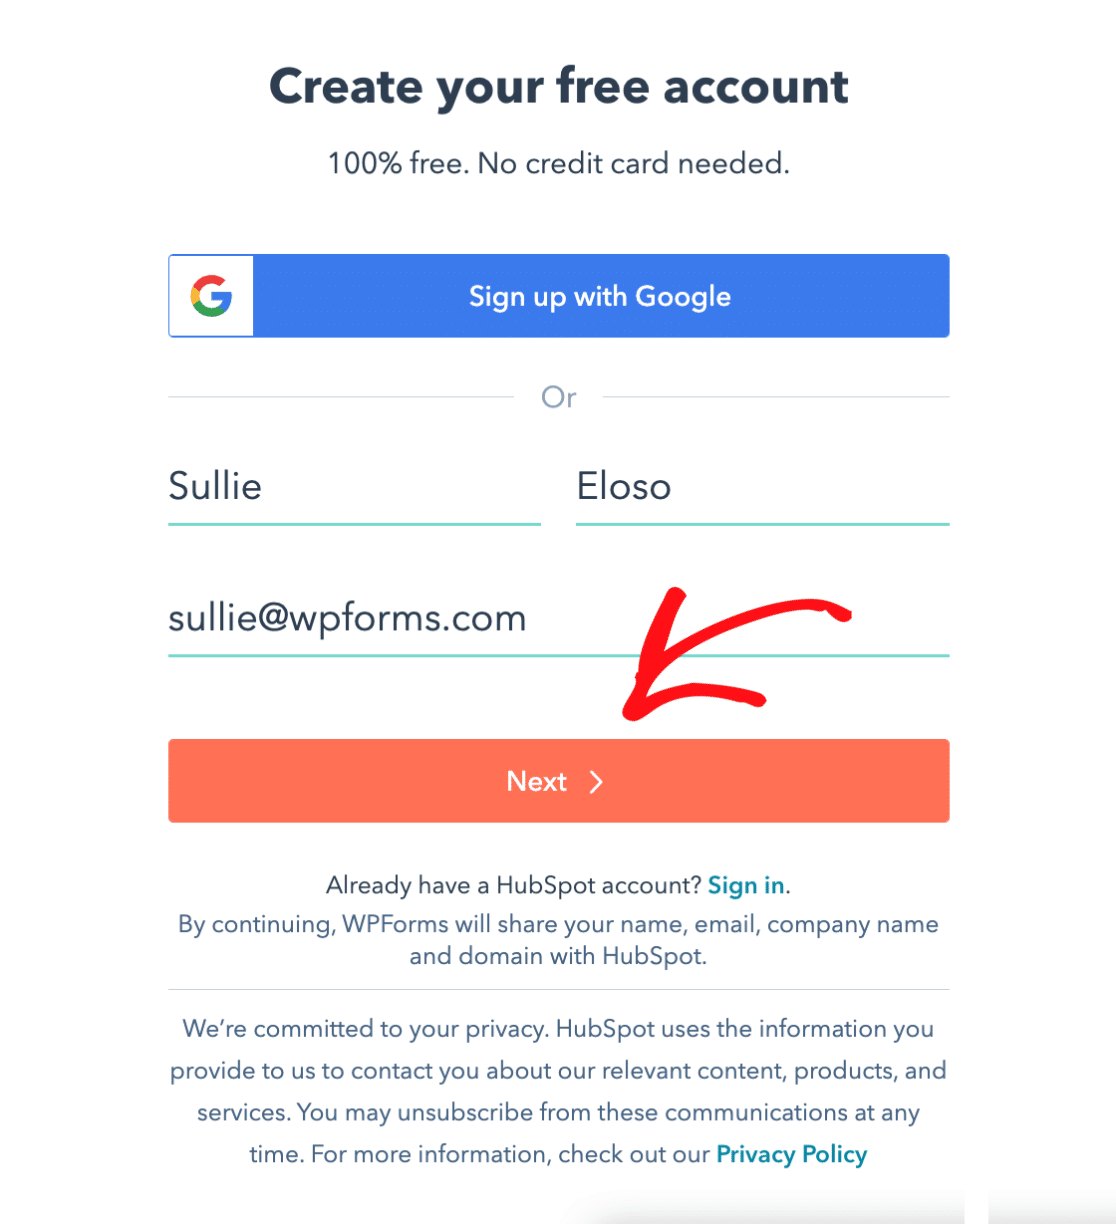
You’ll then be prompted to connect to your HubSpot account. If you need to sign up for a new HubSpot account, you can do so by filling in your information and clicking the Next button.
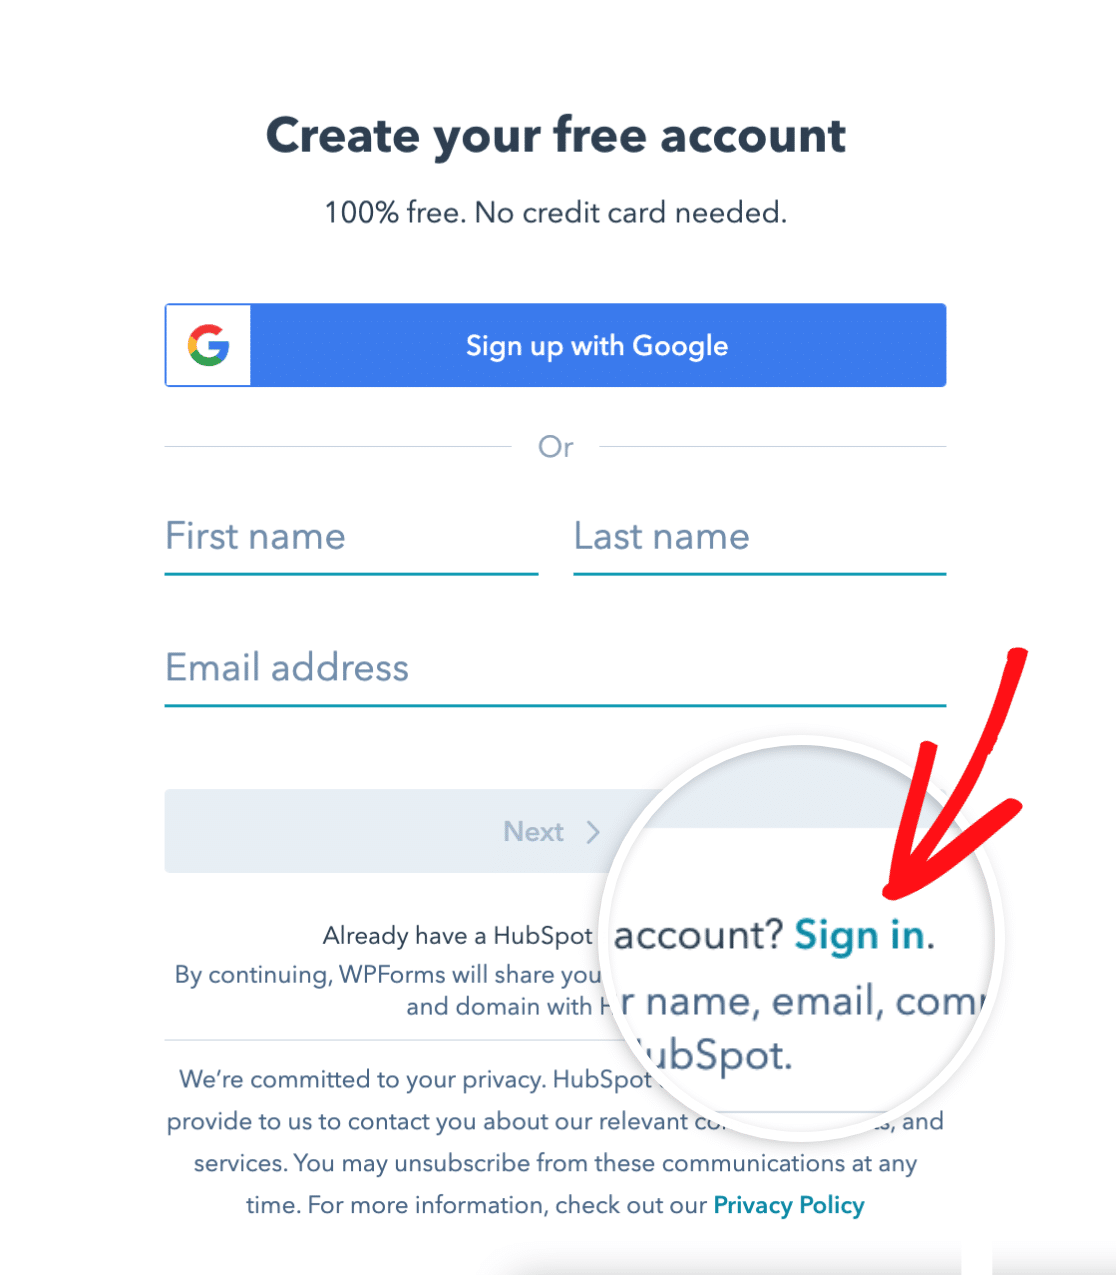
If you already have a HubSpot account, go ahead and click the Sign in link to sign in to your existing account.
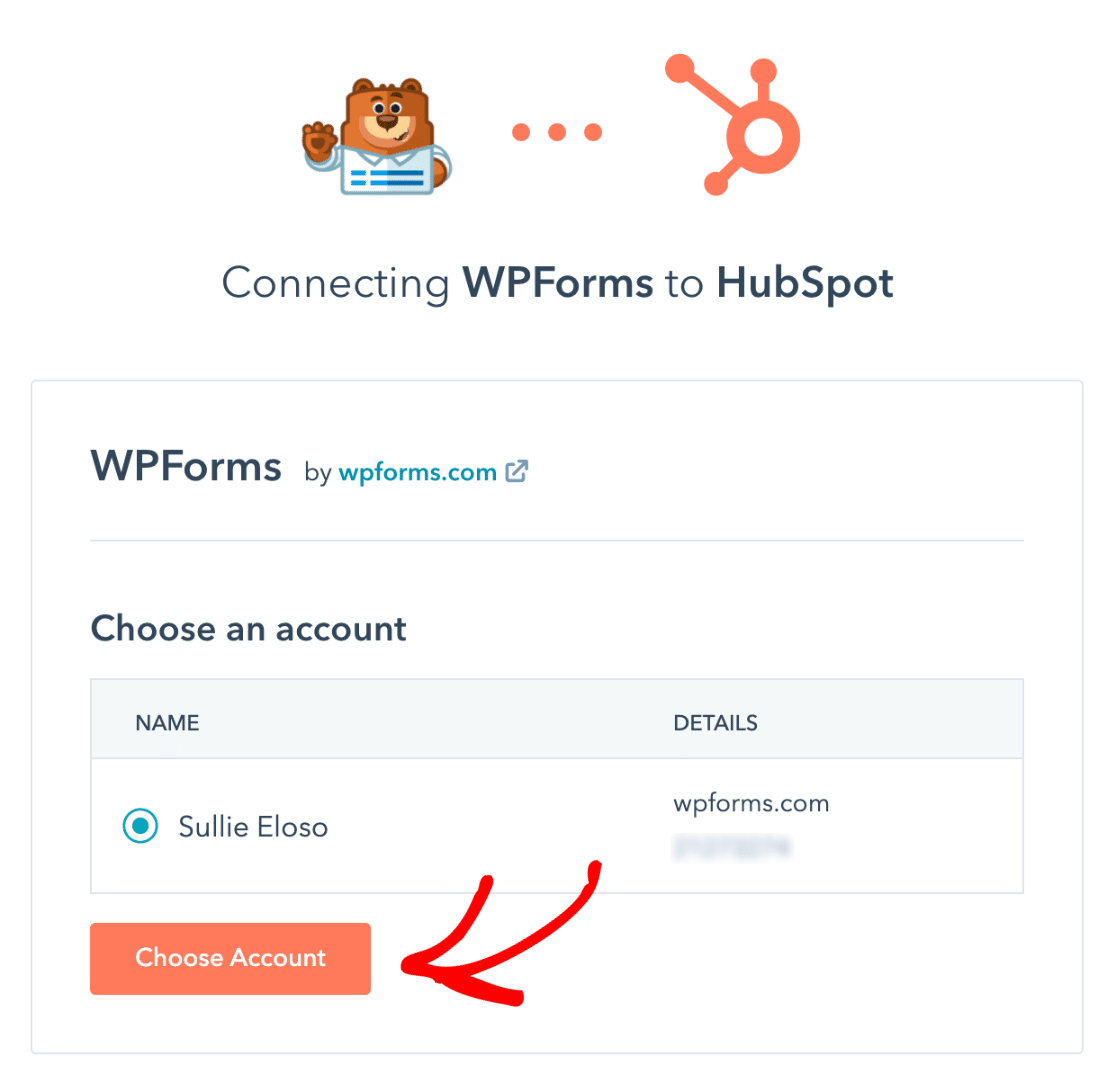
Once you’ve logged in to your account, you’ll need to select your account name and click the Choose Account button.
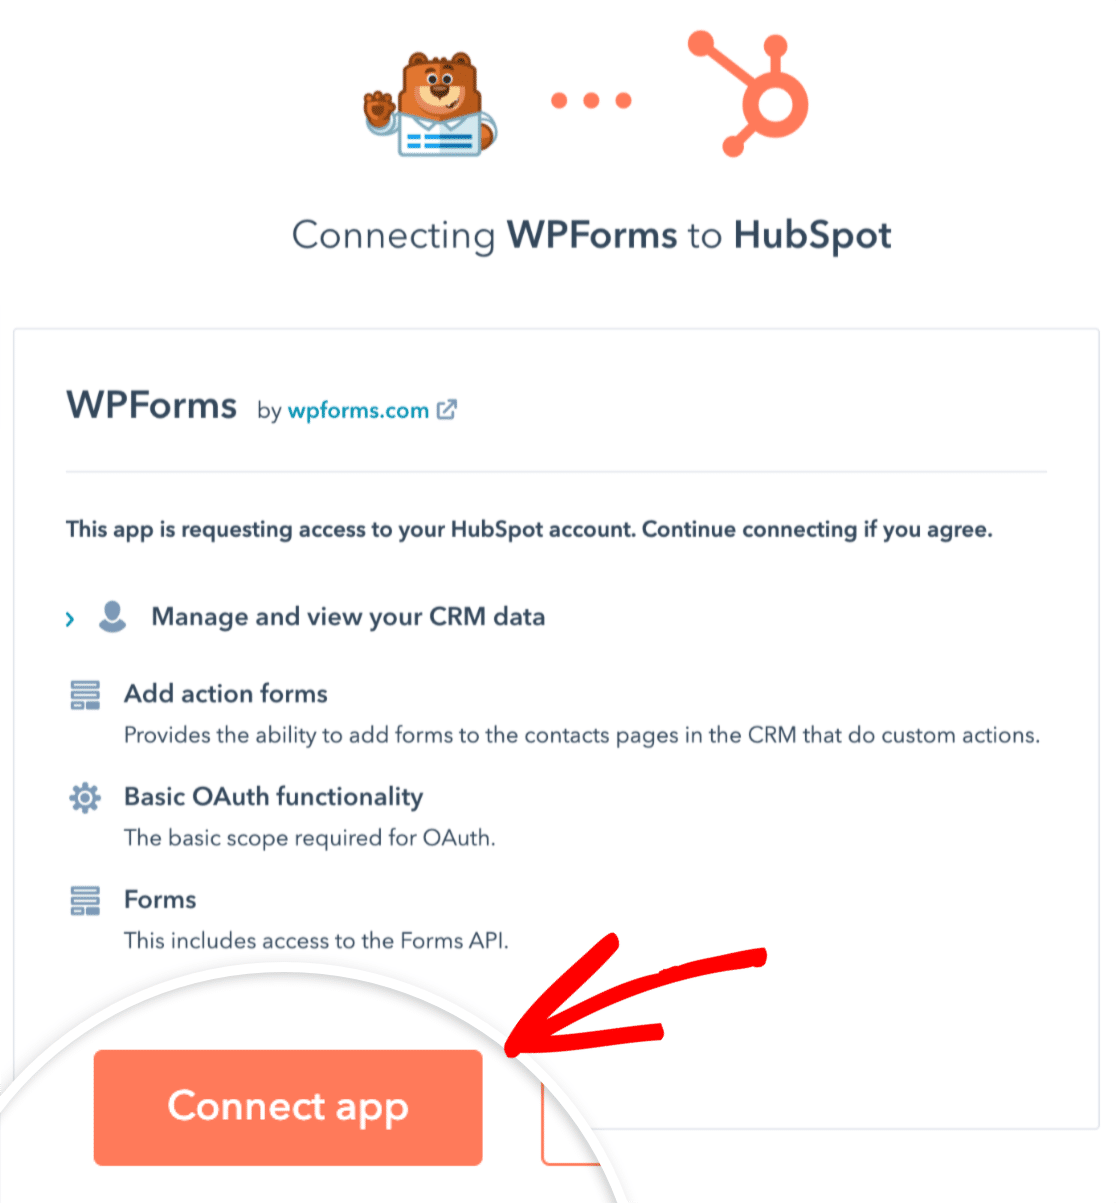
After that, you’ll need to allow WPForms access to your HubSpot account for the connection to work. To agree to the request, click the orange Connect app button.
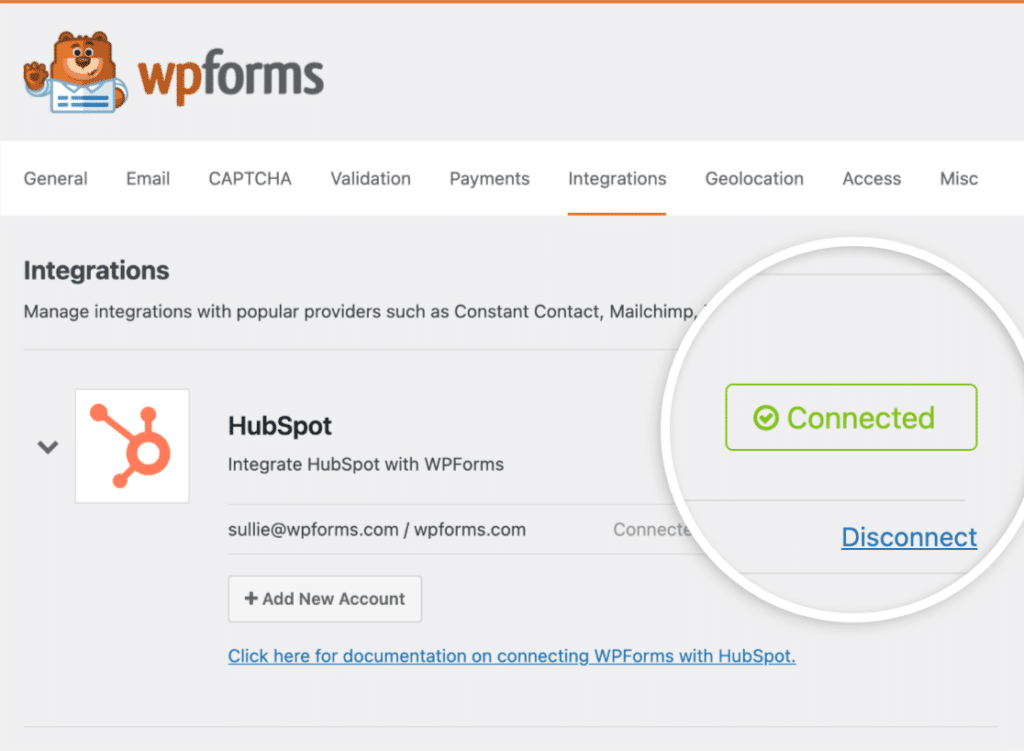
Now when you return to WPForms » Settings » Integrations, you should see the green Connected status along with your connection details.
Adding a HubSpot Integration to Your Form
The next step is to add a HubSpot integration to specific forms on your site. To do this, you’ll need to create a new form or edit an existing one to open the form builder.
Note: Forms that are created with a WPForms and HubSpot integration should not be modified directly within the Forms page of your HubSpot account. This may create a form submission error due to validation changes to the HubSpot forms API.
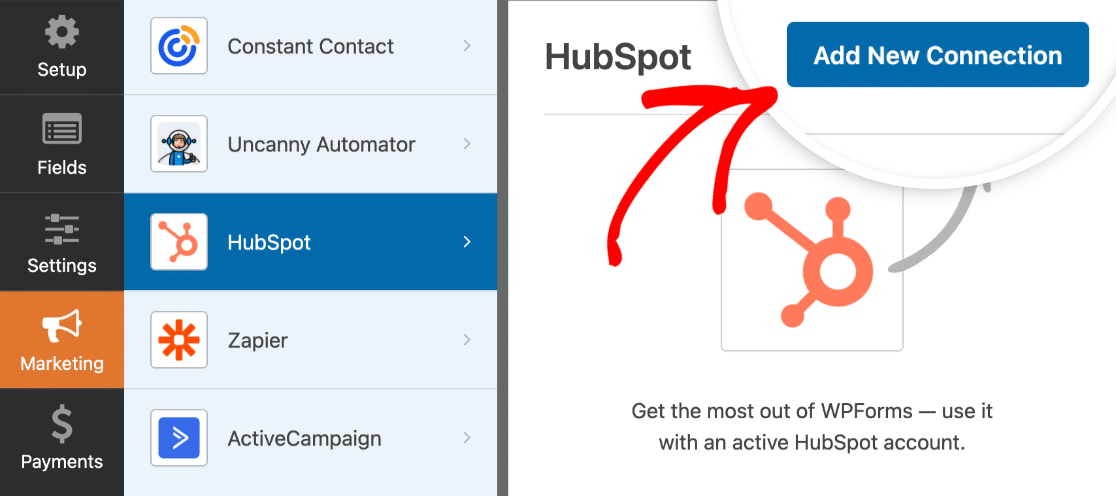
Then, go to Marketing » HubSpot and click the Add New Connection button.
This will open an overlay where you can provide a nickname for this connection. You can use any nickname you’d like, as this is for internal reference only. Once you’ve added a nickname, click the OK button.

After you name the connection, additional settings will appear.
Configuring Connection Settings
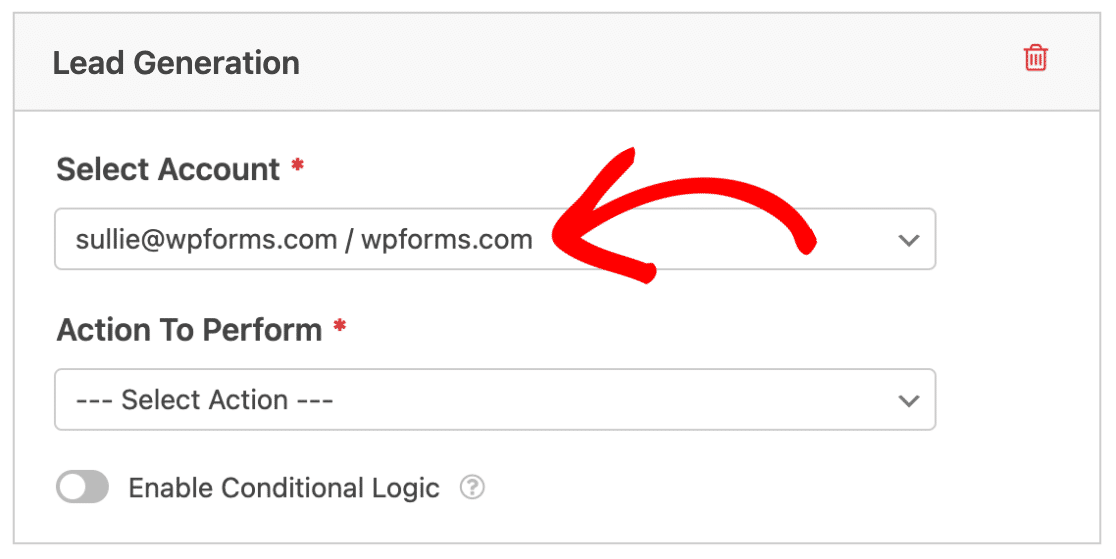
First, use the Select Account dropdown to select the HubSpot account that you’ve connected in the first step.
Next, you’ll need to choose an Action To Perform from the second dropdown. This is the action you want to take when a user fills out your form. The option selected here will also determine which additional settings are displayed.
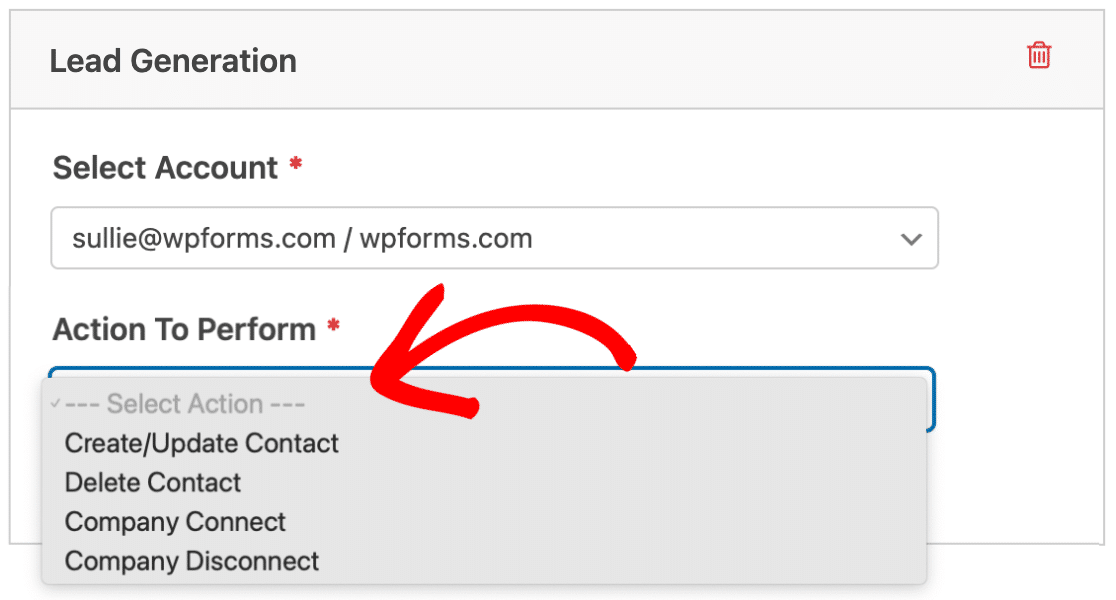
In the following sections, we’ll cover the available actions and their related options in more detail.
Create/Update Contact
This action will add a new contact record to your HubSpot contact database.
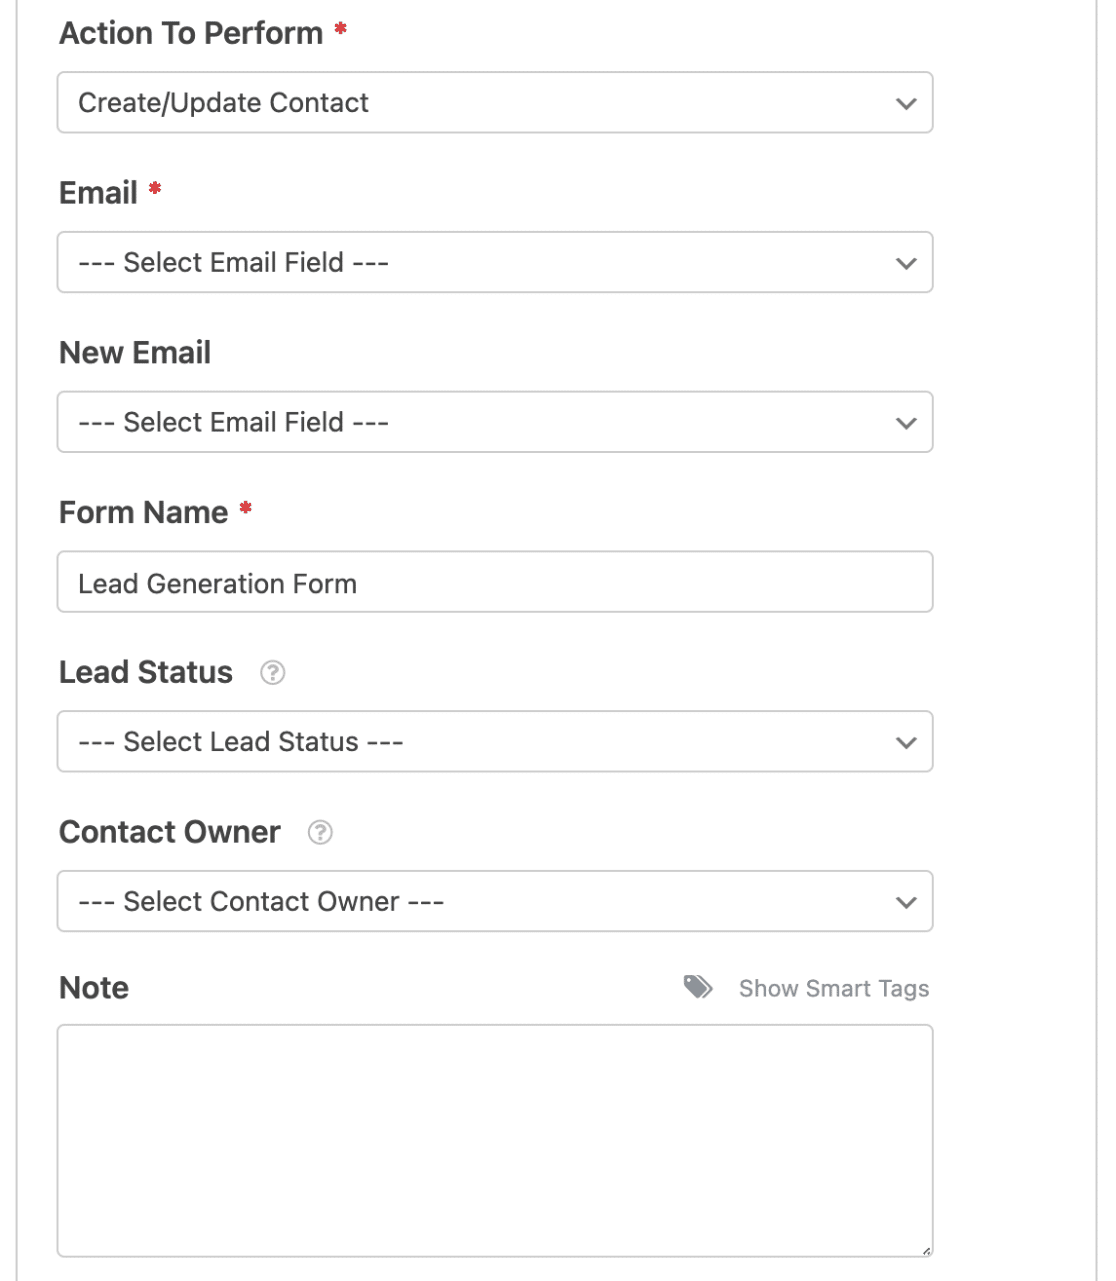
Below is a list of all the options available for this action. Items marked with an asterisk (*) are required:
- Email*: Choose an Email field from your form. If you’re updating an existing contact, then this should be their old email address.
- New Email: Choose the Email field from your form that includes the updated email address. Only use this setting if you’re allowing a user to update their contact email address.
- Form Name*: By default, this field is prepopulated with your form name and will be used to analyze form submission data in HubSpot. However, you can change this name to whatever you’d like.
- Lead Status: Select a lead status to help specify where your contact is in the lifecycle stage.
- Contact Owner: Select an owner to assign to the contact.
- Note: Automatically add a note to the contact’s record.
Note: Want to assign your contact, company, deal, or ticket to a specific owner? Be sure to check out HubSpot’s documentation on assigning ownership records for all the details.
Connecting Additional Fields
Note: To ensure proper form submission handling and custom field mapping, you must add your website’s domain to HubSpot’s additional site domains as forms from unregistered domains may be filtered as spam. For instructions on adding your domain, please see HubSpot’s documentation on setting up site tracking.
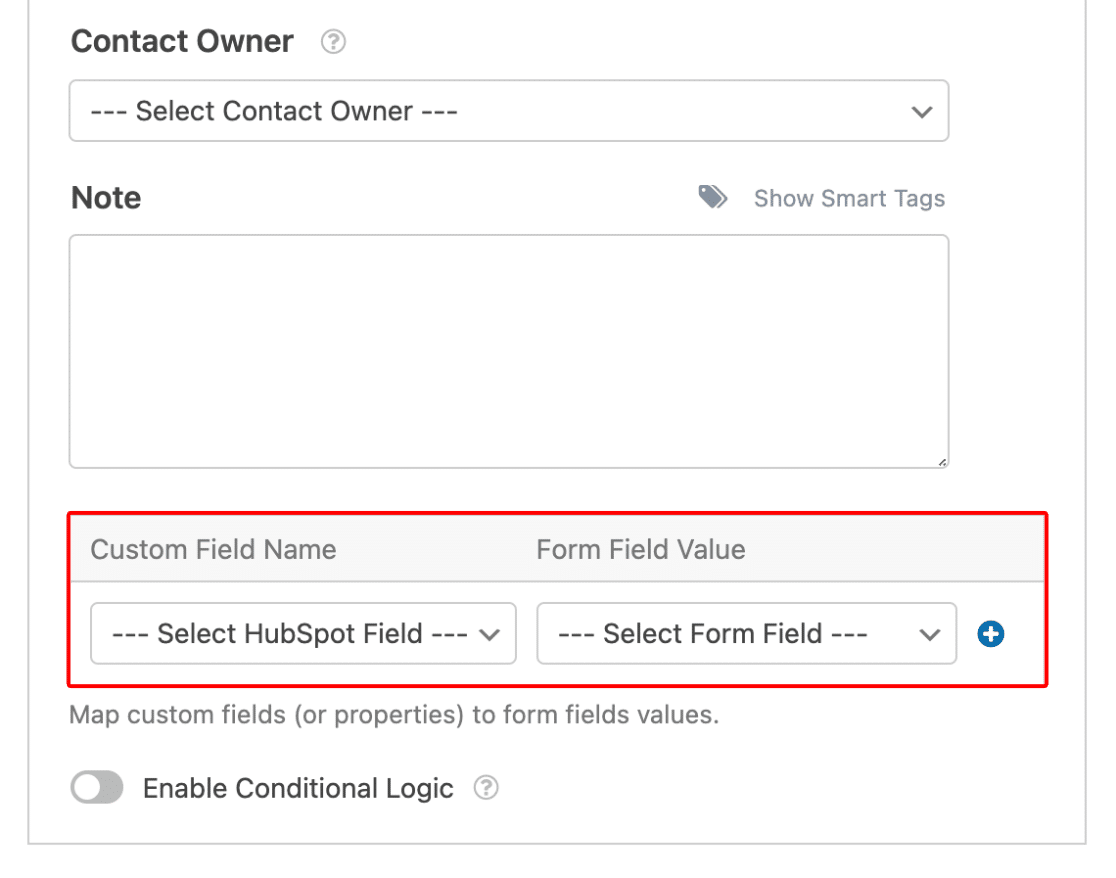
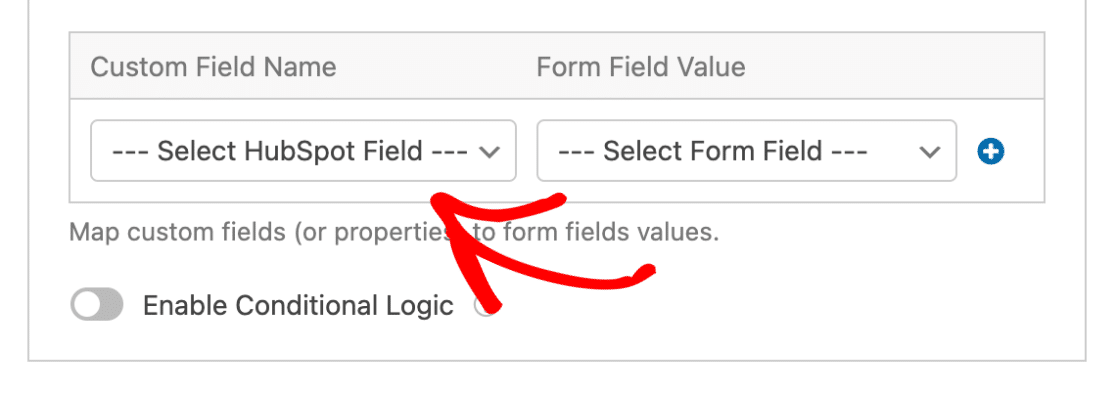
To send additional contact information to HubSpot, you’ll need to map your form fields to the available properties in your HubSpot account.
To do this, choose a field from the Custom Field Name dropdown and select a corresponding form field from the Form Field Value dropdown.
If you’d like to, you can send even more information from your forms with HubSpot’s custom properties option. For more details, please see HubSpot’s documentation on managing properties.
Once you’ve created custom properties in HubSpot, they will appear in the Custom Field Name dropdown in the form builder.
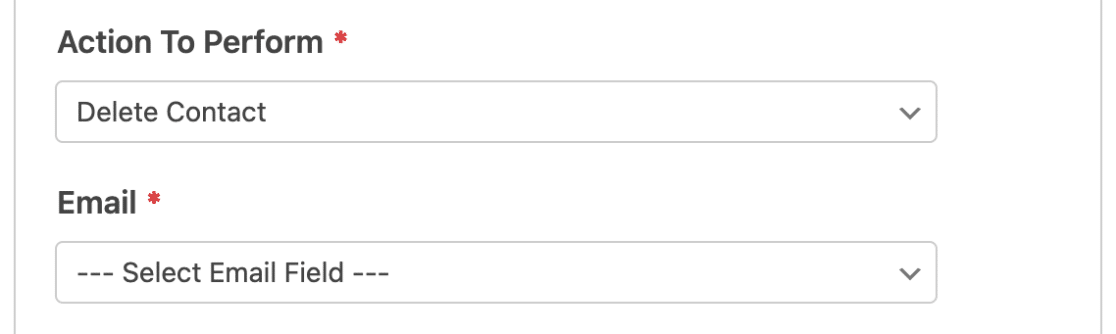
Delete Contact
This action will allow a contact to remove their record from your HubSpot account. However, you’ll still be able to restore the record once it’s deleted.
To set up this action, just select the Email field from your form.
Note: If you’re setting up this option to help comply with GDPR, be sure to disable entry storage for this form in the form builder under Settings » General. Additionally, please see how to perform a GDPR delete in HubSpot.
Company Connect
This action allows you to associate contacts with a specific company record in HubSpot.
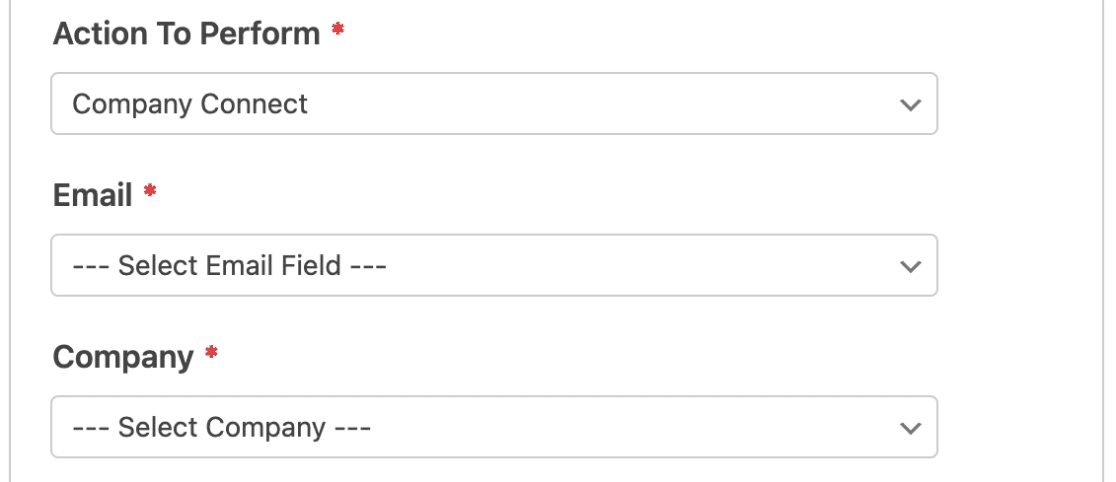
Both of the steps below are required to complete this action:
- Email*: Select an Email field from your form.
- Company*: Choose a company that is currently present in your HubSpot account.
Note: If you’d like to automatically create and associate companies with contacts, consider using the Create/Update Contact action.
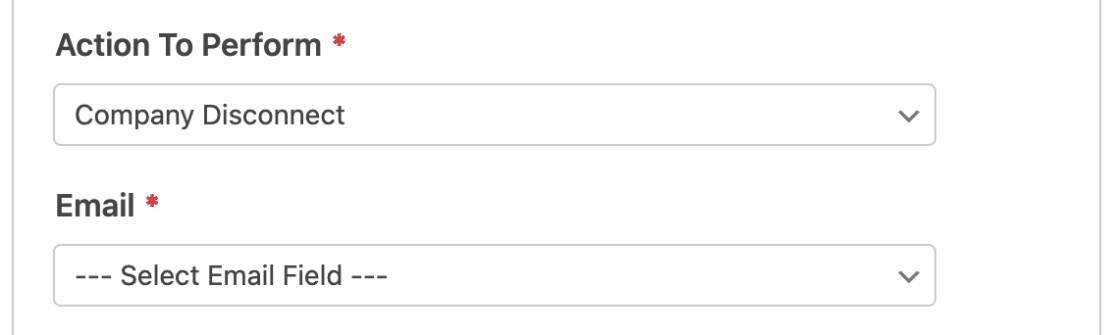
Company Disconnect
This action allows a contact to disconnect the associated company from their record.
To enable this action, select the Email field from your form.
Enabling Conditional Logic (Optional)
Conditional logic lets you automatically change certain aspects of your form depending on users’ selections or input.
As an example, we’ll show you how to use conditional logic to let users choose if they’d like to be added to your HubSpot mailing list.
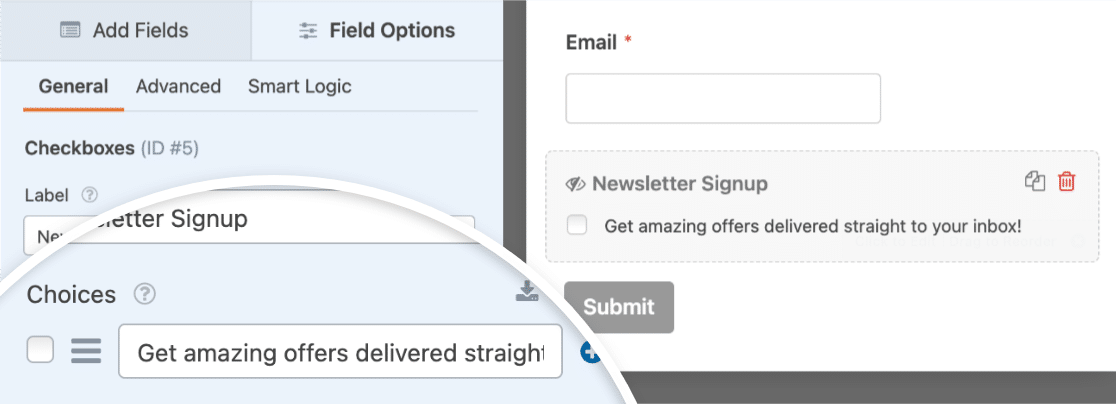
To set this up, you’ll first need to add a Checkboxes field to your form.
For our example, we’ll add a single choice and label it, “Get amazing offers delivered straight to your inbox!”
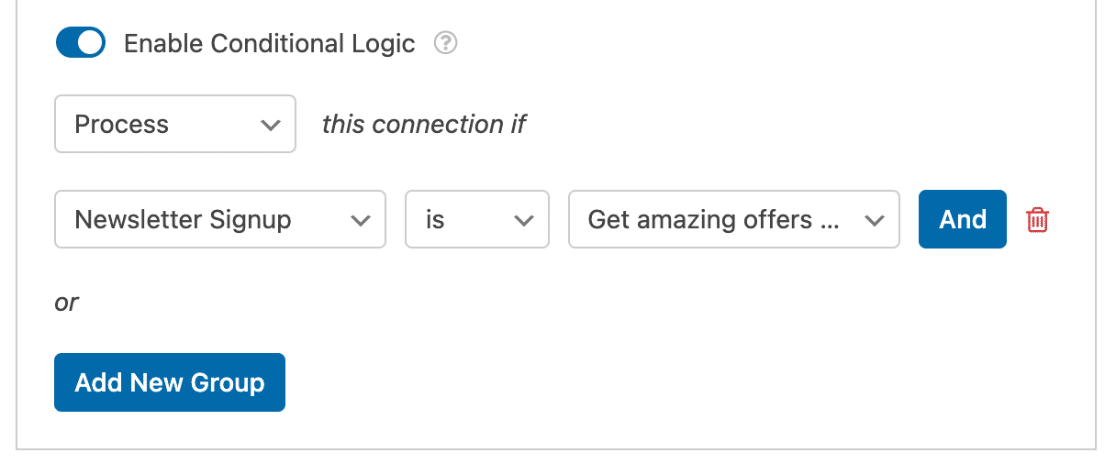
Next, go to Marketing » HubSpot in the form builder and toggle on the Enable Conditional Logic option.

Then, you’ll need to use the dropdowns that appear to set up your conditional logic rule. For this example, ours will read Process this connection if Newsletter Signup is Get amazing offers delivered straight to your inbox!.
Finally, be sure to save any changes and test your form before displaying it on your site.
Frequently Asked Questions
These are some of the top questions we receive about integrating HubSpot with WPForms.
Why do I see a message about my HubSpot account being suspended when I try to save my form?
If HubSpot detects suspicious activity in your account, it may be temporarily suspended. If this occurs, you will see a suspension notice in the form builder when you try to save your form.
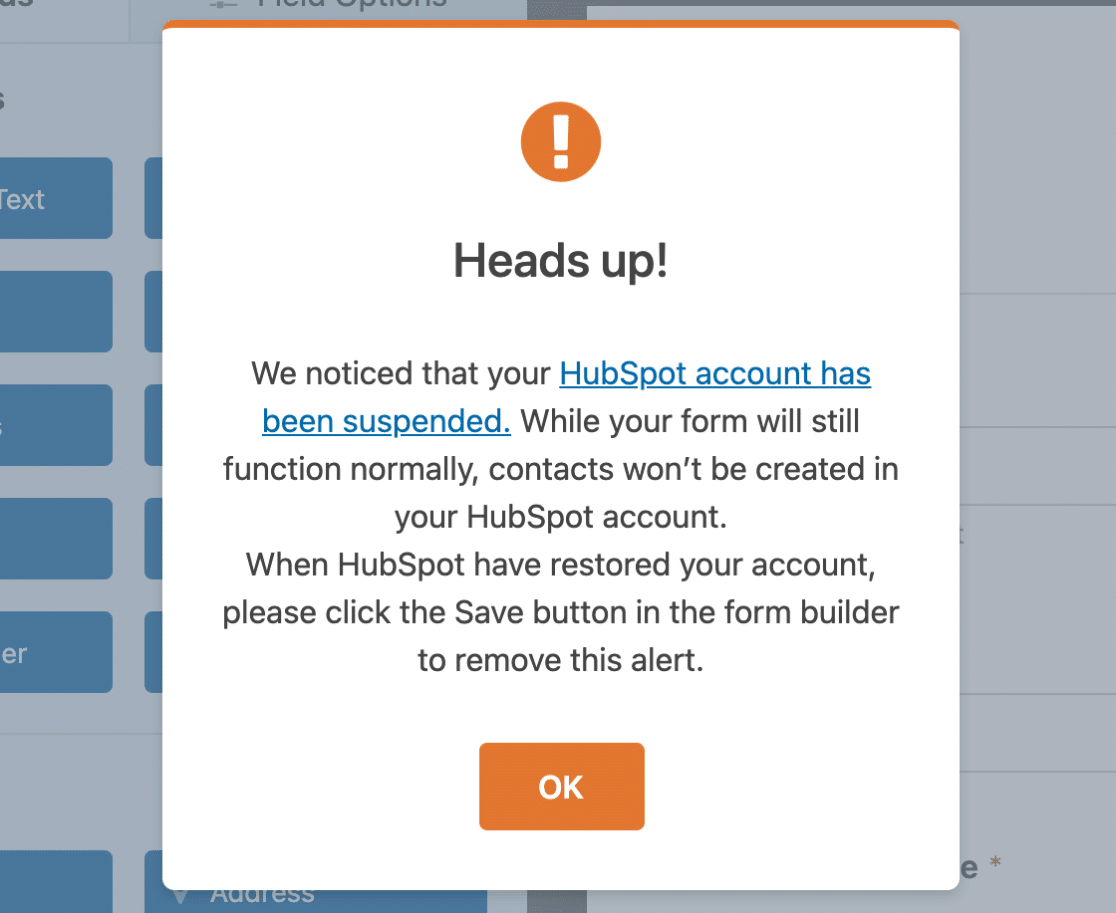
Your form will still function normally, however, new contacts won’t be created in your HubSpot account until it’s been restored. For information on restoring your account, please see HubSpot’s documentation on account suspension.
Why isn’t all my form field data appearing in HubSpot contact records?
If you notice that data from some form fields is not appearing in your HubSpot contact records, this may be because HubSpot is marking submissions as spam from unrecognized domains.
To resolve this, you’ll need to add your website’s domain to HubSpot’s Reports & Analytics Tracking settings. For detailed steps on this, visit HubSpot’s documentation on adding site domains. After adding and saving your domains, all contact field data should appear correctly in your HubSpot account.
That’s it! Now you can set up a HubSpot integration with any form on your site.
Next, would you like to generate even more leads by displaying your form in a popup? Be sure to check out our guide on creating a popup form for all the details.